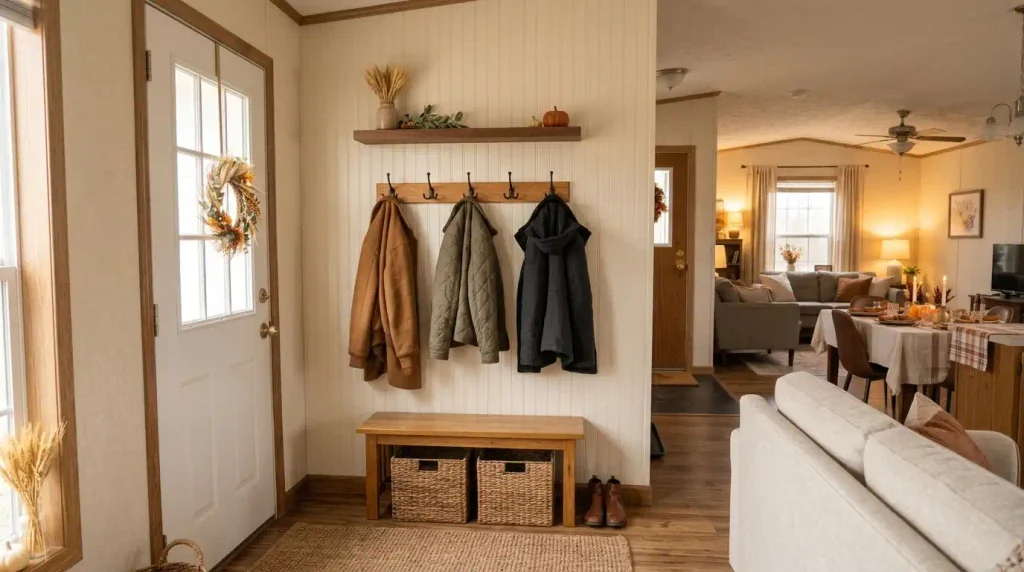
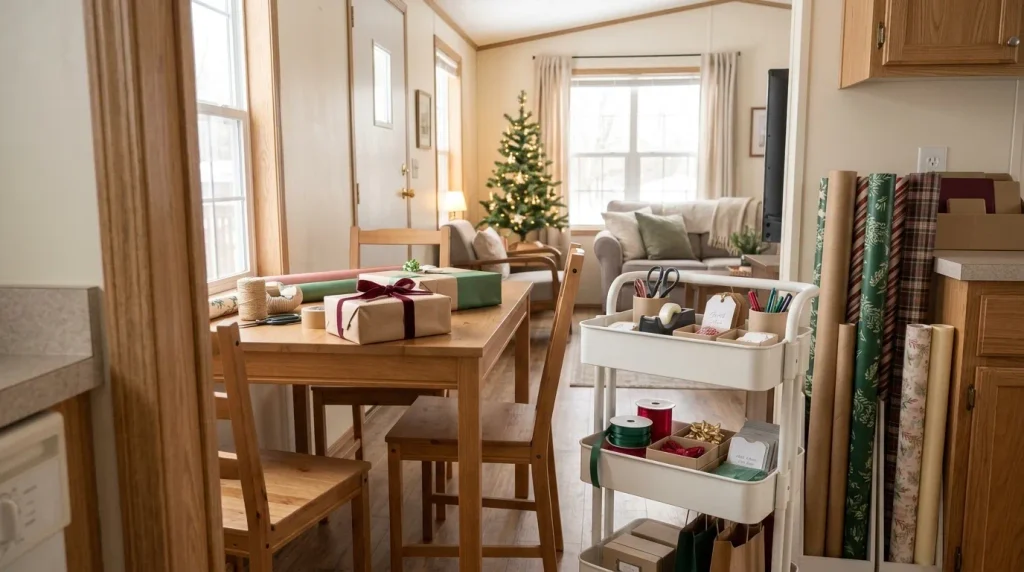
Christmas wrapping can take over a small home surprisingly quickly. One minute you’re wrapping a present at the dining table; the next, paper rolls are leaning against the wall, ribbon is tangled around a chair, and gift bags are scattered across the floor.
In a single-wide or double-wide mobile home, that clutter can interfere with everyday activities. The dining table still needs to serve meals, closets have limited room, and narrow walkways need to remain clear.
The good news? You can create a practical gift wrapping station in a small mobile home without adding an entire craft room or expensive built-in furniture.
A three-tier rolling cart, an organized closet, a narrow paper holder, or a simple portable supply kit can all work beautifully. The right choice depends on where you wrap, how many supplies you own, and what happens to the station afterward.
This guide walks through choosing a location, measuring your workspace, organizing supplies, setting up efficient storage, and packing everything away when you’re finished.
1. Choose the Right Type of Gift-Wrapping Station for Your Space
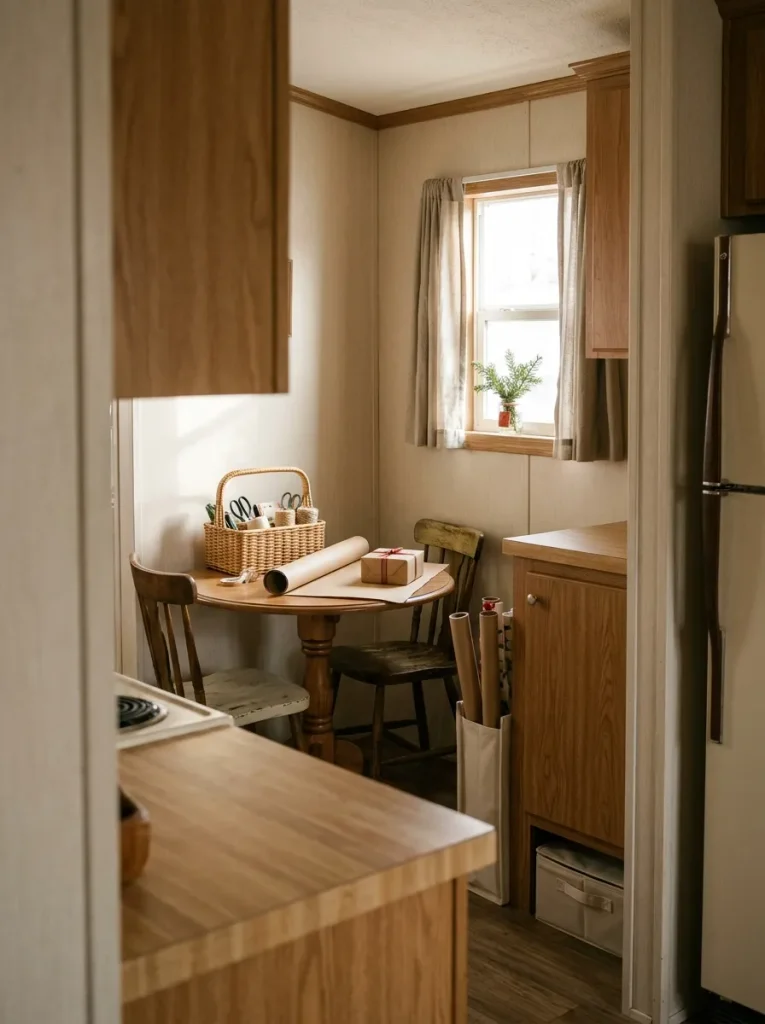
Before purchasing organizers, decide whether you need a permanent wrapping station or something you can bring out only during the holidays.
A small mobile home usually benefits from storage that serves more than one purpose. A dedicated craft cabinet may look beautiful, but it doesn’t necessarily make sense if you only wrap gifts a few evenings each December.
There are four practical approaches.
| Station type | Best location | Main advantage | Consideration |
|---|---|---|---|
| Portable wrapping kit | Dining table or desk | Almost no permanent floor space | Must be unpacked for each session |
| Three-tier rolling cart | Living area, bedroom, or closet | Supplies travel together | Requires a parking location |
| Closet wrapping station | Bedroom or hallway closet | Keeps supplies concealed | Needs sufficient usable storage |
| Fold-down workstation | Suitable wall or cabinet | Provides a dedicated surface | Requires space and appropriate installation |
For most small mobile homes, I would start with a portable kit or rolling cart.
Both options provide flexibility without requiring permanent changes to walls or cabinetry.
A portable kit might contain scissors, tape, ribbon, tags, and a few other tools in a handled caddy. Wrapping paper can remain in a separate upright holder.
A rolling cart works especially well if you prefer to keep everything together between wrapping sessions.
The deciding question: Can you put the entire station away without rearranging furniture?
If the answer is yes, you’re starting with a sensible layout.
Find the station that fits your actual home
Choose the constraint that most closely describes your available space.
Tabletop kit + one closed tote
Use the dining table for each session. Keep the complete tool kit in a handled bin and wrapping rolls upright in a separate slim holder.
Before buying: confirm you can clear and restore the table in one short reset.
Closet-corner supply station
Reserve one reachable vertical bay for upright rolls, a small tools caddy, and flat gift bags. Wrap on a nearby table.
Before buying: test the closet opening with its door fully in use.
Lockable rolling cart
Store the tools by tier and move the cart beside a sturdy work surface. It carries supplies; it does not replace the tabletop.
Before buying: measure the narrowest doorway and the cart’s parking spot.
Purpose-built folding worktop
Consider an engineered fold-down cabinet only when you have a safe installation location, appropriate wall support, and regular demand.
Before buying: validate support and clear working depth; skip DIY mounting if uncertain.
2. Find a Location That Keeps Everyday Walkways Clear
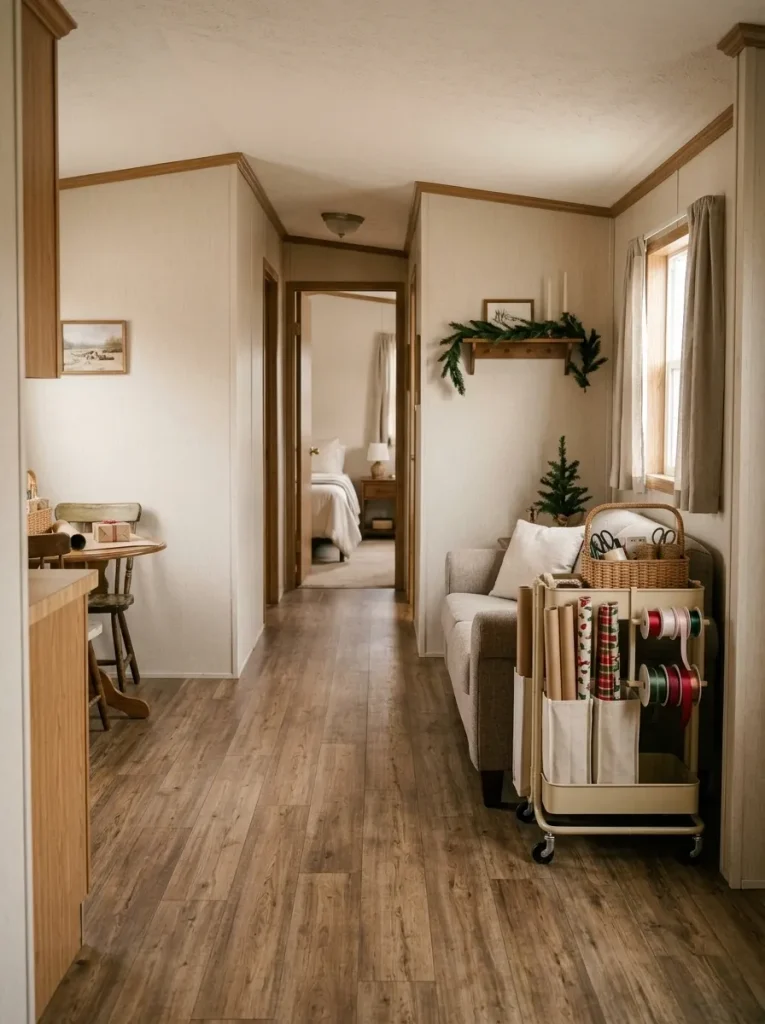
The best wrapping station location isn’t necessarily the emptiest corner. It’s the place where you can work comfortably without interrupting how your mobile home functions.
Imagine a typical evening. Someone is preparing dinner, another person needs access to the hallway, and a bedroom door opens directly toward the proposed wrapping cart.
Even a compact organizer can become inconvenient in the wrong location.
Walk through your home and inspect three things:
- Movement: Can people pass the station while it is in use?
- Access: Can nearby doors, drawers, appliances, and cabinets open normally?
- Temporary clutter: Is there somewhere to place gifts before and after wrapping?
A dining-area corner may work well when you have occasional wrapping sessions. A bedroom desk offers additional privacy when you’re preparing surprise presents.
If your home has a small hallway closet, consider using it to store supplies while wrapping at the dining table.
That arrangement separates storage from the actual workspace.
Important safety consideration: Keep doors, windows used for emergency escape, and exit routes unobstructed. The U.S. Fire Administration’s home fire escape guidance recommends identifying multiple escape routes and ensuring doors and windows remain clear.
You can also explore these mobile home storage ideas for small spaces for additional ways to preserve circulation while organizing compact interiors.
The ideal location should feel comfortable on an ordinary day, even when the Christmas wrapping supplies are out.
3. Measure Your Wrapping Area Before Buying Furniture
A narrow desk may look spacious in a product photo, yet become frustrating once you place a large gift and a sheet of wrapping paper on it.
Before choosing a surface, try a simple practical test.
Step 1: Choose a representative gift.
Take the largest box you expect to wrap regularly. Place it on your dining table or proposed workstation.
Step 2: Lay out the wrapping paper.
Unroll a sheet and check whether you have enough room to position, measure, and cut it.
The two long edges of the paper should reach around the box with a small overlap. The paper extending beyond each end should be sufficient to fold over the box ends without leaving a gap.
Step 3: Test the wrapping movement.
Rotate the box, fold the paper underneath, and reach for your scissors and tape.
Notice where your elbows, hands, and supplies need space.
Step 4: Measure the usable surface.
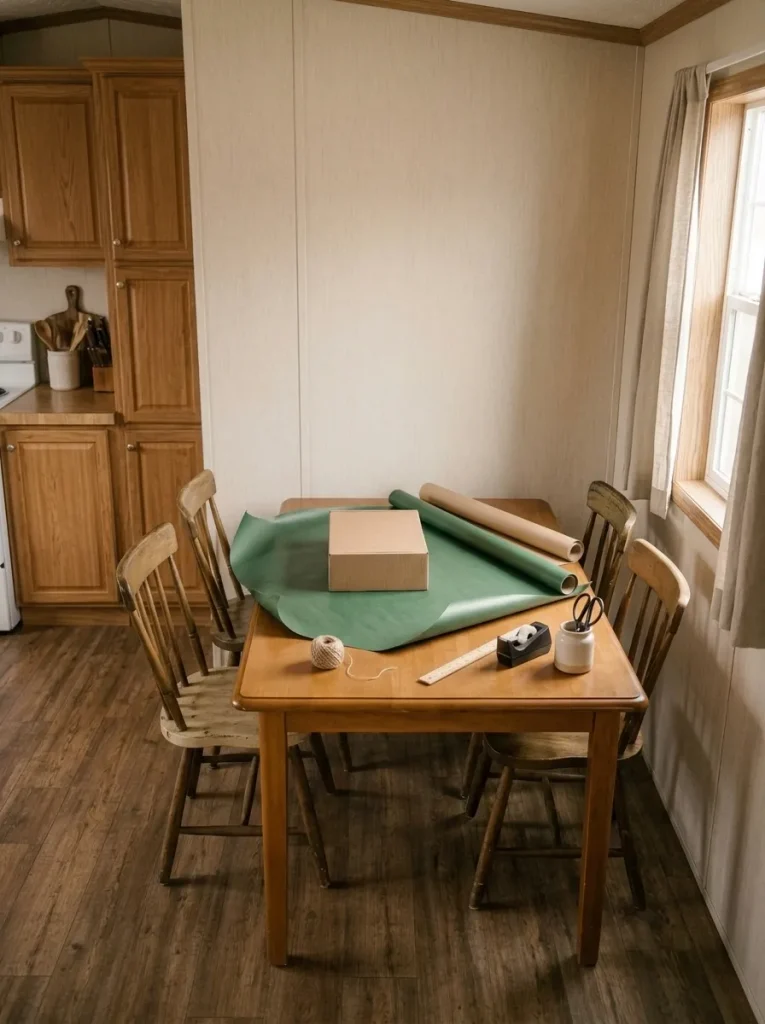
Record the available width and depth, accounting for nearby walls, raised edges, or objects that cannot be moved.
The surface needs to accommodate the wrapping process, not merely the package itself.
For occasional larger gifts, you may find it easier to use the dining table temporarily or switch to a correctly sized gift bag.
There’s little reason to dedicate valuable floor space to an oversized workstation when most presents fit on an existing table.
Measure the gift, then the surface
Place your largest regular gift and a sheet of wrapping paper on your intended table. The paper must spread, turn, and fold without falling into another task area.
What is the largest item you usually wrap?
Likely workable: a clear dining-table end or stable folding table. Test cutting paper and rotating the box while supplies stay in a nearby bin.
Plan more turning room: clear the entire table segment before starting. If edges hang over while folding, relocate to a bigger existing surface.
Do not force a tiny desk: wrap temporarily on a larger clear table or use a suitable gift bag. Keep the everyday station compact for normal gifts.
4. Gather the Supplies You Actually Use
A beautifully organized gift-wrapping station can still become cluttered when it contains too many materials.
Start by gathering everything you already own.
Check cupboards, seasonal boxes, desk drawers, and bags containing leftover Christmas supplies.
Then divide your collection into essentials, optional decorations, and backup materials.
Essential wrapping supplies
- Wrapping-paper rolls or sheets
- Scissors
- Adhesive tape and a dispenser
- Gift tags or labels
- Pens or markers
- A small selection of ribbons or twine
- Gift bags and tissue paper
- A small container for paper scraps
Additional materials might include decorative bows, kraft paper, spare gift boxes, stickers, and reusable fabric wrapping.
You don’t need to keep every item within arm’s reach.
For example, one active tape dispenser belongs beside your work surface. The remaining tape rolls can stay in a storage bin.
Likewise, a couple of ribbon colors may be enough for everyday wrapping, even when your collection contains dozens of spools.
Use three simple supply zones
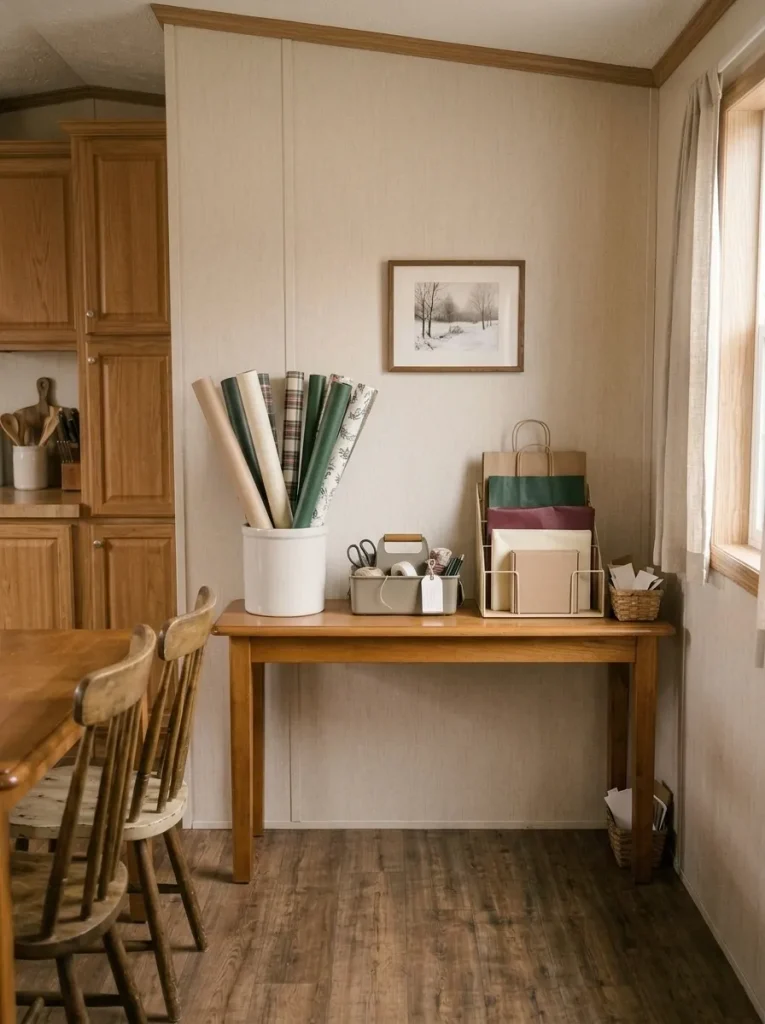
Everyday tools: scissors, tape, pens, and labels.
Wrapping materials: paper rolls, bags, tissue, and gift boxes.
Finishing supplies: ribbons, bows, twine, and decorative tags.
Keeping these categories separate makes it easier to find what you need and return supplies to their proper places.
Before buying another organizer, try arranging your existing materials in these three groups. You may already have suitable baskets and containers at home.
5. Create a Temporary Wrapping Surface Using Existing Furniture

One of the easiest ways to set up a gift-wrapping station in a small mobile home is to use furniture you already own.
The dining table is an obvious choice because it generally offers a usable, stable surface without adding another piece of furniture.
However, it needs a simple setup and cleanup routine.
Clear the table completely before beginning. Remove placemats, decorations, paperwork, and anything that might catch on the wrapping paper.
Use a suitable protective mat or cutting mat if your tabletop could be scratched. Never cut directly against a surface that could be damaged.
Keep drinks and food away from paper and electrical tools.
Place a small container for your active supplies on one side of the table, leaving the central area open.
A shallow basket nearby can hold completed gifts.
What about a folding table?
A folding table can be useful if you have a suitable storage location.
Check that it is stable, designed to handle the intended use, and large enough for the wrapping tasks you perform.
You should also test the table in its fully opened position.
Does it prevent a bedroom door from opening? Will it interfere with the sofa or kitchen walkway? Can you store it flat afterward?
If you cannot identify a practical permanent storage spot, using your existing dining table is usually the simpler option.
The most successful temporary station restores the room to everyday use after each wrapping session.
6. Store Wrapping Paper Vertically in Narrow Baskets
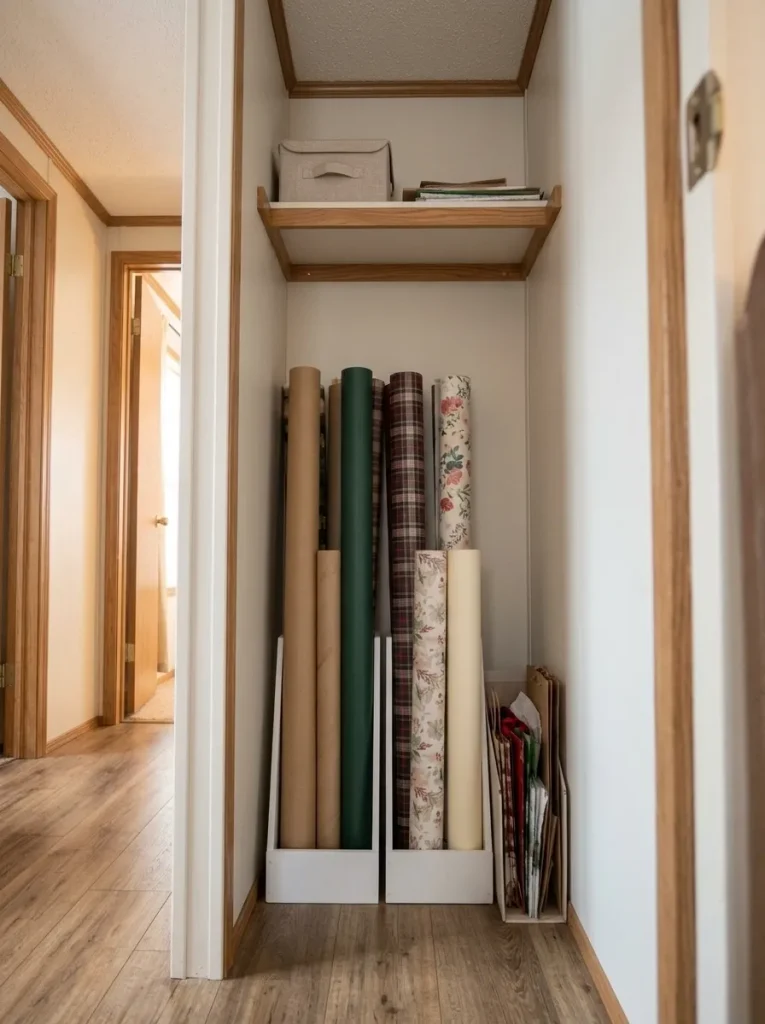
Wrapping-paper rolls are among the most awkward supplies to store in a small home.
They are long, easily damaged, and often roll around when placed on horizontal shelves.
Vertical storage offers an efficient solution.
A tall, narrow basket can hold several rolls upright while occupying a relatively small floor area.
You might use a rigid laundry basket with a suitable footprint, a purpose-made wrapping-paper holder, or a compartmented organizer that supports the rolls.
How to arrange the rolls
First, sort them by height.
Place taller rolls toward the back of the holder and shorter rolls where they remain easy to reach.
You can also organize them by use:
- Christmas paper
- Birthday and celebration paper
- Plain kraft or neutral paper
- Partially used rolls
Secure loose paper edges with a gentle reusable band or removable wrap holder. Avoid tight bands that leave creases.
Make awkward closet corners useful
If your mobile home has a closet beneath a sloped ceiling, check the changing headroom.
The taller end may accommodate full-length wrapping-paper rolls, while the lower section could hold shorter rolls or flat gift bags.
Measure the holder’s position before assuming everything will fit.
The basket itself should remain stable when you remove a single roll. If the whole container tips, use a sturdier holder or a different position.
Keep paper away from moisture, heaters, and other heat sources.
When to choose this idea: Vertical storage is especially practical when your closet has available height but insufficient shelf width for storing paper horizontally.
7. Organize Ribbon, Tape, Scissors, and Tags for Quick Access
Think about what happens while wrapping a single gift.
You measure the paper, reach for scissors, fold the corners, grab tape, add ribbon, and write a name.
Those frequent movements should determine your organization.
Place your most-used tools together in a small caddy positioned beside your dominant hand.
A simple setup could contain a sturdy scissors holder, tape dispenser, two pens, and a shallow compartment for labels.
Reserve the remaining work surface for paper and gifts.
Keep ribbon spools from tangling
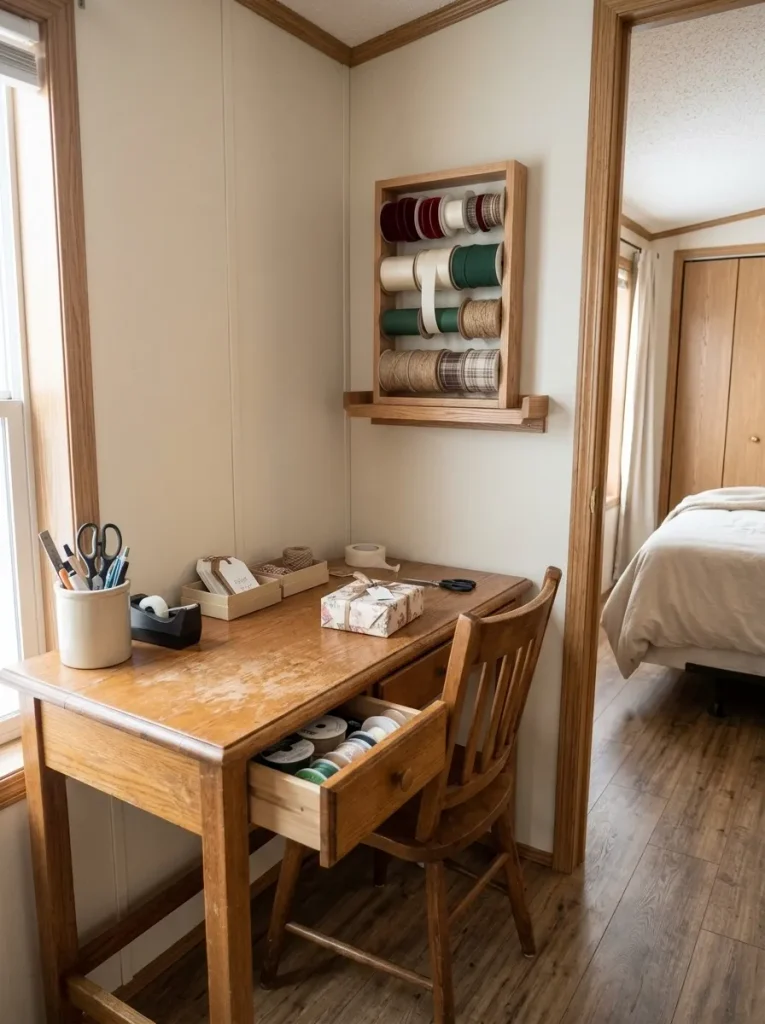
Ribbon storage becomes more complicated as the collection grows.
For a small supply, a divided tray or shallow basket is often enough. Arrange spools upright where their colors and widths remain visible.
If you own many ribbons, a dowel-style rack may be useful.
Choose one that allows individual spools to be removed without dismantling the entire organizer.
Wall-mounted ribbon racks can work in a dedicated storage area, but the installation method should suit the wall and expected load.
For a temporary station, a removable ribbon tray is generally more flexible.
Give gift tags their own small compartment
Gift tags disappear easily beneath larger supplies.
Store them in a divided container with separate areas for blank tags, string, labels, and small decorative accents.
One practical habit makes a difference: return scissors and tape to the same location after every gift.
This reduces the constant searching that can turn a short wrapping session into a frustrating project.
8. Organize Gift Bags, Tissue Paper, and Flat Supplies Separately
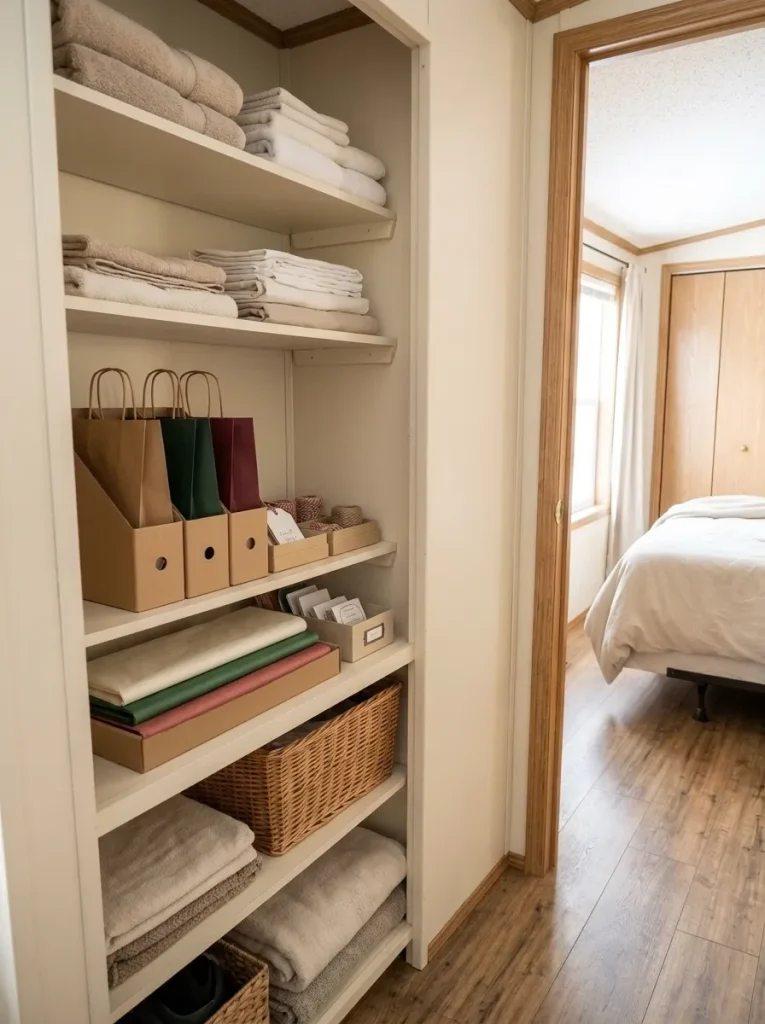
Gift bags and tissue paper require different storage from wrapping-paper rolls.
They bend, tear, and crease when squeezed beneath heavy supplies.
A better approach is to arrange them vertically or in shallow compartments that keep each item accessible.
Start with gift bags.
Sort them into small, medium, and large groups. A sturdy magazine holder or suitable narrow bin can hold the smaller bags upright.
Oversized bags may need a wider storage box.
Store tissue paper flat in a folder, shallow tray, or appropriately sized container.
You should be able to remove a sheet without pulling out the entire stack.
Keep folded gift boxes together, preferably flat, so they don’t occupy unnecessary space.
Avoid overfilling the organizers
A container is only useful when you can retrieve items without damaging them.
If tissue paper becomes crushed or gift bags bend at the edges, divide the collection into smaller groups or reduce the quantity.
You may find that a single folder for tissue, one holder for gift bags, and a small tag box provide enough organization.
This arrangement is particularly useful when your mobile home has shallow shelves or small closet compartments.
9. Set Up a Three-Tier Rolling Gift-Wrapping Cart
A three-tier rolling cart is one of the most versatile solutions for a small mobile-home wrapping station.
It brings supplies together while allowing you to move them between a closet, bedroom, and dining area.
The important distinction is that the cart functions primarily as organized storage beside your wrapping surface.
The actual cutting and folding can take place on a table.
Top tier: Everyday wrapping tools
Use the top shelf for the items you reach for most frequently.
Keep tape, scissors, pens, tags, and one or two ribbon spools in small organizers.
A removable caddy is particularly useful because you can lift the entire collection onto the table when wrapping begins.
Middle tier: Finishing materials
Reserve the middle shelf for bows, tissue paper, ribbons, decorative labels, and smaller gift bags.
Use shallow containers to prevent items from getting mixed together.
This area works best when each group can be removed without disturbing the others.
Bottom tier: Backup supplies
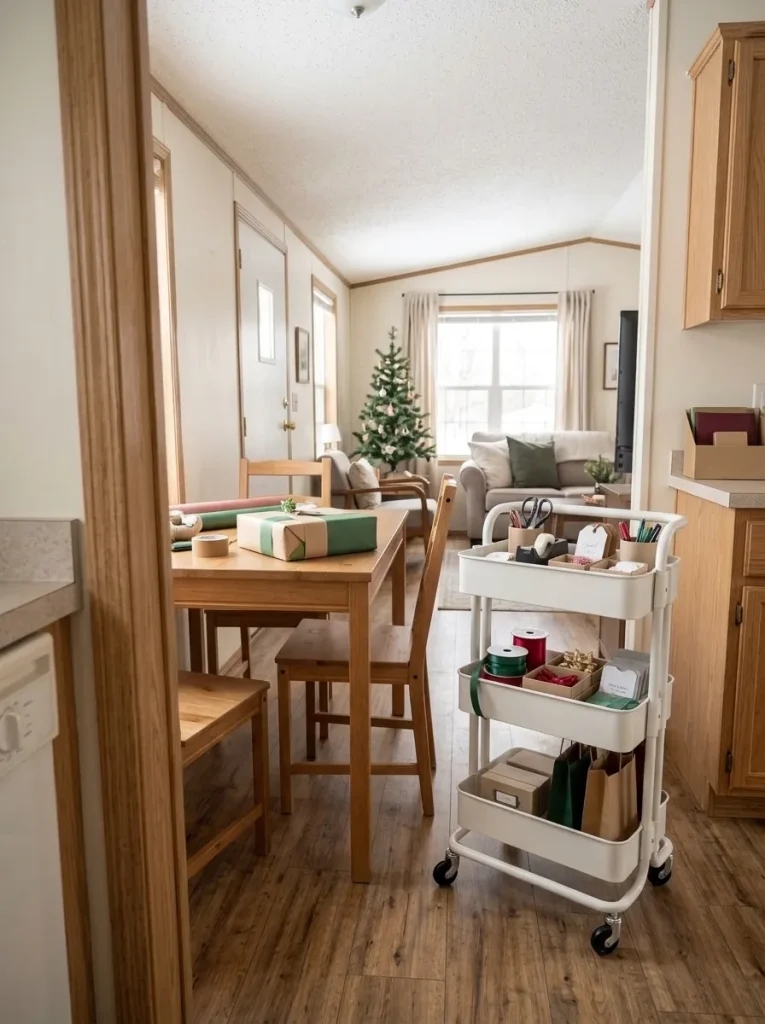
The lowest tier is a sensible place for heavier supply containers, spare tape, and reserve materials, provided they fit securely within the cart.
Wrapping-paper rolls should only be added if the cart’s design can accommodate and restrain them safely.
Avoid attaching heavy side baskets or long paper holders in ways that make the cart unstable.
Check the cart before purchasing
Measure its overall width, depth, and height.
Then measure the narrowest point along the route where you intend to move it.
Consider where the cart will park between sessions.
Check the manufacturer’s load instructions, ensure the wheels move smoothly, and use wheel locks when available.
If a loaded cart tips easily or creates a daily obstruction, switch to a smaller portable caddy.
For broader seasonal organization, these holiday storage solutions offer additional approaches for keeping Christmas supplies together.
The biggest advantage of a rolling station is the ability to bring it out when needed and return it to storage afterward.
One cart. Three jobs.
10. Transform a Small Closet Into a Gift-Wrapping Storage Station
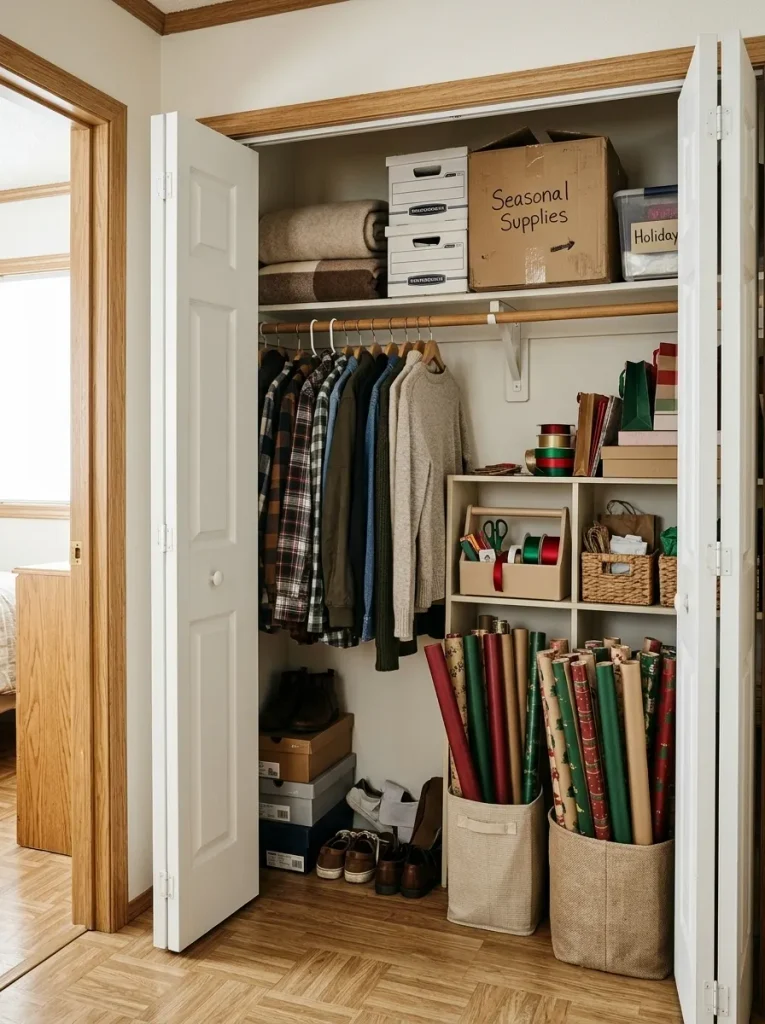
A spare closet can become an organized wrapping supply area without turning into a full craft room.
This works particularly well when the closet already contains shelves and has enough space for a narrow floor organizer.
Begin by removing only the contents you can realistically store elsewhere.
There’s no need to empty an entire closet just to accommodate seasonal supplies.
Divide the available area into practical zones.
Upper shelf: Store lightweight, infrequently used seasonal supplies in labeled containers.
Middle section: Keep ribbon, scissors, gift tags, tissue, and other regularly used materials within comfortable reach.
Lower section: Place a stable vertical wrapping-paper holder where the rolls can be removed without pulling everything forward.
If the closet has a hanging rod, you may be able to use a small hanging organizer for lightweight accessories while preserving space for existing items.
Work with the closet’s actual shape
A shallow closet may benefit more from narrow containers than deep storage boxes.
In a closet with angled ceiling space, position tall paper rolls where headroom is greatest.
Keep access to electrical equipment, service panels, and household necessities clear.
Most importantly, make sure the closet still functions when all the supplies are inside.
If you want to improve the broader layout, the site’s mobile home closet ideas for tiny closets explain additional ways to organize shelving, hanging space, and difficult closet corners.
Your wrapping station can live in the closet while the dining table remains the place where gifts are actually wrapped.
11. Use the Back of a Door for Lightweight Wrapping Supplies
An interior door can provide useful storage without requiring additional floor space.
Over-the-door pocket organizers, shallow baskets, and specially designed wrapping-paper racks are potential options.
However, door clearance matters more than storage capacity.
Before installing anything, open the door completely.
Look at the space between the door and adjacent wall, the position of hinges, and whether the organizer would interfere with the door’s movement.
Choose the right supplies for the door
Lightweight items make the most sense:
- Gift tags and labels
- Small gift bags
- Ribbon and twine
- Tissue-paper packets
- Light decorative supplies
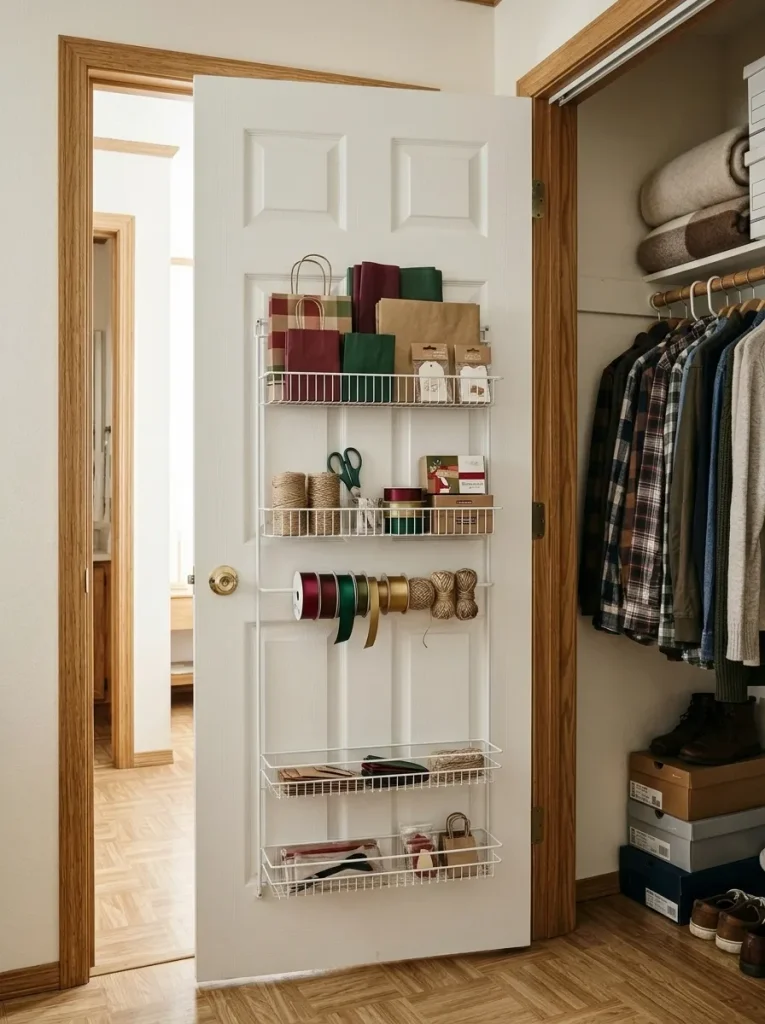
Long paper rolls require a more substantial holder that keeps them secure when the door moves.
Do not assume adhesive hooks will safely support a loaded rack.
Check the organizer’s installation instructions, weight limits, and compatibility with your door.
If you rent your mobile home, choose suitable removable systems where possible and obtain permission before permanent alterations.
A fully loaded organizer should never prevent a door from opening, closing, or latching properly.
For additional ways to use overlooked wall and door space, see these vertical storage ideas for small mobile homes.
When clearance is limited, keep the door organizer shallow and store tall paper rolls elsewhere.
12. Consider a Fold-Down Wrapping Cabinet for a More Permanent Setup
If wrapping gifts, making cards, or crafting is a regular activity in your household, a fold-down cabinet may be worth considering.
This type of workstation combines concealed storage with a surface that opens when needed.
Inside the cabinet, compartments can hold wrapping paper, ribbons, scissors, tape, and decorative supplies.
Once the work is finished, the surface folds away.
It’s an appealing concept for rooms where a permanent desk would occupy too much floor space.
However, it also introduces practical requirements that portable stations don’t have.
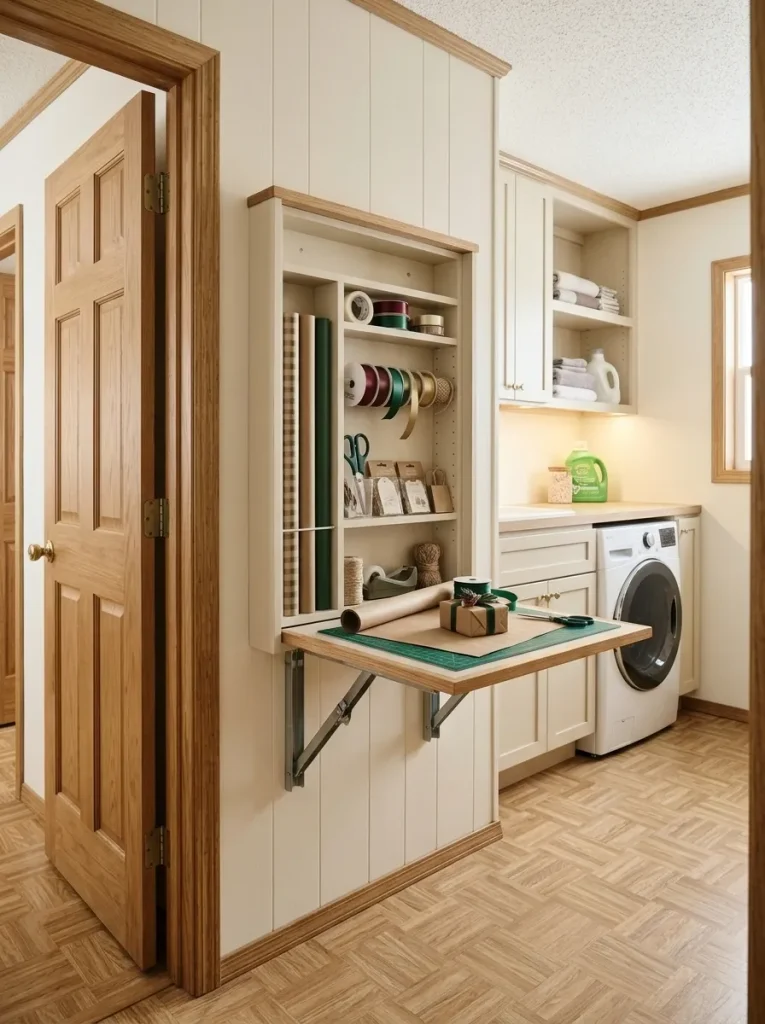
Check the full working position
A cabinet may look compact while closed, but the open tabletop changes how much space the unit occupies.
Measure the depth of the opened work surface and the area required for someone to stand and move around it.
Make sure nearby doors and walking routes remain usable.
Treat installation as a separate decision
Fold-down worktops place loads on hinges, brackets, cabinets, and their supporting structure.
Manufactured and mobile homes can have different wall assemblies, so a generic wall-mounting method may not be appropriate.
Follow the product manufacturer’s requirements and seek a qualified installer when the support or mounting method is uncertain.
Tall storage furniture also needs appropriate tip-over protection. The U.S. Consumer Product Safety Commission’s Anchor It safety guidance explains why top-heavy furniture should be secured correctly.
Renters should confirm whether permanent installation is permitted.
If the structural or space requirements make a fold-down cabinet impractical, a rolling cart beside an existing table offers a less complicated alternative.
You can explore other potential projects in these DIY mobile home storage projects for small spaces.
13. Arrange Your Station Around the Actual Gift-Wrapping Process
Even well-organized supplies can become inconvenient when they aren’t arranged in the order you use them.
A productive wrapping station follows a straightforward sequence.
Select → Measure → Cut → Wrap → Decorate → Label → Store
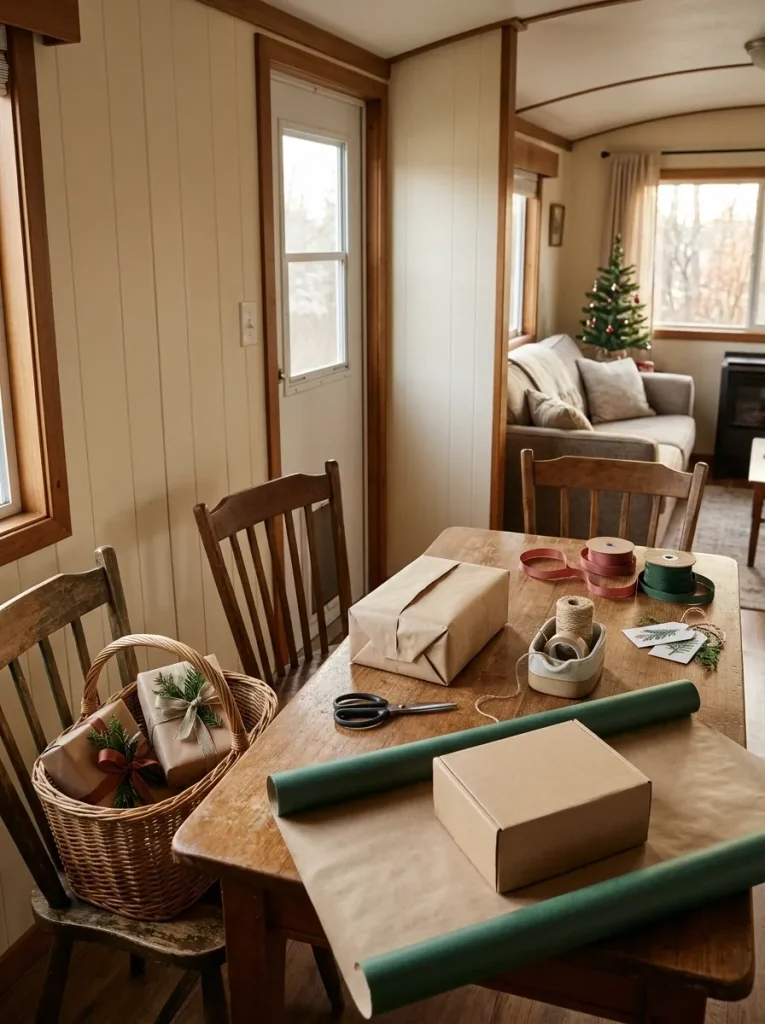
Consider how each stage works.
Select your wrapping materials
Choose the gift, paper, and any decorative finishing supplies before spreading everything across the table.
Keep the unused materials in their assigned storage areas.
Measure and cut
Place the present in the center of your working space.
Unroll the paper, check how it folds around the package, and cut the amount you need.
Keep the roll holder close enough to reach but away from the cutting area.
Wrap and secure
Fold the paper around the gift and secure the edges with tape.
Return the scissors and tape dispenser to their usual places between presents.
Add the finishing details
Choose ribbon, twine, bows, or decorative accents from their separate storage zone.
For a compact workstation, keeping one or two finishing options on the table is often more manageable than displaying every ribbon spool.
If you’re looking for more creative finishes, these holiday gift-wrapping ideas offer a wide range of styles and decorative techniques.
Label and move the finished gift
Write the recipient’s name immediately.
Then place the completed present in a designated basket or storage spot.
That final movement matters because piles of wrapped gifts can quickly consume the surface needed for the next present.
If you’re preparing multiple gifts for different people, use a private labeling system that makes sorting straightforward later.
Keep your active work area clear enough to begin the next package without reorganizing everything.
Where does wrapping slow down?
Pick the bottleneck. Get one targeted change to make before your next gift.
My most frequent problem is…
Expand the active work zone
Move the tool caddy beside—not on—the tabletop. Place the roll on the far edge and reserve a clear area for cutting and folding.
Test: Can you rotate the gift without catching loose paper?
Give tools a permanent landing spot
Put tape, scissors, and your marker in one handled cup at your dominant-hand side. Return each item after every gift.
Test: Can you grab all three tools without standing up?
Separate selection from dispensing
Keep extra ribbon together but put the active spool on a low-friction rod or flat tray. File tags separately in a shallow holder.
Test: Can you choose ribbon without lifting another spool?
Add a finished-gift exit lane
Keep an empty basket or a designated shelf off the wrapping surface for finished packages; move each gift immediately after labeling.
Test: Does the tabletop reset after every single gift?
14. Pack Away Your Gift-Wrapping Station Without Creating More Clutter
The final step is what determines whether your wrapping station remains practical.
A setup that takes over the dining area for several days can become frustrating, even if every supply is beautifully organized.
Create a simple cleanup routine that returns the room to normal after each session.
After each wrapping session
- Return scissors, tape, pens, and tags to their organizers.
- Secure the loose edges of wrapping-paper rolls.
- Put ribbons and bows back into their assigned compartments.
- Collect paper scraps and discard anything that cannot be reused.
- Move completed presents to a safe location.
- Return the cart or supply kit to its storage area.
- Check that nearby doors and walkways are clear.
This routine should be easy enough to repeat without having to reorganize the entire collection.
After Christmas
Sort the remaining supplies before storing them for another year.
Discard badly damaged paper, broken decorations, and packaging you no longer need.
Keep reusable tissue, ribbons, tags, and bags in separate compartments.
Store rolls where they won’t be crushed or exposed to damp conditions.
Label the outside of your storage container clearly.
Something as simple as “Christmas Wrapping Supplies — Paper, Ribbon, Tags” can save time when you unpack everything next season.

If you use a rolling cart for other household tasks during the year, transfer seasonal wrapping supplies into a compact container and reclaim the cart.
The objective is to preserve the organization while freeing the space for everyday use.
Your 5-minute reset sequence
Use these checkboxes as you finish a wrapping session. Your selections stay on this page only; keep a separate printed copy if you want a permanent record.
Final check: The room should work normally again, with all emergency exits and window escape routes accessible.
No extra furniture requiredA Simple Gift-Wrapping Station Setup Checklist
Before you consider the project finished, check the essentials.
- I’ve chosen a station type that suits my available space.
- The working surface fits the gifts I usually wrap.
- Doors, windows needed for escape, and circulation routes remain clear.
- Wrapping-paper rolls have stable, suitable storage.
- Scissors, tape, and pens have a consistent location.
- Ribbons, gift tags, and tissue paper are organized separately.
- I have a place for finished gifts and reusable offcuts.
- Any furniture or mounted organizer is installed and used safely.
- I know where every component will go after wrapping.
- The room can return to its normal function when the station is packed away.
You don’t have to check every item by buying something new.
Existing furniture, repurposed containers, and careful placement may provide everything you need.
Final Thoughts: Make Gift Wrapping Easier Without Giving Up Living Space
A well-organized gift-wrapping station should make Christmas preparation more enjoyable while keeping your mobile home comfortable.
For most small spaces, start with a clear dining table, a portable tools caddy, and a stable vertical holder for wrapping-paper rolls. Add a rolling cart or dedicated closet section when your supplies and wrapping routine justify the extra storage.
Permanent cabinets can be useful, but they aren’t necessary for an efficient setup.
Focus on easy access, a comfortable work surface, and a cleanup process that you can repeat after every session.
Save this article on Pinterest so you can set up your own small mobile-home gift-wrapping station before the Christmas wrapping begins.