The best Thanksgiving craft on a small dining table might be the one guests barely have to move. A hand-lettered name card resting on a napkin, a soft ribbon around a fold, or a tiny gratitude message can make dinner feel personal while leaving room for actual plates, glasses, and serving bowls.
These DIY Thanksgiving place cards for a small dining nook and coordinating napkin rings are 15 practical, make-at-home projects: eight ways to identify seats and seven ways to finish cloth napkins. Each includes construction guidance and a fit decision for compact round tables, narrow mobile-home dining corners, and wall-side banquettes. The looks draw on floral gallery walls, natural oak, warm walnut, cottage textiles, and leafy window nooks.
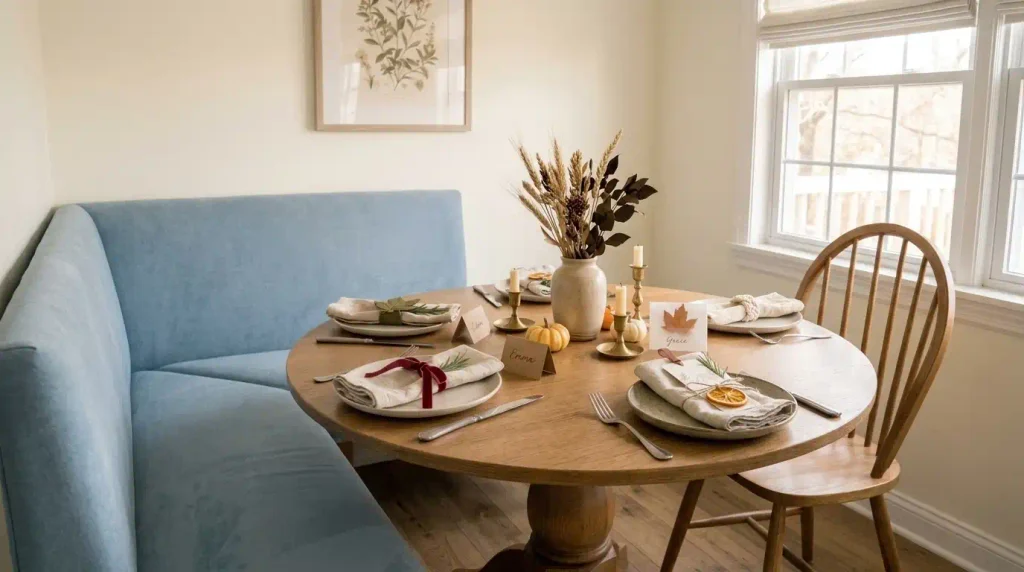
Before making a batch, set your real dinnerware at every seat. Fold one actual napkin, assemble one sample, and test the view from a seated position. If a detail blocks a glass, snags a sleeve, sheds near food, or forces a guest to reach across a corner bench, simplify it. The handmade element should welcome someone to the table—not get in the meal’s way.
For the underlying plate, cutlery, and glass placement, Emily Post’s basic table-setting guide is a useful starting point; adapt it to the real space available at each seat.
Interactive Dining-Nook Craft Finder
One little detail.
Exactly the right fit.
Choose the shape of your table. See which handmade place cards and napkin rings keep the setup welcoming without taking over dinner.
Flat card + flexible loop
Start with a kraft tent (#1) or bookmark tag (#11), plus a soft velvet ring (#2). Set each finished piece on its own napkin, not the shared center.
- #1 Kraft tent
- #2 Velvet ring
- #11 Bookmark
A narrow profile wins
Use pressed vellum (#3) or reversible paper bands (#10). Keep napkin decorations aligned along the longer plate edge to preserve space opposite it.
- #3 Vellum leaf
- #10 Paper band
- #12 Cotton cord
Easy to reach, easy to keep
Place gratitude pockets (#7) or clip-on flags (#15) before guests enter the bench. Felt cuffs (#4) can be removed without shifting plates.
- #4 Felt cuff
- #7 Gratitude pocket
- #15 Clip flags
1. Mini Kraft Tent Cards That Stand on the Plate
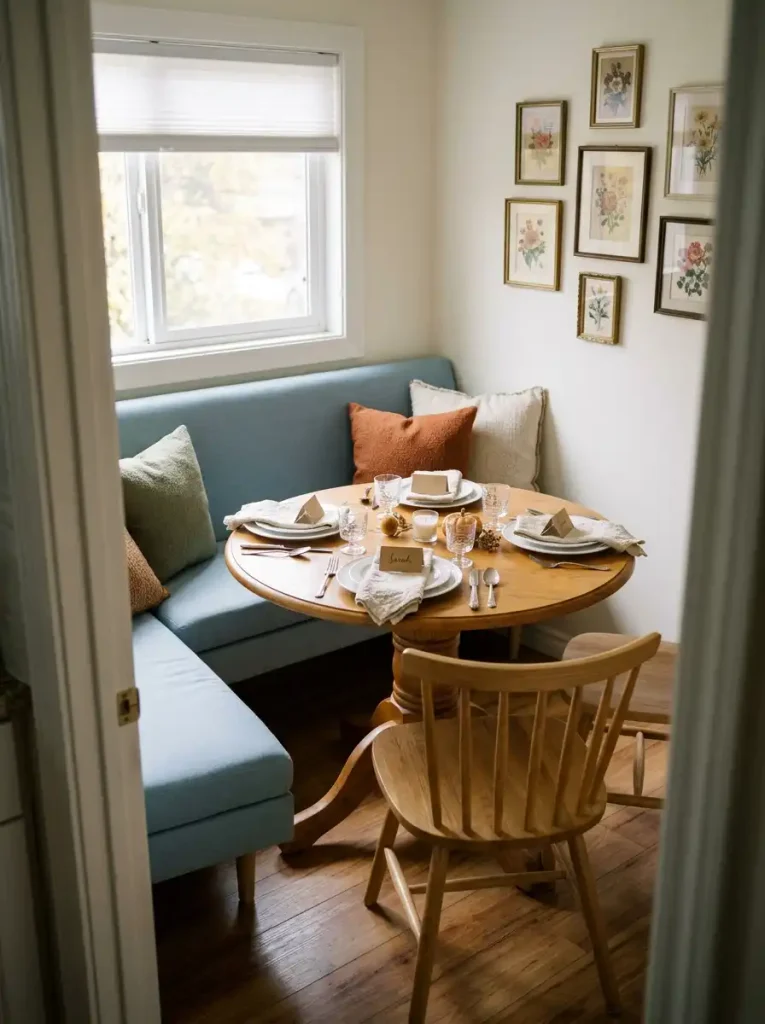
Start with the easiest object to build and the hardest detail to fake: a name that guests can read from their seats. A small tent card gives the tabletop a finished, welcoming look without requiring a stand, pumpkin, or vase. On a shallow round table, its entire footprint can stay on the folded napkin.
Make a Neat Fold in Three Moves
- Cut: From medium-weight kraft cardstock, make a rectangle approximately 3 × 4 inches; the size is a suggested starting point, not a required specification.
- Score: Mark the midpoint and run a blunt scoring tool along a ruler before folding. The card should stand without curling.
- Letter: Open it flat, write the name on the outward-facing half, then refold. Test lettering from a seated position, not directly overhead.
Small-nook adjustment: Put each finished tent on the napkin or the upper edge of a plate. Keep card height below the line of conversation and remove the cards before serving saucy dishes.
For broader plate-and-glass coordination, explore our small mobile-home Thanksgiving table settings.
2. No-Sew Velvet Ribbon Napkin Rings
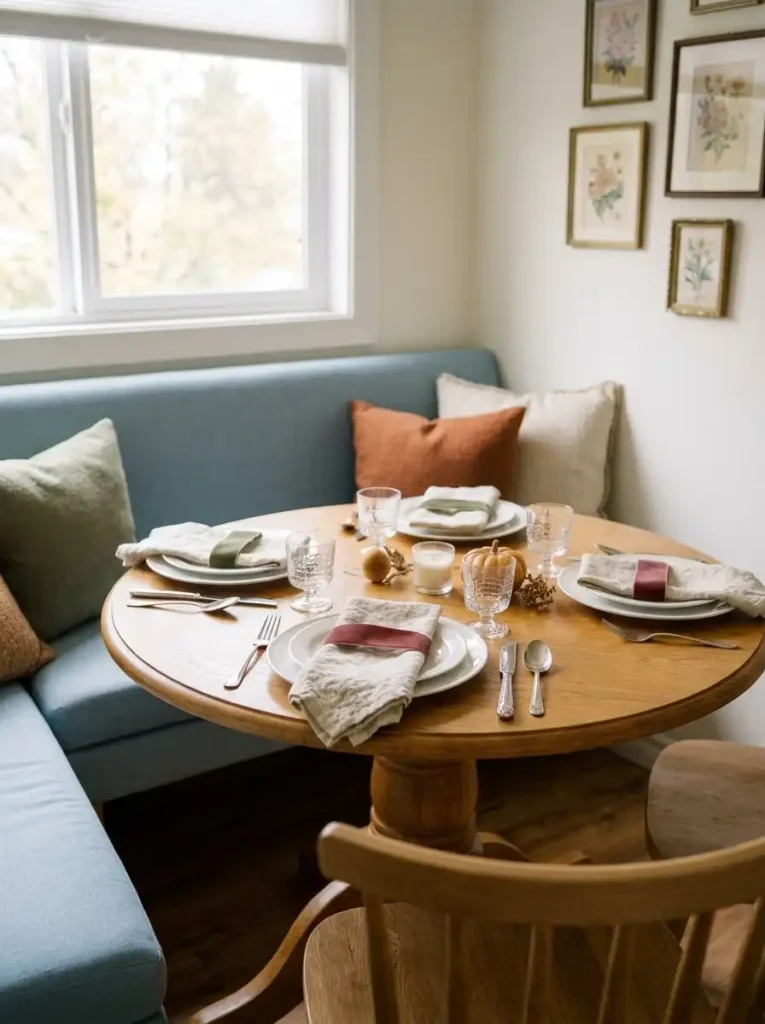
A velvet cuff feels luxurious against plain linen, yet it packs flatter than a chunky wooden ring. On the cream-and-rust nooks in the reference images, a muted cranberry or moss ribbon is enough to introduce a Thanksgiving color without competing with upholstered seating.
Supplies: Velvet ribbon, scissors, self-adhesive fabric fastening dots suitable for fabric, and a napkin to use as the fit model.
Fit the Napkin Before Cutting
Fold your actual cloth napkin into the shape guests will receive. Wrap a ribbon length around its center, overlap the ends underneath, and mark that overlap. Cut with a small allowance for adjustment.
Fix the fastening material to the overlapping ends according to its product directions; press closed around the folded napkin. Tuck the join toward the plate.
Decision check: A thick, soft napkin needs more overlap than a thin one. If the ribbon pulls the napkin into a hard bundle or rides off when lifted, lengthen the cuff. Choose a removable fastener when you want to reuse the ribbon for another season.
3. Pressed-Leaf Vellum Place Cards
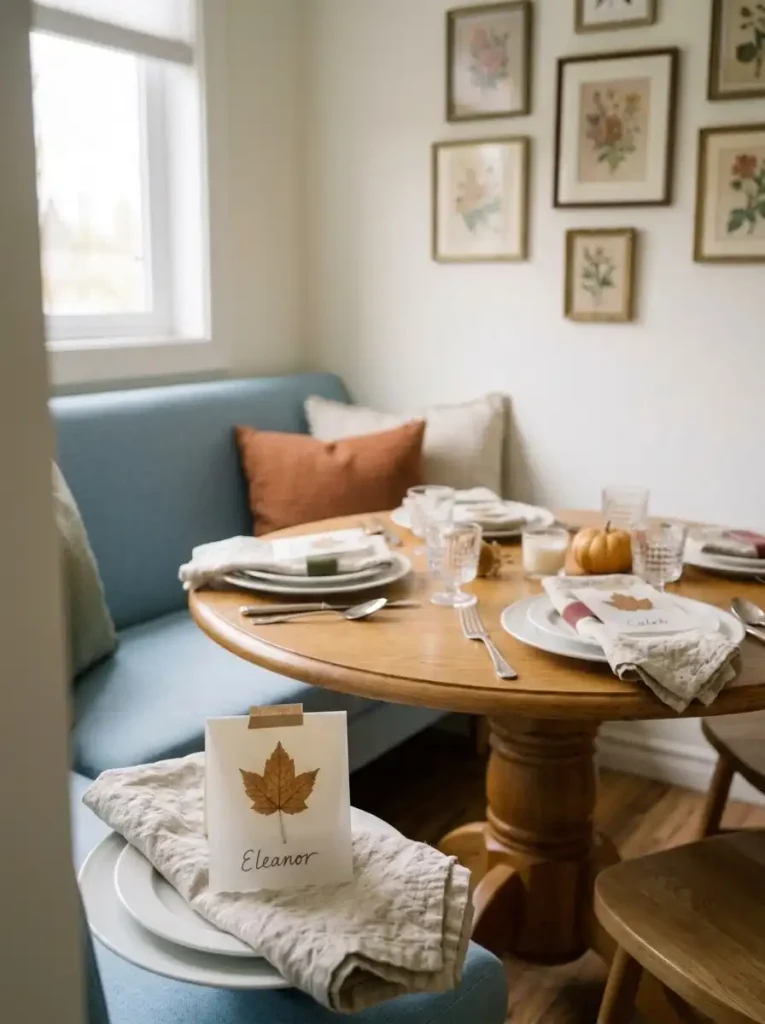
Window light is particularly flattering to translucent place cards. In a dining nook with botanical prints and a white blind, a pressed leaf becomes a delicate layer against the greenery outside; nothing taller than the place card itself is needed.
Layer, Do Not Laminate the Whole Table
Prepare clean, fully dry pressed leaves ahead of time. Cut a piece of cardstock for the back and a slightly narrower vellum overlay.
Place one small leaf between the two, then fasten the layers at the top with a tiny paper brad or two narrow pieces of decorative tape. Write the guest name on the front of the vellum using a pen tested on an offcut.
- For bright, white dining corners: Choose faded olive or copper leaves with dark charcoal lettering.
- For a darker wood banquette: Use cream cardstock so the name does not disappear against the table.
- For a family meal: Use flat paper leaves when natural ones are brittle or shedding.
Place the card flat on the upper portion of a plate or lean it against a water glass where it will not fall into food.
For more of the room-level botanical styling, see our fall dining nook ideas for small mobile homes.
4. Felt Leaf Napkin Cuffs with Hidden Fasteners
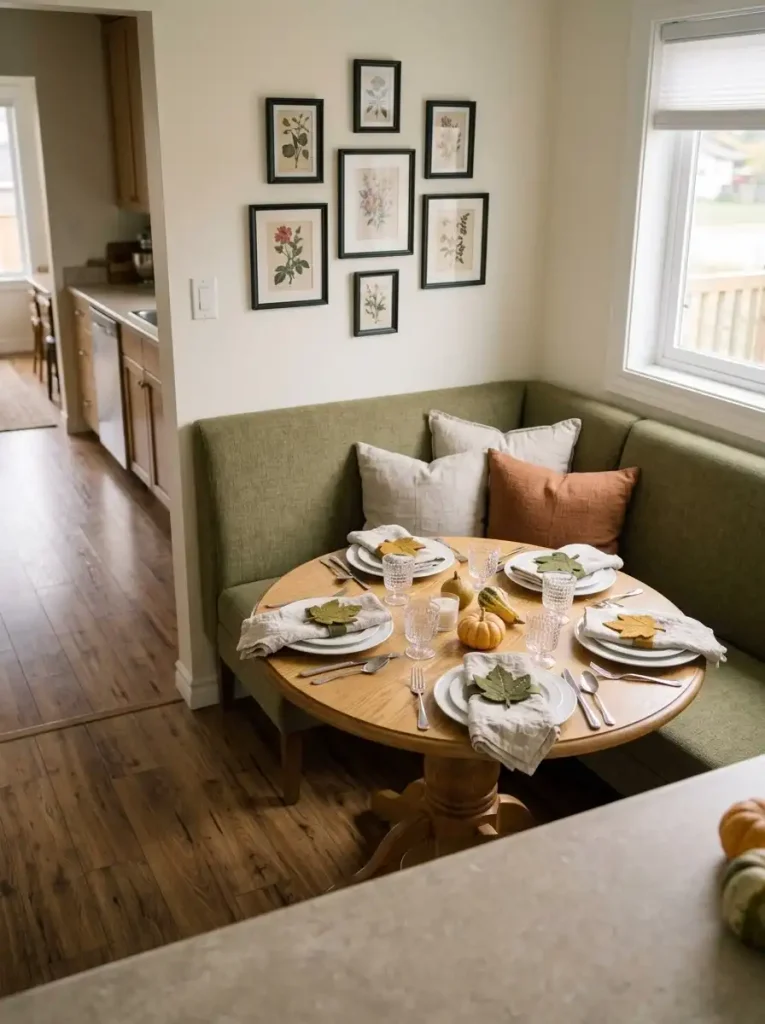
Traditional autumn leaves can become a practical cuff: soft enough for tightly packed place settings and durable enough to store flat. The trick is to build the closure first and add just one oversized felt leaf, rather than stacking many bulky shapes.
Cut-and-Close Checklist
- Trace a leaf approximately the width of the folded napkin, then cut it from medium-weight felt.
- Cut a matching narrow felt strip long enough to wrap around your napkin with overlap.
- Attach small fabric hook-and-loop patches to opposite sides of the strip ends, using an appropriate fabric-safe method.
- Secure the leaf at the front of the strip, keeping the fastener and any stitching away from the plate-facing side.
- Roll and unroll the napkin twice. Adjust the closure if the cuff slips or squeezes too tightly.
Best fit: An olive or deep green leaf complements blue or dark timber banquettes; use ochre to warm a white-painted nook. Skip loose beads or tiny detachable decorations when young children will handle the setting.
Napkin-Ring Fit Comparison
See what the napkin
will actually feel like.
Choose a closure. Each option changes the likely bulk, ideal fabric, and the test to perform before making the full set.
Flexible and forgiving
A ribbon can overlap to suit thick or thin napkins. Best for a soft, generous fold where you want very little extra volume.
Structured but soft
A felt cuff keeps a leaf detail facing upward. Useful with neatly folded cotton where the leaf should stay visible.
Best with a soft backing
A small clay piece is decorative and rigid. Support it with ribbon, keep it clear of food, and check that it cannot chip.
The bulk bars are qualitative comparisons, not laboratory measurements. Actual fit depends on the napkin and ornament dimensions.
5. Mini Accordion-Fan Thanksgiving Name Cards
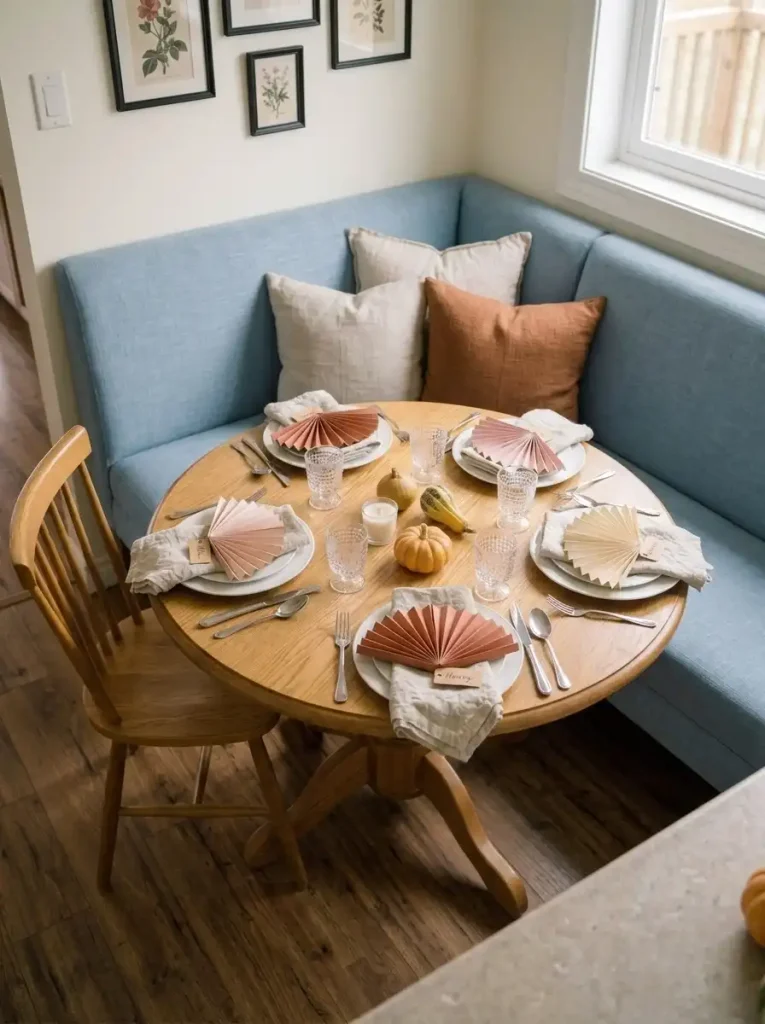
The table is already crowded, and you still want something festive enough to catch the eye. A short folded paper fan solves that problem through silhouette: it gives each guest a sculptural accent while remaining lighter and smaller than a miniature pumpkin.
Cut a strip of decorative paper, fold it back and forth in even, narrow pleats, then pinch and secure one end with a piece of tape on the reverse. Fan out the free end; attach a small rectangular name label across the front near the base.
Rest the finished fan against a folded napkin. For a freestanding version, use a tiny folded cardstock brace behind it.
Which Fan Belongs at Your Table?
| Table | Choose | Avoid |
|---|---|---|
| Two-seat bistro | A shallow half-fan laid on the plate | Tall freestanding fans |
| Four-seat round table | Equal fan widths for visual rhythm | Wide fans between neighboring glasses |
| Bench nook | Easy-to-read labels facing the guest | Cards that need reaching past other people |
Test the paper in a gentle indoor draft; a light fan that flips over is better laid flat. Rust, dusty pink, and ivory suit the pastel gallery-wall inspiration without matching every frame.
6. Dried-Orange and Cotton-Twine Napkin Rings
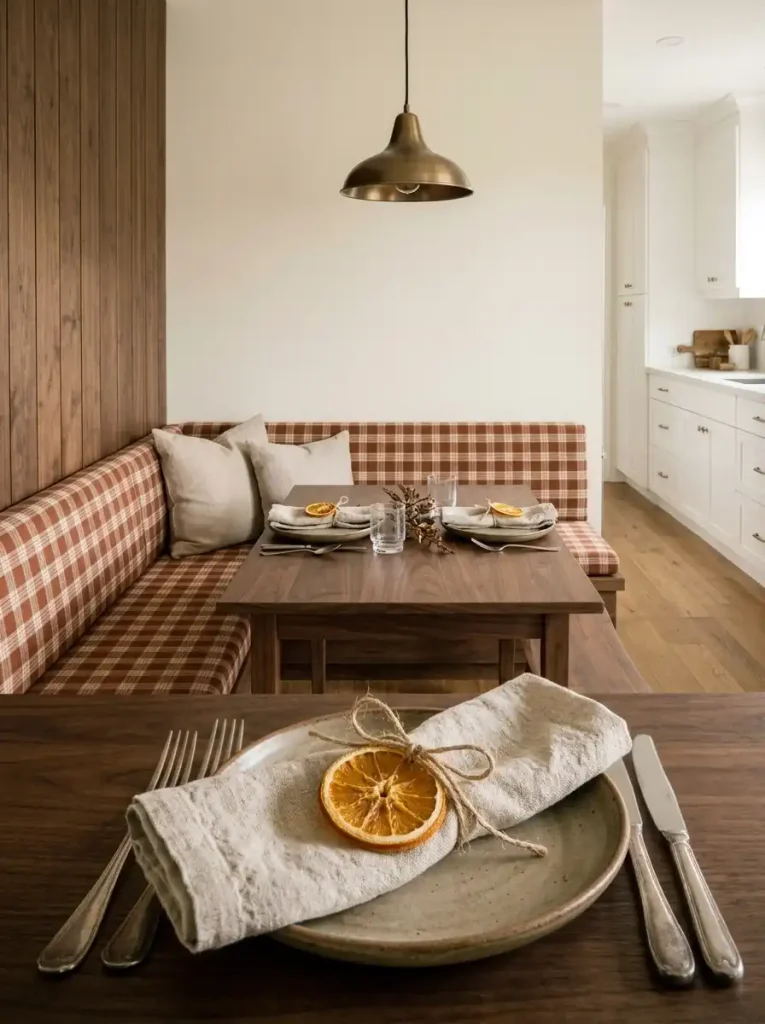
Dried citrus gives a natural-wood dining nook a harvest mood in one small gesture. It works particularly well with oatmeal napkins and honey-colored furniture, where its burnt-orange color is visible from the doorway.
Four-part assembly:
- Choose completely dried, firm orange slices from a reliable craft supply or prepare them well ahead; leave any soft or damp pieces out.
- Make a comfortable double loop of cotton twine around a rolled test napkin, then tie the loop closed.
- Thread the twine through an existing hole or gently secure the slice to the knot with an appropriate craft fastening method. Avoid forcing a hole that cracks the slice.
- Place the citrus on top, with the twine join hidden beneath the napkin.
Keep these decorative pieces away from food contact, lit candles, and damp storage. For preparing and storing your own dried citrus, University of Minnesota Extension explains how moisture removal and dry storage reduce spoilage risks.
If fragrance or fragile materials are unwanted, substitute a printed orange-shaped cardstock disc.
To keep the meal itself unobstructed, pair the rings with the modest arrangements in our small-table Thanksgiving centerpiece guide.
7. Gratitude-Pocket Place Cards with Secret Notes
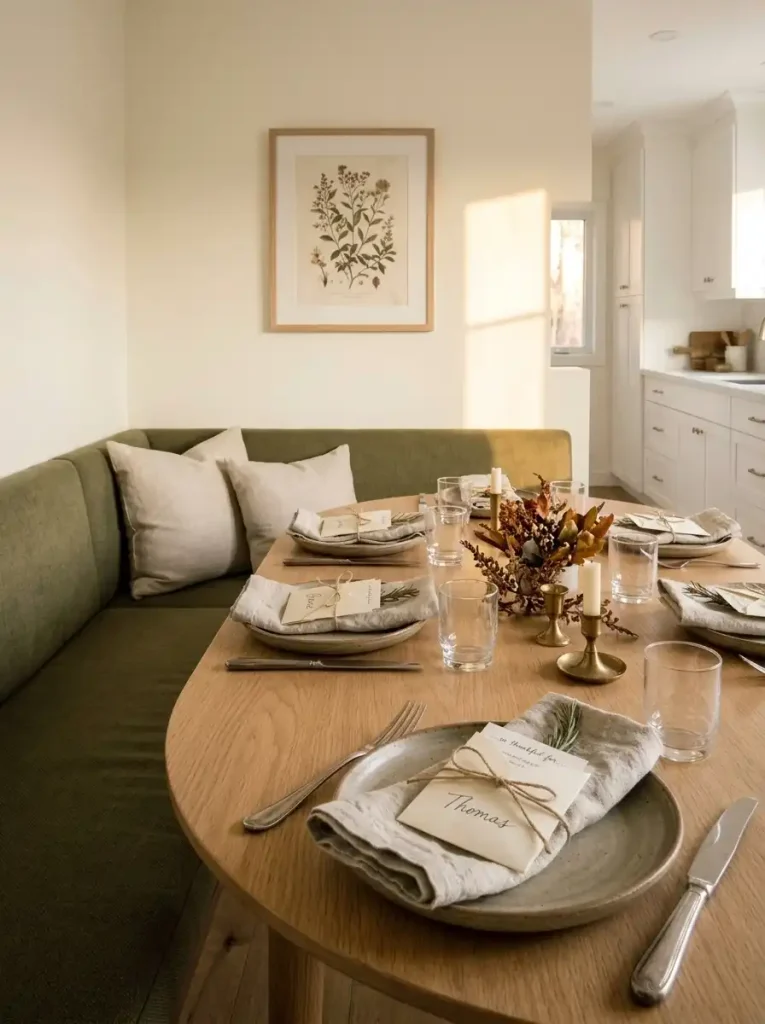
Some Thanksgiving details are best discovered after everyone sits down. These miniature envelopes carry both a name and a private sentence of appreciation, turning a seating label into a keepsake without taking up a second patch of tabletop.
Make a pocket from square paper: fold the lower corner upward to form the front, bring the left and right corners inward with a slight overlap, and tape the overlapping edges while leaving the upper opening free.
Slide a narrow note inside. Add the guest name across the outside in high-contrast lettering; a tiny adhesive seal can finish the flap if it stays easy to reopen.
A note worth keeping: “I loved our long walk this spring.” A specific shared memory is more meaningful than a generic holiday slogan. Leave the text short enough that it can be read without unfolding a large sheet at dinner.
At a banquette, place the envelope on each plate before guests sit down; people in the corner seats should not need to reach across others to find theirs. Families with young children can draw a picture inside the pocket. The cards double as a low-effort take-home gift.
Interactive Dining-Nook Placement Atlas
Every name has a place.
So does dinner.
Switch between three small-nook arrangements. The diagram and rules change to show where a card can sit—and which area is worth keeping clear.
Make the plate do the work.
- Use low kraft cards (#1) or bookmark tags (#11) on each napkin.
- Keep the shared center free for food; remove cards before serving.
- Test the fully laid table before choosing a wider craft.
Preserve the narrow middle.
- Use paper bands (#10) or braided cord (#12) that sit across folded napkins.
- Check the gap between glasses and opposite plates.
- Keep name details short and flat to reduce crowding.
Set every seat before guests sit.
- Face gratitude pockets (#7) toward the guests assigned to corner seats.
- Use clip flags (#15) for simple seating changes.
- Keep the approach to the bench clear of decorative holders.
Illustrative overhead diagrams only. Not measured seating plans, accessibility guidance, or claims about safe clearances.
8. Recycled-Flannel Button Napkin Cuffs
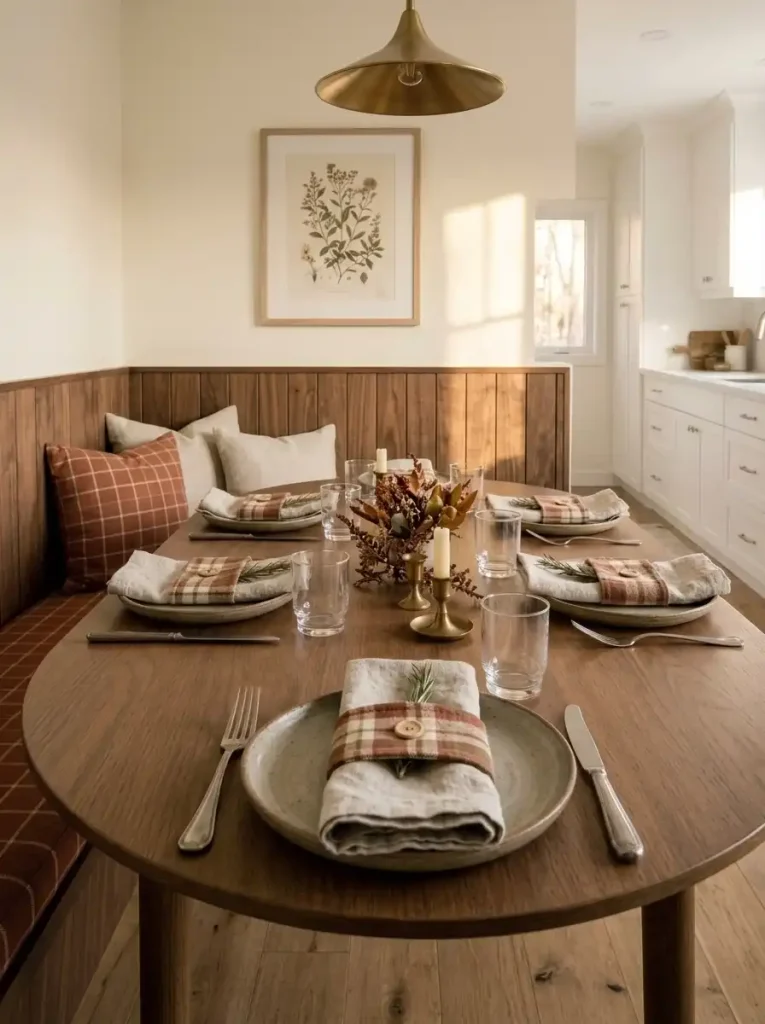
Old flannel shirts have a softness new craft felt sometimes lacks. A slim cuff cut from a clean shirt can echo gingham cushions or a checked seat pad without adding another patterned tablecloth to a tiny dining area.
One Shirt, Several Matching Cuffs
Cut a long, narrow rectangle from an intact section of washed flannel. Fold under the raw edges and stitch them securely.
Wrap the band around a folded napkin to mark the closure position. Attach a sufficiently large, firmly sewn button at one end and make a matching reinforced buttonhole at the other; alternatively, stitch the ends into a fixed loop after checking the napkin fit.
Trade-off: Buttons look charming and withstand reuse, but they take longer than a ribbon overlap. Use the fixed-loop version when several guests will be unpacking napkins quickly. Position every button on the outer side so it does not press into the plate or snag fine linen.
To compare other seasonal table looks without repeating this construction project, browse our broader fall tablescape and napkin-ring inspiration.
9. Cinnamon-Stick Name Card Holders
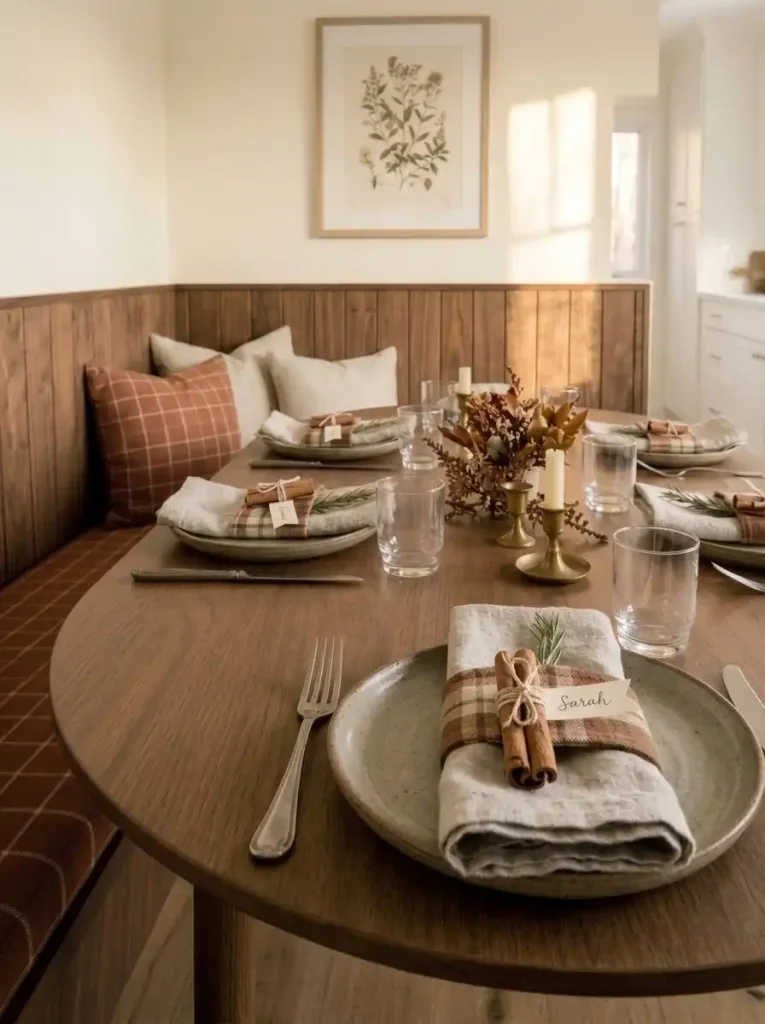
A pair of bundled cinnamon sticks can support a surprisingly legible name flag. The rustic texture belongs in a wood-lined breakfast nook, and the holder lifts the card just enough to remain visible beside dinner plates.
Before cutting anything, set the empty plates and glasses at their intended places. A cinnamon holder belongs on a dry napkin corner; if it would sit between two glasses or touch food, switch to the flat paper version below.
Build the Holder
- Lay two straight, similarly sized cinnamon sticks beside each other.
- Bind them snugly with fine cotton twine near both ends so they do not roll apart.
- Cut a narrow cardstock flag, write the guest’s name, and tuck the blank end into the gap between the sticks. Add a hidden paper shim if the fit is loose.
- Test the bundle on the tabletop. If it rocks, place it flat on the napkin rather than near a glass.
When to skip: Some guests dislike strong scents, and cinnamon bark can splinter. For a fragrance-free version, tightly roll two short paper tubes, tape them so they keep their shape, and tie them together the same way; the slot between them holds the name flag.
Where guests serve food from the kitchen, plan that route with our Thanksgiving buffet guide for narrow mobile-home kitchens so the name holders can remain on the table until dinner begins.
10. Reversible Vintage-Paper Napkin Bands
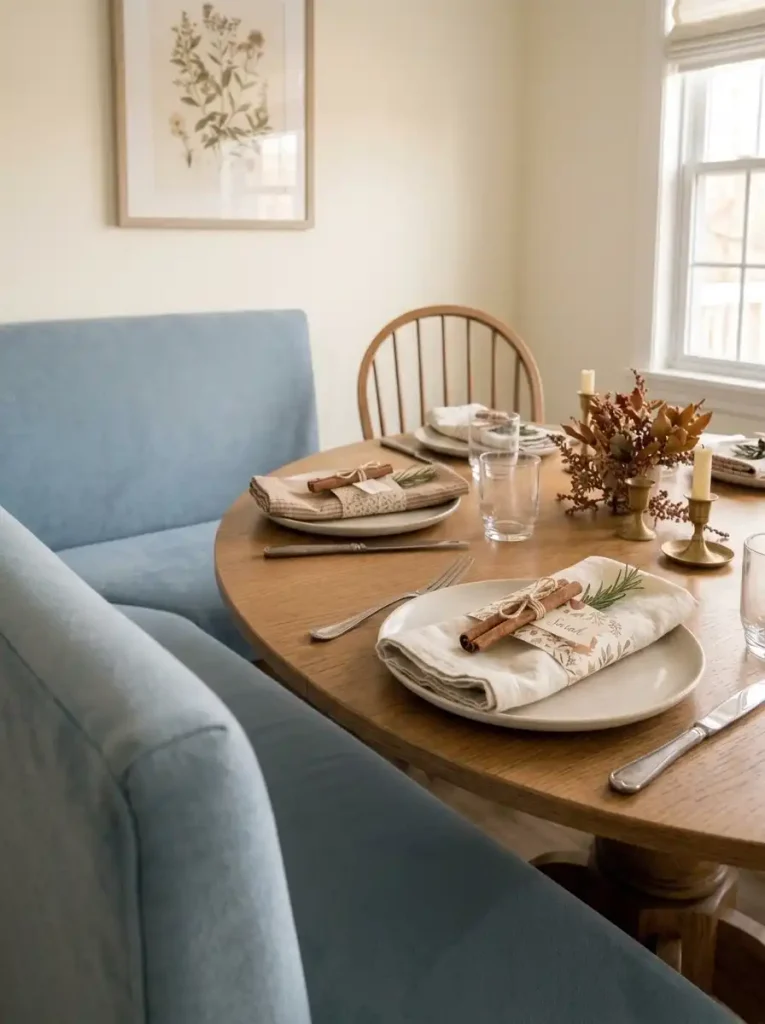
Vintage artwork already brings personality to many of the supplied dining nooks. Let a napkin band borrow that feeling through small-scale botanical patterns, reproductions of public-domain ephemera, or contemporary paper prints you are permitted to use.
Cut two equal-length, thin decorative paper strips: one with an autumn botanical design and the other with a neutral print.
Bond their blank backs together with a light, even layer of suitable paper adhesive, then let the two-sided strip dry flat. Trim uneven edges. Wrap it around your test-folded napkin and secure the overlapping ends with a small, removable paper adhesive dot. Keep the fastener underneath where it can be peeled open before reversing.
The Two-Season Trick
Show the autumn face for Thanksgiving. For an ordinary winter meal, release the adhesive dot, turn the band over, and re-close it with a fresh removable dot.
This works only when both outward faces are decorative; a plain reinforcement backing would defeat the reversible design. Keep paper away from food and damp napkins, and remove the band before the napkin is used.
Choose this over fabric when you need coordinated settings for a larger guest count on a short timeline. Use fabric rings for repeated laundering and family meals.
Material Swap Studio
Choose your supplies with a little more intention.
Open a sourcing route to see the projects it supports, what you need, and the trade-off worth knowing before you start.
01 Use what you already own Paper-led · fast to personalize
Best projects: kraft tents (#1), folded gratitude pockets (#7), bookmarks (#11), and clip-on name flags (#15) if you already own clips.
Gather: cardstock or clean scraps, a working pen, scissors, tape and any spare ribbon.
02 Buy one signature craft material Coordinated look · modest sourcing effort
Best projects: velvet loops (#2), felt leaves (#4), and chalk-look tags (#13).
Gather: one ribbon roll, a little felt, or matte black card—choose one accent rather than purchasing a separate material for every place.
03 Make pieces worth storing Reusable · more assembly upfront
Best projects: sewn flannel cuffs (#8), cotton braids (#12), adjustable felt (#4), or reusable name clips (#15).
Gather: sturdy washable textiles or cord, thread and a dedicated storage tin. Replace paper names next time, keeping the hardware.
Editorial rule: Choose your dominant material before selecting decorative extras. One recognizable finish usually feels more coherent on a compact table.
11. Bookmark-Style Thanksgiving Place Cards
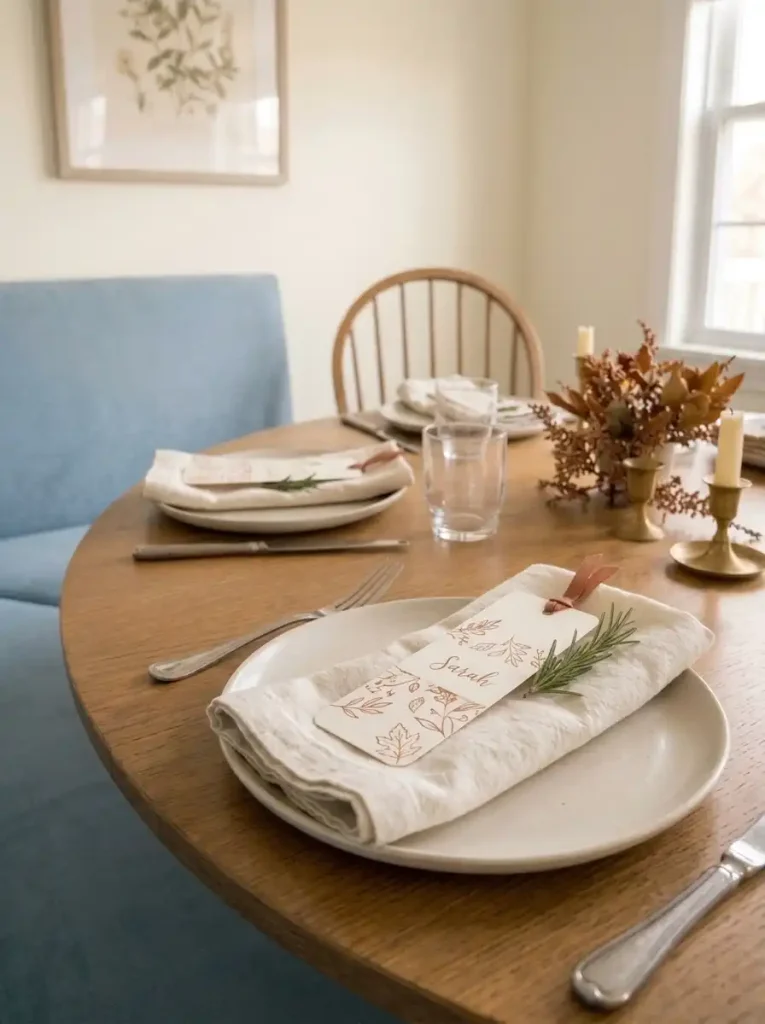
A name card that can become a bookmark earns its place twice. Its long, narrow shape is especially useful when plates nearly meet in the middle of a bistro table: the card can sit across the napkin, leaving the center clear.
The Slimline Recipe
- Base: Cut narrow, heavyweight paper strips with rounded corners.
- Name: Write the guest’s name at the top in lettering readable against the paper color.
- Detail: Add a tiny hand-drawn leaf, short gratitude phrase, or border; leave most of the surface clear.
- Finish: Punch a hole at the end and tie a short ribbon loop, keeping loose fibers away from the plate.
Slide the finished tag under the napkin fold so the name remains visible. If guests tend to move their glasses, avoid laying the bookmark in the glass zone.
Let each person take theirs after dessert; a small handwritten message on the back makes the keepsake feel deliberate.
12. Braided Cotton-Cord Napkin Rings
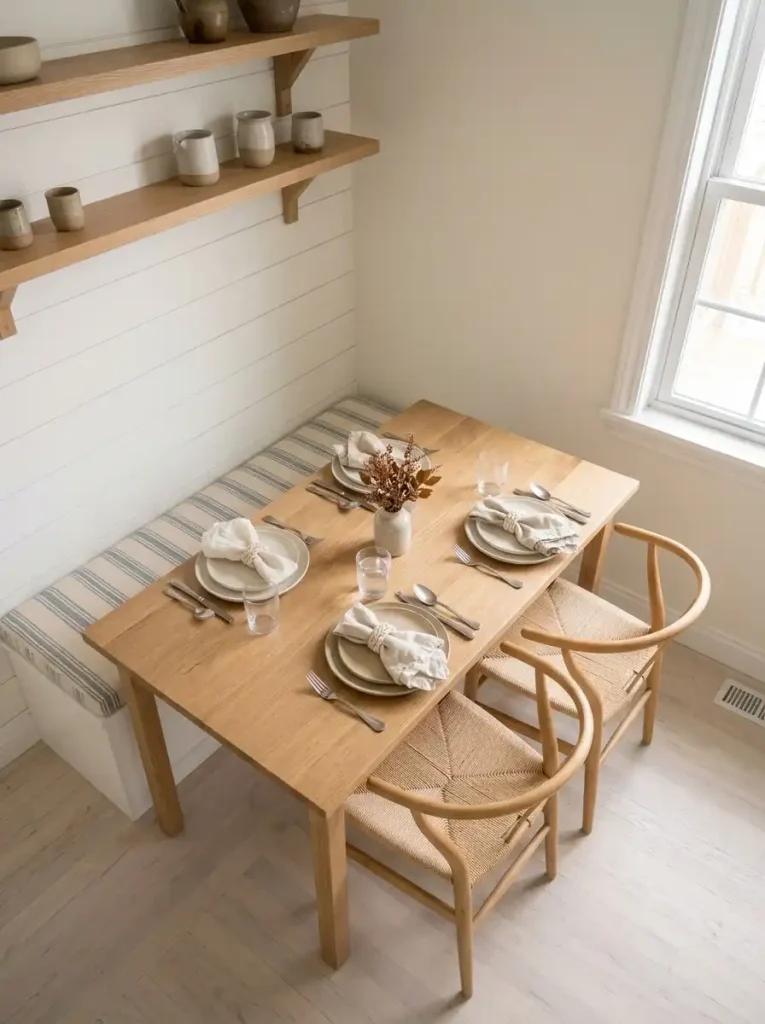
For a Scandinavian-style nook with striped bench seating and open oak shelves, a quiet braided texture can carry the entire handmade detail. Cotton cord adds tactile interest without relying on autumn motifs that may clash with permanent decor.
Cut three equal pieces of soft cotton cord, tie the strands together temporarily, and braid them to a length that comfortably circles a folded napkin.
Join the braid into a loop with strong thread, securing and hiding both cut ends under a short matching wrapped section. Tug lightly before putting it on the table. Make a cardboard size guide from the first successful loop so the remaining rings are consistent.
Material verdict: Soft cord behaves well with loosely folded linen; rigid rope can feel bulky against delicate napkins. If the braid twists the fold or the join opens with handling, undo and resize it. This is a good choice for understated, reusable everyday pieces.
13. Chalkboard-Look Mini Name Tags
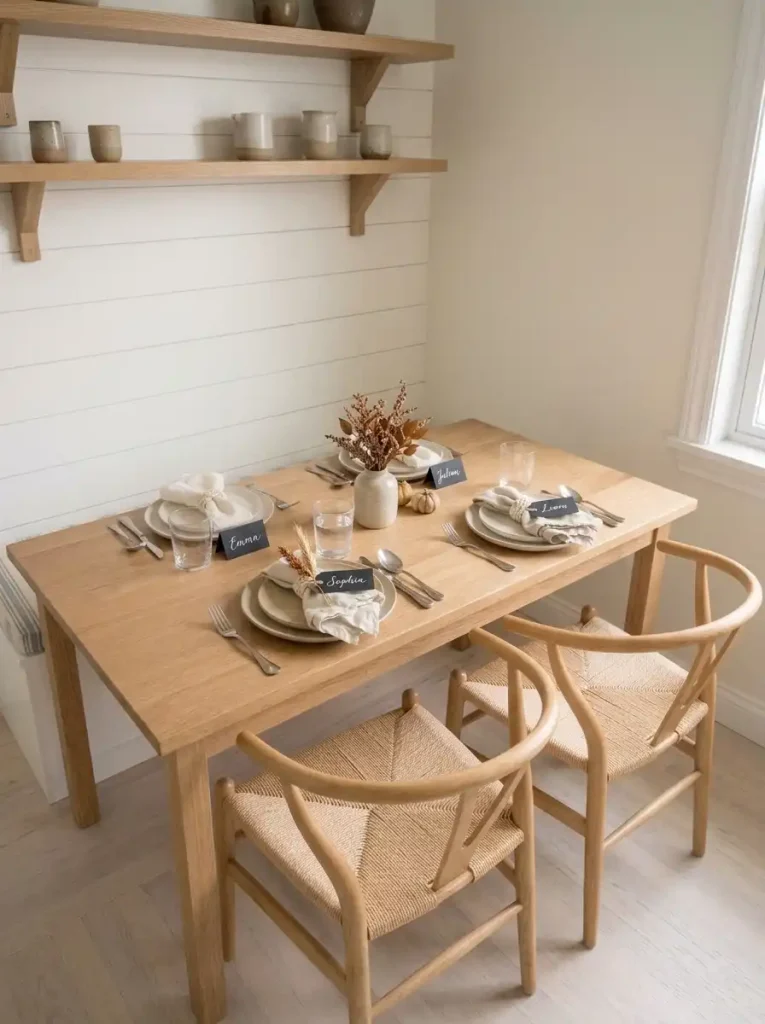
Dark name tags provide a crisp contrast against cream plates, white-painted banquettes, and pale gingham. The appeal is graphic: each guest sees their name immediately, even when the rest of the table is softly patterned.
Lettering Test Before Batch Production
Paint small cardstock tags with matte black craft paint or start with black paper. Let the surface dry as directed.
Use an opaque white paint pen and trial a guest name on an offcut. If the first pass streaks, allow it to dry and apply a second pass before writing the full set. Attach a mini clip or a ribbon loop so the label can rest on the napkin.
At a window-side nook, position these labels away from direct reflections; dark paper can look glossy when coated. For a two-person table, one horizontal tag per folded napkin is sufficient. For a larger gathering, preserve a consistent writing size so longer names are no harder to read.
Clean-table test: Skip actual chalk if it sheds dust. A matte-black paper tag and an opaque white paint pen deliver the graphic look without loose powder near dinnerware. If a label glares under the window, angle it or lay it flat.
14. Hand-Stamped Clay Medallion Napkin Rings
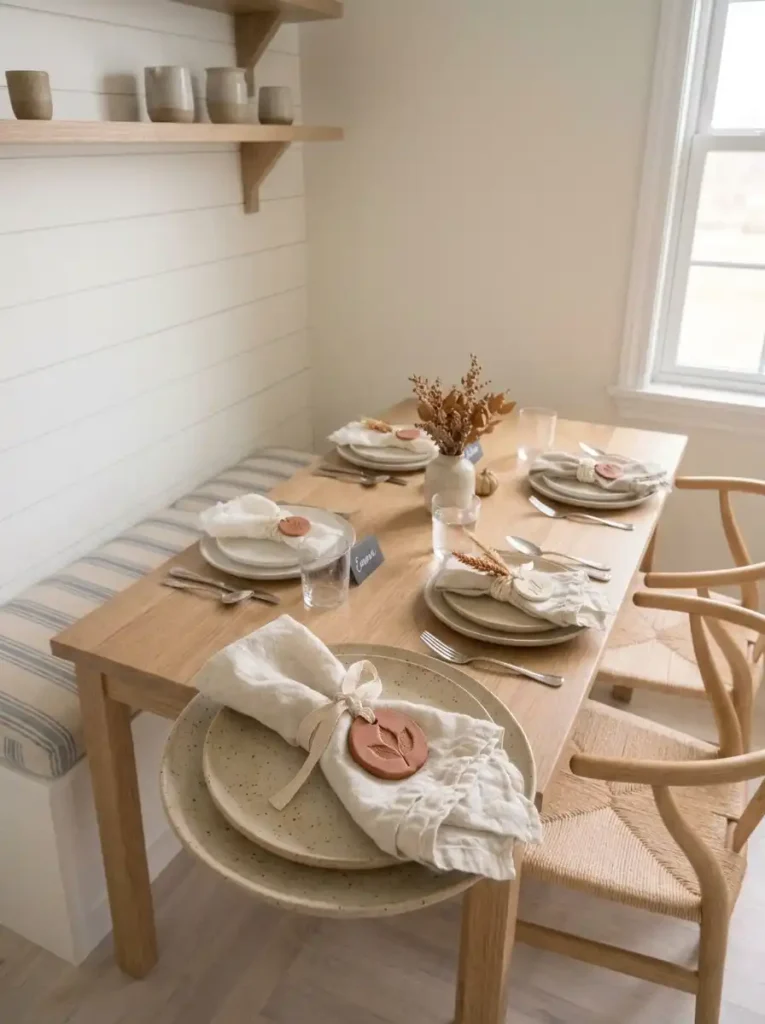
A tiny stamped medallion brings a handmade, pottery-like touch to a compact dining nook with curved seating and warm wood. It is the most preparation-dependent project in the set, so make it early and keep the finished piece small and light.
Prepare, Shape, Cure, Attach
Plan this project earlier than the paper crafts. Choose a lightweight size and attach it using a ribbon loop; a hard clay ornament should never press directly against a guest’s dinner plate.
- Choose a suitable air-dry craft clay; read the product’s recommended thickness and drying guidance before starting.
- Roll a small even slab, cut medallions with a round cutter, and press a leaf stamp or single initial lightly into each piece.
- Make attachment holes while the clay is workable, if supported by the product directions. Allow the pieces to dry completely as instructed.
- Thread narrow ribbon through the finished holes and tie a flexible loop around a test napkin; do not use brittle clay pieces.
Keep the clay decorative and separate from food. Air-dry clay is not automatically food-safe or dishwasher-safe; Crayola’s manufacturer guidance for its air-dry clay specifically advises keeping finished pieces away from food and liquids.
If a medallion chips or catches fabric, leave it off the table. A cardstock circle stamped with the same initial produces a last-minute alternative with no curing delay.
Thanksgiving DIY Assembly Timeline
A calmer table starts
before Thanksgiving.
Follow this preparation order, then open any phase for the actual projects and checks. Drying time follows each material’s directions—not a made-up universal timer.
Phase 01 / Several days ahead Start the slow crafts. View preparation notes ↘
Press and fully dry leaves #3, prepare dried citrus #6, and shape clay medallions #14.
Follow manufacturer drying instructions. Replace fragile or damp pieces before assembly.
Phase 02 / The day before Batch the repeatable pieces. View assembly notes ↘
Score tent cards #1, fold fans #5, sew flannel cuffs #8, braid cord #12.
Check spelling and fit using the actual napkins.
Phase 03 / Before guests arrive Do the table test. View final checks ↘
Set place cards, arrange napkins, and face names toward guests. Keep two blank flags #15 nearby.
Remove anything that wobbles, sheds, snags fabric or crowds glassware.
15. Removable Clothespin Name Flags
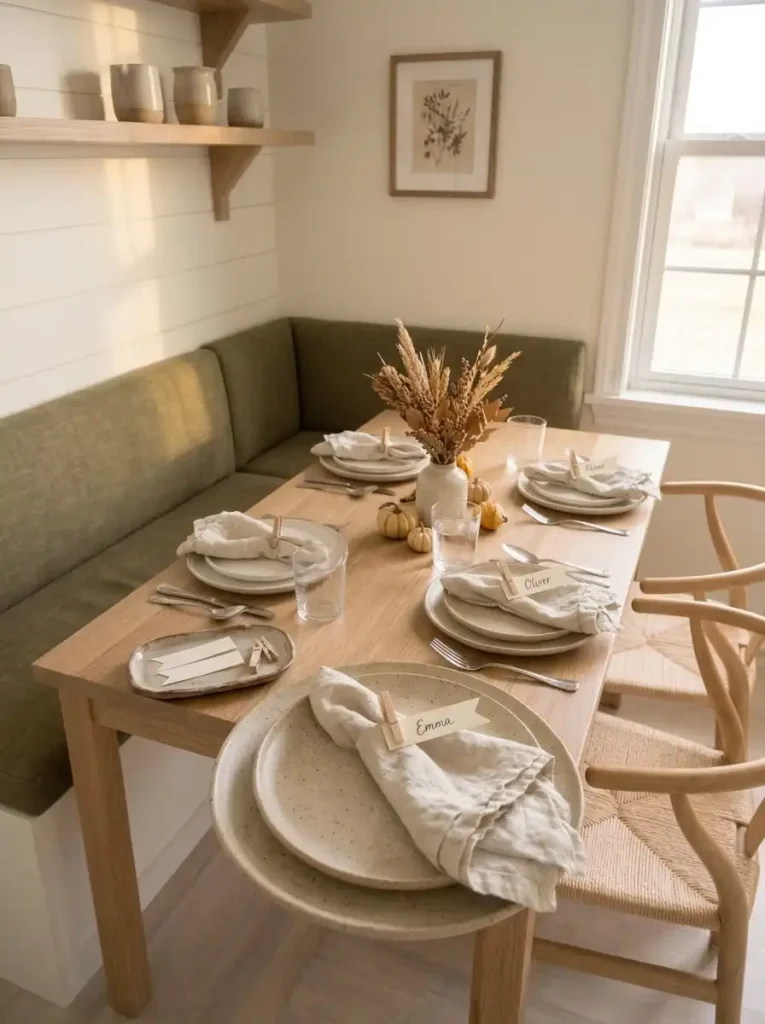
A last-minute seating change should not require rewriting an entire tablescape. Mini wooden clips let you replace only the paper flag while keeping the reusable hardware for the next dinner.
Cut narrow flags from warm ivory cardstock. Write a name at one end, leaving the opposite end blank. Attach the blank end to a miniature wooden clothespin and clip it to a sturdy folded napkin edge.
If a clip leaves dents in fragile linen, attach it to a separate cardstock napkin band or small tent card instead.
A Two-Minute Seat-Swap Test
Before the guests arrive, move one completed flag between two seats. Can you do it without disturbing the dinner plate, unfolding the napkin, or reaching awkwardly across a corner banquette?
If yes, the system is doing its job. Keep two spare blank flags and a pen nearby for unexpected guests or spelling corrections.
The clean profile also works for a nook used every day: pack the clips in one small tin and recycle or save the paper names afterward.
Make the Smallest Details the Most Personal
For a cozy Thanksgiving in a small dining nook, choose one place-card design and one napkin treatment that work together: kraft tents with velvet, pressed leaves with braided cord, or gratitude pockets with flannel cuffs.
Make a single complete place setting first, including the glass and utensils, then check it from every chair or bench position.
Start with paper if time or budget is tight; choose cloth and cord if you want something to store and reuse. Leave the shared tabletop center available for the meal, collect decorative pieces before serving, and keep two spare blank name tags for unexpected changes.
Save your favorite pairing to Pinterest so you can make the matching set when the next gathering comes around.