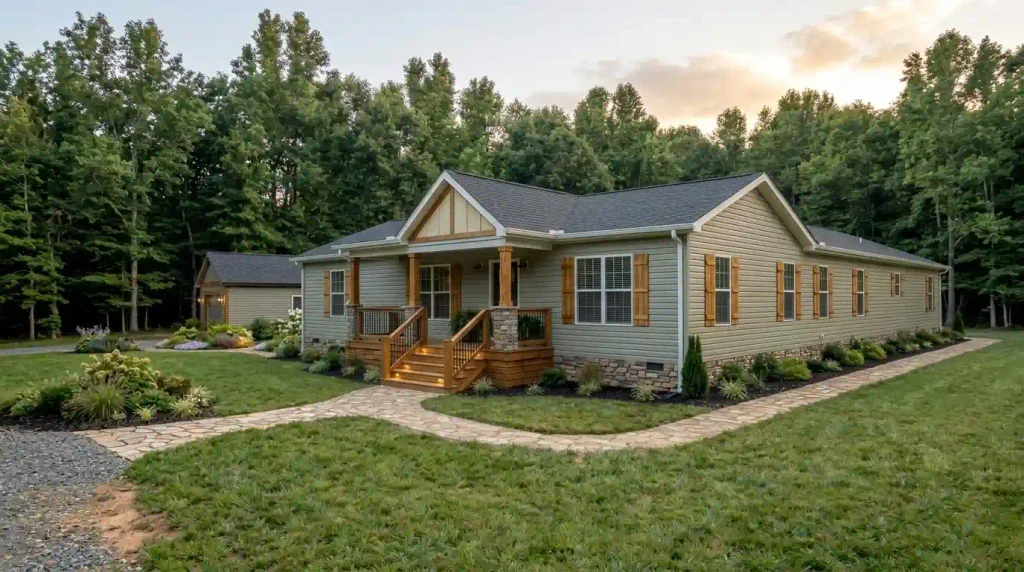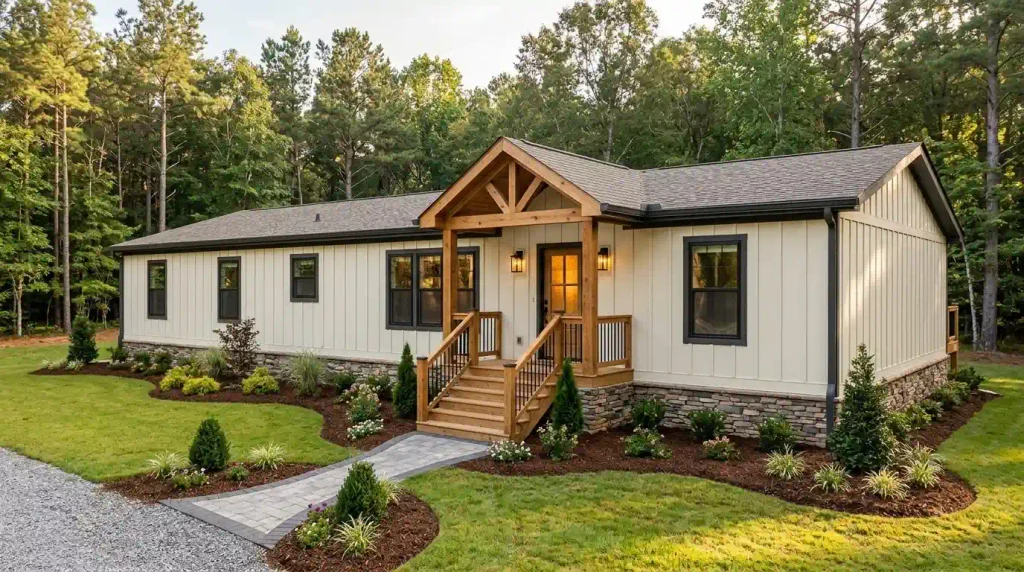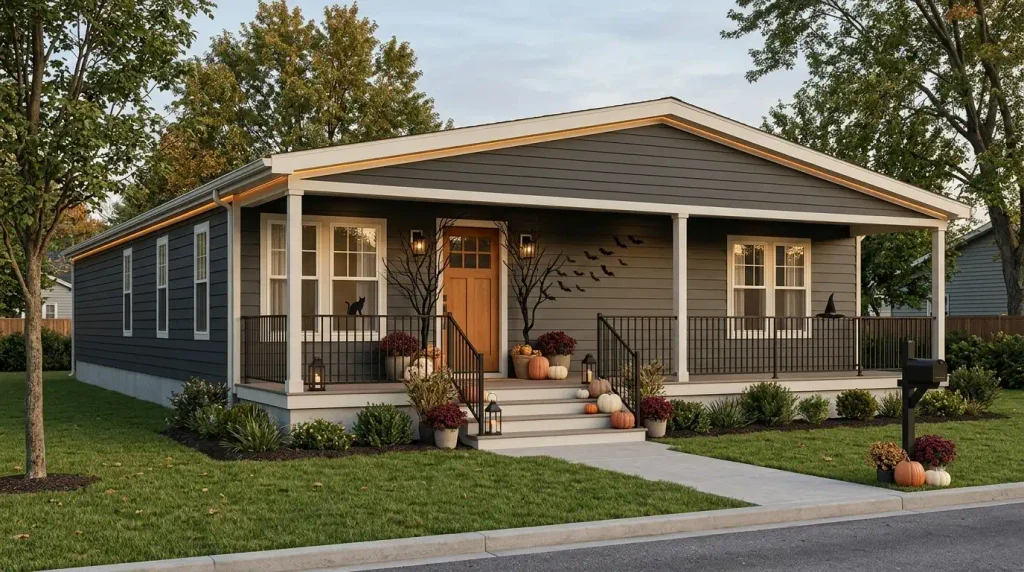
A single-wide home has one architectural feature you cannot ignore: its long, low profile. That shape can look beautifully intentional, but faded siding, an overlooked entrance, mismatched skirting, and a disconnected porch can make the entire exterior feel unfinished. The good news is that a striking single wide exterior makeover does not always start with an addition or a replacement roof.
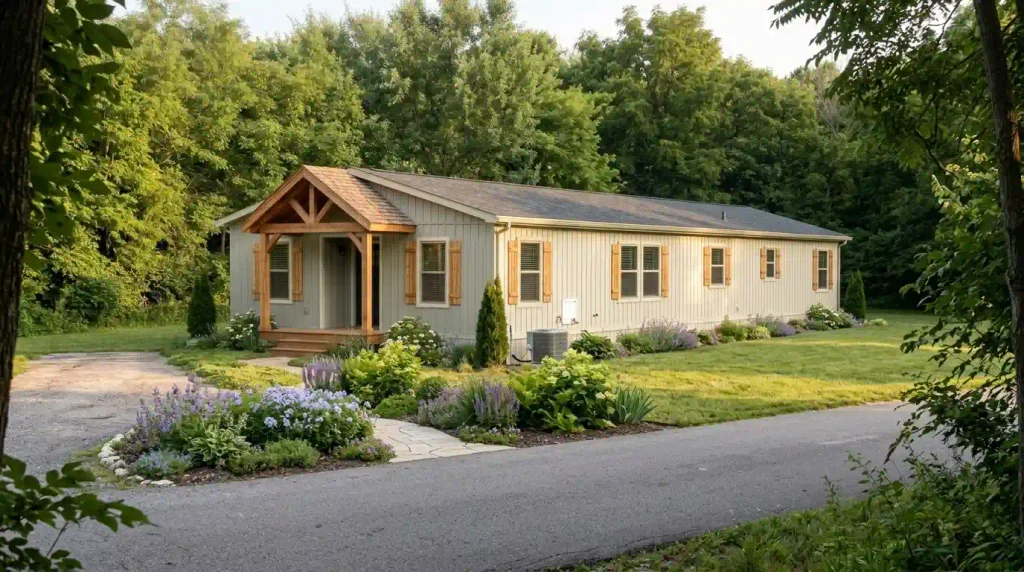
Start by studying the full home from the place visitors actually approach. What stands out first—the broad siding field, the door, an awkward run of steps, or the gap between the home and the ground? That first impression tells you where a cosmetic improvement might make a real difference and where repair or professional construction advice belongs ahead of styling.
These 21 ideas cover siding colors, window trim, warm wood accents, porches, paths, planting, and more substantial architectural transformations. Along the way, you will find ways to choose a makeover direction that suits a single wide, rather than borrowing details from a much wider house and hoping they fit.
What a single-wide exterior makeover can change
| Common before condition | Coordinated after direction | What to check first |
|---|---|---|
| Faded, visually fragmented siding | One compatible body finish with restrained trim contrast | Siding condition and material compatibility |
| Door disappears along a long wall | Clear arrival point through color, light and landing | Door access, step condition and space |
| Patchy skirting and bare ground line | Continuous-looking, serviceable base with considered planting | Under-home moisture, ventilation and access |
| Unconnected steps and pathway | A legible route from parking to entrance | Site drainage and safe walking surface |
These are illustrative planning comparisons, not photographs of a specific completed renovation.
1. Break Up a Long Single Wide Exterior With Three Visual Zones
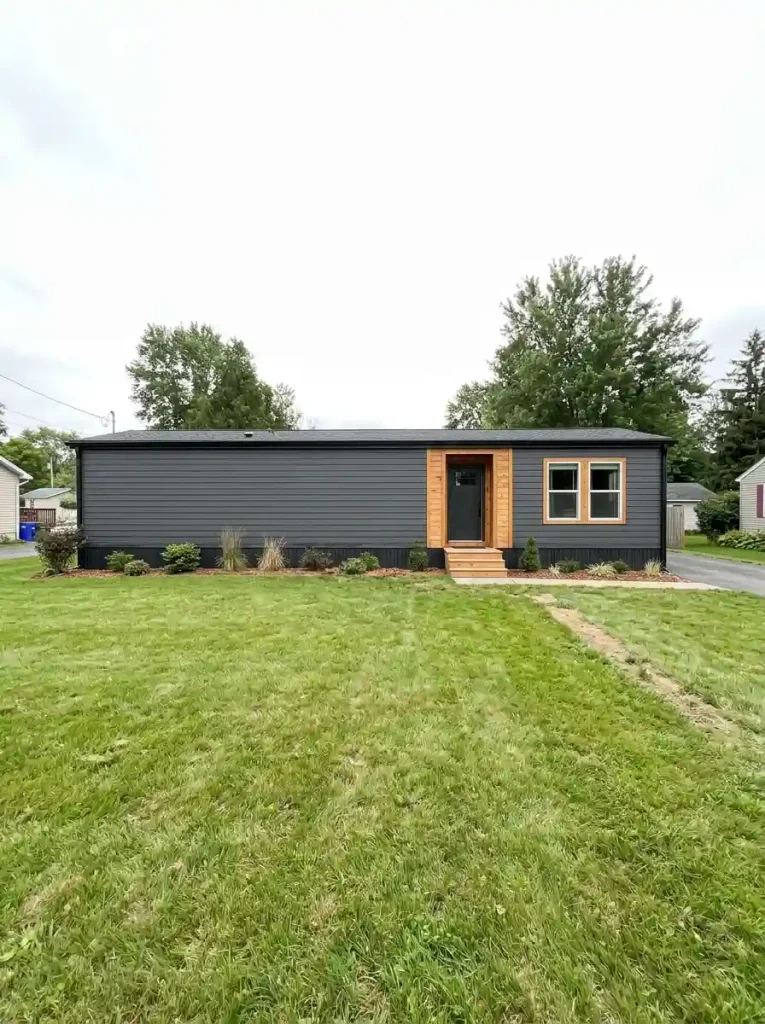
Look at a typical single-wide façade: a generous stretch of siding, repeated windows, and a door that may sit far from the center. Giving every part of that wall the same amount of decorative attention often makes the building look even longer.
Divide the elevation into three visual zones without changing the structure: arrival, support, and quiet wall. The arrival zone receives the strongest contrast or warmest material. A nearby window group supports that emphasis through repeated trim. The remaining siding stays deliberately calm.
For example, a charcoal exterior could use natural wood around the entry and matching wood shutters on only the most visible window pair. The long wall beyond them can remain unadorned. Take a photo from across the yard; if you see an obvious entrance and a balanced façade, the composition is working.
Decision to make: Identify one focal area before you purchase accents for the entire front.
2. Design the Makeover Around the View From Your Driveway

The best front elevation is not always the one shown in a perfectly straight-on photograph. Some single-wide homes face the road along their entire length. Others are approached from an angle, so the short end and a portion of the long side form the first impression.
Try a three-view test before choosing a palette or porch design:
- Full-length view: Look for repetitive windows, uninterrupted siding, and a weak entrance.
- Three-quarter view: Notice how the front steps, side wall, skirting, and roof edge meet.
- Approach view: Follow the actual route from the parking spot to the door.
A large porch might be the right focal point when the long elevation faces the street. On an angled property, a strong corner treatment and a clear walkway could have more impact. Save photographs from all three positions. They will also help you judge whether a proposed change solves a real visibility problem.
01 / Perspective studio
Where does the makeover need to work hardest?
Choose the view visitors usually see first. The sketch and recommendation change with your selection.
Give the entire façade a clear rhythm.
Start with: consistent siding, one entrance feature, and repeated trim. Judge the home as a single composition.
Avoid: equally bold accents on every window; they can make a narrow, long building look busier.
Finish the short end and long side together.
Start with: coordinated corner trim, a continuous lower edge, and one material that wraps visually around the corner.
Avoid: a dramatic front-only feature that leaves the exposed end looking neglected.
Let the walking route reveal the door.
Start with: an obvious landing, pathway alignment, readable lighting, and contrast concentrated near the entry.
Avoid: styling a centered front when visitors approach from one side.
Conceptual viewing diagrams only; they do not show construction plans or required walkway dimensions.
3. Give Weathered Siding a Fresh, Coordinated Color Palette

Color has unusual reach on a single-wide exterior because one siding material can dominate a very long wall. A thoughtful combination of body color, trim, and a single accent often does more than several scattered decorative upgrades.
Three balanced exterior palettes are soft white with natural oak and black details; muted sage with creamy trim and aged bronze; and charcoal with warm cedar and pale stone. The darker route looks especially crisp when the entry and landscaping introduce enough warmth.
First check what material is already on the home. Vinyl, metal, engineered siding, and wood do not share identical cleaning, coating, or installation requirements. Follow applicable manufacturer guidance and correct loose panels, corrosion, or moisture issues before refinishing. Test sample colors in morning light and at sunset; a deep gray that looks elegant in a photo may feel overpowering on a shaded lot.
Good starting point: Let the roof and surroundings influence the palette instead of choosing the siding color in isolation.
4. Replace Tired Skirting With a More Finished-Looking Base

Even freshly updated siding can look disconnected when the lower portion of the home is patchy, crooked, or visibly damaged. Skirting forms the visual line between the structure and the ground, so consistent panels and a clean edge make a large difference in full-home photographs.
The right finish depends on the home. A body-color base makes the wall appear continuous; a subtly darker base can ground pale siding. Wood-look panels may suit rustic exteriors, but only when the material and installation are appropriate for the actual enclosure.
Inspect before covering anything: look for moisture, pest damage, damaged access panels, drainage trouble, blocked openings, or evidence of movement. Manufactured-home perimeter enclosures have functional requirements; do not seal vents, exhausts, or service access to get a cleaner photograph. HUD’s manufactured housing homeowner resources explain that perimeter enclosures need appropriate ventilation and should follow manufacturer and local requirements.
For other inexpensive cosmetic improvements beyond the exterior, see cheap mobile home upgrades that look expensive.
5. Make a Plain Front Door Feel Like a Real Entrance
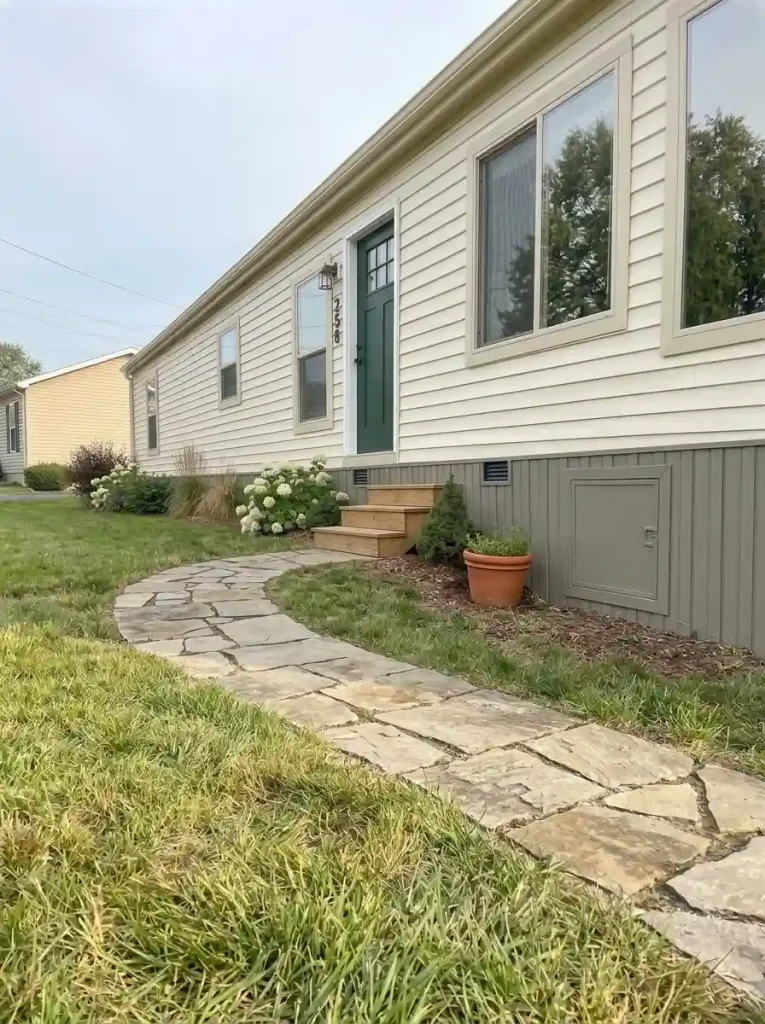
The small-entry problem: a door sits between two similar windows, with a porch light barely visible from the driveway. The house has an entrance, yet the wall offers no clear arrival point.
Create a small but coherent set of details around the door. Choose a contrasting door color that belongs to the exterior palette, a light fixture scaled to the wall, legible house numbers, and a landing that connects visually to the path. If space permits, one substantial planter can frame the door without narrowing the approach.
You do not need symmetry when the door itself is off center. The path, lighting, and landing can establish visual importance through alignment and repetition. Avoid adding large pots on both sides merely to imitate an entry that has more width than yours.
Stop signal: From the parking area, the entrance should be apparent without multiple competing signs and accessories.
6. Add a Timber-Framed Entry Portico for Cottage Appeal
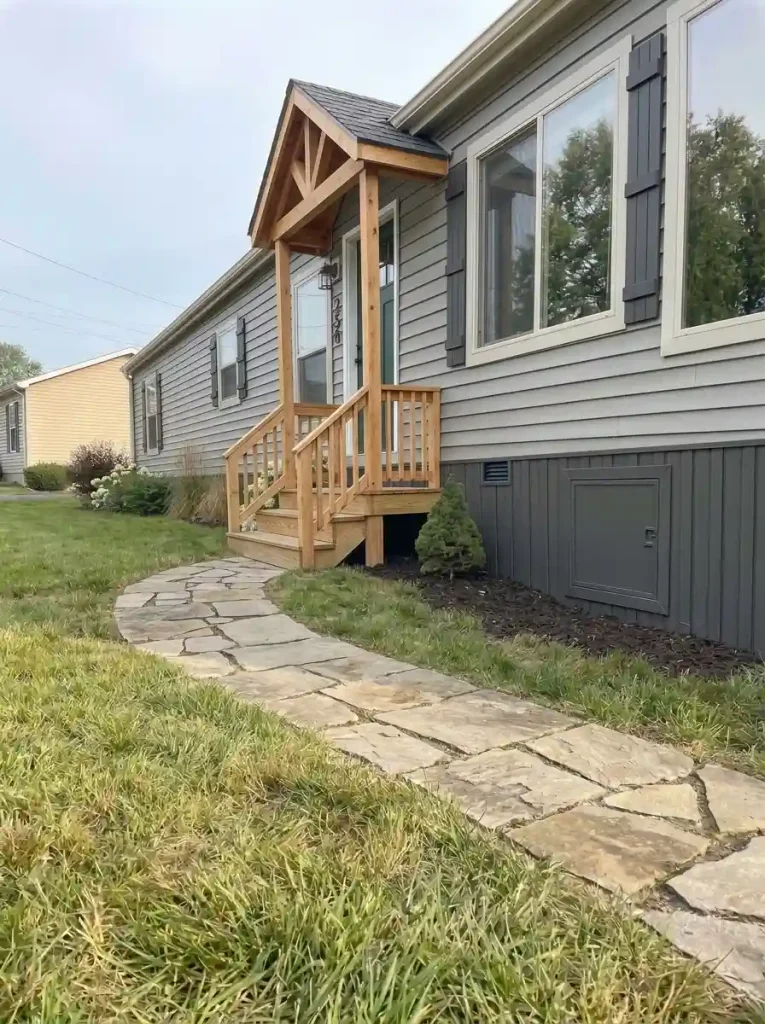
Timber-gabled entrances can create welcome depth in front of an otherwise flat wall. Warm posts, a visible roof peak, and a sheltered landing introduce a recognizable cottage or rustic-farmhouse shape.
There is a critical difference between designing the look and constructing the structure. A new roofed portico adds loads, connections, foundation demands, and drainage considerations. A post that looks decorative in a photograph may be part of a substantial building system.
A narrower portico can be a better fit for a single wide than an oversized central gable. Before specifying the width, compare the door position, adjoining windows, roof geometry, steps, and available yard. Have a qualified local professional check structural support, approvals, attachment strategy, and clearances. Do not assume a conventional site-built porch detail is suitable for your manufactured home.
For a purely cosmetic first phase, coordinate the existing door, light, landing, and any sound, already-approved porch finishes while planning the larger work separately.
02 / Entry decision studio
How much entrance does your single wide need?
Choose what is genuinely missing. Each route produces a different project scope and next step.
Build clarity around the existing entrance.
Often the most useful improvement is simply making arrival easier to read without changing the building.
- First Coordinate door finish, lighting, and house numbers.
- Then Clean up sound landing surfaces and trim.
- Optional Add one planter where walking space remains open.
Investigate a compact roofed portico.
A sheltered arrival is a building project. Match its scale to the door, windows, roof and existing step geometry.
- First Document rain exposure and the existing entry dimensions.
- Then Consult qualified local professionals for support, connections, drainage and approvals.
- Optional Select timber finishes after the design is feasible.
Plan circulation before porch length.
A bigger porch needs a realistic route from steps to door and useful furniture zones, as well as a separately assessed structure.
- First Map door swing, windows, views and daily movement.
- Then Define seating zones and commission structural/site planning.
- Optional Add furnishings only after safe access and required guards are resolved.
7. Use Natural Wood Shutters to Warm Up the Windows

Shutters bring texture to long, repetitive siding without requiring an entirely new color scheme. Their visual effect is strongest when they feel proportionate to each window and share a finish with another feature, such as the entry or porch posts.
Picture a charcoal single wide with three differently spaced windows. A pair of wide rustic shutters on each opening may overwhelm the narrowest window. You may get a calmer composition by using appropriate shutter proportions or by reserving the treatment for the most visible windows and repeating the wood tone elsewhere.
Wood details also introduce maintenance questions. Choose exterior-suitable materials, finishes, fasteners, and attachment methods, especially where the existing siding is thin or the climate is wet. Decorative shutters should not be mistaken for operational storm protection.
For hands-on planning of lightweight shutters and other exterior accents, see DIY mobile home projects that make a huge difference. In this makeover, the shutters should reinforce one deliberate architectural theme.
8. Give the Short End of the Home Its Own Exterior Identity

An exposed short end can become a feature when the driveway approaches the home diagonally. Yet it is often treated as a blank leftover surface, with its trim or skirting less carefully finished than the front.
Stand at the corner and compare the two walls in one photograph. Do the siding colors, trim widths, gutter finishes, and base treatment continue coherently around the turn? A thoughtful makeover may need only a consistent edge detail and one restrained accent where the two elevations meet.
A vertical siding feature on the end wall can sometimes help it look more intentional, especially beside otherwise horizontal front siding. Use that idea selectively: unexpected material transitions and extra penetrations can complicate weatherproofing, so assess the existing wall system before changing cladding.
Choose this idea when: the short elevation is a significant part of the everyday approach. Otherwise, spend your first design effort on the visible front.
9. Unify Uneven Windows With Consistent Exterior Trim
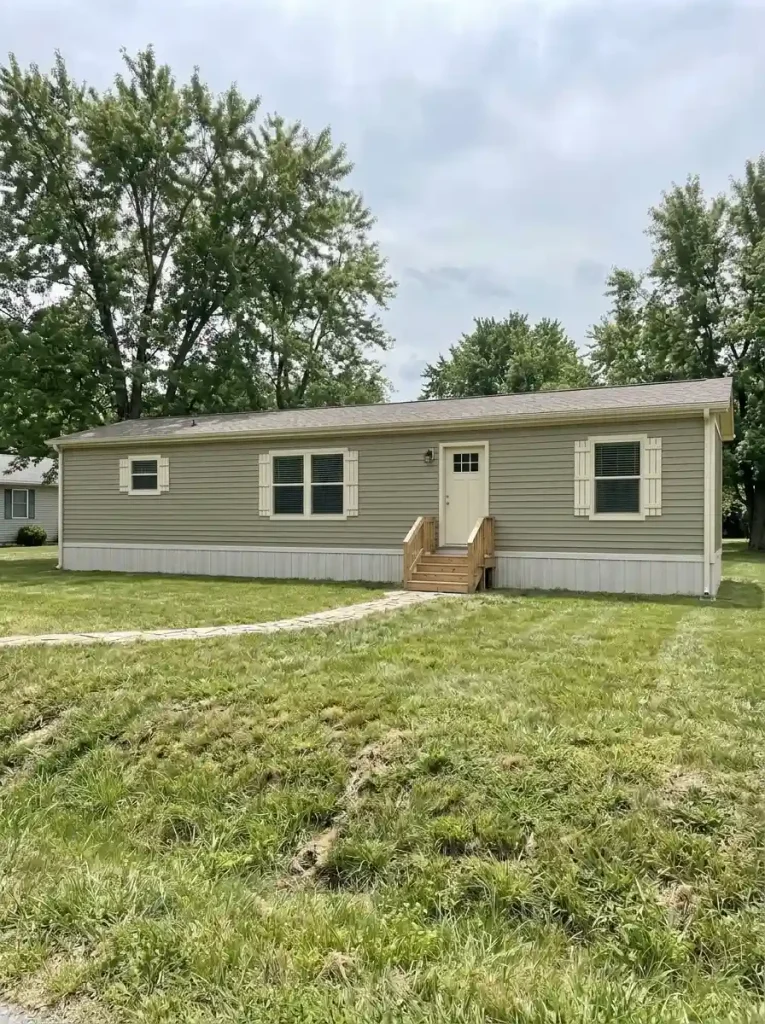
Single-wide windows are often dictated by the rooms behind them. A small bathroom opening may sit near a much wider living-room window, and forcing every opening to look alike can create awkward proportions.
Treat the edges as the repeating element. Related trim color, consistent reveal depth where appropriate, and a coherent shutter or sill approach can make different windows feel part of the same design. This is a visual coordination project—not a recommendation to cut new openings.
Try masking a photograph of the façade so only the windows and trim remain. Look for one opening whose treatment is dramatically heavier than the rest. Simplify that exception before adding anything new to the other windows.
What to avoid: covering drainage paths, interfering with window operation or egress, or fastening trim without understanding the existing frame and wall construction. A neat visual border is only successful when the windows remain safe and functional.
10. Refresh the Roofline, Fascia and Gutter Details

A long, low roof can either emphasize the home’s simple modern shape or make its age stand out. Often the difference lies in the edges: uneven fascia color, stained gutters, disjointed trim, and downspouts that interrupt the façade.
Start by separating maintenance from aesthetics:
- Condition: identify leaks, damage, sagging, or drainage trouble that needs competent repair.
- Continuity: look for fascia and gutter finishes that interrupt the long roof edge.
- Appearance: decide whether a consistent trim color would quiet the roofline without replacing sound components.
A dark roof and pale body can look refined with restrained dark fascia. A warmer farmhouse exterior may benefit from a lighter edge with inconspicuous drainage details. Do not use a decorative fascia treatment to disguise water damage or alter roof geometry without the appropriate design and approvals.
03 / Architectural anatomy
The three visible layers of a tidy roof edge
A simple roofline feels more intentional when these components read as one detail family. Study them separately before choosing a new finish.
Roof plane
Sets the dominant top color and long horizontal silhouette.
Fascia / trim edge
Connects the roof visually to the siding; patchy colors stand out across a long wall.
Gutter / drainage path
Should be visually neat and functionally able to move water away from the home.
Inspect first: active leaks, failed drainage or loose components need repair. This illustration does not specify roof construction or drainage sizing.
11. Turn a Full-Width Porch Into an Inviting Outdoor Living Space
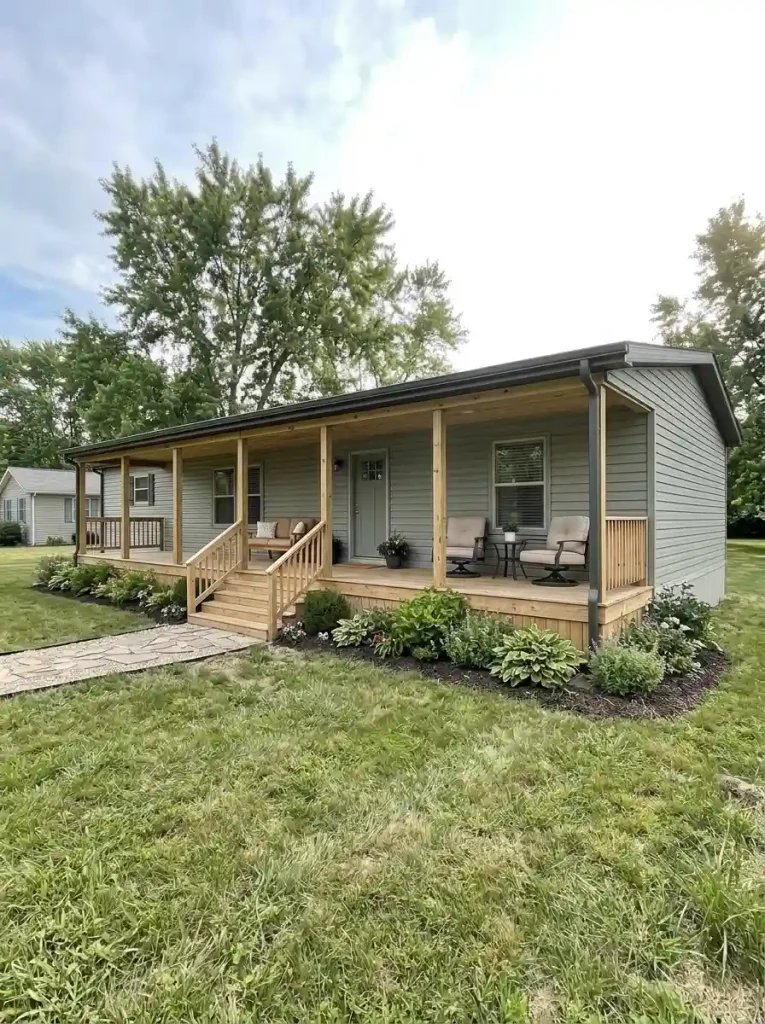
A broad porch is among the most dramatic changes possible on a long, low exterior. It establishes a shaded horizontal layer in front of the long façade and can create a real outdoor room. The design only succeeds if the porch has a practical relationship to the home and yard.
Imagine furniture arranged along one side while an uninterrupted route remains from the steps to the door. Divide the porch by activity: a sheltered seating end, an arrival area at the door, and perhaps an uncluttered window-facing corner. Avoid filling the entire length with matching chairs simply because the platform is long.
The big tradeoff: a full-width covered porch is a substantial construction project, not a simple décor upgrade. Its foundation, structure, attachments, roof drainage, steps, guards, and approvals need competent review. If the existing porch is sound, begin with its finish, seating plan, and lighting. Then explore summer mobile home porch decorating ideas for seasonal furnishings after the permanent layout is resolved.
12. Give an Existing Porch a Lighter Railing Design

Can you see the house and yard clearly through the existing porch railing? If a solid or visually heavy barrier takes up much of the front elevation, the porch may appear more massive than the single wide behind it.
Vertical pickets in an appropriately scaled pattern can give a classic farmhouse appearance. Cable or another open-style infill may suit a modern rustic exterior, but looks alone cannot determine whether a railing system is suitable. Guards must meet applicable requirements for the platform, including openings, height, loads, and attachment.
For a porch with an existing compliant guard, consider whether repainting and simplifying adjacent décor would already reduce visual weight. For a replacement, use a qualified installer and a suitable approved assembly.
Decision rule: The railing should make the edge safe while supporting the chosen architectural style. If you are only trying to make the porch feel less cluttered, remove unnecessary visual distractions before replacing functional safety components.
13. Introduce Vertical Siding Details for Farmhouse Character
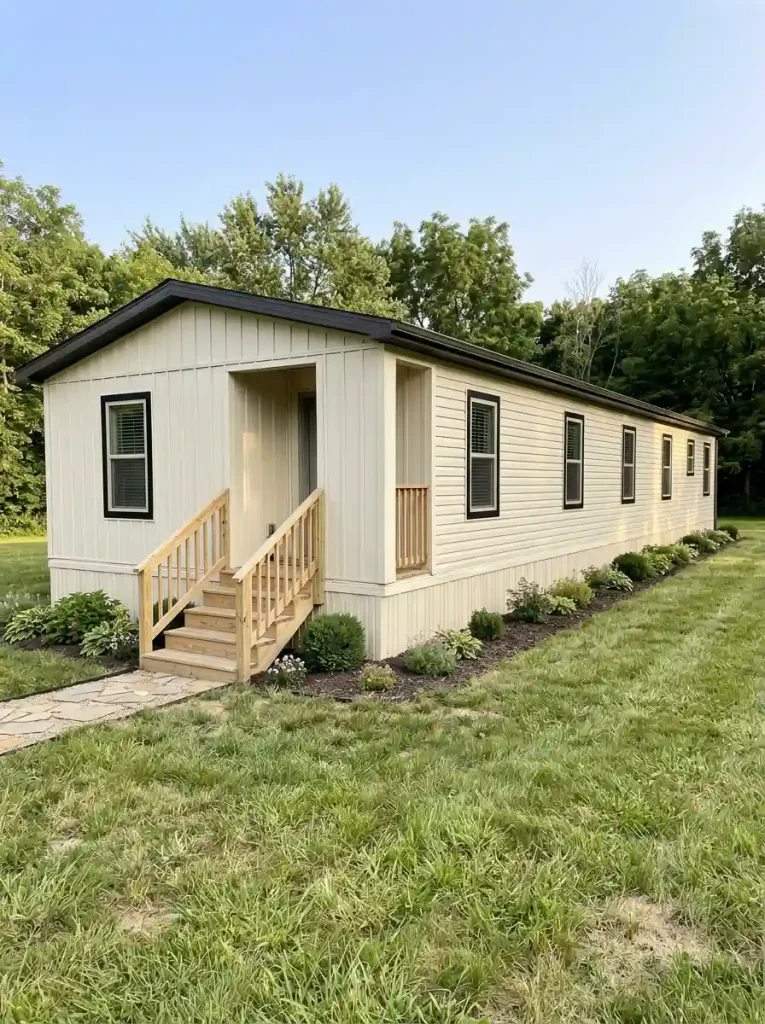
Horizontal siding accentuates a long building. A carefully chosen vertical treatment can add a different rhythm, especially at the entrance or on an exposed end wall.
The most useful version is usually concentrated. Imagine creamy horizontal siding across the home with a limited board-and-batten-style feature around a recessed entry. The contrast reads as a purposeful architectural highlight. Covering every surface in multiple siding patterns risks making an otherwise clean single wide feel patched together.
Before switching materials, verify that the proposed product, fastening, flashing, drainage detailing, and wall assembly are compatible with the existing home. Do not assume decorative battens can simply be attached over any original cladding.
Try this visual test: On a straight-on photo, sketch one vertical accent area, then sketch three. If three accents compete with the door and windows, return to the single focal treatment.
04 / Material condition gate
Is your siding ready for a design upgrade?
Choose the condition you actually see. Your next best action changes because decoration and building-envelope repair are different jobs.
Test a limited vertical accent.
If existing siding is sound, a carefully detailed entry accent may offer the contrast you want. Verify cladding compatibility and weather detailing before installation.
Restore continuity before accenting it.
Localized damaged panels, trim, or failed seams should be assessed and repaired with suitable components. An accent can make neighboring deterioration more obvious.
Pause finish decisions until the cause is known.
Soft areas, recurring dampness, suspicious stains, or uncertain wall condition make this a diagnostic issue. Get appropriate professional or manufacturer guidance before choosing finishes.
Decision guide only. It cannot determine structural or moisture safety from a visual selection.
14. Add Selective Window Awnings for a Polished Exterior

An awning can introduce shadow and depth to a flat elevation. Simple dark awnings are particularly effective against pale siding and black-trimmed windows.
Placement matters more than quantity. An awning over one heavily sun-exposed window can look intentional; repeating the same feature at every opening may crowd a small façade and create awkward roof-to-window relationships.
Compare the sun exposure, headroom, roof runoff, window operation, and available wall support. A decorative awning still needs a suitable exterior-rated system, approved fixing method, and proper weather detailing. It must not restrict an emergency escape opening where one is required.
For homes that only need a stronger window rhythm, simpler trim or shutters may achieve the desired effect with fewer building-envelope changes. Choose awnings where shade or architectural depth genuinely adds value.
15. Make Basic Front Steps Look Connected to the Home

Sometimes a full exterior makeover seems underwhelming because the entrance still ends in a tiny landing with mismatched steps. The approach reads like a separate object set against the siding.
Follow the sequence from path to tread to landing to door. Do the materials, widths, and edge details look related? Warm timber treads can complement a rustic porch. A neutral landing can blend with a white-and-charcoal façade. Coordinated lighting can clarify the route after dark.
Here, distinguish visual finishing from safety work. Wobbly steps, missing required handrails, failing posts, and inadequate landings are reasons for qualified assessment before painting or decorating. Keep the door swing and access route clear, and do not set planters on usable tread space.
A good entry feels like one arrival sequence; each stage supports the next without interrupting movement.
16. Create a Walkway That Leads Naturally to an Offset Entrance
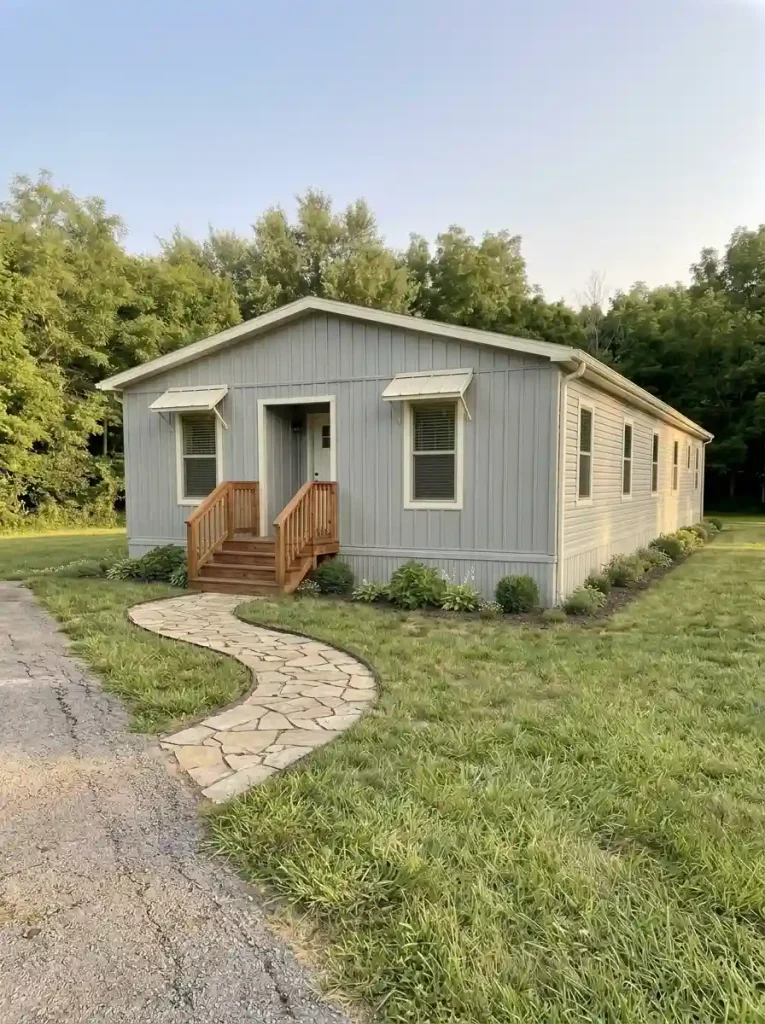
Many single-wide homes have doors placed well away from the façade’s midpoint. A path laid out for the center of the house can lead visitors toward a window before bending awkwardly toward the actual entrance.
Pick a route based on where people start:
- Straight approach: Best when parking and door naturally align. It keeps the entrance legible and limits unnecessary turns.
- Gentle curve: Useful when the door is offset and a broad lawn creates space for a gradual transition.
- Side approach: Appropriate where visitors arrive along the length of the home. It can use narrow planting to make the passage feel purposeful.
Measure the actual site, check drainage and local requirements for accessible routes where relevant, and keep the walkway clear of downspout outlets and service access. The stepping-stone curve in a makeover photograph is a composition idea, not a universal path specification.
05 / Walkway atlas
Three ways to arrive at an off-center door
Select the approach that resembles your site. The conceptual route and site decision both change.
Make the door easy to find.
Best fit: Visitors approach from a parking area in line with the entrance. A direct line gives immediate orientation.
Check: drainage, level changes, and a safe landing transition. Keep the route clear of service equipment.
Use lawn depth to soften the approach.
Best fit: A generous front yard allows a natural sweep toward an offset entrance. Planting can reinforce the movement.
Check: Avoid unnecessary tight bends, sloping surfaces, and paths that trap runoff by the skirting.
Turn the long wall into an arrival sequence.
Best fit: Vehicles stop alongside the home, and visitors walk parallel to the façade before turning toward the door.
Check: Walking clearance, downspouts, steps, utilities, and where the final turn meets the landing.
Illustrations show route logic, not scaled plans or accessible-path compliance. Validate dimensions and site conditions before building.
17. Use a Statement Timber Gable to Transform a Flat Front
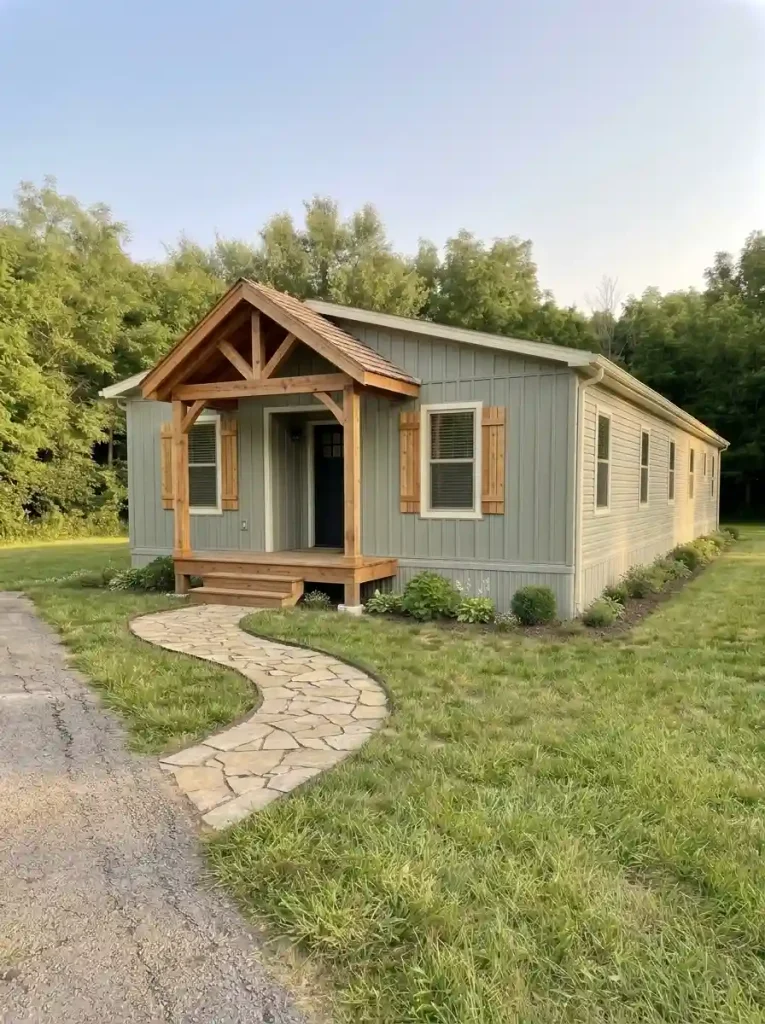
An exposed timber gable draws attention because it changes the perceived shape of the arrival area. Against a low, uninterrupted roofline, a single visible peak gives the front a recognizable center of gravity.
It is also easy to overdo. An enormous triangular feature can dominate a modest single wide or clash with the roof behind it. Compare the proposed gable with the door, adjacent windows, and overall elevation. Its visual weight should make the entrance clear without making the rest of the home appear undersized.
Important distinction: A real roofed gable must be structurally designed and detailed for loads, drainage, foundations, weather, and local approvals. Decorative-looking trusses are not necessarily nonstructural, and photographs do not demonstrate how loads transfer. If this project is outside your current scope, borrow the visual principle through compatible existing trim and a stronger door composition first.
18. Soften a Long Exterior With Layered Foundation Planting

A long siding wall can look stark when the lawn runs directly up to the skirting. Planting gives the building a softer foreground and can direct attention to the entry without adding another material to the wall itself.
Think in layers. Low spreading plants create a ground-level edge. Mid-height flowering shrubs add rhythm. A limited number of taller accents can flank a focal area without hiding windows or vents. Repeat plant groups in loose intervals along the façade; identical shrubs lined shoulder to shoulder may exaggerate the home’s length.
Choose plants for the actual site: sunlight, mature size, local climate, soil, and maintenance capacity matter more than the species shown in a Pinterest photograph. Leave space for airflow, drainage, skirting inspection, utility access, and future growth. Keep mulch and irrigation from creating persistent wet conditions against the home.
For a quick visual check, photograph the home from the street and draw the mature outline of each planting group before buying.
19. Give the Exterior a Warm Evening Makeover With Lighting

Your home’s appearance changes dramatically at dusk. A deep green or charcoal façade that feels flat after sunset can gain definition when the entry, steps, and path receive restrained warm lighting.
Build the lighting plan in order of importance. First, make the entrance identifiable and usable. Second, improve visibility along the walking route and steps. Finally, consider subtle garden accents where they help reveal the planting shape. More fixtures do not necessarily create a more polished result; glare and overly bright points can obscure the façade.
Try viewing the home from the driveway at night. Can you identify the door without squinting? Are the steps visible? Does the lighting flatter the exterior without shining into windows or neighboring properties?
Use weather-rated equipment appropriate to its location. Electrical installations, permanent wiring, and structural fixture attachments should be handled according to applicable requirements by qualified people.
20. Conceal Visual Clutter Without Blocking Essential Utilities

Outdoor bins, hoses, service equipment, and miscellaneous storage can pull attention away from a well-designed front. On a single wide, these interruptions are especially visible because a long side wall often remains in view for most of the walk to the door.
Start with relocation where practical. Move loose items to a convenient, less visible location and consolidate everyday gardening equipment. Then consider a freestanding screen or planting arrangement only when it can be safely positioned without affecting the home or equipment.
Never screen blindly: utility meters, electrical disconnects, dryer vents, combustion exhausts, access hatches, HVAC equipment, and other service areas need clearances and access defined by the relevant manufacturer, service provider, and local rules. A pretty enclosure is a bad improvement if it traps heat, blocks airflow, or delays maintenance.
The most effective result is often surprisingly minimal: fewer visible objects, one neat storage location, and a continuous planting edge.
21. Bring Every Exterior Upgrade Together Into One Cohesive Makeover
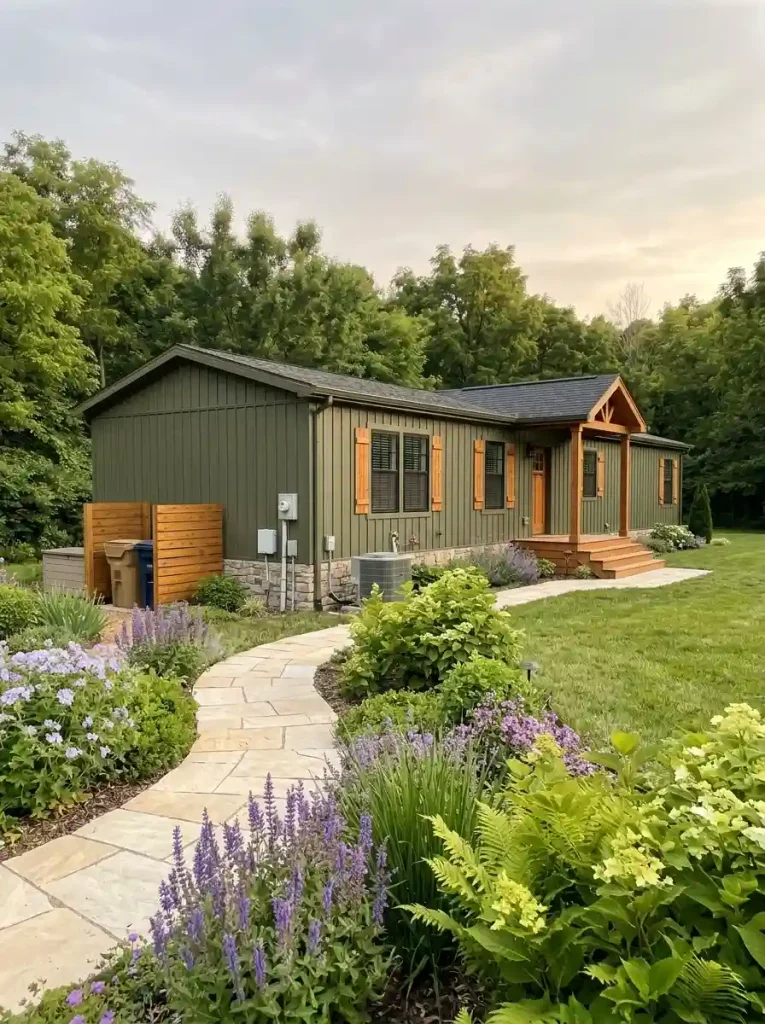
A successful single wide exterior makeover feels like one design project even when it happens over several seasons. Choose a clear architectural direction, then repeat only a small group of materials and colors from the roofline down to the walkway.
Three complete makeover routes:
- Modern rustic: charcoal or soft olive body, natural wood shutters or porch posts, quiet black lighting, and textured low planting. Best when the site can support a darker façade without feeling gloomy.
- Bright farmhouse: creamy white siding, reserved black window accents, a timber entry feature, and a simple, unified base. Best for a bright farmhouse-style exterior where the site and any existing porch proportions suit the approach.
- Soft cottage: muted sage siding, warm-white trim, restrained bronze details, a narrow flower border, and a winding approach where the lot permits it. Best for a gentler, garden-led transformation.
Make your work sequence honest. Inspect and repair first. Next, coordinate the shell and visible edges. Then define the entrance and route. Leave seasonal décor until the permanent composition works. For whole-home inspiration beyond the exterior, visit old single-wide makeovers that look like new homes.
06 / Makeover sequence builder
What should happen first?
Your first project should depend on the home’s actual condition and the scale of work you intend—not the most dramatic photo saved to your board.
Cosmetic route: create a unified façade.
Set the palette
Compare full-home views and choose the body, trim and focal accent.
Unify visible edges
Improve appropriate siding finishes, sound trim, skirting appearance and the door composition.
Layer landscape
Introduce a path, planted rhythm and selective nighttime lighting.
Defer expensive structural work unless a functional need or a well-developed plan justifies it.
Repair route: protect the home before styling.
Diagnose issues
Document moisture, loose components, drainage, or failing access and seek appropriate assessment.
Restore function
Complete suitable repairs and keep required service openings clear.
Return to color
Choose a coordinated appearance when conditions are stable and materials are suitable.
Defer coverings, new trim and accent panels that could hide or worsen unresolved damage.
Construction route: establish feasibility before finishes.
Map arrival and use
Record door swing, window positions, circulation, yard levels and desired outdoor activity.
Plan structure
Work with qualified local professionals on foundations, support, roofing, drainage and permissions.
Unify materials
Choose post, railing, siding and lighting finishes around the feasible design.
Defer buying beams, roofing or rail assemblies until the approved design determines what is appropriate.
Final Thoughts
The single-wide shape is not a flaw that needs to be disguised. It offers a strong, simple canvas for a well-designed exterior. Start with the full view: correct damage, choose a coherent wall-and-trim palette, and make the entrance easy to recognize. From there, decide whether a targeted update such as skirting, steps, shutters, or landscaping will complete the picture—or whether a properly planned porch project is genuinely worth the investment.
Before buying materials, photograph your home from the driveway, the main approach, and one distant angle. Choose the one change that improves all three views. That is a more dependable foundation for curb appeal than copying every attractive feature from a makeover photo.