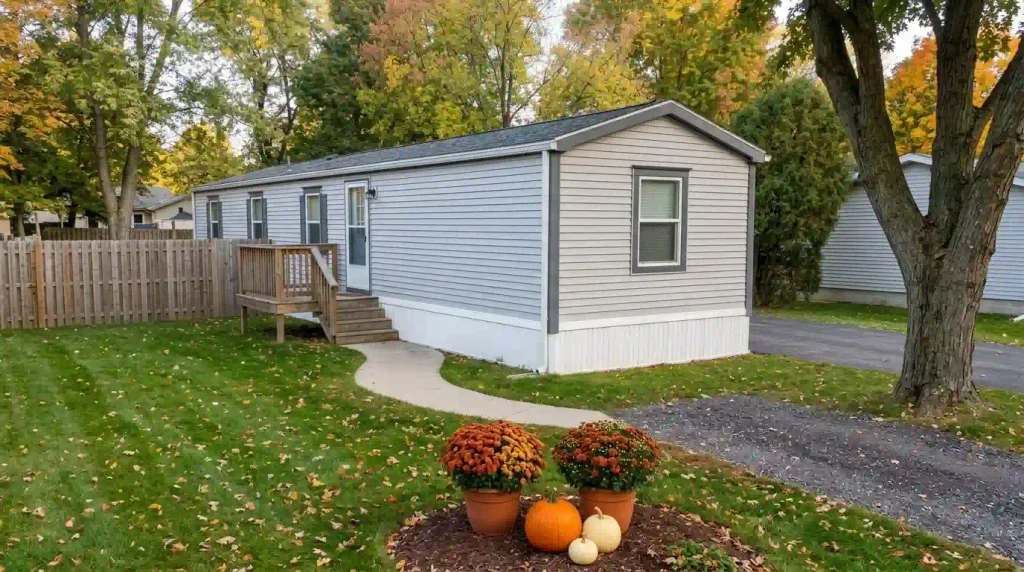
A mobile-home front yard can turn spooky fast, but compact frontage leaves very little room for random placement. The lawn, walkway, planting beds, steps, driveway edge, and façade often sit close together, so every pumpkin, skeleton, light, or tombstone carries more visual weight than it would on a deep suburban lot.
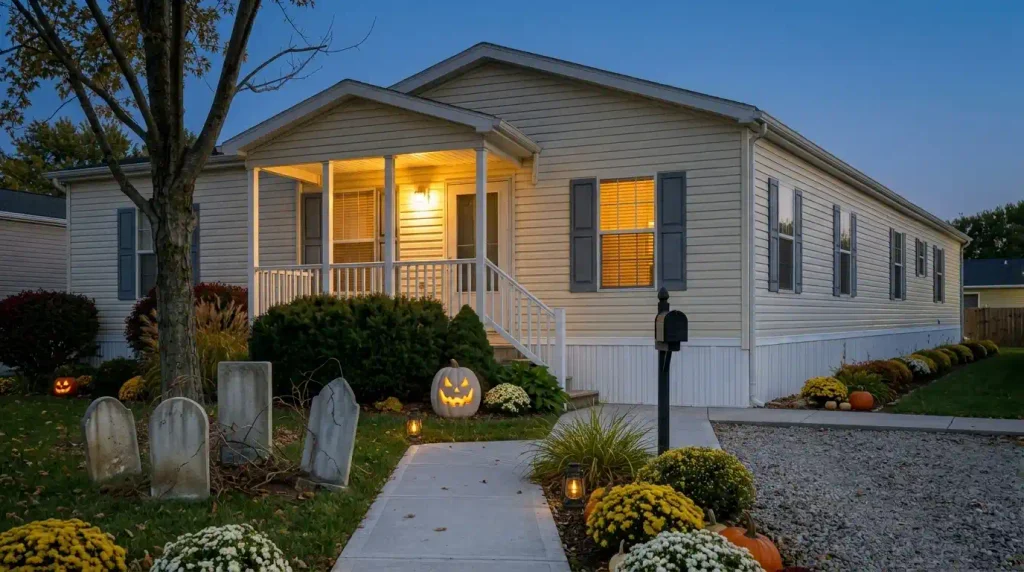
The strongest Halloween mobile home front yard ideas work with that compression. They protect the route to the door, use shrubs and trees as part of the scene, place larger props where they improve the yard’s proportions, and save lighting for moments that become more dramatic after sunset. A successful display can feel immersive without covering every patch of grass.
The 17 ideas below move from curb to entry and from daylight to night. Use them as alternatives, not a checklist. Choose the concepts that match your actual yard, keep the strongest focal point easy to read, and let undecorated lawn or planting create breathing room around it.
1. Protect the Trick-or-Treat Route Before the Yard Gets Spooky
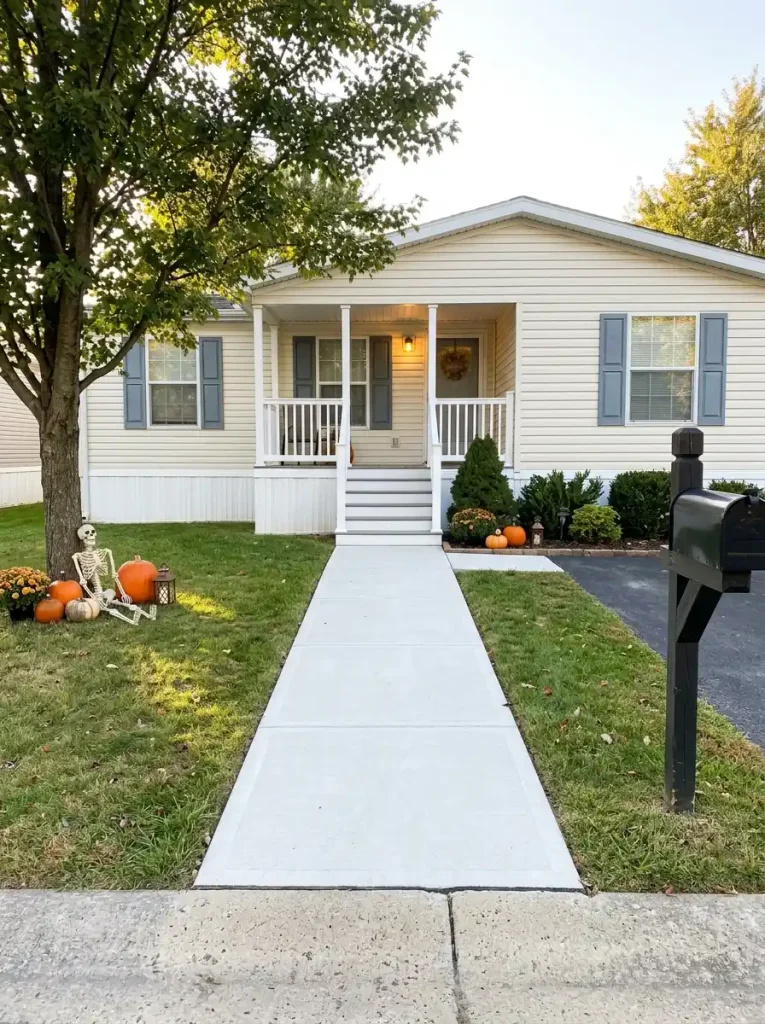
Before placing a tombstone, pumpkin, skeleton, or lantern, walk from the street or driveway to the front steps exactly as a visitor would. On many mobile-home lots, that route is short and visually compressed, so one badly positioned prop can make the entire entrance feel crowded.
Treat the walking path as the yard’s negative space. Keep the strongest ground decorations to one side, use planting beds for smaller accents, and place taller pieces beyond the main movement line. Where the path changes direction or meets steps quickly, preserve a calm visual pocket around that transition.
The useful question is not how much décor can fit. Ask which parts of the yard can become theatrical while the route remains immediately understandable.
Front-Yard Route Lab
Decide where Halloween can happen before you decorate
Choose the approach that most closely resembles your yard. The protected route stays visually quiet; the surrounding zones can carry the Halloween story.
Straight walk
A direct path already creates a strong central axis. Use it as an organizing line, not another decorating surface.
- Keep the central strip visually open.
- Build asymmetry in the beds or lawn beside it.
- Let one focal piece terminate the view near the home.
Offset steps
A path that shifts before the entrance already asks visitors to change direction, so décor should clarify that turn.
- Keep the turning point clean.
- Use one prop beyond the bend as a visual guide.
- Avoid low décor immediately beside the change in level.
Driveway-side entry
When visitors arrive from the driveway, the strongest Halloween moment may belong on the lawn-facing side rather than directly in front of the steps.
- Use the driveway edge as the first signal.
- Keep vehicle and foot traffic visually distinct.
- Angle the main focal point toward the actual arrival direction.
2. Make the Mailbox or Driveway Edge Your First Halloween Signal
A mobile home’s Halloween display does not need to begin beside the front door. If the mailbox, driveway edge, or curbside planting pocket is visible first, use that point as the opening scene.
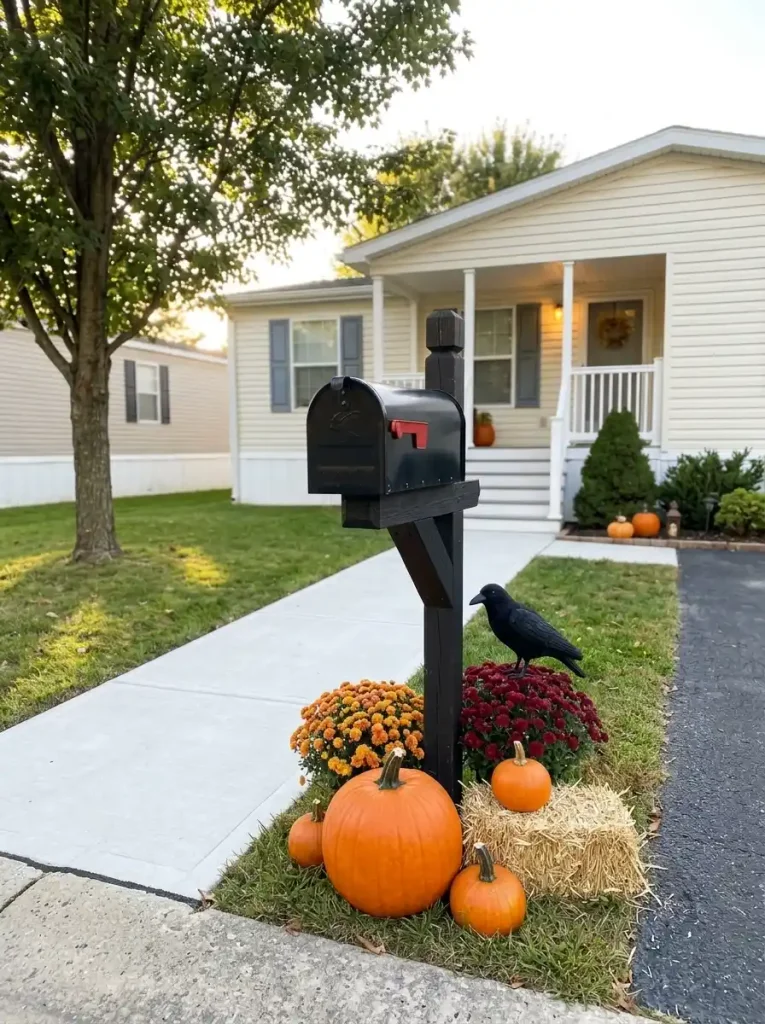
A compact cluster works especially well: one substantial pumpkin, a smaller companion, a mum or dried grass for volume, and one Halloween cue such as a black crow, tiny ghost, or dark lantern. Keep the pieces tightly grouped so they read as one composition from the street. Spreading the same objects across several feet usually weakens the effect.
Use this test: stand where a passerby would first see the property. If the eye reaches the front steps before noticing the yard, the display probably needs an earlier anchor.
On an especially shallow lot, the mailbox may be enough. Let it introduce Halloween and save the larger focal point for the middle of the yard.
3. Turn One Existing Shrub Into a Pair of Giant Watching Eyes
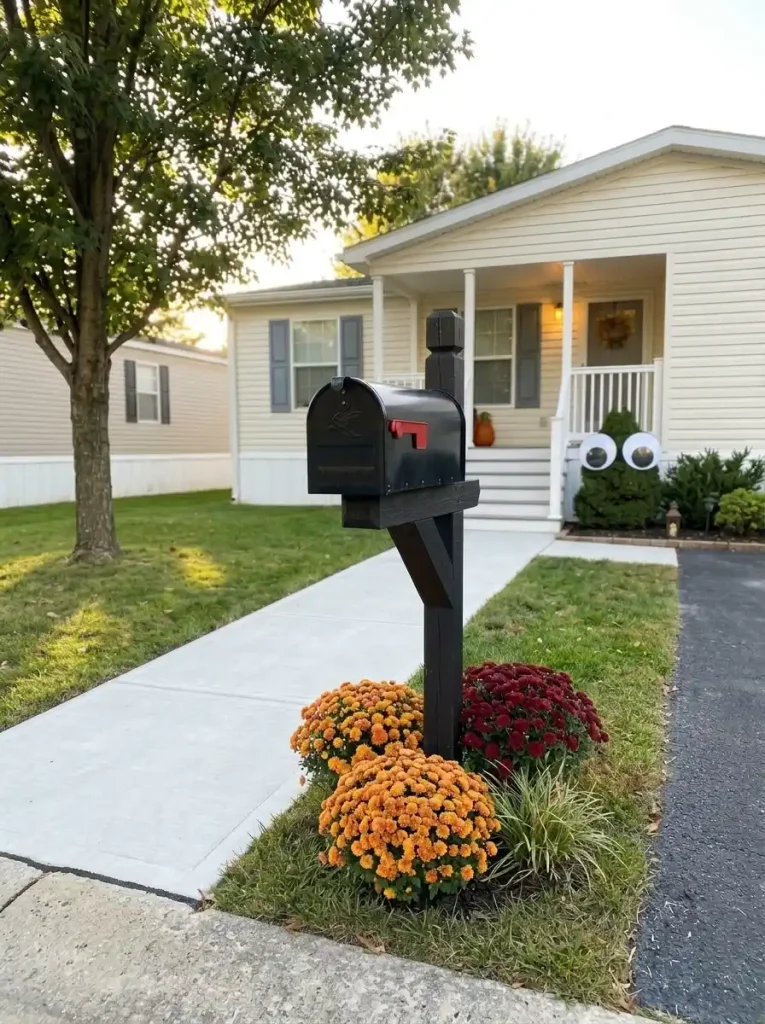
A rounded shrub already provides the bulk of a Halloween creature; two oversized eyes can supply everything else. This is one of the most efficient front-yard ideas because it creates a character without occupying another patch of lawn.
Scale matters. Tiny eyes disappear into foliage, while a deliberately oversized pair reads quickly from the sidewalk or driveway. Aim them toward the direction people approach from. A shrub beside the path may look more convincing when the “face” seems to watch visitors coming toward the steps.
For the strongest surprise, let one shrub own the joke. Turning every plant into a face reduces the novelty and makes the yard feel busier.
A large hedge can carry a more dramatic expression. A small boxwood or ornamental grass suits a lighter, playful treatment. In either case, the plant remains the visual mass and the Halloween addition stays simple.
4. Use a Front-Yard Tree for Hanging Pumpkins, Ghosts or Lanterns
When the lawn already carries enough activity at ground level, look upward. A mature front-yard tree can move part of the Halloween display into the canopy while keeping the grass and approach calmer.
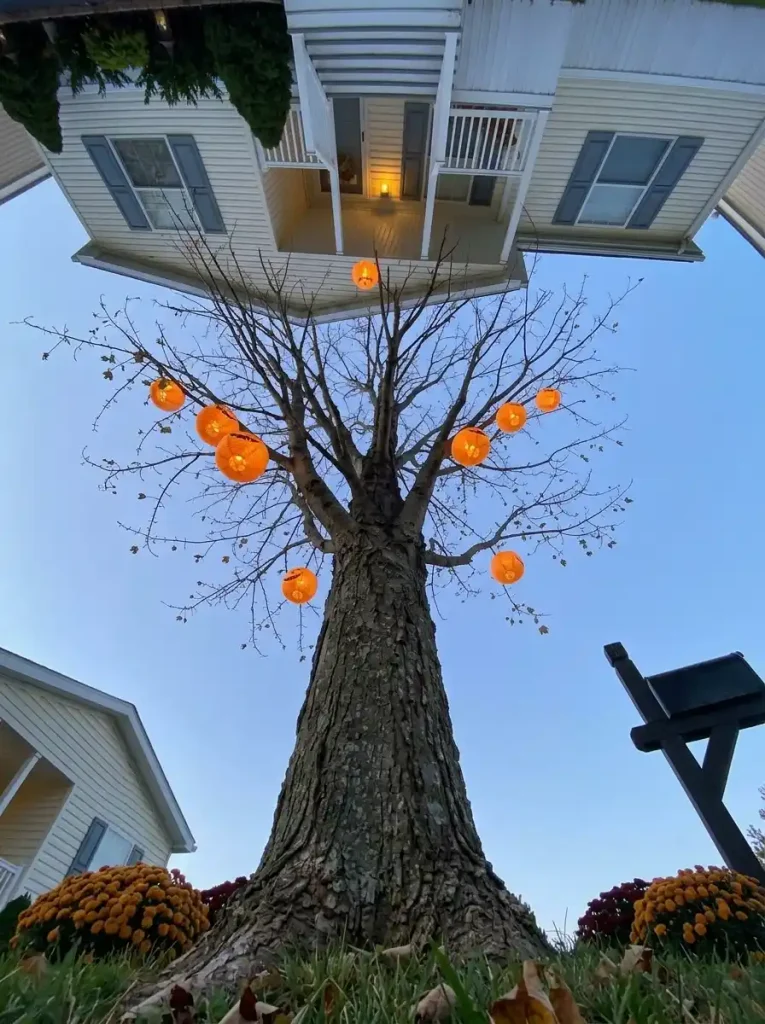
Choose one hanging language—glowing pumpkin forms, lightweight ghosts, bats, or lantern-like ornaments—and vary height more aggressively than quantity. Lower pieces connect the canopy to the yard; several higher elements make the display feel as though it continues through the branches.
The tree should remain recognizable. Once every branch appears occupied, the canopy becomes a decorative ceiling and individual silhouettes lose their impact.
Canopy Composition
Build height without filling the lawn
Think in three vertical bands. The middle canopy carries the theme; the outer zones provide breathing room.
Leave some branches visually empty so the decorated area has a clear beginning.
Keeping the second side calmer stops the canopy from becoming one continuous orange band.
If the branches are small, brittle, difficult to access, or positioned over the busiest part of the approach, skip the overhead treatment and move the theme to a shrub, boundary, or planting bed.
5. Add a Removable Halloween Layer to an Existing Fall Flower Bed
Already have mums, pumpkins, grasses, or warm-toned foliage in the front bed? Do not dismantle a good fall arrangement solely to make it read as Halloween.
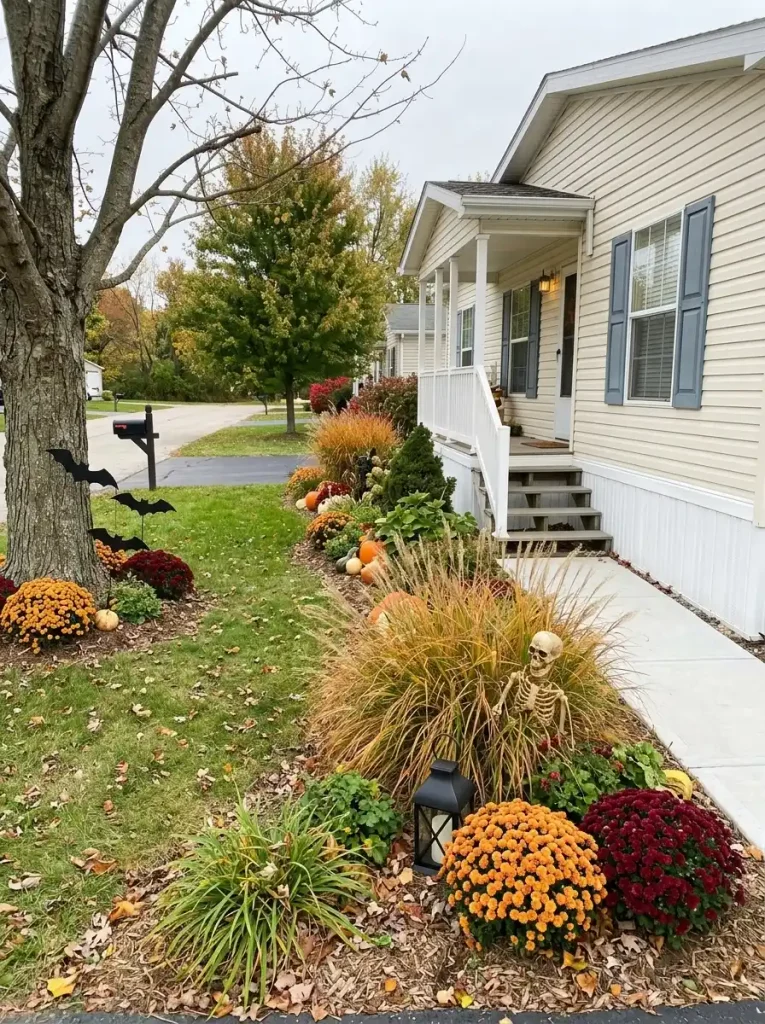
First identify what is doing the seasonal work. Pumpkins provide shape, mums create dense color, and ornamental grasses contribute height and movement. Halloween only needs to supply the new narrative layer: a dark lantern between two pots, a small skeleton behind grass, monster eyes inside a shrub, or a few black silhouettes threaded through the planting.
This approach is especially useful around mobile homes because foundation beds often sit close to the façade. Keeping the intervention landscape-based gives the windows, siding, steps, and plants enough separation to remain legible.
Seasonal Layer Switch
See how a fall bed becomes Halloween without rebuilding it
What already works
The bed has three useful ingredients before Halloween arrives.
- foliage for visual mass
- pumpkins for seasonal shape
- height variation from plants
What changes
The Halloween layer supplies contrast and story while the autumn structure remains visible.
- add one black or bone-toned focal cue
- repeat it once only if the bed is long
- leave the existing planting visible
A bed that already feels full may need one Halloween intervention. A sparse bed can handle two related accents, provided the planting still remains visible as part of the composition.
6. Build a Narrow Graveyard Strip Beside the Walk, Not Across the Lawn
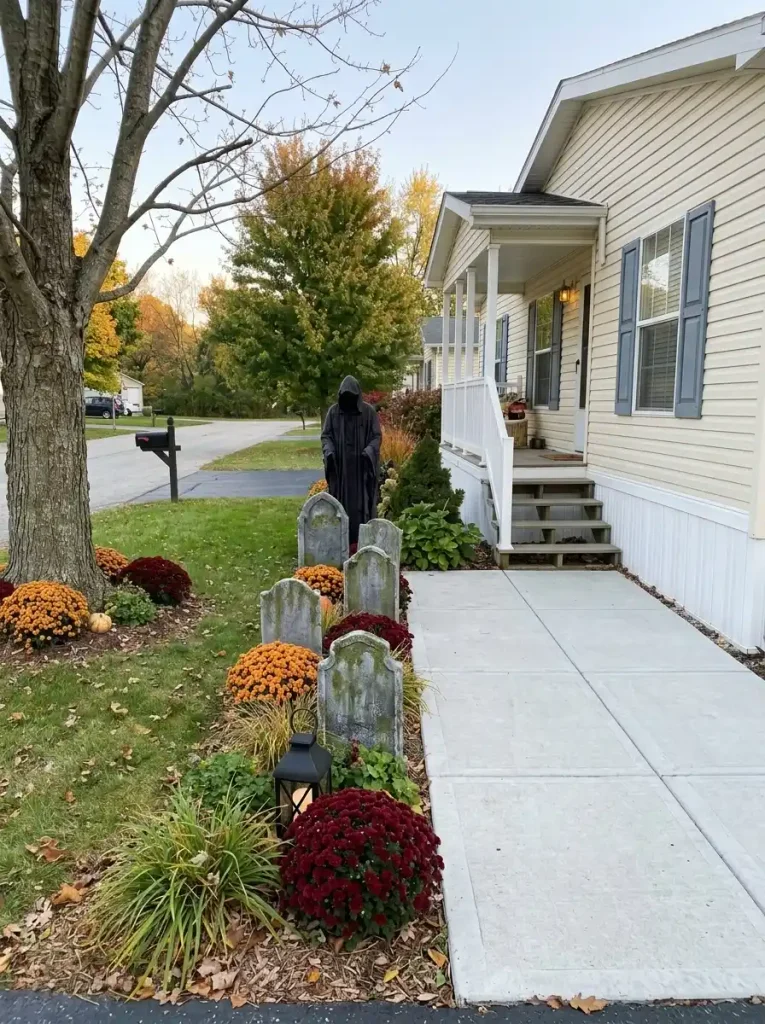
A graveyard does not need to consume the center of a mobile-home front yard. On a property with limited depth and a short approach, a linear cemetery beside the walk can feel more intentional because visitors move past it and see the markers unfold in sequence.
Use the longest uninterrupted edge already available: a mulched strip, planting border, fence line, or lawn edge. Position tombstones at slightly different setbacks, then use one taller marker or figure to interrupt the rhythm. Keep the whole graveyard outside the usable walking route.
From the curb, the cemetery should read as one defined zone while the path toward the house remains obvious.
For readers who want to construct the tombstones and graveyard effects themselves, continue with StylishGalore’s DIY graveyard décor ideas.Graveyard Strip Planner
Choose the cemetery shape your small front yard can actually carry
A compact graveyard becomes stronger when its shape follows an existing edge instead of consuming the center of the lawn.
Straight edge
Best when the walkway already runs beside a planting or mulch strip.
- Keep tombstones mainly on one side.
- Vary setback more than height.
- End the scene before the steps begin.
Staggered pocket
Useful when the lawn has one wider bulge or planting pocket near the middle of the approach.
- Cluster several markers at uneven depths.
- Use one taller figure behind them.
- Leave open grass around the cluster.
Corner graveyard
Choose this when the usable yard disappears quickly near the driveway or home.
- Push the scene toward the outer corner.
- Angle markers toward the approach.
- Keep the remaining lawn mostly undecorated.
7. Stage One Groundbreaker Scene Where Mulch Meets Lawn
A zombie, skeleton, or pair of reaching hands looks far more convincing when the scene appears to emerge from a believable ground transition.
Look for the line where mulch meets grass, a planting bed ends, or fallen leaves collect beneath a tree. That material change does part of the theatrical work. Place the emerging figure partly inside the darker surface and let only the head, hands, shoulders, or another deliberate fragment cross toward the lawn.
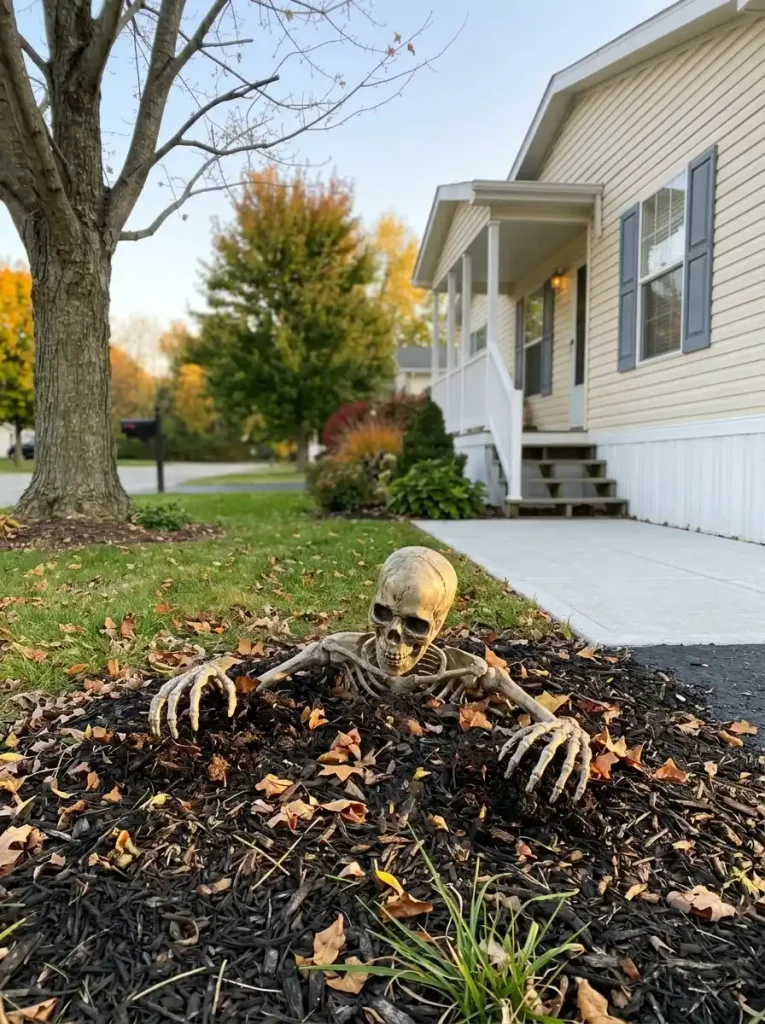
One carefully positioned groundbreaker is usually enough for a compact frontage. Multiple figures scattered through the grass can turn the illusion into a collection of separate props.
A little displaced mulch, leaf litter, faux chain, or a low marker can finish the scene. Stop once a viewer understands what is supposed to be happening.
Decision rule: if the figure could move several feet in any direction without changing the story, the placement has not yet found its strongest location.
8. Use a Hedge or Fence as the Backdrop for One Oversized Spider Web
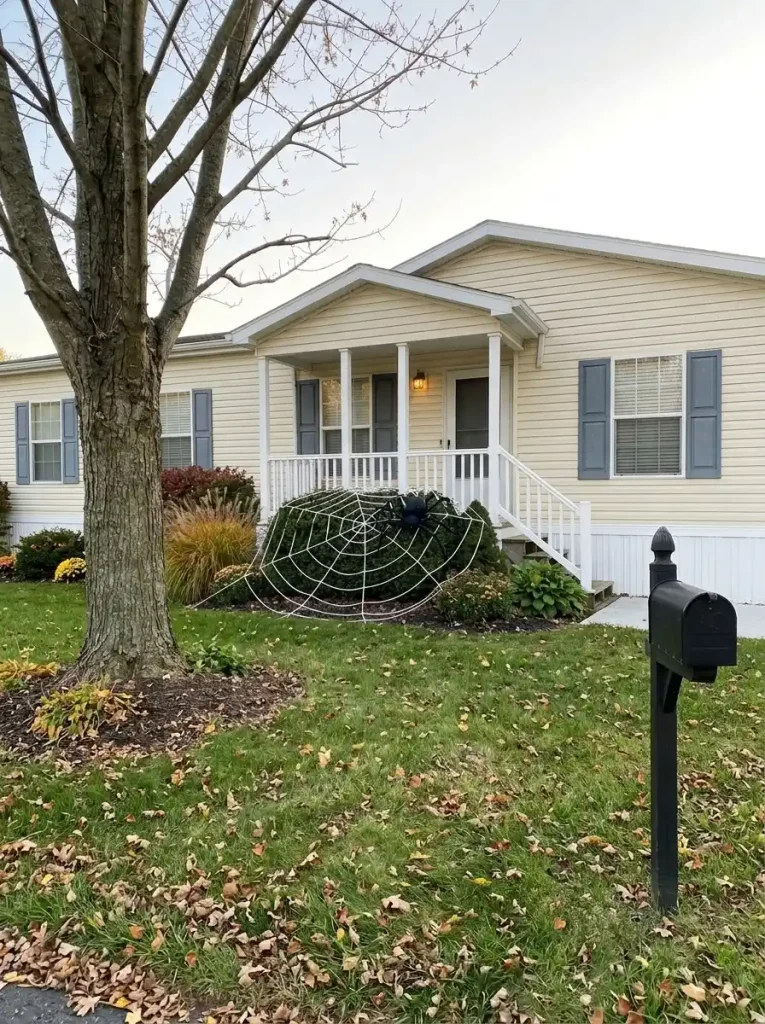
The lawn does not have to carry every Halloween idea. A hedge, privacy fence, porch lattice, or side boundary can become the background for an oversized web while the usable ground remains relatively quiet.
Choose one uninterrupted surface large enough for the web to read as a complete shape. A large spider near the densest section can establish the focal point without requiring a second scene below it.
This becomes especially effective when the hedge sits between the lawn and mobile-home façade. The web occupies the middle distance, while visible siding behind it keeps the yard from feeling flat.
Check the installation from the direction guests actually arrive. If the web disappears edge-on or breaks into several unrelated fragments, tighten the composition onto a smaller section of the boundary.
Stronger: one oversized web against a clear backdrop.
Weaker: thin webbing distributed across every shrub, railing, tree, and sign.
9. Give One Skeleton a Yard Job Instead of Scattering Figures Everywhere
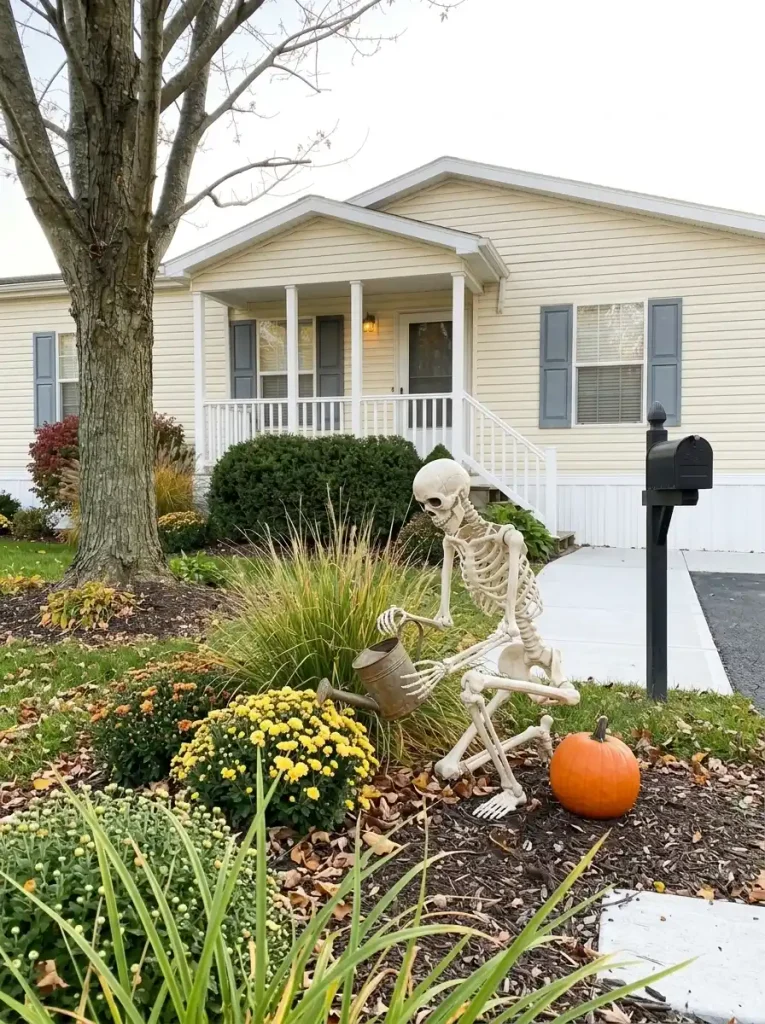
A skeleton becomes more memorable when it appears to be doing something.
Seat one beside the mailbox with the flag raised. Let one push a wheelbarrow of pumpkins, rake a leaf pile, hold a watering can beside the mums, or lean against a tree as though it has been waiting all season. A compact mobile-home yard makes these small narratives easy to understand from the sidewalk.
The object it interacts with should already belong naturally in that zone. Gardening belongs near a bed. A mailbox joke belongs close to the curb. That relationship prevents the figure from feeling like an unrelated prop placed in leftover lawn space.
One character with a clear role can carry more personality than several figures with no connection to the landscape.
If the yard already contains a cemetery, witch scene, or oversized spider, let the skeleton remain supporting cast.
10. Create a Witchy Cauldron Corner in the Yard’s Least-Used Pocket
Every front yard has a zone that receives less traffic: the outside corner of a planting bed, the area beside a tree trunk, the far side of the steps, or a lawn pocket near the end of the façade. That can become a contained witch scene.
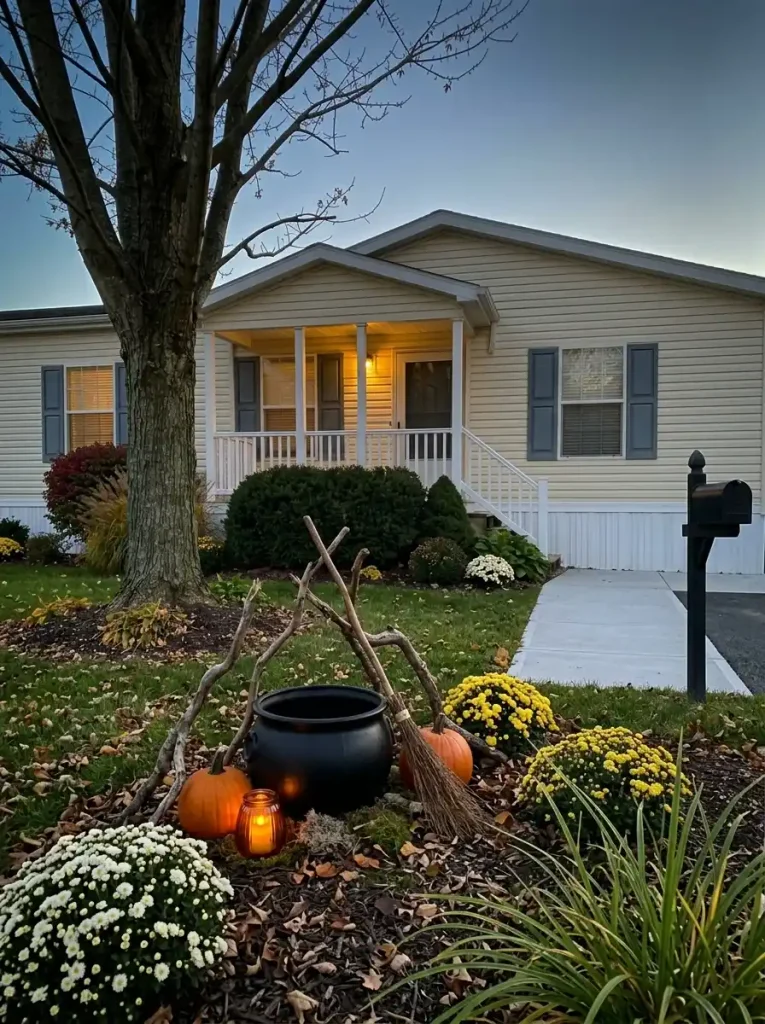
Start with the cauldron as the visual center. Build height behind it with crooked branches, a lightweight broom, or one tall silhouette. Keep lower details—pumpkins, skulls, faux bottles, chains, moss, or a small lantern—close enough to read as a single installation.
The scene works because one corner becomes a destination. It should not spill halfway across the lawn.
Judge it in daylight before relying on glow or colored lighting. If the shapes and hierarchy already communicate the witch theme, the after-dark treatment only has to deepen the mood.
For construction-heavy versions, continue with StylishGalore’s DIY Halloween yard prop ideas.Stop signal: once the cauldron, one vertical element, and one ground layer establish the story, another category of prop usually adds clutter rather than information.
11. Tuck Glowing Jack-o’-Lanterns Into Beds Instead of Crowding the Steps
Pumpkins naturally migrate toward the front steps because that is where many Halloween displays place them. On a mobile home, however, the steps may already sit close to the walkway, railings, and porch decorations.
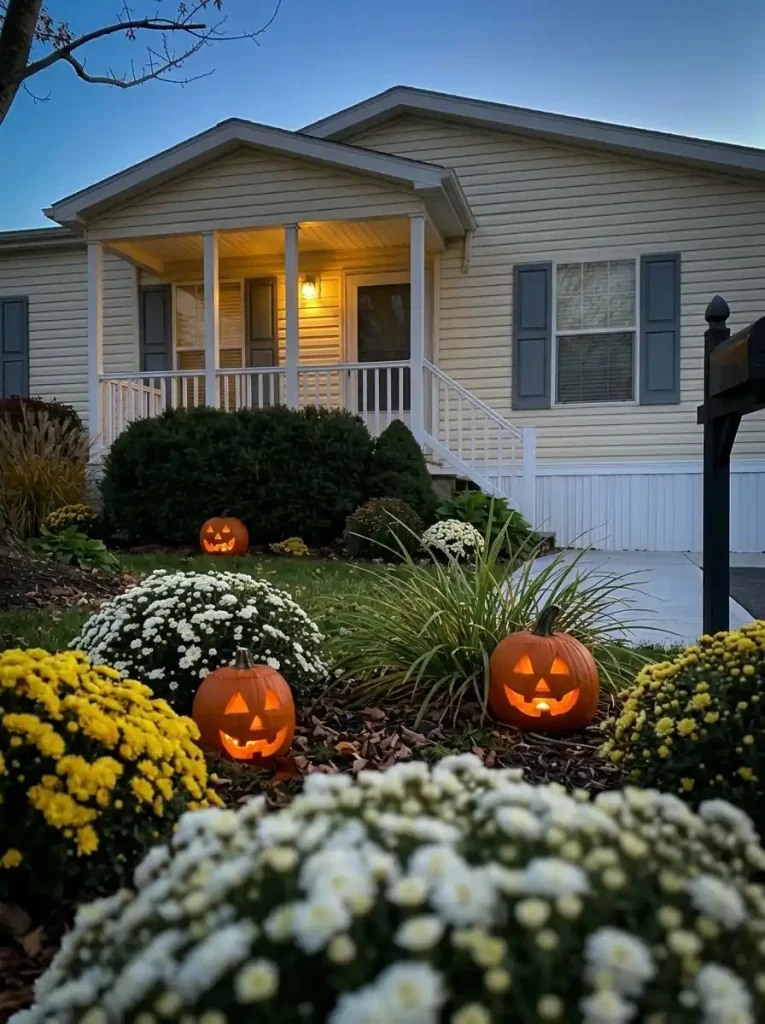
Move part of the orange glow outward.
Nest a carved or illuminated pumpkin inside a foundation bed, beneath a shrub, near ornamental grass, or beside an existing landscape stone. Lights appearing at different distances from the viewer create depth and let the yard participate in the Halloween composition.
Avoid turning the bed into an evenly spaced row. One substantial jack-o’-lantern with a smaller companion can be enough beside dense foliage.
After dark, check the faces from the real approach. If leaves hide the expression completely, bring the pumpkin slightly forward. If the pumpkin visually erases the plant behind it, tuck it deeper.
Think “discovered glow,” not “pumpkin border.”
12. Light the Approach Low Enough to Reveal Edges and Changes in Level
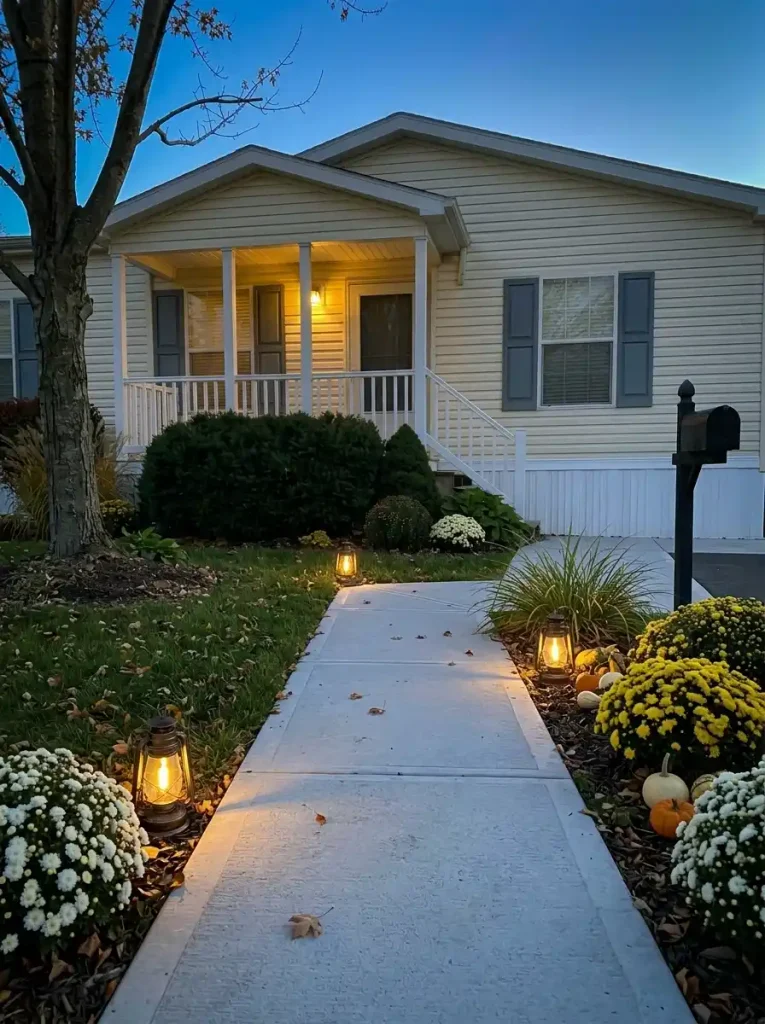
Halloween lighting earns its place when it contributes both atmosphere and orientation.
Look first at a walkway edge, a change in level, the bottom of steps, or a bend where the entrance is not immediately obvious. Low lantern-style lights or suitable outdoor landscape lighting can reinforce those transition points without illuminating every foot of the yard equally.
Keep decorative electrical equipment outside the walking surface. The U.S. Consumer Product Safety Commission advises checking light sets for broken sockets, frayed or bare wires, and loose connections; damaged sets should be discarded. Extension cords should be rated for their intended use, and outdoor lights should be certified for outdoor use and connected through GFCI protection. U.S. Consumer Product Safety Commission
Once the route reaches the compact door or landing zone, continue with StylishGalore’s
Halloween entryway ideas for small mobile homes.After-Dark Approach Diagram
Light the decisions in the route, not every foot of pavement
The most useful glow appears where a visitor needs to notice a boundary, turn, or level change.
Keep atmospheric lights among planting or props where they do not disguise the usable route.
Darkness can be part of the composition. The entire front yard does not need equal illumination.
13. Let Black Cat, Witch or Bat Silhouettes Peek Out of Existing Planting
Some Halloween decorations become stronger when they are only partly visible.
Slide a flat black cat silhouette behind ornamental grass. Let the upper half of a witch appear between shrubs. Arrange several bats so they seem to emerge from the darker side of a planting bed. The plant becomes foreground, the silhouette occupies the middle layer, and the mobile home’s siding or lit window becomes the background.
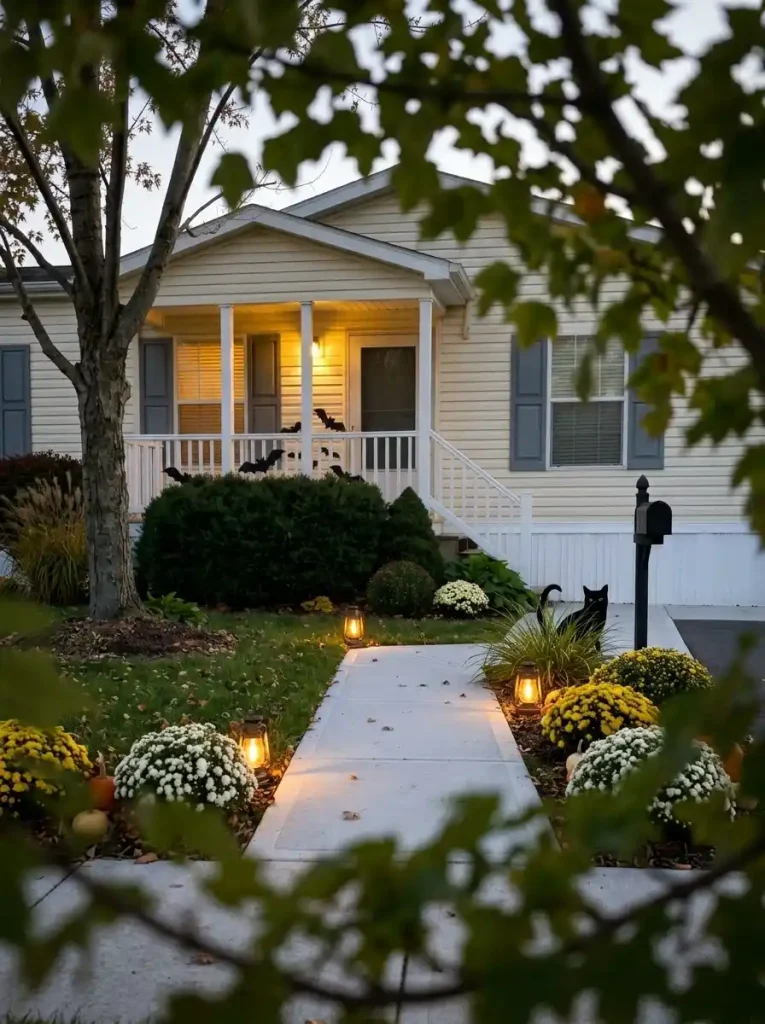
That layering is useful in a shallow front yard because it produces visual depth without requiring more physical space.
How much should remain hidden? Conceal too little and the figure simply sits in front of the landscape. Hide too much and recognition disappears. Aim for a point where the viewer identifies the character quickly but still has to visually complete part of it.
Test the reveal from the curb and again halfway to the home. If the silhouette remains readable from both positions, the planting is successfully staging the decoration.
14. Balance a Long, Low Mobile Home With One Tall Halloween Sentinel
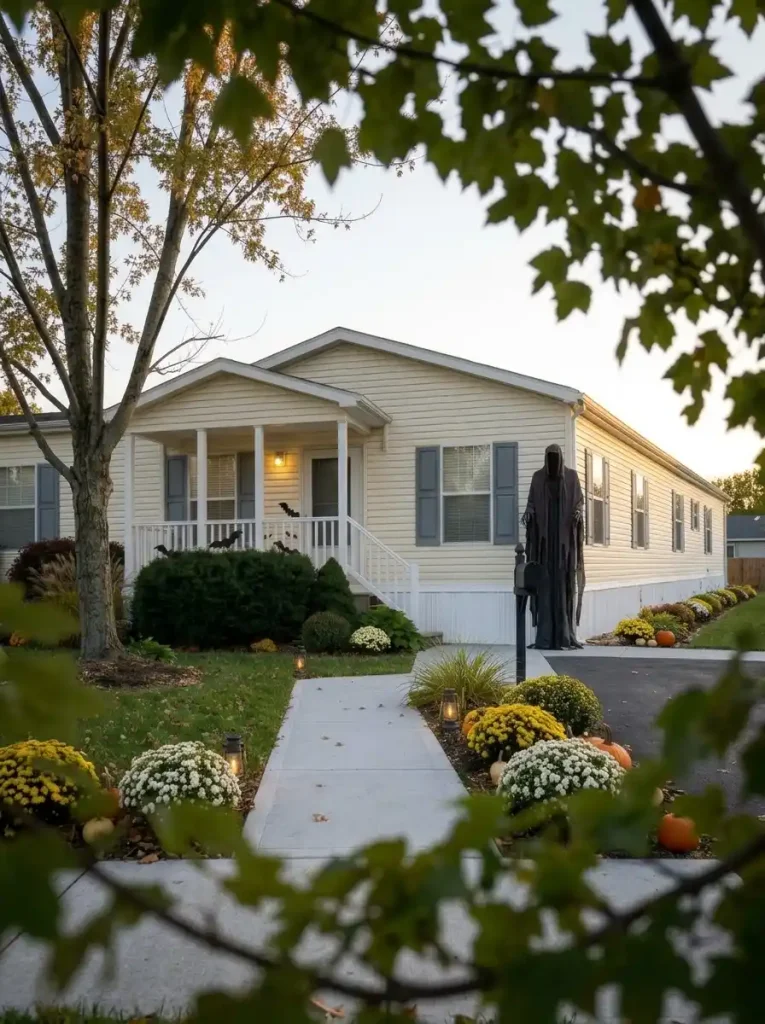
The long horizontal line of a mobile home changes how oversized Halloween props should be positioned.
Several equally tall figures spread across the lawn can amplify the width and divide the façade into competing sections. One tall element—an oversized skeleton, ghost, witch, scarecrow, cloaked figure, or narrow pumpkin stack—can provide a stronger vertical counterpoint.
Test it beside a porch edge, mature planting, substantial tree, or the far end of the visible façade. The sentinel should connect to an existing anchor while still rising above the lower landscape or pumpkin layer.
Double-wide properties behave differently because their frontage supports a broader composition. For that scale, continue with StylishGalore’s
Halloween exterior ideas for double-wide mobile homes.Façade Balance Lab
Move one tall figure across the frontage and watch the balance change
A long, low exterior usually benefits from one intentional vertical interruption, not a repeated line of oversized figures.
What to judge
The best position should relate to an existing architectural or landscape anchor.
- Does it interrupt the horizontal roofline?
- Does it leave the entry readable?
- Does it compete with another tall tree or porch post?
- Does the yard still have one clear focal hierarchy?
15. Design the Display to Read in Daylight Before You Add Night Effects
Colored lights can make almost any Halloween yard look dramatic after sunset. That does not automatically mean the daytime composition is working.
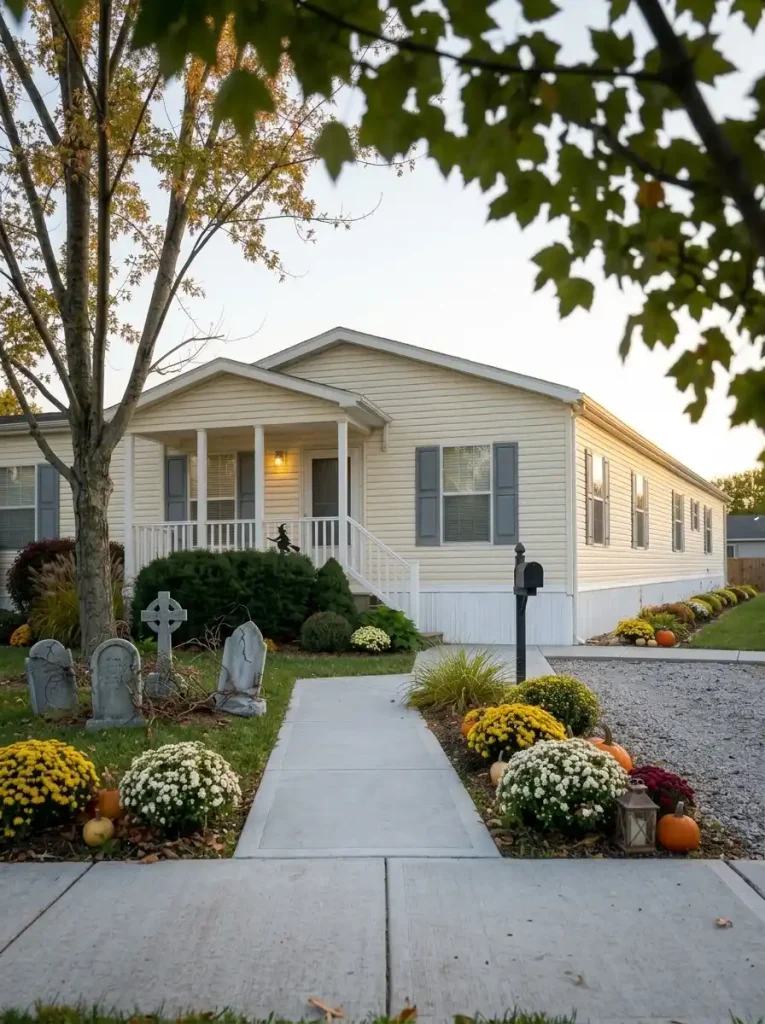
Look at the front yard in late afternoon with decorative lighting switched off. Can you identify the main scene immediately? Are the smaller decorations supporting it, or is every pumpkin, skeleton, web, and sign demanding equal attention?
A useful daylight hierarchy has three levels:
- one dominant focal event
- one or two supporting Halloween cues
- quiet areas where lawn, planting, siding, or walkway remain visible
Take a quick phone photo from the curb. A photograph compresses the scene and makes competing focal points easier to notice. If five decorations appear equally important, edit before adding more lighting.
Night effects should reveal, deepen, or transform an existing hierarchy. They should not be the only reason the display feels organized.
On a particularly compact lawn, remove the weakest object and take another photograph. The simpler version may give the home, landscape, and Halloween focal point far more room to work together.
16. Give the Yard a Second Look After Dark With One Controlled Color Wash
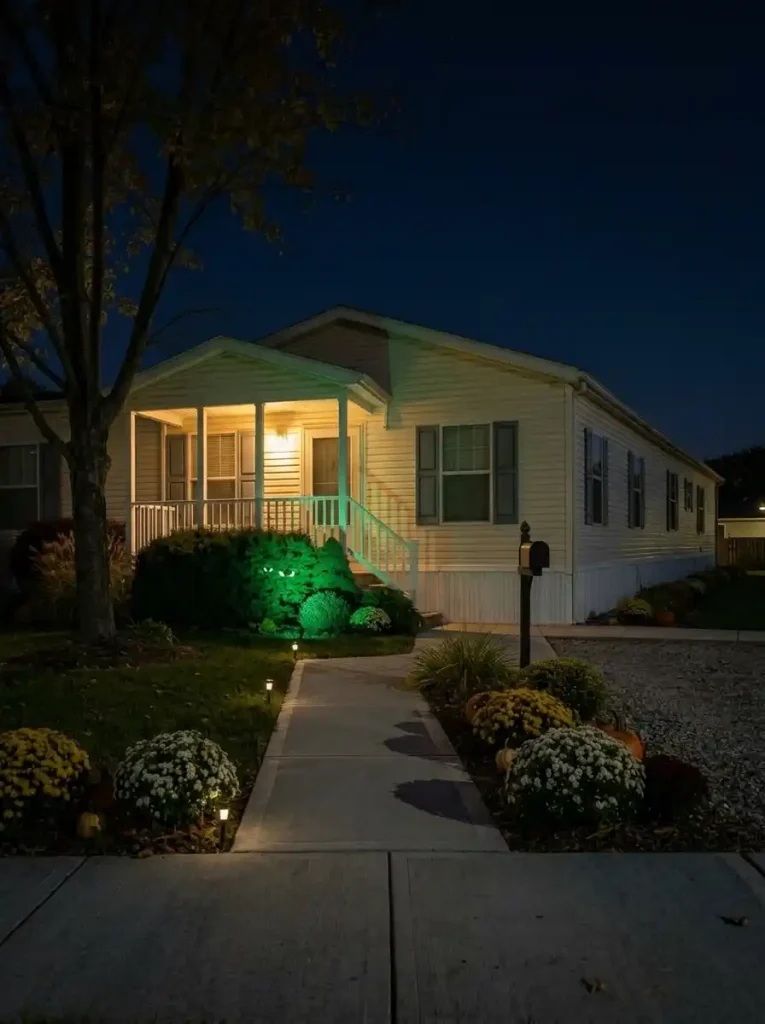
Restricting saturated color to one focal surface creates a stronger nighttime transformation than lighting every part of the yard differently.Once the daytime hierarchy works, choose one surface or scene to transform after dark.
A green wash through a shrub can make monster eyes suddenly feel alive. Violet behind a witch silhouette can separate the figure from the siding. Amber-orange illumination beneath a tree can connect hanging pumpkins to the ground below.
The important decision is which existing feature becomes more interesting when the light changes it.
Avoid giving the façade, tree, lawn, graveyard, porch, and walkway separate saturated colors. On a modest frontage, several intense zones can flatten the composition because nothing remains visually secondary.
For plug-in lighting, keep the same outdoor electrical checks described in Idea 12 in place. U.S. Consumer Product Safety Commission
Night Wash Selector
Choose what changes after dark
Color is strongest when it transforms one existing feature instead of coating every exterior surface equally.
One target, one job
Ask what the colored light is supposed to reveal that daylight does not.
- Green: animate dense foliage or monster eyes.
- Violet: isolate a witch, graveyard, or silhouette scene.
- Amber: emphasize branches, pumpkins, or warm fall material.
17. Finish With Three Depths: Curb Cue, Mid-Yard Focal Point and Lit Entry
Before declaring the front yard finished, stop evaluating individual objects and read the property as three depths.
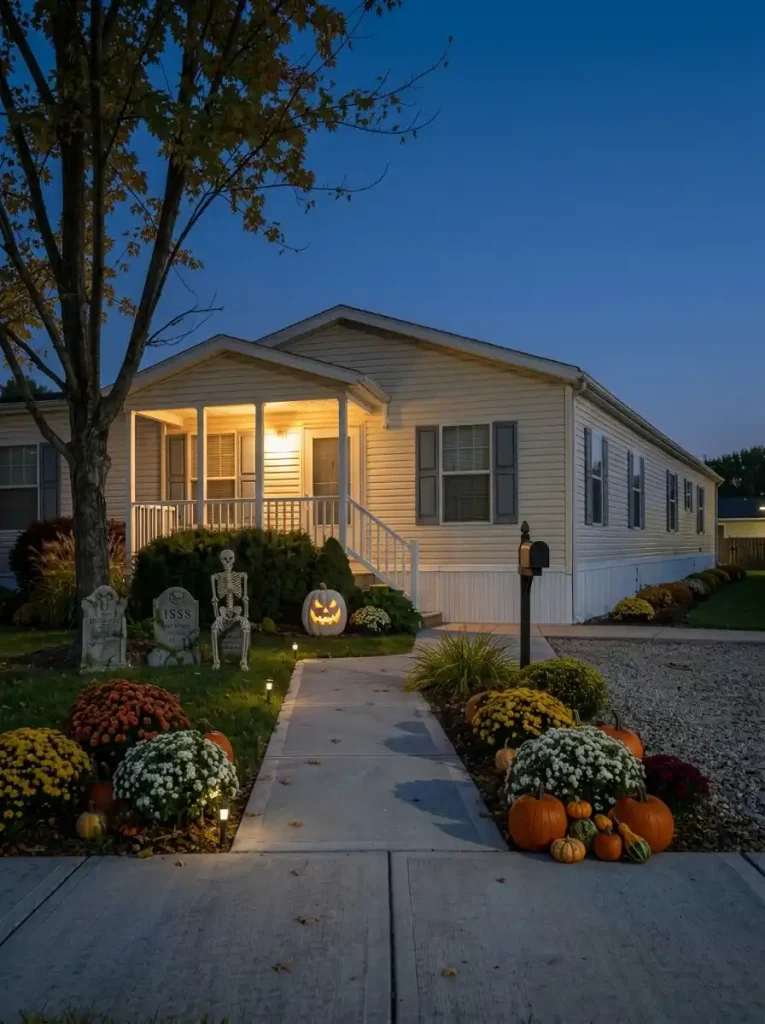
At the curb, use one cue that announces Halloween: the decorated mailbox, a pumpkin cluster, or the first silhouette.
In the middle of the yard, give the eye something more substantial to discover: the narrow graveyard, monster shrub, cauldron, groundbreaker, or skeleton scene.
Near the home, let the entry become the destination without repeating the entire lawn display. A restrained pumpkin accent, warm light, or one vertical figure may be enough.
Now remove anything that performs the same job twice. If two curb displays both announce the season, choose the stronger one. If the graveyard and cauldron compete for the middle, nominate one as the lead scene.
Sequence creates depth. Quantity alone cannot.
A Halloween Front Yard That Feels Bigger Than Its Footprint
The best Halloween mobile home front yard is not the one with the most props. It is the one that uses the property deliberately. Keep the visitor route easy to understand, let one mid-yard scene carry most of the story, and use trees, shrubs, planting beds, or the long façade as part of the composition while keeping the permanent landscape visible.
Once the daylight version feels balanced, add only the lighting that changes or clarifies something after dark. Then return to the curb and check the three depths again: arrival cue, main focal point, and entry.
If those three layers read clearly, stop. The undecorated lawn between them is doing useful design work too.