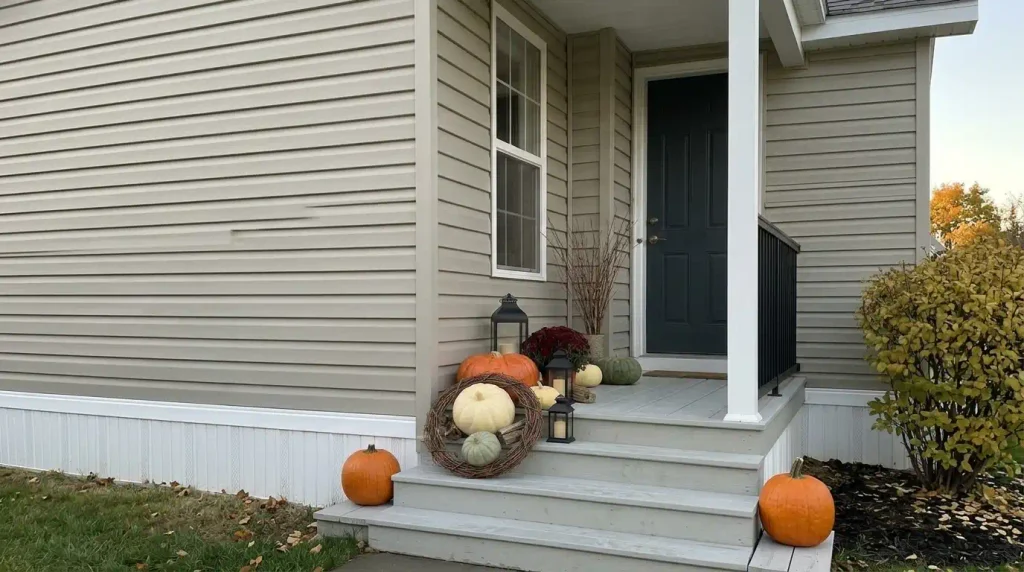
A mobile-home porch can look incredible for Halloween, but it rarely has the spare floor space of the oversized porches that dominate Pinterest. A shallow landing, narrow steps, close-set railings, low roofline, and an outward-opening storm or screen door can turn one extra pumpkin or prop into clutter surprisingly fast.
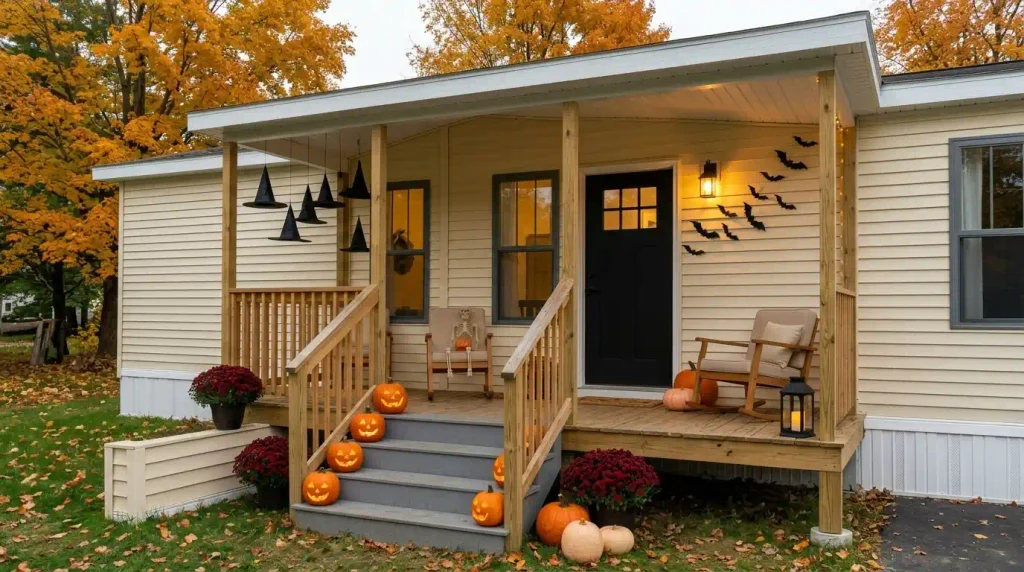
The strongest Halloween mobile home porch ideas work with the architecture that is already there. Ceiling space can hold floating witch hats or ghosts. Porch posts can frame gauze and lights. Railings can carry flat decorations. Steps can establish a descending pumpkin rhythm, while an unused outer corner can support one tall arrangement or memorable Halloween character.
The 25 ideas below are organized around those real porch surfaces and constraints. You’ll see where each decoration works, when it becomes too much, and how to keep the porch welcoming in daylight and atmospheric after dark.
Halloween porch safety note: when trick-or-treaters will use the entrance, the U.S. Consumer Product Safety Commission recommends removing obstacles from steps and porches and favors flameless lighting in accessible jack-o’-lanterns. NFPA likewise recommends battery-operated candles or glow sticks, keeping decorations away from heat sources, and keeping exits clear. U.S. Consumer Product Safety Commission
1. Map the Porch Footprint Before the Halloween Decorations Come Out
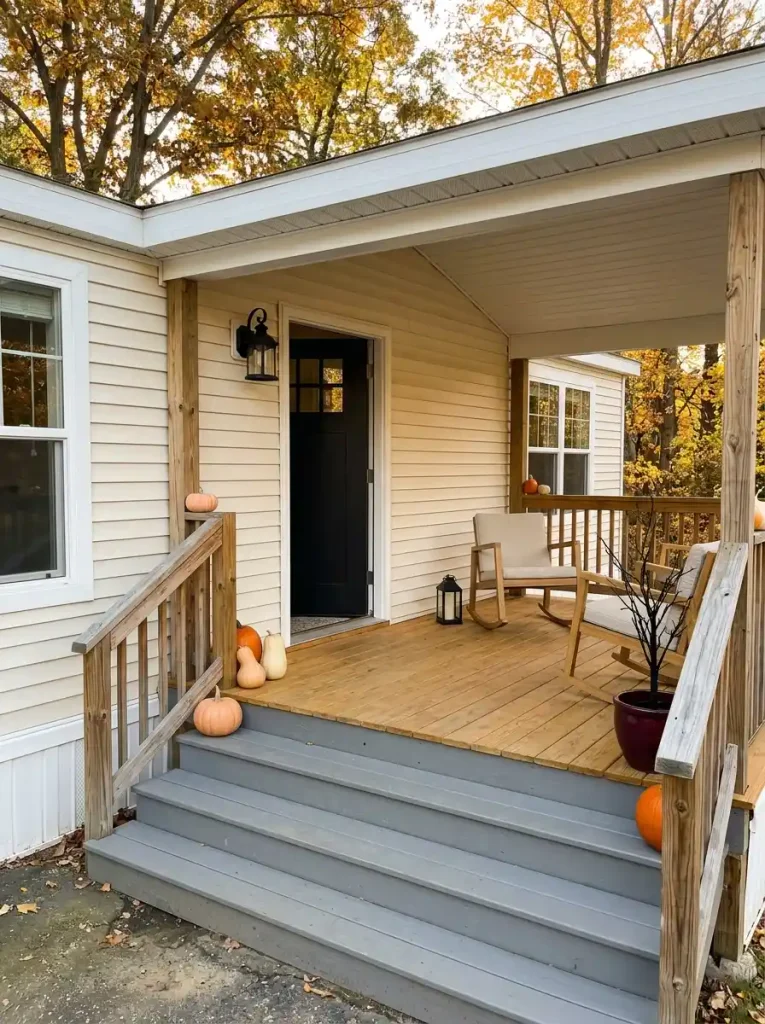
Stand at the bottom of the steps and imagine the porch completely empty. Before choosing pumpkins, lanterns, skeletons, or signs, identify every part that still has to perform a job: the center of the steps, landing in front of the door, door-swing area, and route somebody naturally follows toward the entrance.

On many mobile homes, those functional zones consume most of the floor. The real decorating opportunity often sits somewhere else—above the landing, beside the door, along a railing, against an outer post, or inside one corner nobody walks through.
Sort the porch into three working zones:
- Keep clear: main walking route, threshold, door movement and central stair area.
- Decorate lightly: edges of steps, narrow wall strips, railing faces and areas beside furniture.
- Decorate boldly: ceiling volume, one unused outer corner, an exterior rail face or a secondary porch bay.
That exercise changes the question from “How much Halloween décor can I fit?” to “Which surface can create the strongest effect without making the porch harder to use?”
Porch rule: a decoration that forces a visitor to change the natural route to the door belongs somewhere else.
2. Choose One Halloween Anchor Based on the Porch You Actually Have
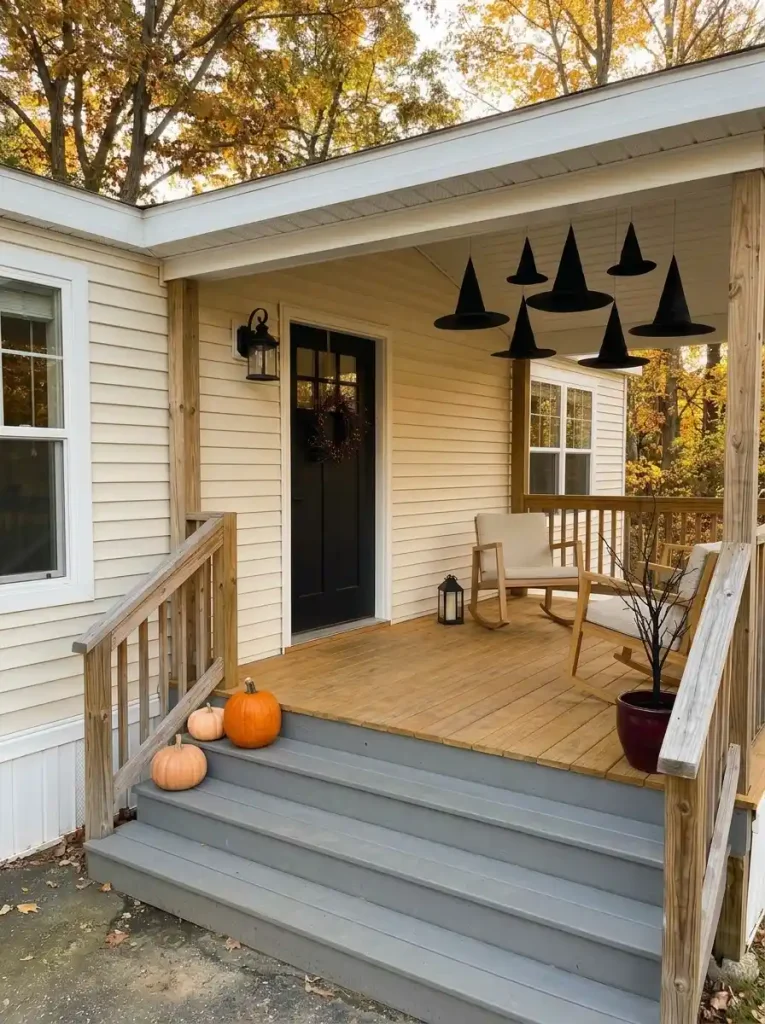
A small porch feels more intentional when one element receives clear visual priority. The best anchor comes from the surface with the most unused visual capacity; it does not automatically belong on the floor.
A tiny uncovered stoop may rely on the front door or a narrow vertical strip beside it. A covered porch gains an entire ceiling plane. Railings move decoration toward the perimeter. A deeper porch with existing furniture can accommodate a character scene without sacrificing the threshold.
Use the mapper below before deciding where your largest Halloween moment belongs.
Mobile-home porch planner
Where should the Halloween focal point live?
Choose the porch shape that most closely matches yours. The strongest decorating plane changes with the architecture.
Let the door zone carry most of the Halloween story.
A stoop has almost no spare depth, so concentrate visual weight on the door, trim, one narrow side wall, or the area immediately above the entrance.
Use the ceiling before surrendering scarce floor space.
A covered porch gives you a plane many decorating schemes ignore. Floating hats, a ghost cluster, or one controlled gauze treatment can become the main Halloween moment above the walking route.
Push the Halloween display toward the railing plane.
The railing provides length without consuming landing depth. Flat silhouettes, restrained garland, lights, or one outer-corner arrangement can create a broad visual read from the yard.
Give one seating corner a Halloween role.
A deeper porch can support a seated skeleton, witch setup, or compact haunted-harvest scene because furniture already occupies visual space. Build around that existing footprint.
Once the anchor is established, supporting decorations become easier to edit. Their job is to reinforce that main feature, not create a second equally strong display two feet away.
3. Float Witch Hats Above a Covered Porch and Give the Floor Back to the Entry
A row of black witch hats can create more Halloween impact than another cluster of floor props because their silhouettes read immediately against a pale porch ceiling.
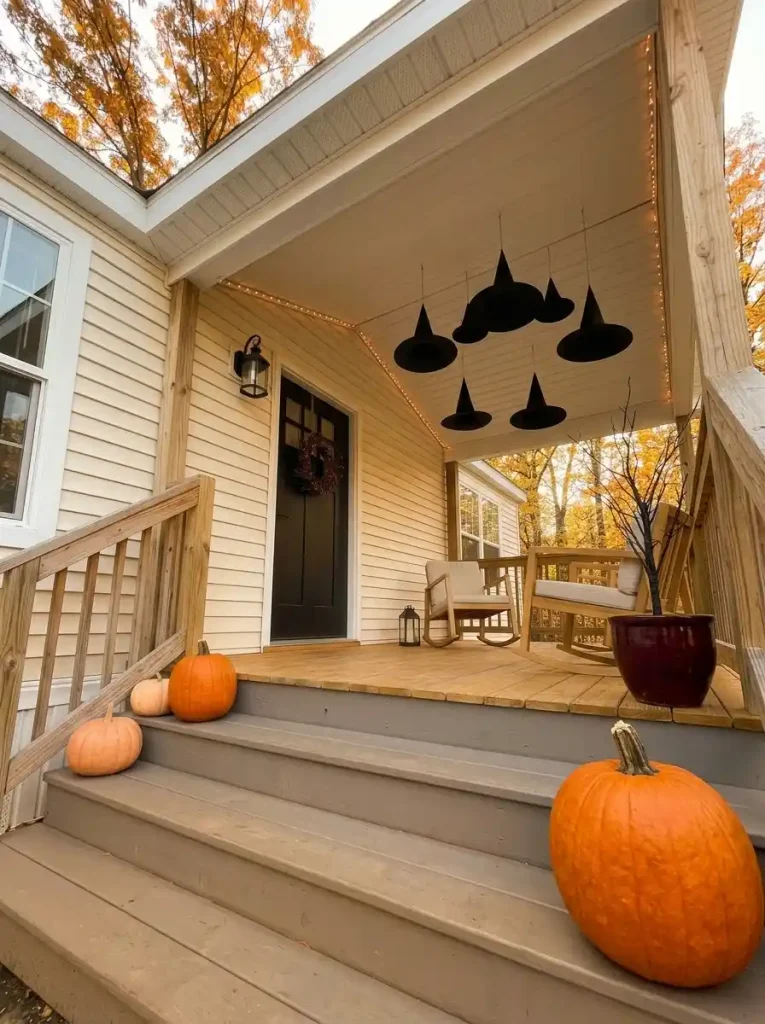
Keep the hats within one defined ceiling zone—the outer half of the porch, a seating bay, or an area beside the doorway. Vary the heights enough to create movement, while leaving generous gaps between individual hats.
On a narrow mobile-home porch, five clearly separated hats can look stronger than ten overlapping ones.
Small-porch note: the ceiling treatment should feel like a floating layer above the porch, not a dark canopy visually pressing down on the entrance.
Keep the busiest hanging section away from the exact door-opening zone and normal head path. The attraction should be visible from the steps without making the entrance feel enclosed.
This idea belongs primarily to covered porches. An uncovered stoop will usually benefit more from moving the witch theme to a broom, hat, or vertical arrangement beside the door.
4. Hang a Small Ghost Cluster Where It Can Read From the Walkway
Imagine two porches of identical size.
One has five little ghosts scattered across the ceiling, rail, door and steps. Every ghost is visible, yet none matters very much.
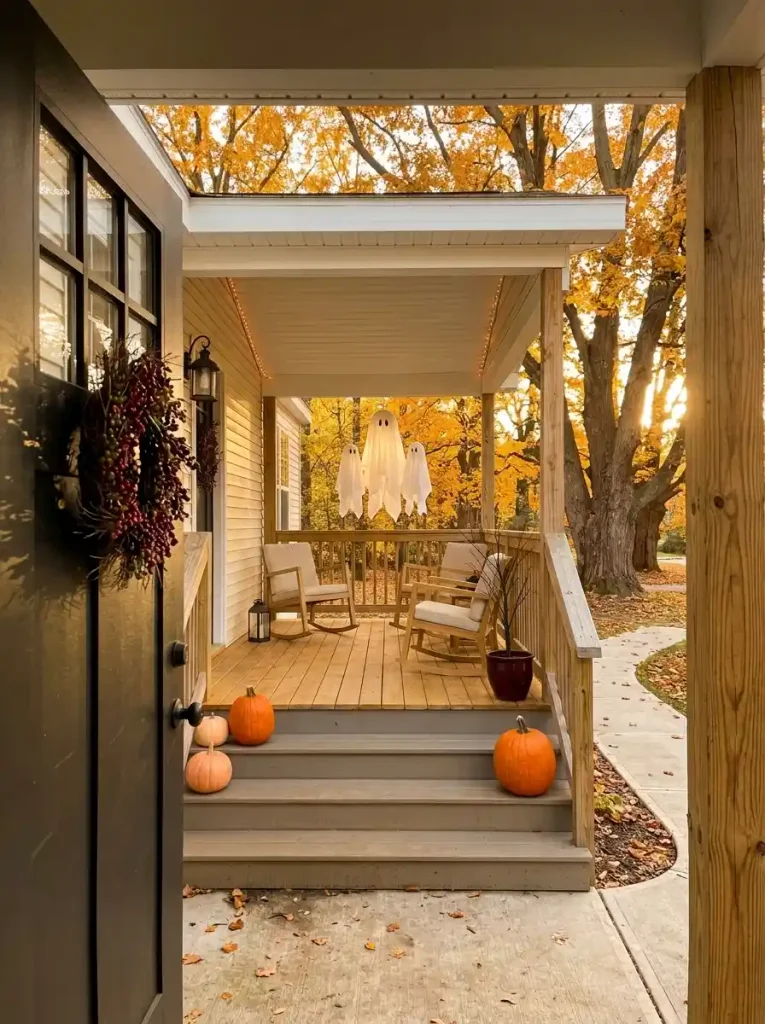
The other has three ghosts hanging together near one outer porch bay at deliberately different heights.
The second composition usually reads more strongly because the figures become one identifiable silhouette.
Use one larger ghost to establish the group, then add one or two smaller forms slightly lower or farther back. An outer corner, porch post or seating bay gives the cluster room to float visually without occupying the busiest entrance zone.
Once white ghosts become the dominant light shapes, reduce competing white fabric elsewhere. Black siding accents, charcoal textiles, wood, orange pumpkins or dim warm lighting can provide the contrast that keeps the cluster distinct.
Decision: scatter ghosts only when the porch itself is large enough to connect them visually. On a compact porch, clustering usually provides more impact per square foot.
5. Send a Bat Flight Diagonally From the Door Toward a Porch Corner
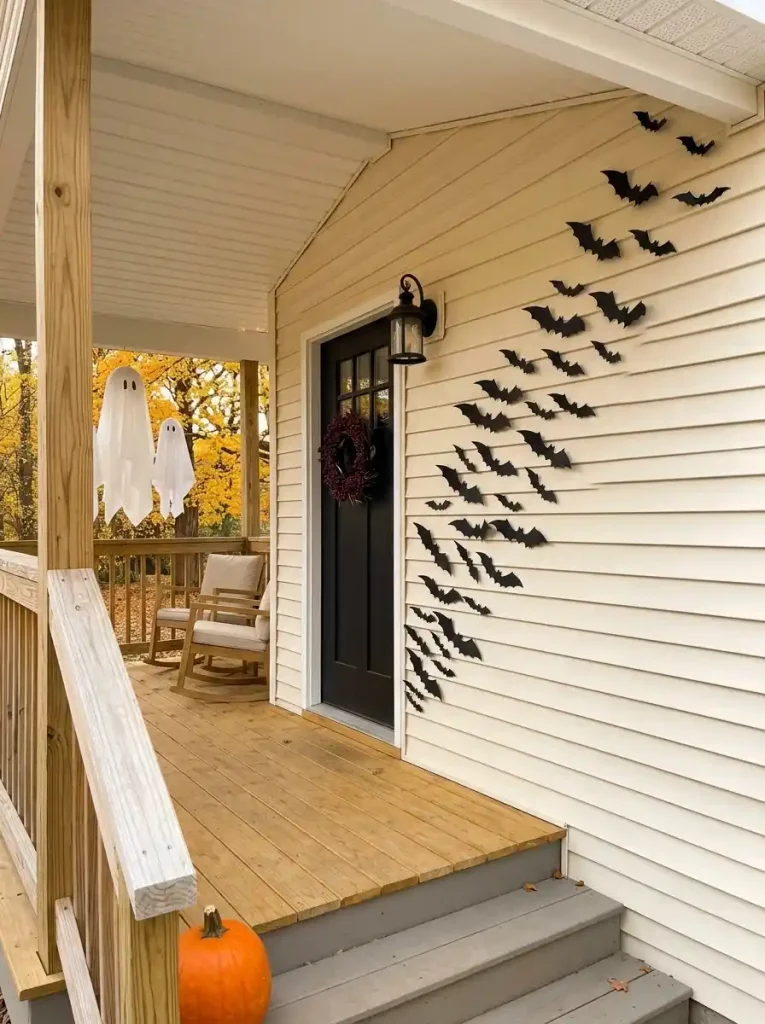
Flat bat silhouettes are unusually effective on a shallow porch because they create movement without creating depth.
Give the installation a direction.
- Begin with a denser collection near one edge of the door or trim.
- Mix two or three noticeably different bat sizes.
- Let the flight rise diagonally toward a post, beam or upper siding corner.
- Increase the empty space between bats as the composition climbs.
- End before the flight meets another strong decoration.
A diagonal path can visually stretch a narrow porch because the eye travels across the façade instead of stopping at the center.
Avoid placing separate mini-flocks around every window, porch light and sign. Once bats surround everything, their movement turns into wallpaper.
The test is simple: step back until individual bats become small. The overall flight path should still be obvious.
6. Stretch Spiderweb Across One Upper Corner, Not Across the Whole Entrance
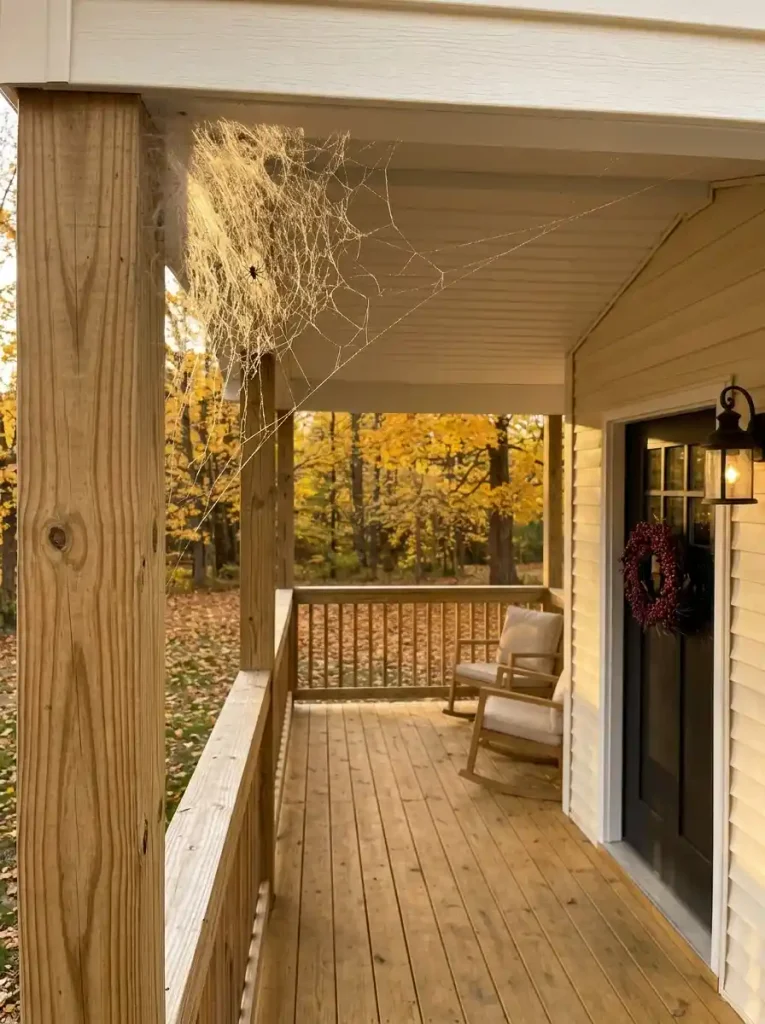
Synthetic spiderweb looks more convincing when it appears to originate from a believable architectural junction.
Choose one corner where a porch post meets a beam, the upper edge beside a railing, or a wall-to-ceiling junction. Make the web densest close to that corner, then thin the strands as they travel outward.
This gives the porch three useful layers:
dense origin → stretched middle → open architecture
A small spider placed near the densest section can establish the Halloween story without requiring additional floor props.
Covering every railing, light fixture, window and doorway produces the opposite effect. The entire porch becomes one pale texture, and the architecture that should frame the Halloween scene disappears beneath it.
Stop point: once the web reads clearly from the bottom of the steps, the treatment has enough scale.
7. Drape Black Gauze Through One Porch Bay for a Soft Haunted Frame
Porch posts already provide the vertical framework needed for a dramatic Halloween installation.
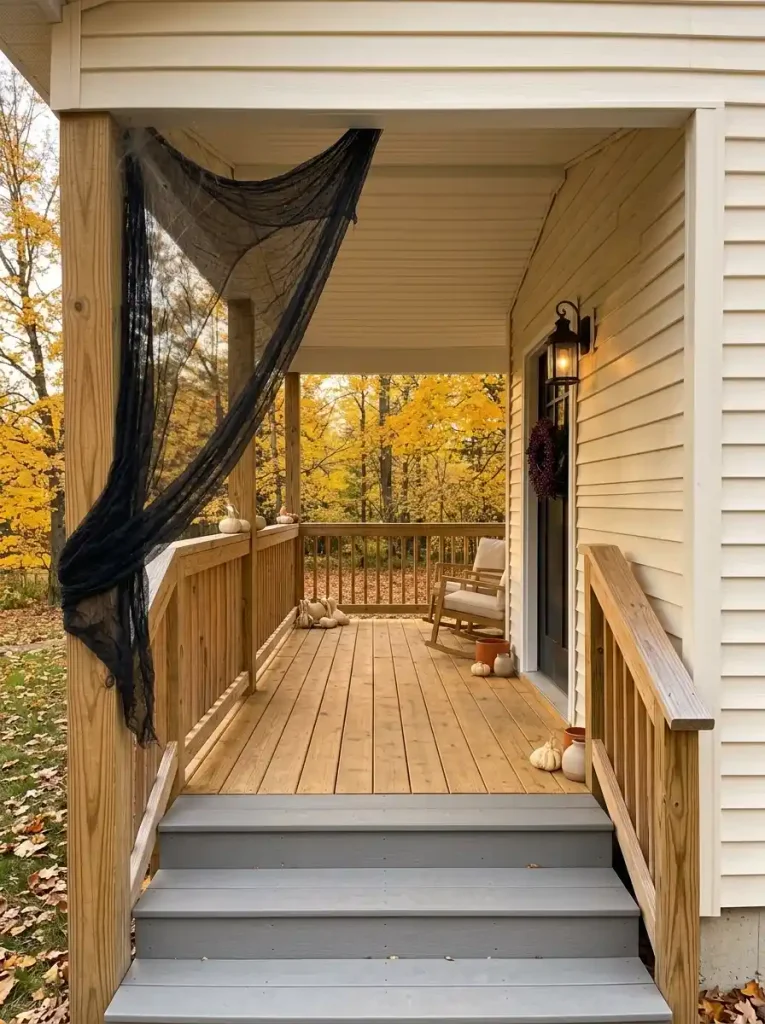
Choose one bay between a post and exterior wall. Gather part of the fabric near the beam, allow one loose section to fall, and preserve visible open space within the bay. Sparse folds feel atmospheric; heavy folds make the area visually denser.
That distinction matters on a mobile-home porch because a shallow covered space can feel enclosed surprisingly quickly.
The best location is usually a secondary bay, seating zone, or outer edge—not the most active part of the doorway.
Black or charcoal material is especially effective against cream, white or light-gray siding because a relatively small amount can create a large silhouette.
Keep decorative materials away from open flames and other heat sources; NFPA specifically advises separating Halloween decorations from flame and heat. NFPA
8. Build a Tall Branch-and-Bat Arrangement at the Porch’s Outer Edge
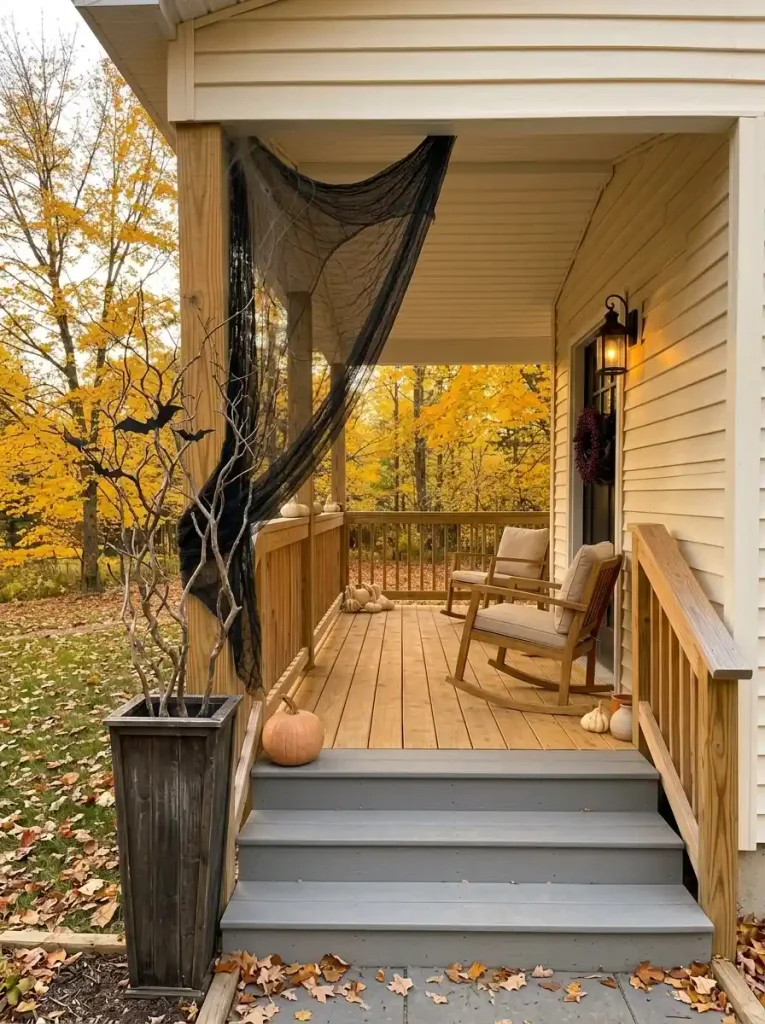
When a floor arrangement feels too small from the walkway, increasing its height can be more useful than increasing its width.
Place one substantial planter or container at an unused outer corner. Fill it with bare branches that extend upward through the porch volume, then add only a few bats, crows or small lights through the branching structure.
A single pumpkin, dark plant or compact mum at the base is often enough.
This arrangement performs well beside horizontal mobile-home siding because the vertical branches interrupt the long horizontal lines while using a relatively small footprint.
Inspect the display from the approach before filling the bottom with additional objects. If the branch silhouette already looks dramatic against the siding or sky, a crate, sign, second planter and extra pumpkins may weaken the cleaner vertical composition.
Best placement: the porch’s outside edge, where height can be enjoyed without narrowing the landing.
9. Let One Skeleton Become the Porch Character Instead of Adding Five Smaller Props
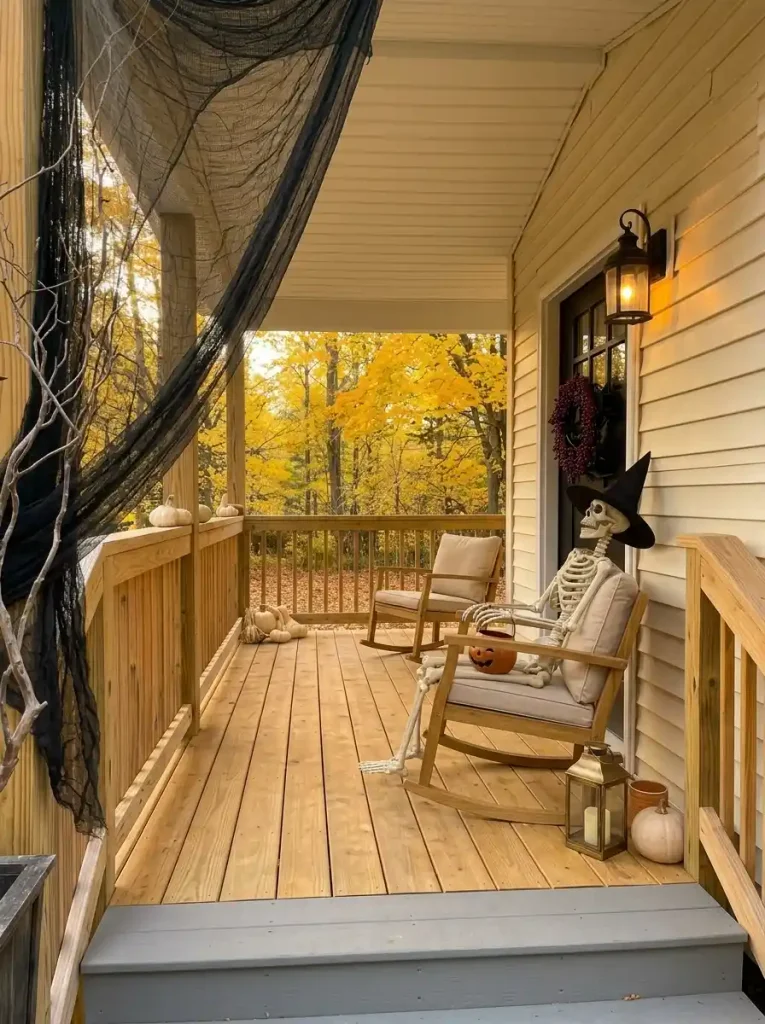
A skeleton does something that garlands, signs and pumpkins cannot: it gives the porch a character.
Seat one in an existing chair, lean it casually near an outer post, or let it inhabit a small side-table scene. Because a human-scale figure establishes instant narrative and scale, surrounding decorations can become quieter.
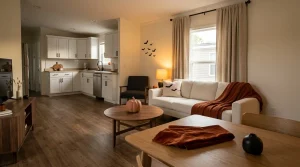
Give the skeleton one job
The position changes the way the whole porch reads. Pick the role first, then allow nearby decorations to support it.
The Host
Seat the skeleton in an existing chair near a side wall. Add one small pumpkin or lantern so the setup feels like a scene rather than abandoned furniture.
The Greeter
Position the figure near an outer post where it is visible from the approach without standing directly in the threshold.
The Witch
Add a hat, broom or pumpkin bucket and allow one accessory to establish the character. A separate backdrop is unnecessary.
A single strong character can replace several small decorations because visitors understand the idea immediately.
10. Keep the Porch Chair Usable With One Halloween Textile Swap
Existing furniture can participate in the Halloween scheme without becoming another prop platform.
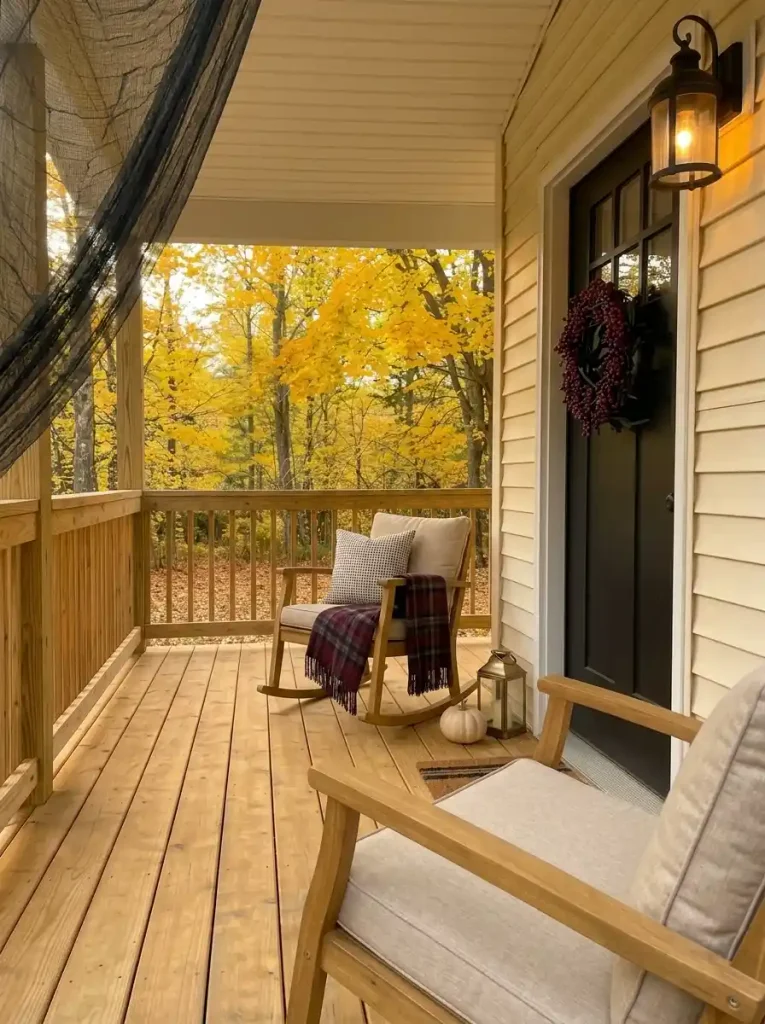
A porch chair may need only one seasonal textile: a charcoal-and-cream pillow, rusty plaid throw, subtle bat cushion or deep burgundy accent.
The stronger the pattern, the less decoration the surrounding furniture zone needs.
A graphic ghost or pumpkin pillow might stand alone. A quieter plaid textile leaves more room for a lantern, pumpkin, or skeleton nearby.
There is also a practical editing test here. A chair carrying three pillows, a throw, sign, pumpkin and basket has stopped functioning as seating even though the furniture is technically still visible.
Choose one role:
usable chair with Halloween styling
or
dedicated Halloween vignette
The distinction keeps a small porch from losing useful furniture to seasonal clutter.
11. Create a Slim Witch Parking Spot With a Broom, Boots and One Small Sign
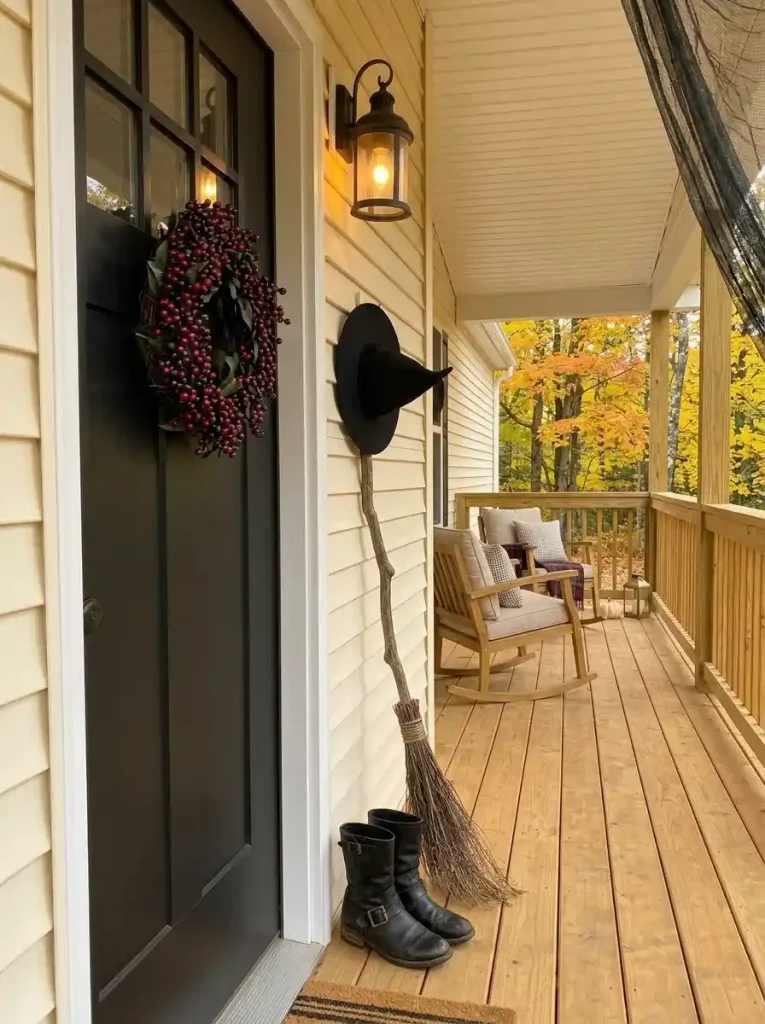
What can you do with the narrow strip beside a front door that is too shallow for a planter?
Build upward.
Lean a decorative broom in that side zone, place a pair of witch boots below it, then add either a hat or compact sign if the vignette still needs context.
The composition follows a simple visual sequence:
broom = height
boots = low anchor
small accent = story
This is more readable than filling the same strip with a tall sign, several pumpkins, lantern, basket, broom and boots.
The eye needs one clear vertical line and one low stopping point.
Stand several feet away before adding the third object. If the broom and boots already communicate the witch theme clearly, the display may already be finished.
12. Run Glowing Jack-o’-Lanterns Down Only One Side of the Steps
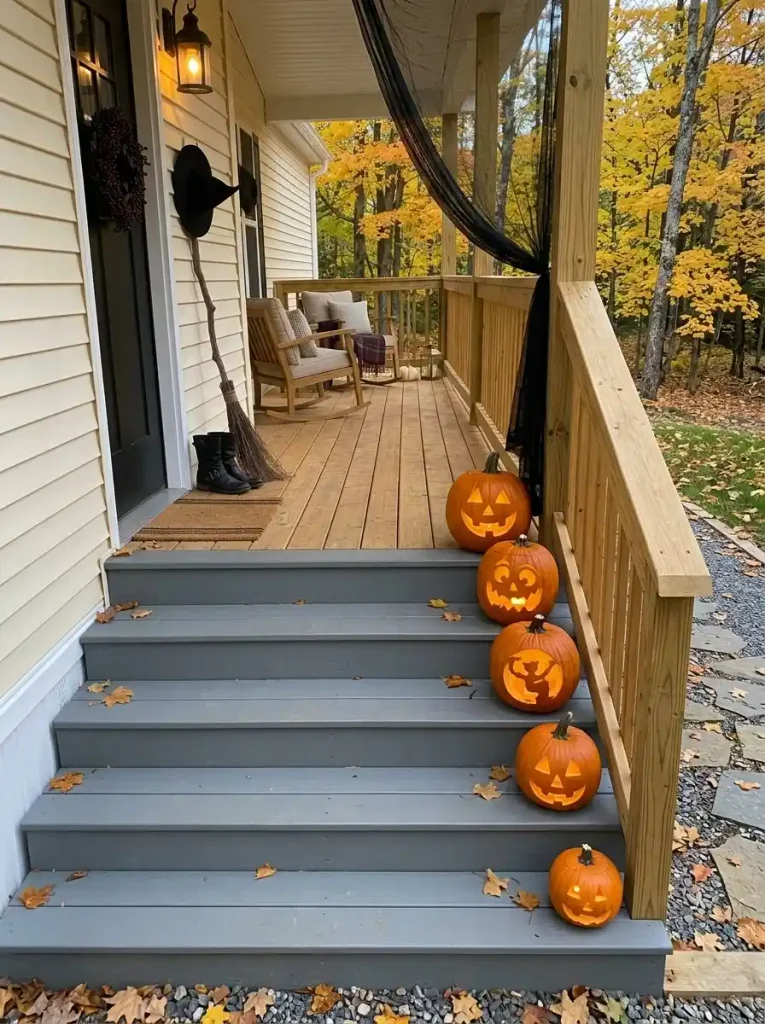
Pumpkins create a natural stair rhythm, but compact mobile-home steps often cannot comfortably carry matching rows on both sides.
Concentrate the arrangement on one edge and protect the middle route.
Begin with a larger pumpkin near the porch, then introduce smaller or varied sizes down the staircase. The gradual descent visually connects the landing to the yard without turning every step into a display shelf.
CPSC recommends removing obstacles from steps and porches when expecting trick-or-treaters. It also recommends flameless battery-operated lights or glow sticks in jack-o’-lanterns and other areas accessible to children. U.S. Consumer Product Safety Commission
The useful decision is not how many pumpkins the staircase can physically hold. It is how many can create a clear descending rhythm while preserving the entrance route.
13. Use the Porch Rail as a Flat Halloween Canvas When the Landing Is Tiny
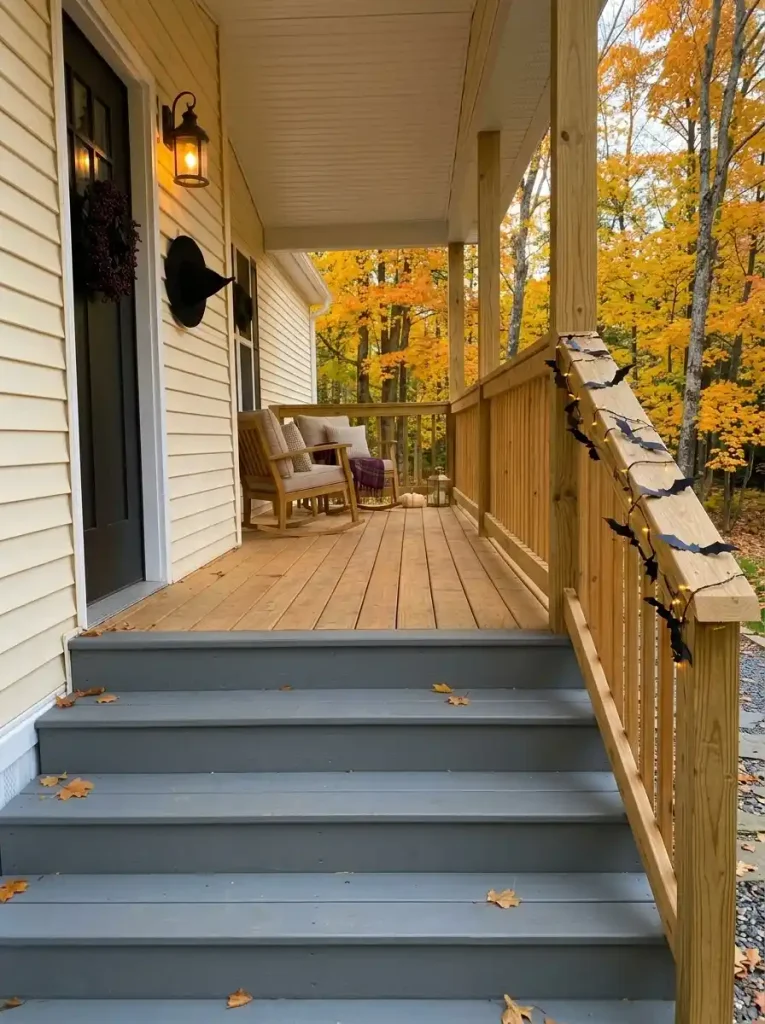
A railing offers valuable display area without requiring another deep object on the landing.
Think in shallow layers.
A bat silhouette strip might follow part of the upper rail. A lightweight garland can occupy one span. Small lights can emphasize the horizontal line. Flat or shallow decorations may use the outside face where appropriate.
What should stay off the rail?
A continuous inner row of pumpkins, baskets, lanterns and standing signs.
That turns a useful edge into another floor-level obstacle and produces a visually heavy strip where every object sits at nearly the same height.
Choose one primary rail treatment, then leave some sections exposed. Those quiet gaps reveal the porch architecture and make the decorated portions easier to notice.
Rail test: use the railing as a plane, not as a shelf.
14. Build One Haunted-Harvest Riser With a Crate, Pumpkin and Dark Foliage
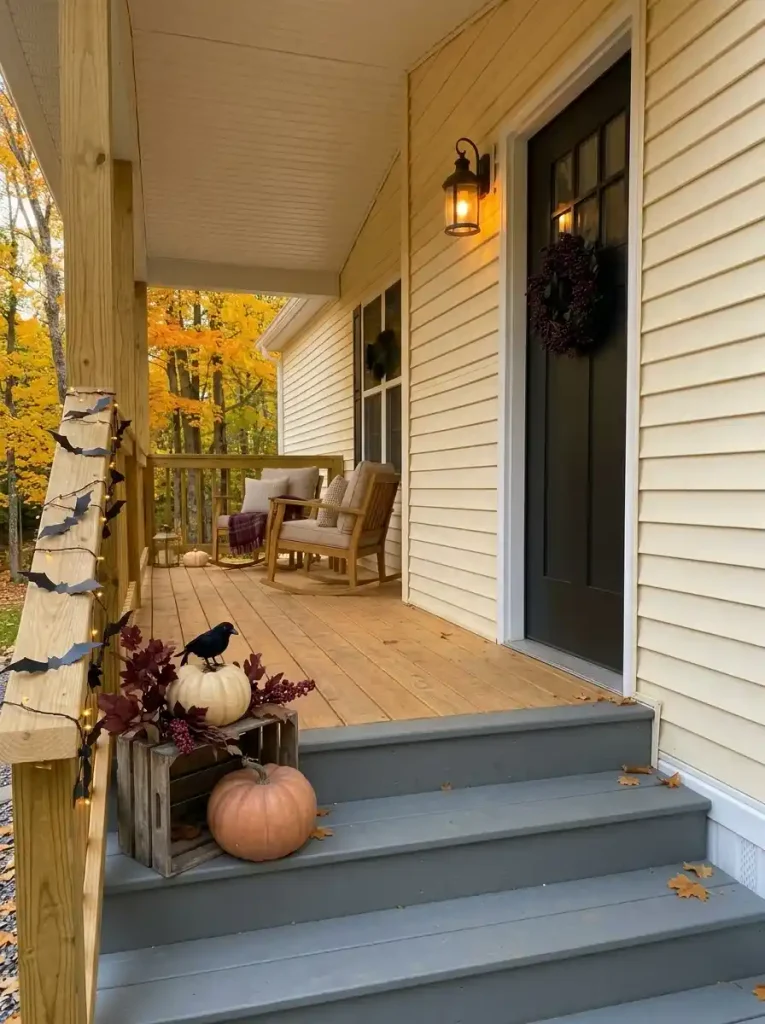
A porch may have enough space for one floor vignette while lacking room for several separate arrangements.
In that case, concentrate the display vertically.
Place one sturdy decorative crate or low riser near the outside of the porch. Keep a larger pumpkin low, raise a smaller seasonal object, and use branches or darker foliage to form the highest layer.
You now have:
- a low visual anchor,
- a middle feature,
- and a vertical finish
inside one compact footprint.
Limit the palette so the arrangement remains Halloween-specific rather than turning into a generic fall harvest display. Orange, bone, weathered wood, black, muted green and deep burgundy work well when one clearly spooky object—a crow, skull, bat or dark lantern—defines the seasonal direction.
For handmade construction ideas and material-focused projects, continue with 21 DIY Halloween Decor Ideas for Mobile Homes. Its focus is specifically DIY Halloween treatments for compact mobile-home spaces. Stylish Galore
15. Let the Halloween Wreath Support the Porch Scene Instead of Competing With It
A wreath does not automatically need to be the strongest element on the porch.
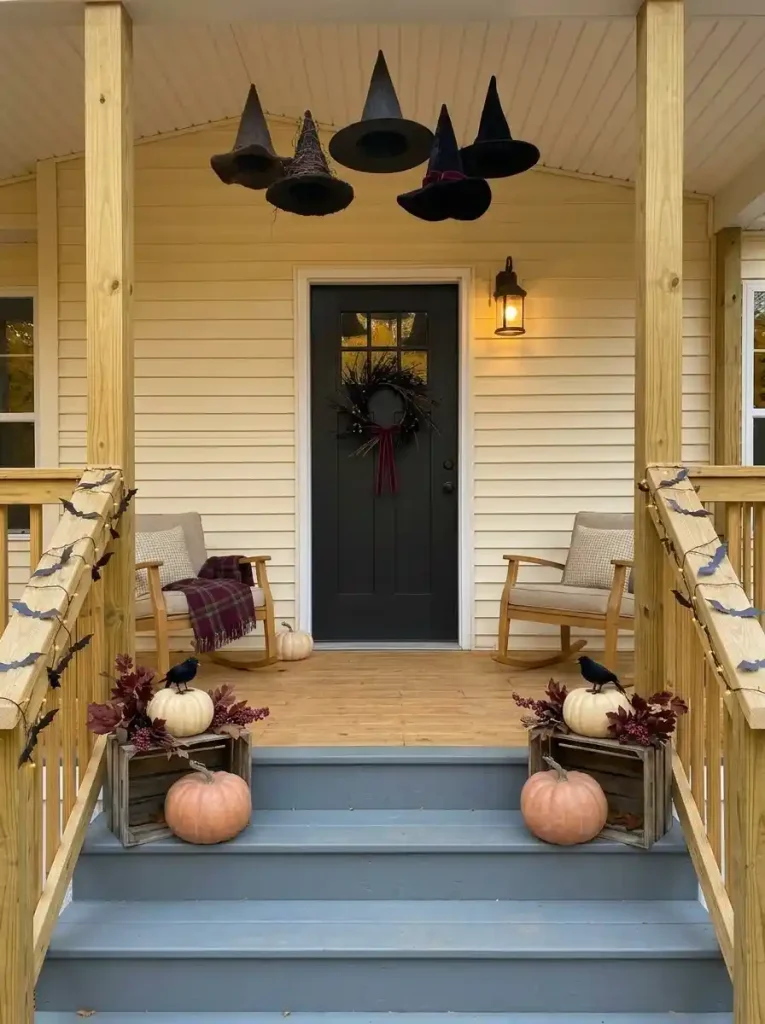
When floating hats dominate the ceiling, a skeleton controls the seating corner, or pumpkins create a strong staircase rhythm, choose a quieter door treatment: black foliage, narrow ribbon, sparse branches or a restrained crescent shape.
Reverse the hierarchy on a tiny stoop.
Where the door is the only substantial decorating surface, an expressive wreath may legitimately become the focal point while the floor stays mostly empty.
Ask one question from the walkway:
Where does the eye land first?
If the answer is already “the skeleton,” “the ceiling,” or “the glowing steps,” keep the wreath secondary.
If two elements demand equal attention, simplify one.
For a deeper door-first treatment, continue to 39 Spooky & Chic Halloween Door Decor Ideas. That guide owns the detailed front-door Halloween territory, allowing this article to keep the focus on the complete porch. Stylish Galore
16. Turn a Front Window Into the Backdrop When the Porch Has Almost No Depth
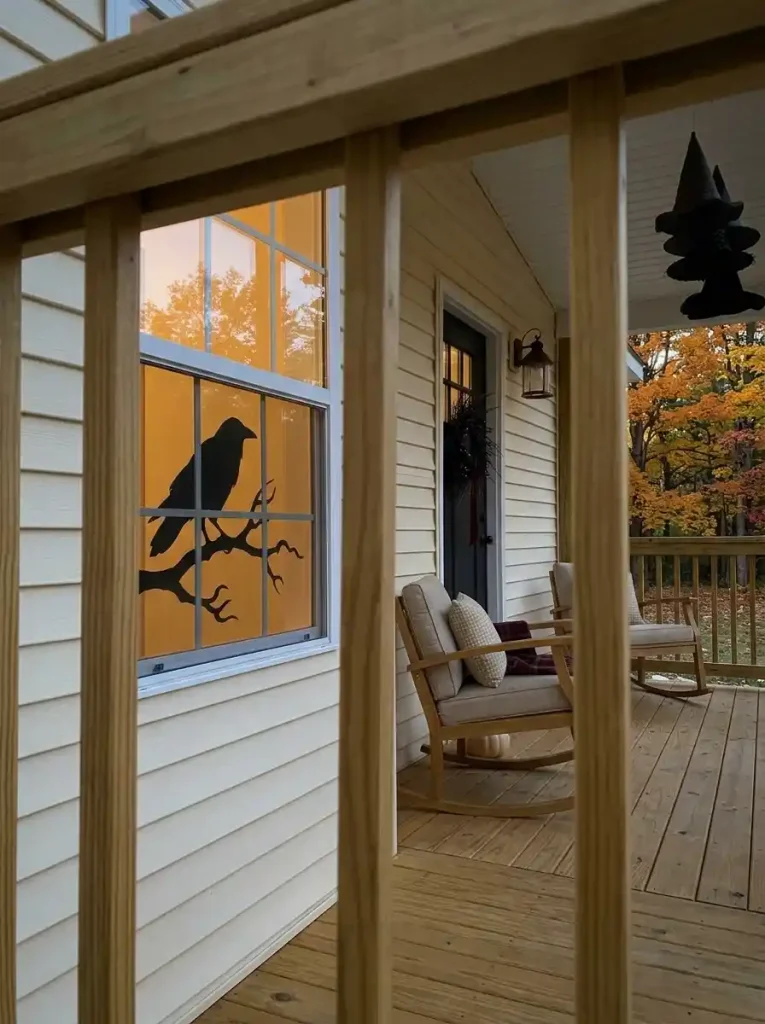
A nearby window can make a Halloween porch look deeper even when the landing itself has almost no spare floor space.
Place a large silhouette, softly lit ghost, moon shape, raven branch or graphic bat composition behind the glass. The decoration appears visually connected to the porch while physically sitting on another plane.
This works particularly well on mobile homes where a front window sits immediately beside a small stoop.
Favor one large, high-contrast image over a collection of tiny objects on the sill. Small decorations that look charming indoors may disappear behind reflections when viewed from the sidewalk.
Check the treatment twice:
Daylight: can the main silhouette be recognized through reflected sky?
Night: does interior lighting reveal the shape or dissolve it into the room behind?
For a deeper treatment of compact door, trim, landing and front-window relationships, continue to 15 Halloween Entryway Ideas for Small Mobile Homes. Stylish Galore
17. Trace the Porch Architecture With Warm String Lights Before Adding More Props
A porch that feels unfinished after sunset may need definition, not another decoration.
Trace one existing architectural line with warm lights: the ceiling perimeter, upper beam, railing or another suitable edge. Once that geometry becomes visible at night, the covered porch reads as a complete volume and the Halloween objects inside gain a stronger background.
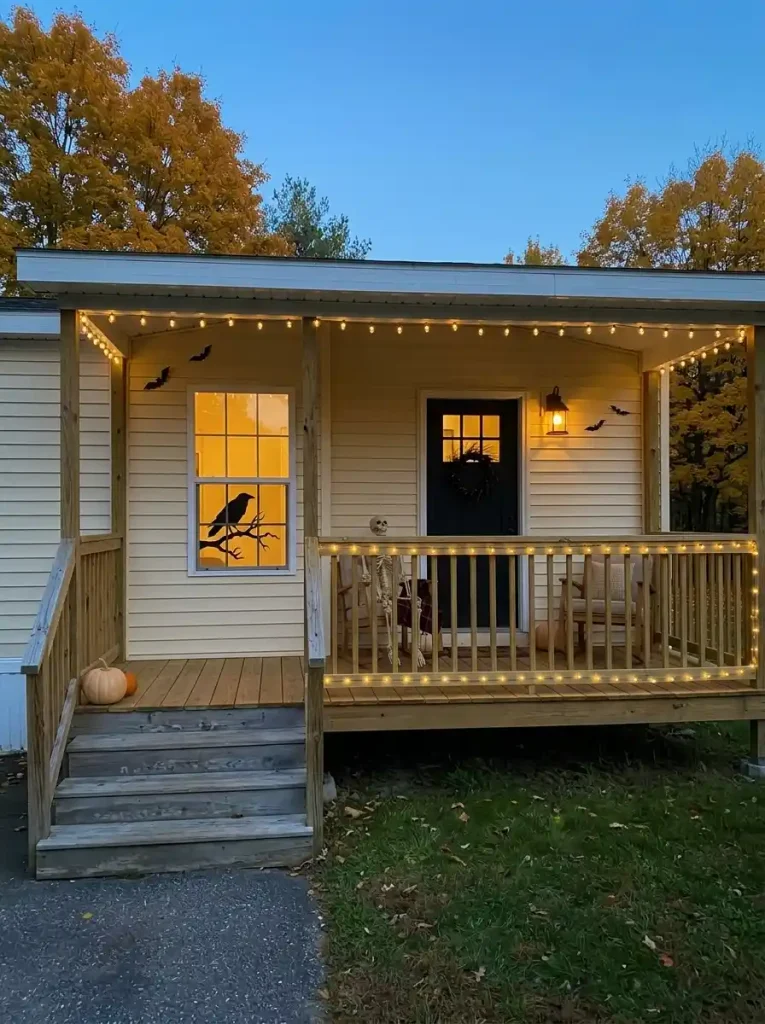
Switch the lights on before purchasing another prop.
If the skeleton, pumpkins or bats suddenly look more connected once the roofline or railing becomes visible, lighting solved the missing layer.
Electrical safety should stay separate from styling. CPSC advises checking decorative light strings for damaged sockets, bare or frayed wires and loose connections, and using lights suitable for their intended setting. U.S. Consumer Product Safety Commission
Follow product instructions and use lighting intended for the location where it is installed.
Visually, keep the route simple. One continuous architectural line is usually more sophisticated than several unrelated zigzags crossing a small ceiling.
18. Choose One Night Mood: Amber Glow, Purple Twilight or Classic Orange
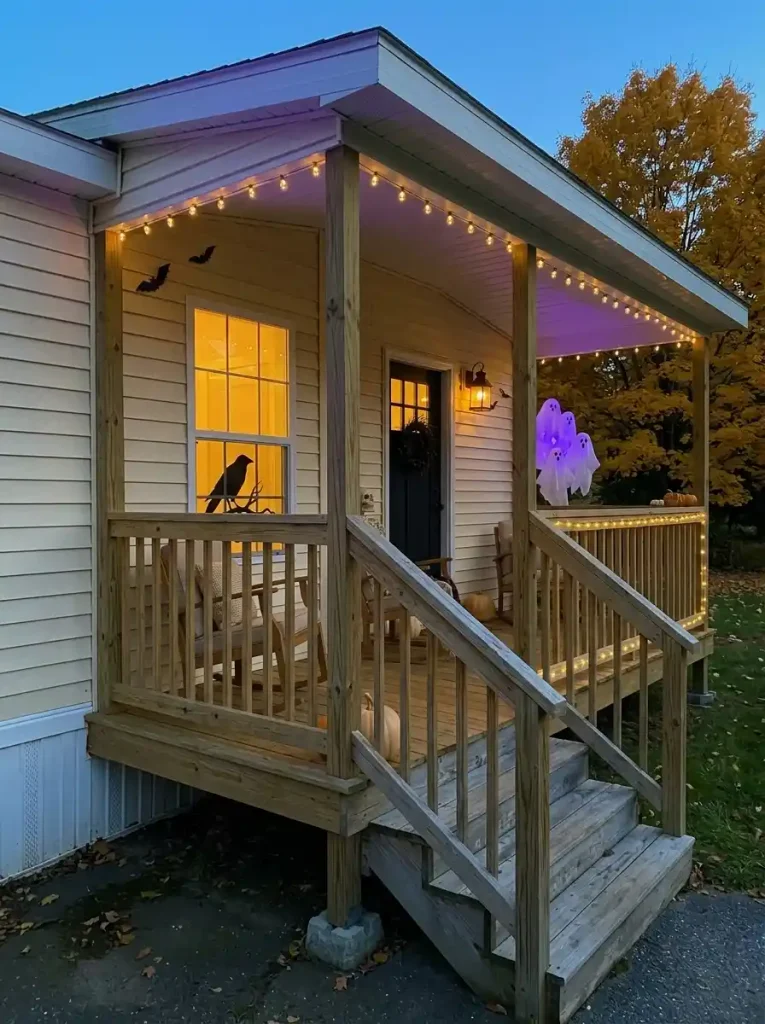
The same porch can become three completely different Halloween scenes after dark.
Amber emphasizes pumpkins, dried foliage, wood, brick and warm siding. Purple gives ghosts, moons, bare branches and black silhouettes a theatrical twilight atmosphere. Orange offers the clearest traditional Halloween signal.
The visual problem begins when all three compete equally.
Night-lighting lab
Pick the atmosphere before you pick more lights.
Warm, dimensional and easy to blend with fall.
Amber light enriches pumpkins, wood, brick and dried foliage. Choose it when Halloween should feel atmospheric without becoming a themed light show.
Cool, eerie and visually distinctive.
Purple works well with ghosts, moon shapes and bare branches. Preserve some neutral or warm doorway light so the porch retains dimensional form.
Immediate Halloween recognition.
Orange works when you want the season to read clearly from the street. Let pumpkins or one architectural line glow while the remainder stays quieter.
Check the chosen lighting mood from the sidewalk. Colored light often appears stronger from a distance than it does while standing beneath it.
19. Wrap Bare Branches With Tiny Warm Lights for Height Without Visual Bulk
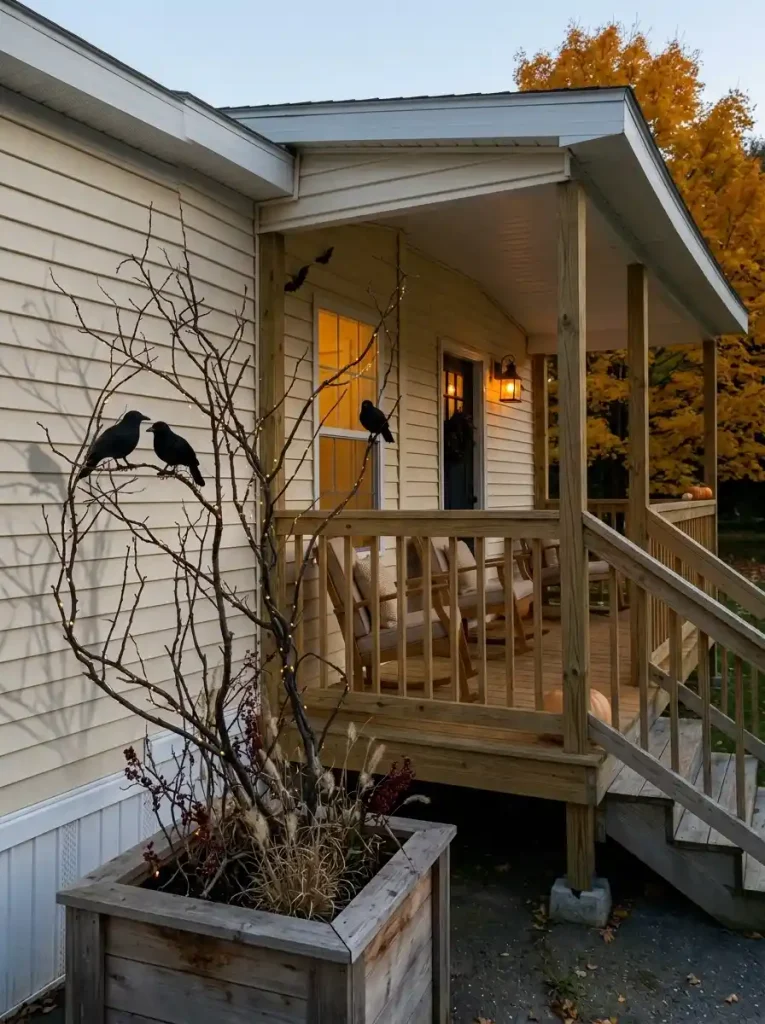
An oversized solid prop is not the only way to create height.
Bare branches provide a lighter silhouette.
Place a few irregular branches in a substantial planter and follow some of their natural lines with tiny warm lights. Allow the surrounding spaces to remain open.
The composition then works through three relationships:
branch structure → pinpoints of light → shadow against the siding
That gives a compact arrangement far more visual depth than a solid decoration occupying the same footprint.
Choose a relatively calm background so the branch silhouette can be understood. A wall already covered with bats, signs, wreaths and garland will weaken the reason for using such a delicate form.
A few crows or bats can sit at natural branch forks, but the lighting and branch structure should remain the primary idea.
20. Keep Lantern Glow Low and Outside the Trick-or-Treat Walking Line
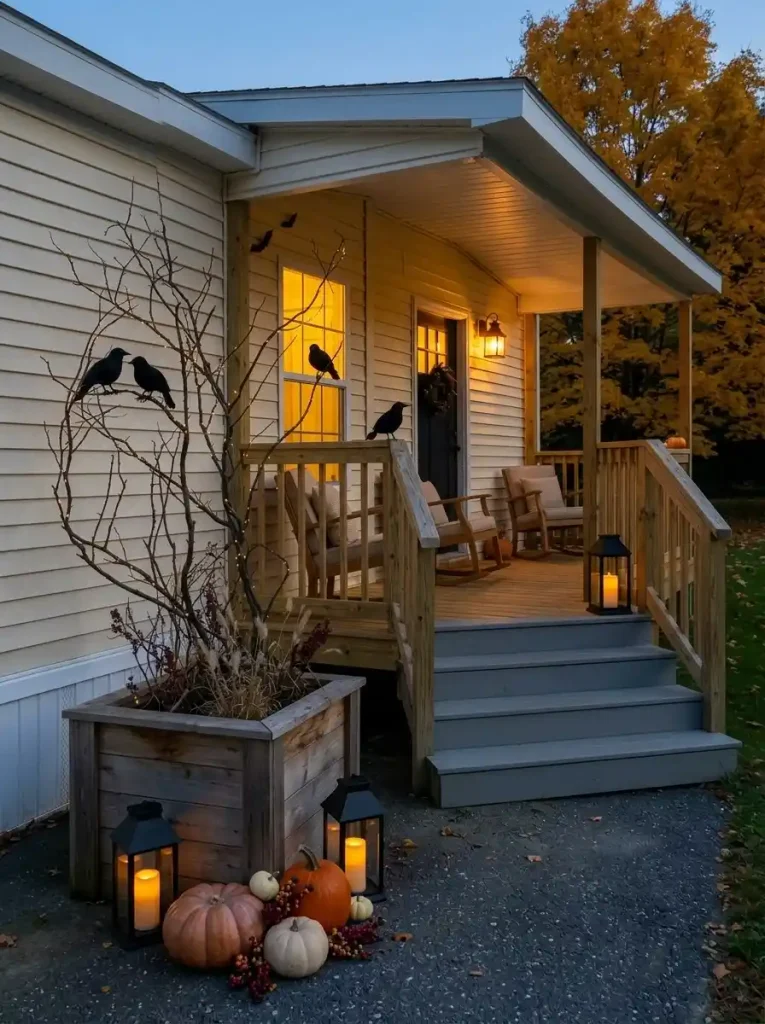
Lanterns work best as edge markers, not as obstacles within the route.
Place them beside an outer porch post, beneath a side table, next to a non-walking pumpkin cluster, or at the far edge of a landing.
Then perform a visitor test.
Walk from the bottom step to the door while looking ahead rather than down. If the arrangement makes you monitor every footstep, relocate something.
For Halloween displays around children and costumes, flameless lighting is the safer choice. CPSC recommends flameless battery-operated lights or glow sticks in accessible jack-o’-lanterns, while NFPA similarly recommends battery-operated candles or glow sticks and keeping exits unobstructed. U.S. Consumer Product Safety Commission
A small porch can still have layered nighttime lighting. Put those layers at the perimeter of movement and let the clear path remain visually obvious.
21. Turn an Existing Fall Porch Into Halloween With Three Strategic Swaps
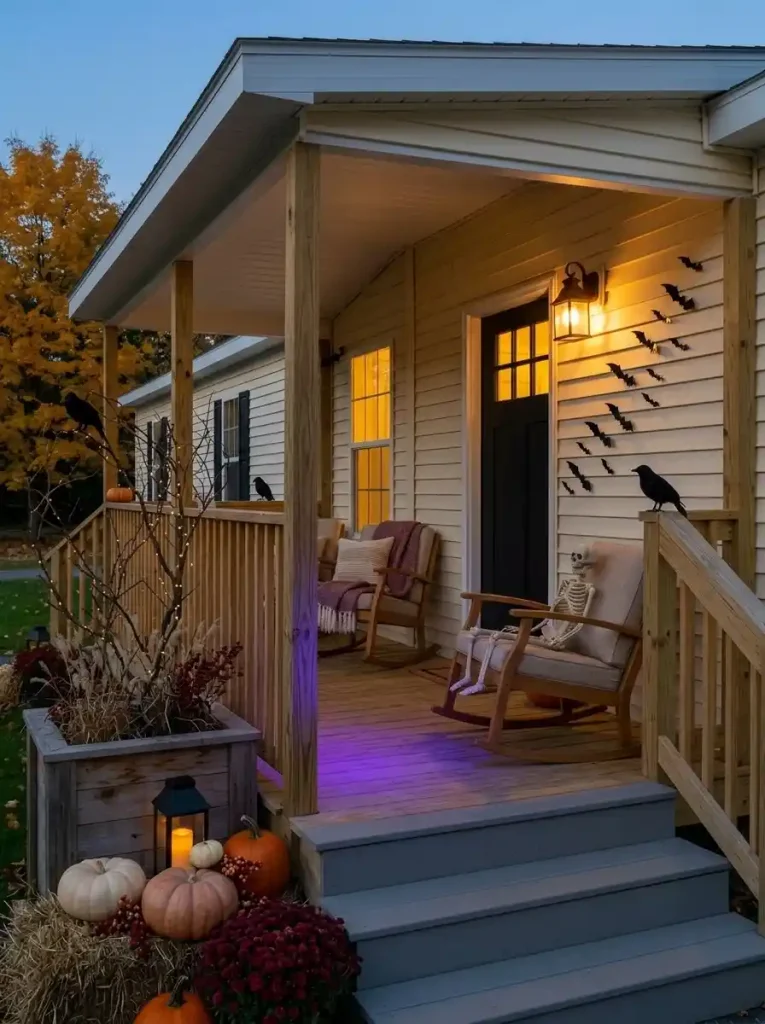
You may already have most of the porch finished before Halloween decorating begins.
Pumpkins, mums, grasses, warm textiles, baskets and amber lighting can remain. The efficient move is to change a few signals, not rebuild the entire porch.
Keep the autumn base. Change three signals.
3This approach preserves bulky seasonal pieces you already own while making the porch read differently for Halloween.
For the fall-specific foundation, continue to 19 Fall Mobile Home Porch Decorating Ideas. That specialist guide covers the autumn porch layer in depth. Stylish Galore
22. Pull the Halloween Palette From the Siding, Door and Porch Materials
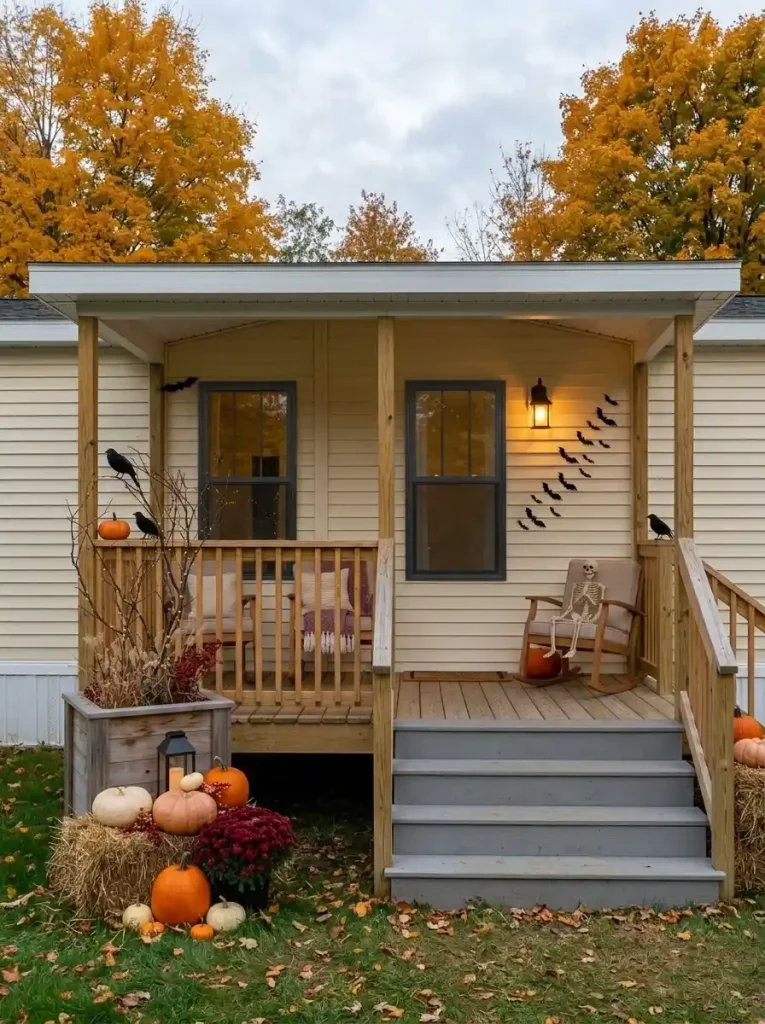
Orange and black are not mandatory.
The permanent exterior already contributes much of the palette.
Warm beige or cream siding: charcoal, muted pumpkin, oxblood, warm white and weathered wood can feel natural.
Cool gray siding: black, bone, burgundy, dried olive and a restrained purple accent often sit more comfortably beside the existing color.
White exterior with a dark door: a tighter black-and-ivory scheme can let orange appear only where the eye should stop.
Give seasonal colors different jobs:
- Background: siding, decking, brick, trim and door.
- Seasonal mass: pumpkins, foliage and textiles.
- Halloween signal: skeletons, bats, ghosts and black accents.
- Night accent: one deliberate lighting family.
Photograph the porch in daylight and look at the biggest color blocks. When the architecture already contains strong contrast, echo it in the Halloween display.
For a wider façade where the composition extends far beyond the porch, continue to 21 Classy Halloween Exterior Ideas for Double Wide Mobile Homes. The broader frontage changes how focal hierarchy and color repetition need to work. Stylish Galore
23. Use a Narrow Side-Wall Composition When the Porch Is Really a Stoop
Some mobile-home porches are essentially a small landing plus steps.
Trying to decorate both sides equally can consume the entire entrance.
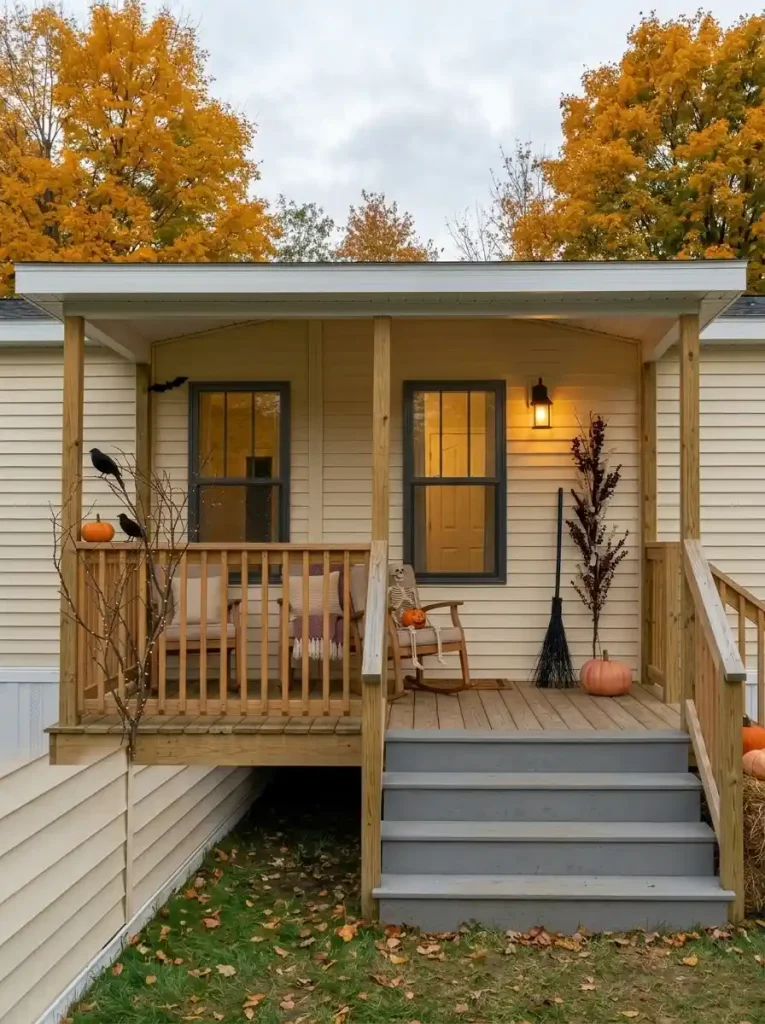
Choose one side.
Start with a tall element such as a slim sign, broom, branch arrangement or narrow bat flight. Add one low pumpkin or lantern beneath it. Keep the opposite side comparatively open.
That asymmetry gives the eye one concentrated Halloween zone while preserving breathing room around the doorway.
It works particularly well when the door itself already has glass, strong paint, visible hardware or a wreath.
Symmetrical architecture does not require symmetrical decoration.
On a tiny landing, the undecorated side can be exactly what makes the decorated side look deliberate.
24. Choose Halloween Decor That Can Handle the Porch’s Wind, Rain and Storage Reality
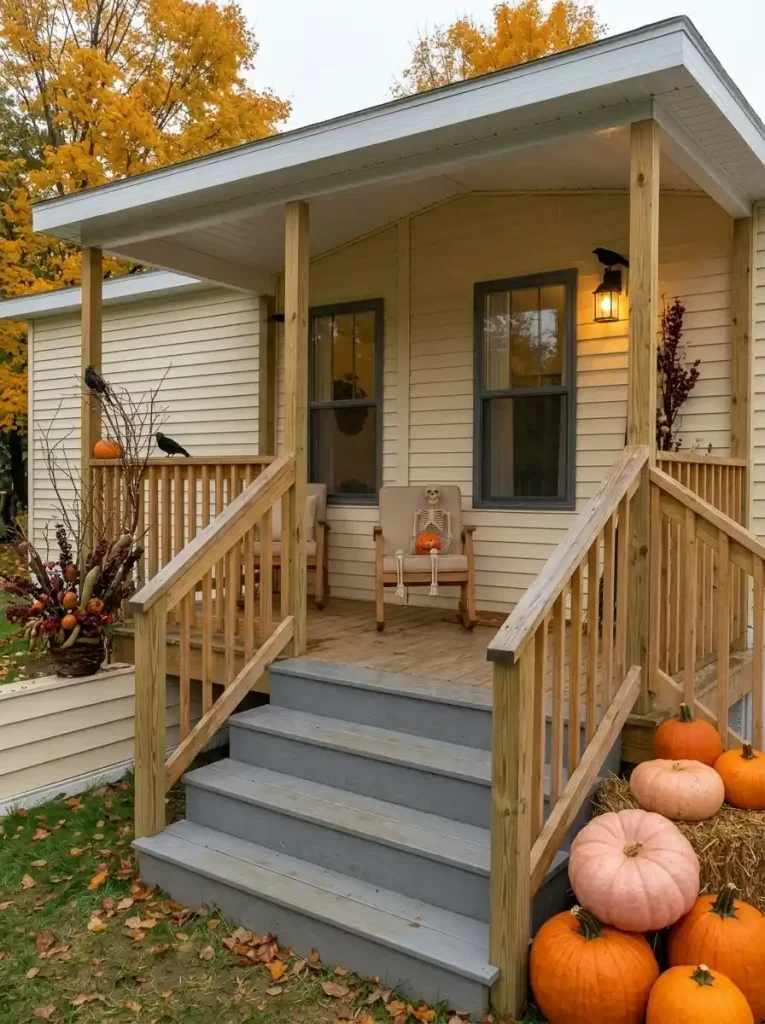
A decoration may look perfect in a product photograph yet make little sense on an exposed mobile-home porch.
Before buying a large seasonal item, evaluate four things:
Display impact
Can it actually be seen from the approach?
Exposure
Is the product intended for the conditions where it will be placed?
Installation
Can it be installed and used according to its manufacturer’s instructions without creating problems around the entrance?
Storage
Where will the object live for the other eleven months of the year?
Lightweight hanging pieces may suit a sheltered roofed porch and be frustrating in an exposed location. Absorbent fabrics make more sense under cover. Large rigid decorations can create substantial storage burden after October.
Lighting needs its own check. Inspect damaged cords and connections, use decorative lighting according to its intended use, and follow manufacturer instructions for outdoor applications. CPSC advises checking seasonal light sets for damaged sockets, bare or frayed wires and loose connections. U.S. Consumer Product Safety Commission
A large purchase that succeeds only on visual impact may not be the smartest porch decoration.
25. Run the Approach, Door-Open and After-Dark Test Before Adding Anything Else
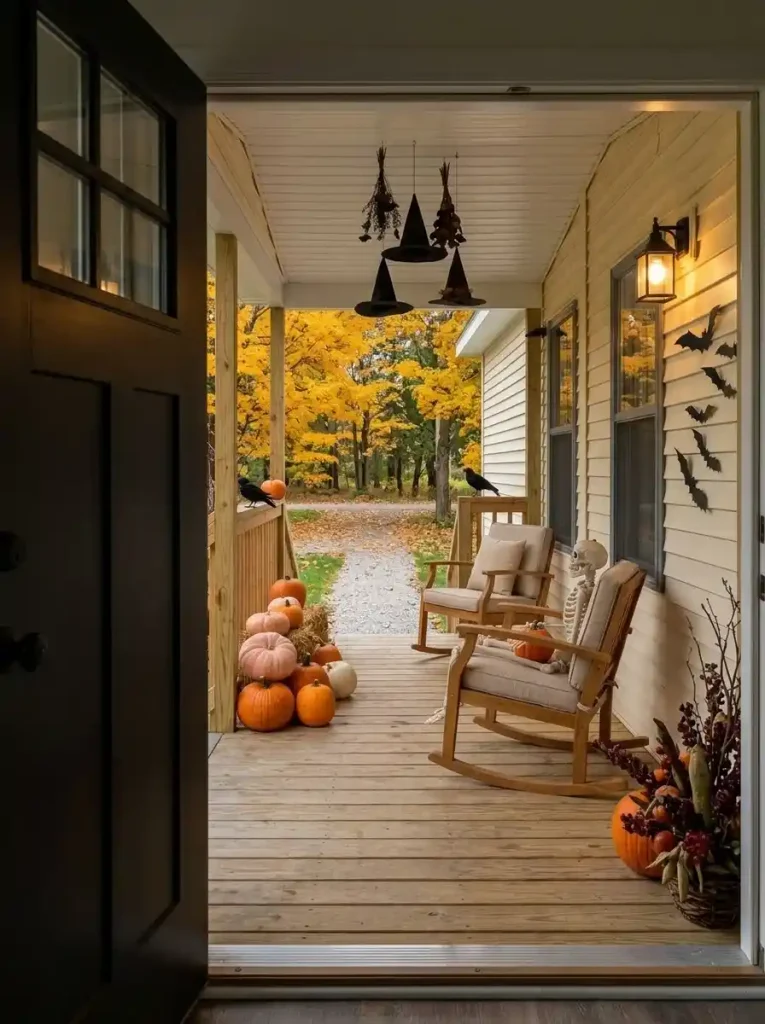
A Halloween porch is never experienced from one viewpoint.
You see it from the yard. A visitor experiences it while climbing the steps. Somebody standing at the threshold sees it from a few feet away. After sunset, the lighting hierarchy can completely rearrange what appears important.
Use three final views before declaring the porch finished.
Three viewpoints decide whether the porch is finished.
Approach View
Walk to the sidewalk or driveway and look at the complete entrance.
Door-Open View
Open the door fully and follow the same route a visitor would use.
After-Dark View
Turn on the Halloween lighting and step back to the normal approach point.
When one view feels confused, relocate or remove the first object competing with the main Halloween story before adding anything new.
CPSC specifically recommends removing obstacles from porches and steps when expecting trick-or-treaters, which makes the door-open check functional as well as visual. U.S. Consumer Product Safety Commission
When the approach has a clear focal point, the door area remains usable, and the nighttime view gains atmosphere without visual chaos, the porch is finished.
A Small Porch Can Still Create a Big Halloween Moment
The strongest Halloween mobile home porch ideas come from using the right surface, not filling every available one. Let the ceiling carry floating hats when the floor is tight. Move a tall display toward an outer corner. Use railings as visual planes, steps as controlled rhythm, and lighting to reveal the architecture after sunset.
Choose one idea that should lead, then make the surrounding decorations support it.
Before adding the final prop, check the porch from the approach, with the door open, and after dark. If the Halloween story already reads clearly from all three views, the most effective finishing move may be subtraction.
Save this guide to Pinterest so you can return to your favorite Halloween mobile-home porch ideas when you’re ready to decorate.