A Christmas doorway garland can make a small mobile home feel festive before anyone reaches the tree. The tricky part is the doorway itself: a narrow passage, a shallow surround, delicate paint, or a storm door can leave little room for a lush arrangement. A beautiful arch in a photograph is no help if it catches the latch or leaves adhesive behind in January.
This DIY Christmas doorway garland for a mobile home is designed to come apart, fit the opening you actually have, and go into storage for next year. We will measure the fixed surround, build lightweight greenery in manageable sections, choose a compatible removable hanging method, and check the finished door in use. The project works best with artificial greenery and reusable ties; an unlit version can be every bit as welcoming as a glowing one.
Choose the shape first, then gather only the materials that fit it. The measurement worksheet, mounting decision guide, and final doorway test below will help you spot problems before a decoration is installed.
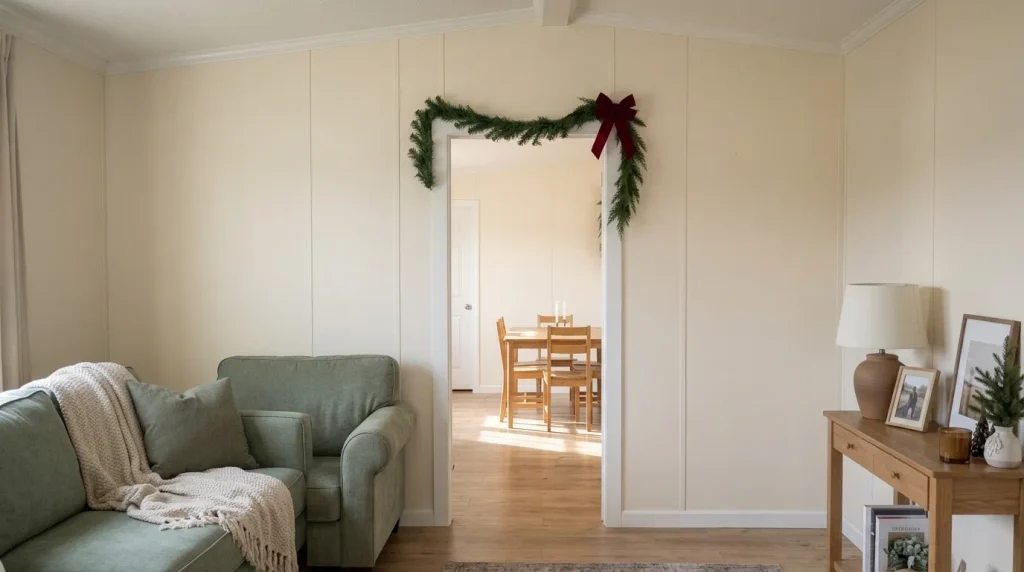
1. Check Whether Your Doorway Can Support Removable Garland
Stand where someone would enter with a grocery bag. Look at the complete doorway, including the fixed casing, the moving door, any storm door, the handle, light switches, and the landing or hallway behind you. Open each door through its normal travel. You are looking for a fixed, permitted surface that could support a light decoration without competing with any moving part.
A mobile home’s entry may have narrow vinyl or metal trim, a shallow recess, or a wall surface that was never intended to carry seasonal decorations. Decorative molding may also be loose, textured, recently painted, or unsuitable for adhesive products. A renter must check their lease or community rules as well as the hardware instructions. Do not assume a product labeled “removable” is appropriate for every finish.
- Good candidate: a stable, accessible fixed surround with a manufacturer-approved attachment surface and a clear door swing.
- Needs a different plan: a tight storm-door gap, an inaccessible mounting location, uncertain paint adhesion, or an exterior position exposed beyond the hanger’s rated conditions.
- Stop: any arrangement that could hinder opening, latching, exiting, or normal use of the entrance.
The U.S. Fire Administration advises keeping doors and windows unblocked. Treat that as a design requirement, including in a compact manufactured home where a single doorway may serve several rooms.
2. Choose a Garland Shape That Fits Your Opening
The biggest visual decision is whether the garland should crown the doorway, travel down one side, or frame the whole opening. A full three-sided border can look spectacular, but it also demands more attachment points, greenery, and unobstructed space. A short upper swag is often the better choice when the frame sits close to a ceiling or the door is used constantly.
Interactive Doorway Shape Studio
Three outlines. Three different demands.
Select a silhouette. The mounting path and best-fit advice change with it.
Use the quiet upper edge
Best fit: a narrow passage with suitable fixed trim above the opening.
Measure: top path and any planned central dip. Leave the usable opening clear.
Next action: mock up a light, shallow swag before committing to hooks.
Move the weight to one side
Best fit: an entrance with one generous fixed side and a tight opposite edge.
Measure: top section plus only the usable side. Put the fullest greenery in the upper corner.
Next action: test hand, latch, and furniture clearance beside that side.
Frame the entire passage
Best fit: a wider interior opening with known, suitable attachment points on all three fixed sides.
Measure: top and both available sides, plus intended drape and joining allowance.
Next action: verify every attachment and the complete door path; otherwise step back to a simpler shape.
For more options that decorate the outside of a manufactured-home entrance without repeating the build instructions here, see these Christmas front-door ideas for manufactured homes. This tutorial will stay focused on the detachable garland itself.
3. Measure the Doorway Before Buying Greenery
Use a tape measure on the actual fixed route where the garland would sit—not the width of the movable door leaf. Record the upper span, the safe decorated length of each side, and the locations you will deliberately leave empty.
Also note the distance from the proposed foliage to the door when it swings, the storm-door clearance if present, and the space needed to reach a latch or light switch.
For a straight upper piece, the starting material length is roughly the measured upper path, adjusted for the amount of intentional drape. An L-shape adds only the side you will decorate. A full frame adds both sides.
If separate lengths overlap at a corner, include overlap in the material estimate. For a pronounced swag, mock it up with string first and measure that actual curve. These are planning methods, not universal garland measurements.
Doorway Measurement Worksheet
Measure the decorative path, not the door leaf.
Material planning: upper-only = A + actual drape; L-shape = A + one selected side + drape/joining; full frame = A + B + C + drape/joining. These are manual worksheet entries, not a hidden calculator. Leave all unsafe or unavailable runs out of the total.
Worked example—not a standard doorway size: Suppose the intended top route is 38 inches and a loose string mock-up reveals that the gentle curve and join will use 8 additional inches of greenery.
You need approximately 46 inches of usable garland for that upper piece. Recheck the exact string route before cutting; use any leftover greenery for a smaller separate decoration.
Take a photograph of the opening with the measuring tape or a temporary paper outline visible. That simple record makes it easier to reconstruct the arrangement next December, especially if your mobile home has an unusual corner detail or a shallow door recess.
4. Gather Supplies for a Lightweight, Reusable Garland
Build around a flexible artificial pine or cedar garland that can be reshaped without shedding heavily. Artificial greenery is easier to section, label, and reuse than fresh branches. Outdoors, any material must also suit the actual weather exposure.
For a small opening, choose a slimmer profile before choosing more ornaments.
The Useful Kit
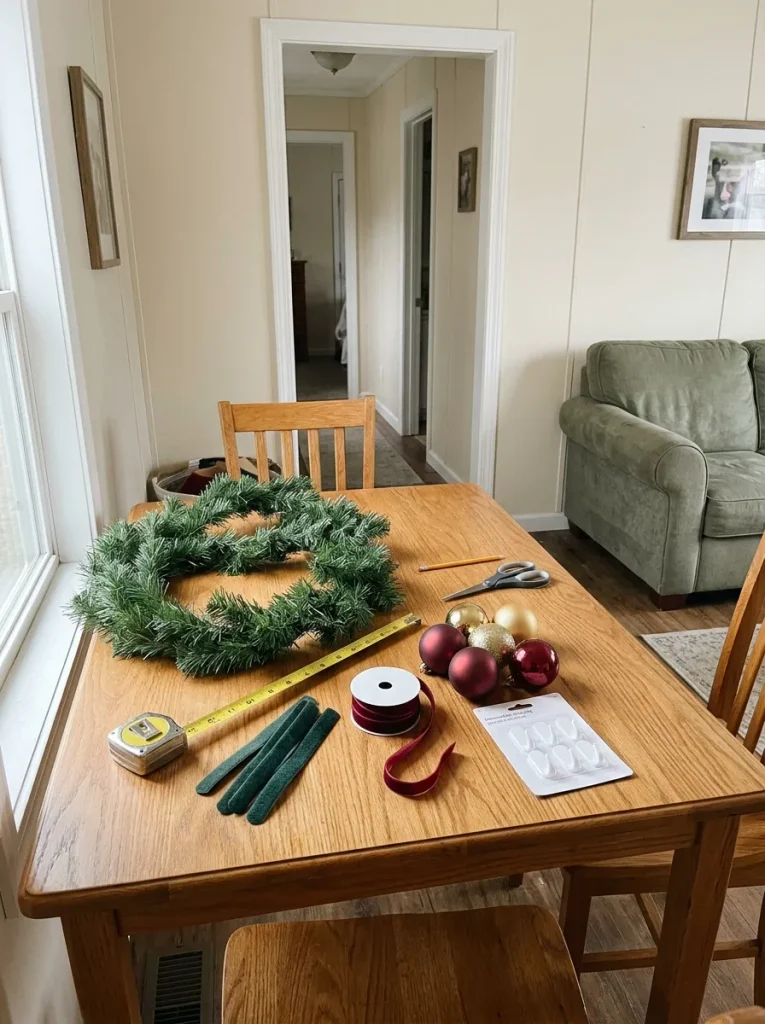
- Core materials: flexible artificial garland, tape measure, string for the mock-up, soft reusable hook-and-loop ties or suitable reusable fastening ties, scissors, and a stable step stool appropriate for the task.
- Mounting hardware: hooks or hangers compatible with the confirmed surface, environment, finished decoration weight, and manufacturer instructions.
- Styling accessories: one ribbon focal point, a few lightweight shatter-resistant ornaments, and optional artificial berries or stars securely fixed to the greenery.
- Optional lighting: properly rated LED decorative lighting with its battery pack or approved power arrangement, only if it can be routed without damage or obstruction.
Place everything on a table before assembling. If you already have neutral greenery, ribbon, or ornaments from earlier seasonal displays, adapt them first.
The Thanksgiving-to-Christmas decor transition guide explores which reusable seasonal pieces deserve another year of use.
What to skip: Heavy glass ornaments, dense wired swags with unknown weight, uncovered sharp wire ends, staples, nails through electrical cords, and any temporary attachment whose surface compatibility you cannot establish.
5. Choose a Removable Mount That Suits Your Door Trim
Buying a hook is not proof that the hook fits the doorway.
First identify the fixed mounting surface: painted drywall, sealed wood, metal, smooth finished trim, vinyl, or a textured material. Then compare the actual product’s accepted surfaces, environmental conditions, installation steps, and weight rating with the complete decorated garland—not the bare greenery.
An unsupported finish or an unknown load is a reason to change the design.
Removable Mounting Decision Studio
Which surface are you actually working with?
Consider a rated removable hook
Evidence needed: the product explicitly accepts this finish and the completed decoration’s load. Use its exact preparation, pressing, waiting, and removal instructions.
Action: prepare the approved fixed surface and test the finished door after mounting.
Do not infer: all painted, vinyl, or wood trim is suitable merely because one smooth wall is.
Outdoor rating alone is not enough
Evidence needed: compatible substrate, stated operating conditions, load, and approved use. Moisture, cold and UV exposure can rule out an indoor product.
Action: check the manufacturer’s specific outdoor instructions. If the conditions exceed them, choose an unmounted display away from the exit.
Do not infer: a covered porch is always equivalent to a dry indoor wall.
Do not attach here yet
Why: removable does not guarantee paint safety; textured, fragile, poorly adhered, or unapproved surfaces can fail or be damaged.
Action: shorten the project or relocate it to a confirmed suitable display area. If nothing is compatible, skip doorway mounting.
Do not try: adding more unsupported hooks or strong adhesive as a workaround.
The guide is conditional and cannot certify a particular doorway. The selected hardware’s current instructions take precedence.
Check the entire loaded arrangement. Weigh the garland with its ribbon, ornaments, and lighting if you can do so safely.
Never assume two hooks automatically double usable capacity or that a wall hook is approved for overhead or sideways loading. Use only the number, spacing, and orientation of supports approved for that specific product.
If the available guidance does not cover the arrangement, choose a lighter or different display.
For one concrete example, Command’s hook instructions identify different indoor and outdoor products and describe preparation, waiting, and stretch-release removal. They also warn against certain surfaces and uses.
Those directions apply to the specific product family—not to every removable hook sold.
A hook that fits the surface may still be wrong for the load or position. Keep attachment points on the fixed architectural surround where permitted; never rely on a door seal, a moving closer arm, loose trim, or a light cord as a mounting support.
If a hanger slips over a door, check that it is expressly compatible and does not change closing or weather sealing. A failed door-clearance test rules it out.
6. Assemble the Garland in Removable Sections
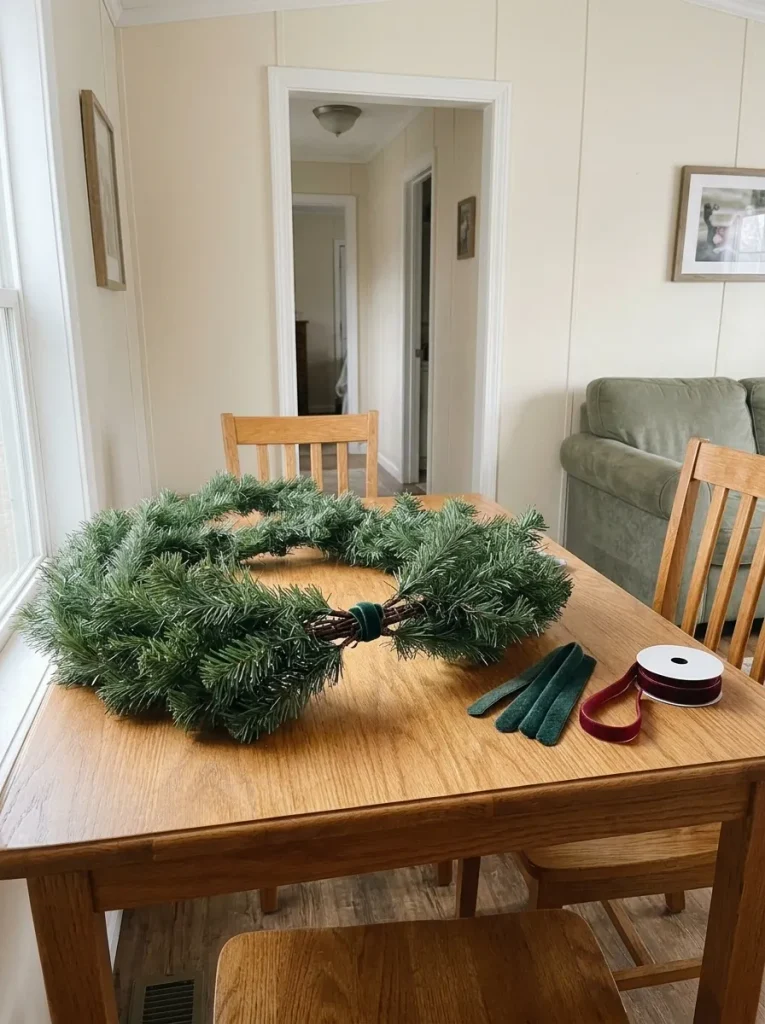
Work on a table or clean floor with enough room to lay out the whole planned shape.
The easiest version uses one flexible length across the top and a separate side length only if the chosen outline requires it.
Step-by-Step Garland Assembly
Step 1: Shape the bare greenery.
Gently open the artificial tips and point the fullest branches toward the visible front. Keep the back flatter where it will meet the fixed surround.
Step 2: Mark connection points.
Lay a strip of removable paper tape beside the greenery to mark where sections will join. Do not tape a delicate door finish as your drafting surface.
Step 3: Overlap separate sections.
Join them with reusable ties around the garland’s structural core, keeping any sharp wire ends covered. A good joint moves as one piece without forcing the whole garland rigid.
Step 4: Create attachment loops.
Add secure loops to the garland structure at approved support locations. They should carry the foliage, not tug on individual branch tips or the lighting wire.
Step 5: Check the weight and handling.
Temporarily attach the planned decorative elements, weigh the complete piece where practical, and compare the load and hanging direction with the selected hardware’s instructions.
Divide the garland into separately supported pieces if needed; never assume dividing the greenery makes an unsuitable surface safe.
Test a gentle lift from the intended hanging points while the piece is still on the work surface.
If a joint slides or a branch-heavy side rotates downward, correct the balance now. Once the greenery has an orderly skeleton, the decorative details can be adjusted without dismantling everything.
7. Dry-Fit and Hang the Garland Around the Fixed Opening
Make a full-size paper or string outline of the intended garland route and compare it with the actual doorway.
This rehearsal reveals surprising problems: a corner that looks generous straight on may sit directly against a storm-door closer, while a beautiful side cascade may brush a handle every time someone enters.
After the fit is confirmed, install the selected supports exactly as the hardware manufacturer requires.
Observe its surface cleaning, application temperature, pressing, and waiting instructions. Some adhesive systems require a waiting period before anything is hung; do not treat a label such as “removable” as permission to skip that step.
Hang the upper section first where its approved supports are suitable, adjust its position, and add side pieces only when each attachment is rated for the load and hanging direction.
Never substitute improvised nails or screws in an unknown manufactured-home assembly.
If the length is awkward to manage, ask another adult to help from a stable position; do not stretch from a ladder while pulling on the trim.
Inspect the garland from both sides of the passage. Its foliage should follow the fixed frame, with no branch tips between the door and jamb.
Open, close, and latch every relevant door before proceeding to ornaments or lights.
Small-home example: An interior opening beside a narrow hall may only accommodate a shallow upper swag.
That is a finished design, not a compromised version of a giant arch. A doorway with no compatible attachment surface should remain undecorated overhead.
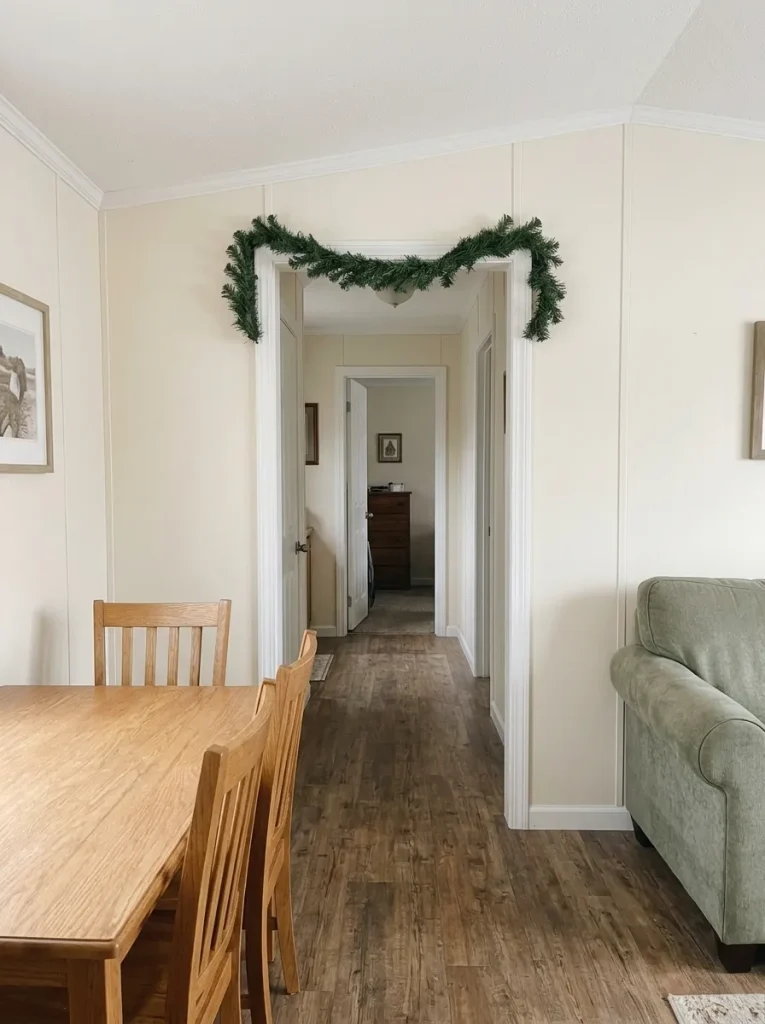
8. Add Christmas Bows, Stars, and Ornaments Without Bulk
Now that the garland is secure and the passage works, make it look intentional.
The strongest inspiration in your photographs comes from repeated colors—deep green with warm-white lights, a few red accents, and occasionally champagne gold.
A small mobile-home doorway usually needs only one of those decorative accents to lead.
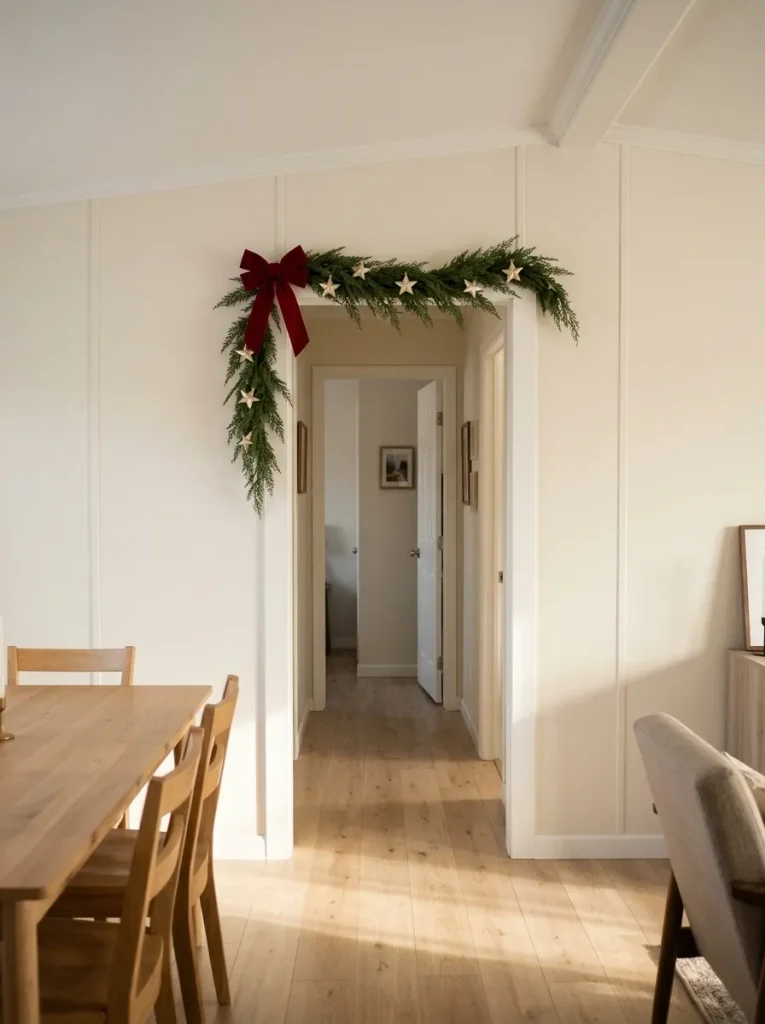
For a traditional entrance: Attach one modest red velvet bow near a high corner and let the rest of the greenery taper away. Keep ribbon tails short enough that they cannot trail into the door opening.
For a softer interior: Use an irregular scattering of lightweight gold stars or small ornaments across the upper edge. Secure each piece directly to the garland core; long hanging strings can swing into someone’s head or hand path.
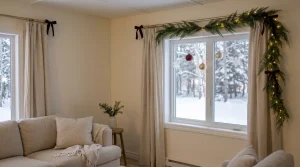
For a handmade look: Add a short paper chain, white pom-pom strand, or dried orange accent only in a suitable dry interior. Check that the additions do not pull the foliage away from its supports, and keep combustible craft materials away from heat and electrical equipment.
The ceiling-spanning strings and low-hanging baubles in dramatic Christmas photographs are better treated as mood references, not instructions for a compact entry.
Keep the decorative story on the fixed architectural line and leave the passage itself visually calm.
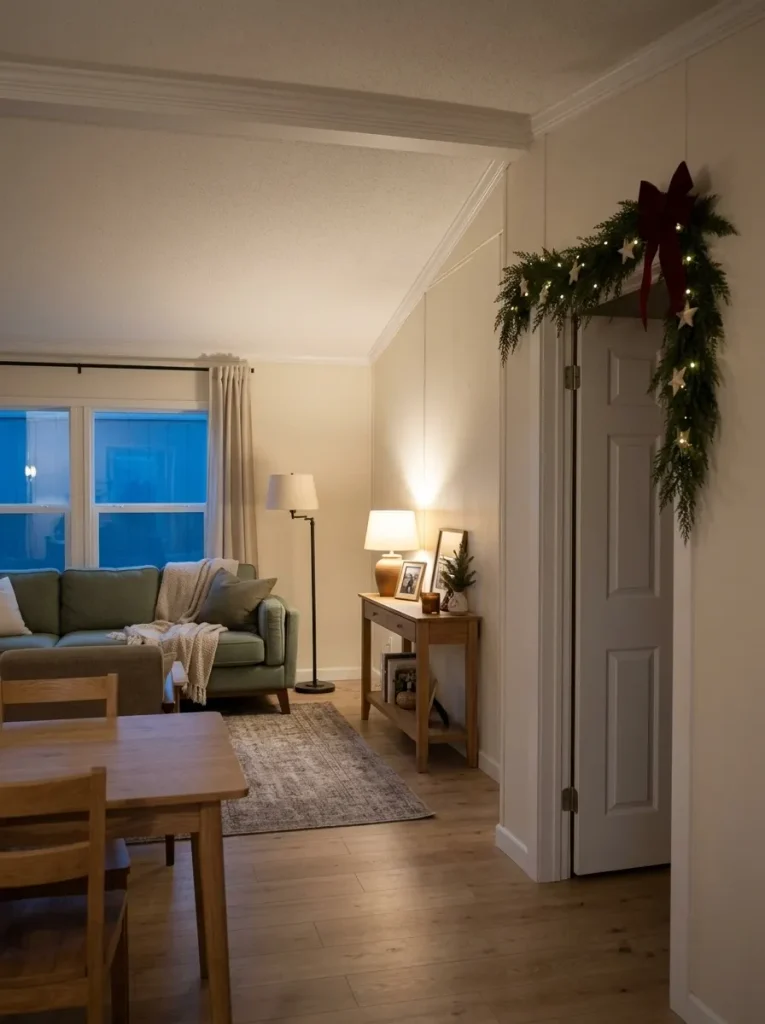
9. Add Warm Christmas Lights Only Where Routing Is Safe
An unlit garland is the simplest option for an opening without nearby, suitable power access.
If lighting adds something genuinely useful, choose appropriate LED decorative lights and plan the power supply before wrapping the greenery.
Check the product’s indoor/outdoor rating and its directions for mounting, connection, and operation.
Arrange the lights on the greenery with the power disconnected, using suitable non-damaging ties where permitted.
Never staple through a wire, hang the greenery from the light string itself, or route a cord between a door and its frame.
A battery pack needs a secure, accessible location that does not obstruct a switch, hinge, latch, or the door’s movement. It must also match the lighting product’s instructions.
Use suitable outdoor-rated products and electrical protection where applicable.
If safe power routing is uncertain, omit lights and let the greenery and ribbon provide the Christmas effect.
For an extensive lighting plan along the whole exterior, consult the separate single-wide outdoor Christmas lights guide; a doorway tutorial cannot substitute for planning an entire electrical display.
10. Perform the Final Doorway Clearance and Stability Test
The installation is complete only after a normal-use test.
Start at the most frequently used approach and walk through with a bag or laundry basket.
Open and close the entry and any storm door fully; operate the lock and latch; reach nearby switches; and check the overhead foliage from the height of everyone who uses the space.
Then gently inspect every support for unexpected movement.
This is not a cosmetic final glance. A garland that interferes with a required exit, makes a door harder to operate, or depends on insecure mounting must be altered or removed.
The U.S. Fire Administration’s home escape guidance explicitly says to keep doors and windows unblocked.
Final Doorway Acceptance Checklist
Five checks before calling it finished
Tick a box only after physically testing it in your home. The sign-off changes only when all five conditions pass.
Not signed off: any unchecked item needs an adjustment or removal before the doorway is considered ready.
All five checks marked complete. Your installation has passed this self-inspection. Keep monitoring the attachments during the season and follow all product instructions.
This checklist is an aid to physical inspection, not a certification or replacement for a product’s installation requirements.
For a small outdoor landing that needs seasonal atmosphere without occupying the walking area, the mobile-home Christmas porch guide offers wider decorating choices.
If your garland fails even one exit, operation, or mounting check, shorten it, relocate it to a suitable location, or take it down.
11. Fix Common Garland Installation Problems
A little sag can be a styling choice; a connection slipping off its support is not.
Diagnose the problem before adding anything.
The Middle Drops Farther Than Planned
Check whether the swag was measured correctly and whether the support arrangement is approved for the actual load.
Reduce foliage weight or remake a shorter top piece. Do not add extra unsupported adhesive patches.
One Corner Twists Outward
Inspect the joint where the top and side lengths overlap.
Move the decorative bow away from the rotating point, then rebalance the two lengths on the work surface.
The Door Brushes a Branch
Remove the garland first.
Flatten or shorten the affected portion and re-test full door travel. Any remaining contact means the shape is unsuitable.
The Hook or Finish Looks Unreliable
Take down the decoration.
Check the manufacturer’s compatibility and removal instructions before touching the mounting surface. Do not strengthen an unapproved mount with a random glue or nail.
The Display Looks Crowded
Remove dangling ornaments and long ribbon tails before changing the greenery.
The fixed architectural outline should still be readable.
When the underlying problem is inadequate mounting or door clearance, styling changes cannot solve it.
A simpler upper swag—or no doorway decoration—is the correct outcome.
12. Remove, Label, and Store the Garland for Next Christmas
At the end of the season, photograph the finished shape from the same angle used for measuring.
Unplug or switch off lighting as appropriate, remove ornaments and ribbon, and then lift each greenery section from its support.
Work in reverse order so that a side piece does not pull down the upper section.
Release removable hanging hardware according to the specific manufacturer’s instructions.
For example, Command’s published removal instructions say to hold the hook or base while stretching the adhesive tab slowly straight down along the wall, not pulling it out toward you.
Other products may use different removal methods, so follow the package for the exact hook installed.
Loosen reusable ties, label the top and side lengths, and coil the greenery without crushing fragile stems.
Keep lights separately organized so their wires are not strained.
Store clean, fully dry decorations in a suitable covered container away from moisture and damage.
Any cracked, frayed, or otherwise defective electrical decoration should be replaced, not packed for next year.
Write the measured doorway path on a tag attached to the kit.
Next season’s project starts with a known shape and a fresh check of the mounting surface—not from scratch.
Frequently Asked Questions
Can I make a Christmas doorway garland without drilling holes?
Potentially, yes, when the doorway has a stable, permitted surface compatible with a rated removable mounting product.
No-drill does not automatically mean damage-free or suitable for every doorframe.
Can I hang garland on a manufactured-home storm door?
Keep the garland on a suitable fixed surround whenever possible.
Mounting on or across a moving storm door is not an acceptable shortcut if it changes closing, sealing, hardware movement, or exit function.
What if removable adhesive hooks are not allowed on my trim?
Do not test stronger glue or improvise fasteners.
Choose a compatible existing support only if its use is permitted and suitable; otherwise decorate a stable surface elsewhere or use a different Christmas focal point.
Should I choose pre-lit or unlit artificial garland?
Choose unlit greenery when safe power access is uncertain.
If you choose a lit product, verify electrical condition, intended location, routing, and operation according to its instructions.
Will removing the hooks definitely protect my paint?
No manufacturer can guarantee every existing finish.
Surface preparation, paint condition, product compatibility, and correct removal matter. Follow the exact instructions and avoid installations on fragile or unsuitable finishes.
How do I know how much garland to buy?
Measure the fixed decorative route, including any selected side lengths, and follow the planned curve with string.
Measure that string to account for the drape and joints. Purchase according to the resulting usable length, allowing for the actual sections sold, rather than relying on a generic door-width recommendation.
Can I use my existing over-the-door hanger?
Only when its product instructions allow the door type and full decoration weight and it passes the door-operation test.
A hanger that compresses the weather seal, catches a storm door, interferes with the latch, or makes closing more difficult is not suitable—even if it avoids drilling.
A Christmas Welcome You Can Take Down Cleanly
The most successful removable Christmas garland looks as though it belongs to the doorway, even when the opening is small. Its greenery traces a fixed edge; its bow or ornaments draw the eye upward; and nothing interrupts the everyday work of opening, closing, or carrying things through.
Start with the simplest suitable shape, record the measurements, and make every connection reusable. If the surface cannot support a compatible mount, let a different decoration provide the holiday welcome.
When January arrives, a carefully assembled garland comes down in manageable sections—ready for another season, with the doorway still doing its job.
Save this DIY Christmas doorway garland guide on Pinterest so your measurements, supply list, and installation checks are easy to find next holiday season.