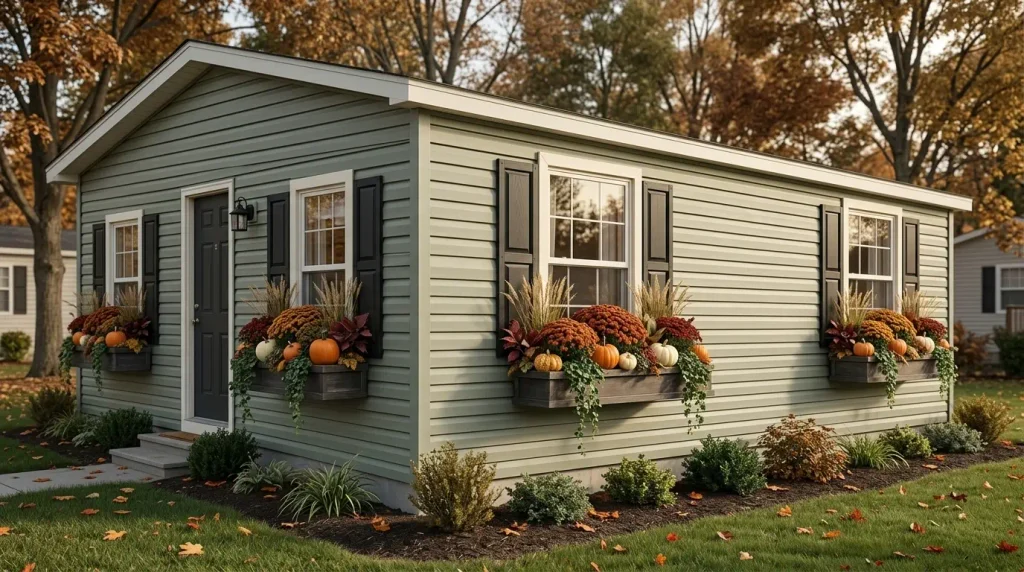
A single wide mobile home can look wonderfully festive at Christmas with a simple line of warm lights along the roof, a glowing front entrance, and a few carefully chosen accents near the steps. The challenge is deciding where those lights should go on a long, low exterior without making the display feel scattered or overdone.
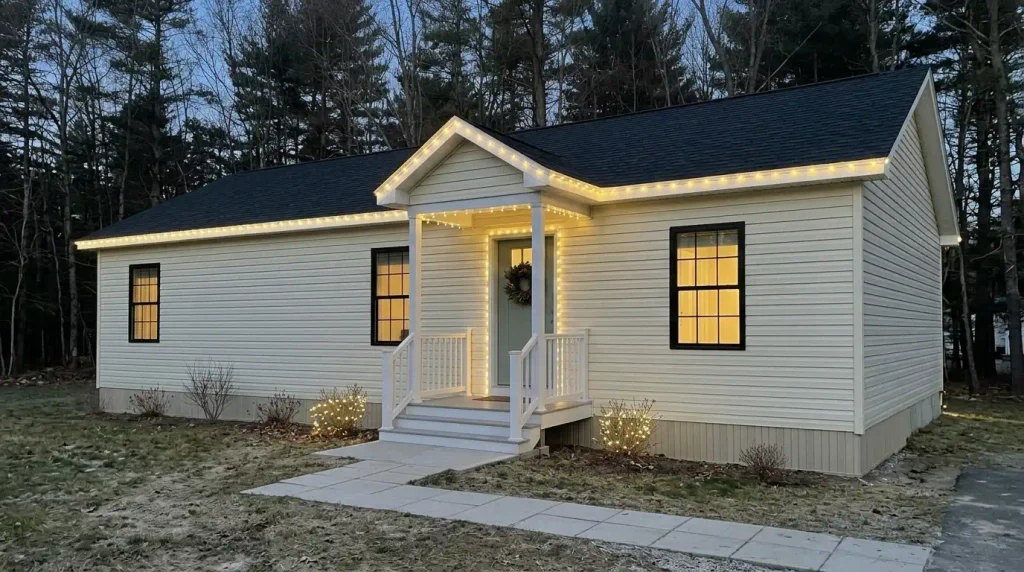
Planning single wide mobile home outdoor Christmas lights starts with the shape of your home. A manufactured home may have a shallow roof pitch, a long uninterrupted eave, repeated windows, and a small porch or landing. These details call for a different lighting arrangement from the steep rooflines and large porches often seen in Christmas inspiration photos.
The most practical approach is to choose a lighting layout, verify where it can safely be powered and mounted, measure each run, and build the display in stages.
Whether you love soft warm-white lights or cheerful multicolored bulbs, this guide will help you create an outdoor Christmas display that fits your home’s architecture, available space, and installation conditions.
1. Read Your Single Wide From the Street Before Placing Lights
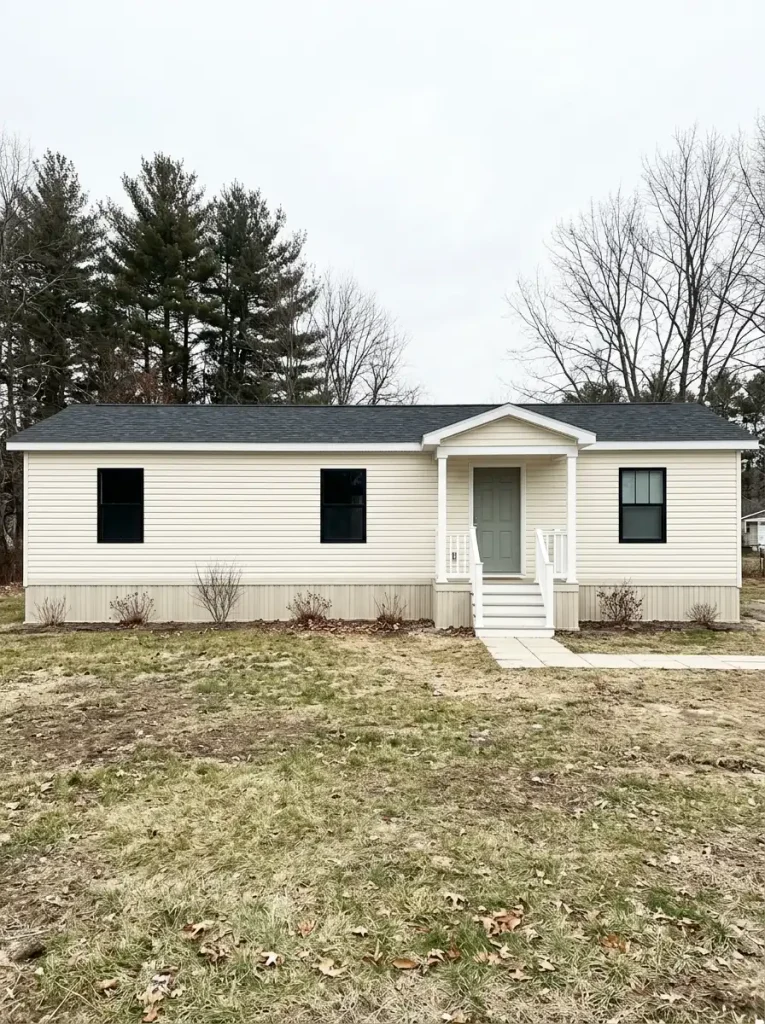
Before buying Christmas lights, stand near the driveway or street and look at the entire front of your mobile home.
Notice the roofline first. Is it one long horizontal edge, a shallow slope, or a roof with a small covered entry? Where does the front door sit in relation to the windows? Does your porch have posts, a railing, or only a few steps?
These features determine where decorative lighting will have the strongest visual effect.
For example, a single wide with a long uninterrupted eave may look striking with one continuous line of warm-white bulbs. A home with a compact central porch may benefit more from concentrating lights around the entrance.
Take a daylight photograph and identify four possible lighting zones:
- Architectural outline: The main visible eave, fascia, or suitable porch-roof edge.
- Entrance: The doorway, covered porch, or nearby architectural trim.
- Windows: Selected openings that contribute to the overall composition.
- Ground level: Steps, a short walkway, existing planters, or landscaping.
Mark these zones on your photograph without assuming they are suitable installation surfaces. Actual mounting and electrical feasibility will be checked before anything is purchased.
The horizontal proportions matter. On many single wides, a long bright roofline can visually connect the exterior, while the entrance provides a stronger focal point.
If you’re exploring broader façade improvements, our guide to modern single wide mobile home ideas discusses how architectural lines and finishes influence the home’s appearance.
Visual checkpoint: From your normal approach, you should be able to identify the home’s main horizontal line and the entrance without needing to decorate every available surface.
Once those features are clear, you’re ready to select a lighting arrangement.
2. Choose a Christmas Lighting Plan That Matches Your Porch and Roof
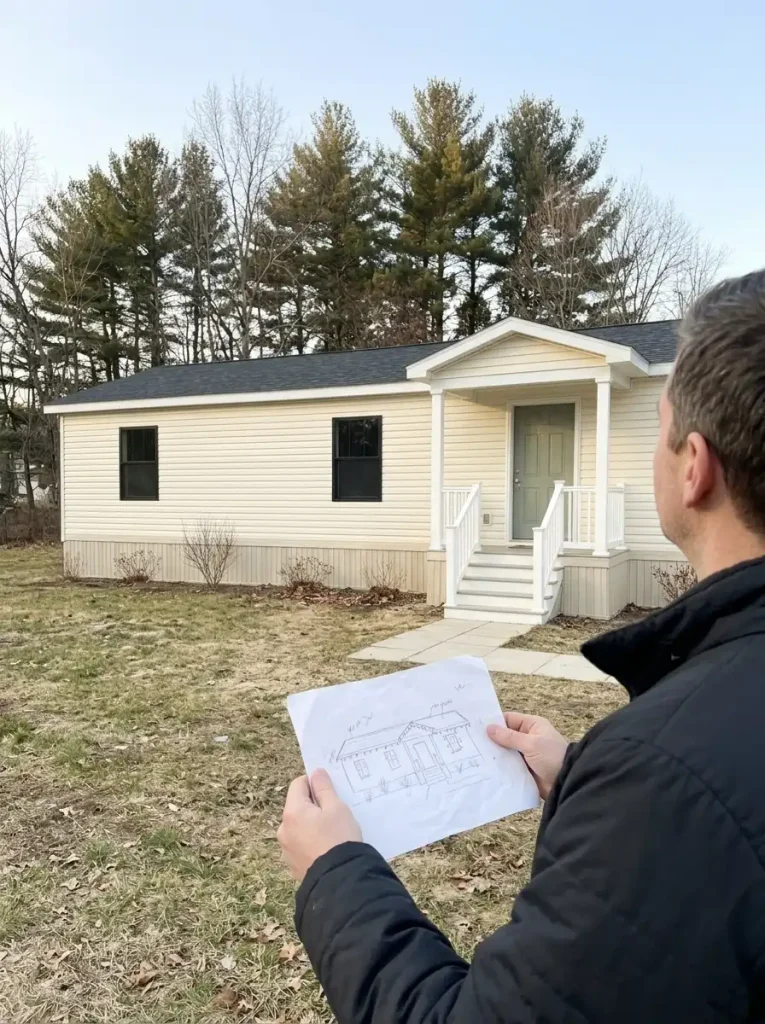
Three outdoor Christmas lighting arrangements work especially well for common single-wide layouts. Each creates a different visual effect and requires a different amount of material and installation work.
Entry-first lighting
This is the simplest option for a home with a tiny landing, limited approved mounting points, or an inaccessible roof edge.
Concentrate your display around the doorway or a suitable covered porch. A short run across an existing porch beam, restrained door-frame illumination, and an appropriately placed decorative light can create a welcoming entrance.
The roofline can remain unlit.
Balanced façade lighting
A single line along a suitable front eave establishes the main architectural shape. Entrance lighting then gives the display a focal point.
This works especially well when the roof edge is relatively straight, compatible mounting points exist, and installation can be completed safely.
Window accents should be selective. Not every window needs an illuminated border.
Layered approach lighting
For a single wide with a covered porch and a defined walkway, combine the main architectural lights with a softly illuminated entrance and a few ground-level accents.
The additional lighting creates depth between the street and front door.
It also requires more careful power planning, weather protection, and maintenance.
The Single-Wide Lighting Route Selector
Find Your Single-Wide Lighting Route
Compare three display arrangements based on your actual home. Open each option to see what belongs in the scheme and when to simplify it.
PLAN 01 / COMPACT Entry First Best for little or no porch and limited accessible mounting.
Use: One compact illuminated area.
Skip: Roof work that cannot be done safely.
Visual result: A warm entrance with a calm façade.
PLAN 02 / ARCHITECTURAL Balanced Façade Best for a long, suitable eave and recognizable entry.
Use: Eave lighting and a doorway accent.
Skip: Excessive window outlines.
Visual result: A clean, connected Christmas exterior.
PLAN 03 / LAYERED Layered Approach Best for a covered porch with usable landscaping.
Use: Approved architecture, porch and selective ground accents.
Skip: Excess fixtures that create glare or cord hazards.
Visual result: Depth from the yard to the front door.
Design decision: Select one preferred route and one simpler fallback. Final installation depends on compatible electrical equipment, safe access and approved mounting points.
Choose your preferred plan based on the shape of your home, not the number of lights in an inspiration photograph.
A compact display with a clear focal point can look more intentional than a larger one with competing bright areas. Once the arrangement is selected, check whether it is physically and electrically suitable.
3. Check Power, Outdoor Conditions, and Safe Attachment Locations
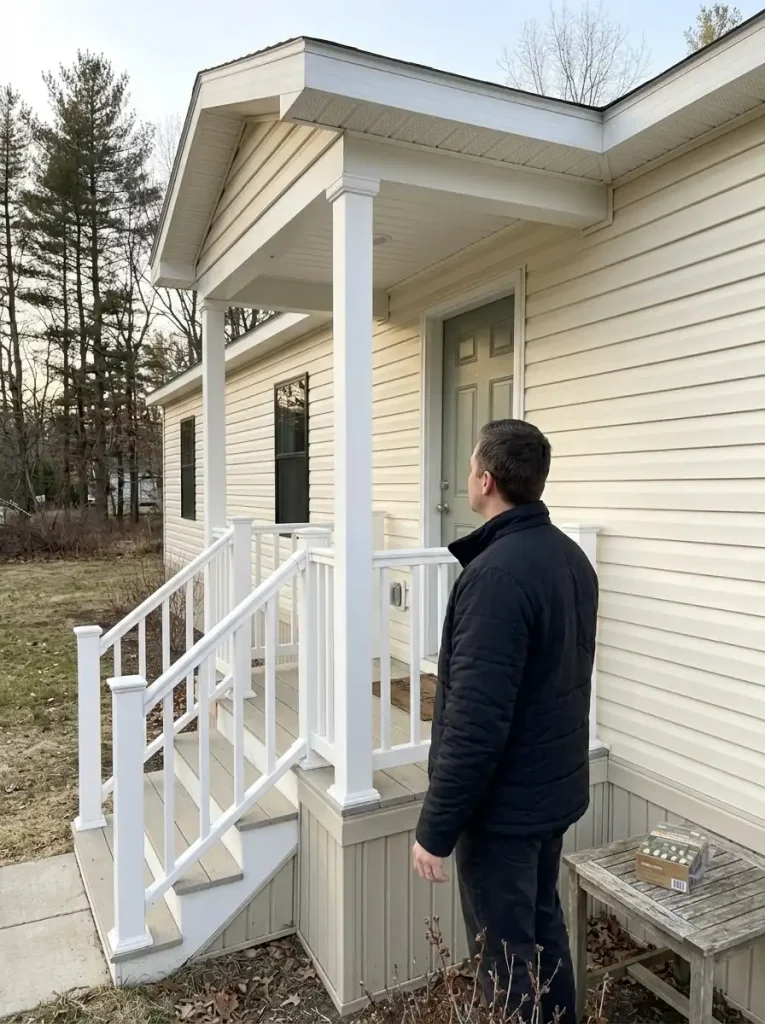
Before purchasing or hanging outdoor Christmas lights, inspect the existing conditions around your home.
Outdoor lighting introduces electrical, weather, mounting, and access considerations. A single wide may also have roof panels, vinyl siding, fascia details, porch posts, or other materials that require particular attachment methods.
Begin with the intended power source.
Check whether there is an existing receptacle appropriate for outdoor use and whether the circuit has suitable ground-fault circuit interrupter (GFCI) protection. Avoid assuming that a receptacle is suitable simply because it is near the front door.
The Electrical Safety Foundation International’s outdoor decoration guidance recommends outdoor-rated lighting and cords, GFCI protection, proper cord ratings, and keeping electrical equipment clear of snow and standing water.
This is U.S. safety guidance; applicable local electrical requirements and the manufacturer’s instructions also matter.
Next, inspect the proposed mounting locations.
A gutter, fascia board, porch trim or siding panel may appear convenient, but the attachment must be compatible with the actual material and the light manufacturer’s requirements.
Do not drill into manufactured-home roofing, siding, flashing, or weather barriers merely to attach seasonal decorations. Avoid nails and staples that can damage wire insulation.
Keep lighting well away from overhead power lines and other electrical services. If the installation would require accessing an unsafe roof edge, working near electrical hazards, or modifying permanent wiring, use a qualified professional or choose a lower, accessible lighting arrangement.
Exterior Lighting Preflight
Can This Lighting Zone Be Used?
Check every intended zone before installation. A decorative plan is ready only when its power, equipment, mounting method and access conditions are suitable.
01 — Power
Is there an appropriate existing outdoor electrical supply with required protection? Are the intended cord ratings and product loads compatible?
02 — Equipment
Are the lights, connections and accessories rated for the actual outdoor conditions? Are all components undamaged?
03 — Attachment
Is the mounting method approved for the exterior material without damaging wiring, trim, roofing or weather protection?
04 — Access
Can installation occur without unsafe heights, overhead electrical hazards or obstructed doors, stairs and windows?
The planned zone meets applicable requirements and manufacturer instructions.
Choose a lower, simpler or differently located lighting zone if the original is unsuitable.
Uncertain wiring, unsupported mounting, unsafe access or unresolved electrical hazards require qualified help.
This is an editorial planning aid, not an electrical inspection or certification. Check applicable local rules and product instructions.
Complete this assessment before moving on to measurements and purchasing.
If a roofline cannot be reached safely, you can still create a beautiful display using appropriate porch or ground-level lighting.
A smaller plan that respects the building and available power is a better choice than an elaborate installation that creates unnecessary risk.
4. Measure the Lighting Runs and Build a Shopping Worksheet
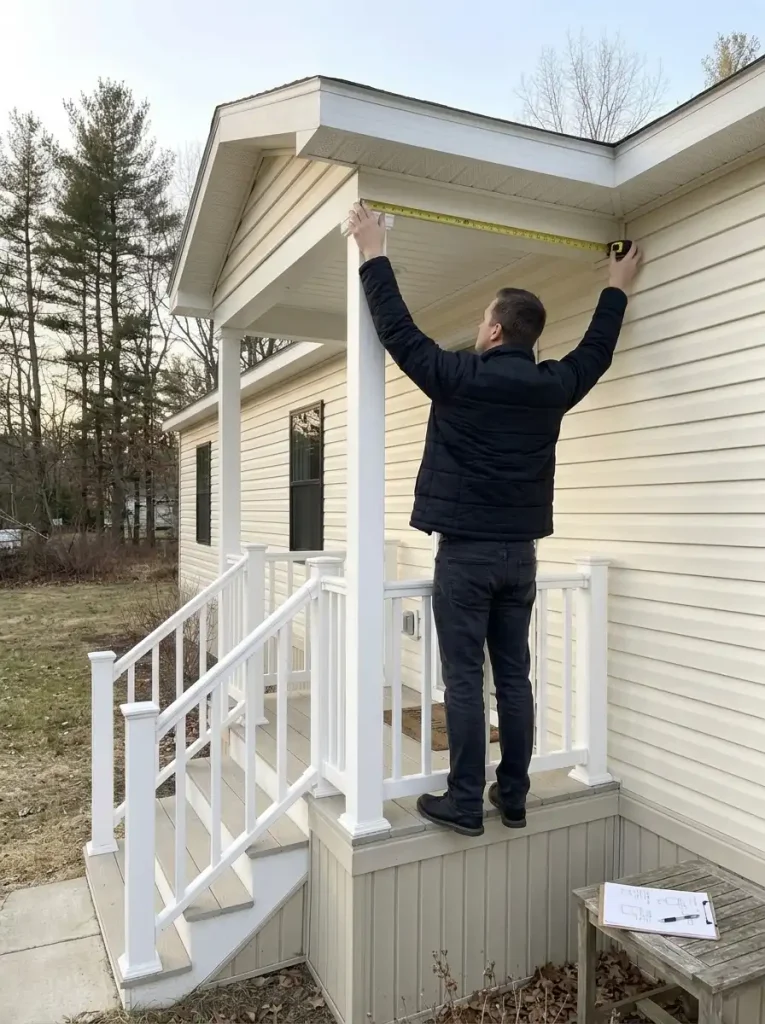
One of the easiest Christmas lighting mistakes is buying based on the advertised overall length of the mobile home.
A single wide described as a certain length does not tell you how much of its front façade is actually suitable for lighting. Porch additions, roof overhangs, door positions, offsets, and electrical routing may all change the required quantity.
Measure only the segments that passed your safety and installation assessment.
Measure one lighting zone at a time
- Main eave: Measure the actual approved run, including any architectural breaks or corners that will be followed.
- Entrance: Measure the intended doorway or porch-beam section without crossing the door’s moving parts.
- Windows: Record any selected window outlines separately.
- Ground accents: Measure individual shrub or landscaping zones where additional lights are appropriate.
- Connection routing: Identify the length needed to reach the suitable power source without creating a cord hazard.
Take measurements from safe accessible positions. Use existing drawings, an appropriate ground-based measuring method, or a professional for inaccessible areas.
Do not assume a strand labeled 25 feet provides 25 feet of illuminated coverage. Some products include unlit lead wires, connector sections, or other design features.
Also check whether the product can connect end-to-end, its maximum permitted connection count, and whether it can be shortened. Many decorative strands must not be cut.
Single-Wide Lighting Length Worksheet
Plan by Lighting Run, Not House Length
Divide the exterior into separate approved segments. Record the measured distance, usable lit length and product count for each one.
| Lighting zone | Required lit run | Available lit length per set | Sets |
|---|---|---|---|
| Main eave | 30 ft | 20 ft | 2 |
| Porch beam | 10 ft | 10 ft | 1 |
| Door accent | 15 ft | 15 ft | 1 |
Example only. Two 20-foot sets provide 40 feet of nominal illuminated length, not an exact 30-foot fit. Choose product lengths and approved routing that handle surplus without cutting, unsafe bunching or exceeding connection limits. Lead wires and connector positions must be assessed separately.
A little planning can prevent both shortages and unnecessary purchases.
If a 30-foot segment would require two 20-foot sets, you should also decide what will happen to the excess illuminated length. A different product length or a revised lighting layout might produce a cleaner result.
Do not force incompatible products together merely to use the material already purchased.
The Electrical Safety Foundation International recommends matching electrical loads to cord ratings and avoiding overloaded outlets. The permitted number of connected light sets must come from the actual product instructions.
Once the quantities are established, select the bulb type and color scheme.
5. Pick Outdoor Lights, Bulb Size, and a Cohesive Color Scheme
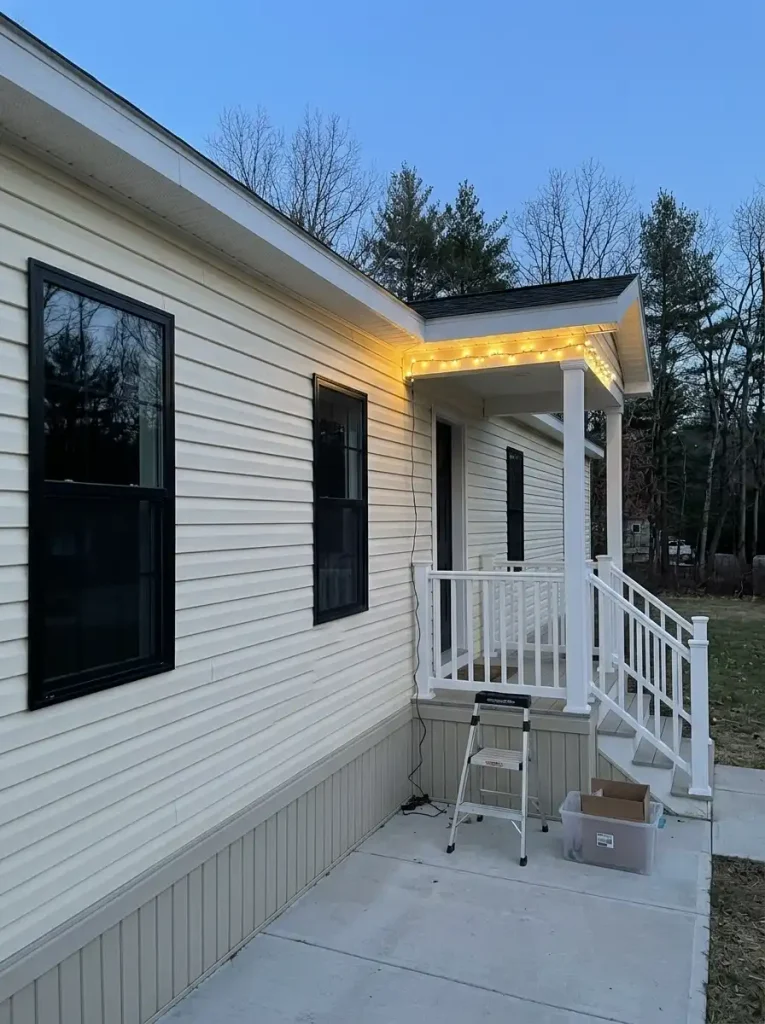
Outdoor Christmas lights differ in bulb size, spacing, brightness, color temperature, construction, power requirements, and intended location.
For a long single-wide façade, those details influence how the lighting reads from the street.
Small LED string lights
Mini lights can create a delicate dotted line along suitable trim or porch elements.
They are particularly useful when the design calls for quiet detail rather than a strong architectural outline.
Larger traditional-style bulbs
Larger bulbs create more visible individual points of light, which can suit a long eave or covered porch.
Check the size, spacing and product configuration carefully. A large bulb style is not automatically appropriate for every mounting location.
Specialty outdoor lighting
Some products are designed for particular applications such as icicle effects, net lighting, or permanent exterior systems.
Use them only for their intended locations and installation methods. Avoid mixing incompatible product systems or treating temporary holiday strands as permanent lighting.
The UL Solutions guide to decorative lighting strings explains the importance of appropriate safety certification and identifying products intended for indoor or outdoor use.
For the appearance of the display, start with one dominant palette.
Christmas Light Color Studio
Choose One Dominant Christmas Glow
These are illustrative color combinations. Actual light appearance varies by product, bulb type and viewing conditions.
Quiet, cozy and architectural. Suits cream siding, natural greenery and understated porch décor.
Playful and nostalgic. Works best when repeated consistently across selected porch or eave zones.
Calm main lighting with a small festive highlight at the front entrance or wreath.
Warm-white lighting can give a small manufactured home a soft, welcoming appearance. Multicolored lights create a more nostalgic Christmas atmosphere, especially on a covered porch.
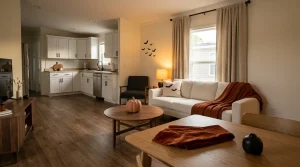
Both can work beautifully.
Problems usually appear when several unrelated bulb sizes, color temperatures and flashing modes compete across the same façade.
For a restrained design, use one dominant product style for the primary architectural run and save any contrasting color for a smaller accent.
Before buying, also review the U.S. Consumer Product Safety Commission’s holiday safety guidance and the manufacturer’s product instructions.
6. Test and Organize Every Strand Before Installation
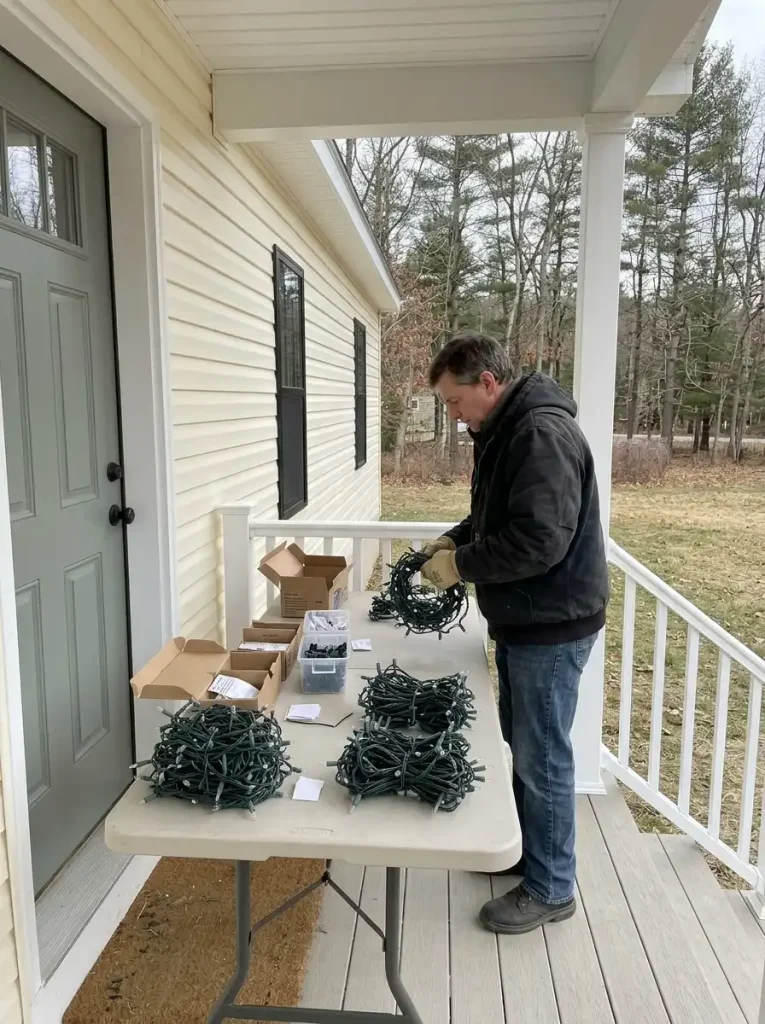
Unpacking all your lights on installation day can reveal frustrating problems: missing connectors, damaged wires, mismatched colors, or strands that do not work.
A short preparation session makes the installation more predictable.
Use a suitable dry workspace and organize the products by their intended location.
Check each light set for visible damage, verify the model and outdoor-use markings, confirm connection compatibility, and test the set according to its manufacturer’s instructions.
Do not use damaged cords, exposed wiring, cracked sockets, or products with uncertain ratings.
Keep the eave, porch, doorway and ground-level sets in separate labeled groups. If several products look similar, a small label on the storage packaging can prevent confusion.
For each group, confirm:
- The set operates as intended.
- Its rating matches the planned location.
- Its connectors and accessories are compatible.
- Its intended mounting method is available.
- Its connection limits and routing needs are understood.
Unplug equipment before replacing any user-serviceable component, following the product instructions.
Success checkpoint: Every approved lighting zone has a clearly identified, working product set ready for installation.
If any item is unsuitable, replace it or remove that zone from the plan before beginning exterior work.
7. Install the Main Roofline or Eave Lighting Where Access Is Safe
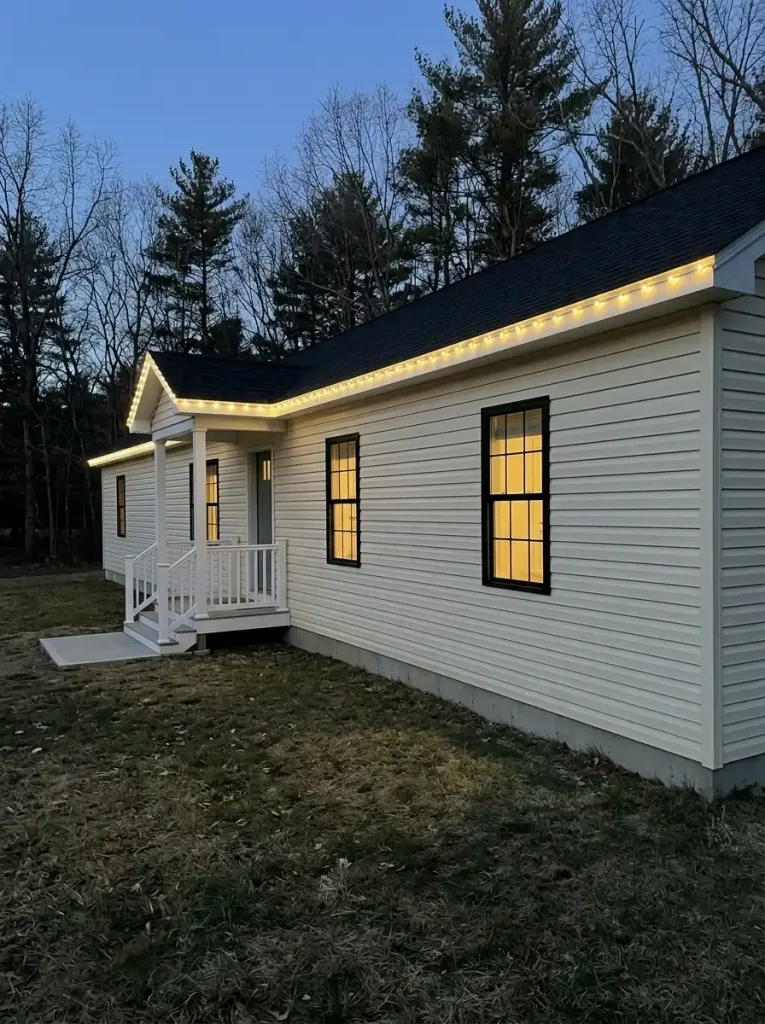
On a typical single wide, the long roof edge is one of the strongest architectural features.
A clean, continuous line of lights can emphasize the length of the home and visually connect sections of the façade that might otherwise feel unrelated.
Begin only after confirming that the particular mounting surface, lighting product, and installation method are compatible.
For homes with appropriate accessible gutters, fascia, or porch trim, suitable manufacturer-approved clips may be an option. Other exteriors require different methods, and some should not receive attachments at all.
Do not assume that a clip designed for a conventional house will work on every manufactured-home roof or siding system.
Make the line look consistent
Think about the rhythm of the bulbs across the entire visible run.
The spacing and alignment should look intentional from your normal viewing distance. Check that the line follows the actual approved edge without sagging, crossing unrelated architectural features, or leaving unnecessary loops of wire.
Long horizontal façades can make uneven positioning especially noticeable.
A useful visual test is to examine the lighting line from the driveway before adding more decorative layers.
If it appears crooked or visually broken, further decoration will not correct that underlying issue.
Respect the mounting material
Metal roof edges, vinyl siding, gutters, fascia boards, and porch beams can have very different attachment requirements.
Do not puncture roofing, weather barriers, or siding with improvised fasteners. Avoid fastening methods that damage cord insulation or compromise the exterior.
The Electrical Safety Foundation International’s outdoor decoration recommendations emphasize secure mounting that does not damage electrical insulation, as well as appropriate ladder precautions.
Roof access and high installation work introduce fall and electrical hazards. If the location cannot be reached and worked on safely, do not attempt it yourself.
A qualified installer can assess whether a suitable system is possible.
What if the roofline cannot be used?
Use the architectural features already available lower down.
An approved covered-porch beam, suitable post, or entry area can create an attractive lighting outline without extending the work onto the roof.
For a very simple single wide, concentrating the illumination around the entrance may be the most practical and visually convincing solution.
Stop once the main approved architectural line is complete. Evaluate it from the street before deciding whether the entrance needs more emphasis.
8. Frame the Door, Windows, and Porch Without Blocking Access
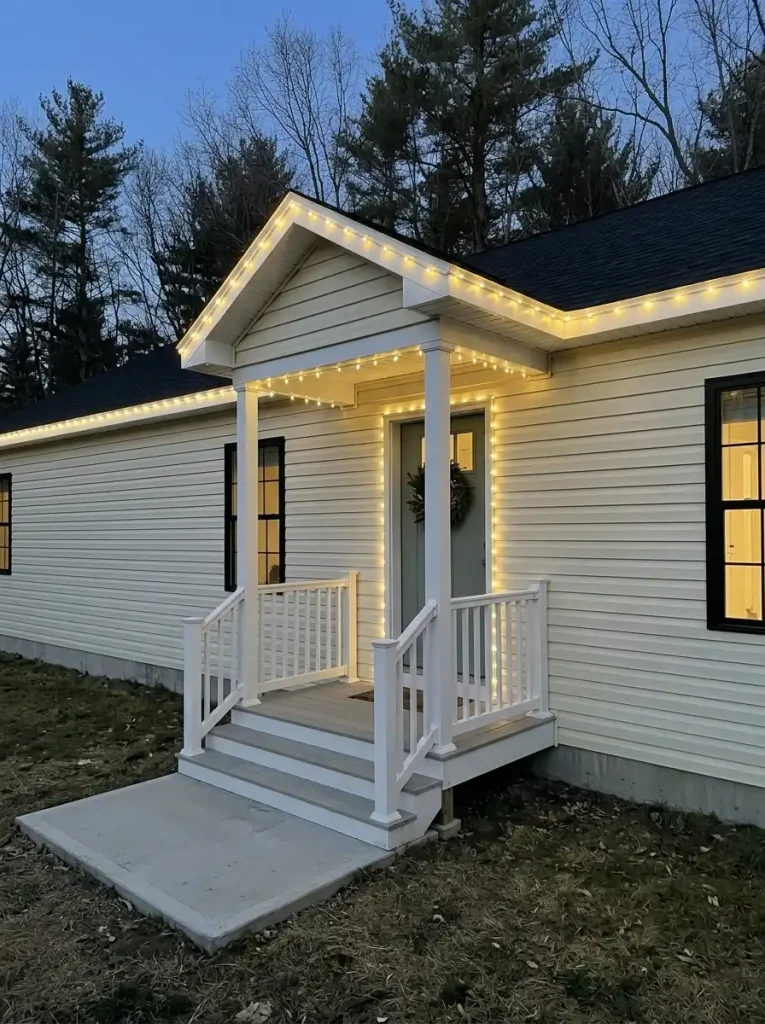
The roofline establishes the overall shape of the home. Entrance lighting tells visitors where to look next.
On a single wide with a small porch, this can be achieved with surprisingly little additional material.
A suitable porch beam might carry a short decorative run. A compatible door-frame treatment can strengthen the entrance, while a wreath adds a non-electrical Christmas accent.
For a home without a porch, use an appropriate feature near the doorway rather than attempting to create the appearance of a large porch that does not exist.
Keep the doorway functional
Before installing decorative lighting around the entrance, check the full movement of the door and storm door, if present.
Lights and cords must not be trapped in moving parts or routed through the door opening in a way that damages insulation.
Handrails, steps and required exit paths must remain usable.
A small landing can quickly become crowded if decorative lanterns, illuminated planters and cords all occupy the same space.
The same principle appears in our guide to Thanksgiving porch decor for mobile homes with narrow steps, where the available walking area determines which decorations are practical.
Select windows carefully
An entire row of illuminated windows may appear attractive in a photograph, but it can make a long manufactured-home façade look overly busy.
Try emphasizing one window near the entrance or using subtle interior window glow with appropriate products.
Keep required emergency escape windows and their operation unobstructed.
If your front entrance already has a strong wreath and illuminated porch beam, the nearby window might need no further decoration.
Before: A bright roofline with an entrance that feels visually lost.
Adjustment: Introduce one clear entrance-lighting element.
After: The façade remains connected, but the doorway becomes easier to recognize.
Evaluate the result from the curb and then from the bottom step. Both views should feel intentional, and the entrance should remain comfortable to use.
9. Add Steps, Shrubs, or Path Lights Only Where They Improve the Scene
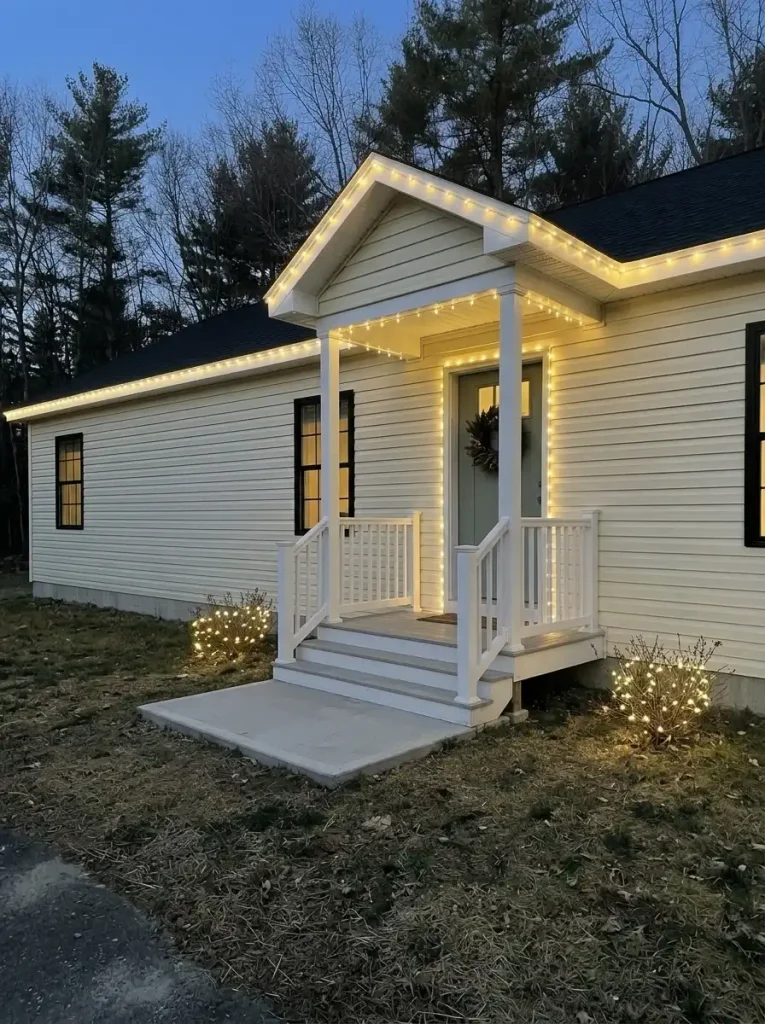
Ground-level Christmas lights can give your single wide a welcoming glow, especially when visitors approach along a short walkway.
However, additional lighting is not always necessary.
A small home with a well-lit porch and an attractive eave outline may already have enough visual interest.
Use the shape of the existing approach to decide.
For a short landing and a few steps
Focus on keeping the entrance clear and visible.
If suitable decorative lighting can be placed outside the walking area without interfering with handrails or functional stair lighting, it may provide a small festive accent.
Avoid loose light strands across step treads or cords stretched over the route.
For a longer front walkway
A few appropriately rated, securely positioned accents may help connect the yard to the entrance.
Use restrained repetition. There is rarely a visual need to illuminate every inch of the route.
Do not position power cords where pedestrians must cross them.
For existing shrubs and planters
A modest amount of suitable outdoor lighting on an existing plant or planter can add depth to the finished display.
Choose locations that allow the lights and their connections to remain secure, with appropriate protection from weather and no conflict with skirting vents, utilities, or maintenance access.
Do not wrap lighting so tightly that it damages living plants or the product wiring.
Our broader guide to fall manufactured-home curb appeal explores how the walkway, landscaping and entrance relate visually across the front of a manufactured home. Those general landscape-composition ideas can also inform winter decorating.
Snow, rain, and standing water require particular attention. As the Electrical Safety Foundation International advises, outdoor cords and light strings should be kept clear of snow and standing water.
Final ground-level decision: If an additional strand does not improve the approach, clarify the entrance, or add a distinct visual layer, leave that part of the yard unlit.
10. Run the Dusk Test and Set Up a Low-Maintenance Display
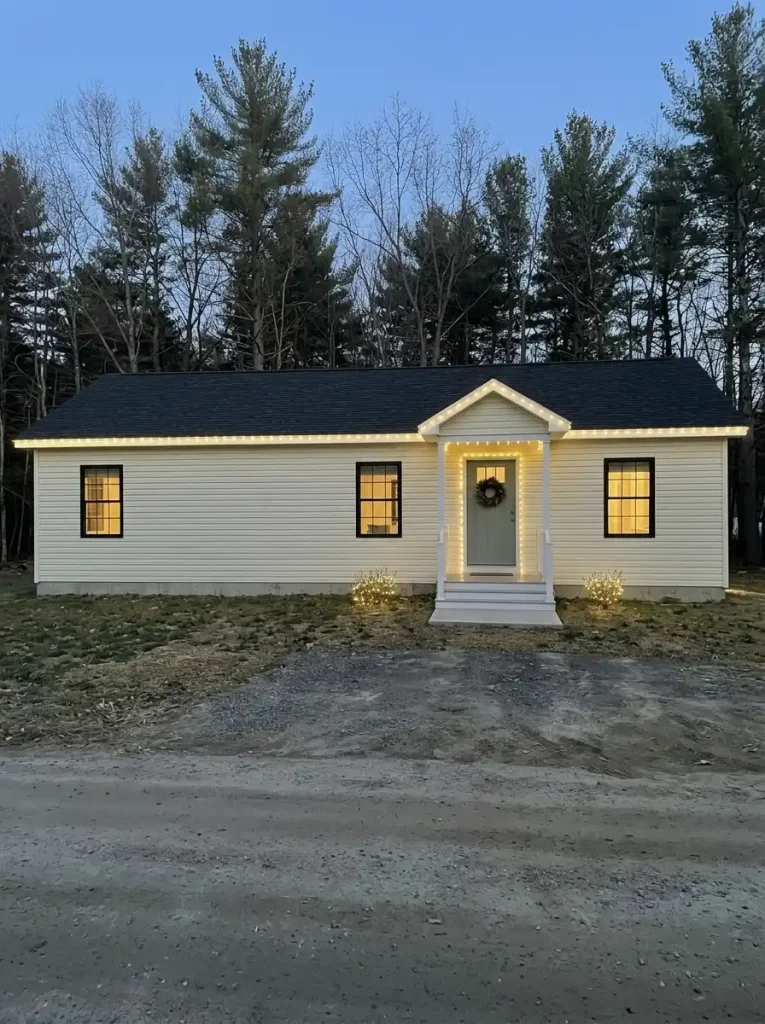
Your Christmas lights should be evaluated at the time people will actually see them.
Switch on the display under suitable conditions near dusk and examine it from three positions: the street, the beginning of the walkway, and the front entrance.
Look at the whole exterior before adjusting individual bulbs.
A single-wide display usually feels most settled when the architectural line reads clearly, the entrance has enough presence, and the ground-level accents remain secondary.
The Dusk Correction Matrix
Find the Problem. Refine the Glow.
Open the issue that matches what you see at dusk. Resolve installation or electrical hazards before making decorative adjustments.
Uneven rooflineALIGNMENT
Adjustment: Reassess only from a safe position, using the approved mounting method. Obtain professional help for inaccessible sections.
Recheck: The line reads consistently from the curb.
Entrance looks darkFOCAL POINT
Adjustment: Consider one approved entrance accent or reduce competing brightness.
Recheck: The door is recognizable from the approach.
Too many competing colorsPALETTE
Adjustment: Keep one dominant color scheme and remove unnecessary contrasting accents.
Recheck: The display reads as one composition.
Steps or walkway feel clutteredACCESS
Adjustment: Remove the conflicting items and relocate accents only where a suitable clear area exists.
Recheck: The full path, steps and handrail are unobstructed.
Lights fail after wet weatherSAFETY STOP
Adjustment: Stop using the affected zone. Do not bypass protective devices or handle suspect energized equipment. Follow manufacturer guidance and consult a qualified electrician where needed.
Recheck: Resume only after the cause is safely resolved.
After the visual adjustments, establish a simple operating routine.
A compatible outdoor-rated timer or control system may help manage the display. Select it according to its rated use and manufacturer instructions, and ensure the operating schedule follows the relevant safety guidance.
The Electrical Safety Foundation International recommends turning off electrical decorations before leaving home or going to sleep.
Check the display periodically, especially after strong wind, rain, snow, or other challenging weather. Inspect it for damage, displaced attachments, water exposure, or interference with normal access.
At the end of the season, disconnect and remove the temporary lights according to product instructions, inspect them, and store the undamaged strands in labeled groups.
The labels from your installation worksheet will make next year’s decorating much easier.
Common Outdoor Christmas Lighting Mistakes to Avoid
Several small planning mistakes can have an outsized effect on a long manufactured-home exterior.
Copying a steep-roof cottage display. A single wide may have a completely different roof profile and installation conditions. Adapt the visual principle to the existing building.
Buying strands before measuring. Package length, usable illuminated length and actual mounting runs may not match.
Mixing too many lighting styles. Different bulbs, colors and flashing effects can make the display appear disconnected. A consistent primary style usually looks more deliberate.
Treating exterior siding as a universal mounting surface. Manufactured-home materials require compatible attachment systems, and some locations should not be used.
Blocking a small landing. Even attractive decorations become impractical when they interfere with a door, handrail or walkway.
Ignoring the display after installation. Wind, weather, damaged products and changed conditions can require inspection, adjustment or removal.
Correcting these issues early is generally easier than rebuilding a finished display in cold weather.
Frequently Asked Questions
What Christmas lights look best on a single wide mobile home?
Warm-white LED lights often work well for a simple architectural outline, while classic multicolor lights can create a cheerful traditional porch display. The better choice depends on the home’s siding, available mounting surfaces, and preferred atmosphere.
A consistent bulb style and a recognizable entrance usually matter more than the total number of lights.
How many Christmas lights do I need for a single wide mobile home?
Measure the specific approved lighting runs, then divide each run by the usable illuminated length of the selected product.
For example, a 30-foot run with 20 feet of usable illuminated length per compatible set would require at least two sets by length. The actual selection must also account for connector positions, excess length, power requirements and manufacturer limits.
The home’s advertised overall length alone is not enough to calculate a reliable shopping quantity.
Can I put Christmas lights on manufactured-home vinyl siding?
Only use attachment methods confirmed as suitable for the actual siding, trim or other surface, while following the relevant home and product instructions.
Avoid drilling into weather-protective building components or using nails and staples that could damage wiring.
If the mounting requirements are uncertain, use a different approved location or consult an appropriate professional.
How can I decorate a single wide with no porch?
Try an entry-first arrangement using an appropriately located door accent, suitable nearby trim or an approved ground-level decorative element outside the walking route.
A dramatic roofline display is not required. A compact illuminated entrance can provide plenty of Christmas atmosphere.
Is it better to use LED or incandescent Christmas lights outside?
LED products are often a practical choice because many provide lower electrical consumption than comparable traditional incandescent sets. Actual performance, brightness, electrical compatibility, and installation limits vary by product.
Whatever technology you choose, use lights specifically rated for the intended outdoor conditions and follow their instructions.
Can outdoor Christmas lights stay on all night?
Follow the product manufacturer’s guidance and applicable safety recommendations. ESFI advises turning decorative electrical lights off before sleeping or leaving home.
An appropriately rated timer can make scheduled operation easier, but it does not replace safe installation or regular inspection.
What should I do if I cannot safely reach the roofline?
Leave that roofline unlit or hire a qualified professional to assess the installation.
Use a suitable porch beam, accessible entry feature or approved low-level lighting zone to create a festive display without unsafe roof access.
Make Your Single Wide Glow This Christmas
A beautiful Christmas lighting display begins with understanding the home you already have.
The long façade, modest roofline, compact entrance and available landscaping each offer an opportunity to create a warm holiday scene. They do not all need the same level of illumination.
Start with the architectural outline where it can be safely installed. Give the entrance enough light to feel welcoming. Add window, porch or ground-level accents only when they improve the overall composition.
Measure before buying, use suitable outdoor electrical products, respect the building’s actual mounting limitations, and finish with a careful dusk inspection.
When the lights come on, the best result is a single wide that looks unmistakably festive while still looking like itself.
Save this guide on Pinterest before decorating, so you can return to the lighting layout choices, measurement worksheet and final dusk checklist when you’re ready to plan your Christmas exterior.