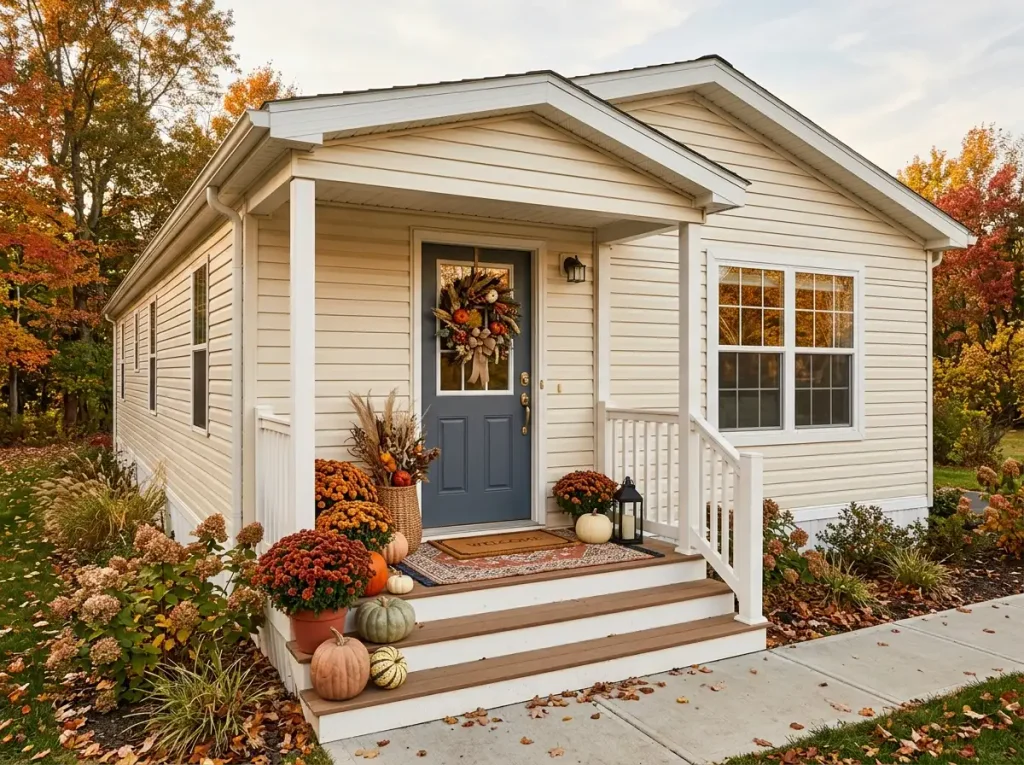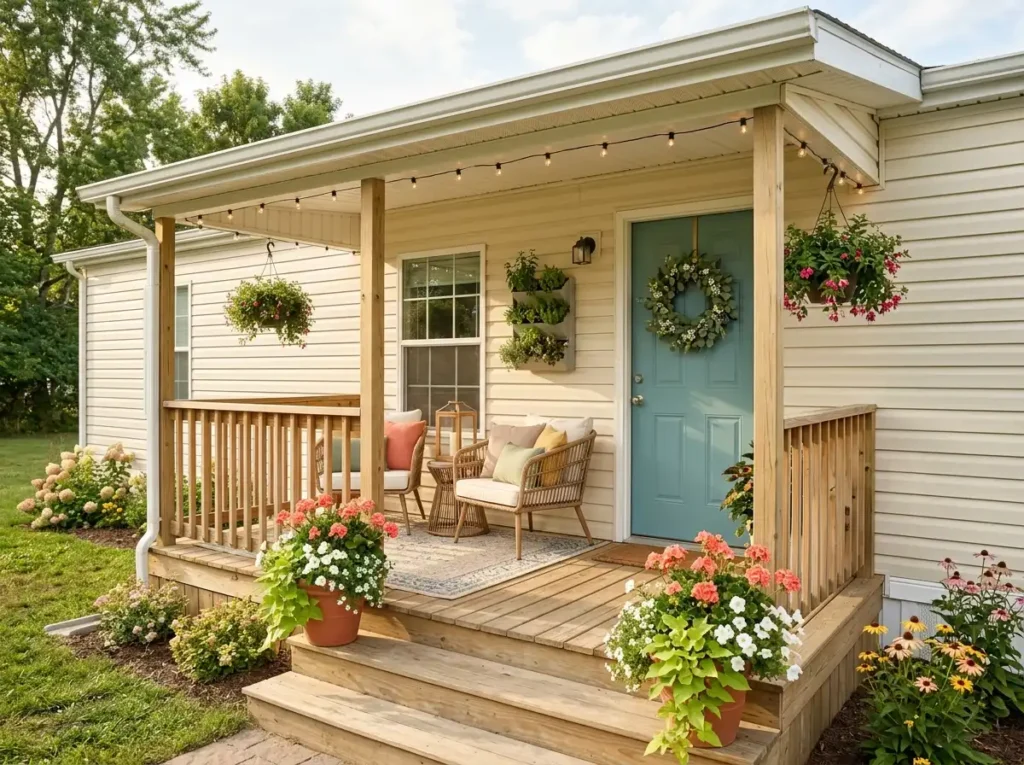
A mobile home patio can turn wonderfully spooky for Halloween, but compact outdoor spaces have one problem Pinterest photos do not always show: the patio still has to work after the pumpkins, webs, lights, and ghosts arrive. Chairs need room to pull out. The door may open directly onto the space. A narrow path might connect the steps to the yard. Cover every surface, and a cozy setup can start feeling crowded surprisingly fast.
The best Halloween mobile home patio ideas treat the patio like an outdoor room first. Decide where people sit, walk, eat, or set down a drink; then place the Halloween drama where it will have the most visual reach with the least disruption.
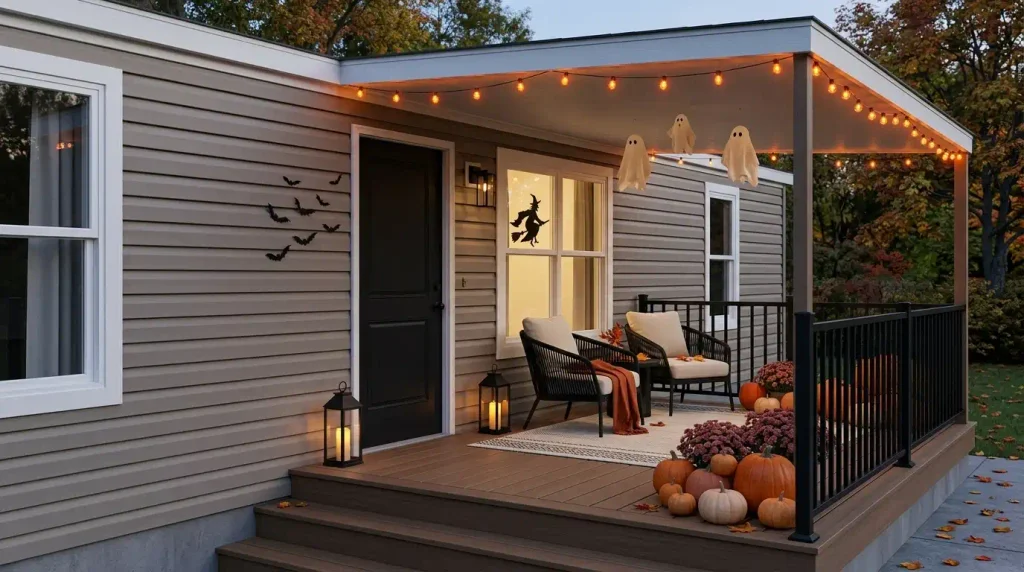
The 21 ideas below move through the patio by function—from zoning and color to seating, overhead décor, lighting, dining, circulation, and the final nighttime edit. Start with the patio mapper below so you know which part of your space should carry the strongest Halloween moment.
1. Map the Patio’s Live Zones Before Halloween Decor Moves In
Before placing a pumpkin, stand at the patio entrance and ask a less glamorous question: what still needs to happen here every day? On a smaller mobile home patio, the same few feet may handle seating, the route to the door, outdoor meals, and access to the yard. Decorating all four jobs equally usually creates clutter.
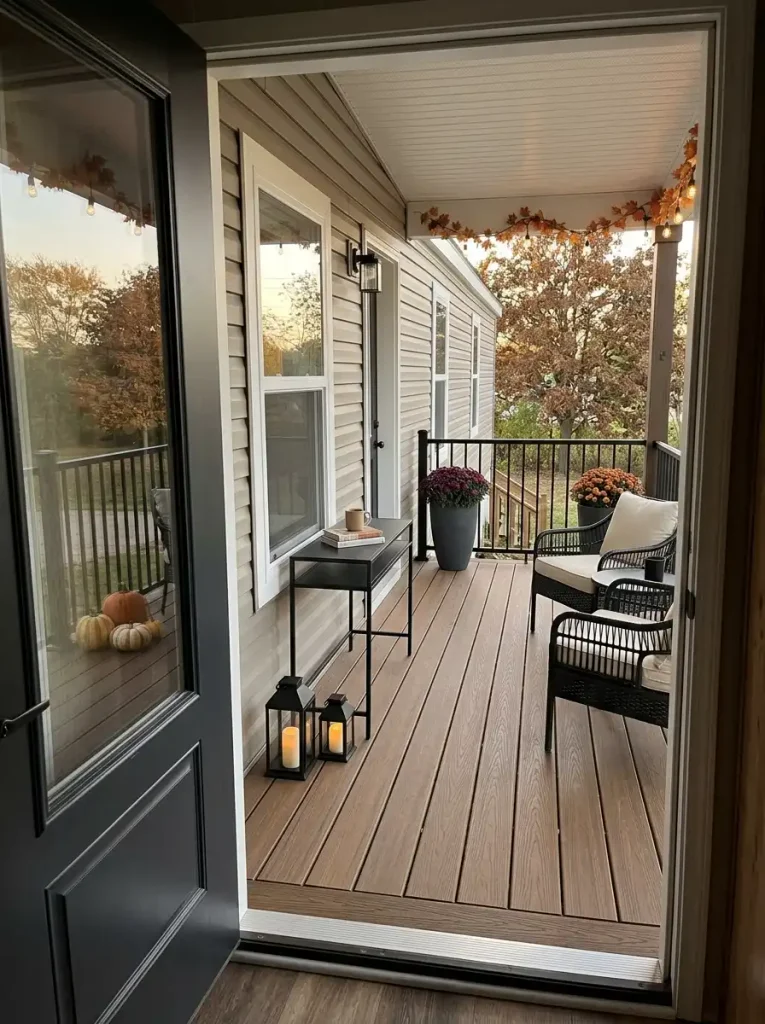
Find the zone that has the most visual influence with the least functional pressure. A lounge can carry textiles and a focal cluster. A dining patio needs more restraint around the table. A walk-through patio benefits from vertical or perimeter décor. An underused outer edge can take the heavier pumpkin, mum, or lantern display.
Use the mapper to identify your strongest decorating plane.
Small-Space Patio Mapper
Where can your strongest Halloween moment live?
Choose the job your patio needs to protect most. The mapper shifts the seasonal drama toward the part of the space that can handle it without making the patio feel crowded.
Build Halloween around the seating composition.
Let cushions, one low pumpkin or lantern cluster, a rug, and nearby lighting turn the furniture into one complete scene. Avoid dropping independent displays into every leftover gap.
Move the Halloween drama upward and outward.
Keep the dining surface mostly functional. Let the ceiling edge, nearby wall, railing, or one restrained centerpiece carry the seasonal story so plates, drinks and serving pieces still have room.
Decorate the perimeter, not the route.
Use flat bats, hanging ghosts, string lights, siding décor, or one outer-edge cluster. The Halloween scene remains visible without narrowing the natural route between the door, steps and yard.
Concentrate the strongest display on the unused edge.
A grouped composition of pumpkins, mums, lanterns, or one taller prop can give the entire patio a focal point without consuming the central living area.
Once the patio has a clear functional hierarchy, you can decorate the chosen zone more confidently and leave the other areas quieter. If your project extends across a much wider façade, StylishGalore’s specialist guide takes the whole exterior approach further:
21 Classy Halloween Exterior Ideas for Double Wide Mobile Homes
2. Build the Spooky-Cute Palette From Your Siding and Patio Furniture
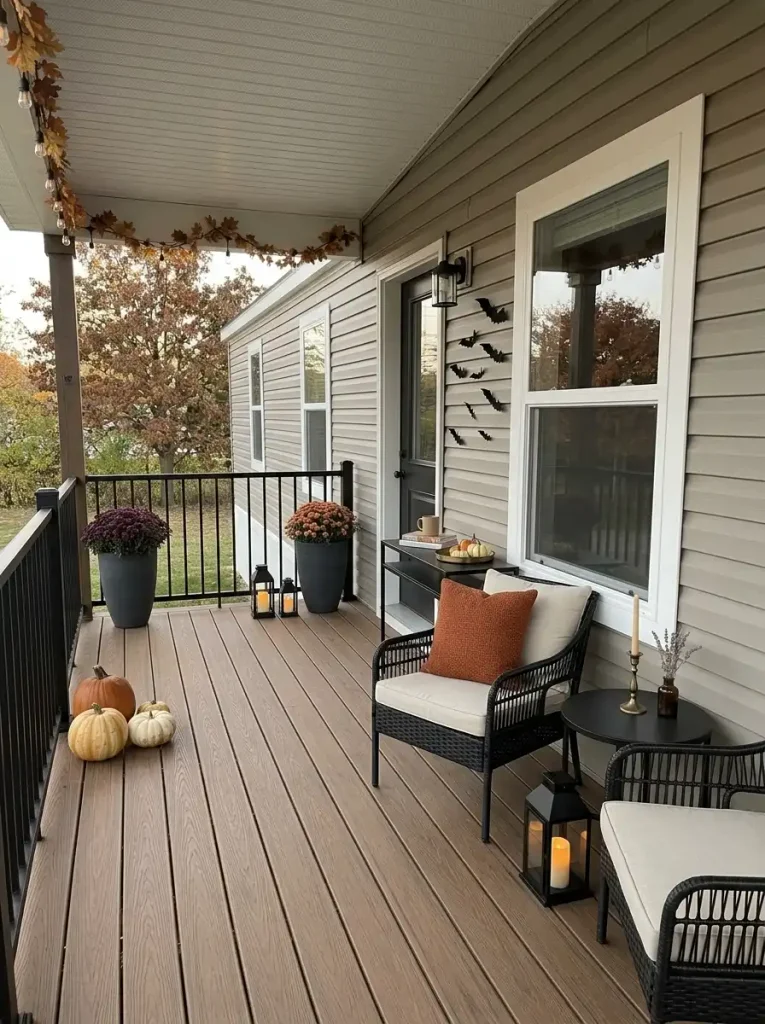
The easiest way to make Halloween décor look collected on a mobile home patio is to start with the colors that cannot leave in November. Siding, decking, railings, outdoor chairs, and large cushions occupy far more visual area than seasonal accessories, so they should determine the palette.
A cream-sided home can handle black, burnt orange, and aged brass without becoming heavy. Gray siding often looks sharper with charcoal, muted pumpkin, and cream. Tan or warm-beige exteriors naturally support rust, espresso, and soft ivory, while a dark façade can take pale pumpkins, warm amber, and one playful accent such as dusty lavender.
Choose the permanent surface closest to your seating area below. Then repeat the suggested Halloween tones two or three times across the patio so the palette reads as a system.
Patio Palette Matcher
Start with the surface that already dominates the scene.
Use the palette as a direction, not a shopping list. Two or three repeated seasonal tones are usually enough.
Warm contrast
Let the pale exterior remain the breathing room. Soft black adds definition, pumpkin tones bring warmth, and aged brass introduces a softer vintage note.
Graphic harvest
Gray already provides a cool neutral field. Charcoal deepens it, muted pumpkin supplies the seasonal cue, and cream keeps the combination from becoming flat after dusk.
Earthy Halloween
Warm siding works naturally with espresso and rust. Ivory provides enough contrast to keep the patio welcoming rather than visually heavy during the day.
Pale-on-dark drama
A dark exterior already supplies Halloween depth. Pale pumpkins or textiles improve visibility, warm amber adds glow, and one dusty-lavender accent keeps the palette playful without becoming busy.
Do not worry about matching every accessory exactly. A repeated pumpkin tone in a cushion, one planter, and a lantern glow can establish the palette more convincingly than six unrelated Halloween colors competing across a narrow patio.
3. Make the Seating Area the Main Halloween Anchor
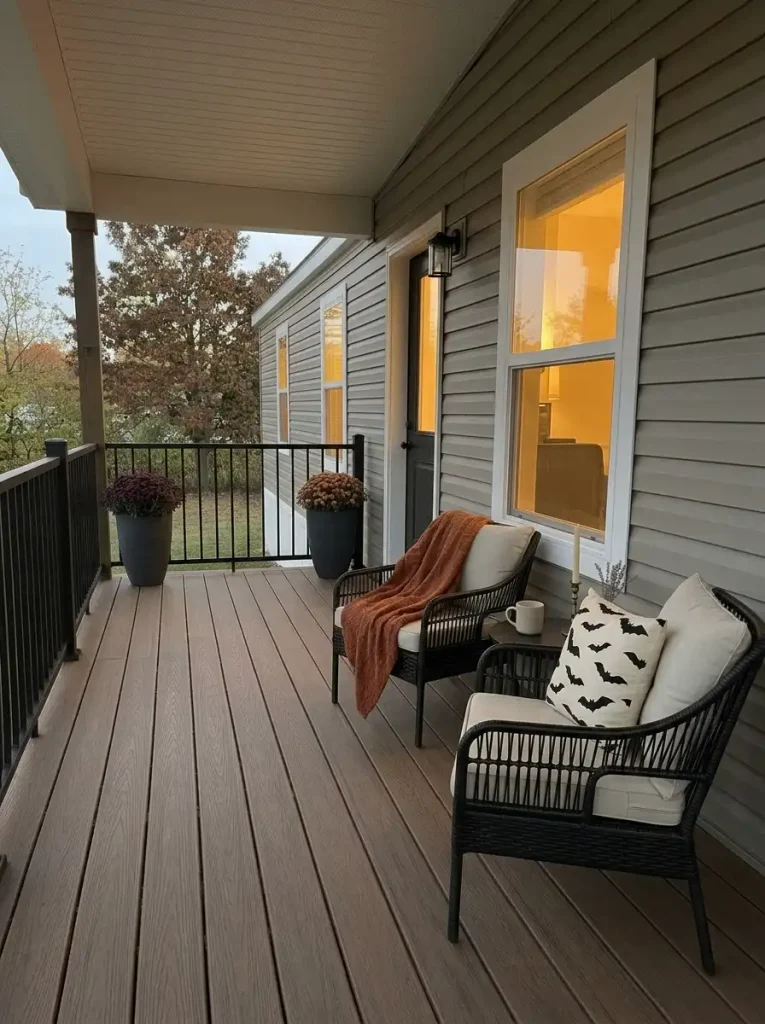
Picture a mobile home patio with two chairs, a small table, three pumpkin clusters, a sign by the wall, bats near the door, and another display beside the railing. Every object may look seasonal, yet the patio has no obvious center.
Start with the furniture people actually use. If the patio has a loveseat, let that become the anchor with one patterned cushion family, a throw, and a low accent beside it. With two separate chairs, visually pair them through matching textiles or a shared side table. When dining chairs occupy most of the space, allow the table setup to lead and keep the lounge-style accessories quieter.
Use this check:
- Furniture reads first: add one supporting Halloween cluster.
- Décor reads before the furniture: remove or combine one display.
- Every edge reads equally: choose a single seating-side focal point.
Compact patios tend to feel calmer when the eye understands the furniture arrangement before it starts counting decorations.
4. Ground the Lounge With One Halloween Rug or Runner
A floor covering changes more than color. It tells the eye where the seating zone begins and ends, which can make a loose group of outdoor chairs feel like one intentional Halloween room.
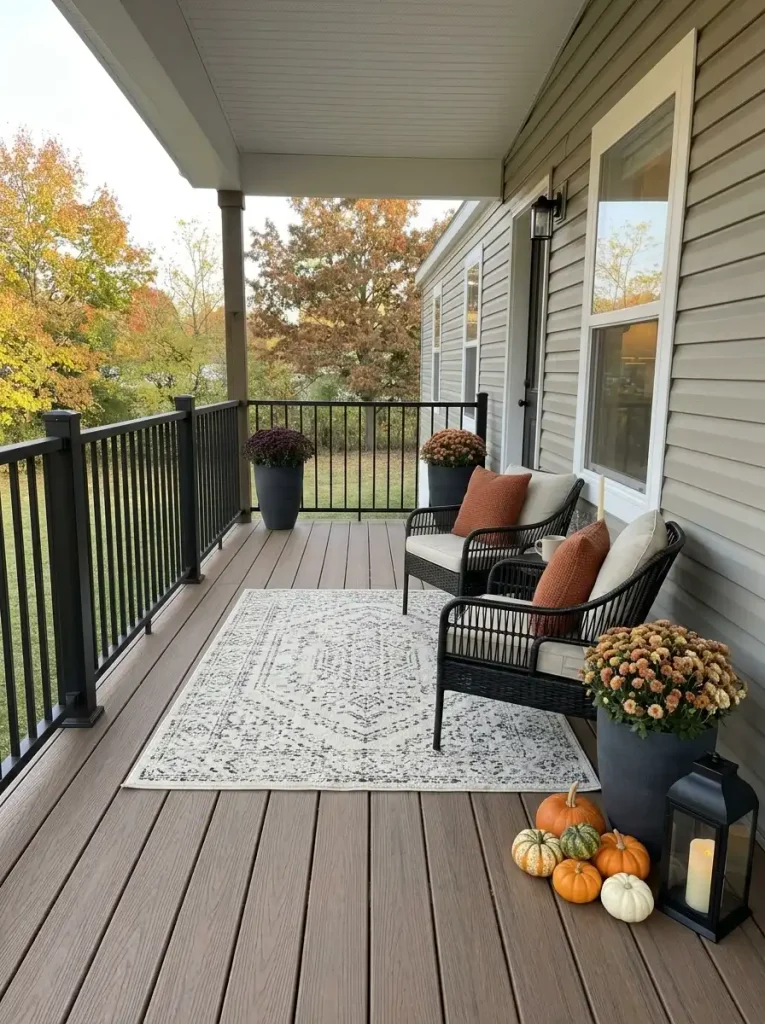
For a compact lounge, place one rug beneath the visual center of the furniture group, keeping the arrangement broad enough that it looks connected from the patio entrance. On a long, narrow patio where a full rug would compete with the route to the door, a runner can introduce pattern along the usable side while leaving the main passage visually clear.
Before committing, check the patio with the door fully open and walk the route you use most. If the floor textile makes the circulation line feel tighter, bunches where chairs move, or becomes the dominant object in an already patterned setup, skip it.
Decision rule: use a rug when the seating needs definition; use a runner when the patio needs direction; leave the floor quiet when furniture placement already creates a clear zone.
5. Add Halloween Textiles in Two Layers, Then Stop
Halloween cushions are easy to keep adding because each one occupies very little space. Visually, though, five small motifs can make a two-chair patio feel busier than one larger focal decoration.
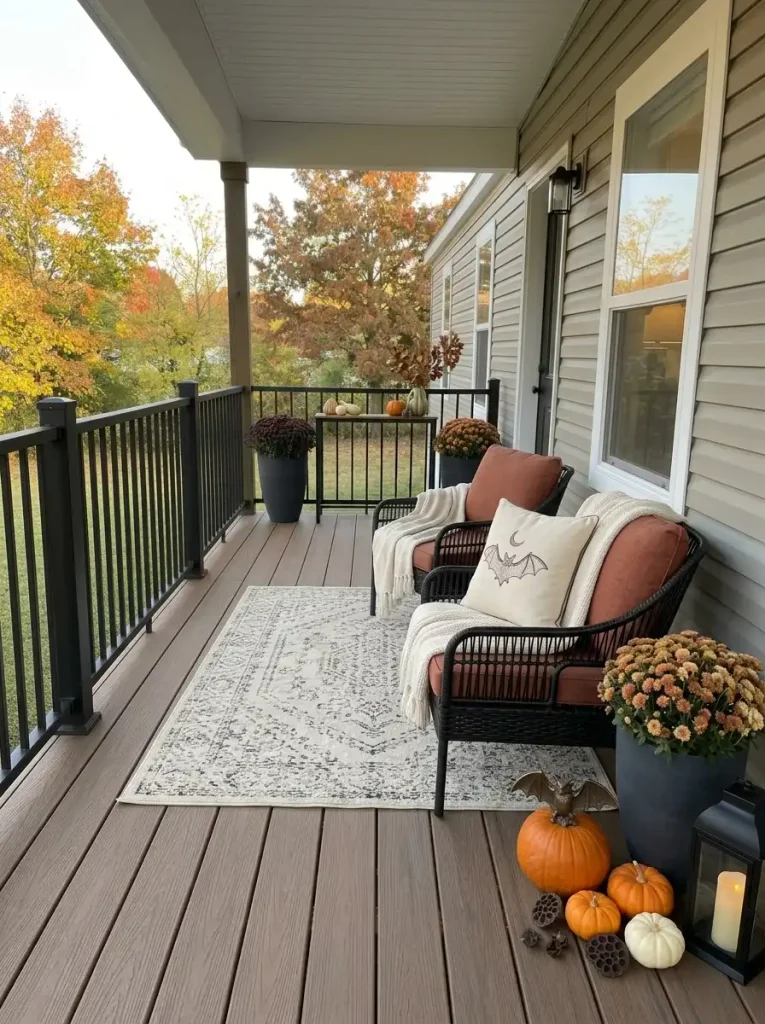
Use a two-layer textile formula. First choose one obvious Halloween signal—perhaps bats, checkerboard, moons, pumpkins, or a restrained spooky print. Then add one quieter texture or solid color such as rust, charcoal, cream, burgundy, or muted orange. The second layer supports the theme without asking for equal attention.
For example, two black wicker chairs could share rust seat cushions, while only one chair carries a cream pillow with a dark bat motif. A small throw over the second chair repeats the cream and connects the pair. The Halloween message remains clear even though only one textile is explicitly themed.
Stop signal: stand at the patio entrance. If the cushions become the first thing you notice before the shape of the seating area, remove the weakest pattern.
6. Float Witch Hats or Soft Ghosts Over an Unused Ceiling Zone
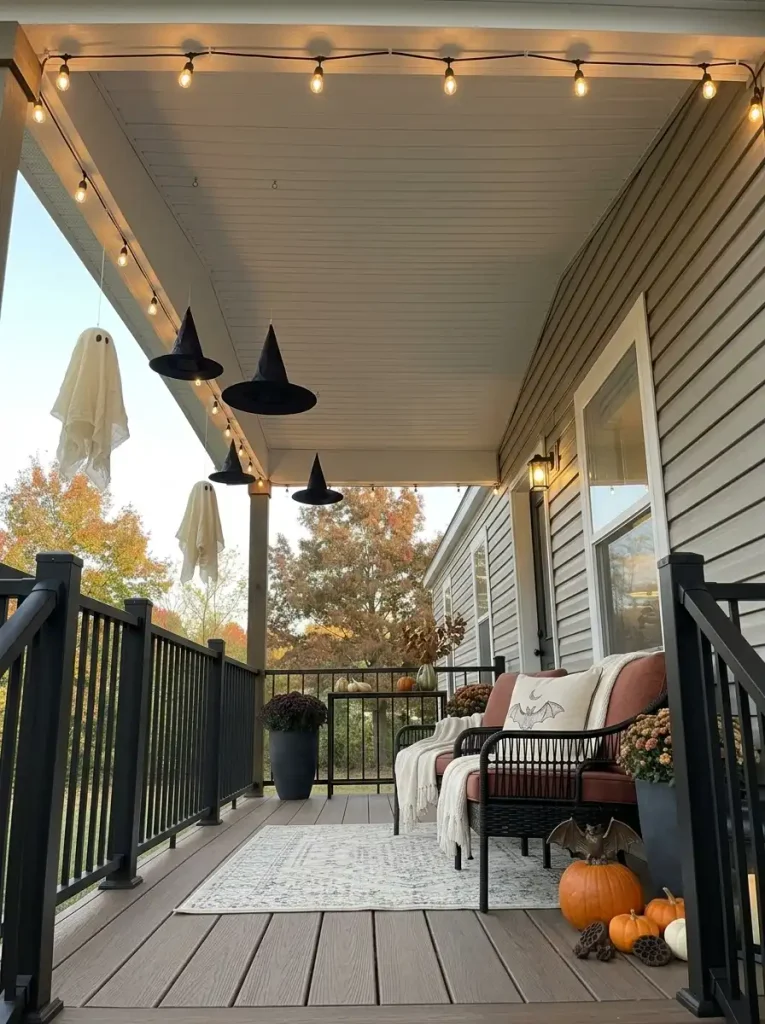
When the patio floor is already doing enough, look up.
A covered mobile home patio often has valuable ceiling space that can carry Halloween character without squeezing chairs, tables, planters, or the route to the door. A small group of lightweight witch hats can create a playful floating effect above a lounge area, while soft fabric ghosts can work over an outer corner that people do not regularly walk beneath.
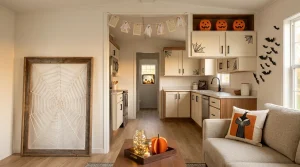
The strongest arrangement is usually asymmetrical. Try three to five pieces at slightly different heights over one zone, then leave the rest of the ceiling noticeably calmer. That difference gives the installation a focal point and keeps the patio from feeling like every square foot has been decorated.
If the patio is very shallow, check the hanging pieces from both a seated position and the doorway. Anything that feels low or intrusive belongs farther toward the perimeter.
Best use: covered patios where floor space is limited but the ceiling plane is visually empty.
7. Trace One Patio Edge With Warm Orange or Amber Lights
Outdoor decorative lighting can change the whole Halloween patio after sunset, but placement matters more than the number of bulbs.
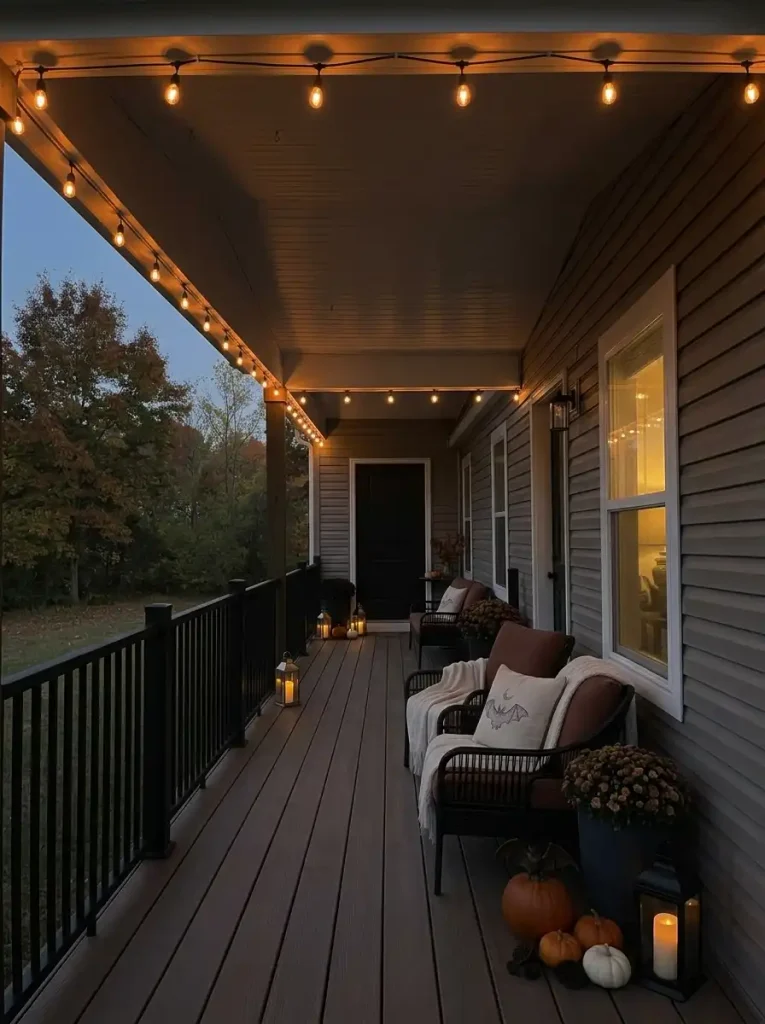
Follow one existing architectural line first: the outer roof edge, a beam, one railing section, or the long side of a covered patio. That illuminated line gives the eye a clear boundary and makes the patio architecture easier to read after dark. On a narrow mobile home patio, this can feel more composed than several competing strands.
Use the planner below to choose a route that matches the structure you actually have.
After-Dark Edge Planner
Let the patio structure choose the light route.
Select the strongest architectural edge you already have. The lighting recommendation shifts so the glow supports the patio instead of becoming another layer of visual clutter.
Trace the outside roof line.
A single warm strand along the outer roof edge outlines the patio as one volume. Leave the siding and central ceiling calmer so the illuminated perimeter stays readable.
Turn the railing into the glowing boundary.
Keep the upper plane quieter and run the strongest light line lower. This visually contains the seating or dining zone and works especially well when the roofline is difficult to access.
Create one deliberate light span.
Use a single defined run between appropriate existing supports where your setup allows it. Avoid creating a dense web of lines over the whole patio simply to fill the ceiling.
Light only the focal edge.
On a tiny patio, illuminating one short wall, corner, or railing section can provide enough Halloween atmosphere. Let the remaining edges disappear softly after dark.
For decorative lighting, CPSC advises using safety-tested light strands, inspecting sets for broken sockets, frayed or bare wires, or loose connections, discarding damaged sets, and avoiding overloaded extension cords. U.S. Consumer Product Safety Commission
The styling payoff comes from restraint: one clear line of warm light can make pumpkins and dark accents below it feel richer without requiring a brighter patio.
8. Build One Pumpkin-and-Mum Cluster at the End of the Sightline
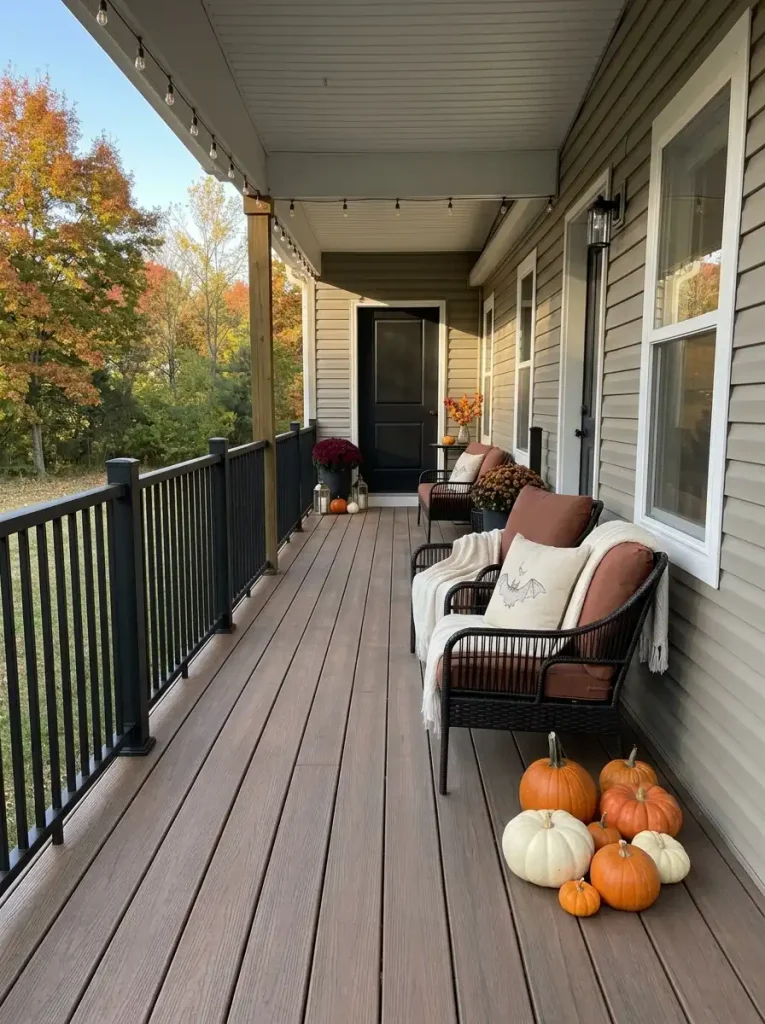
Walk toward the patio from the direction you see most often—the yard, side path, driveway, or door. Where does your eye naturally stop?
That point is a strong candidate for the largest pumpkin-and-mum cluster.
Use height variation, not sheer quantity, to give the group presence. A taller mum or planter can form the back layer, medium pumpkins can create the middle mass, and one or two smaller pumpkins can soften the lower edge. If every pumpkin sits at the same height, the display tends to read like a row. Changing levels gives the composition more depth.
On a narrow patio, keep the cluster compact enough that it behaves like one object. A grouping that spreads gradually down an entire railing or walking edge can make the patio feel narrower.
Photograph the patio from its main approach. If your eye reaches the cluster and then comfortably moves back toward the seating area, the hierarchy is working. If the cluster visually blocks the furniture, reduce its width.
9. Keep the Patio Table Usable With a Low Spooky-Cute Centerpiece
A Halloween table can look beautiful in a photograph and still be frustrating at dinner.
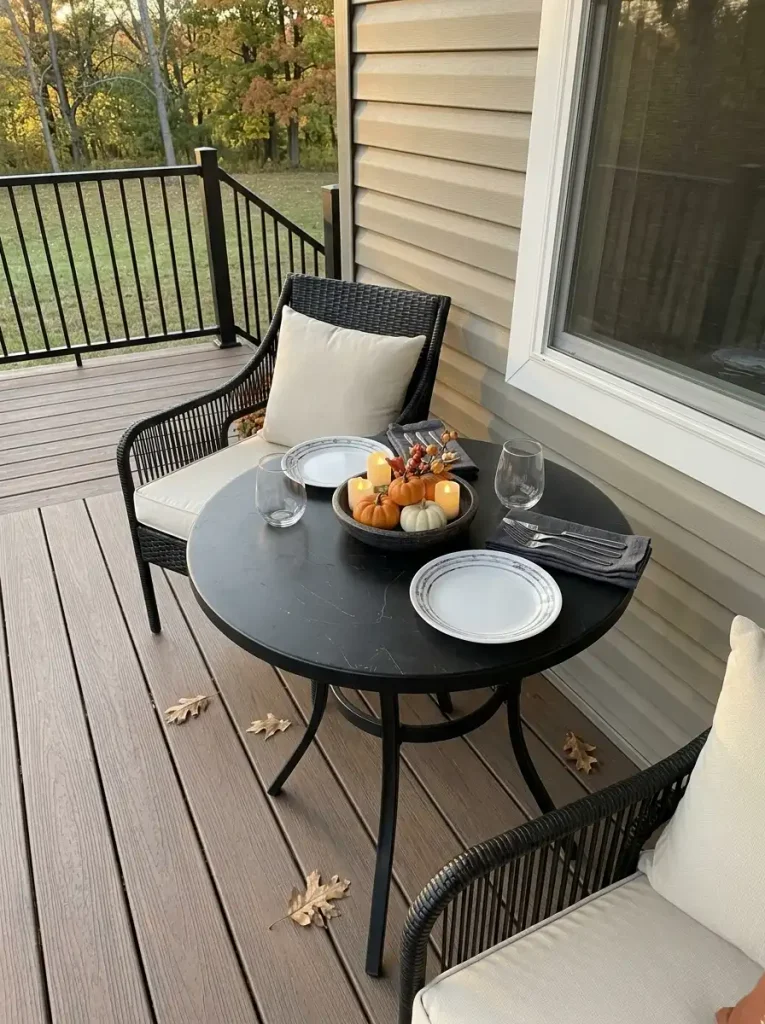
Treat the middle as shared working space, not a display shelf. A low arrangement of mini pumpkins, faux foliage, a compact bowl, or battery-operated candle-style lights can create a Halloween focal point while leaving room for plates, drinks, serving pieces, and conversation.
Tabletop Footprint Check
Give Halloween the center, not the whole table.
Use the centerpiece as a compact visual island. The surrounding surface still belongs to the people using the patio.
CENTERPIECE
SETTING
SETTING
SETTING
SETTING
If the table is only occasionally used for dining, put the centerpiece on one tray or shallow bowl. The entire seasonal setup can then move as one unit when you need more working surface.
10. Put Small Halloween Objects on a One-Lift Side-Table Tray
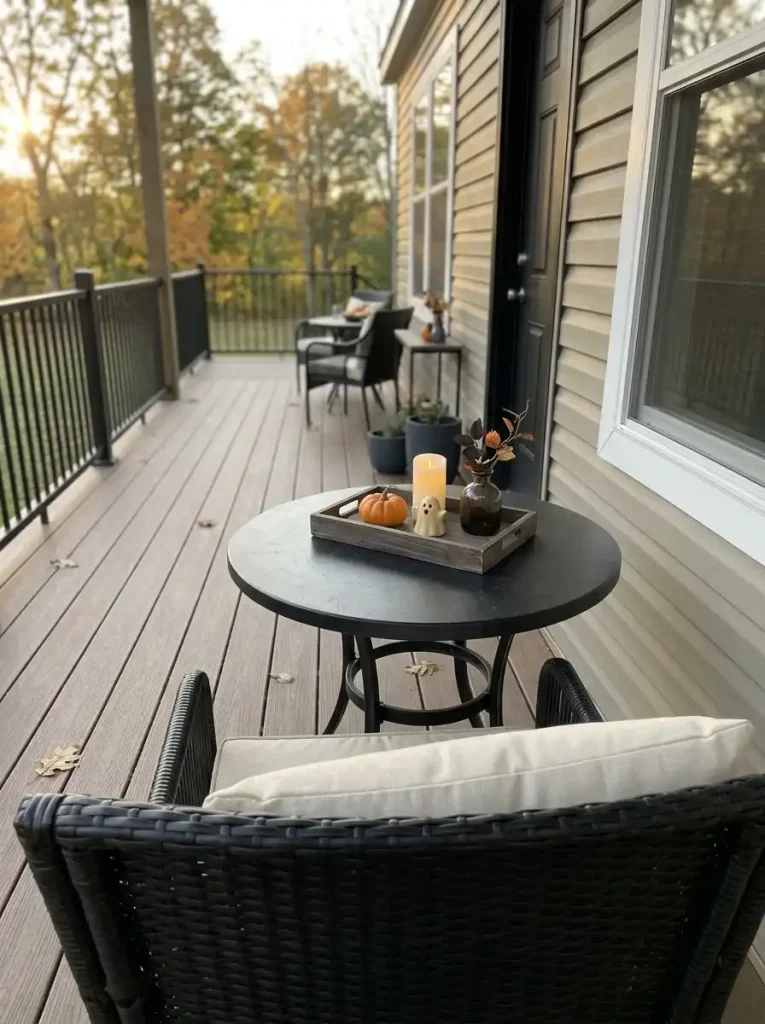
Small decorative pieces become clutter fastest because they scatter.
A side-table tray solves that problem by turning several objects into one visual unit. A mini pumpkin, tiny ghost, LED candle, small vase of dark foliage, or faux potion bottle can share the tray while the rest of the tabletop stays open.
The practical benefit matters on a mobile home patio where the same side table may hold coffee in the morning, a phone in the afternoon, and drinks after dark. When the decorations occupy one movable footprint, clearing space takes seconds.
Keep the tray noticeably smaller than the tabletop. If its edges nearly match the table edges, the table has stopped functioning like a useful surface and has effectively become a pedestal.
For an especially tiny patio, treat the tray as the entire tabletop Halloween moment. You may not need another collection of small decorative objects nearby.
11. Stretch Cobwebs Across One Corner Frame, Not Every Railing
Faux cobweb becomes visually powerful when it has architecture to connect.
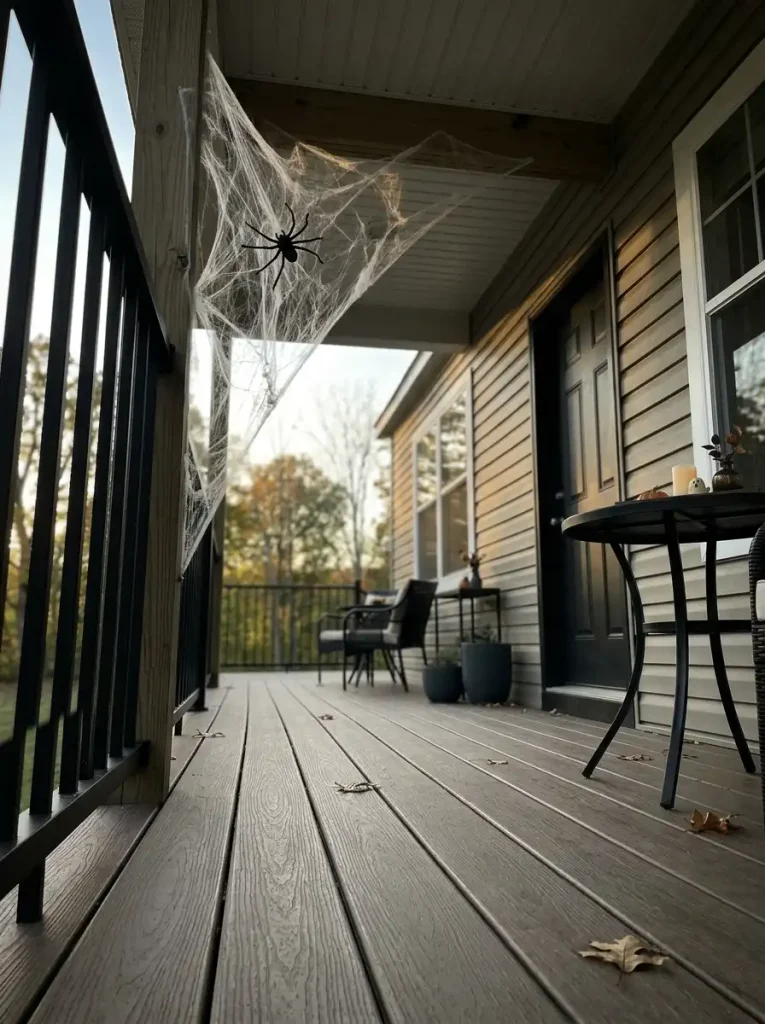
Choose one corner where a post, railing, trellis, roof support, or adjacent wall naturally forms a frame. Stretch the webbing across that defined area and allow negative space around it. A concentrated web reads as a deliberate Halloween feature; thin strands scattered across every available edge can blur the patio’s lines.
Think of the corner as a temporary backdrop.
Use one larger spider or one strong central feature if the web needs a focal point. Several equally sized spiders spread across the entire surface can weaken the composition because none becomes dominant.
For Halloween mobile home patio ideas with heavy outdoor exposure, favor a location you can inspect and clean up easily if the webbing becomes tangled, damaged, or untidy.
Stop point: once the web shape reads clearly from several feet away, it is doing enough.
12. Send a Bat Flight Across One Blank Siding or Screen Panel
A long piece of siding beside the patio can make the space feel unfinished at Halloween, yet it does not need a bulky floor display.
Use bats as directional wall movement.
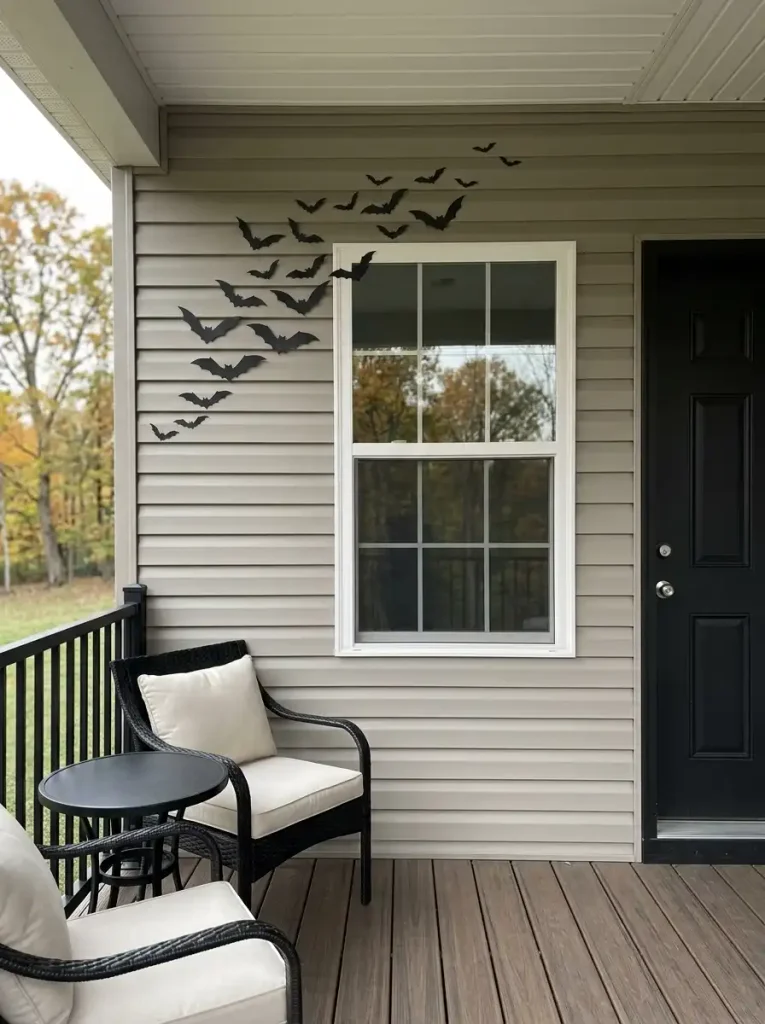
Begin with the largest shapes near one visual anchor—perhaps the window edge, a planter, or the seating area. Let the forms become smaller as they travel diagonally upward or across the wall. That shift gives the impression that the bats are moving through the scene and lets a modest number occupy a larger visual area.
Avoid covering the panel with identical silhouettes. A clear starting point and a tapering finish usually read more strongly.
This section owns the composition rather than the construction. For the deeper project-making side, continue with StylishGalore’s dedicated specialist:
21 DIY Halloween Decor Ideas for Mobile Homes
On the patio itself, use a bat flight when you have a blank vertical plane and want to preserve valuable floor space.
13. Use the Window Beside the Patio as a Backlit Halloween Layer
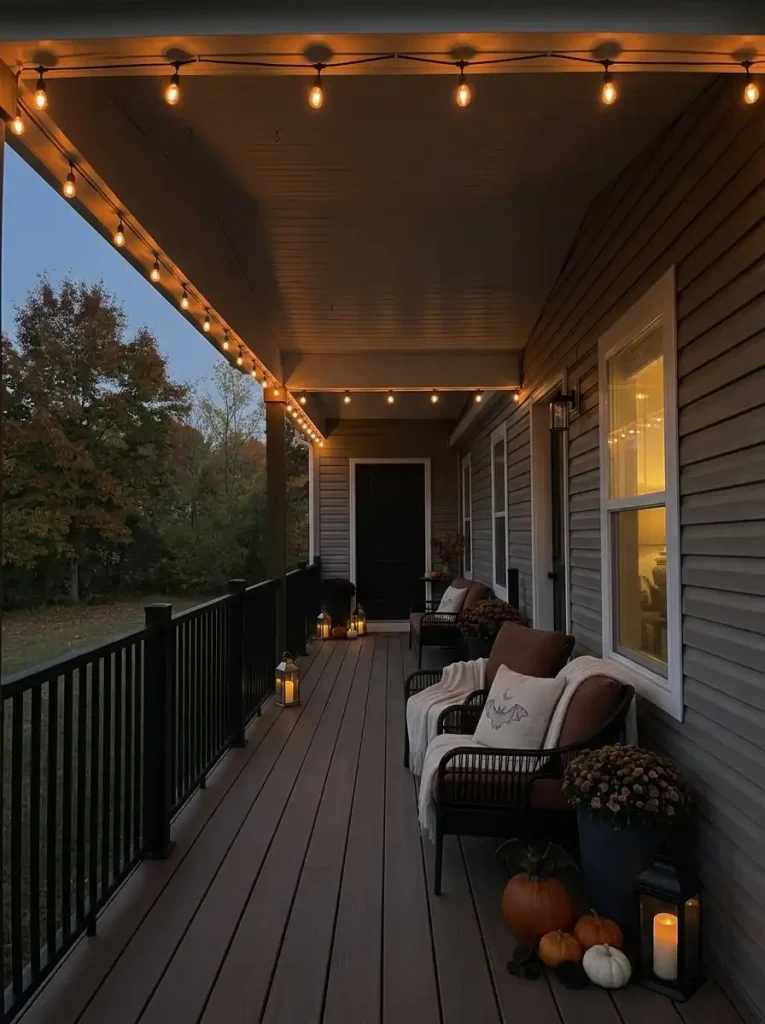
A patio window can become part of the outdoor scene even though the decoration sits inside.
Place one simple silhouette or translucent Halloween shape where it is visible from the patio after dark. A cat, moon, ghost, branch, or oversized pumpkin face can work well because a larger graphic remains readable through glass. Interior light behind it supplies the glow.
This is especially useful on a narrow mobile home patio because the window adds visual depth without adding another physical object to the floor.
Do not fill the entire pane automatically. Leaving part of the glass open preserves the window as part of the architecture and keeps the effect from becoming visually heavy during daylight.
The idea can also do double duty: the decoration contributes to the indoor room while becoming part of the patio composition at night. That makes it a strong choice when seasonal storage is limited.
14. Turn a Trellis or Privacy Screen Into a Moon-and-Branch Backdrop
A patio privacy screen is already doing the hardest visual job: it defines a boundary.
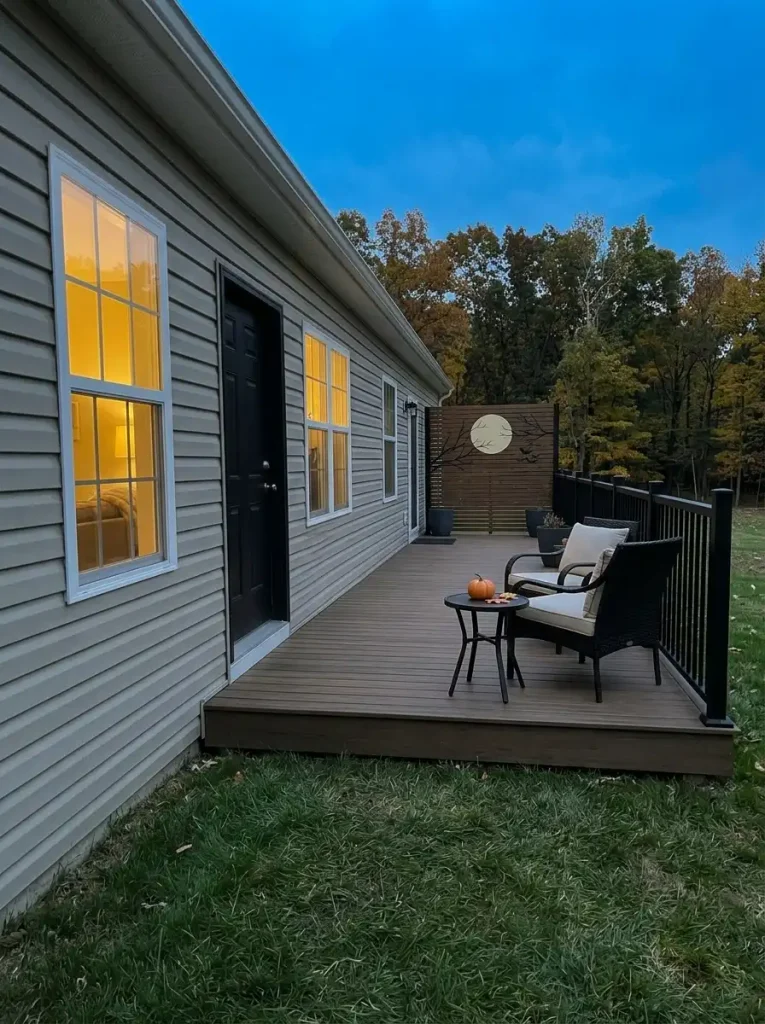
Use that surface as the background layer for the Halloween scene. A pale moon shape, dark branch silhouette, restrained garland, or small group of bats can give the screen a specific role without requiring another freestanding prop.
Compare the two outcomes. When chairs, floor, railing, table, wall, screen, and planters all receive separate decorations, the patio can become visually fragmented. When the screen carries the stronger graphic story, the furniture can remain calmer in front.
That layering gives a compact mobile home patio more apparent depth: furniture in the foreground, a few low seasonal accents in the middle, and the screen as the backdrop.
If the screen already has strong lattice, vines, or patterned material, reduce the Halloween graphics. The permanent texture may already provide enough complexity.
15. Set Up a Slim Candy-and-Drink Station Against the Wall
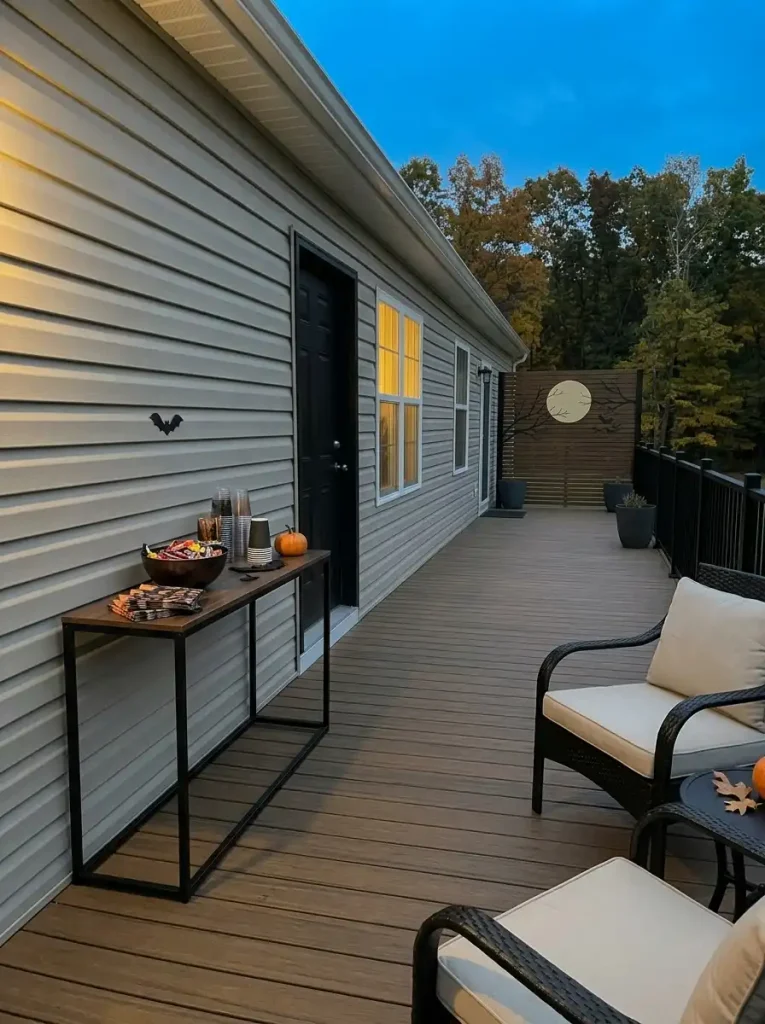
Imagine four friends arriving on a cool October evening.
If every drink, snack bowl, napkin, and candy container lands on the main patio table, the centerpiece disappears and the dining area starts doing too many jobs. A narrow service station can solve the problem.
Use an existing console, compact cart, shelf unit, or sturdy narrow surface against the wall. Keep the top focused on things guests actually reach for: drinks or cups, one candy bowl, napkins, and one small Halloween accent.
Anything else can stay indoors until needed.
The location matters more than the styling. The station should sit outside the main movement route and close enough to the seating or dining zone that guests will actually use it.
On a very small patio, skip this idea unless you already own a narrow piece that fits naturally against the wall. Buying another furniture item to create a holiday moment rarely improves a patio that already feels tight.
16. Create One Pale Pumpkin-and-White Ghost “Quiet” Corner
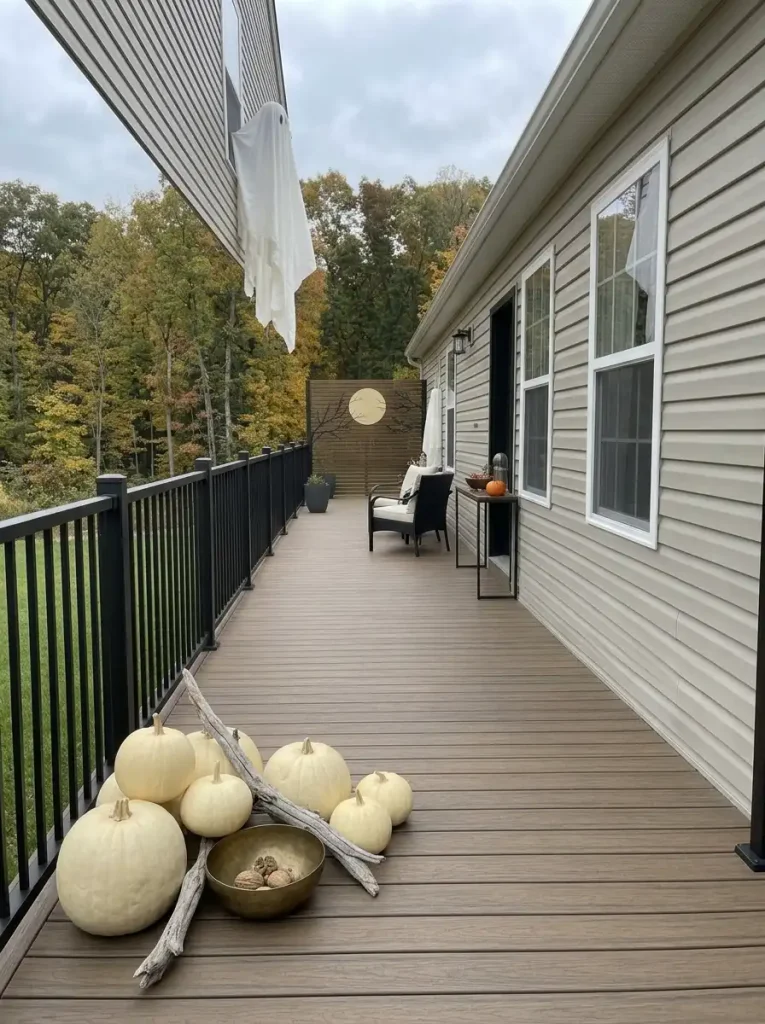
Halloween patios do not need maximum contrast everywhere.
After several black, orange, burgundy, purple, or glowing elements appear, one quieter corner can make the stronger features feel more intentional. Use pale pumpkins, cream textiles, soft white ghosts, weathered wood, or muted foliage in a single secondary zone.
The lighter corner acts like a visual pause.
It works especially well beside cream or gray mobile-home siding because part of the seasonal palette already belongs to the architecture. The area remains Halloween-specific through recognizable shapes—pumpkins, ghosts, moons—while the softer colors lower the visual volume.
This is also useful when you want the patio to feel seasonal in daylight and moodier after dark. Warm light can transform pale pieces at night without introducing another group of bright props.
If the main seating zone already uses a pale palette, reverse the contrast and let the quieter area become a darker textural corner.
17. Layer Lantern Glow at Floor, Table and Eye Level
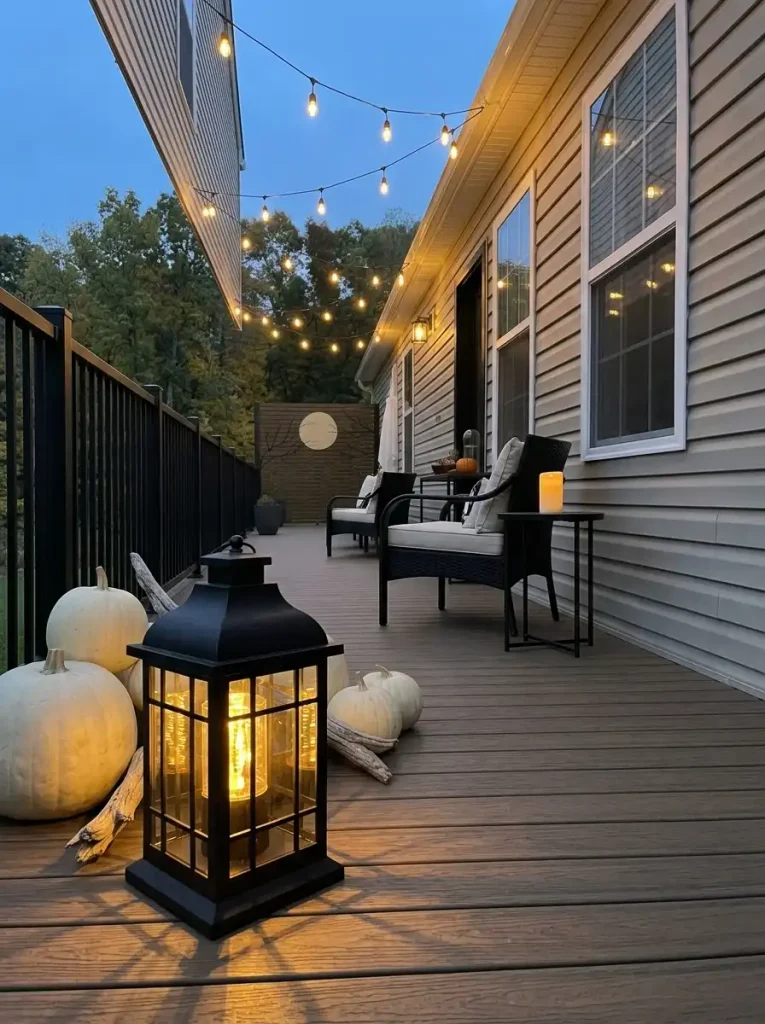
One lantern on the floor can look charming. Five lanterns on the floor can start looking like storage.
A stronger nighttime composition distributes decorative glow across different heights.
Start low with one lantern or illuminated pumpkin near a focal cluster. Add a second glow around table height. Then allow the highest light source—string lights, a wall fixture, or another suitable decorative light—to complete the vertical sequence.
The eye now moves through the whole patio instead of staying close to the floor.
Where dried flowers, faux webs, paper decorations, textiles, or other easily ignited seasonal materials are present, battery-operated candle-style lighting is a useful choice. NFPA advises keeping Halloween decorations away from open flames and heat sources and recommends battery-operated candles or glow sticks for jack-o’-lanterns. NFPA
Lighting decision: vary the height of the glow before deciding that the patio needs more glowing objects.
18. Load Decor Onto the Perimeter So the Main Route Stays Open
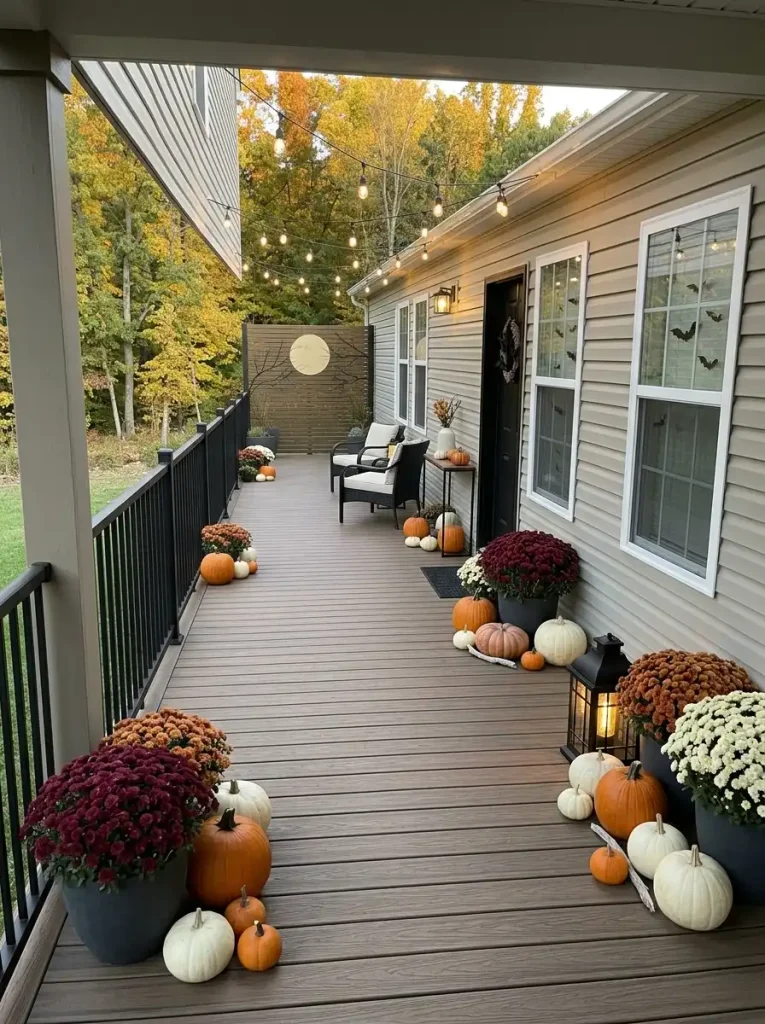
A mobile home patio often does something that a styled outdoor room in a catalog does not: it works as a passage.
You may cross it to reach the door, stairs, yard, grill, storage, or driveway. Halloween décor should respect that route.
Use the tool below to identify the path your patio needs to protect.
Perimeter-Load Route Planner
Protect the route before you decorate the floor.
Choose the movement pattern your patio needs to preserve. The planner shows where seasonal visual weight can move so the important circulation path stays readable.
Keep the furniture approach readable.
Load pumpkins and lanterns onto the outer edge or behind the seating line. Avoid making people weave around seasonal clusters just to reach the chairs.
Make the long through-route the quietest strip.
Place stronger seasonal mass against the siding or far perimeter. Use lighting or wall décor to carry Halloween visually across the patio without filling the physical route.
Let the arrival line stay obvious.
Keep the step landing and door approach visually simple. Concentrate low objects farther down the perimeter and place flatter décor on vertical surfaces.
Lift more of the Halloween story off the floor.
When several paths overlap, use the ceiling, siding, windows, railing, screen and lighting as the primary decorating planes. Keep freestanding props grouped in one genuinely unused corner.
If the door, landing, or immediate threshold needs its own concentrated Halloween treatment, continue with StylishGalore’s small-entry specialist:
15 Halloween Entryway Ideas for Small Mobile Homes
NFPA also recommends keeping exits clear of Halloween decorations so escape routes are not blocked. NFPA
19. Give a Tiny Patio One Photo-Ready Spooky-Cute Corner
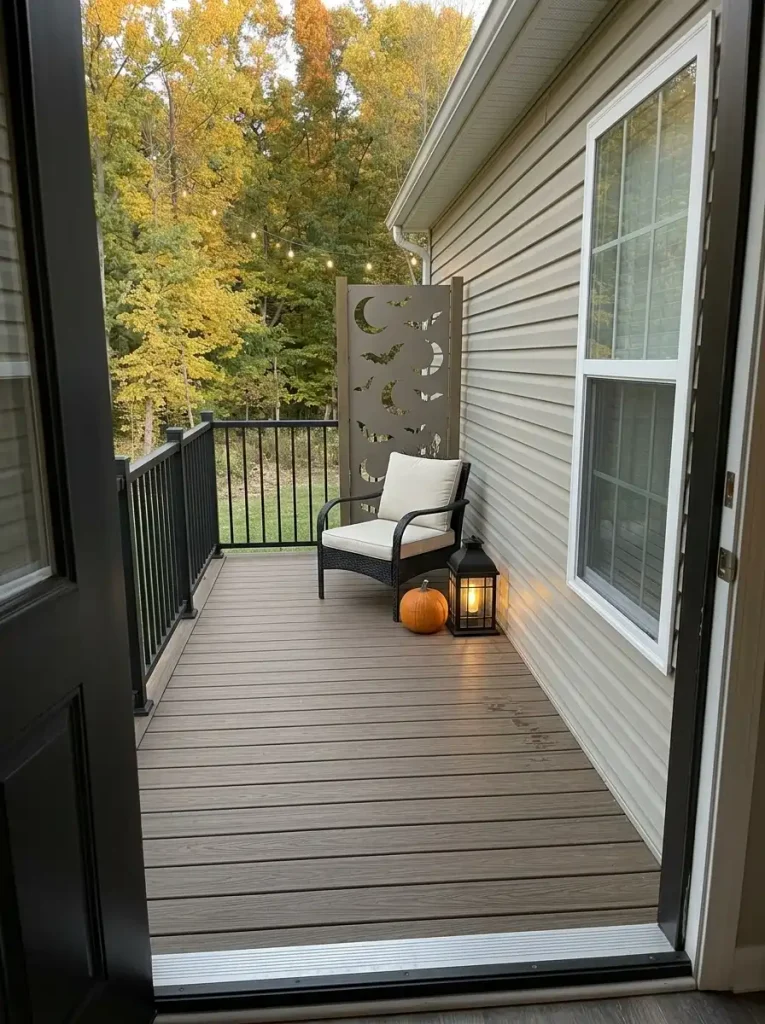
A tiny patio may not have room for separate dining, lounge, pumpkin, lantern, and wall-display moments.
It does not need them.
Choose one corner that appears naturally in photos from the doorway or yard. Place one chair or the edge of an existing bench there. Add one vertical seasonal signal—bats, a hanging ghost, a narrow branch arrangement, or a moon graphic—and one low element such as a pumpkin or lantern.
The three pieces occupy different parts of the frame: furniture establishes scale, the vertical element gives the eye height, and the low accent anchors the floor.
You can make the corner richer with lighting after dark, but avoid expanding the installation until it begins claiming neighboring functional space.
For patios where almost everything is visible in one glance, one convincing frame can carry the whole seasonal identity.
20. Flip One Summer Patio Piece Into Halloween Mode Instead of Buying a New Set
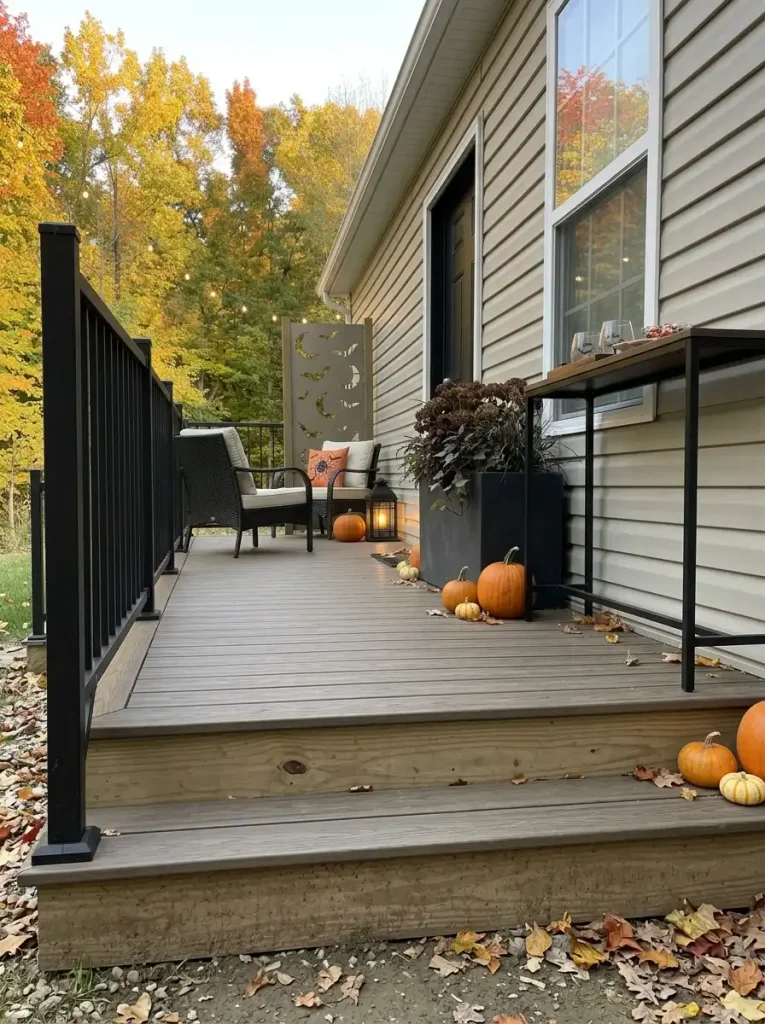
A patio does not need a second life worth of seasonal furniture.
Look at what already occupies the space before adding anything new. A neutral planter can take dark foliage. A summer lantern can hold a battery-operated candle-style light beside a small pumpkin. A beige cushion can work with one seasonal patterned pillow. A bar cart can become the candy-and-drink station from Idea #15.
The permanent object keeps doing its normal job; only the seasonal layer changes.
This approach is particularly useful on mobile home patios because storage after Halloween can matter as much as styling during October. The fewer bulky holiday objects you add, the fewer items need somewhere to go in November.
Use this priority:
Keep: furniture, planters, lanterns, trays, and outdoor textiles that already fit.
Change: removable colors, graphics, and small seasonal objects.
Buy last: another large item that exists only for the holiday.
For a deeper cost-cutting strategy across the home:
21 Cheap Halloween Decor Ideas for Mobile Homes That Look High-End
21. Run a Four-View Edit Before Calling the Patio Finished
The last decorating decision is often subtraction.
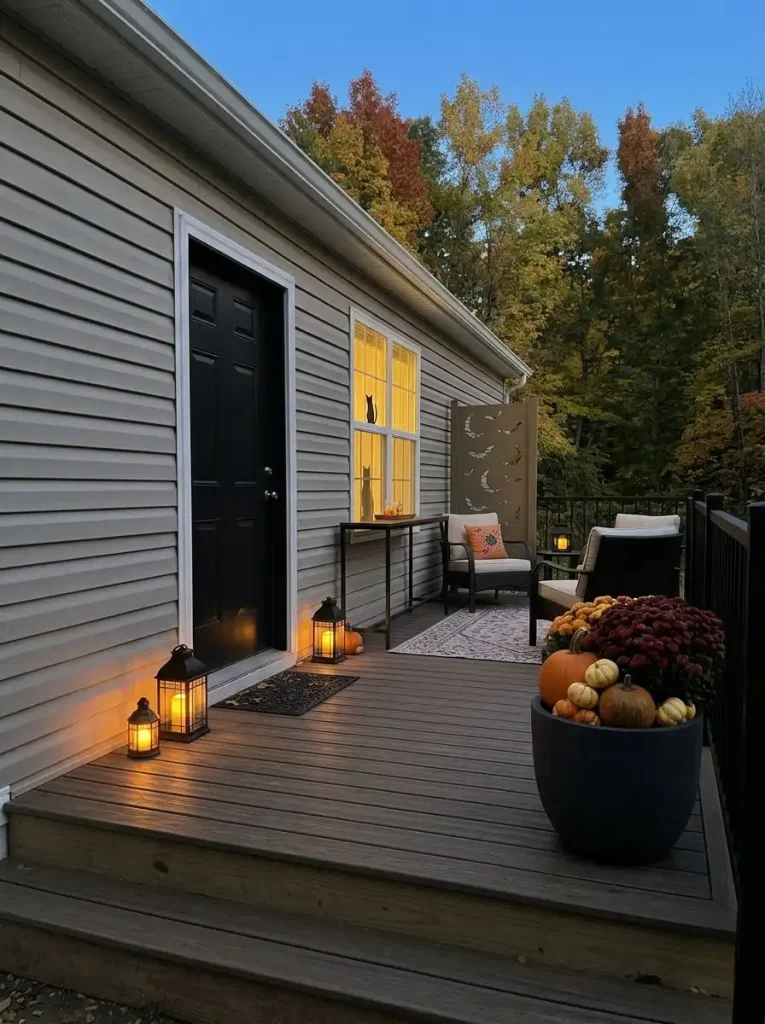
A patio can look balanced from the yard yet feel crowded from the chair. It can photograph beautifully at noon and lose its hierarchy at night. It can seem open until you stand in the doorway carrying something bulky.
Do one final edit from four different views.
Four-View Final Edit
Which view still feels wrong?
Inspect the patio from the perspective that feels weakest. Each view exposes a different kind of visual problem and points to the first edit worth making.
The patio feels busy while you are actually using it.
Look for small props occupying side tables, floor space directly beside chairs, or decorations entering the seated sightline. The décor may look successful from outside while becoming intrusive from within.
The arrival feels crowded before the patio opens up.
The first few feet are carrying too much visual weight. Shift one low cluster toward a farther corner or replace a floor object with a flatter wall, window, or hanging element.
The nighttime scene has too many competing bright points.
Choose one primary glow—the roof edge, lantern group, table, or focal pumpkin cluster—and reduce the weakest secondary light source so the composition gains hierarchy.
The patio looks fragmented in a photo.
Small unrelated objects may be breaking the scene into disconnected pieces. Combine nearby items into one cluster and leave a cleaner area beside it so the eye has a clearer focal hierarchy.
If an element fails two different views, it is a strong candidate for removal. The finished patio should still feel comfortable when nobody is taking a photograph of it.
A Spooky-Cute Patio Still Needs Room to Be a Patio
The strongest Halloween mobile home patio ideas do not depend on covering every surface. Give the patio one clear seasonal anchor, one useful after-dark lighting layer, and enough open space for the way you actually sit, walk, dine, or entertain there.
Start with the architecture and furniture you already own. Put the strongest decoration where it can be seen without interrupting the patio’s daily job, then let smaller Halloween cues support that moment.
When the seating still feels inviting, the route to the door remains obvious, and the Halloween character reads from both daylight and dusk, the patio is finished. At that point, editing one weak decoration will usually improve the space more than adding another.
Love this idea? Save it to Pinterest so you can return to your favorite Halloween mobile home patio ideas when you’re ready to decorate.