

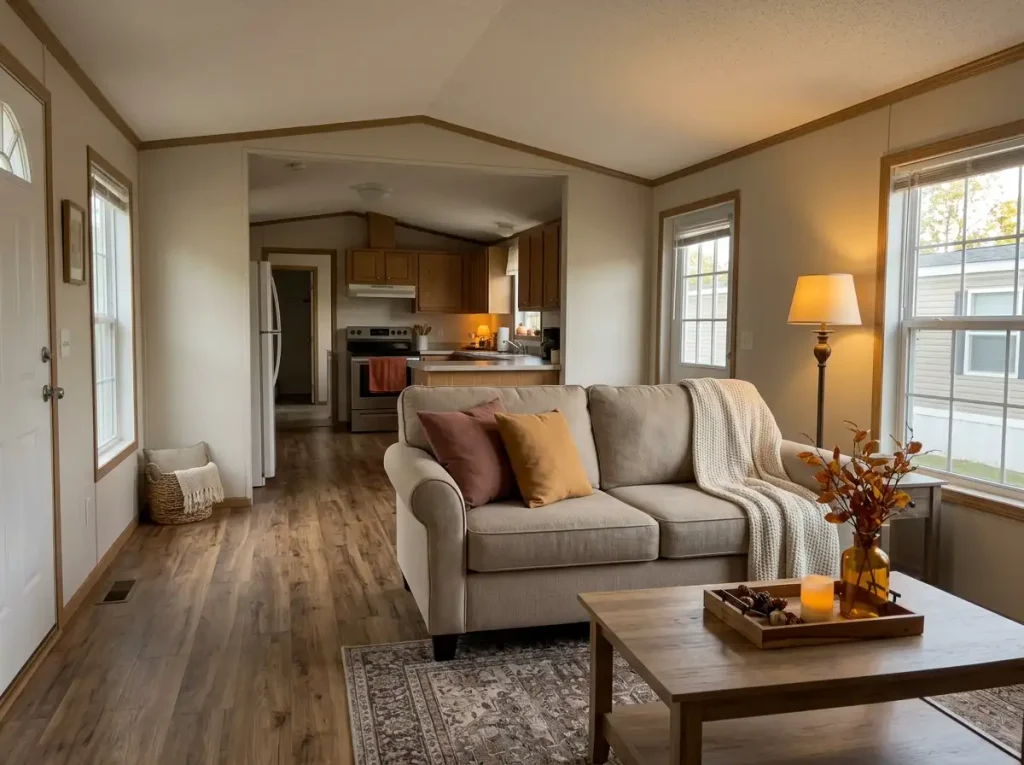
A mobile home can be one of the easiest spaces to transform for fall because a single well-placed project often influences several sightlines at once. You do not need boxes of seasonal decorations to make the entire place feel warmer.
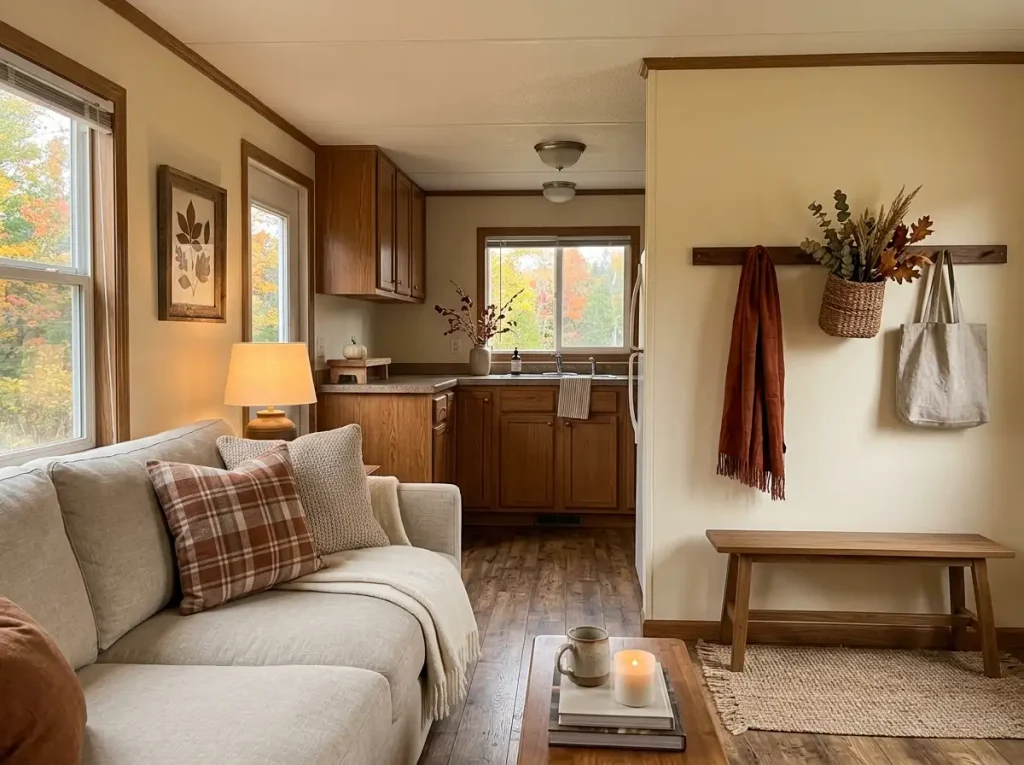
The best fall mobile home DIY projects work with the home’s proportions. They use shallow walls, compact corners, windows, porches and overlooked surfaces without sacrificing storage or comfortable movement.
These 17 ideas mix simple crafts with useful upgrades, so the finished space feels handmade and seasonal while still functioning like a real home.
1. Build a Slim Fall Peg Rail for a Bare Mobile Home Wall
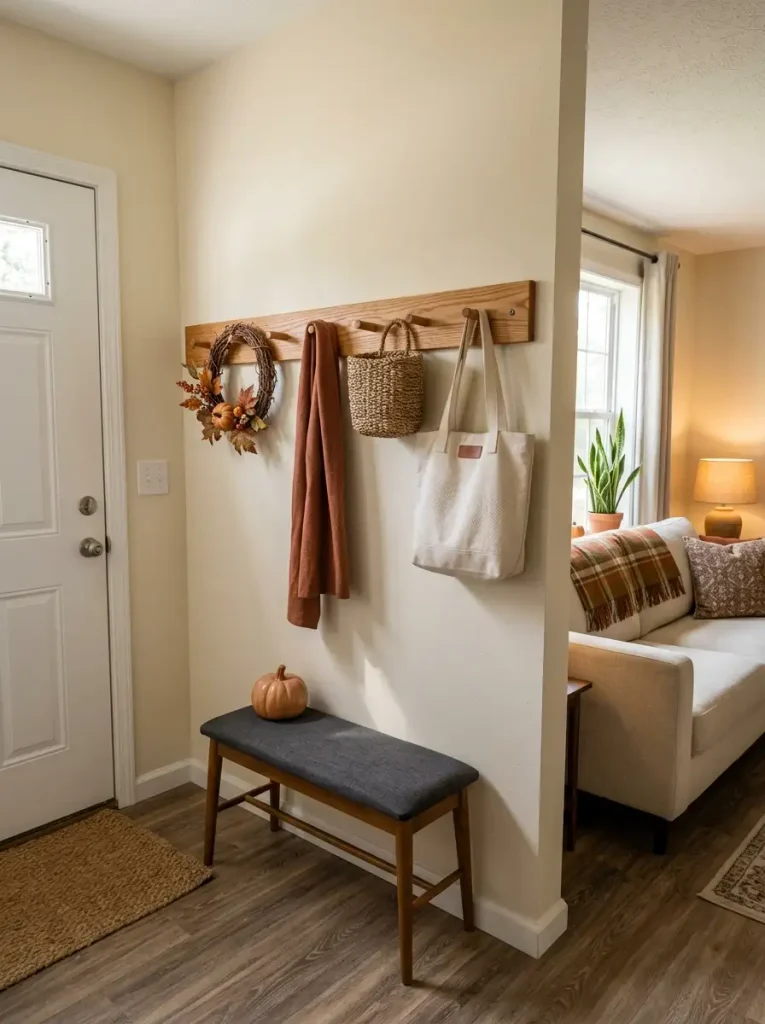
A long empty wall in a mobile home can look underused even when there is not enough floor space for another piece of furniture. A shallow wooden peg rail gives that wall a purpose without pushing into the walking path.
Build the rail from a narrow board and evenly spaced wooden pegs, then finish it in warm oak, walnut or a soft painted neutral. The most convincing proportion usually comes from connecting the rail visually to something already nearby—a console, small bench, window or doorway.
Keep the styling selective. A rust-colored scarf, a miniature wreath, a woven basket and one lightweight fall ornament will read as a complete seasonal arrangement once they share the same horizontal line. Filling every peg weakens that effect and turns useful storage into visual noise.
Placement matters more than total wall width. A rail that stretches too close to a door casing or around an awkward corner can make a narrow entry feel even tighter. Leave clear breathing room at both ends and keep anything bulky away from shoulder-height circulation.
Use appropriate fasteners for the wall construction and the weight you plan to hang. Decorative pieces can stay light; bags, coats or filled baskets require a much more secure installation.
2. Make No-Sew Flannel Pillow Covers From Thrifted Fabric
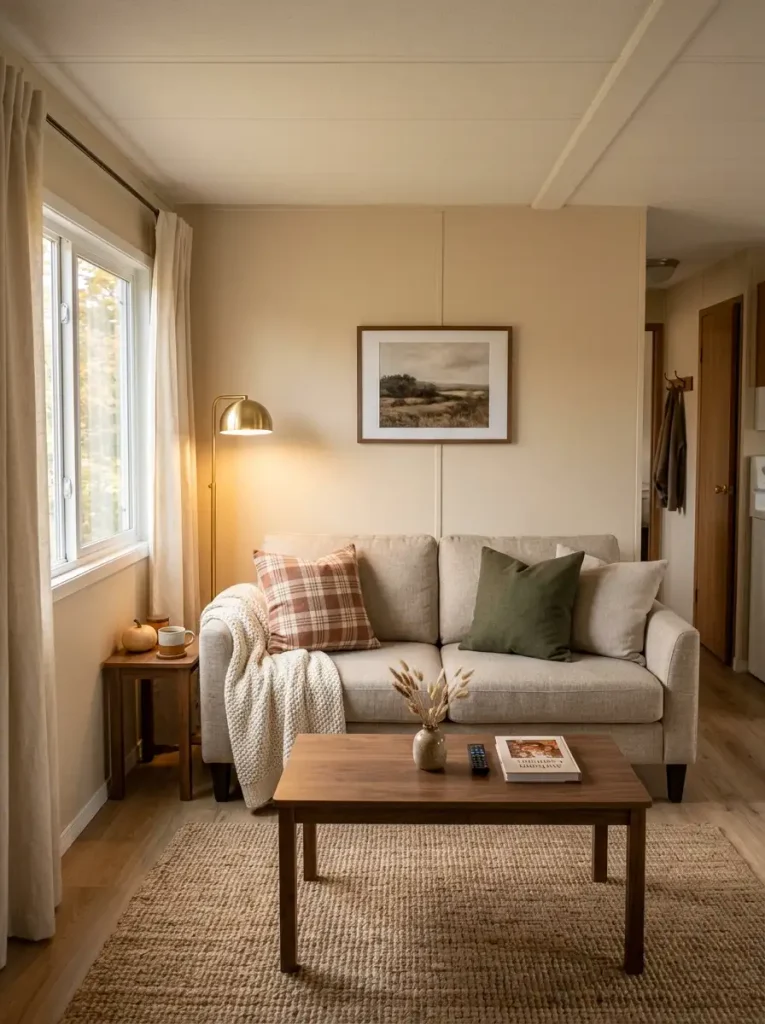
Fall color gets attention first, but texture often changes how a room feels before you consciously notice the palette. Brushed flannel is especially useful in a mobile home because a small amount can soften a large neutral sofa without introducing another piece of furniture.
Look through thrift stores for flannel shirts, lightweight blankets or fabric remnants in cinnamon, oatmeal, deep olive, rust or muted plaid. Fabric with a supple drape will wrap a pillow form more cleanly than very thick blanket material.
For an easy no-sew version, cut the fabric with enough excess to fold around the existing pillow and secure the back using fabric-safe fastening tape. An envelope-style overlap hides the closure and allows the cover to come off once the season changes.
Do not make every pillow plaid. One patterned cover beside one or two solid textures feels calmer, particularly on a short sofa where multiple large patterns can compete at close range.
The storage advantage is easy to miss. Flat fabric covers take up a fraction of the room required by additional seasonal pillows, which matters when closets and under-bed storage are already working hard. Wash and fold the covers at the end of fall, then reuse the same pillow inserts year-round.
3. Frame the Kitchen Window With a Removable Leaf-and-Light Arch
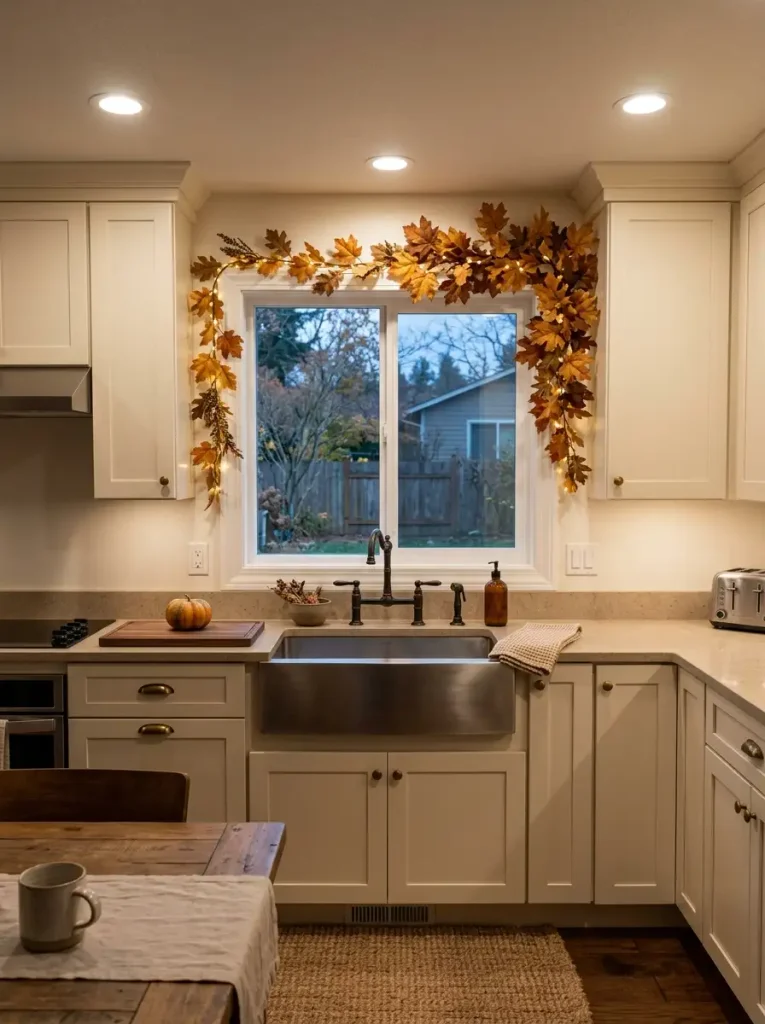
What if the strongest fall feature in your kitchen used almost no countertop space? The window above the sink is an ideal candidate because it already sits inside one of the room’s most visible sightlines.
Build a lightweight seasonal frame with faux maple leaves, a thin flexible vine and warm-white micro lights. Concentrate the fuller foliage near one upper corner and let the opposite side become progressively lighter. That uneven distribution feels more natural and leaves more of the glass exposed.
The open center matters. Daylight is valuable in a compact kitchen, and a solid curtain of leaves can make a modest window appear smaller. Treat the window trim as the decorative boundary while the pane remains the bright visual center.
Run battery-powered lights or a carefully routed plug-in strand where cords stay away from the sink and active prep surfaces. Choose LEDs rated for the way you intend to use them, and keep leaves clear of hot fixtures.
At night, the effect changes completely. The foliage becomes a warm perimeter around the darkened window, giving the kitchen atmosphere without needing several countertop candles, pumpkins or small signs competing for working space.
Use removable hooks or another attachment method suitable for the surface so the whole frame can come down cleanly after the season.
4. Turn Scrap Wood Into a Compact Fall Countertop Riser
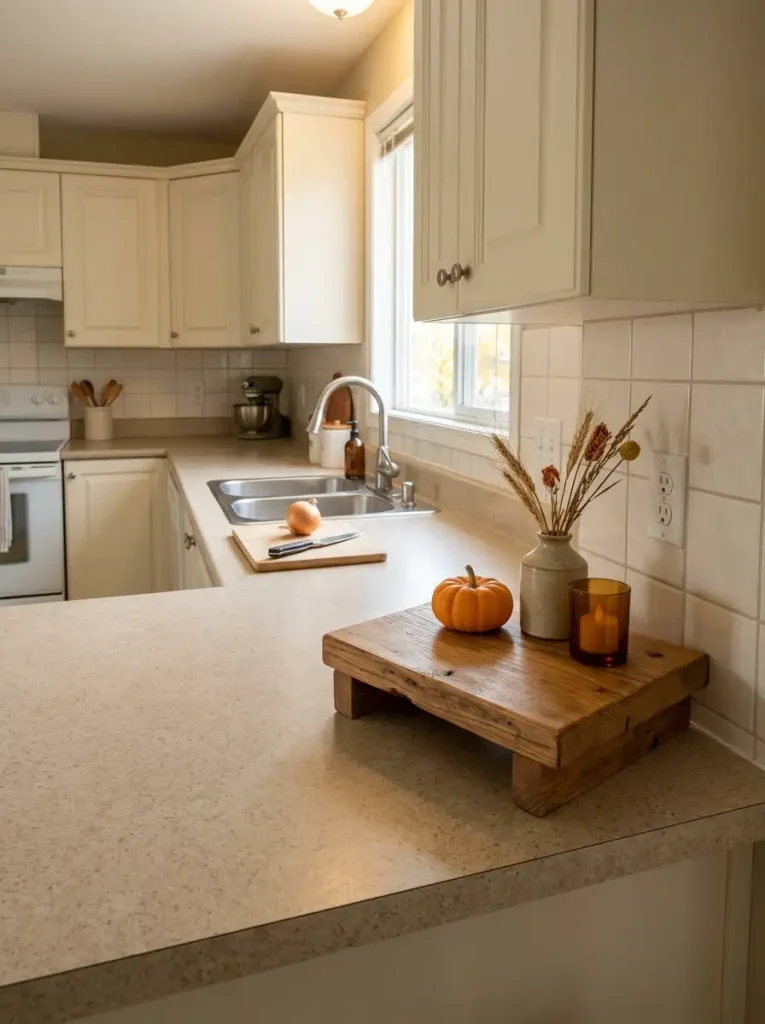
Kitchen counters in mobile homes often have to perform several jobs within a short run of cabinetry. That makes a large seasonal centerpiece impractical, but it does not mean the counter has to stay completely undecorated.
A small wooden riser creates a second visual level while keeping its footprint controlled. Use leftover lumber or an inexpensive board, add two short block-style feet, then sand and finish it with food-area-appropriate paint, stain or sealer according to where it will sit.
Placement determines whether the project feels useful or annoying. Set the riser near a backsplash corner, coffee station or end section that is not needed for chopping and meal preparation. The most attractive arrangement still fails if you have to move it every time you cook.
Height should stay modest. A riser around the scale of a thick stack of cookbooks creates enough elevation for a small pumpkin, candle-style LED or vase of dried stems while preserving the open sightline above it.
Leave part of the lower counter visible around the riser. That exposed surface is what makes the extra level appear intentional instead of crowded.
A narrow riser also makes cleaning easier than a scattered collection of autumn accessories—you can lift one piece, wipe underneath and put the entire display back at once.
subtle layer
clear focal level
use sparingly
5. Craft One Lightweight Twig-and-Pumpkin Hanging Mobile
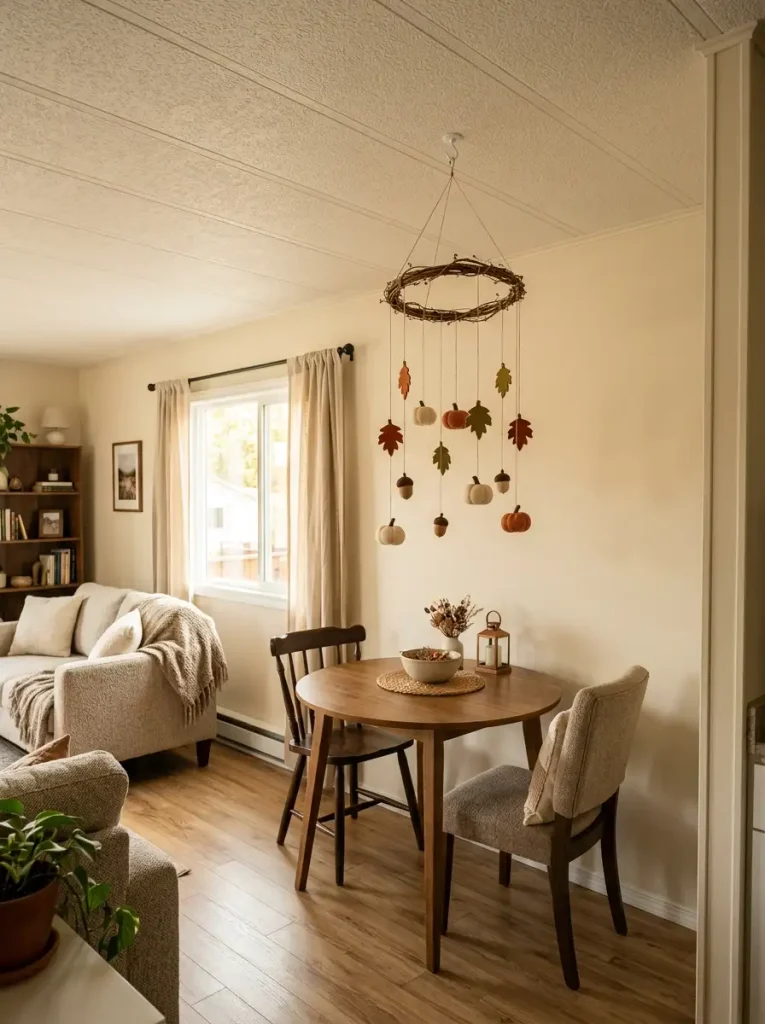
Picture a small dining nook with almost no room for another basket, floor stand or side table. Above the table, however, there may be an entire layer of unused visual space.
A lightweight autumn mobile can make use of that zone beautifully. Form an irregular oval from thin twigs or a ready-made lightweight grapevine ring, then suspend miniature foam pumpkins, paper leaves, felt acorns or other low-weight pieces at different lengths.
The important measurement is not simply the distance from the ceiling. Start with the people and furniture below. A mobile above a dining table can hang lower because no one normally walks through the table; a normal circulation route requires far greater clearance and is usually a poor location for this project.
Stagger the hanging pieces enough to keep them from forming one solid curtain. Empty space between the drops gives each pumpkin or leaf its own silhouette and lets the arrangement move gently without looking tangled.
Weight deserves more attention than decoration. Keep the frame and suspended elements very light, and attach the piece only to an appropriate, properly supported mounting point. When that is uncertain, choose a tabletop or wall-mounted fall project instead.
The finished mobile should feel airy from across the room. A few deliberate drops usually produce more charm than filling every available string.
6. Give the Bathroom Mirror a Removable Fall Garland Frame
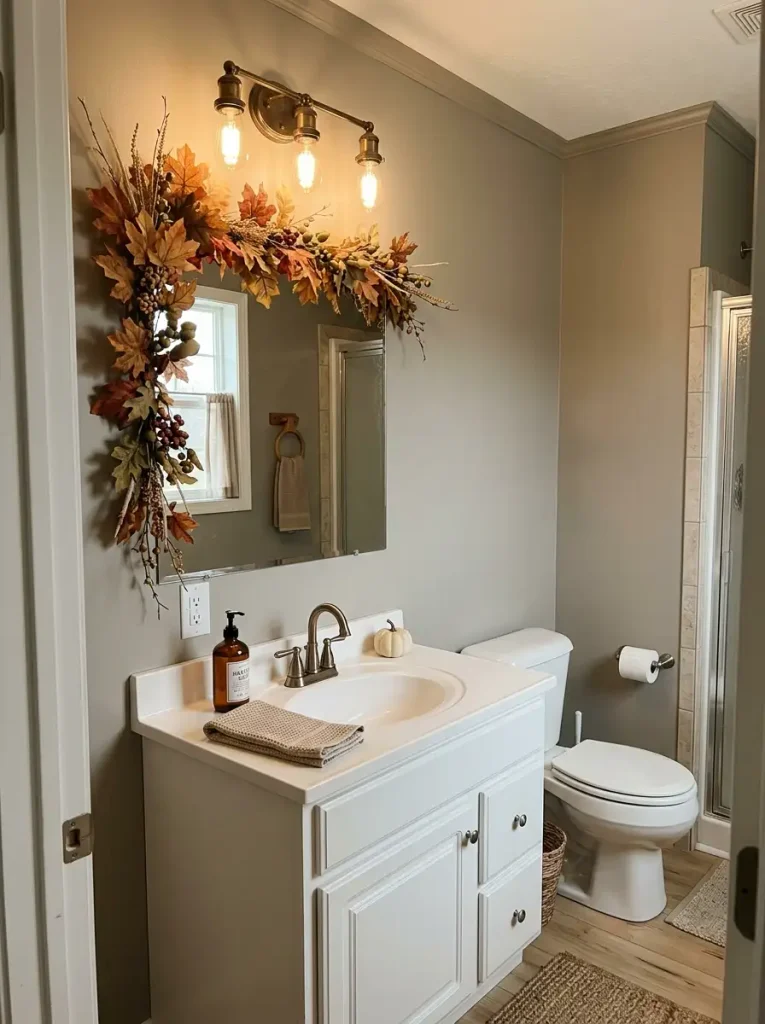
Bathrooms are easy to overdecorate for fall because nearly every available surface is functional. The mirror solves that problem differently: its perimeter offers visual space without claiming the vanity itself.
A lightweight garland made from faux leaves, dried-looking stems and a few muted berries can follow part of the mirror frame. Keep the arrangement intentionally uneven, with one fuller upper corner and a thinner trail along the opposite side. Perfect symmetry tends to make seasonal foliage look more artificial.
Reflection changes the amount of decoration the eye perceives. A garland that looks sparse while you are holding it may appear almost twice as substantial once the mirror begins repeating the surrounding color and texture. Start lighter than expected, then evaluate the finished effect from the bathroom doorway.
Choose removable attachments that suit the mirror or surrounding wall surface, and keep materials clear of vanity bulbs, electrical outlets and areas that receive frequent splashes. Humidity also favors faux foliage or properly dried materials over fragile untreated leaves.
Leave the central glass completely usable. The strongest version frames your daily routine rather than interfering with it, while a few reflected orange and russet notes make the whole bathroom feel seasonally connected.
7. Press Fall Leaves Into a Thrift-Frame Gallery
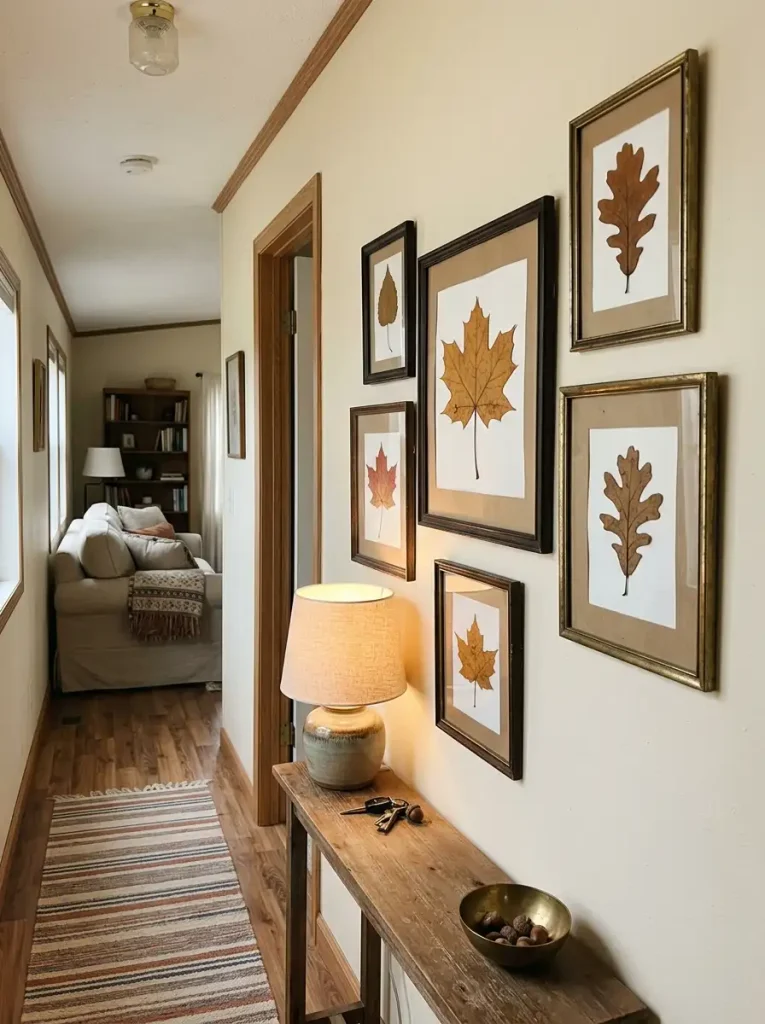
Some of the most beautiful autumn materials are free, but they often disappear into generic craft projects. Framing individual leaves gives them enough negative space to look more like botanical specimens than leftover seasonal decorations.
Collect leaves with clearly defined shapes and relatively flat surfaces. Press them between absorbent paper under heavy books until fully dry, replacing damp paper as needed. Proper drying matters because moisture trapped behind glass can cause discoloration or mold.
Thrifted frames make the gallery more interesting when they share one visual trait without matching perfectly. You might choose all dark wood frames in different profiles, or several simple brass-toned frames with slightly varied sizes.
Give larger leaves more breathing room on the backing paper. A small leaf can sit comfortably inside a tighter mat, while a broad maple leaf needs enough empty border for the outline to remain distinct from a few feet away.
Cream, muted olive, kraft brown or warm white backgrounds usually support autumn color without competing with it. Arrange the frames on the floor before putting anything on the wall, then build an intentionally uneven cluster with one larger piece acting as the anchor.

The final display feels seasonal because of the materials, yet its specimen-like presentation keeps it quieter than a wall covered with signs or themed slogans.
tighter border
more breathing room
8. Build a Leaning Blanket Ladder for a Narrow Corner
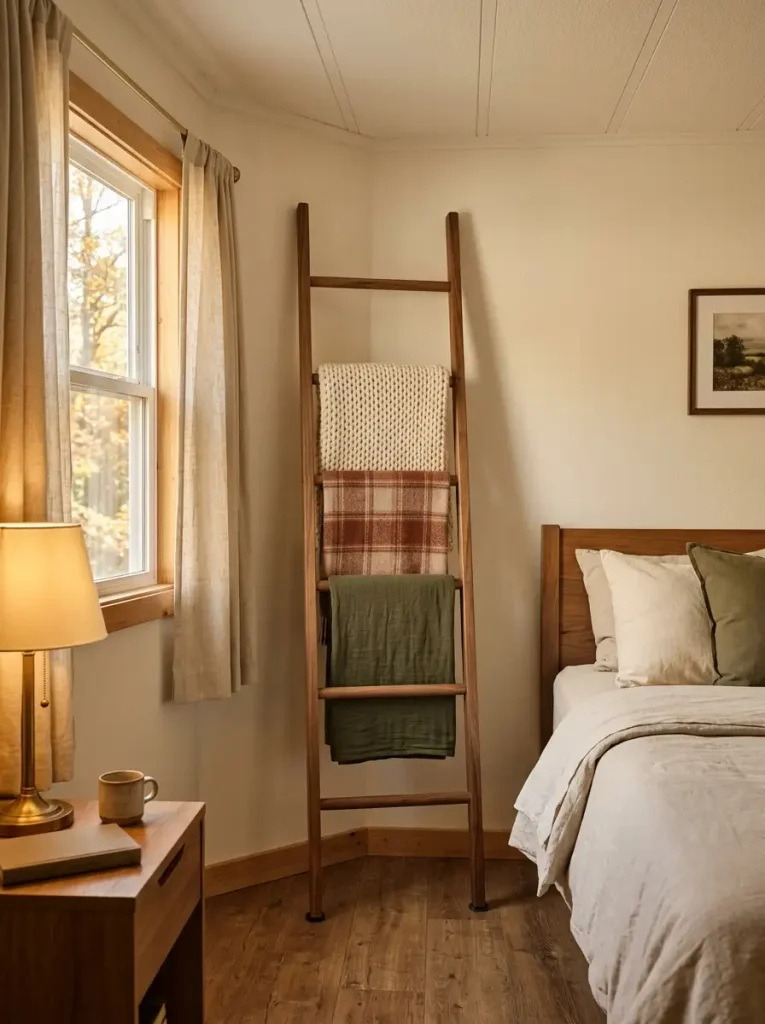
A narrow strip of wall can be too small for a cabinet yet still wide enough to hold several bulky throws vertically. A simple blanket ladder turns that forgotten corner into useful seasonal storage.
The angle matters more than most DIY instructions acknowledge. Lean the ladder too upright and it becomes easier to knock away from the wall; lean it too far and the feet start consuming the same floor area you were trying to save. A modest, stable rake keeps the silhouette slim.
Decide the width by folding your blankets first. The rungs only need to accommodate the folded textile with a little clearance at the sides. Making the ladder much wider simply adds visual mass without improving storage.
Build the side rails from straight, smooth lumber and place the rungs far enough apart that thick throws do not stack directly over each other. Sand every edge carefully so woven blankets do not snag.
Protect the wall and flooring with appropriate pads, and consider a discreet anti-tip solution suited to the location, especially in homes with children or pets. A ladder should never depend on decorative styling for stability.
For fall, two blankets are often enough: perhaps a cinnamon plaid on one rung and a cream knit below it. Keeping one or two rungs visibly empty makes the ladder read as furniture rather than a pile of fabric standing on end.
9. Make a Reversible Fall Entry Sign From One Board
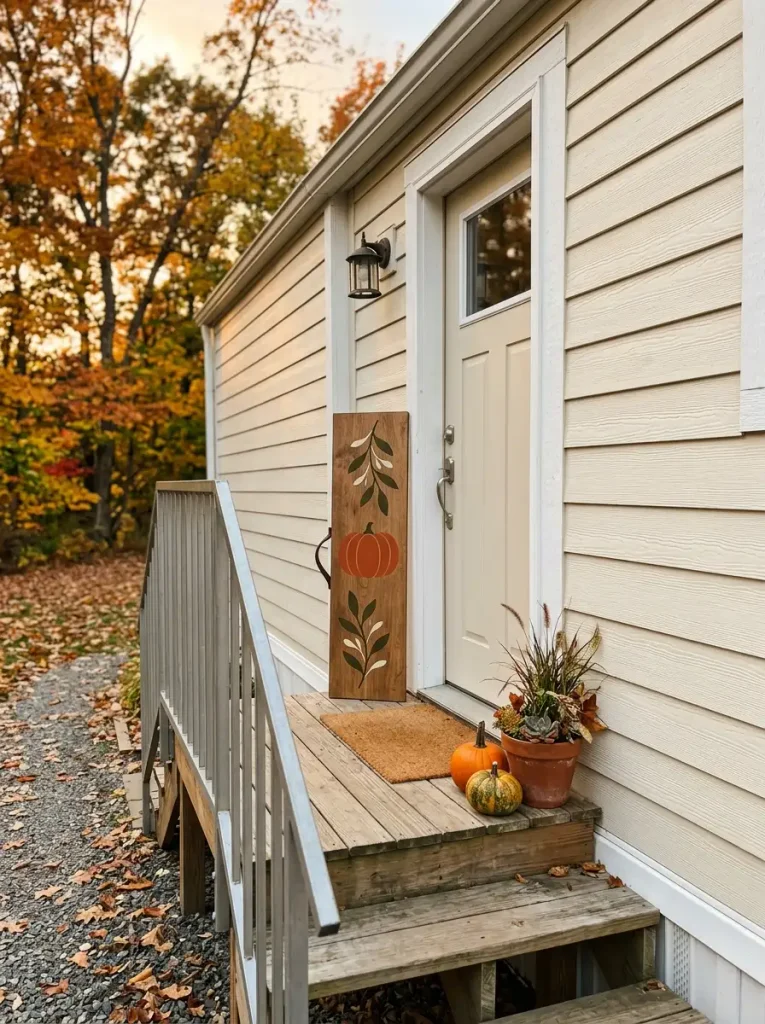
Seasonal signs are easy to make and surprisingly difficult to store. A reversible design solves that problem before the project even reaches your porch.
Start with one narrow board sized for the actual entrance. On a compact mobile-home landing, a slim vertical format generally uses space more efficiently than a broad sign that competes with the door, railing or planters.
Finish one face for fall using a restrained motif—perhaps a painted branch, simple pumpkin silhouette or warm geometric pattern. The opposite face can carry a winter design, a neutral welcome message or a plain finish that works year-round.
That second surface changes the storage equation. Once autumn ends, the same piece remains useful, so you are not finding closet space for another seasonal object.
Seal any sign that will live outdoors with a finish compatible with the paint and expected exposure. Elevating the bottom slightly off a wet porch surface can also reduce moisture contact.
Before committing to lettering or graphics, set the blank board in place. Check the door swing, stair approach and railing clearance first. A design that looks beautifully proportioned on the workshop floor may feel oversized once it stands beside a narrow mobile-home doorway.
The finished sign should support the entrance composition, not become an obstacle people have to walk around.
10. Stencil a Layered Doormat for a Tiny Front Step
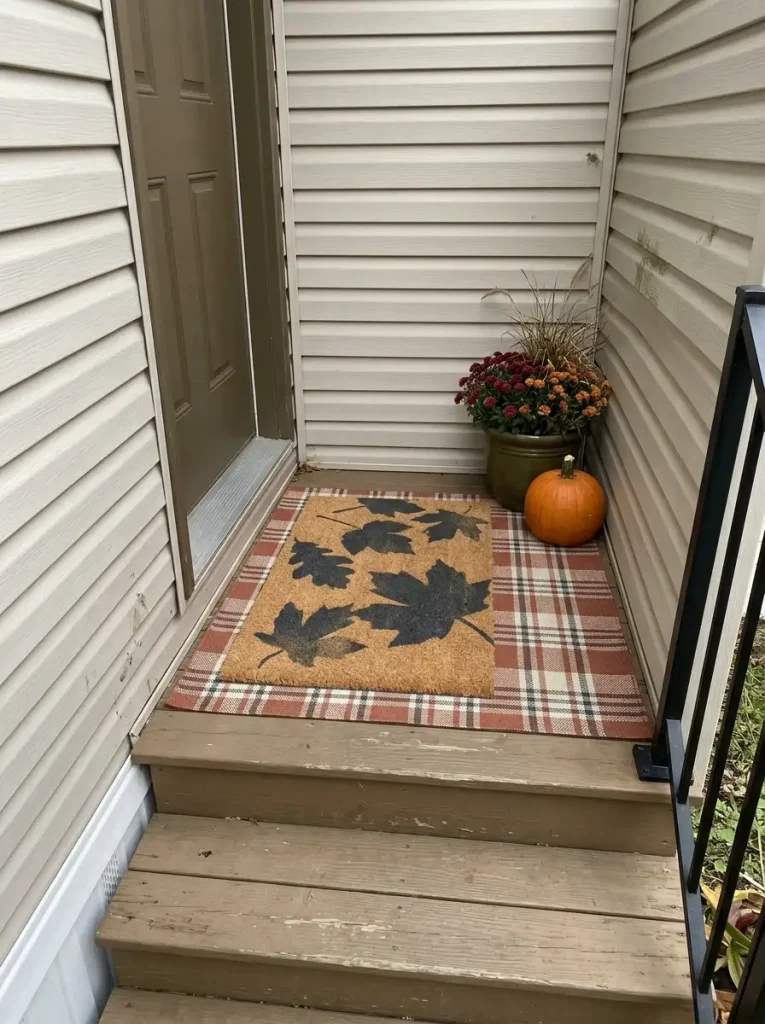
A tiny front landing may not have room for lanterns, stacked crates and oversized pumpkin displays. The floor plane, though, can carry plenty of fall character without making the entrance harder to use.
Start with a plain coir mat and a simple stencil whose shapes remain readable from several feet away. Oversized leaves, a restrained border or one short word usually reproduces more cleanly than intricate lettering. Use paint suitable for the mat material and apply it in light passes so the fibers do not become saturated.
A second flat-weave outdoor rug can sit beneath the coir mat when the landing has enough depth. Let only a modest border of plaid, stripe or muted color show around the upper mat. The lower textile should frame the coir piece, not become another full-size layer competing for attention.
Door clearance decides whether layering works at all. Open the door fully before placing either mat and check that edges stay flat along the normal walking route.
For exposed entries, simpler may be better. One stenciled weather-resistant mat can look more polished than a layered setup that remains damp after rain.
Pattern is doing the decorative work here, so the surrounding porch can stay quiet. A small planter or single pumpkin nearby is enough to connect the threshold to the rest of your fall exterior.
11. Turn Basic Planters Into a Coordinated Fall Porch Set
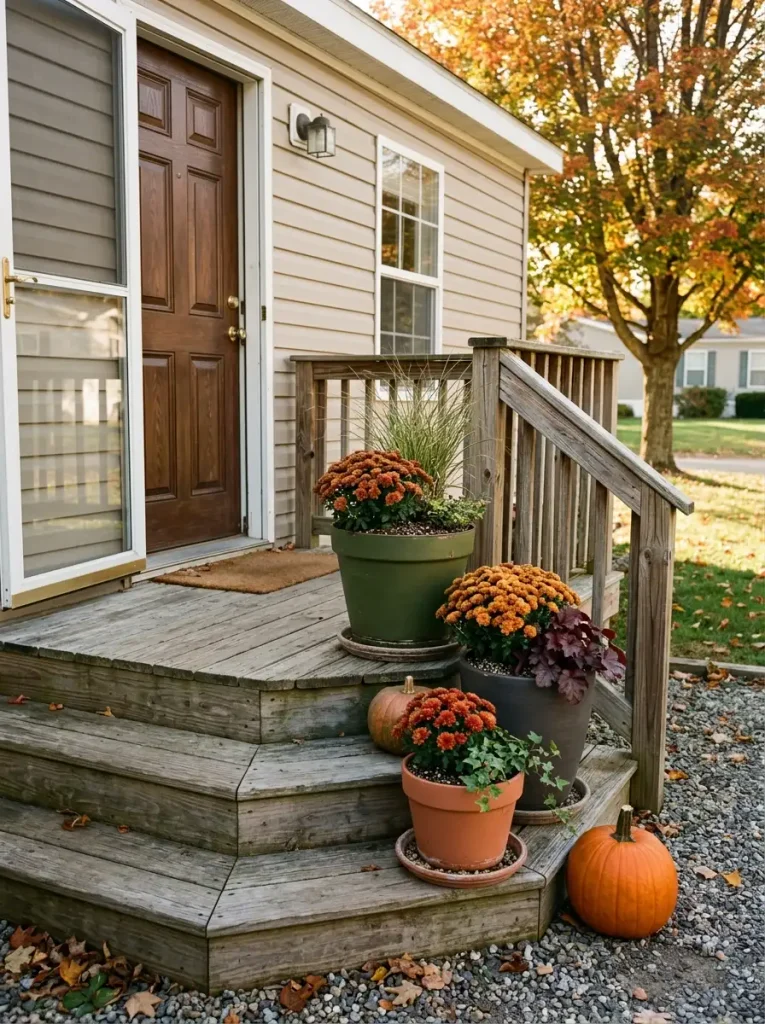
A porch can look disconnected when every container has a different finish, even if the plants themselves are beautiful. Before buying a matching set, look at the pots you already own as one collection waiting for a common visual thread.
Terracotta, plastic and older resin containers can often be refreshed with an exterior-appropriate coating suited to the material. Deep olive, espresso, charcoal or weathered clay tones work especially well with orange mums and pumpkins because the containers provide a quieter base.
Put the largest pot closest to the architectural anchor—the steps, porch post or doorway—and allow smaller containers to taper away from it. Uniform pot height can make a compact porch feel oddly flat; varied plant and container heights create a more natural progression.
Spend money where performance matters. Cracked containers, blocked drainage holes or pots too small for their plants deserve attention before decorative accessories do. A beautifully painted planter will still be frustrating if autumn rain leaves the roots sitting in water.
You also do not need identical flowers in every container. Repeating the container finish is enough to establish a family relationship, allowing mums, ornamental grasses and hardy foliage to vary.
Once the pots share one visual language, a few inexpensive plants can make the entire entrance look deliberately styled.
12. Create a Mailbox Harvest Bed With Pumpkins and Mums
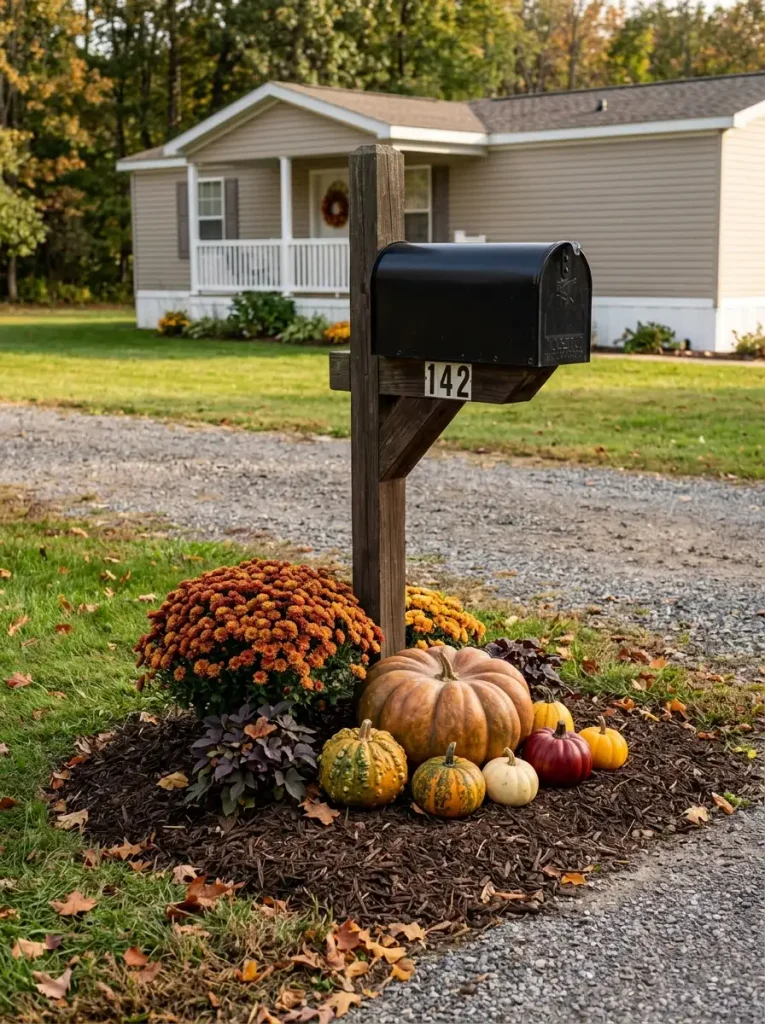
The mailbox is already one of the strongest vertical markers in the front yard, so adding tall fall décor directly around the post can make the area feel top-heavy. A better composition starts near the ground.
Define a compact planting or mulch bed around the base without interfering with postal access, driveways or local visibility requirements. Let one medium-to-large mum form the main mass, then use pumpkins and lower plants to extend the arrangement horizontally.
Scale them down as they move away from the post. One substantial pumpkin can anchor the display, while smaller gourds fill the gaps that would otherwise make the grouping feel accidental. Irregular spacing usually looks more natural than lining everything up in a row.
Site conditions should shape the plant choices. A mailbox in full sun may support traditional mums well; a shadier location may need foliage plants or temporary potted color that can be moved elsewhere later.
Keep pumpkins off persistently wet soil when possible, and check them regularly for soft spots. A small paver, shallow crate or dry mulch layer can improve air movement beneath heavier specimens.
Most importantly, leave the mailbox itself functional. The seasonal display belongs around the post—not across the box door, house numbers or the approach used by the mail carrier.
13. Build Stackable Pumpkin Crates for a Small Porch
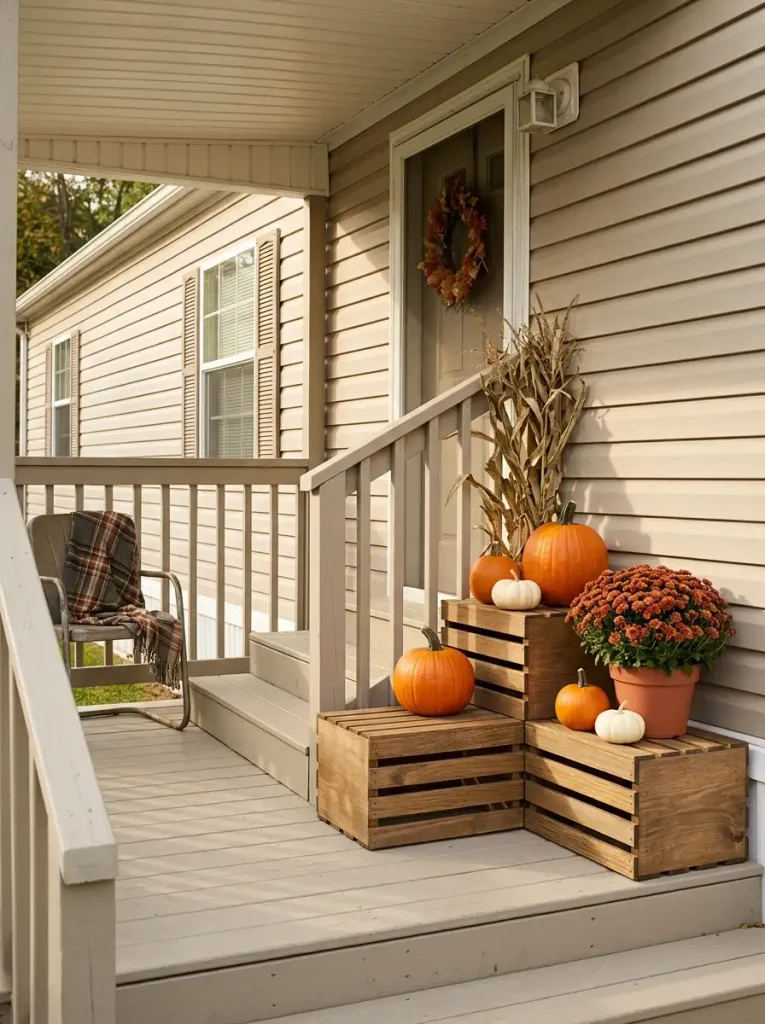
One crate offers a surface. Two or three crates offer something more useful on a small porch: a display system that can change shape as the season progresses.
Build shallow wooden crates from exterior-suitable lumber or reinforce unfinished craft crates that are genuinely sturdy enough for outdoor use. Keep the modules close in footprint so they can stack, step or sit side by side without producing awkward overhangs.
Stability sets the upper limit. A wide base with a lighter crate above is much safer than a narrow tower loaded with heavy pumpkins. Wind exposure matters too, particularly on open mobile-home steps where lightweight containers can shift during autumn weather.
Think of the crates as adjustable elevations. Early in the season, one may hold a mum while another raises a pumpkin. Near Halloween, the configuration can change to accommodate larger gourds. Later, the same crates can support evergreen branches or remain in storage as utility bins.
Allow water to drain rather than collect inside horizontal surfaces, and protect unfinished wood appropriately for the porch conditions.
The arrangement is finished when it produces a clear rise and fall in height. Once every crate top contains several objects, the modular character disappears beneath the accessories. Leaving one surface partly empty keeps the structure visible and gives the pumpkins enough room to command attention.
14. Add a No-Drill Warm-Light Canopy Under the Porch Roof
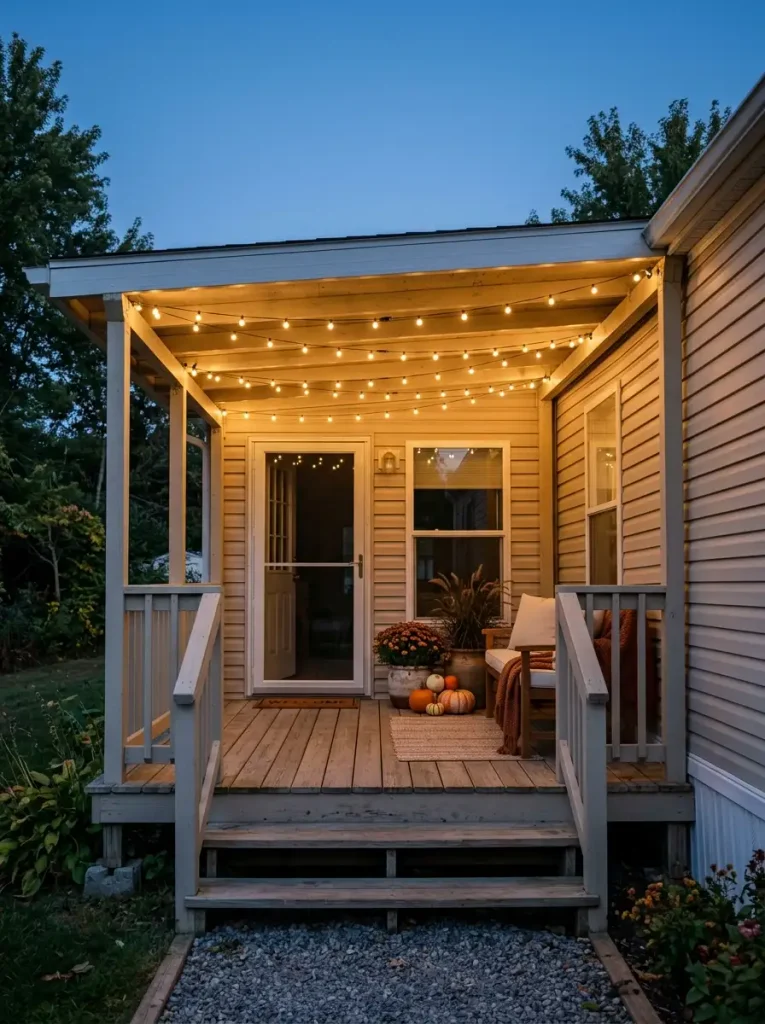
Outdoor lighting can change a mobile-home porch more dramatically than another group of seasonal accessories, especially after sunset. The challenge is avoiding a ceiling packed with cords that makes a shallow covered porch feel visually lower.
Begin by identifying existing attachment points or removable outdoor-rated hooks that are suitable for the porch material and the light system. Never fasten through roofing, siding or electrical components simply to create a decorative route.
Then space the strands with restraint. A few broad passes across the ceiling plane can suggest a glowing canopy while keeping the roof structure visible. Dense zigzags generate far more visual activity and may create glare when viewed from seating directly below.
Choose warm-white outdoor-rated LEDs and route the power lead along an edge where it is less exposed to foot traffic, door movement and water. Follow the manufacturer’s installation and connection limits, particularly when linking strands.
The best layout also considers the view from indoors. Step inside after dark and look through the front window or open door. The lighting should frame the porch atmosphere without shining directly into the room.
Fall color can then remain minimal: two planters, a throw and a pumpkin cluster may be enough. Once the ceiling itself provides the amber glow, the porch already carries a strong seasonal mood.
15. Build a Compact Fall Drop Zone for Shoes, Scarves and Wet-Weather Gear
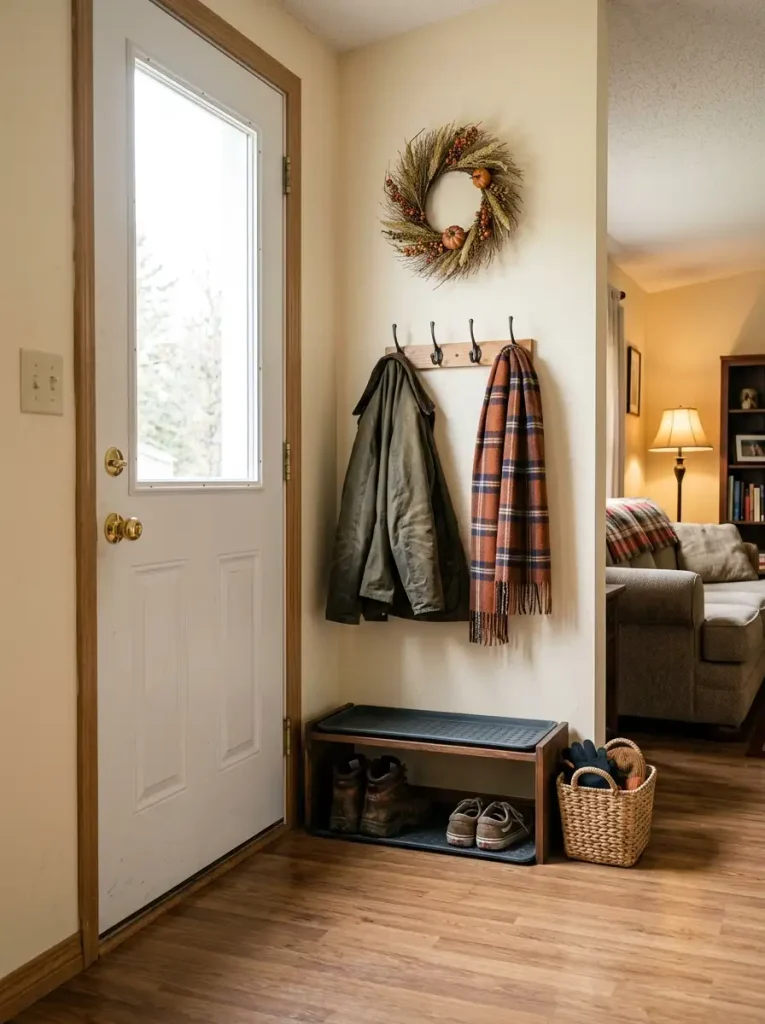
The coziest fall entry is often the one with fewer things lying on the floor.
Cooler weather introduces shoes, damp jackets, scarves and bags that may not exist in the same volume during summer. In a mobile home, those everyday items can quickly occupy the same narrow entrance used for circulation.
Start with the shoes. A shallow DIY tray, low open rack or narrow bench can define exactly where footwear stops. Measure the depth of the largest pair first; a storage piece that is too shallow simply pushes shoes back into the walkway.
Next, give frequently used outerwear an assigned landing point above or beside that floor zone. Hooks can work well where the wall structure and attachment method support the intended load. Keep hanging garments away from switches, doors and any equipment that needs airflow or access.
For wet weather, use a surface that can be wiped clean and allow damp items to dry before placing them in enclosed storage. Decorative baskets are useful only after the messy part of the entry routine has been solved.
Seasonal styling comes last. A plaid scarf, small wreath or warm-toned basket may already provide enough fall color once the clutter is contained.
The design test is wonderfully practical: two people should still be able to enter, remove their shoes and use the door comfortably.
16. Create a Removable Faux-Wood Accent Panel Behind a Small Dining Nook
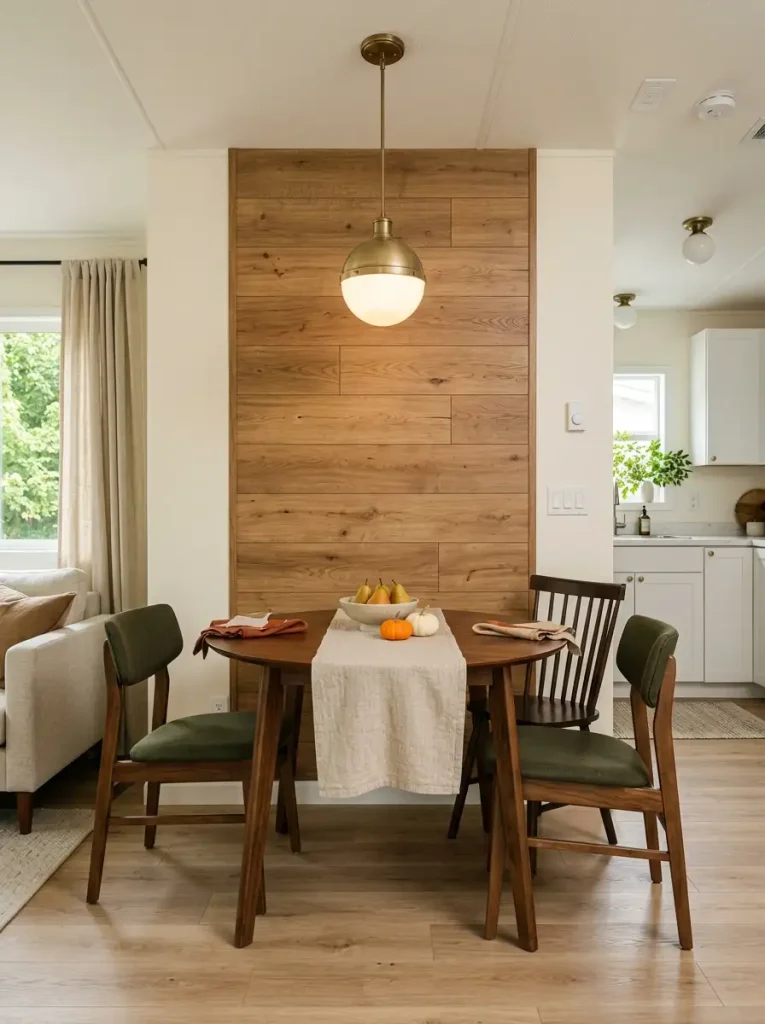
Painting an entire wall is not always the strongest way to define a compact dining area. In many mobile homes, a smaller architectural backdrop can do more because it visually gathers the table, chairs and lighting into one recognizable zone.
Build the panel from removable wood-look planks, lightweight slats or another renter-appropriate material compatible with your wall surface. Keep its width close to the dining composition itself. Extending the treatment far beyond the table can weaken the zoning effect and make it resemble an unfinished accent wall.
Pay close attention to undertones. Honey-toned wood works beautifully with pumpkin, cream and muted olive, while reddish wood can intensify rust-colored decorations quickly. Cooler gray-brown finishes suit a quieter modern fall palette.
The panel also changes how ordinary furniture is perceived. A basic table sitting against a blank wall may appear temporary; placing a warmer material behind it gives the furniture a visual boundary and makes the nook feel more deliberately established.
Account for outlets, switches and wall fixtures before installing anything. Removable panels should remain truly reversible rather than creating an elaborate obstacle when the season ends.
For fall, the backdrop can carry most of the atmosphere. Add a modest bowl of pears or pumpkins and one textile element to the table, then let the wood tone provide the deeper seasonal layer.
17. Build a Narrow Rolling Harvest Cart for Flexible Fall Storage
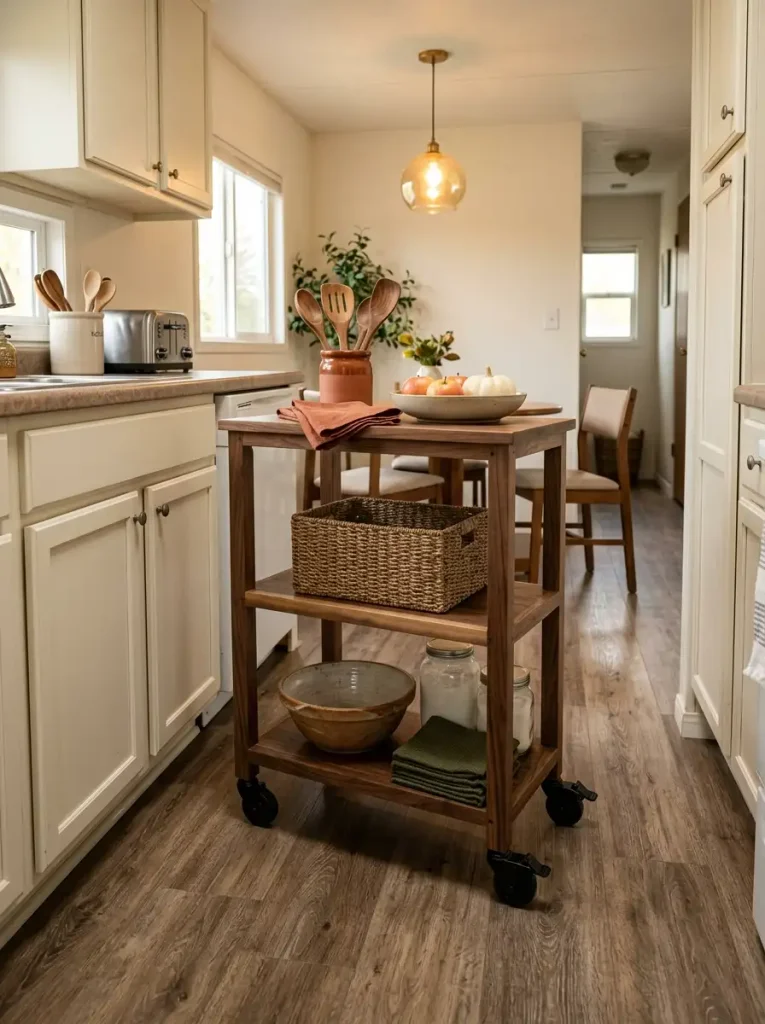
The final project treats mobility itself as a design tool.
A narrow rolling cart can serve as a coffee station in the morning, extra dining storage at dinner and a small fall serving surface when guests arrive. In a compact mobile home, furniture that changes jobs can be more valuable than a larger piece with only one purpose.
Before cutting lumber, map the cart’s route, not merely the place where you want to park it. Measure the tightest doorway, furniture gap and kitchen passage the cart will need to cross. Its finished depth must comfortably pass through the narrowest of those points.
Use sturdy casters suited to the finished weight, preferably with locking capability where appropriate. Keep heavier supplies on the lower shelf to reduce top-heavy movement, then reserve the upper level for frequently handled items.
The fall styling can remain remarkably restrained. A small crock of wooden utensils, folded rust-colored napkins and one bowl of seasonal fruit may be enough to turn the cart into part of the autumn room scheme.
Give it a permanent parking location too. Mobility stops being useful if the cart simply floats around searching for an empty corner.
As the season changes, remove the autumn pieces and keep the furniture working. That ability to shift roles makes this project especially well suited to homes where every square foot needs to earn its place.
Bringing Your Fall Mobile Home DIY Projects Together
A cozy fall home does not require every surface to announce the season. In a mobile home, a handful of thoughtful changes can travel visually from one room into the next, making smaller projects feel surprisingly significant.
The strongest projects in this collection also continue working after the pumpkins disappear. A peg rail still holds everyday items. The blanket ladder stores throws. A rolling cart keeps serving the kitchen. Reversible and removable pieces make seasonal changes easier to live with—and easier to store.
Choose the project that solves something your home already needs, then let the fall materials provide the atmosphere. That approach keeps the space comfortable, functional and distinctly yours.
And if several of these ideas belong on your autumn project list, save this guide to Pinterest so you can come back to them when DIY season begins.