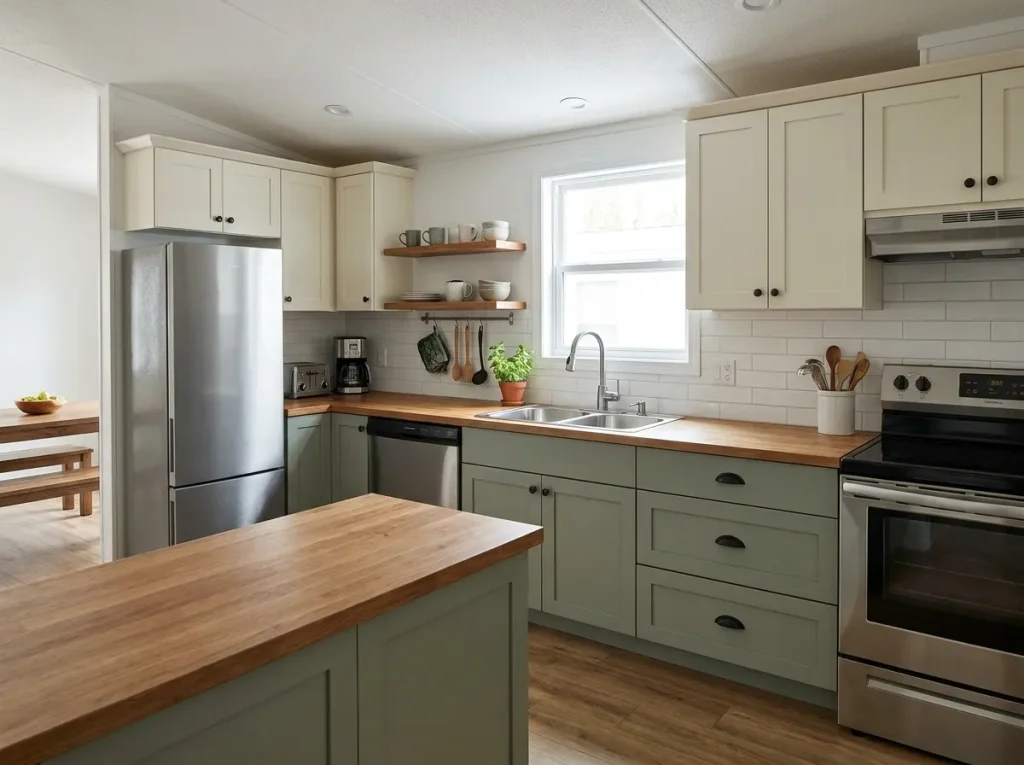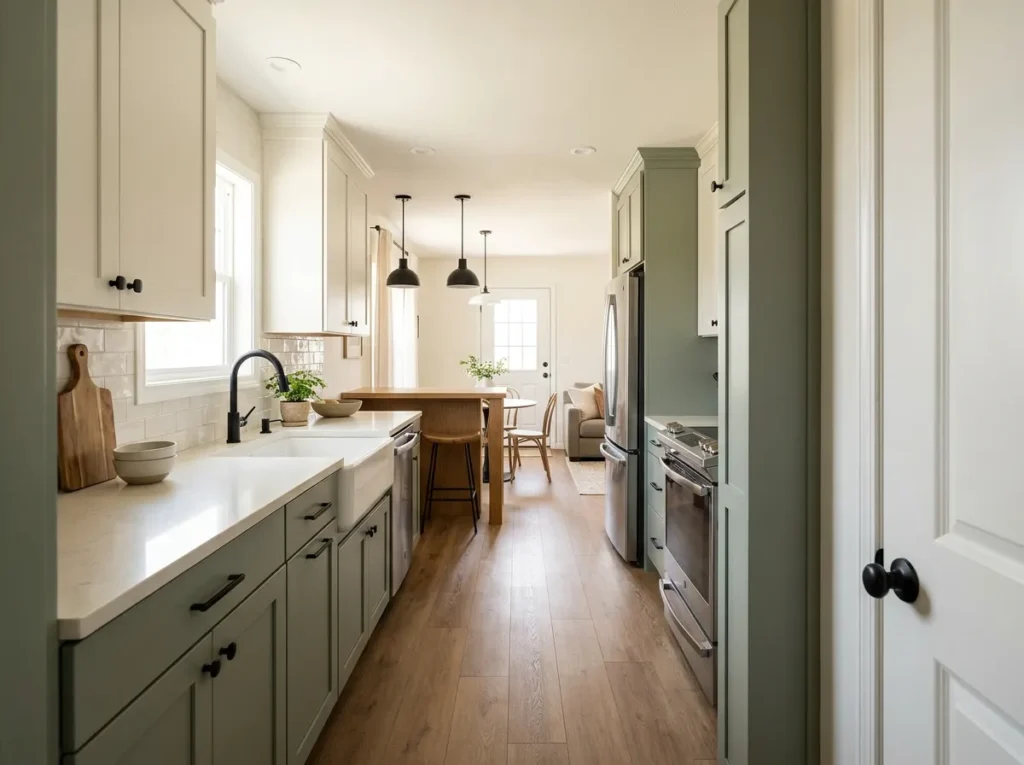
A single-wide kitchen can have enough cabinets, decent appliances, and even a surprising amount of counter space—and still feel frustratingly tight. The problem is usually not square footage alone. In a narrow home, refrigerator doors, cabinet depth, seating, prep space, and the main walking route often compete for the same few feet.
The best single wide kitchen ideas solve those conflicts before adding more décor. A peninsula can outperform an island, a strategically placed pantry can add storage without creating a visual wall, and one uninterrupted prep zone can be more valuable than several small pieces of counter scattered around the room.
The 21 ideas below are designed specifically for small and narrow single-wide kitchens. Some involve simple editing or organization; others can guide a larger remodel. Start by diagnosing how your kitchen actually works, then decide what deserves to change.
1. Map the Narrowest Cross-Section Before You Change Anything
Stand at the entrance to your kitchen and look across it, not down its length. In many single wides, that short cross-section tells you more about the room than the total floor area.
Open the refrigerator. Pull out a dining stool. Drop the dishwasher door. Imagine someone standing at the sink while another person walks behind them. The point where those activities begin competing is the kitchen’s true pressure point.
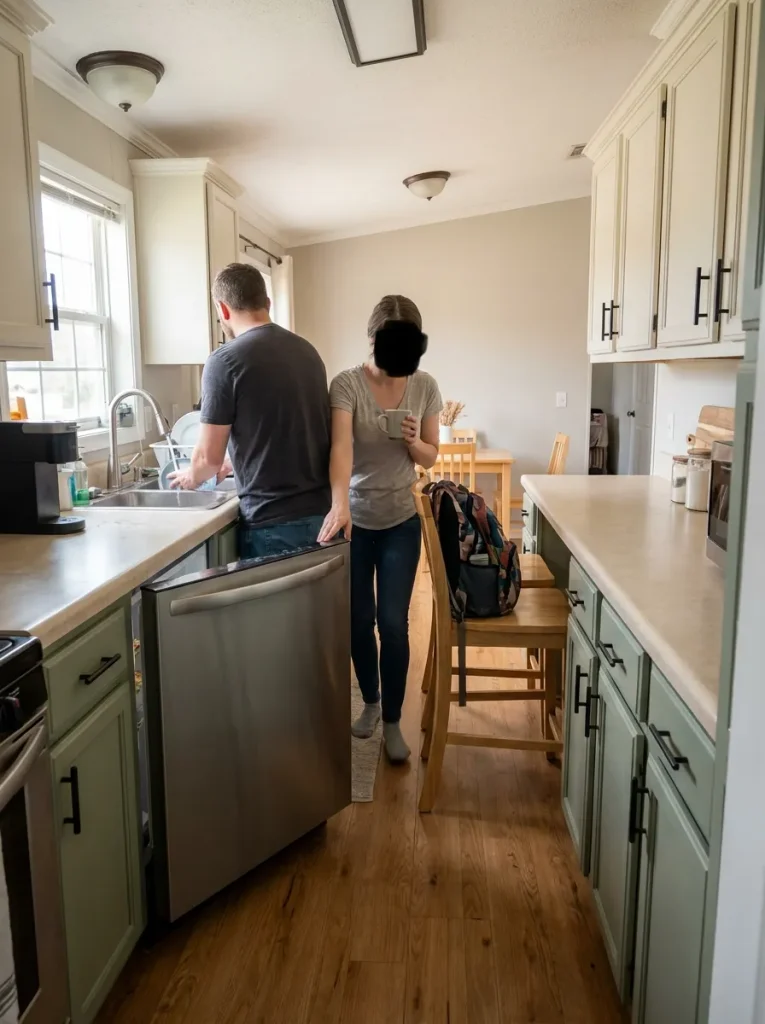
A room can look spacious in a listing photo because the long sightline stretches toward the living area, yet daily movement happens across a much smaller band.
Do a five-minute pressure audit:
- Open every major appliance as it would be used.
- Pull chairs or stools into their normal occupied positions.
- Stand at the sink, range, and refrigerator.
- Walk the usual route from kitchen to dining or living area.
- Mark where two activities repeatedly collide.
If the problem appears only when seating is occupied, replacing cabinets may solve nothing. If the refrigerator blocks the entire path, cosmetic updates should wait.
The first decision is therefore not what style should the kitchen become? It is which element is consuming the width you actually need?
2. Choose the Layout That Fits Your Single Wide’s Actual Shape
Two kitchens can have almost identical square footage and need completely different solutions. A one-wall kitchen benefits from different interventions than a parallel galley, while a peninsula can either improve a narrow room or become the exact object creating congestion.
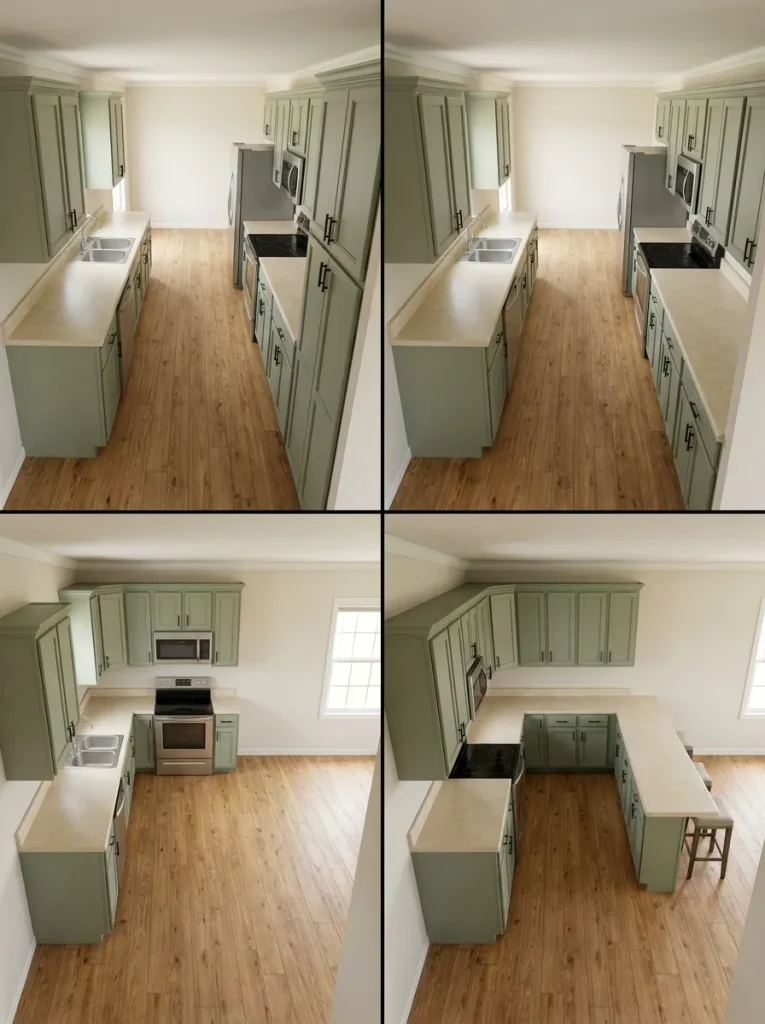
Use the layout selector below as a starting diagnostic. It is designed to help you decide what to preserve before assuming the room needs a full remodel.
Single-Wide Kitchen Fit Map
Start with the layout you already own
Choose the shape closest to your kitchen. Each option changes the priority because the same improvement can help one single wide and overcrowd another.
Parallel / galley kitchen
Two working sides can be efficient, but the aisle becomes valuable shared territory. Your first job is controlling doors, handles and anything that projects into that route.
One-wall kitchen
Your challenge is usually not aisle width but functional sequencing. Keep refrigerator, landing space, preparation and cooking from collapsing into one overloaded counter.
L-shaped kitchen
The corner can add counter length while quietly stealing usable storage. Treat the turn as a functional junction and avoid filling the open side simply because floor area is visible.
Kitchen with a peninsula
The peninsula may already be your island, dining edge and room divider. Measure its value by how many jobs it performs without becoming an obstacle between kitchen and living space.
A layout that already works should usually be refined before it is replaced. That distinction matters in a single wide because moving one component can affect the kitchen, dining zone, and main passage simultaneously.
3. Test Appliance Door Swings Against the Main Walking Route
A stainless-steel refrigerator can look perfectly proportioned when closed and behave like a temporary wall when both doors are open. The same is true of a dishwasher positioned opposite base cabinets or an oven that projects into the only route through the kitchen.
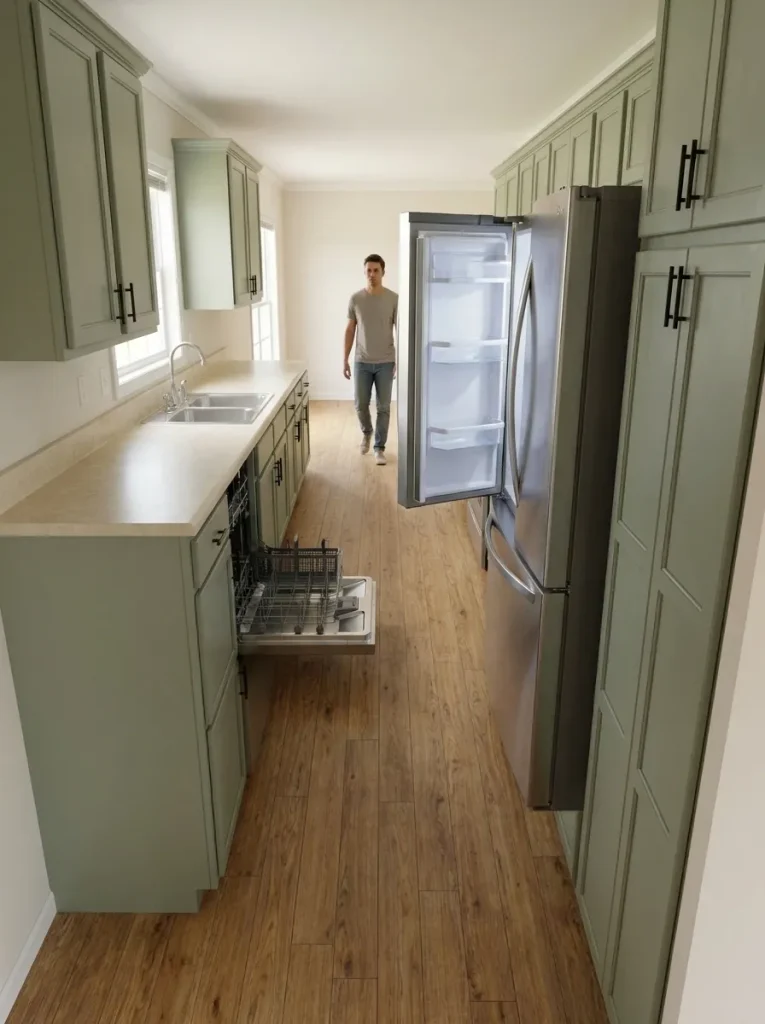
Run the test during the condition that actually matters: with the appliance open.
The open-door test
Judge the aisle during use, not in the staged photograph.
You do not necessarily need to relocate the appliance. Sometimes the useful change is smaller: moving a nearby stool, reversing which end of a counter carries small appliances, or preventing two opposing doors from needing to open at the same moment.
What matters is recognizing that a kitchen’s usable width changes throughout the day.
4. Separate Landing, Prep, and Cleanup Space on the Same Short Counter Run
A long countertop is not automatically useful countertop.
Imagine a common single-wide sequence: refrigerator, a little counter, sink, another short counter, then range. If the coffee maker occupies the first section and dishes collect beside the sink, the kitchen may leave almost nowhere to prepare dinner even though several feet of counter are technically present.
Instead of treating the counter as one continuous surface, give each section a job.
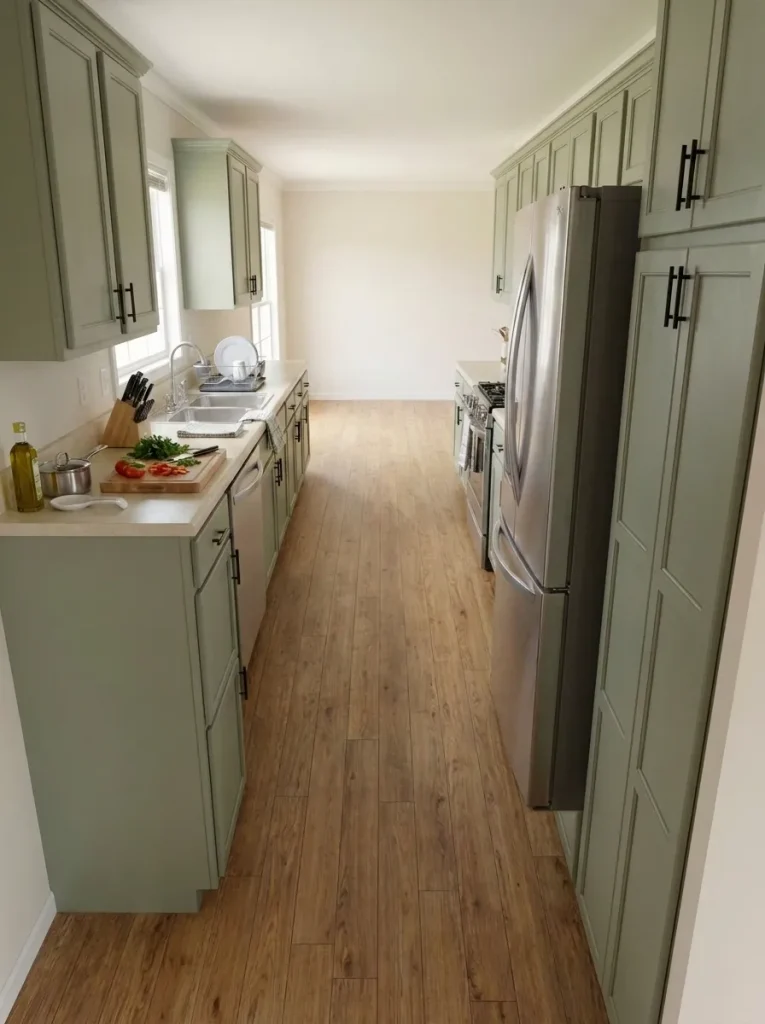
A practical sequence might look like this:
LANDING → groceries, refrigerator items, hot pans
PREP → chopping, mixing, assembling meals
CLEANUP → sink, soap, drying
COOKING → range and frequently used utensils
Your kitchen may need a different sequence, but one rule is especially useful in a narrow single wide: avoid letting the main prep area become the default parking spot for everything else.
A homeowner who discovers that only one 2- or 3-foot section supports most meal preparation can make a better decision about where the microwave, coffee machine, knife block, drying rack, or decorative tray should live.
The improvement may cost nothing. It begins by protecting the counter section that does the most work.
5. Let the Peninsula End the Kitchen Before You Add an Island
Small kitchens are often photographed with islands, so an empty patch of floor can make it feel as though something is missing. In a single wide, that instinct can create a second obstacle inside an already narrow route.
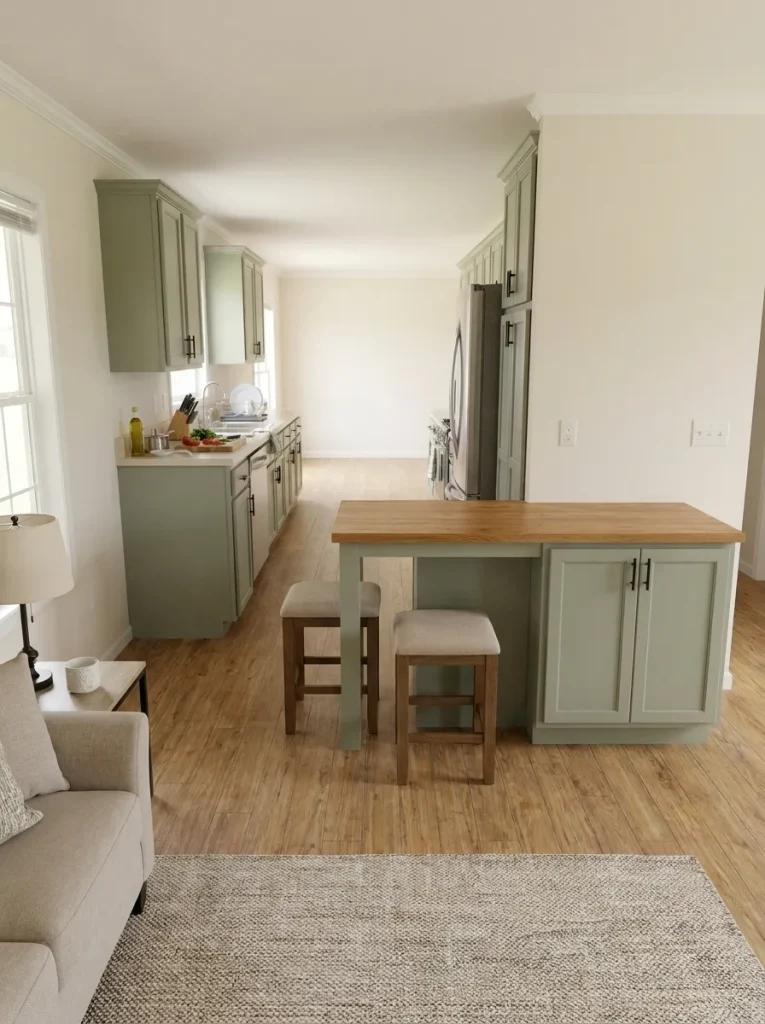
Consider a kitchen that opens directly into the living or dining area. A peninsula attached to the cabinet run may already provide:
- extra prep space,
- a breakfast edge,
- storage underneath,
- and a visual endpoint for the kitchen.
Adding an island behind it can duplicate those functions while consuming the very breathing room that makes the home feel open.
The better question
What job would the island perform that the peninsula does not already handle?
If the answer is only “more counter space,” first inspect whether the existing counter is poorly organized. If the answer is seating, look at tuck-under stools. If the goal is separating the kitchen from the living room, the peninsula may already be doing that visually.
An island earns its place only when the space can support both the object and the movement around it.
For many narrow single-wide kitchens, stopping with a well-designed peninsula produces the more generous-looking room.
6. Make Every Stool Disappear Under the Counter Between Meals
Breakfast-bar seating can look compact while nobody is using it. The real test begins after someone sits down.
A stool that projects into the passage turns a narrow peninsula into a wider object. Add a second stool, a backpack, or someone walking behind the seated person, and the kitchen-to-living-room route can become noticeably tighter.
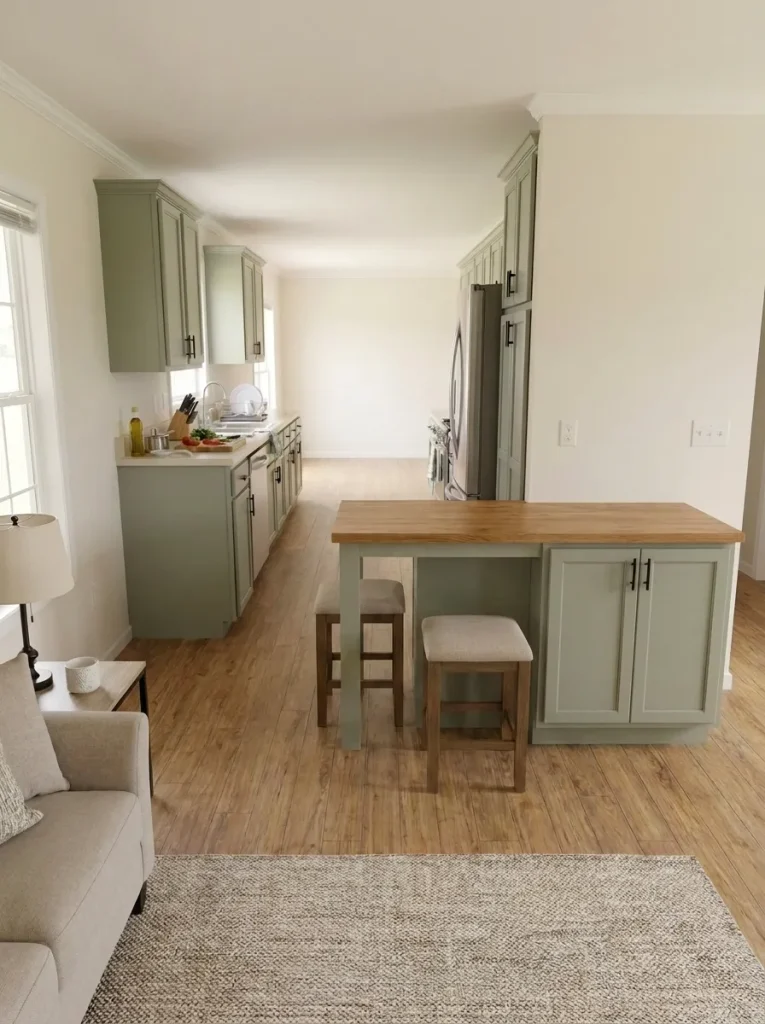
For a single-wide kitchen, evaluate stools in two different states:
Stored state: Can the seat and most of the base tuck beneath the counter?
Occupied state: Can another person still pass behind someone sitting there without constantly turning sideways?
Backless stools and slim-profile seats often make sense because they can visually and physically disappear when breakfast is over. A beautiful chair with a deep back, wide legs, or arms may be comfortable but effectively become permanent furniture in the aisle.
Small-space seating rule: Judge counter stools by the floor space they occupy for the other 22 hours of the day—not only by how they feel during breakfast.
If seating works comfortably only when nobody is moving through the kitchen, the peninsula may support fewer stools than its countertop length visually suggests.
7. Protect One Counter Section as Real Prep Space
Picture the kitchen at 6:30 p.m.
The coffee maker is still beside the refrigerator. A toaster sits near the sink. The dish rack occupies another section. A decorative tray fills the corner because it looked good when the kitchen was styled.
Now dinner begins, and the largest uninterrupted counter is barely large enough for a cutting board.
That is a counter-management problem, not necessarily a counter-size problem.
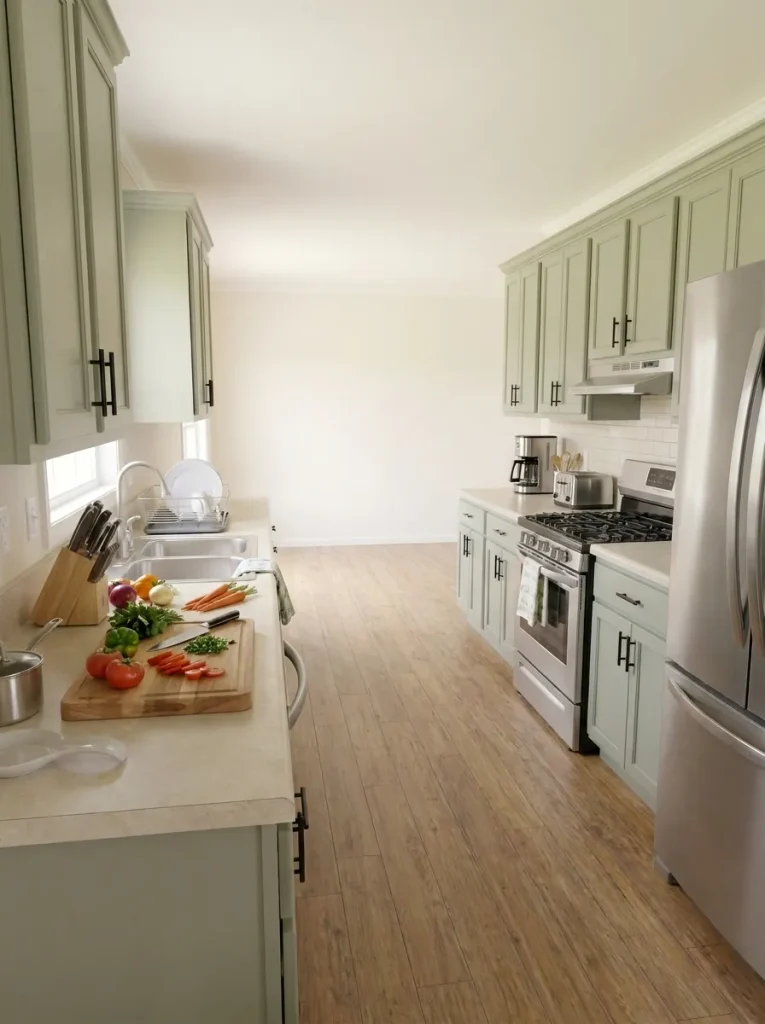
Choose one section of the kitchen as the protected preparation zone. Anything permanently stored there should earn its place by participating in food preparation almost every day.
Keep here
- chopping board
- frequently used knife or utensil container
- one genuinely high-use appliance, if necessary
Move elsewhere
- occasional appliances
- unopened mail
- decorative trays
- oversized utensil collections
- duplicate jars and canisters
Reconsider completely
Anything that gets moved every time you prepare food.
The useful measurement is not simply “How many feet of countertop do I have?”
It is:
How much uninterrupted surface remains when the kitchen is in its normal everyday state?
In a narrow single wide, one calm prep zone can improve daily function more than adding another small countertop section elsewhere.
8. Move Tall Storage Toward the End of the Kitchen Sightline
Tall cabinets are powerful because they convert a small footprint into serious storage. They can also make a narrow kitchen feel like it is pinching inward.
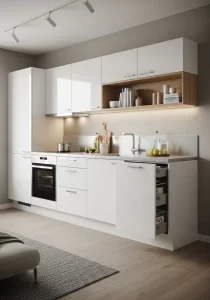
The difference often comes down to where the tall mass appears along the long view through the home.
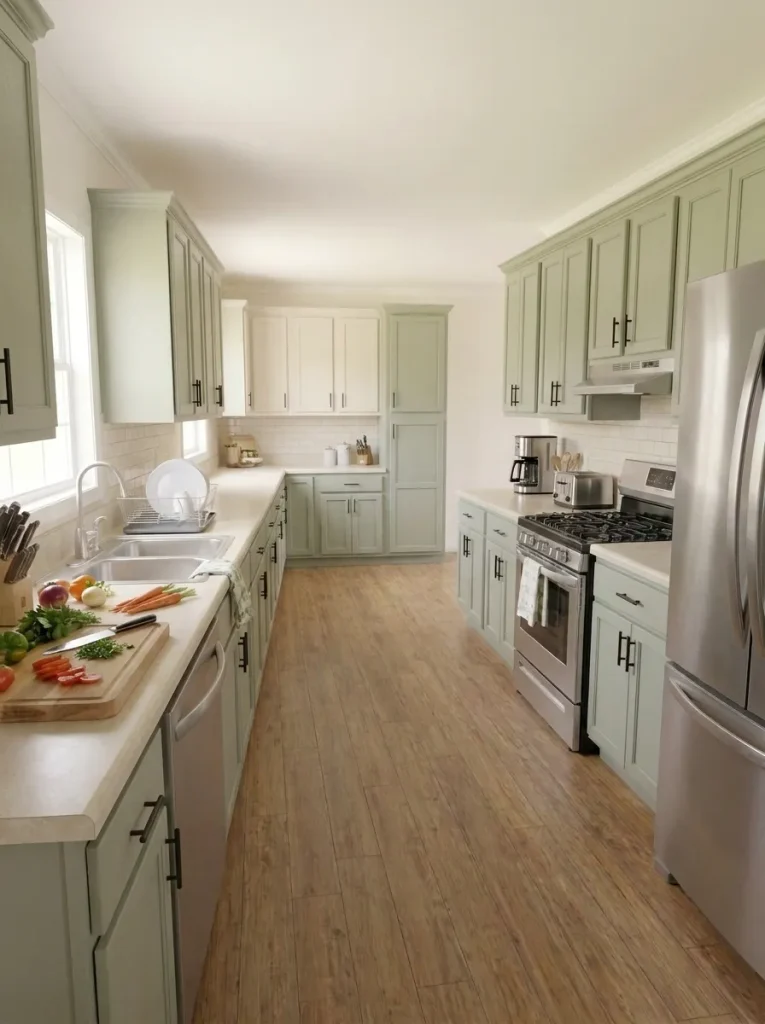
A pantry cabinet positioned at the far end of the kitchen can read like an architectural endpoint. The same cabinet placed halfway through the main run may interrupt the visual rhythm of counter, backsplash, and upper cabinetry.
Use the placement lab below to compare the effect.
Tall-Storage Sightline Lab
Where should the pantry-height mass go?
Compare three positions along a narrow cabinet run. The storage capacity may stay similar while the visual effect changes dramatically.
This is not a universal command to place every pantry at the far wall. Doorways, windows, refrigerators, and existing utilities may dictate another solution.
The important decision is whether a tall cabinet deserves to interrupt the middle of your strongest sightline. If not, move full-height storage toward an architectural endpoint whenever the existing layout allows it.
9. Make Lower Storage Come to You Instead of Reaching Into Deep Cabinets
A deep base cabinet can look generous on a floor plan while hiding half of its useful contents behind the first row of pots.
That problem becomes more noticeable in a compact kitchen because every storage zone needs to perform well. If you are routinely kneeling down, moving three pans, and reaching into a dark cabinet just to find the fourth item, the cabinet’s theoretical capacity is much higher than its everyday capacity.
Consider two homeowners with the same lower cabinet:
Kitchen A has fixed shelves. Frequently used pans migrate toward the front, while appliances and lids disappear at the back.
Kitchen B uses drawers or pull-out storage in the most heavily used lower zones. The full depth becomes visible in one movement.
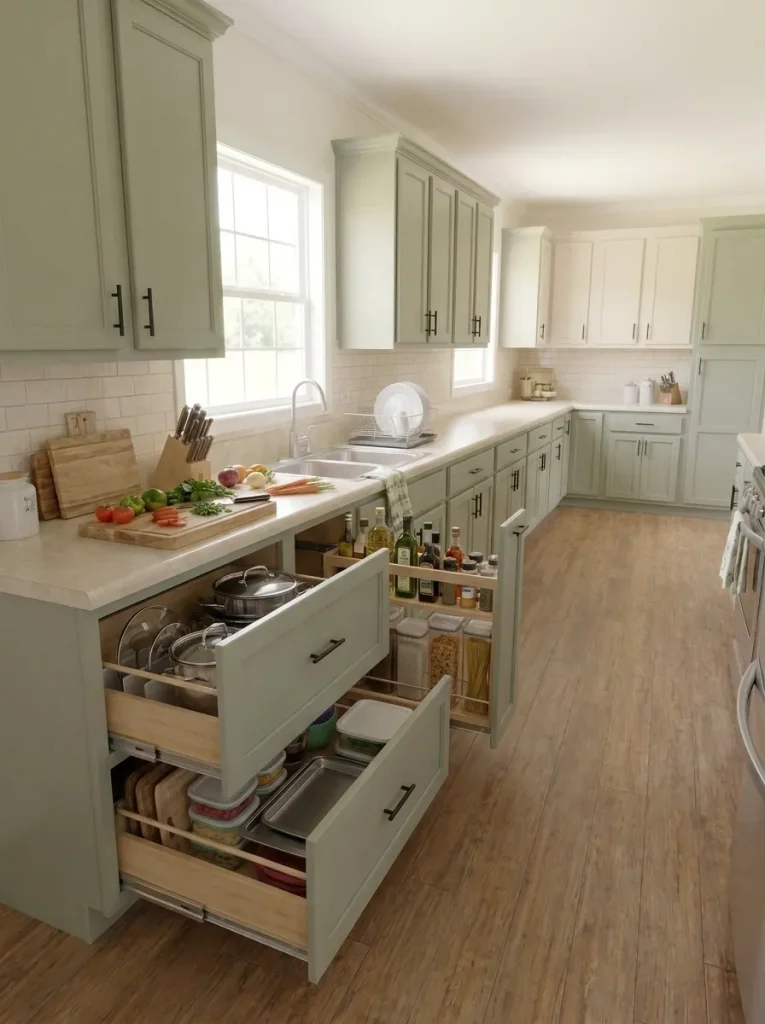
The second kitchen has not necessarily gained more cabinet volume. It has made more of the existing volume accessible.
Where pull-outs or drawers earn priority
Use them first in cabinets holding:
- everyday cookware,
- food-storage containers,
- frequently used dry goods,
- small appliances that are too bulky for upper cabinets.
A rarely opened cabinet does not need an expensive organizational system simply because pull-outs are fashionable.
In a single-wide kitchen remodel, upgrade high-friction lower storage first. That gives limited cabinet volume a bigger functional return.
10. Turn a Slim Vertical Gap Into Pantry Capacity
Not every narrow gap needs to disappear behind a filler panel.
A small strip beside the refrigerator, at the end of a cabinet run, or between two architectural elements can sometimes become useful vertical storage for items that are themselves narrow: canned goods, jars, spices, trays, or bottles.
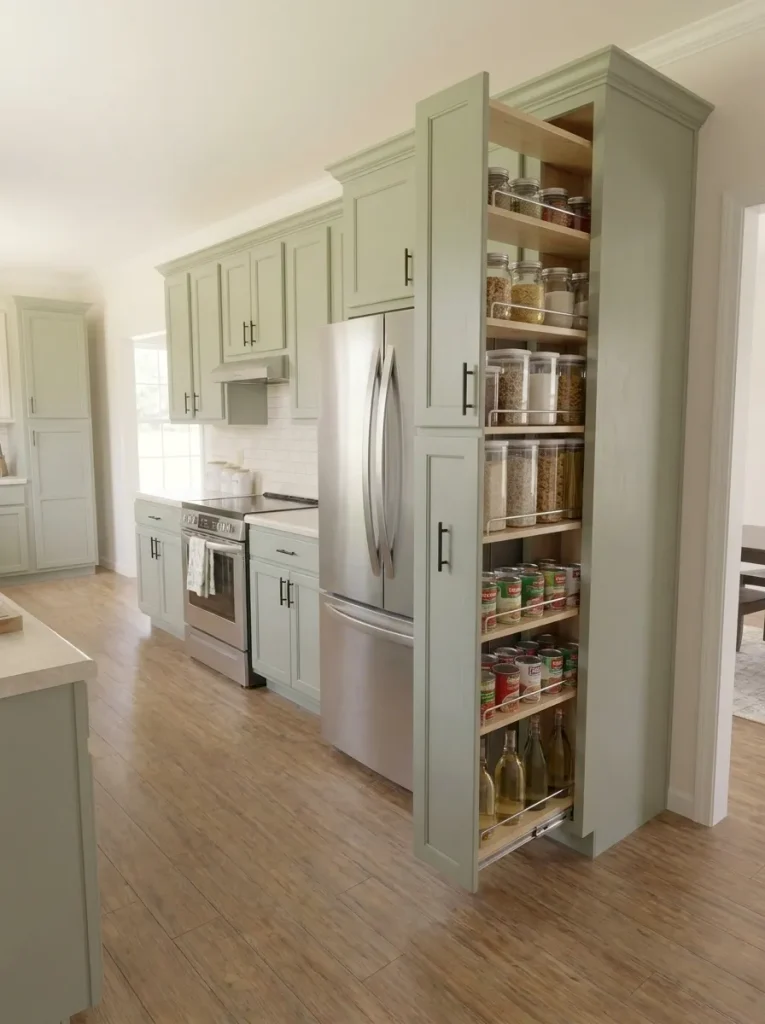
But there is an important exception.
If filling that gap makes the refrigerator feel boxed in, crowds a doorway, or adds another full-height visual block to the middle of the kitchen, the storage gain may not justify the spatial cost.
Use the gap when three conditions are true
- The storage is genuinely accessible.
A narrow cavity that requires awkward reaching is only nominal storage. - It stores appropriately scaled items.
A slim pantry works best when shelf depth and stored objects make sense together. - The full-height element does not choke the main sightline.
This matters especially in a single wide where the kitchen is often visible from the adjoining living or dining area.
Once the storage exists, organization becomes the next problem—not the same problem. A dedicated guide to pantry organization solutions can help with grouping and maintaining what goes inside; this section is specifically about deciding whether the narrow cabinet itself deserves the floor and visual space.
A thin pantry is therefore valuable when it converts otherwise unusable vertical space into accessible storage without making the kitchen feel more enclosed.
11. Let the Sink Window Break Up the Cabinet Wall
In a narrow single-wide kitchen, the wall above the counter can become almost continuous: upper cabinet, appliance, cabinet, backsplash, cabinet again. That much vertical mass can make the room feel more enclosed than the floor area actually is.
A window above the sink interrupts that rhythm.
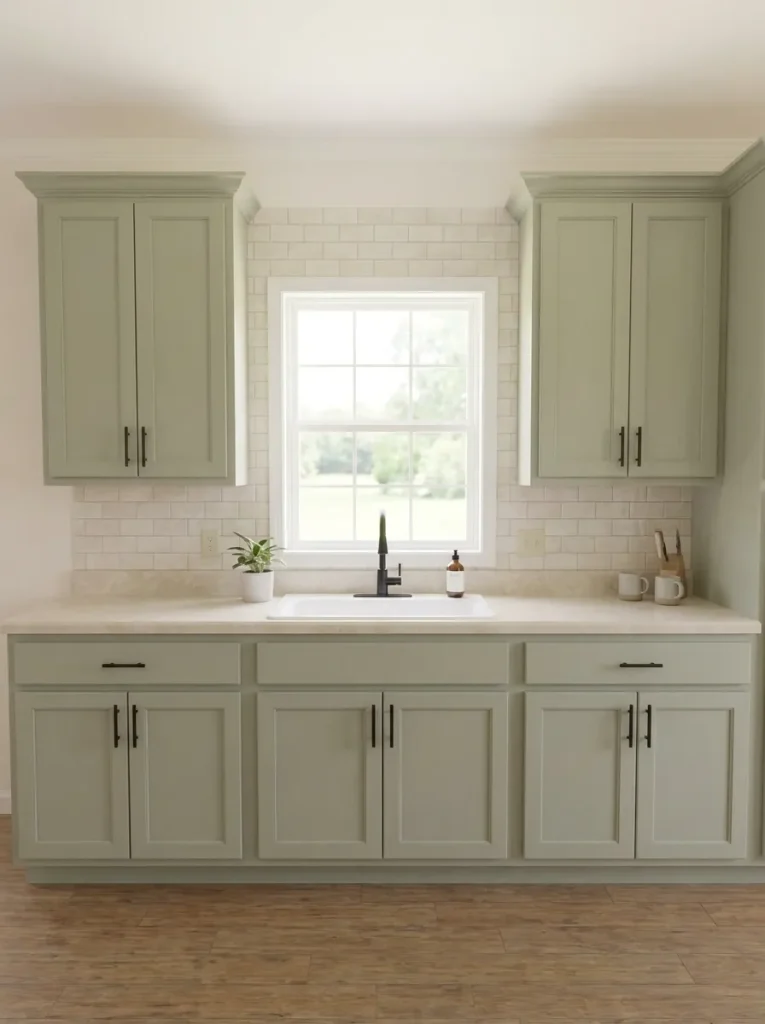
Its value is not only daylight. It creates a visual pause between cabinet groups, gives your eye somewhere farther away to rest, and prevents the upper half of the kitchen from reading as one long storage wall.
Imagine two otherwise identical layouts:
Option A: cabinetry continues tightly around the sink, maximizing every possible inch of upper storage.
Option B: the window zone is allowed to breathe, with cabinetry ending cleanly to either side.
Option A may technically hold more dishes. Option B may make the entire narrow kitchen feel calmer.
Before sacrificing the window zone for more storage, ask:
- Are your existing upper cabinets actually full of frequently used items?
- Could deeper lower storage solve the shortage instead?
- Is the kitchen particularly dark?
- Is the sink already one of the strongest sightlines from the adjoining room?
If the answer points toward light and visual relief, protecting the window may produce more overall value than another small cabinet.
In a single wide, not every empty wall section is wasted storage opportunity. Sometimes it is the space that keeps the cabinetry from feeling like a tunnel.
12. Create One Breathing Gap in a Heavy Upper-Cabinet Run
The usual advice for a small kitchen is to “use every inch vertically.”
Taken too literally, that can create a row of upper cabinets so continuous that the room begins to feel narrower at eye level.
You do not need to remove half the storage.
You need one deliberate interruption.
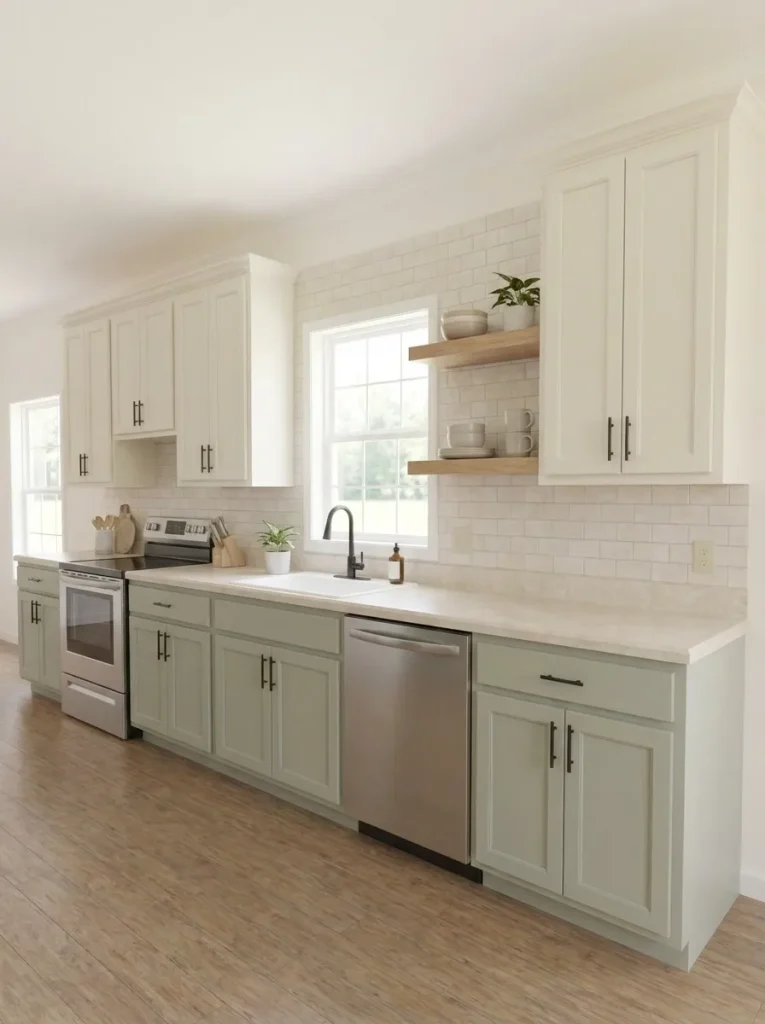
That could be:
- the existing sink window,
- a short stretch of open shelving,
- an uncluttered range-hood zone,
- or simply a small section where cabinetry stops earlier than expected.
The intervention works because your eye can distinguish cabinet groups rather than perceiving one unbroken overhead mass.
A useful editing test
Stand at the kitchen entrance.
Do your upper cabinets appear as several purposeful storage zones—or as one uninterrupted strip running toward the far wall?
If they read as a single strip, identify the least valuable section of upper storage before automatically adding another cabinet during a remodel.
There is also a tradeoff. Open shelving only creates visual relief when it stays visually lighter than the cabinetry it replaces. Filling it with appliances, baskets, signs, jars, plants, and stacked dishes can make the wall busier than before.
One controlled pause usually works better than several decorative gaps.
13. Treat the Refrigerator Like a Tall Wall—and Quiet the Space Around It
A refrigerator is not visually equivalent to a base cabinet.
It is a full-height object with a deep face, reflective surface, handles, door swings, and sometimes a water dispenser. In a compact single-wide kitchen, that makes it behave almost like a piece of architecture.
Problems begin when several tall elements gather around it:
- refrigerator,
- tall pantry,
- stacked décor,
- cabinet tower,
- open shelves,
- and countertop appliances immediately beside the unit.
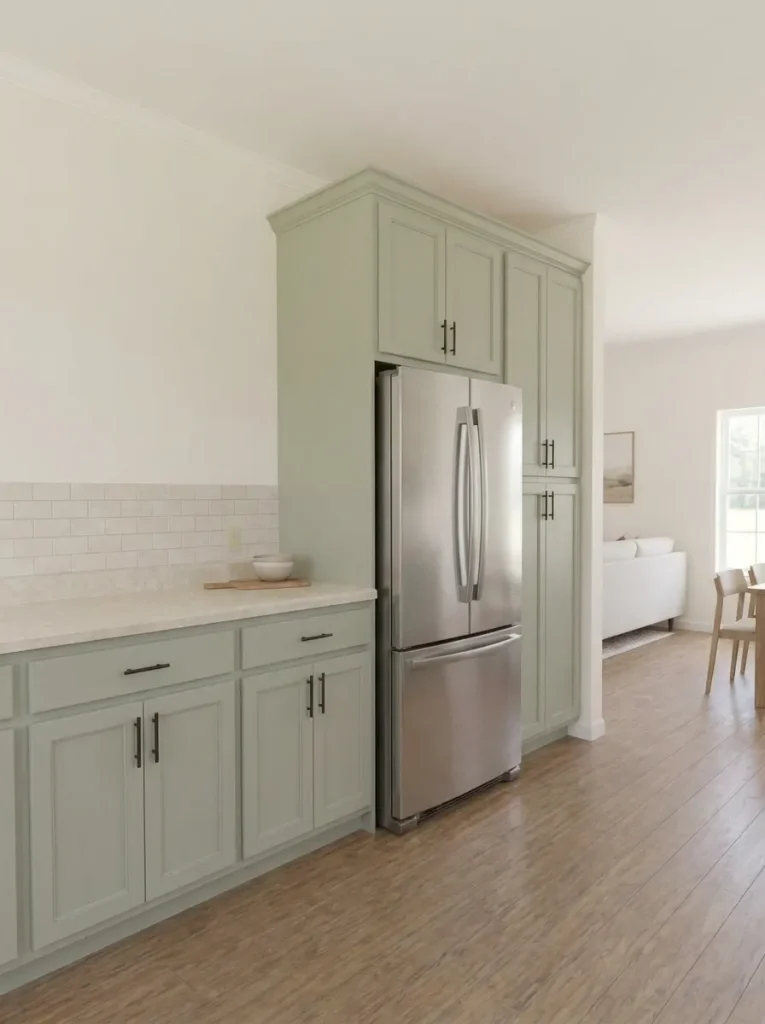
The end of the kitchen can become visually dense before you even notice the individual objects causing it.
Think in terms of tall-mass concentration
If the refrigerator already occupies one strong vertical block, allow some of the neighboring surfaces to remain quieter.
For example:
Heavy arrangement
Tall pantry + refrigerator + overhead décor + appliance station
Calmer arrangement
Tall pantry + refrigerator + clear counter landing zone
The second option still provides major storage, but the tall elements feel intentional because they are not surrounded by smaller competing objects.
This is especially important when the refrigerator is visible from the living room. In a single wide, the kitchen is often part of a longer shared sightline, so visual bulk at one end can affect how spacious the connected room feels.
The decision is simple: after placing the refrigerator and essential full-height storage, resist treating every remaining surface around them as another opportunity to add something.
14. Give Small Appliances a Home Base Away From the Main Prep Strip
Small appliances create a strange problem in compact kitchens: each one seems harmless, but together they can erase the counter space you actually use.
A coffee machine, toaster, air fryer, blender, kettle, stand mixer, and microwave do not merely occupy countertop length. They also create cords, clearance needs, crumbs, accessories, and visual noise.
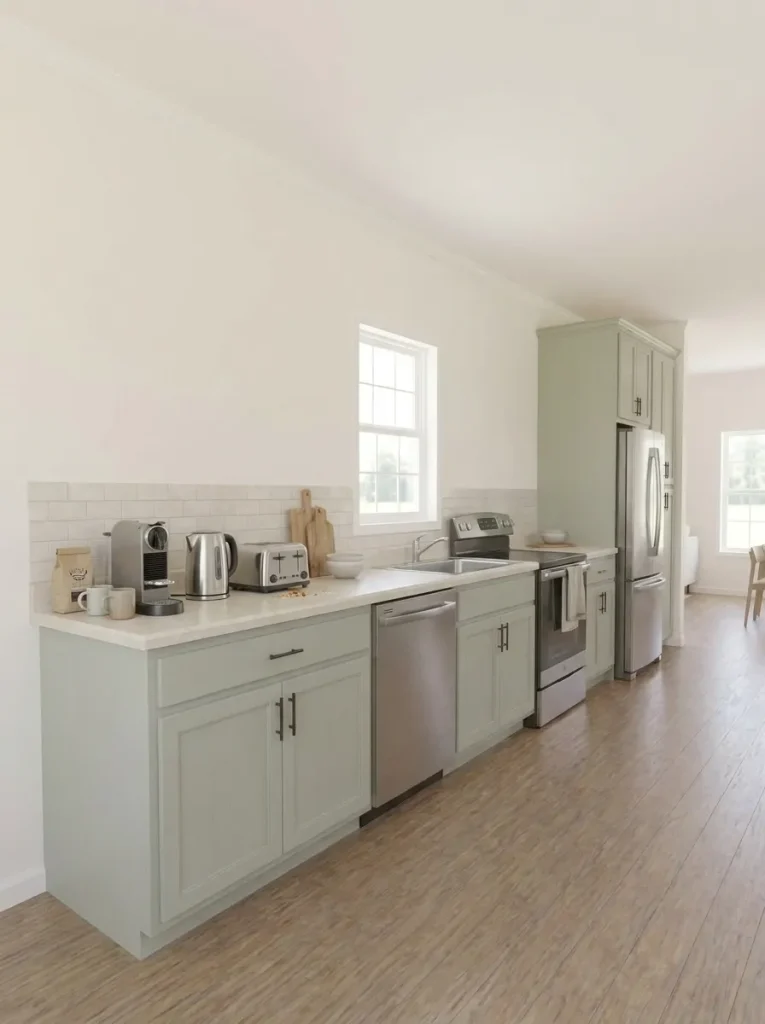
The best storage decision depends on how often each appliance genuinely participates in your routine.
Use the filter below to classify them.
Counter Exposure Filter
How often do you really use it?
Choose the frequency that best matches one appliance. The storage recommendation changes with the routine.
Permanent counter position can be justified
An appliance used through most meals earns convenient access, provided it is not sitting in the only useful preparation zone.
Accessible, but not necessarily center stage
Daily use justifies convenience, though the appliance may work better grouped into a breakfast or beverage station away from the primary prep surface.
Easy-access cabinet storage usually wins
A few uses each week normally do not justify giving the appliance permanent ownership of scarce countertop space.
Counter space should usually win
An occasional-use appliance does not need to remain visible simply because there is technically room for it.
The goal is not a perfectly empty countertop. It is a countertop where the items left visible reflect the way the kitchen is actually used.
In a small single wide, that distinction can recover an entire prep zone without adding a single cabinet.
15. Light the Work Surface, Not Only the Ceiling
A kitchen can have several ceiling fixtures and still feel dark where it matters.
Upper cabinets project over the counter, which means the person standing in front of the workspace can partially block overhead light. Dark counters, deep cabinet colors, and a narrow room can make that shadow even more noticeable.
Look at the kitchen after sunset.
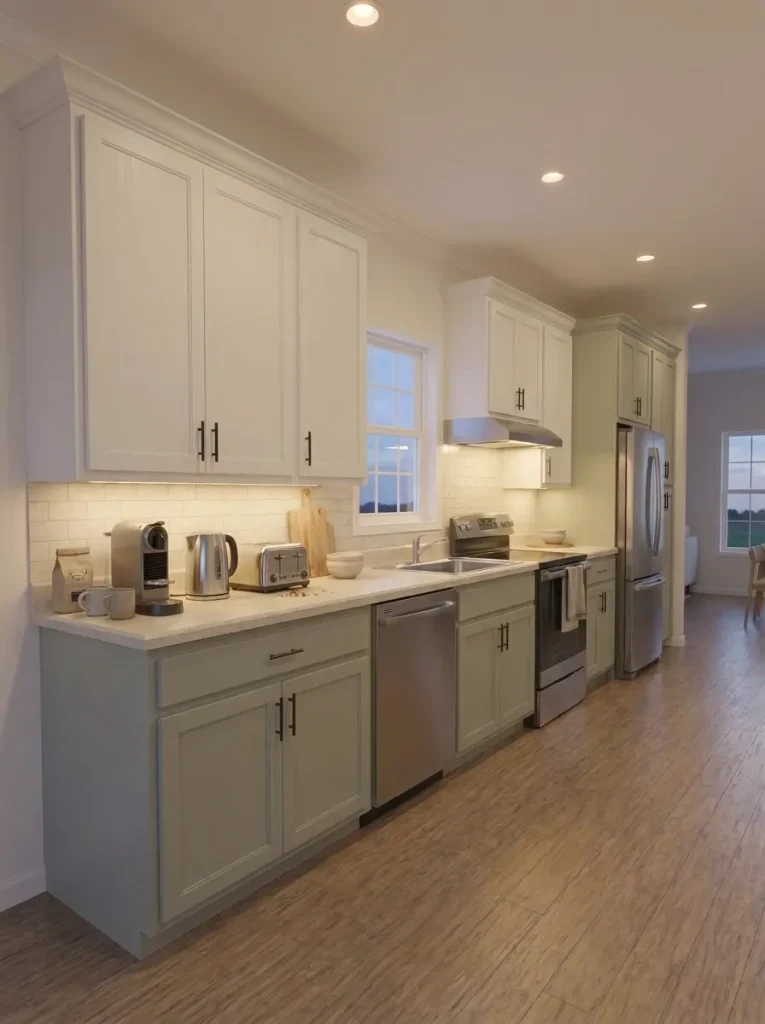
Do not judge the room from the doorway. Stand where you actually:
- chop vegetables,
- read packaging,
- wash dishes,
- use the range,
- or make coffee.
If the counter becomes noticeably darker than the rest of the room, adding more decorative ceiling fixtures may not solve the problem.
Think in layers
Ambient light
General illumination for moving around the room.
Task light
Light directed toward the surfaces where food preparation and cleanup happen.
Accent light
Optional visual warmth from pendants, shelf lights, or decorative fixtures.
For a narrow single-wide kitchen, task lighting can also change the perceived weight of upper cabinetry. Illuminating the backsplash and worktop creates a brighter horizontal band beneath the cabinets, visually separating the upper and lower halves of the kitchen.
That can make darker sage, olive, gray, or wood cabinetry feel much easier to live with.
If the change requires new hardwired electrical work, treat installation as an electrical project rather than a casual décor DIY. The design decision comes first: identify the shadowed work zone before deciding what fixture belongs there.
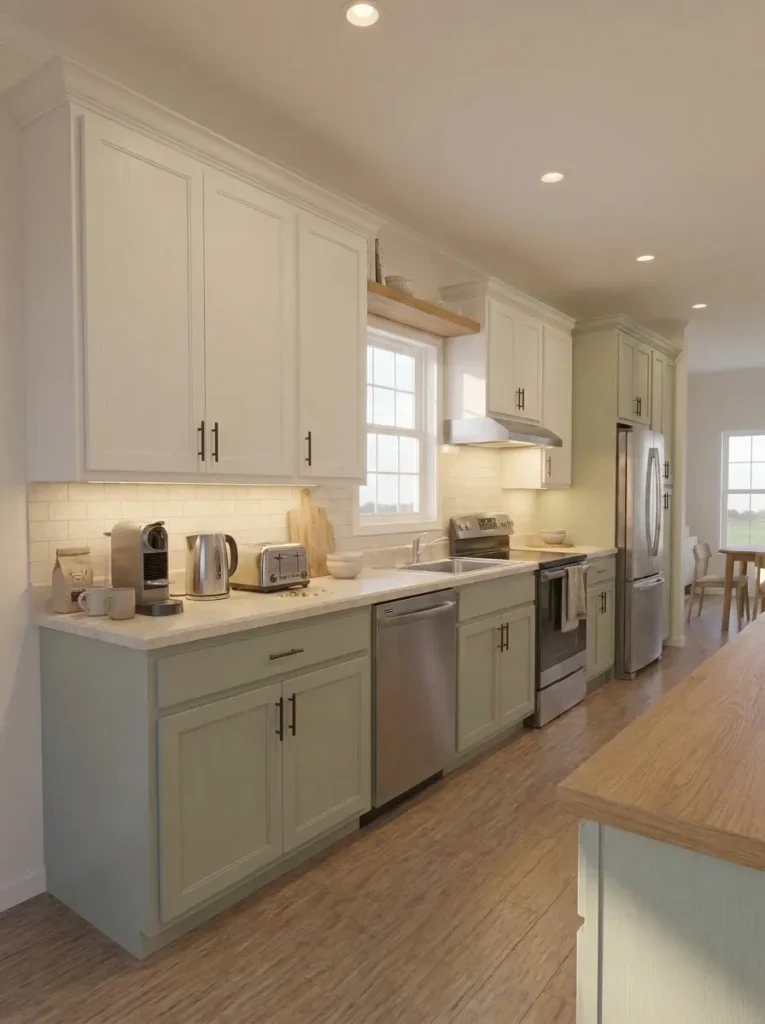
16. Keep Warm Wood to One or Two Strong Horizontal Planes
Warm wood is one of the reasons the reference kitchens feel inviting. Butcher-block counters, oak shelves, wood stools, and plank ceilings soften painted cabinetry and stainless appliances beautifully.
In a narrow single-wide kitchen, however, too many different wood surfaces can make the room feel visually busy.
A useful way to control it is to decide which horizontal planes will carry the warmth.
For example:
- butcher-block countertop + matching floating shelves,
- wood peninsula top + wood stools,
- or wood ceiling + restrained wood accents below.
Then let the remaining surfaces stay quieter.
If you already have strong wood flooring, a wood counter, several open shelves, a rustic beam, and heavily grained cabinet doors, adding another contrasting timber finish may reduce the calmness you were trying to create.
A simple material hierarchy
Primary wood: the surface your eye notices first
Supporting wood: visually related but secondary
Background finish: painted, tiled, or otherwise quieter
This matters especially in a single wide because the kitchen is often visible from several rooms at once. Too many unrelated wood tones can appear simultaneously along the home’s long axis.
If you want a broader modern update that carries beyond the kitchen, the approach can continue into these modern single wide mobile home ideas without requiring every finish to match exactly.
The decision is not whether wood belongs in the kitchen. It is which one or two surfaces deserve to carry most of its visual weight.
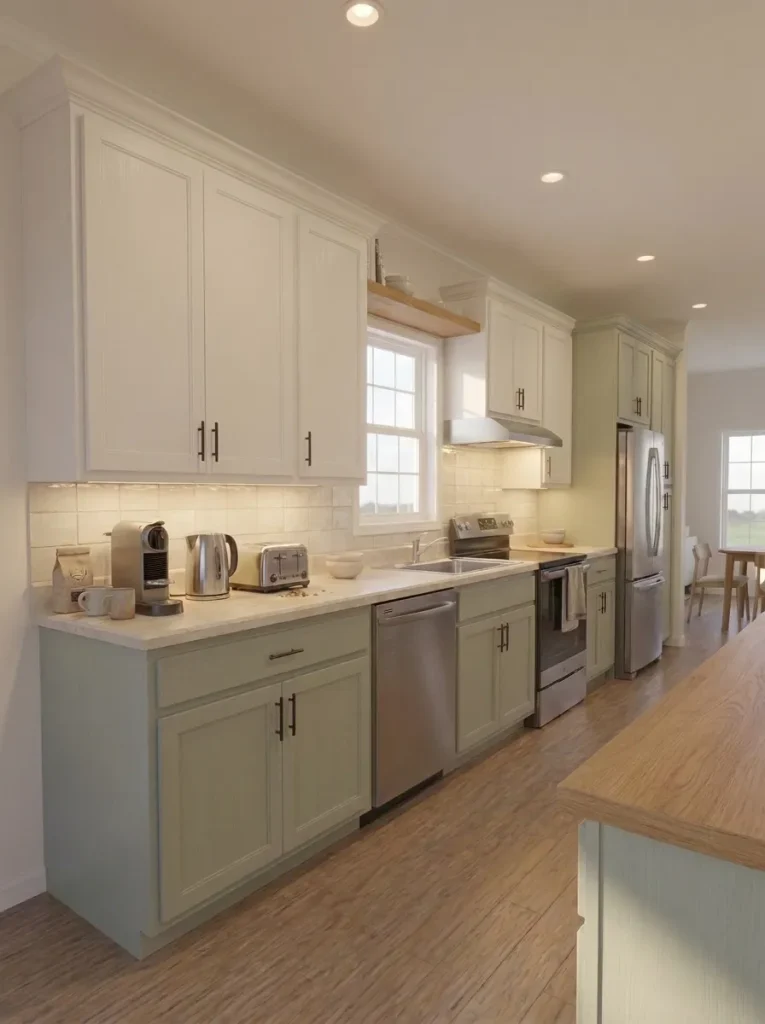
17. Make the Backsplash Read as One Calm Horizontal Band
Backsplashes occupy a surprisingly important position in a narrow kitchen.
They sit directly between the two heaviest visual layers—the base cabinets and upper cabinets—so the way that middle strip reads can either organize the room or fragment it.
Look at the backsplash from the opposite end of the kitchen.
Does your eye see one continuous background?
Or does it jump between:
- contrasting tile sections,
- outlet covers,
- decorative plaques,
- hanging utensils,
- floating shelves,
- appliance cords,
- patterned grout,
- and several countertop accessories?
A narrow kitchen usually benefits when that zone behaves like a calm visual ribbon running through the room.
This does not require white subway tile. A muted handmade-look tile, soft stone, warm neutral, pale green, or restrained vertical texture can still work beautifully.
What matters is avoiding unnecessary competition.
Use stronger pattern when:
- the surrounding cabinetry is simple,
- the countertop is visually quiet,
- and the backsplash is intended to become a focal feature.
Keep it calmer when:
- cabinetry already has strong color,
- countertops show significant movement,
- several appliances remain visible,
- or the kitchen can be seen from the living room.
A backsplash is not merely a decorative rectangle behind the range. In a single-wide kitchen, it forms a long horizontal field that can visually connect—or break apart—the entire cabinet run.
18. Repeat One Kitchen Finish Into the Adjoining Living or Dining Area
In many single wides, the kitchen does not exist as a visually isolated room.
You may see the dining table from the sink, the living room from the peninsula, or the entire sequence from the front entrance. That means the kitchen’s finish choices participate in a much longer composition.
The solution is not to make every room identical.
Choose one repeatable element and let it cross the boundary.
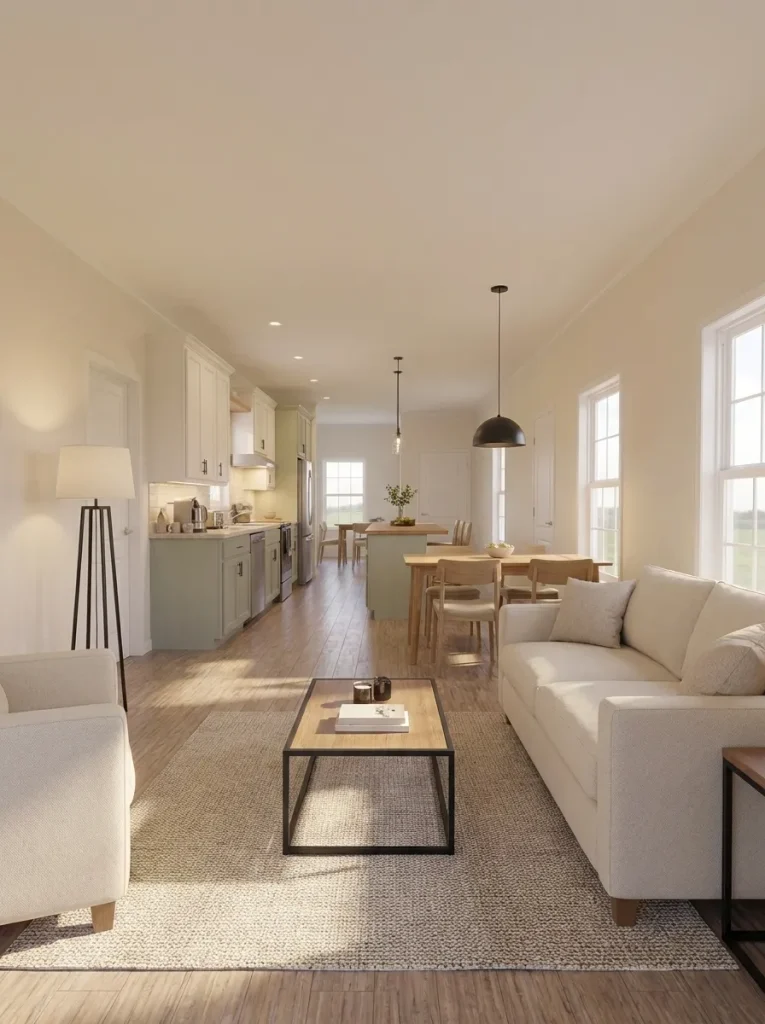
For example:
- black kitchen hardware → black dining light fixture,
- warm oak shelving → similar wood dining tabletop,
- muted sage cabinetry → a softer sage textile or décor accent nearby,
- warm brass detail → restrained brass lighting in the next zone.
That small repetition tells the eye that the spaces belong to the same home.
The strategy works particularly well when the kitchen is visually open to the rest of the single wide. A deeper guide to planning those relationships is available in these single wide open floor plan ideas; here, the decision is narrower: which finish should carry the connection from the kitchen into the next room?
Avoid repeating everything.
If cabinet color, flooring, wood tone, lighting finish, textiles, and wall décor all match perfectly, the space can feel overly coordinated.
One deliberate echo usually creates more sophistication than a full matching set.
19. Use Tuck-Under or Bench Seating Where Dining Shares the Kitchen Route
A dining table may technically fit beside a single-wide kitchen while still making the entire area difficult to move through.
The hidden issue is often the chairs.
A table has a fixed footprint. Chairs have a changing one.
When someone sits down, the dining zone expands toward the kitchen route. When chairs remain pulled out after dinner, that expansion becomes semi-permanent.
Compare the occupied footprint
Four separate deep chairs
They require space around several sides of the table and remain visually present even when unused.
Wall-side bench + two movable chairs
The bench stays close to the wall while the loose chairs handle flexible seating.
Tuck-under stools
They can disappear almost completely beneath a narrow counter or peninsula.
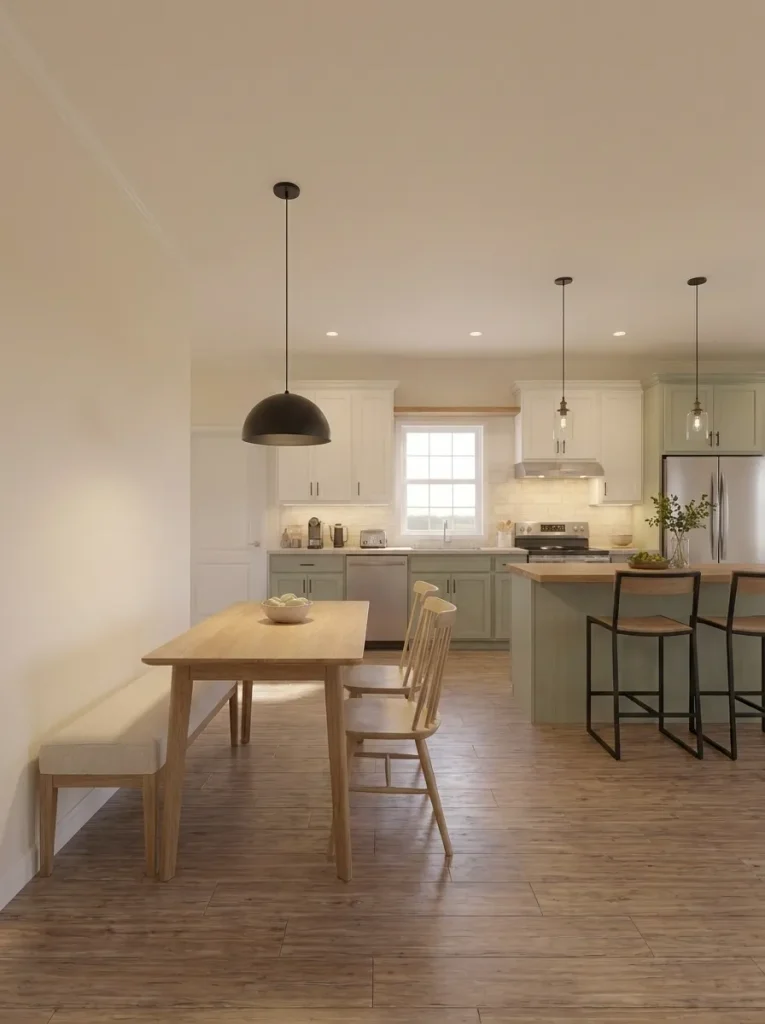
For a single wide where the dining area sits directly beside the kitchen, this difference can matter more than the nominal size of the table itself.
A built-in or wall-hugging bench is particularly useful when one edge of the dining area does not need to function as a walking path. It concentrates seating where circulation is least valuable.
You can also carry the same principle into other rooms with these single wide mobile home decorating ideas: furniture should be judged by how much space it occupies between uses, not only when someone is sitting in it.
The right dining setup leaves the kitchen route feeling open after everyone has stood up.
20. Fix the Friction You Feel Every Day Before Paying for Cosmetic Upgrades
A dated kitchen can tempt you toward the most visible projects first:
new backsplash, cabinet paint, pendant lights, hardware, or countertops.
Those upgrades may improve appearance while leaving the most annoying problem untouched.
If the dishwasher blocks the aisle every evening, beautiful hardware will not fix that.
If your only prep area is buried under appliances, new counters may simply give those appliances a nicer surface to occupy.
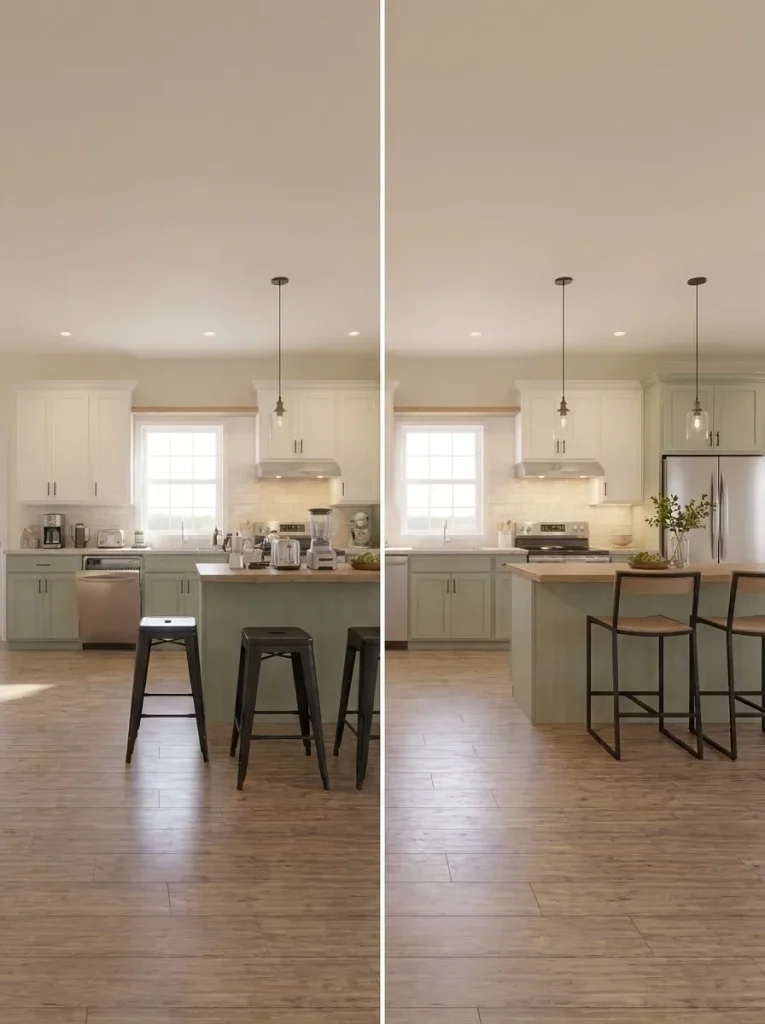
If the room feels dark only at the worktop, repainting every cabinet may be solving the wrong problem.
Use the priority ladder below to identify which type of improvement should come first.
Upgrade Priority Ladder
What bothers you most about the kitchen?
Choose the problem you experience most often. The order below changes so your first improvement targets the cause, not merely the most visible symptom.
Spend first on movement problems
When the kitchen feels cramped, identify the object or activity consuming the narrowest part of the route before changing finishes.
Find the shadow before changing the color
A dark-feeling kitchen may have a lighting problem, a visual-weight problem, or both.
Reduce exposure before buying organizers
Visible clutter is often caused by too many items living on the work surface, not by a total lack of cabinets.
Style can come first—after one functional check
If movement, storage and work surfaces already perform well, cosmetic updates can deliver a strong transformation without rebuilding the kitchen.
Recover hidden capacity before adding bulk
When storage feels insufficient, first determine whether existing cabinets are inaccessible, poorly assigned or genuinely full.
The highest-value upgrade is the one that removes a problem you notice repeatedly.
Once the kitchen works, cosmetic improvements become much easier to prioritize because you are no longer asking paint, tile, or hardware to solve a circulation or storage problem they cannot fix.
21. Run the Breakfast-and-Dinner Stress Test Before You Call the Kitchen Finished
A kitchen can look excellent at 2 p.m. when the counters are clear and nobody is cooking.
That is not the condition that proves whether the design works.
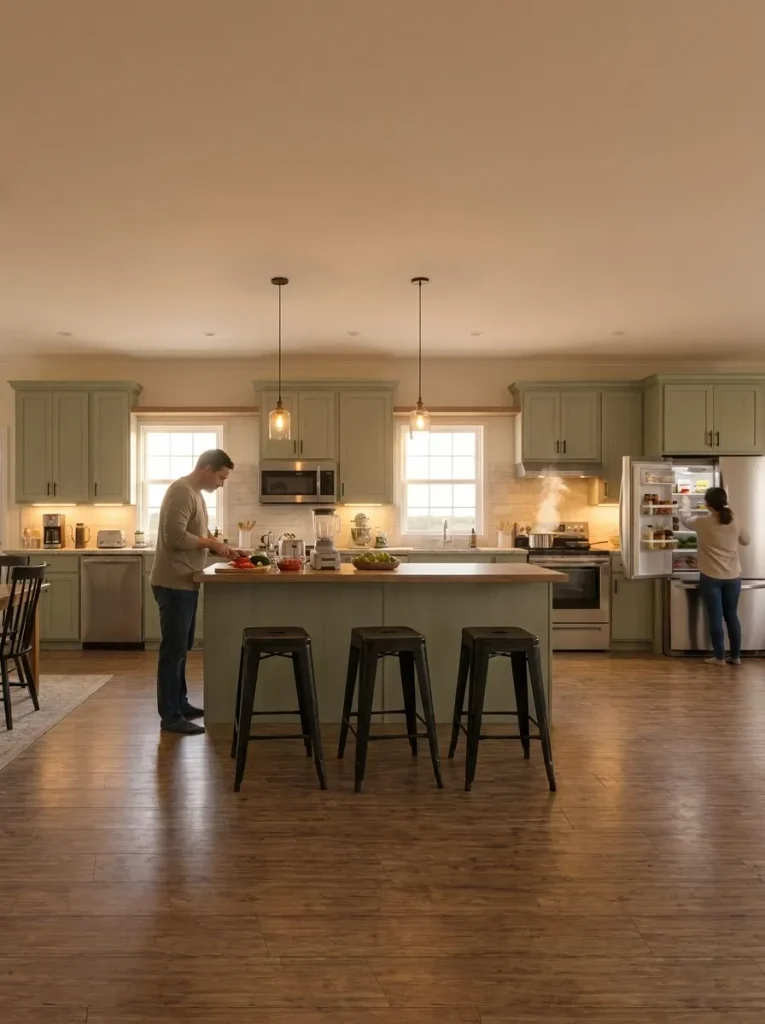
Test it during two different routines:
Breakfast tends to expose beverage stations, refrigerator access, seating, and small-appliance congestion.
Dinner exposes preparation space, cooking, multiple people moving through the room, appliance doors, dishes, and cleanup.
Use the final diagnostic below after your changes are in place.
Final Kitchen Stress Test
Test the kitchen when real life is happening
Switch between breakfast and dinner. Each routine exposes a different kind of friction in a narrow single-wide kitchen.
Prioritize refrigerator clearance, appliance grouping, countertop exposure, or stored seating footprint.
Morning tasks happen without repeatedly moving furniture or countertop objects.
Prioritize prep-space protection, appliance-door conflicts, circulation, or the relationship between kitchen and dining.
Two normal activities can happen without one repeatedly shutting the other down.
Do not keep remodeling simply because another attractive kitchen idea exists.
Once your two highest-friction routines work smoothly, additional changes should be judged as optional improvements rather than necessary fixes.
That stopping point matters. A small kitchen rarely needs every clever idea available to it. It needs the right few ideas solving the problems that actually occur.
Conclusion
The most successful single-wide kitchen does not necessarily contain the most cabinets, the brightest finishes, or the largest possible peninsula. It makes a narrow footprint feel intentional.
Start with movement. Protect one real prep surface. Let tall storage, appliances, lighting, seating, and visual weight support the way the room is actually used. Then layer in the materials and character that make the kitchen feel like part of your home.
When breakfast works, dinner works, appliance doors stop fighting the aisle, and the adjoining rooms still feel connected, you have reached a far better finish line than simply making the kitchen look bigger.