Empty walls can make a home feel cold and unfinished. You might want to add a splash of color but do not know where to start. This collection offers forty beautiful ways to celebrate the season of love through art.

Personalizing your space does not require a massive budget or expert skills. Many of these projects only need a printer and a simple frame. You will find styles ranging from vintage florals to modern geometric shapes.
Creating a warm atmosphere is easy when you have the right inspiration. These ideas help you turn a blank canvas into a meaningful display. Get ready to explore a variety of designs that suit any room in your house.
1 Love Grows Here Floral Art
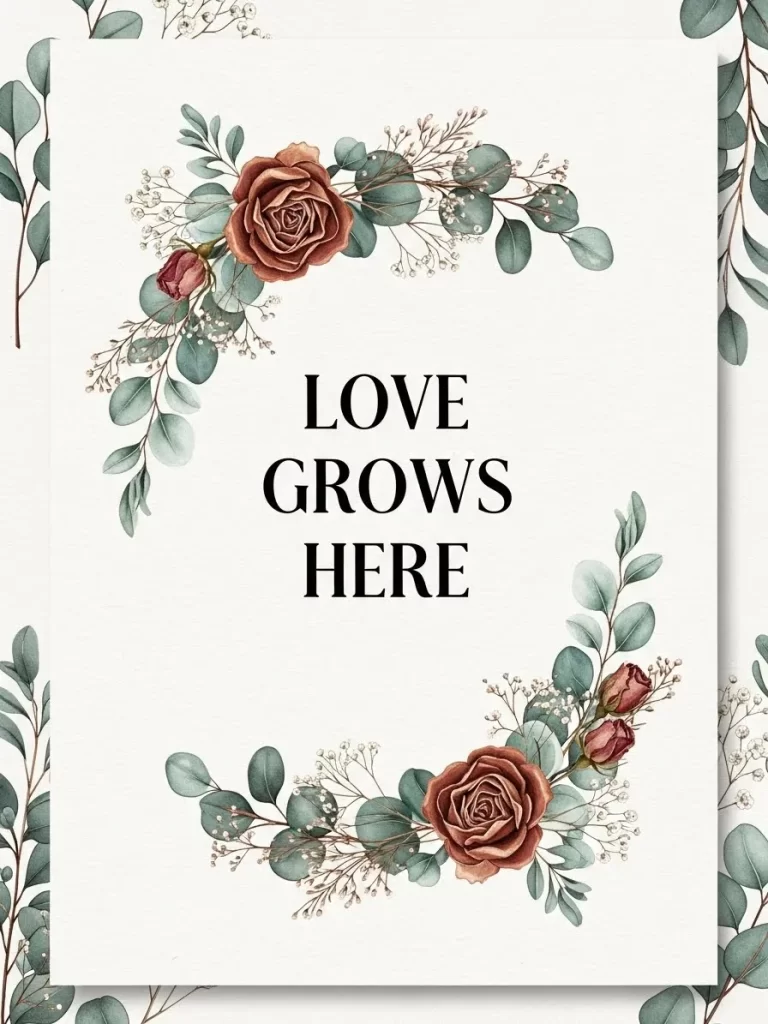
Soft watercolor roses bring a natural touch to your living room. Muted terracotta shades and sage green leaves create a calm look. This piece uses elegant lettering to share a warm message about growth.
Displaying this art in a wood frame brightens up any dark corner. A clean white background helps the floral colors stand out without being too loud. It serves as a gentle reminder of the affection shared in your home.
Earthy tones make this a great choice for year round decor. Guests will appreciate the subtle beauty this art adds to your collection. Every room benefits from such an inviting style.
Materials Required List
- White cardstock paper
- Wooden picture frame
- Double sided tape
Equipment Required List
- Home printer
- Sharp scissors
DIY Instructions
- Download the digital art file to your computer desktop.
- Load the white cardstock paper into your printer tray.
- Adjust your printer settings to high quality for the best colors.
- Print the image onto the cardstock paper.
- Let the ink dry for five minutes so it does not smudge.
- Cut around the edges of the paper to fit your frame size.
- Open the back of your chosen wooden frame.
- Place the art inside the frame and secure the back panel.
- Hang your new decoration on a bare wall using a small nail.
2 Retro Groovy Heart Art
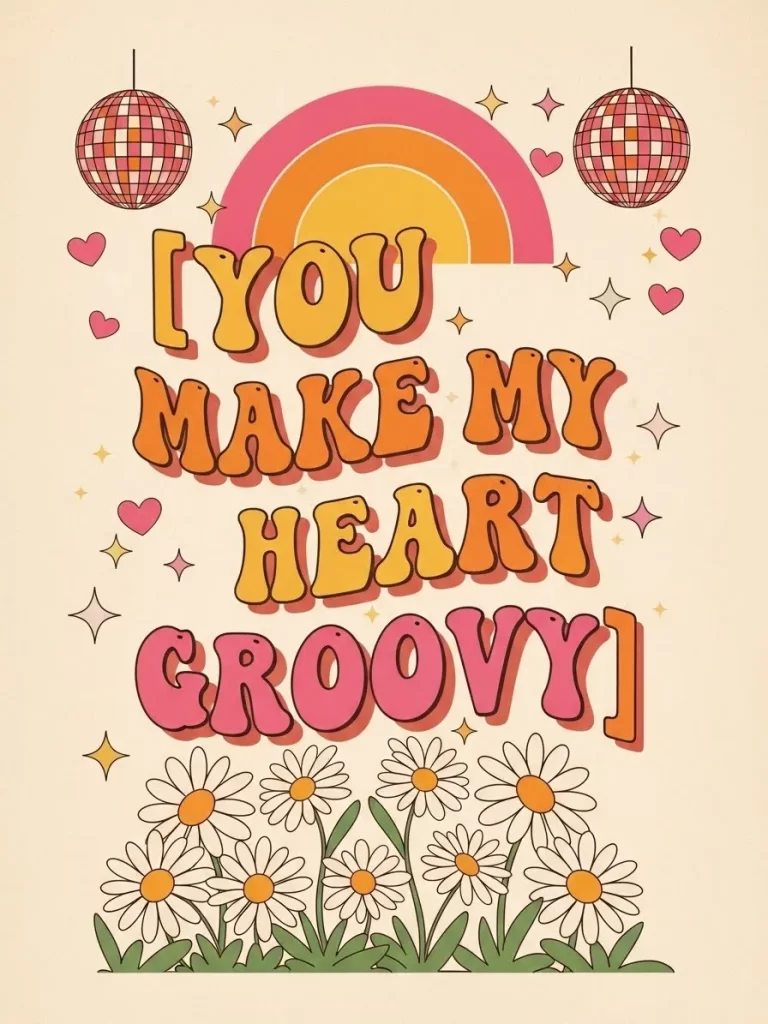
Retro vibes fill the room with this colorful heart design. Bright orange and pink tones catch the eye instantly. Two disco balls hang at the top to add a fun party feel.
Cheerful daisies bloom at the bottom to complete the look. A happy rainbow sits behind the bold text. This print brings a high energy to a bedroom or creative office.
Vintage fonts make the message stand out against the cream background. It reminds everyone to keep a playful spirit during the holiday. Small stars float around the letters to give it extra charm.
Materials Required List
- Heavy cardstock paper
- Colorful plastic frame
- Adhesive strips
Equipment Required List
- Color printer
- Paper trimmer
DIY Instructions
- Save the groovy heart art file to your computer.
- Put a sheet of heavy cardstock into your printer.
- Open the file and choose the print option.
- Set the quality to high so the colors stay vibrant.
- Print the image and let it sit for two minutes.
- Use a paper trimmer to cut the edges until it fits your frame.
- Clean the glass of your frame to remove any dust.
- Place the art against the glass and close the back.
- Attach adhesive strips to the back to hang it without nails.
3 Minimalist Always Line Art
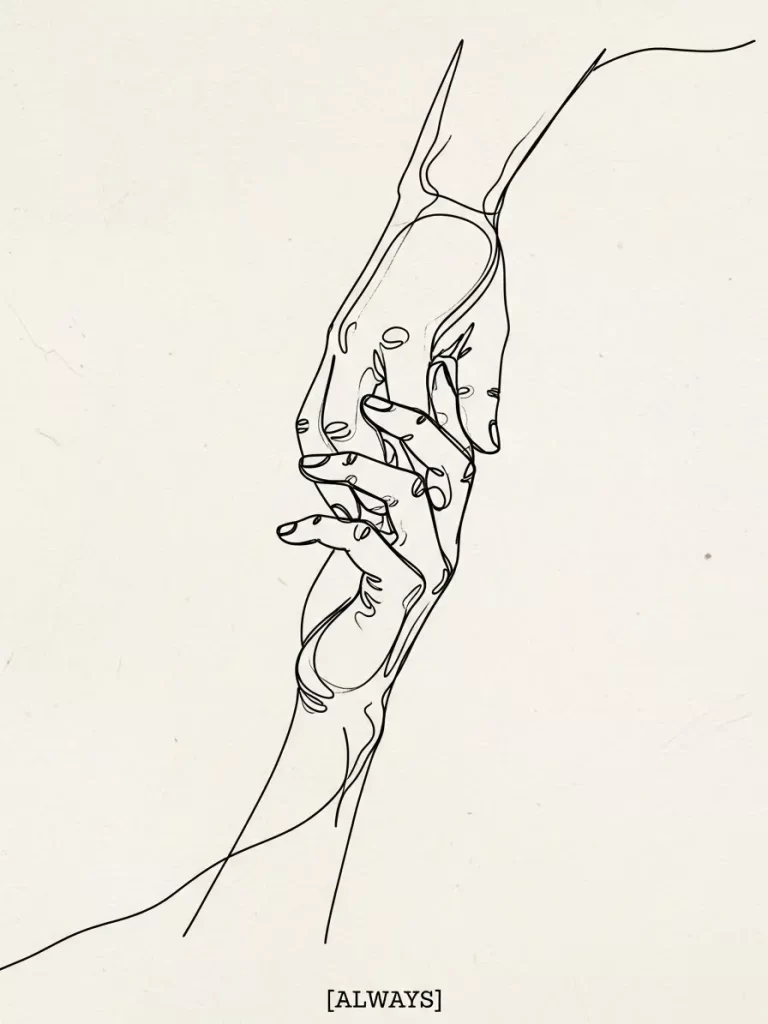
Simple black lines create a powerful image of two hands. This minimalist style fits well in a modern home with clean design. The word Always sits at the bottom in a small font.
Thin strokes capture the gentle grip between two people. The cream background keeps the focus on the connection shown in the sketch. It offers a sophisticated way to celebrate a lasting bond.
Placing this art in a thin black frame creates a sharp look. It works as a single piece or as part of a larger gallery wall. Such simplicity makes it a great addition to any room.
Materials Required List
- Matte photo paper
- Thin black metal frame
- Mounting board
Equipment Required List
- Inkjet printer
- Sharp scissors
DIY Instructions
- Find the minimalist art file on your laptop.
- Insert a piece of matte photo paper into your printer.
- Select the print button and check the image size.
- Hit print and wait for the machine to finish.
- Check the edges for any ink that might still be wet.
- Cut the paper carefully to match the size of your frame glass.
- Lay the frame face down and remove the back panel.
- Set the printed art inside and make sure it is centered.
- Replace the back panel and flip the frame over to see your art.
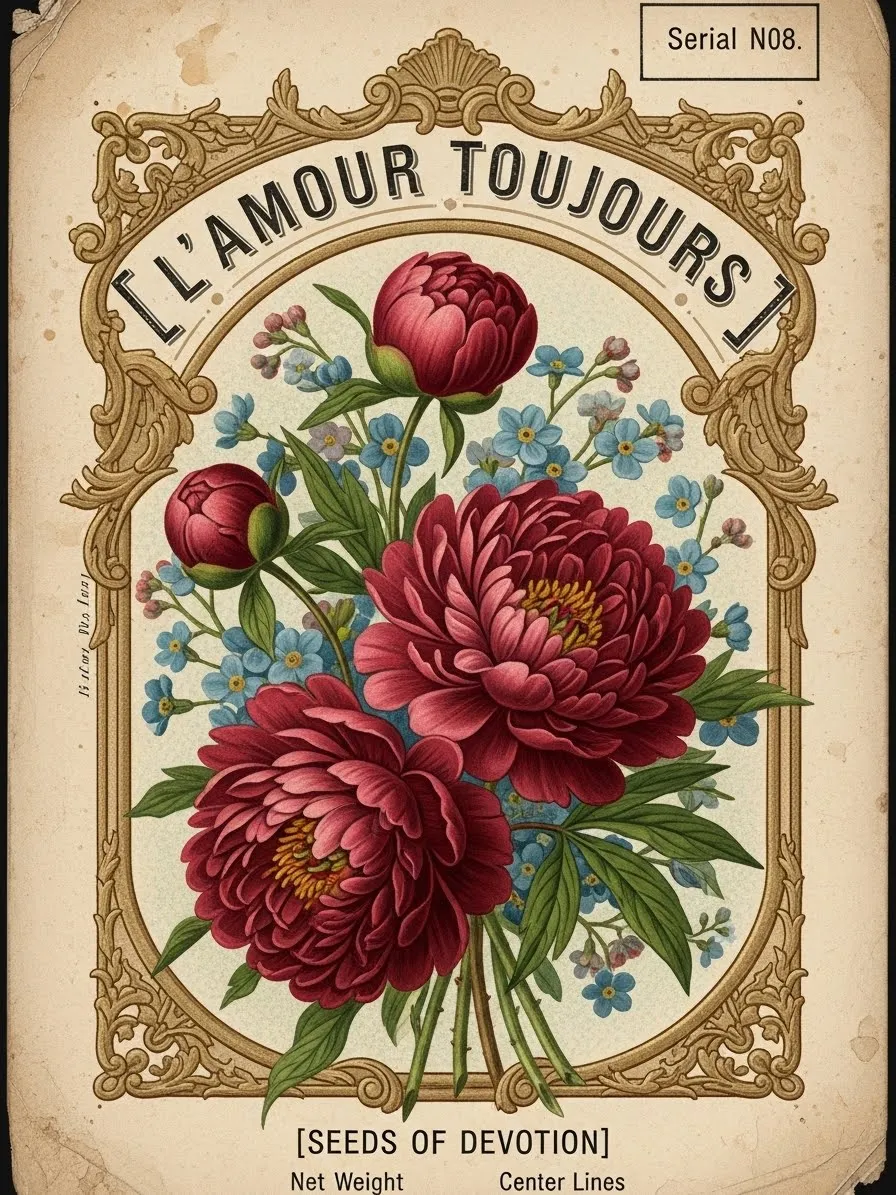
4 French Botanical Peony Art
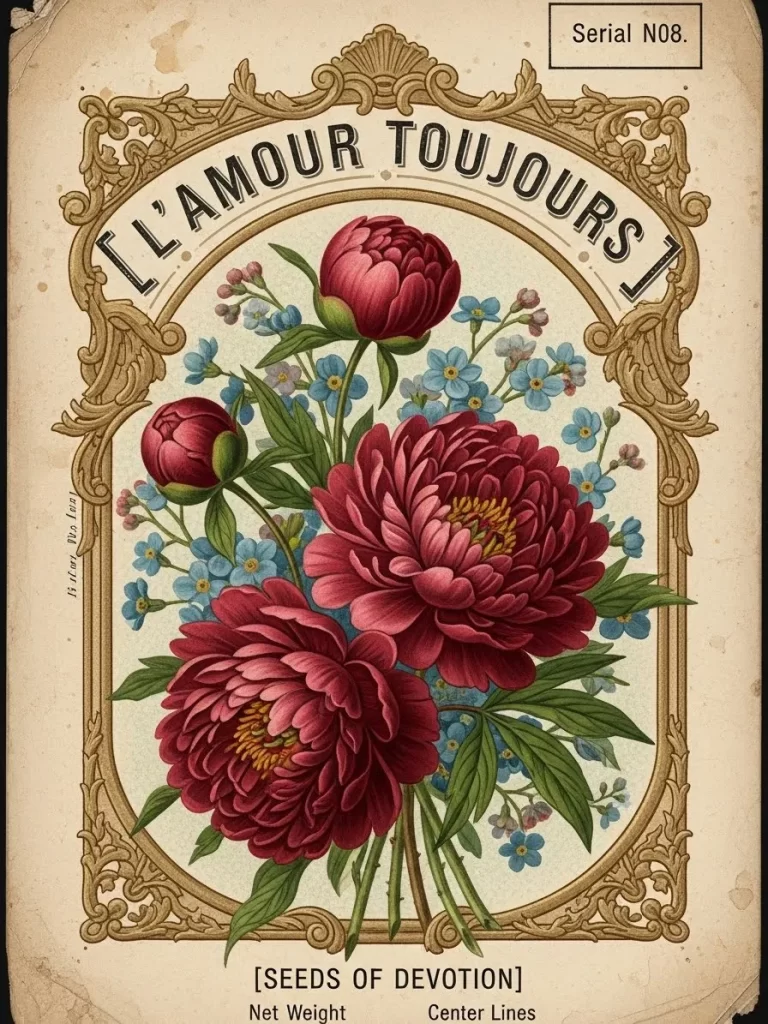
Rich red peonies take center stage in this classic floral piece. Deep colors and detailed petals provide a romantic feeling. Small blue flowers accent the larger blooms to create a full bouquet.
An ornate gold border surrounds the flowers for a regal touch. Text at the top and bottom adds to the antique look of a garden seed packet. It feels like a treasure found in an old market.
Aged paper textures give the print a sense of history. It adds a touch of timeless elegance to a dining room. This piece is a wonderful choice for those who love traditional style.
Materials Required List
- Textured paper
- Gold leaf frame
- Hanging wire
Equipment Required List
- High quality printer
- Measuring tape
DIY Instructions
- Choose a textured paper to give the art an antique feel.
- Place the paper in your printer and open the peony file.
- Choose the high resolution setting for the most detail.
- Start the printing process and watch the colors appear.
- Allow the paper to dry for ten minutes before touching it.
- Measure the inside of your gold frame for a good fit.
- Trim any extra paper from the sides using your tape as a guide.
- Put the art in the frame and secure the clips on the back.
- Attach a hanging wire to the back for easy wall mounting.
5 Geometric We Fit Together Art
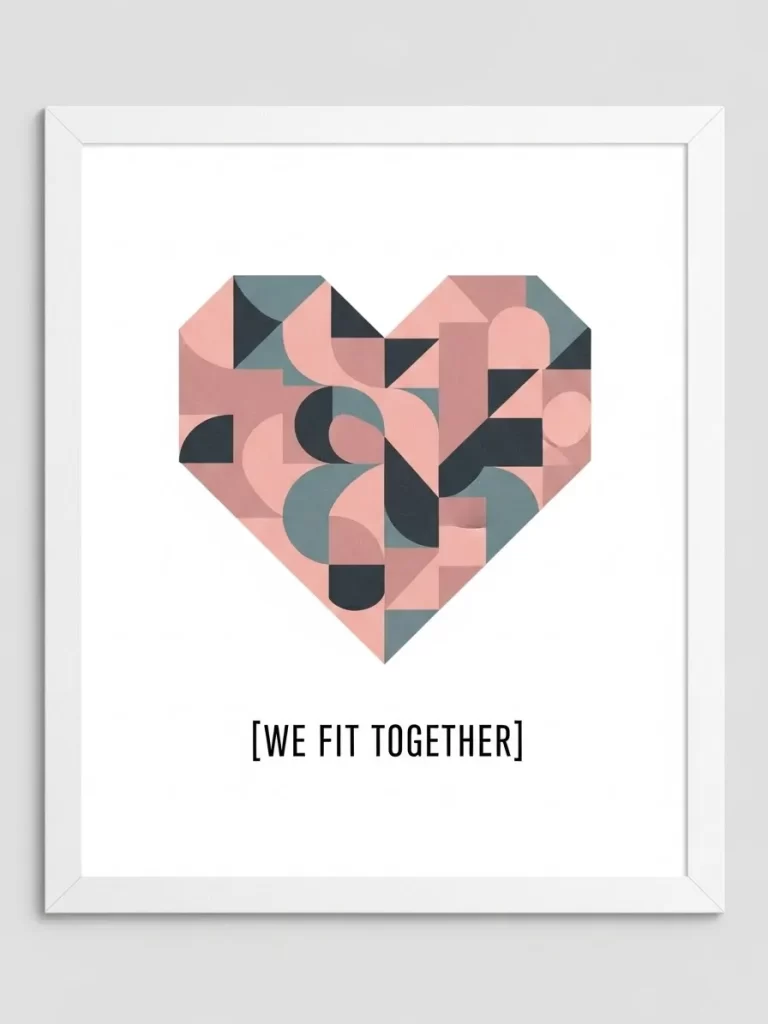
Various shapes come together to form a large heart. Muted pink and slate blue shades create a balanced palette. The clean white border helps the colors look bold and crisp.
Short text below the heart shares a sweet message about connections. This abstract style appeals to those who like contemporary design. It looks great in a sleek white frame.
You can see circles and triangles nested within the larger shape. These patterns represent the many pieces that make a relationship whole. It is a unique way to show affection through art.
Materials Required List
- Bright white cardstock
- White gallery frame
- Level for hanging
Equipment Required List
- Desktop printer
- Metal ruler and blade
DIY Instructions
- Load your printer with the brightest white cardstock available.
- Open the geometric heart file on your device.
- Set the print scale to one hundred percent for a large image.
- Run the print and let the colors set for a moment.
- Use a metal ruler and blade to cut straight lines.
- Clean the inside of the frame glass with a soft cloth.
- Place the heart art into the frame and close the tabs.
- Hold the frame against the wall where you want it.
- Use a level to make sure the frame is straight before hanging.
6 Hello Gorgeous Mirror Decal

Start your morning with a boost of confidence using this white decal. The text is placed on the glass to greet you every day. A small white heart sits below the words to finish the message.
Seeing these words helps build a positive mindset as you get ready. The white vinyl stands out clearly against the reflection. It transforms a regular mirror into a source of inspiration.
This project is quick to do and makes a big impact. It also makes a thoughtful gift for a friend. You can easily remove it later if you want to change things up.
Materials Required List
- White vinyl sheet
- Transfer tape
- Rubbing alcohol
Equipment Required List
- Electronic cutting machine
- Squeegee or card
DIY Instructions
- Upload the text design into your cutting machine software.
- Place the white vinyl sheet onto the cutting mat.
- Send the design to the machine to cut the letters.
- Remove the extra vinyl from around the letters using a tool.
- Press a piece of transfer tape firmly over the letters.
- Clean your mirror with rubbing alcohol to remove oils.
- Peel the backing off the vinyl so letters stick to the tape.
- Press the tape onto the mirror in the spot you like.
- Rub the letters with a card and peel away the tape.
7 Custom Rustic Family Sign
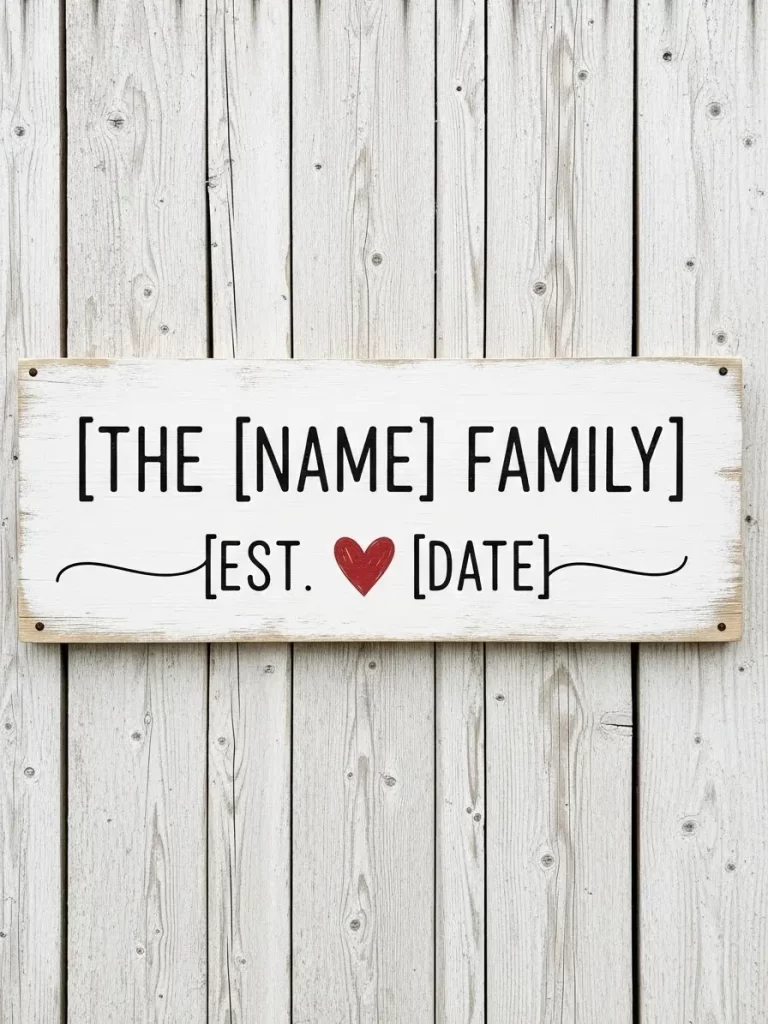
Reclaimed wood provides a rugged background for this custom sign. White paint is lightly sanded to show the grain underneath. Bold black lettering displays the family name and a special date.
A small red heart in the middle adds a splash of color. This sign looks wonderful hanging over a front door. It celebrates the unique history of your household in a charming way.
Decorative swirls on either side of the date add a touch of grace. Every guest will feel the warmth of your home. It is a piece that will be cherished for many years.
Materials Required List
- Wood plank
- White and black acrylic paint
- Sandpaper
Equipment Required List
- Paint brushes
- Stencil or pencil
DIY Instructions
- Clean your wood plank to remove any loose dust.
- Paint the front of the wood with a thin coat of white.
- Let the paint dry and rub it with sandpaper for a worn look.
- Use a pencil to trace the family name onto the wood.
- Fill in the letters with black paint using a small brush.
- Paint a small red heart in the center of the bottom line.
- Let the black and red paint dry for one hour.
- Apply a clear coat of sealer if you plan to hang it outside.
- Drill two small holes in the top to add a hanging rope.
8 Pastel Candy Heart Pattern

Classic candy hearts cover this print in a fun pattern. Pastel shades of pink and yellow bring a youthful energy. Each heart features a short and sweet phrase inside brackets.
Splashes of watercolor dot the background to add an artistic touch. This art is a great choice for a playroom or a kitchen. It captures the look of a favorite holiday treat.
Lighthearted phrases remind us of childhood exchanges at school. It brings a sense of nostalgia and joy to your decor. This pattern is busy enough to be the main focus of a wall.
Materials Required List
- Glossy photo paper
- Pastel pink frame
- Wall adhesive
Equipment Required List
- Color printer
- Paper cutter
DIY Instructions
- Choose a high quality glossy paper for a vibrant look.
- Load the paper into your printer and select the heart file.
- Set your printer to the photo setting for best results.
- Print the pattern and wait for the surface to dry.
- Trim the paper to the size of your chosen pastel frame.
- Open the frame and place the art inside facing the glass.
- Snap the back of the frame into place to hold it tight.
- Clean the wall where you want to place the art.
- Use wall adhesive on the back of the frame to hang it.
9 Cor Meum Anatomical Art
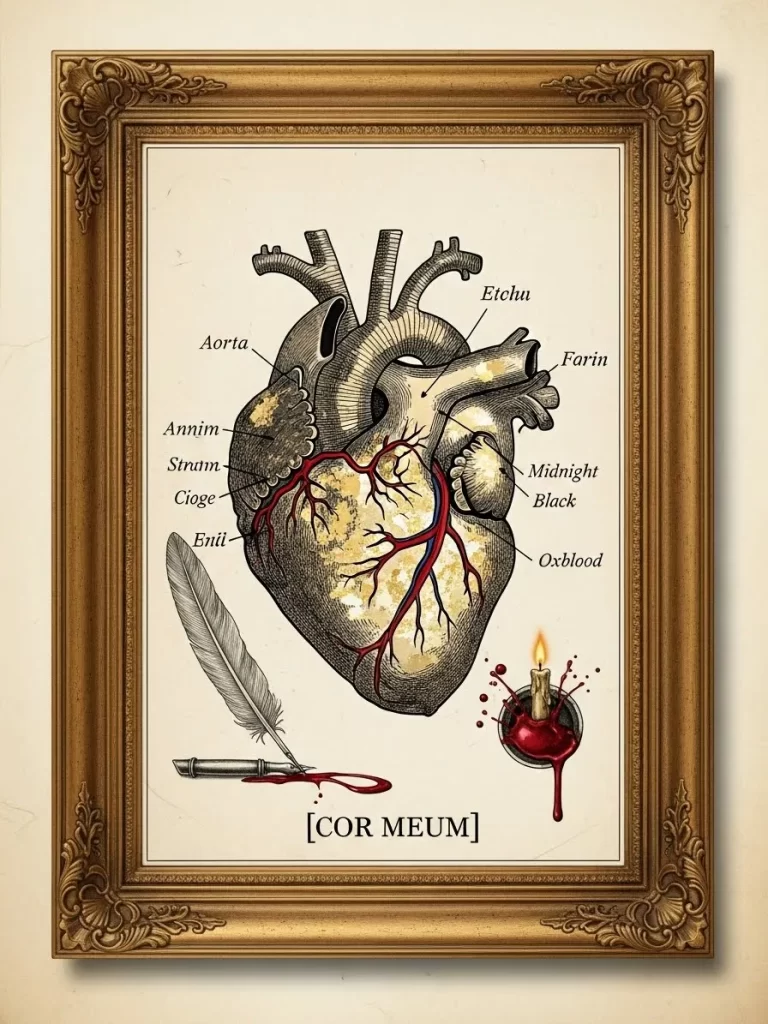
Detailed ink drawings show the complex beauty of a human heart. Latin labels and handwritten notes give it an old textbook look. Rich oxblood red accents the veins to add a realistic touch.
A feather quill and a small candle sit at the bottom of the frame. These elements suggest the act of writing a heartfelt letter. The ornate gold frame adds a layer of sophistication to the display.
This piece is for those who enjoy art that is scientific and romantic. It makes a bold statement on a gallery wall. Warm tones make any space feel more inviting and thoughtful.
Materials Required List
- Cream colored cardstock
- Ornate gold frame
- Matte sealer spray
Equipment Required List
- Inkjet printer
- Paper trimmer
DIY Instructions
- Find a cream colored paper to match the antique style.
- Insert the paper into the printer and open the heart file.
- Print using the finest detail settings to see every line.
- Let the print dry so the dark ink does not run.
- Spray a light coat of matte sealer over the paper.
- Cut the cardstock to fit the opening of your gold frame.
- Remove the glass from the frame and clean it well.
- Put the art and the glass back into the frame.
- Fasten the back of the frame and hang it in a bright spot.
10 Our First Date Custom Map
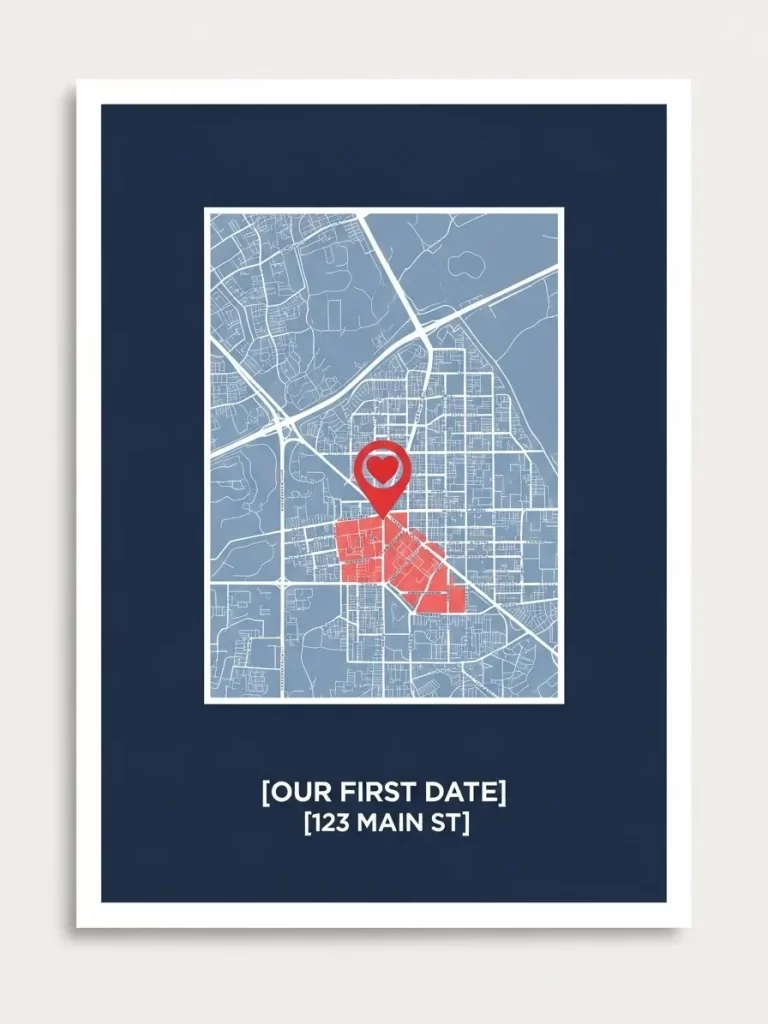
A navy blue background makes the street lines of this map stand out. A bright red heart icon marks the spot where a story began. Clean white text at the bottom records the occasion and location.
This map tells a personal story without using many words. It is a modern way to remember a milestone in a relationship. The simple color scheme ensures it fits into any room design.
You can choose any city to make it unique to your life. It serves as a beautiful focal point that sparks happy memories. This piece makes a thoughtful anniversary or Valentine gift.
Materials Required List
- Premium matte paper
- Navy picture frame
- Hanging hook
Equipment Required List
- Computer with internet access
- High resolution printer
DIY Instructions
- Use a map tool to find the location of your first date.
- Capture the image and place a red heart over the street.
- Add your custom text at the bottom using a white font.
- Load premium matte paper into your printer tray.
- Print the finished map and check that the heart is clear.
- Allow the ink to dry for several minutes before touching.
- Trim the paper to fit the dimensions of your navy frame.
- Place the map inside the frame and secure the back clips.
- Hammer a hook into the wall and hang your custom memory.
11 Out of This World Retro Heart
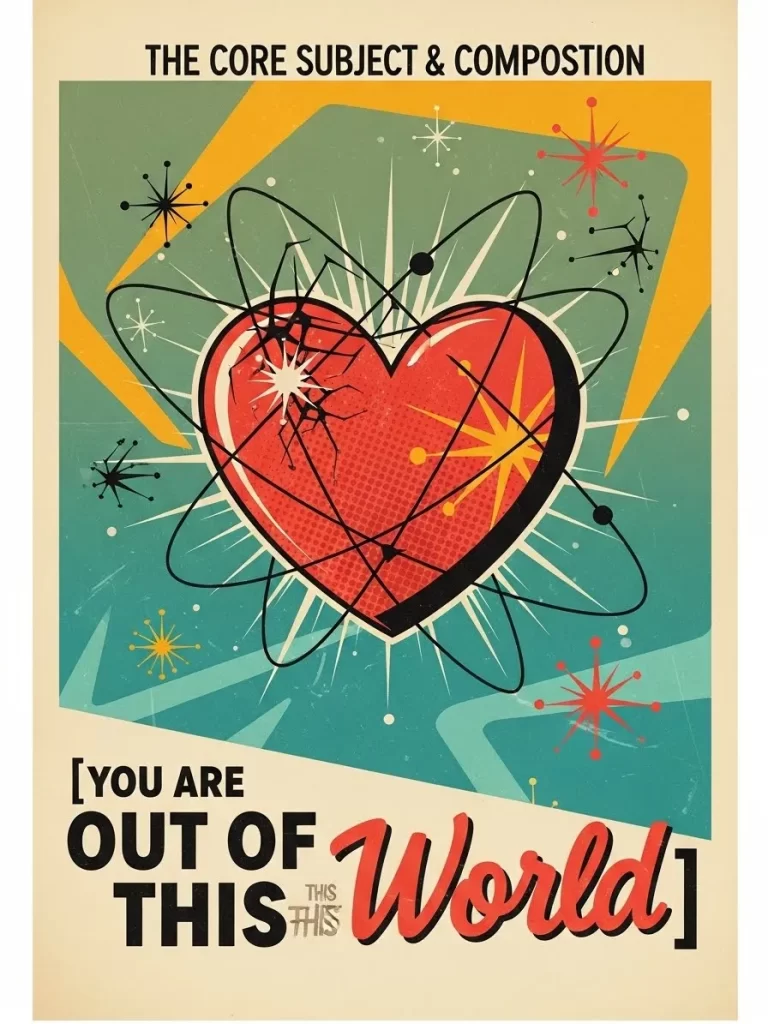
Mid century modern style shines in this vibrant space themed print. A bold red heart sits at the center of atomic rings and starbursts. The teal and mustard yellow background creates a striking contrast that feels both nostalgic and fresh.
This art uses a classic comic book dot texture to add depth to the heart. It captures the excitement of the space age while celebrating a deep connection. It is a wonderful choice for a nursery or a playful home office.
The text at the bottom uses a mix of bold and script fonts. It offers a fun way to tell someone they are truly special. This piece adds a unique pop of color to any wall.
Materials Required List
- White cardstock paper
- Black picture frame
- Hanging hardware
Equipment Required List
- Color inkjet printer
- Ruler and craft knife
DIY Instructions
- Download the high resolution digital file to your computer.
- Place a sheet of white cardstock into your printer paper tray.
- Set the print properties to the highest color quality setting.
- Print the image and let the ink dry for ten minutes.
- Measure the inside of your frame to ensure a correct fit.
- Use a ruler and craft knife to trim the excess white paper.
- Clean the frame glass to remove any fingerprints or dust.
- Slide the art into the frame and secure the back clips.
- Find a prominent spot on your wall and hang the piece.
12 Written in the Stars Constellation Heart

A deep purple and blue galaxy serves as a dreamy backdrop for this art. Small white stars connect with thin lines to form a large heart shape. It looks like a real constellation discovered in the night sky.
The milky way glow adds a sense of wonder and mystery to the design. This print is a beautiful way to show that your bond was meant to be. It fits well in a bedroom where calm vibes are valued.
Clean white text at the bottom confirms the celestial theme. The minimalist line work allows the stunning nebula colors to take center stage. Every person who sees it will feel the romantic atmosphere.
Materials Required List
- Semi gloss photo paper
- Silver or navy frame
- Mounting tape
Equipment Required List
- Digital printer
- Scissors
DIY Instructions
- Save the star heart art file to your local drive.
- Insert semi gloss photo paper into the printer for a shiny finish.
- Choose the borderless printing option in your software settings.
- Print the galaxy image and wait for it to dry completely.
- Cut the paper carefully with scissors if trimming is needed.
- Wipe down the interior of the frame glass with a soft cloth.
- Place the art inside and press the back panel into place.
- Apply mounting tape to the back corners of the frame.
- Press the frame onto the wall to enjoy your night sky art.
13 Dictionary Definition Soulmate Print
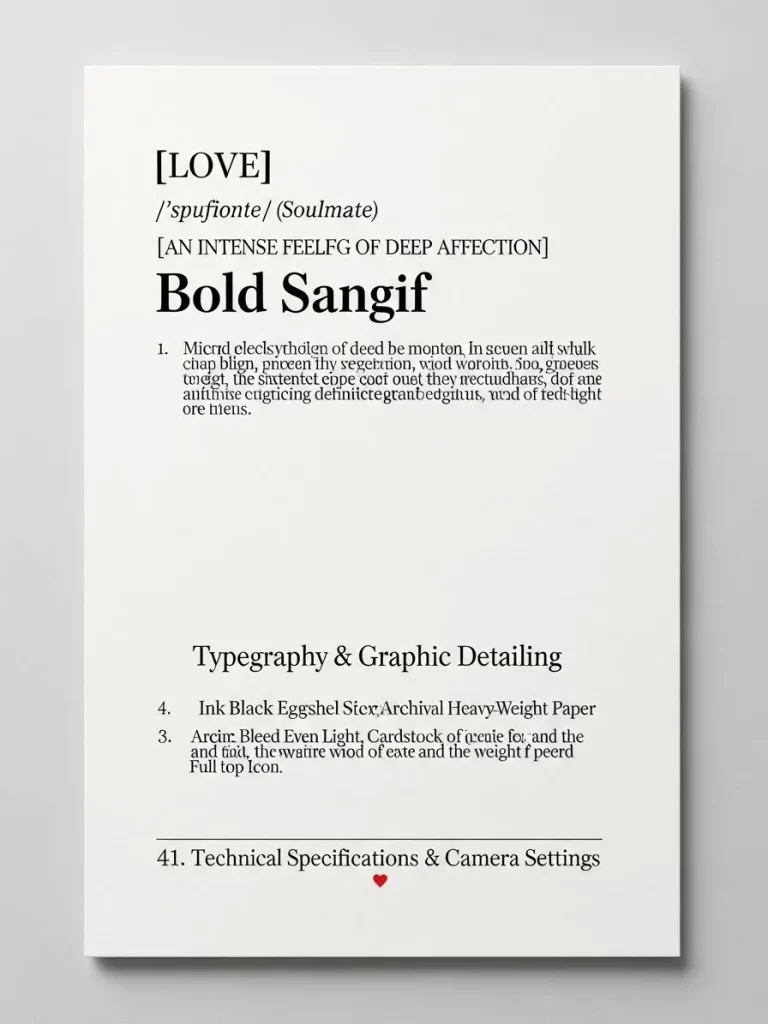
This art looks like a page taken from a vintage book. It features a clean layout with the word Love at the top. The phonetic spelling and a sweet definition follow below in a classic serif font.
A small red heart at the bottom center adds a tiny touch of color to the page. This minimalist style works well for those who love literature and simple design. It brings a sophisticated and academic feel to your home.
Technical details at the bottom add to the authentic dictionary look. This print is a great conversation starter for a library or study. It reminds us of the power of words to describe our feelings.
Materials Required List
- Cream or off white cardstock
- Minimalist black frame
- Wall hook
Equipment Required List
- Laser or inkjet printer
- Paper trimmer
DIY Instructions
- Open the dictionary art file on your computer screen.
- Put cream colored cardstock into the printer for a vintage look.
- Set the print resolution to high for clear and sharp text.
- Print the page and let it rest for a few minutes.
- Use a paper trimmer to get perfectly straight edges.
- Take the back off your black frame and clean the glass.
- Place the art against the glass and replace the back panel.
- Secure the clips to hold the paper firmly in place.
- Use a wall hook to display your new literary art piece.
14 Street Style Graffiti Love Art
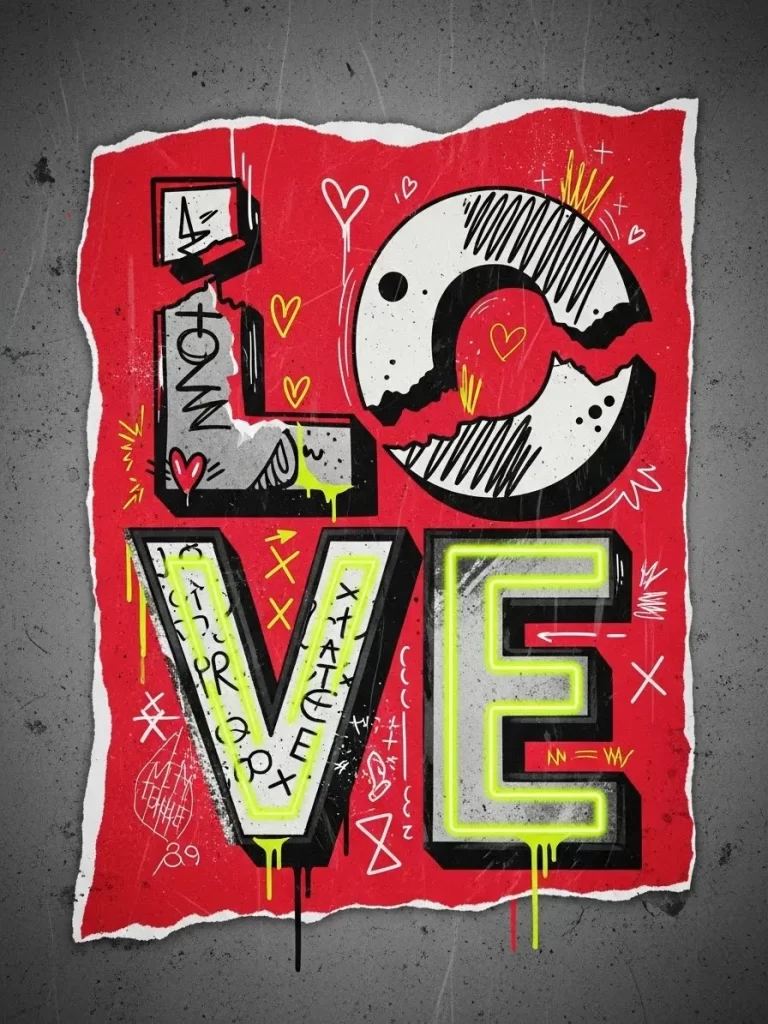
Bold energy leaps off the page with this urban inspired design. A red background features a large Love message in a gritty graffiti style. White and gray letters are accented with neon green drips.
Small doodles like hearts and crowns are scattered around the main text. The torn paper edge effect makes it look like a piece of art pulled from a city wall. It adds a cool and modern edge to any room.
This print is for those who appreciate street culture and bold expressions. It works well in a studio or a teen bedroom. The mix of colors and textures creates a high impact visual.
Materials Required List
- Heavy weight matte paper
- Floating frame
- Level
Equipment Required List
- High quality color printer
- Precision knife
DIY Instructions
- Load the graffiti art file on your workstation.
- Place heavy weight matte paper into the printer.
- Check your ink levels to ensure the red remains vibrant.
- Print the image and allow it to dry for fifteen minutes.
- Cut around the torn paper design with a precision knife for a 3D look.
- Arrange the art inside a floating frame to show off the edges.
- Close the frame carefully to avoid shifting the paper.
- Hold the frame against the wall and check it with a level.
- Mount the frame securely to complete your urban decor.
15 Cute Animal Pun Mini Prints
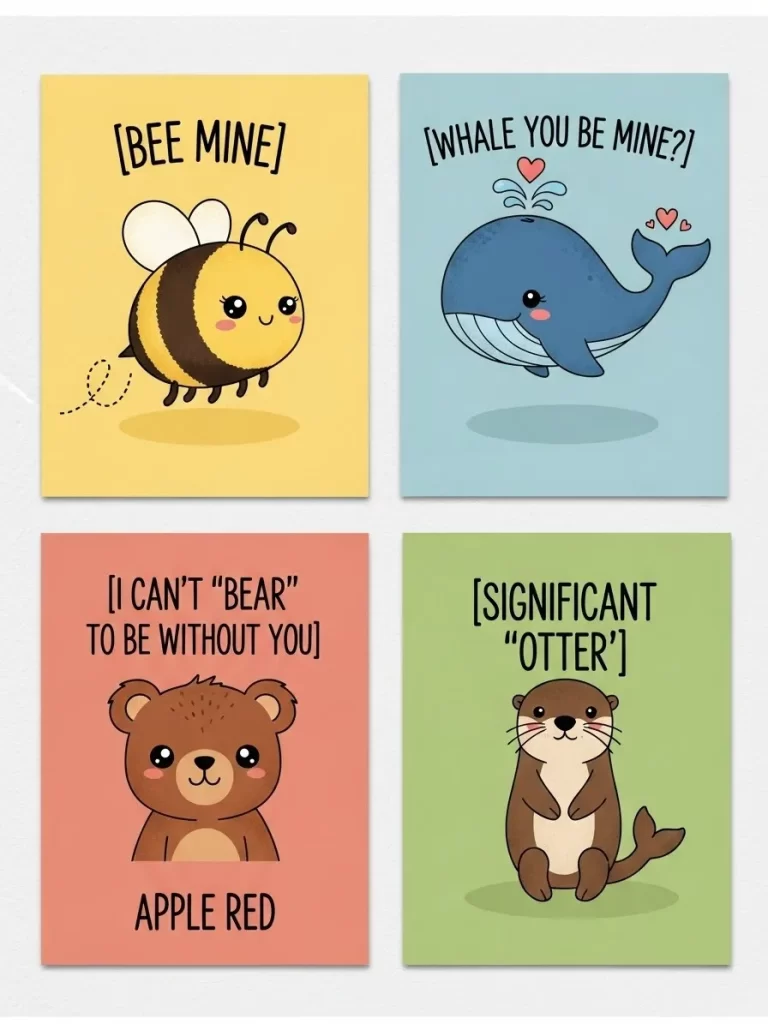
Four adorable illustrations feature sweet animals and funny puns. A bee and a whale and a bear and an otter each share a message of love. Pastel colors like yellow and blue and pink make these prints very cheerful.
These mini designs are great for a child bedroom or as a gift for a friend. The cute faces and soft colors create a warm and friendly feeling. You can display them together in a grid or separately.
The simple text is easy to read and adds to the playful theme. These prints are a lighthearted way to celebrate the season of love. Every animal brings its own unique charm to the collection.
Materials Required List
- White photo paper
- Four small square frames
- Double sided tape
Equipment Required List
- Desktop printer
- Paper cutter
DIY Instructions
- Open the animal pun file and check the image sizes.
- Put a sheet of photo paper into the printer tray.
- Print the four designs on a single sheet of paper.
- Use a paper cutter to separate the four individual squares.
- Let the individual prints dry so the colors do not bleed.
- Open the back of your four small square frames.
- Place one animal print into each frame and close them.
- Decide on a grid pattern for your wall arrangement.
- Use double sided tape or nails to secure the frames to the wall.
16 Cozy Winter Coffee Mug Art
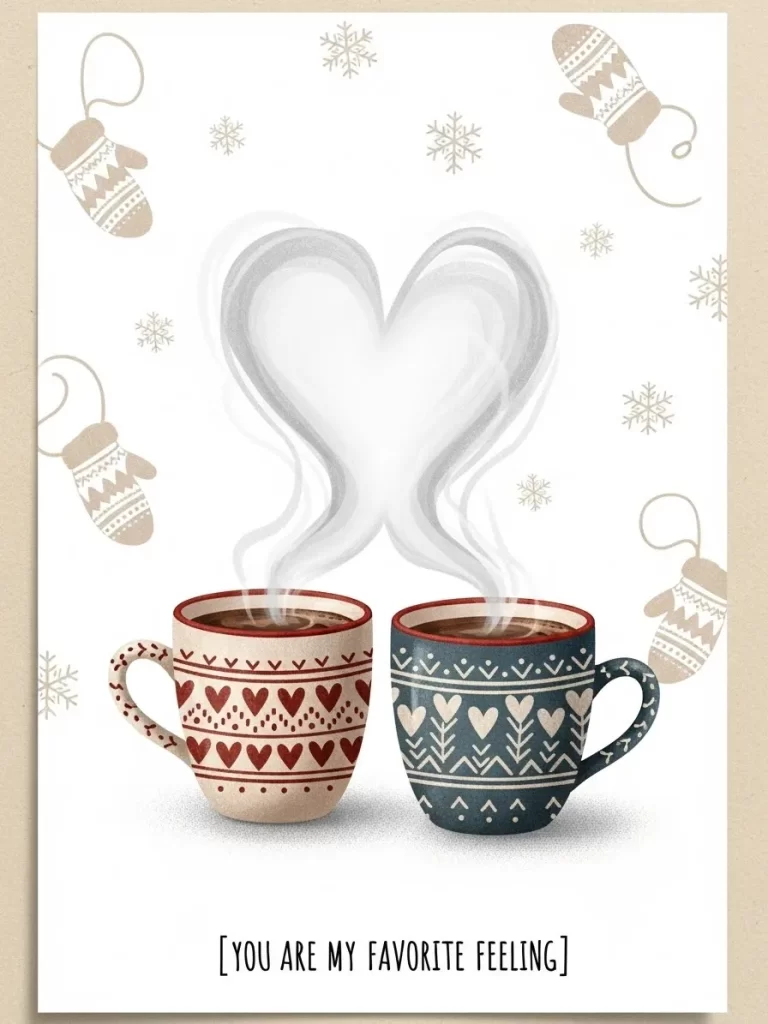
Warm feelings are captured in this sweet illustration of two mugs. A cream mug with red hearts and a blue mug with white hearts sit side by side. Steam rises from the hot drinks to form a large heart in the air.
Small snowflakes and mittens float in the background to add a winter touch. This art is a wonderful way to celebrate a cozy relationship. It looks great in a kitchen or a breakfast nook.
The soft colors and hand drawn style create a very inviting look. A gentle message at the bottom reminds us of our favorite feelings. It brings a touch of warmth to a cold winter day.
Materials Required List
- High quality cardstock
- Light wood frame
- Mounting hardware
Equipment Required List
- Color inkjet printer
- Ruler and pencil
DIY Instructions
- Download the cozy mug art to your computer.
- Place a sheet of high quality cardstock into the printer.
- Set your printer to the high quality photo setting.
- Print the image and let the ink dry for several minutes.
- Use a ruler and pencil to mark the size for your frame.
- Trim the paper carefully along your pencil marks.
- Clean the frame glass and place the art inside.
- Snap the back of the frame shut to hold the art.
- Hang the frame on your wall to add a cozy feel to your room.
17 Steampunk Mechanical Heart Art

Industrial style meets romance in this detailed steampunk design. A mechanical heart is made of metal plates and pipes and gears. The copper and iron colors give it a strong and sturdy appearance.
Blueprints and technical lines in the background add to the engineering theme. This art represents a love that is built to last through anything. It is a bold choice for a modern or masculine space.
The dark background makes the metallic details of the heart stand out clearly. It is a unique and creative way to show a deep connection. Every gear and bolt adds to the complex beauty of the piece.
Materials Required List
- Matte black cardstock
- Metallic silver or copper frame
- Hanging wire
Equipment Required List
- High resolution printer
- Craft knife and ruler
DIY Instructions
- Access the steampunk heart file on your device.
- Load a sheet of matte black cardstock into your printer.
- Ensure your printer is set to handle heavy paper types.
- Print the mechanical heart and let it dry completely.
- Use a ruler and craft knife to trim the paper to fit the frame.
- Prepare your metallic frame by cleaning the glass surface.
- Insert the art into the frame and replace the backing.
- Attach a hanging wire to the back hooks of the frame.
- Hang the piece in a spot where the metallic details catch the light.
18 Sea Glass Beach Heart Art
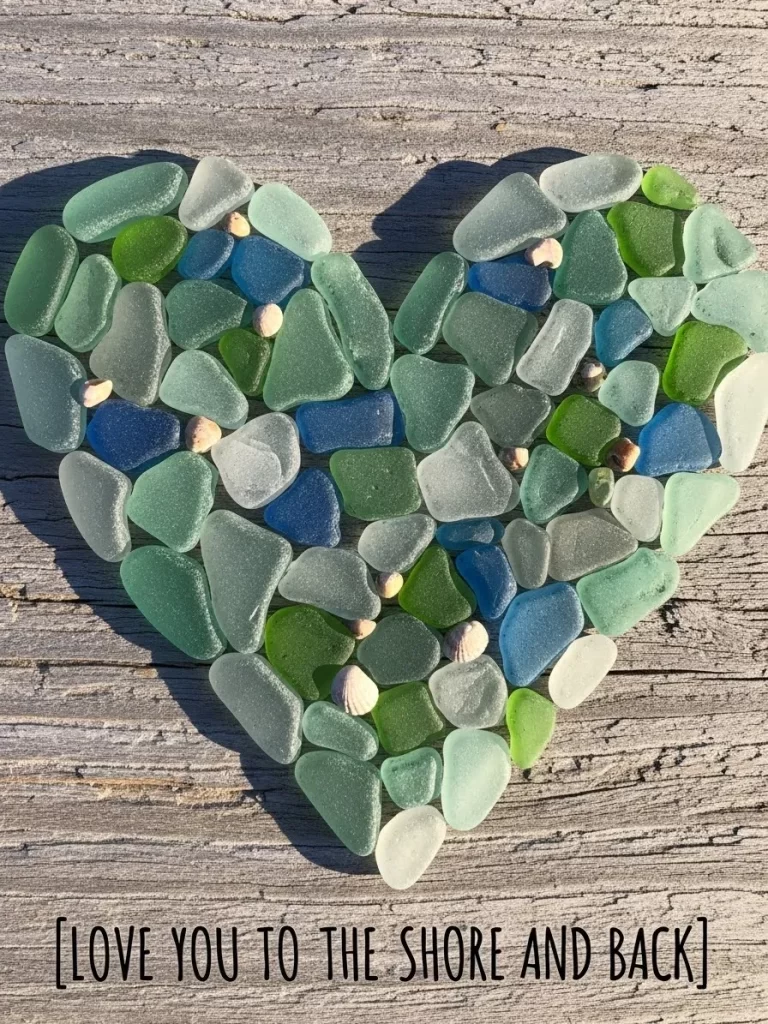
Natural beauty is on display with this heart made of sea glass. Pieces of green and blue and white glass are arranged on a weathered wood background. Small seashells and pebbles are tucked in between the glass pieces.
The soft colors of the glass create a very calm and peaceful feeling. This art is a wonderful way to bring a touch of the ocean into your home. It works well in a bathroom or a beach house.
A sweet message at the bottom ties the coastal theme together. It reminds us of a love that is as deep and wide as the sea. Every piece of glass has a unique shape and history.
Materials Required List
- Textured art paper
- Rustic driftwood frame
- Adhesive dots
Equipment Required List
- Color printer
- Scissors
DIY Instructions
- Save the sea glass heart art to your computer.
- Place a sheet of textured art paper into your printer.
- Set the print quality to high to show the glass textures.
- Print the image and allow it to dry for five minutes.
- Cut the paper to the size needed for your rustic frame.
- Clean any dust off the frame and the glass panel.
- Place the art in the frame and secure the back.
- Use adhesive dots on the back corners if you want extra stability.
- Hang the art on your wall to enjoy a coastal vibe.
19 Comic Book Action Love Art
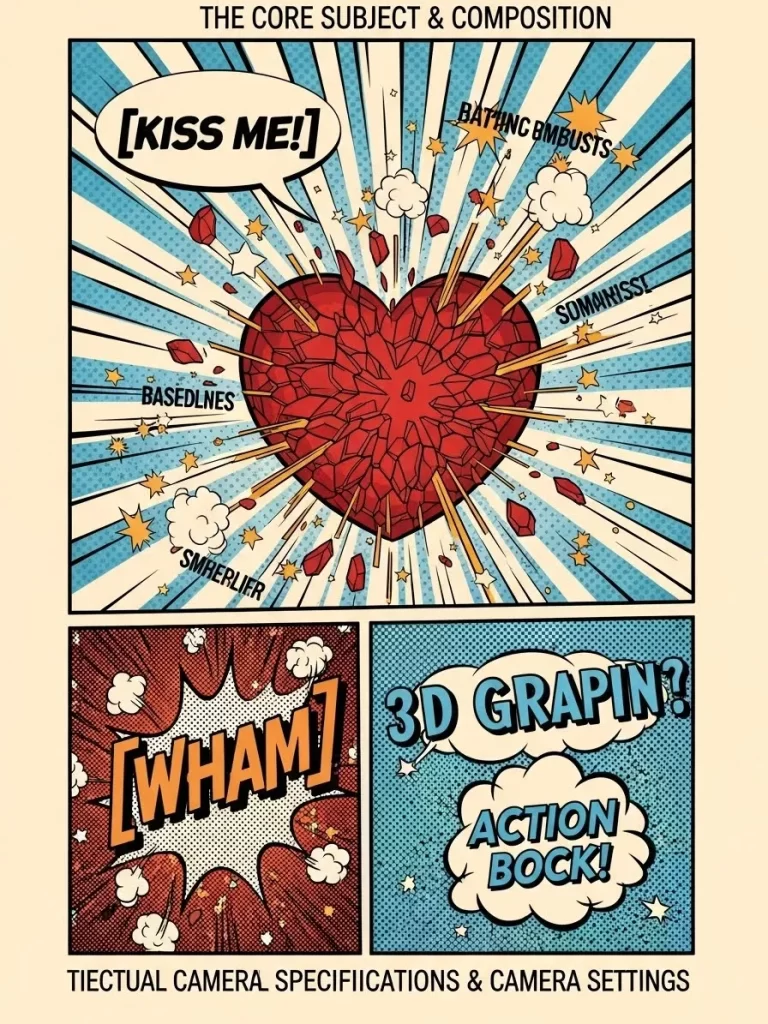
Explosive energy fills this comic book style print. A large red heart is surrounded by action lines and stars and dots. Speech bubbles and comic panels add to the fun and dynamic feel.
Bright yellow and blue and red colors make this art very eye catching. It is a great choice for a fan of pop art or classic comic books. The design feels like it belongs in an action packed story.
The bold text in the bubbles shares messages of excitement and love. This print brings a playful and heroic spirit to your decor. Every panel tells a small part of a larger romantic adventure.
Materials Required List
- Glossy cardstock paper
- Bold black frame
- Picture hanging strips
Equipment Required List
- High quality color printer
- Paper trimmer
DIY Instructions
- Open the comic book art file on your workstation.
- Load glossy cardstock into the printer for a comic look.
- Check that your color settings are at their most vibrant.
- Print the image and let it dry so the ink does not smear.
- Use a paper trimmer to cut the edges of the print cleanly.
- Wipe the frame glass and place the art inside.
- Secure the back of the frame to keep the print flat.
- Apply hanging strips to the back of the frame for easy mounting.
- Press the frame onto the wall to add some action to your room.
20 Gold Foil Marble Heart Art
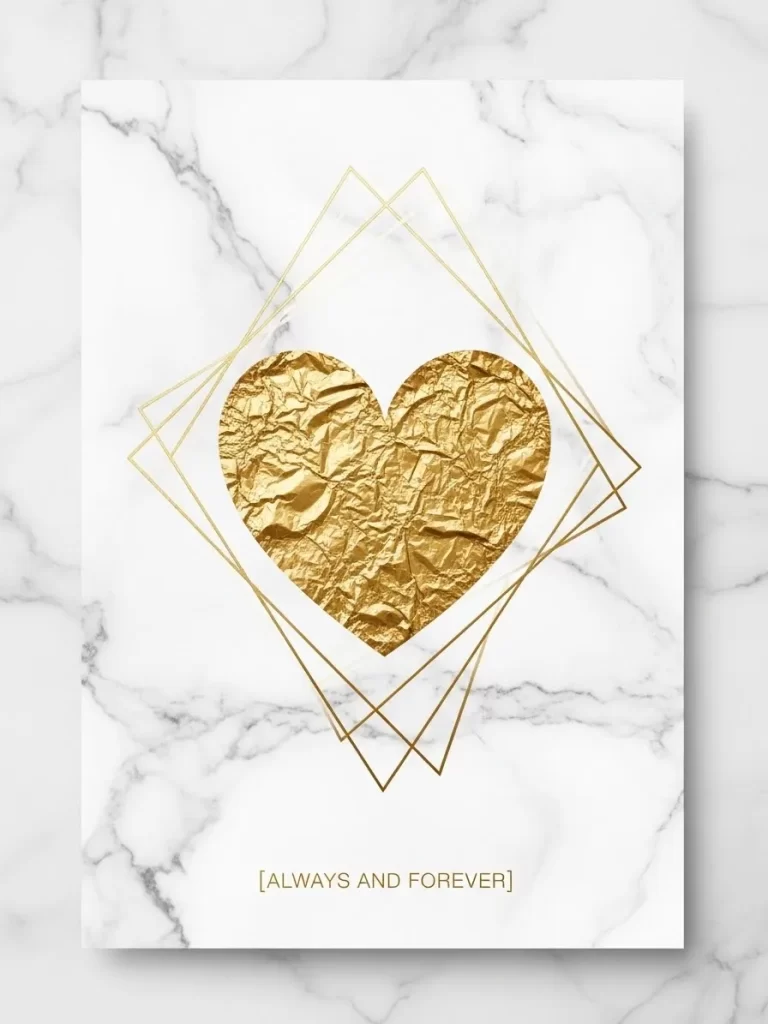
Elegant and modern style shines in this gold and marble design. A wrinkled gold foil heart is surrounded by thin gold geometric lines. The background is a clean white marble with soft gray veins.
This art brings a touch of luxury and sophistication to any room. It looks great in a minimalist living room or a chic bedroom. The contrast between the gold and marble is very striking.
A sweet message at the bottom center adds a warm touch to the cool design. This print is a beautiful way to show a love that is precious and lasting. Every line and wrinkle adds to the unique beauty of the piece.
Materials Required List
- Premium white photo paper
- Gold metallic frame
- Hanging hook
Equipment Required List
- Digital color printer
- Scissors and ruler
DIY Instructions
- Download the gold foil heart art to your desktop.
- Insert premium photo paper into your printer tray.
- Set your printer to the highest resolution for the best detail.
- Print the image and let it sit for ten minutes.
- Measure the paper and trim it to fit your gold frame.
- Clean the frame glass and place the art against it.
- Replace the back panel and secure the clips.
- Check that the art is centered and straight in the frame.
- Use a hanging hook to display your new elegant art.
21 Tic Tac Toe Love Art
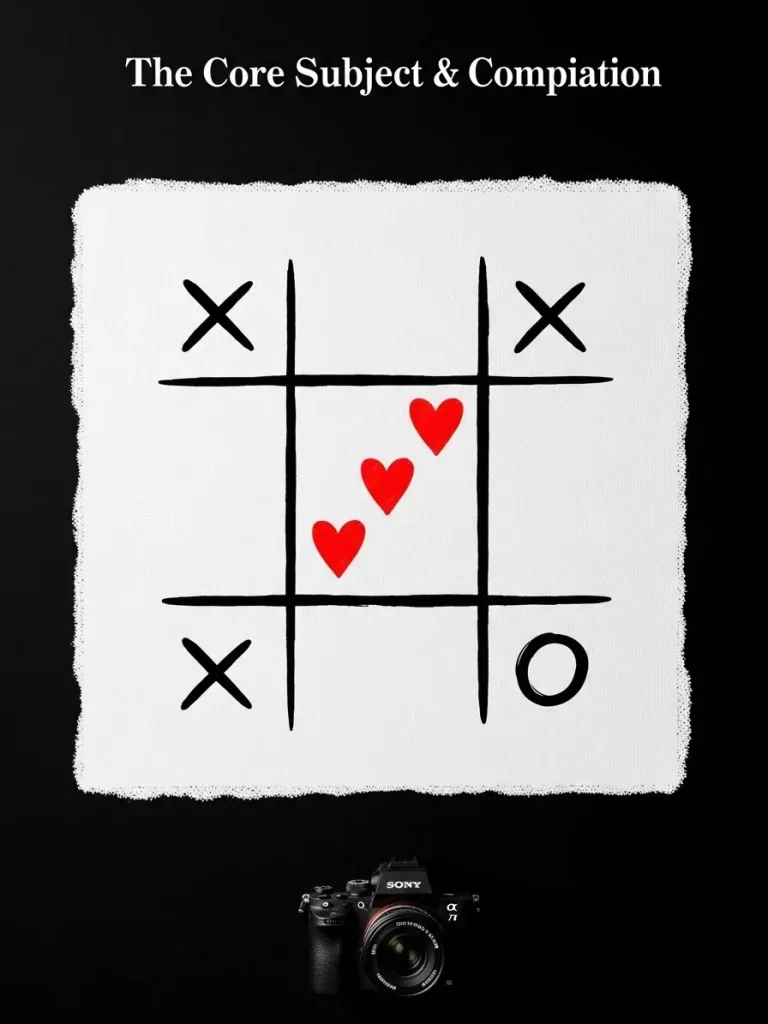
Playful and simple design makes this tic tac toe art a fun choice. A black grid is drawn on a textured white background. Three red hearts are lined up in a row to show a winning game.
Black X and O marks are placed in the other spots to complete the look. This art is a lighthearted way to celebrate a successful match. It looks great in a family room or a kitchen.
The hand drawn style gives the piece a very personal and warm feel. It reminds us that love can be as simple and fun as a childhood game. Every heart and mark adds to the charming story.
Materials Required List
- Heavy textured cardstock
- Square black frame
- Wall nail
Equipment Required List
- Color printer
- Paper cutter
DIY Instructions
- Save the tic tac toe art file to your computer.
- Place a sheet of textured cardstock into the printer.
- Choose the high quality print setting for the best results.
- Print the image and let it dry for a few minutes.
- Use a paper cutter to trim the art into a square shape.
- Clean the frame glass and place the art inside.
- Secure the back of the frame to hold the art in place.
- Find a good spot on your wall for the new piece.
- Hammer a nail into the wall and hang your fun art.
22 The Story of Us Timeline Art

Celebrate your unique journey with this elegant timeline design. A vertical line features small icons and labels for special milestones. Events like a first date and an engagement and a wedding are marked.
Muted blue and pink tones create a balanced and sophisticated palette. This art is a wonderful way to remember all the steps in your relationship. It serves as a beautiful map of your shared history.
The clean white background keeps the focus on the important moments. You can customize the events to tell your own personal story. This piece makes an excellent anniversary or wedding gift.
Materials Required List
- High quality matte paper
- Sleek black frame
- Picture hanging wire
Equipment Required List
- Computer with design software
- High resolution printer
DIY Instructions
- Use a design tool to add your personal dates and events.
- Save your custom timeline as a high resolution image file.
- Load matte paper into your printer tray.
- Set the print properties to high quality for clear text.
- Print the timeline and let it dry completely.
- Trim the paper carefully to fit your black frame.
- Clean the interior of the frame glass and place the art inside.
- Replace the back panel and secure the hanging wire.
- Hang the frame in a spot where you can easily read the events.
23 Sound Wave Heartbeat Art
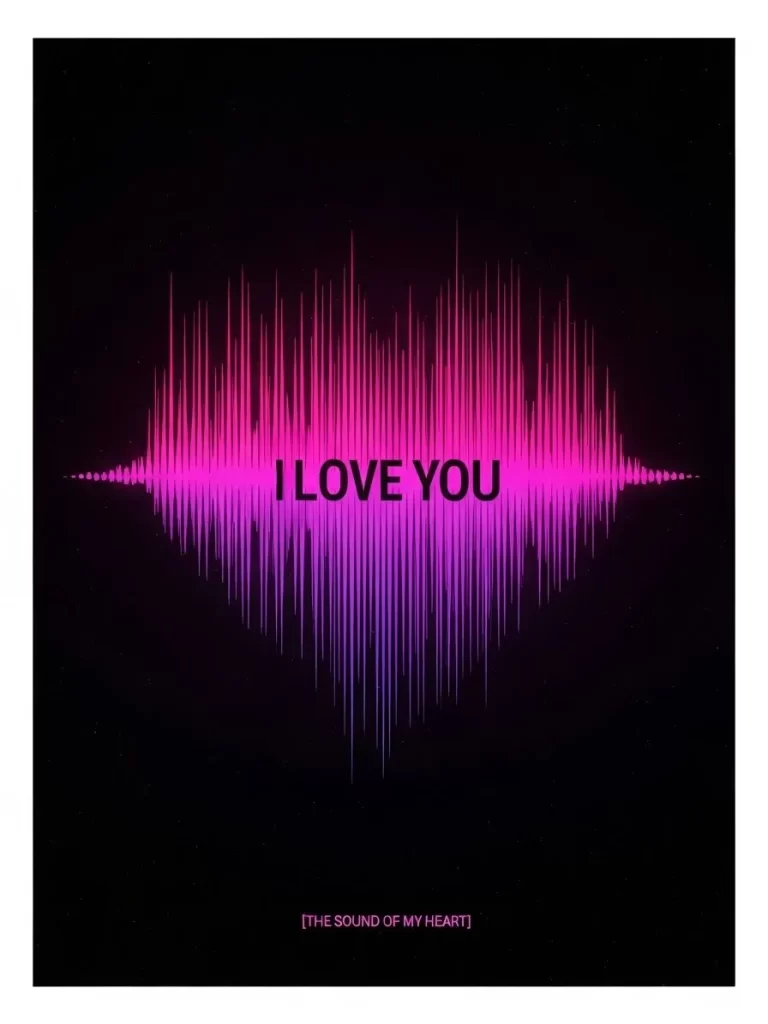
Modern and unique style defines this sound wave heart design. A vibrant pink and purple sound wave is arranged in a large heart shape. It stands out clearly against a deep black background.
This art is a creative way to represent the sound of your heart. It looks great in a music room or a contemporary living space. The glowing colors give it a very high energy feel.
A simple message in the center and at the bottom adds a sweet touch. You can even use a recording of your own voice to make it personal. This piece is a bold and meaningful way to show love.
Materials Required List
- Glossy photo paper
- Modern black frame
- Adhesive strips
Equipment Required List
- Digital printer
- Scissors
DIY Instructions
- Open the sound wave art file on your workstation.
- Place glossy photo paper into your printer for a deep black.
- Choose the best color quality setting for the pink and purple.
- Print the image and wait for it to dry fully.
- Cut the paper to the correct size for your frame.
- Clean the frame glass and place the art inside.
- Snap the back of the frame shut to secure the print.
- Apply adhesive strips to the back corners of the frame.
- Press the frame onto the wall to enjoy your unique art.
24 Vintage Air Mail Love Letters
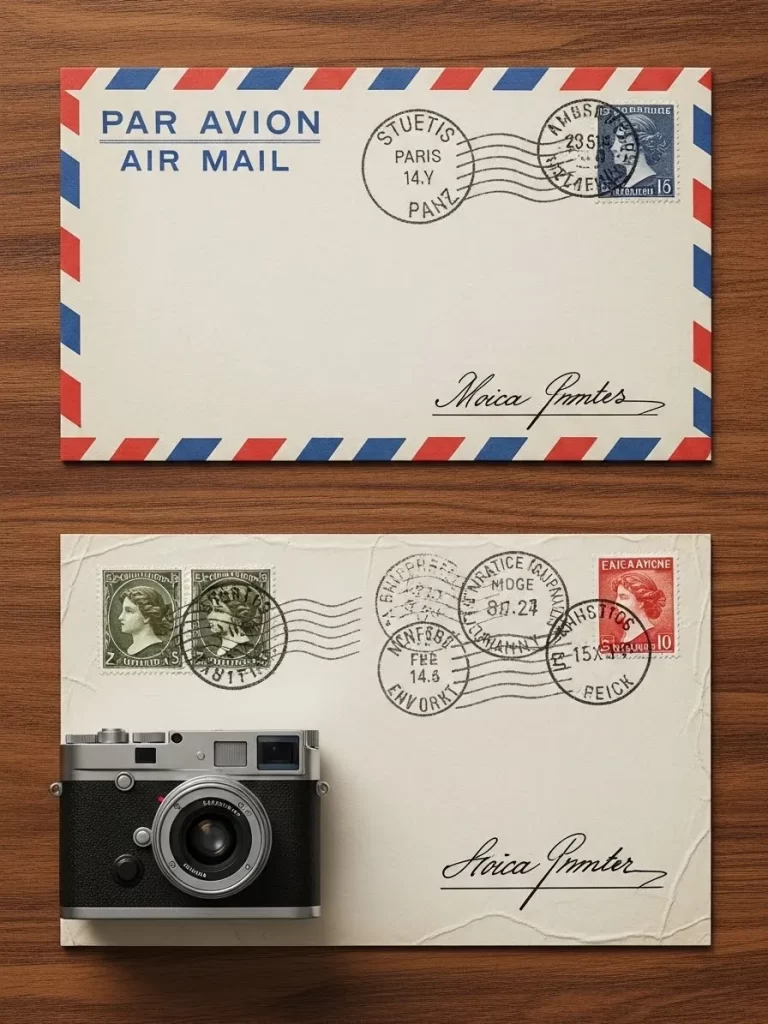
Nostalgic and romantic vibes are captured in this air mail themed art. Two vintage envelopes feature red and blue striped borders. Classic stamps and handwritten addresses add to the authentic look.
A small vintage camera sits at the bottom to complete the scene. This art is a wonderful way to celebrate a long distance relationship. It brings a touch of old world charm to your home.
The warm wood background makes the envelopes look even more real. It reminds us of a time when love letters were sent across the world. Every stamp and postmark tells a small part of a larger story.
Materials Required List
- Textured cardstock
- Warm wood frame
- Wall hook
Equipment Required List
- Color inkjet printer
- Paper trimmer
DIY Instructions
- Download the vintage air mail art to your computer.
- Place a sheet of textured cardstock into your printer.
- Set your printer to the high quality photo setting.
- Print the image and let it dry for ten minutes.
- Use a paper trimmer to get clean and straight edges.
- Clean the frame glass and place the art inside.
- Replace the back panel and secure the clips.
- Check that the art looks centered in the wood frame.
- Use a wall hook to display your nostalgic art piece.
25 Paper Cut Layered Heart Art
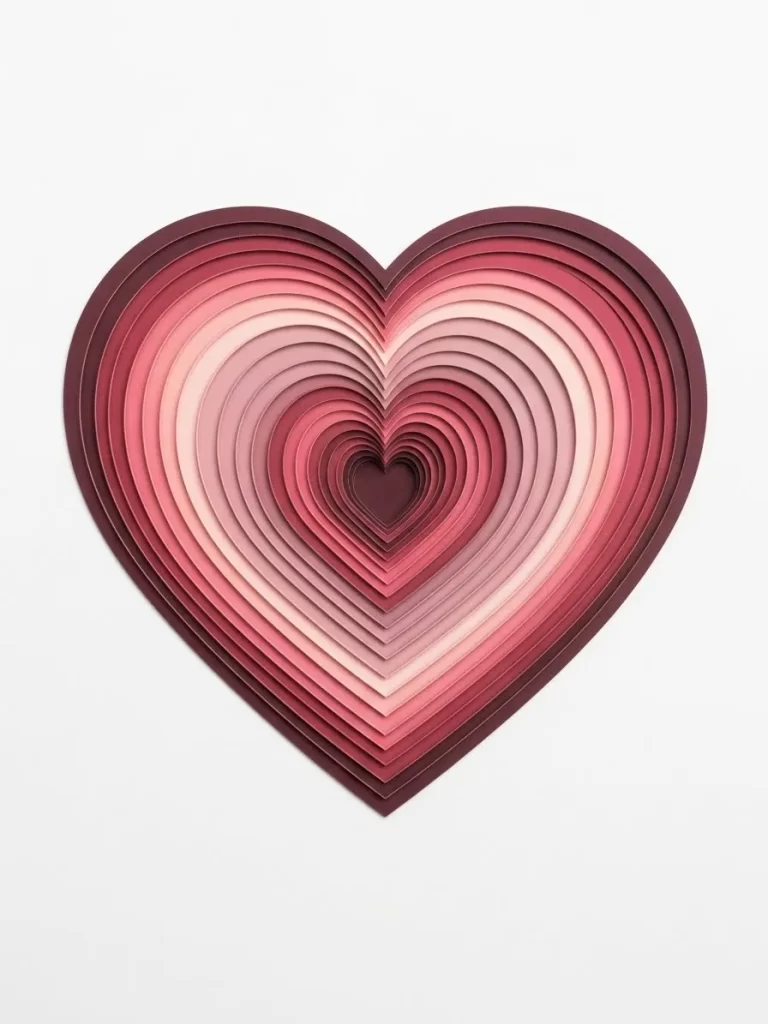
Beautiful depth and texture are found in this layered paper heart. Multiple hearts in shades of red and pink and cream are stacked together. It creates a very soft and romantic 3D effect.
This art is a wonderful way to show the many layers of a relationship. The clean white background helps the warm colors stand out clearly. It looks great in a cozy bedroom or a sweet nursery.
The precise cut edges give the piece a very polished and professional look. It brings a touch of handmade charm to your seasonal decor. Every layer adds to the overall beauty and meaning of the piece.
Materials Required List
- Heavy weight cardstock
- Shadow box frame
- Mounting hardware
Equipment Required List
- High quality color printer
- Scissors or craft knife
DIY Instructions
- Access the layered heart art file on your device.
- Load heavy weight cardstock into your printer tray.
- Set the print quality to high for vibrant colors.
- Print the image and let it dry completely.
- Trim the paper to fit the size of your shadow box frame.
- Clean the glass panel of the shadow box carefully.
- Place the art inside and make sure it is flat.
- Close the frame and secure the back panel.
- Hang the shadow box on your wall to enjoy the depth.
26 Crossword Puzzle Love Art
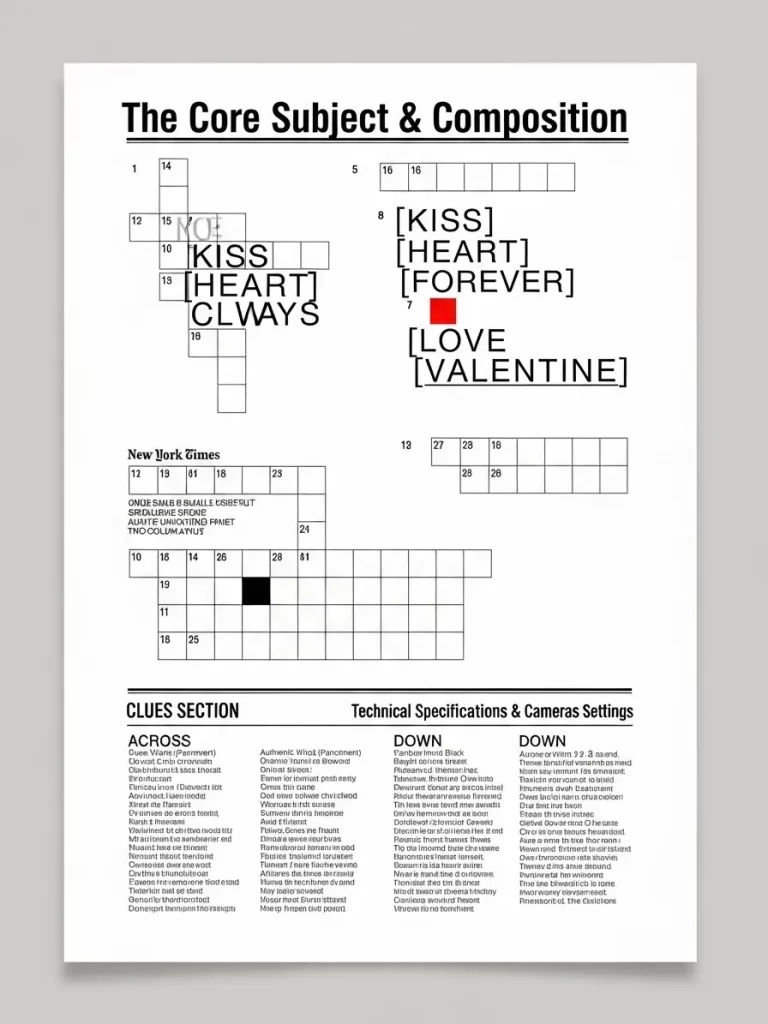
Clever and fun design makes this crossword puzzle art a great choice. Words like Kiss and Heart and Forever are filled in on the grid. A small red heart stands out in one of the squares.
This art is a playful way to show that you are a flwless match. The clean white background and black text give it a very modern feel. It looks wonderful in a study or a cozy reading nook.
Clues and technical details at the bottom add to the authentic puzzle look. It reminds us that finding the right person can be as satisfying as finishing a puzzle. Every word and letter adds to the charming story.
Materials Required List
- Bright white cardstock
- Simple black frame
- Level
Equipment Required List
- Desktop printer
- Paper trimmer
DIY Instructions
- Save the crossword puzzle art to your computer.
- Place a sheet of bright white cardstock into the printer.
- Set the print resolution to high for sharp lines and text.
- Print the image and let it rest for a few minutes.
- Use a paper trimmer to cut the edges of the print.
- Clean the interior of the frame glass and place the art inside.
- Replace the back panel and secure the clips firmly.
- Decide on a spot on your wall for the new piece.
- Use a level to make sure the frame is straight after hanging.
27 Heart Shaped Monstera Plant Art
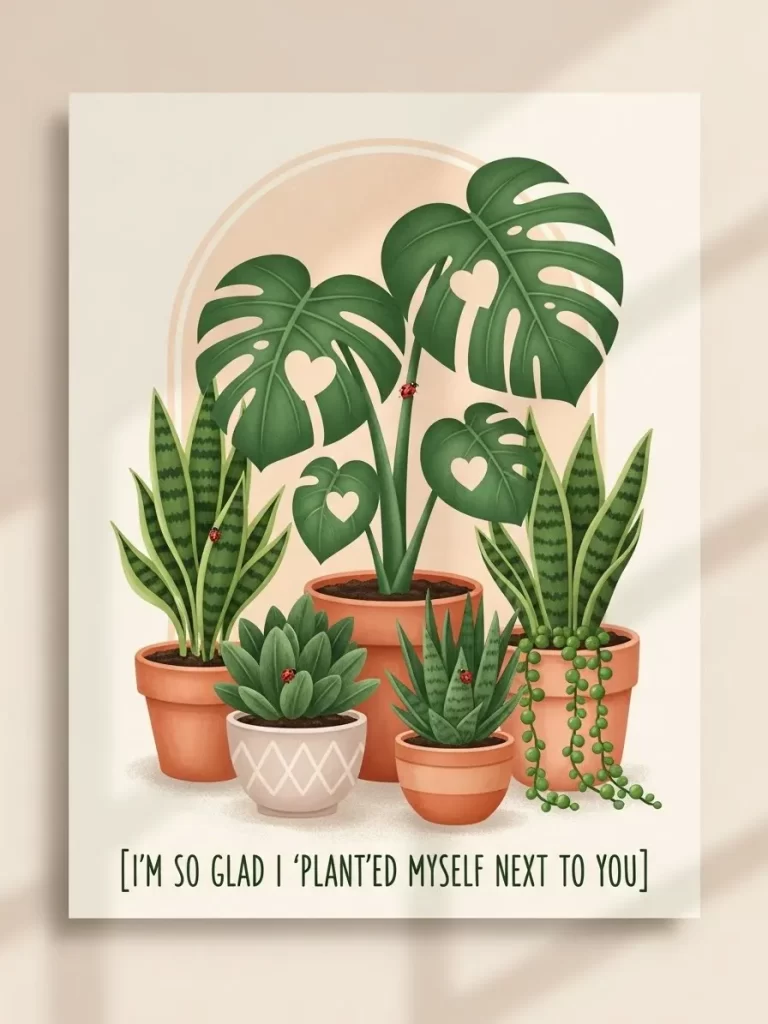
Natural and tropical vibes are captured in this sweet plant illustration. Large green Monstera leaves feature heart shaped holes in the center. Small red ladybugs add a tiny touch of color and charm.
Different potted plants like snake plants and succulents are grouped together. This art is a wonderful choice for a plant lover or a bright sunroom. The warm colors of the pots create a very inviting feeling.
A sweet message at the bottom ties the plant theme together. It reminds us that love can grow in the most beautiful and natural ways. Every leaf and pot adds to the vibrant and happy atmosphere.
Materials Required List
- Matte photo paper
- Natural wood frame
- Picture hanging strips
Equipment Required List
- Color inkjet printer
- Ruler and scissors
DIY Instructions
- Download the monstera plant art to your workstation.
- Load matte photo paper into your printer tray.
- Set your printer to the best quality setting for the greens.
- Print the image and let it dry for ten minutes.
- Use a ruler and scissors to trim the paper to fit the frame.
- Clean the frame glass and place the art against it.
- Replace the back panel and secure the clips.
- Apply hanging strips to the back of the wood frame.
- Press the frame onto the wall to enjoy your tropical art.
28 Dancing Silhouette Song Lyrics Art

Romantic and poetic style is captured in this stunning silhouette design. A couple is shown dancing together against a soft gray background. The entire silhouette is filled with the text of a special song.
This art is a beautiful way to remember a first dance or a favorite song. The clean white border and gray tones give it a very sophisticated feel. It looks wonderful in a bedroom or a music room.
The emotional energy of the dance is captured in the silhouette. You can customize the text with your own special song lyrics. This piece makes an incredibly meaningful and personal gift.
Materials Required List
- High quality matte cardstock
- Sleek black metal frame
- Wall hook
Equipment Required List
- Computer with internet access
- High resolution printer
DIY Instructions
- Find the lyrics to your special song and save them.
- Use a design tool to place the lyrics inside the silhouette.
- Place a sheet of matte cardstock into your printer.
- Set the print properties to high for clear and readable text.
- Print the silhouette and let it dry for several minutes.
- Trim the paper carefully to fit your black frame.
- Clean the interior of the frame glass and place the art inside.
- Replace the back panel and secure the clips firmly.
- Use a wall hook to display your personal romantic art.
29 Coffee Heart Latte Art Print

Warm and cozy feelings are captured in this beautiful coffee themed art. A white mug sits on a wood table with a heart shaped design in the foam. Coffee beans and a silver spoon are scattered around the mug.
This art is a wonderful choice for a coffee lover or a breakfast nook. The rich brown and warm wood tones create a very inviting atmosphere. It brings a touch of morning joy to your home decor.
A sweet message at the top ties the coffee theme together. It reminds us that a good cup of coffee and a loved one are all we need. Every detail adds to the cozy and peaceful feeling of the piece.
Materials Required List
- Semi gloss photo paper
- Warm wood frame
- Mounting hardware
Equipment Required List
- Color printer
- Ruler and craft knife
DIY Instructions
- Save the coffee heart art to your computer desktop.
- Insert semi gloss photo paper into the printer for a rich look.
- Set the print quality to high to show the latte foam detail.
- Print the image and let it dry for ten minutes.
- Use a ruler and craft knife to trim the paper to fit the frame.
- Clean any dust off the wood frame and the glass panel.
- Place the art in the frame and replace the backing.
- Secure the clips to hold the paper firmly in place.
- Hang the art on your wall to add a cozy touch to your room.
30 World Map Love Art Print
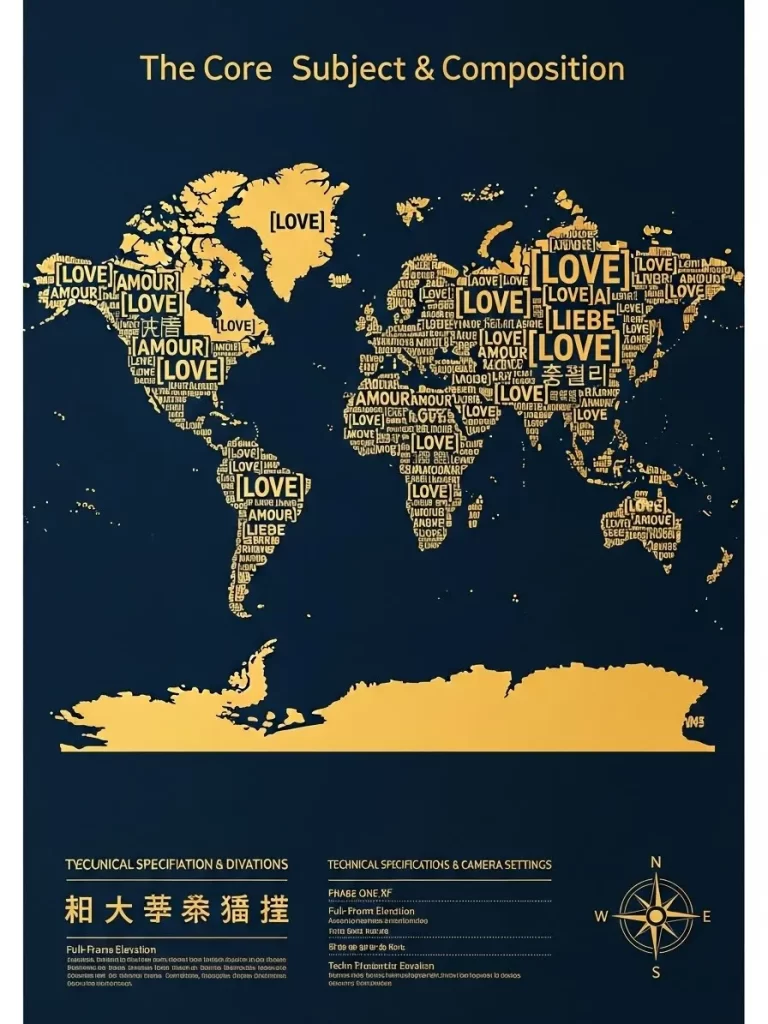
Celebrate a love that knows no bounds with this gold and navy world map. The continents are filled with the word Love in many different languages. A large navy background makes the gold countries stand out.
This art is a wonderful way to celebrate a shared love for travel. The clean lines and gold tones give it a very sophisticated and global feel. It looks great in a living room or a modern office.
Technical details and a compass at the bottom add to the map theme. It reminds us that love is a universal language spoken all over the world. Every word and country adds to the global story of the piece.
Materials Required List
- Premium matte cardstock
- Modern navy frame
- Level
Equipment Required List
- High resolution printer
- Paper trimmer
DIY Instructions
- Access the world map art file on your workstation.
- Load premium matte cardstock into your printer tray.
- Set the print properties to high for clear gold details.
- Print the map and let it dry completely for fifteen minutes.
- Use a paper trimmer to get perfectly straight edges.
- Clean the frame glass and place the art against it.
- Replace the back panel and secure the clips firmly.
- Find a prominent spot on your wall for the global art.
- Use a level to make sure the frame is straight after hanging.
31 Sisters Before Misters Party Art

Fun and festive energy is captured in this bright Galentine themed art. Two hands are shown raising champagne glasses for a celebratory toast. Colorful balloons and confetti float in a vibrant pink background.
This art is a wonderful way to celebrate friendship and female bonds. The bold pink and yellow colors make it excellent for a party. It brings a touch of joy and empowerment to your wall decor.
A playful message at the bottom ties the sisterhood theme together. It reminds us to cherish the friends who are always there for us. Every balloon and sparkle adds to the happy atmosphere.
Materials Required List
- Glossy photo paper
- Bright pink or white frame
- Adhesive strips
Equipment Required List
- Color inkjet printer
- Scissors
DIY Instructions
- Download the party toast art to your computer.
- Place glossy photo paper into your printer tray for a festive look.
- Set your printer to the high quality photo setting.
- Print the image and let it dry so the ink does not smudge.
- Trim the paper carefully to fit your chosen frame.
- Clean the interior of the frame glass and place the art inside.
- Replace the back panel and secure the clips firmly.
- Apply hanging strips to the back corners of the frame.
- Press the frame onto the wall to add some fun to your room.
32 Heart Shaped Pepperoni Pizza Art

Cheesy and fun design makes this heart shaped pizza art a great choice. A pepperoni pizza is baked in a heart shape inside a cardboard box. Small red pepper hearts are added for a sweet and spicy touch.
This art is a playful way to show that food is the way to your heart. The warm brown and red tones create a very inviting and tasty feeling. It looks wonderful in a kitchen or a casual dining room.
A funny pun at the top ties the pizza theme together. It reminds us that love can be as warm and satisfying as a slice of pizza. Every pepperoni and cheese drip adds to the charming story.
Materials Required List
- High quality matte paper
- Red or white frame
- Wall hook
Equipment Required List
- Digital color printer
- Ruler and scissors
DIY Instructions
- Save the pizza heart art to your workstation.
- Place a sheet of matte paper into your printer tray.
- Set the print properties to high for vibrant red colors.
- Print the image and let it dry for ten minutes.
- Use a ruler and scissors to trim the paper to fit the frame.
- Clean any dust off the frame and the glass panel.
- Place the art in the frame and replace the backing.
- Secure the clips to hold the paper firmly in place.
- Use a wall hook to display your fun and tasty art.
33 The Creation of Love Line Art

Classical art meets modern design in this stunning line drawing. Two hands are shown reaching out to touch each other across the page. A thin pink line connects the two fingertips to show a spark of love.
This art is a beautiful way to show the power of connection. The clean white background and black lines give it a very sophisticated feel. It looks wonderful in a minimalist living room or a chic bedroom.
The simple and elegant style allows the emotional energy to shine. It reminds us that love is a powerful force that brings people together. Every line and stroke adds to the overall beauty and meaning of the piece.
Materials Required List
- Bright white textured paper
- Minimalist black frame
- Picture hanging strips
Equipment Required List
- Laser or inkjet printer
- Paper trimmer
DIY Instructions
- Open the creation line art file on your device.
- Put textured white paper into the printer for an art look.
- Set the print resolution to high for sharp and clear lines.
- Print the image and let it rest for a few minutes.
- Use a paper trimmer to get perfectly straight edges.
- Clean the frame glass and place the art against it.
- Replace the back panel and secure the clips firmly.
- Apply hanging strips to the back of the black frame.
- Press the frame onto the wall to enjoy your sophisticated art.
34 GPS Coordinate Destination Sign
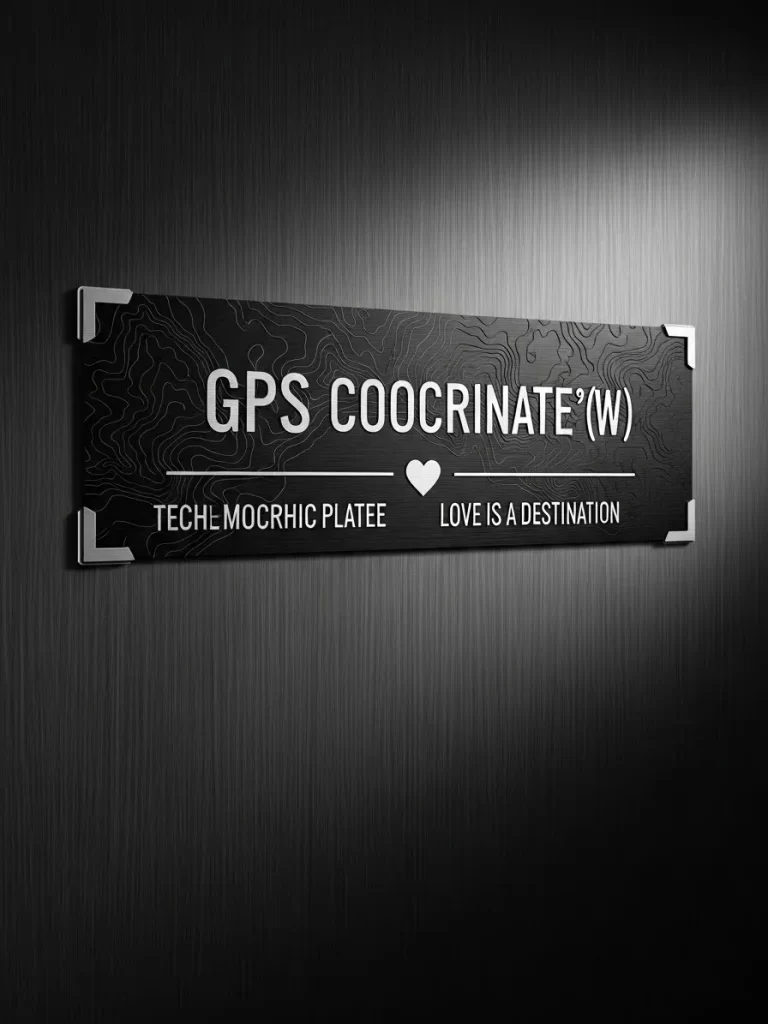
Personal and modern style defines this destination themed sign. A black plaque features a topographic map and GPS coordinates. A small white heart in the center ties the romantic theme together.
This art is a creative way to remember a special place you share. The sleek black and white colors give it a very high end industrial feel. It looks great in a modern living room or a home office.
Messages at the bottom remind us that love is its own destination. You can customize the coordinates for a place that is meaningful to you. This piece makes a unique and thoughtful anniversary or housewarming gift.
Materials Required List
- Heavy weight matte cardstock
- Black metal frame with silver corners
- Level
Equipment Required List
- Computer with internet access
- High resolution printer
DIY Instructions
- Find the GPS coordinates for your special location online.
- Use a design tool to add the coordinates to the sign template.
- Load matte cardstock into your printer paper tray.
- Set the print properties to high for clear topographic lines.
- Print the sign and let it dry completely for fifteen minutes.
- Trim the paper carefully to fit the metal frame.
- Clean the interior of the frame glass and place the art inside.
- Replace the back panel and secure the clips firmly.
- Use a level to make sure the sign is straight after hanging.
35 Lavender Herbarium Botanical Art
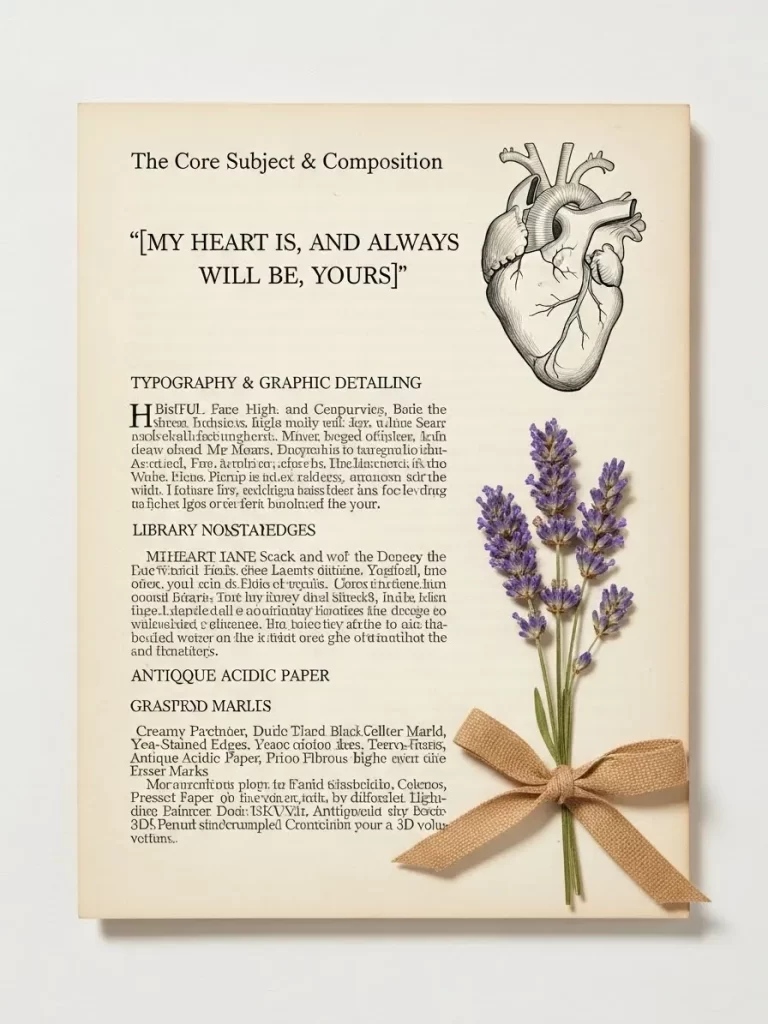
Soft and natural beauty is captured in this sweet botanical print. A sprig of dried lavender is tied with a small tan burlap bow. An anatomical heart drawing at the top adds a touch of science and romance.
This art is a wonderful choice for those who love herbs and vintage style. The warm cream background and purple flowers create a very calm feeling. It looks great in a kitchen or a cozy reading nook.
Handwritten text and a sweet quote add to the authentic herbarium look. It reminds us that love can be as natural and lasting as a dried flower. Every detail adds to the charming and nostalgic atmosphere.
Materials Required List
- Off white textured cardstock
- Light wood or gold frame
- Wall hook
Equipment Required List
- Color inkjet printer
- Paper trimmer
DIY Instructions
- Download the lavender botanical art to your computer.
- Place a sheet of textured cardstock into your printer tray.
- Set your printer to the best quality setting for the purple.
- Print the image and let it dry for ten minutes.
- Use a paper trimmer to get clean and straight edges.
- Clean the frame glass and place the art against it.
- Replace the back panel and secure the clips firmly.
- Check that the art looks centered in the frame.
- Use a wall hook to display your nostalgic herbarium art.
36 Paw Print Heart Dog Art

Sweet and simple design makes this paw print art a great choice. Many brown dog paw prints are arranged in a large heart shape. It stands out clearly against a clean white background.
This art is a wonderful way to celebrate a love for furry friends. The warm brown and white colors give it a very friendly and homey feel. It looks wonderful in a mudroom or a pet corner.
A simple message at the bottom ties the dog theme together. It reminds us that our pets are a big part of our hearts and homes. Every paw print adds to the charming and happy story.
Materials Required List
- High quality matte cardstock
- Simple white or wood frame
- Picture hanging strips
Equipment Required List
- Digital color printer
- Ruler and scissors
DIY Instructions
- Save the paw print heart art to your workstation.
- Place a sheet of matte cardstock into your printer tray.
- Set the print properties to high for clear brown paw prints.
- Print the image and let it dry for ten minutes.
- Use a ruler and scissors to trim the paper to fit the frame.
- Clean any dust off the frame and the glass panel.
- Place the art in the frame and replace the backing.
- Apply hanging strips to the back of the frame.
- Press the frame onto the wall to enjoy your pet themed art.
37 Traditional Tattoo Swallow Love Art
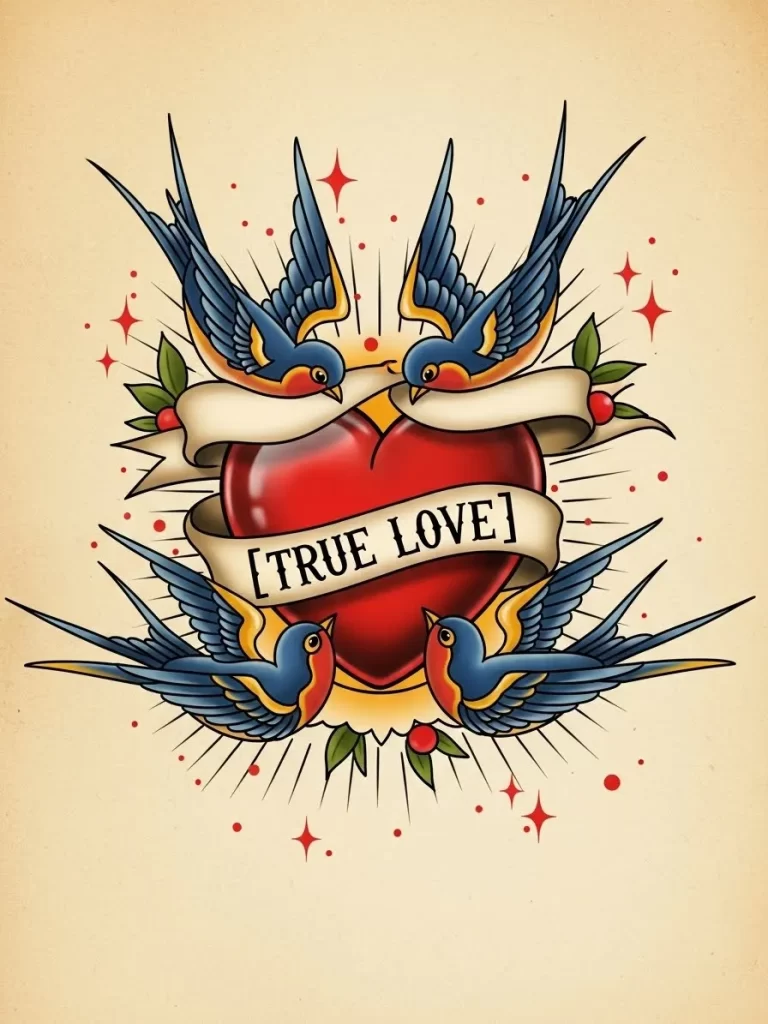
Bold and classic style defines this traditional tattoo inspired design. Two blue and yellow swallows are shown flying around a large red heart. Banners with the words True Love are wrapped around the scene.
Bright red and blue and yellow colors make this art very eye catching. It is a great choice for a fan of vintage tattoo art or bold design. The design feels like it belongs in a classic sea story.
Sparkles and rays in the background add to the dynamic and energetic feel. It reminds us of a love that is as bold and lasting as a tattoo. Every bird and banner adds to the vibrant and happy atmosphere.
Materials Required List
- Heavy weight glossy cardstock
- Ornate gold or black frame
- Wall hook
Equipment Required List
- High quality color printer
- Paper trimmer
DIY Instructions
- Open the traditional tattoo art file on your device.
- Load glossy cardstock into the printer for a tattoo look.
- Check that your color settings are at their most vibrant.
- Print the image and let it dry so the ink does not smear.
- Use a paper trimmer to cut the edges of the print cleanly.
- Clean the interior of the frame glass and place the art inside.
- Replace the back panel and secure the clips firmly.
- Find a good spot on your wall for the bold art piece.
- Use a wall hook to display your new classic tattoo art.
38 Gold State Map Love Art Print
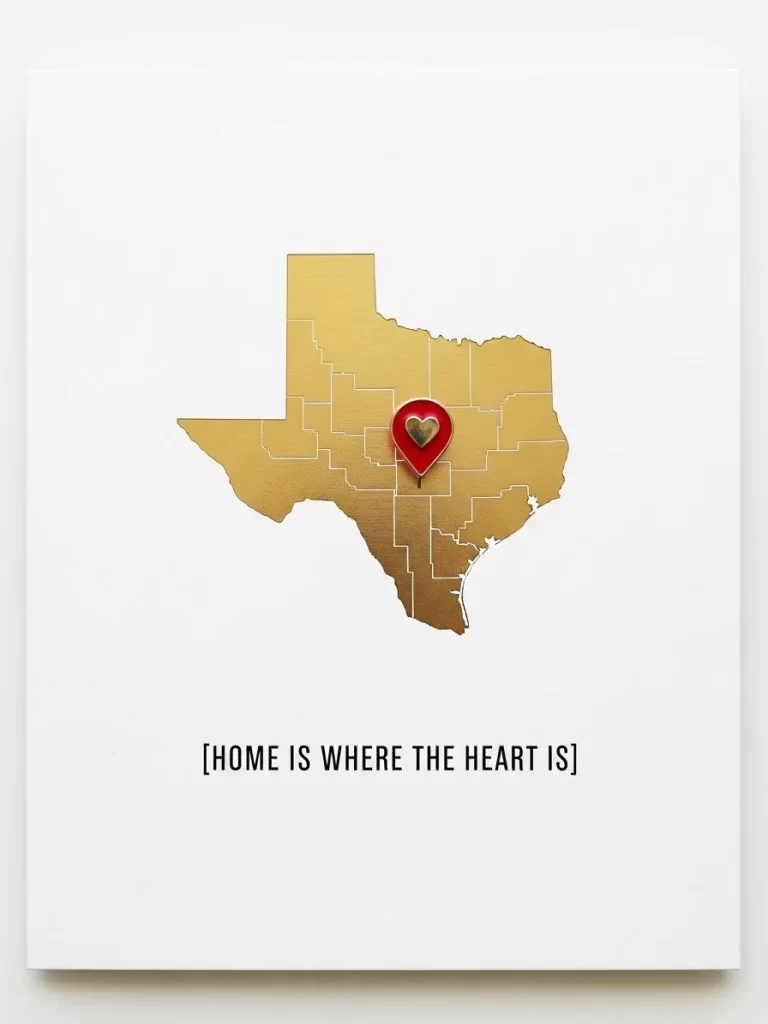
Personal and elegant style defines this state themed map design. A gold silhouette of Texas features a red heart icon for a special location. It stands out clearly against a clean white background.
This art is a creative way to remember a place you call home. The gold and white colors give it a very sophisticated and high end feel. It looks great in a living room or a modern office.
A simple message at the bottom ties the home theme together. You can customize the state and the location of the heart icon. This piece makes a unique and thoughtful housewarming or graduation gift.
Materials Required List
- Premium white photo paper
- Gold metallic frame
- Level
Equipment Required List
- Computer with design software
- High resolution printer
DIY Instructions
- Use a design tool to select your state and place the red heart.
- Save your custom state map as a high resolution image.
- Insert premium photo paper into your printer paper tray.
- Set the print properties to high for the best gold detail.
- Print the map and let it sit for ten minutes to dry.
- Trim the paper carefully to fit your gold metallic frame.
- Clean the interior of the frame glass and place the art inside.
- Replace the back panel and secure the clips firmly.
- Use a level to make sure the map is straight after hanging.
39 Zodiac Matched in the Stars Art

Celestial and romantic vibes are captured in this zodiac themed print. Two star constellations for Aquarius and Leo are connected by a heart. Glowing blue and white stars stand out in a dark purple galaxy.
This art is a wonderful way to celebrate a special astrological match. The deep colors and nebula glow create a very dreamy and peaceful feel. It looks great in a bedroom or a quiet reading nook.
Zodiac symbols and a sweet message tie the star theme together. It reminds us that some connections are truly written in the stars. Every star and constellation adds to the mystical and beautiful story.
Materials Required List
- High quality glossy paper
- Modern silver frame
- Adhesive strips
Equipment Required List
- Digital color printer
- Ruler and craft knife
DIY Instructions
- Download the zodiac heart art to your computer desktop.
- Insert glossy photo paper into the printer for a deep galaxy.
- Set the print quality to high to show the star details clearly.
- Print the image and let it dry for ten minutes.
- Use a ruler and craft knife to trim the paper to fit the frame.
- Clean any dust off the silver frame and the glass panel.
- Place the art in the frame and replace the backing.
- Secure the clips to hold the paper firmly in place.
- Apply adhesive strips to the back corners and hang on the wall.
40 Vintage Key to My Heart Art

Romantic and nostalgic style defines this stunning vintage key design. An ornate gold key with a heart shaped handle is shown in detail. A rich red floral pattern in the background adds to the classic feel.
This art is a beautiful way to show that someone has the key to your heart. The warm gold and red tones create a very sophisticated atmosphere. It looks wonderful in a traditional living room or a bedroom.
Text at the top and bottom ties the key theme together. It reminds us of a time when love was expressed with precious and ornate gifts. Every scroll and detail on the key adds to the charming story.
Materials Required List
- Off white textured cardstock
- Ornate gold frame
- Wall hook
Equipment Required List
- Color inkjet printer
- Paper trimmer
DIY Instructions
- Save the vintage key art to your workstation.
- Place a sheet of textured cardstock into your printer tray.
- Set your printer to the high quality photo setting.
- Print the image and let it dry for ten minutes.
- Use a paper trimmer to get perfectly straight edges.
- Clean the frame glass and place the art against it.
- Replace the back panel and secure the clips firmly.
- Check that the art looks centered in the ornate frame.
- Use a wall hook to display your new classic art piece.
Key Takeaways
- Printable art provides an affordable way to update your home decor quickly.
- Using high quality paper ensures that your prints look professional and last longer.
- Customizing projects with personal dates or names makes them much more special.
- Minimalist designs work well in modern spaces while botanical prints suit traditional rooms.
- Simple tools like scissors and double sided tape are often enough for great results.
Decorating for the holidays brings a sense of joy and renewal to your living environment. You now have a wide range of options to fill those empty spots on your walls. Each project allows you to express your unique style while celebrating affection.
Taking the time to craft or print your own art adds a personal touch that store bought items often lack. Your guests will notice the effort and thought put into every piece. Start with one small project and watch your home transform.
We hope these suggestions inspire you to get creative this season. There is no better way to show care than by making your home feel cozy and invited. Enjoy the process of bringing new life to your walls.