Is your kitchen ready for the season of love? Many people forget to decorate the heart of the home. You might think holiday decor belongs only in the living room.

Small changes can make a big impact in your cooking space. You do not need a huge budget to bring romance indoors. These items add warmth and charm without cluttering your counters.
Explore these creative ways to celebrate with your family. Your kitchen will feel much more inviting with a few simple touches. Get ready to transform your space with these unique finds.
1. Embroidered Love Note Waffle Towel

Soft textures bring warmth to your cooking space. This cream colored waffle weave towel adds a cozy touch. It hangs gracefully from the oven handle while keeping your surfaces dry. Adding small textiles is a simple way to celebrate the holiday season.
Bright red embroidery stands out against the neutral background fabric. The words Love Note sit above two joined hearts to create a sweet theme. You can upgrade your style without spending a lot of money. These colors match many different cabinet designs.
Selecting functional items does not mean you lose out on charm. Choosing this piece combines utility with a festive spirit. Guests will notice this small detail when they enter your room. Your kitchen will feel more inviting with these tiny additions.
Material Required List
- Waffle weave cotton kitchen towel
- Red embroidery floss
- Stabilizer fabric or paper
Equipment Required List
- Embroidery hoop
- Hand sewing needle
- Washable fabric marker or pencil
- Scissors
DIY Instruction Step By Step
- Begin by washing and drying your new towel because doing this prevents the design from bunching up if the fabric shrinks later.
- Draw your words and hearts on the fabric with a washable marker and make sure the design is centered near the bottom edge of the cloth.
- Put the smaller ring of your embroidery hoop under the towel then press the larger ring over the top and tighten the side screw until the fabric feels firm.
- Push your needle through from the back of the towel to the front side and follow your marker lines using small and even stitches.
- Finish by making a small knot on the underside of the fabric then trim any long pieces of thread with your scissors to keep it neat.
- Use a moist cloth to dab at the marker lines until they vanish completely.
2. Bamboo Heart Serving Board
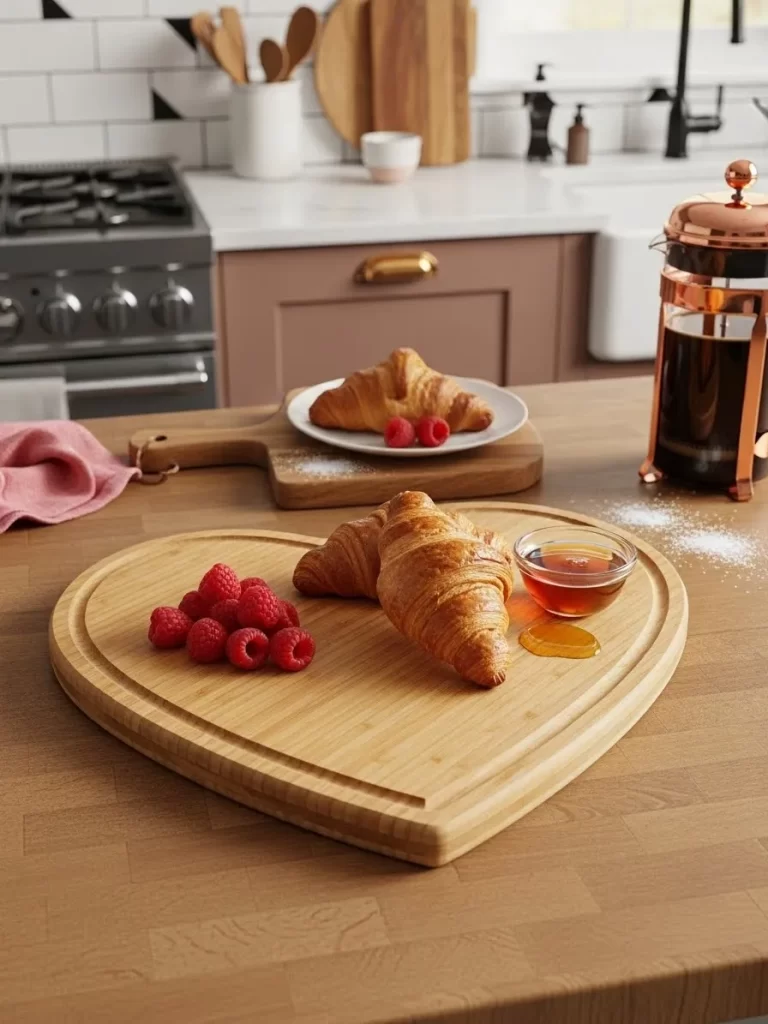
Natural wood grains bring a grounded feel to your breakfast nook. This sturdy bamboo board features a charming heart shape that brightens any morning. It acts as a lovely base for warm croissants and fresh fruit. Using a themed board turns a simple meal into an event.
Deep grooves around the edge catch crumbs or honey drips before they hit your table. You can display this piece on your counter to add a soft touch to your kitchen. Bamboo is durable and resists stains from berries or coffee. Every kitchen needs a piece that combines function with a sweet design.
Material Required List
- Square bamboo cutting board
- Food safe mineral oil
- Large paper for a stencil
- Pencil
Equipment Required List
- Jigsaw with a fine tooth blade
- Power sander or sandpaper blocks
- Clean lint free cloth
- Clamps to hold the board
DIY Instruction Step By Step
- Fold your large paper in half to draw one side of a heart shape.
- Cut out the paper shape and unfold it to ensure both sides are equal.
- Trace this heart onto your bamboo board using a dark pencil.
- Secure your board to a sturdy table using your clamps so it stays still.
- Cut along the pencil line slowly with the jigsaw to avoid splintering the wood.
- Rub the edges of the heart with rough sandpaper until the shape is smooth.
- Use a finer grit of sandpaper to buff the entire surface of the board.
- Clean away all the sawdust with a damp cloth and let it dry.
- Pour food safe mineral oil onto your clean cloth and rub it into the wood.
- Let the oil soak in for several hours before you wipe away any extra liquid.
3. Ruffled Ceramic Bowls
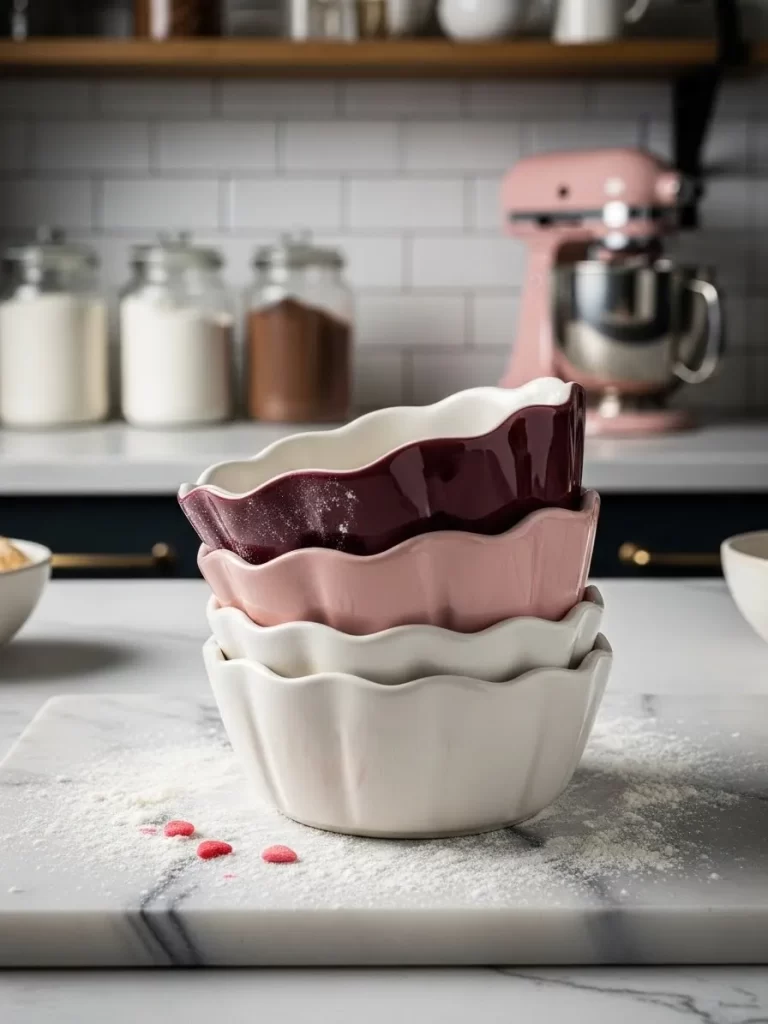
Layering different colors of dishes adds depth to your open shelving. These ceramic bowls feature a unique ruffled edge that looks like a flower. The stack includes shades of deep plum and soft pink mixed with classic white. You can use these for mixing dough or serving individual treats.
Smooth glazes make cleaning easy after a busy morning of baking. The heavy ceramic material keeps your ingredients cool while you work. These bowls look wonderful sitting on a marble counter near your mixer. They bring a vintage style to a modern cooking space.
Material Required List
- Plain ceramic bowls in various sizes
- Ceramic paint in plum and light pink
- Glossy clear sealer for ceramics
Equipment Required List
- Set of soft paint brushes
- Rubbing alcohol
- Small sponges
- Kitchen oven
DIY Instruction Step By Step
- Clean each bowl with rubbing alcohol to remove any oils from your skin.
- Apply a thin coat of light pink paint to the outside of the medium bowl.
- Use the deep plum paint for the smallest bowl in your set.
- Let the first coat of paint dry completely before you add a second layer.
- Dab a small sponge into the paint to create a textured look if you prefer.
- Coat the painted areas with a clear sealer once the color is dry.
- Place the bowls in a cold oven and set the heat to 300°F (150°C).
- Bake the ceramics for thirty minutes to ensure the paint stays on forever.
- Turn off the oven and let the bowls cool inside before you touch them.
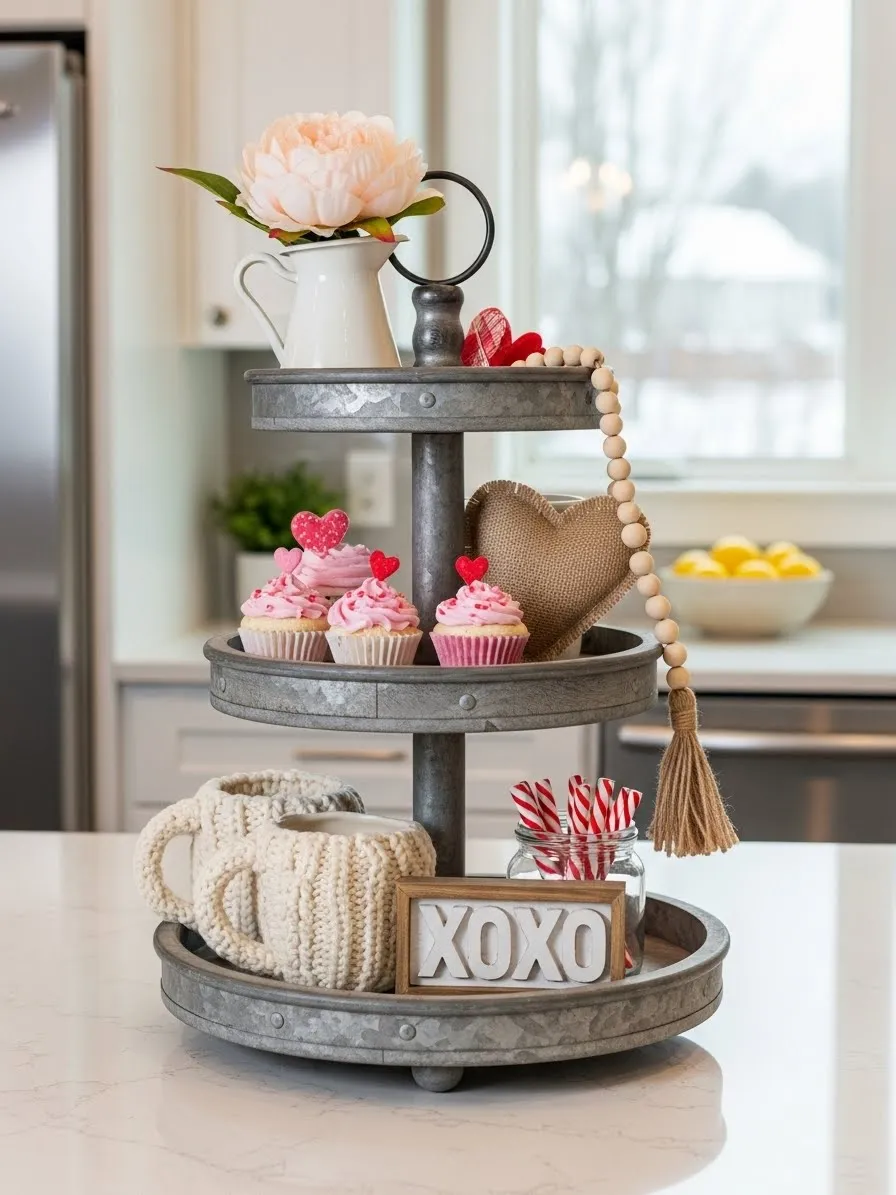
4. Galvanized Tiered Serving Stand
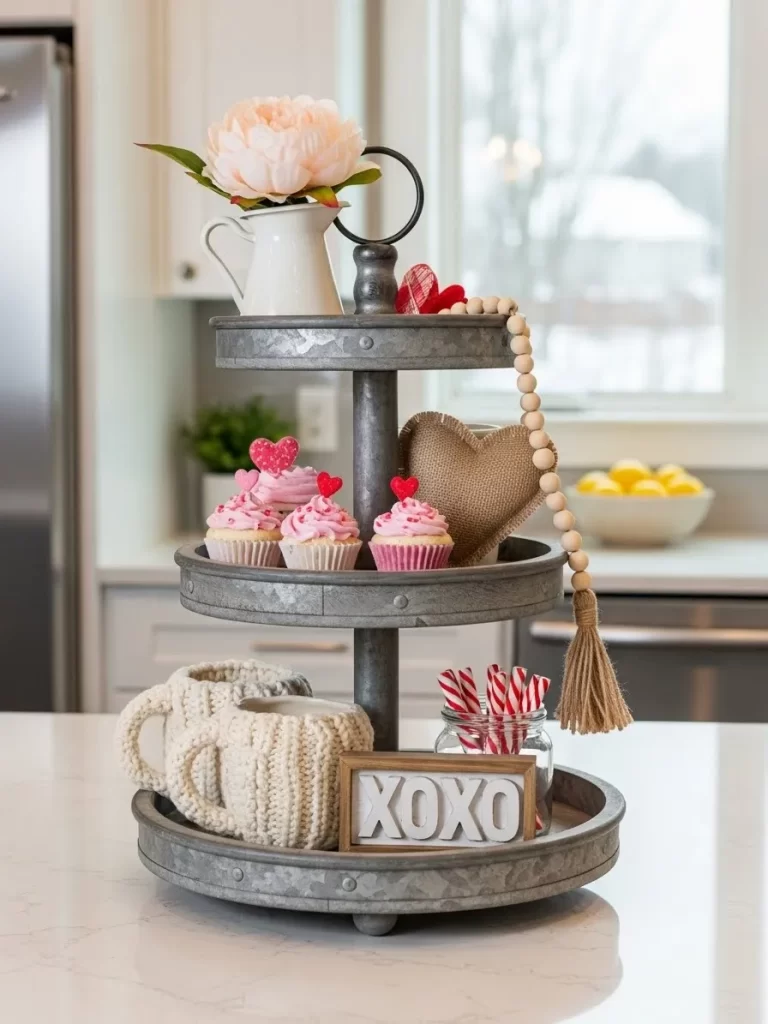
Vertical storage helps you maximize the space on a crowded countertop. This three level stand is made from rustic galvanized metal for a farmhouse look. It features a sturdy central pole with a loop handle for easy carrying. You can fill the trays with mugs and seasonal snacks to create a coffee station.
Neutral metal tones look excellent against white tiles or light wood. You can wrap a wooden bead garland around the levels to add more texture. Small signs with festive words fit nicely on the bottom tray. This stand allows you to display many items without taking up much room.
Material Required List
- Three tier metal stand
- Wooden bead garland
- Small framed sign
- Faux peony in a small pot
- Ceramic mugs with knit covers
- Glass jar with striped candy
Equipment Required List
- Soft cloth for dusting
- Scissors for removing tags
DIY Instruction Step By Step
- Clean each metal tray with a soft cloth to remove any dust.
- Place the largest items like the mugs and the sign on the bottom tray.
- Arrange your glass jar of candy on the middle level so it is easy to reach.
- Set your faux flower on the top tray to act as a centerpiece.
- Drape the wooden bead garland starting from the top and let it hang down.
- Tuck small heart shaped decorations into the gaps between the larger items.
- Turn the mugs so the handles face outward for a neat appearance.
5. Matte Red and Gold Electric Kettle
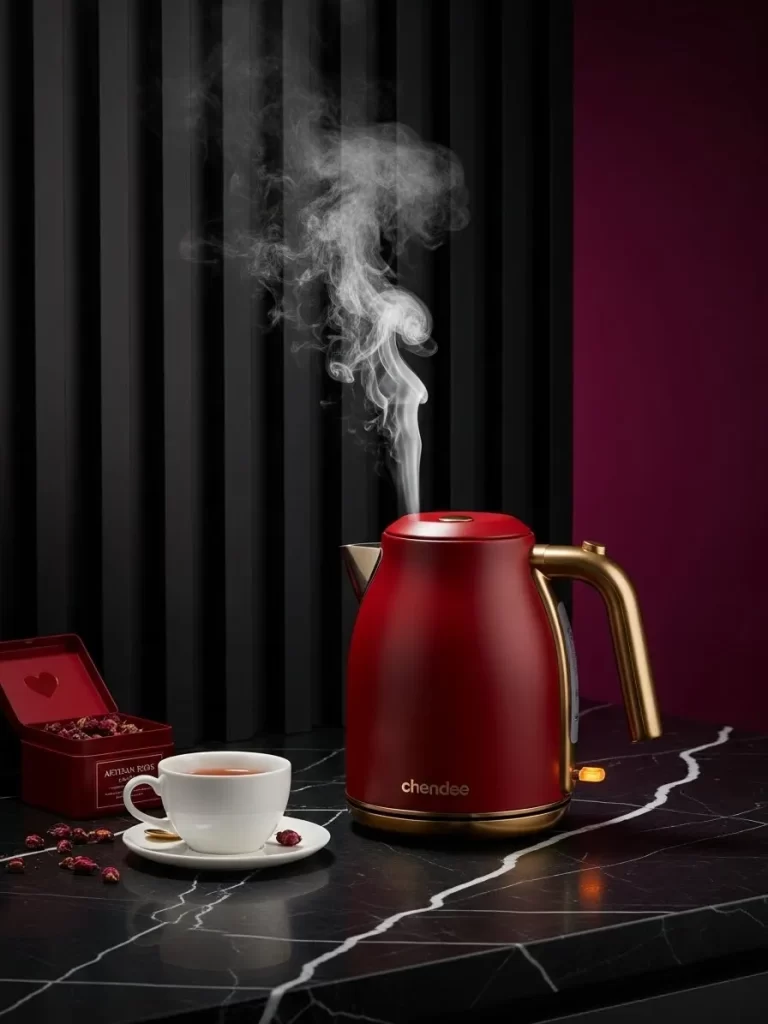
Modern appliances should be beautiful enough to stay on your counter. This electric kettle features a stunning matte red finish that feels soft to the touch. Bright gold accents on the handle and base add a touch of luxury. It boils water quickly for your afternoon tea or morning coffee.
Steam rises elegantly from the spout as the water reaches a boil. The bold color provides a focal point in a dark or neutral kitchen. You can pair it with a white tea cup and a red tin of tea leaves. This kettle combines high end design with the speed you need for a busy day.
Material Required List
- Stainless steel electric kettle
- High heat spray paint in matte red
- Gold metallic spray paint
- Blue painters tape
Equipment Required List
- Screwdriver to remove the handle
- Large cardboard box
- Cleaning rag
- Rubbing alcohol
DIY Instruction Step By Step
- Unplug the kettle and make sure it is completely dry inside and out.
- Clean the metal surface with rubbing alcohol to help the paint stick.
- Use painters tape to cover the heating element on the bottom of the kettle.
- Wrap tape around the water level window and the power switch.
- Take the kettle outside and place it inside a large cardboard box.
- Apply a very thin layer of gold paint to the handle and the base.
- Cover the gold parts with tape once they are dry to the touch.
- Spray the main body of the kettle with the matte red paint using long strokes.
- Let the paint dry for one hour before you apply a second coat.
- Peel off the tape carefully and let the kettle sit for a day before you use it.
6. Pink Peony Range Hood Swag
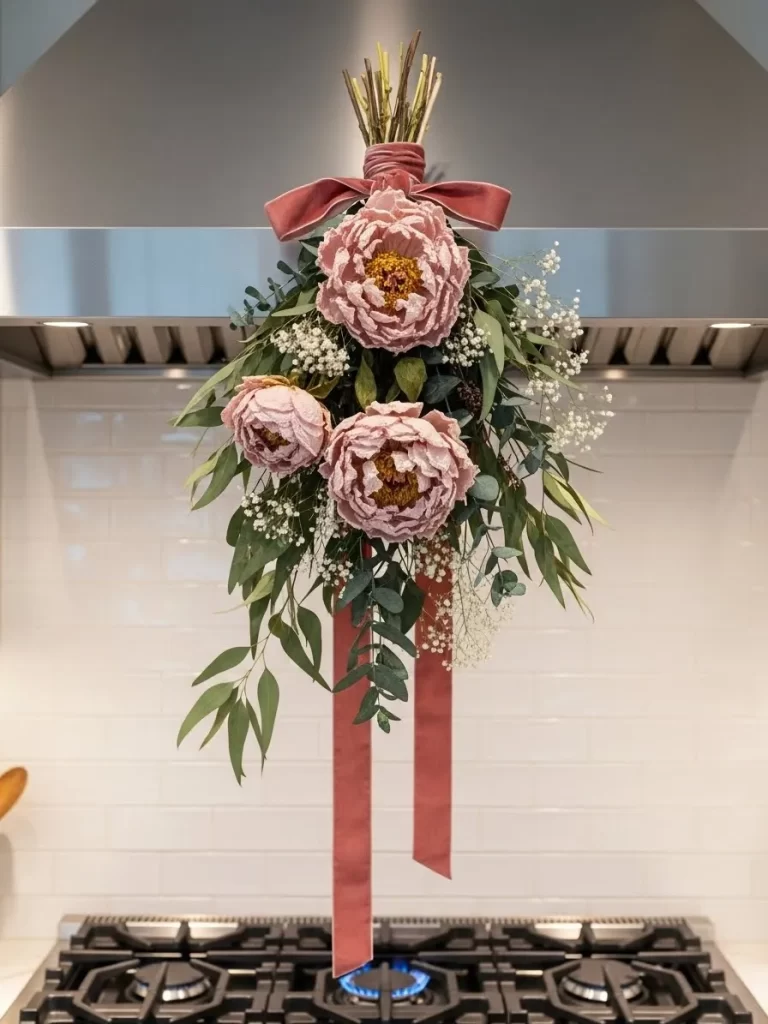
Floral decor is not just for your dining table or windows. This lush swag hangs over your stove to bring a garden feel to the room. It features large pink peonies surrounded by soft green leaves. The arrangement is tied with a long velvet ribbon that hangs down gracefully.
Soft textures of the flowers contrast with the hard surfaces of the kitchen. Sprigs of white baby breath add a delicate touch to the green foliage. You can easily attach this to your range hood using a magnetic hook. This piece stays looking fresh all season without any water or sun.
Material Required List
- Three large silk peonies
- Bundle of faux eucalyptus
- Bunch of faux baby breath
- Two yards of pink velvet ribbon
- Thin floral wire
Equipment Required List
- Wire cutters
- Heavy duty scissors
- Magnetic hook for the range hood
DIY Instruction Step By Step
- Lay the eucalyptus stems on your table in a flat fan shape.
- Place the largest peony in the center of the greens to start your stack.
- Add the other two peonies slightly lower and to the sides of the center flower.
- Tuck the baby breath stems into the gaps to fill out the arrangement.
- Wrap floral wire tightly around all the stems to hold them together.
- Cut the ends of the stems with your wire cutters so they are even.
- Tie the pink velvet ribbon into a large bow over the wired section.
- Leave the ends of the ribbon long so they hang down behind the flowers.
- Place your magnetic hook on the range hood and hang the swag by the wire.
7. Glass Dispenser with Pink Soap
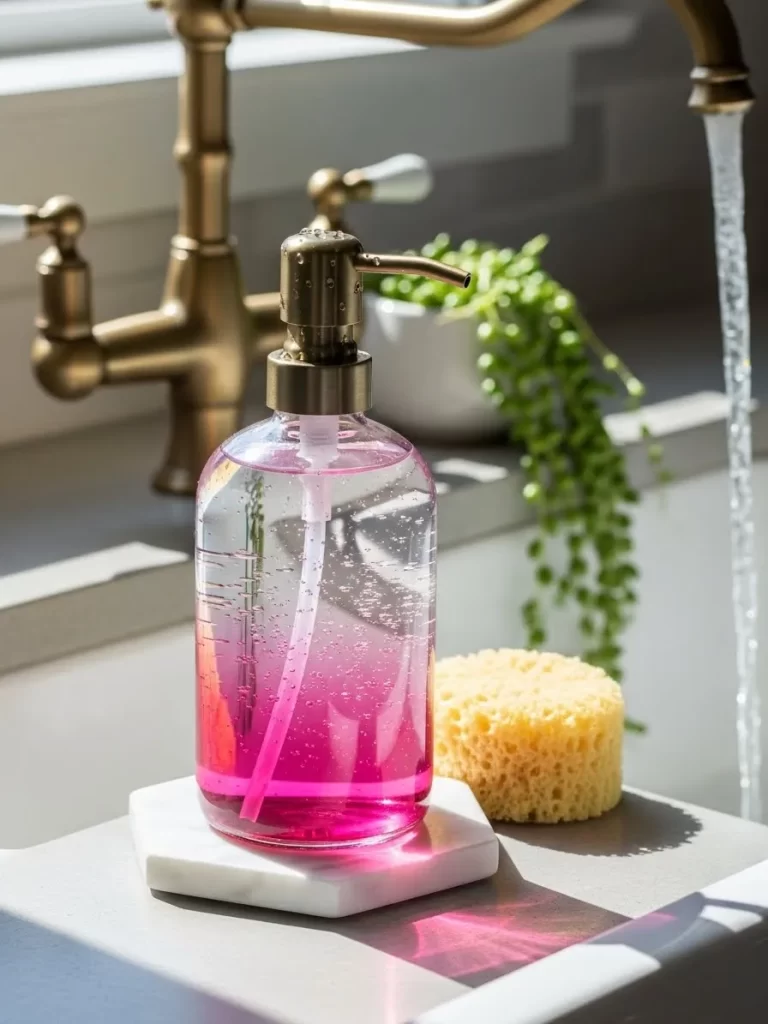
Small details like soap bottles can change the look of your sink. This clear glass dispenser shows off the vibrant pink liquid inside. It features a brushed gold pump that matches modern faucets. Placing it on a small marble tile keeps your counter dry and clean.
Bubbles in the soap catch the light from the window while you wash. The simple design of the bottle fits in any style of home. You can refill this glass jar many times to reduce plastic waste. It makes a mundane task like washing dishes feel a bit more special.
Material Required List
- Clear glass bottle with a wide mouth
- Brushed gold soap pump
- Clear liquid hand soap
- Pink food coloring
- Small marble coaster
Equipment Required List
- Long spoon for stirring
- Small funnel
DIY Instruction Step By Step
- Wash the glass bottle with hot soapy water and let it dry.
- Place the funnel into the top of the bottle to avoid spills.
- Pour your clear liquid soap into the bottle until it is nearly full.
- Add one small drop of pink food coloring to the soap inside the bottle.
- Use a long spoon to stir the soap slowly so you do not make too many bubbles.
- Check the color and add more dye if you want a darker shade of pink.
- Wipe the rim of the bottle to remove any soap drips.
- Screw the gold pump onto the top of the bottle until it is tight.
- Place the finished dispenser on a marble coaster next to your kitchen sink.
8. Heart Pattern Embossed Rolling Pin
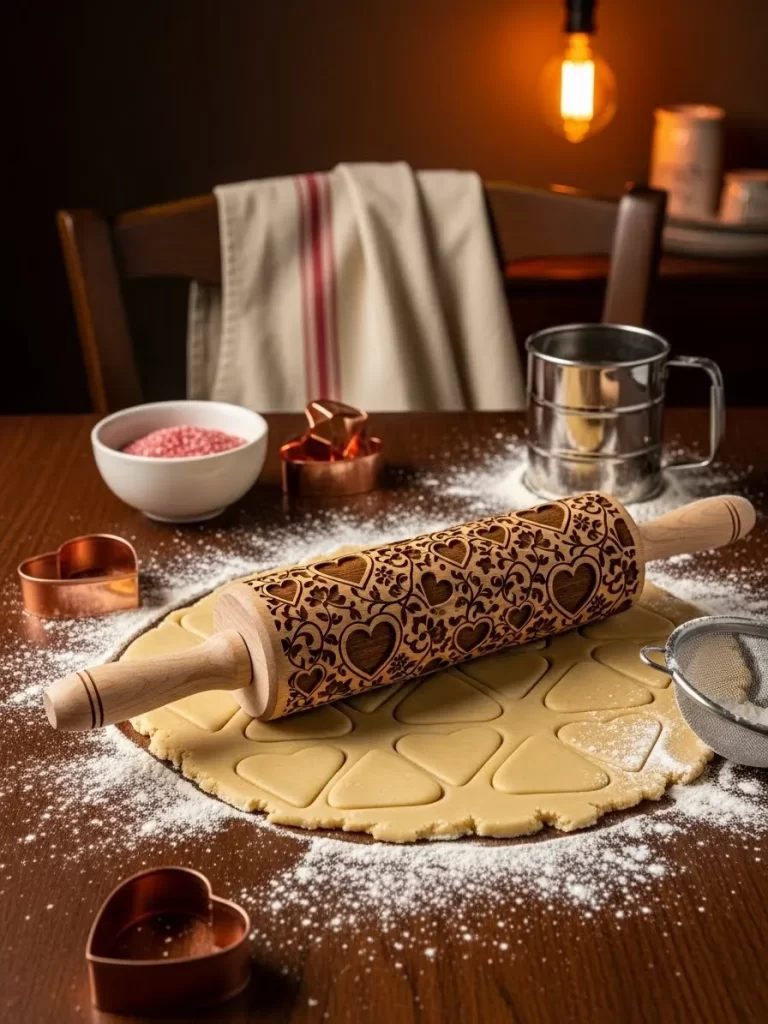
Baking becomes a creative art with the right tools in your hands. This wooden rolling pin features beautiful heart shapes carved into the surface. It leaves a detailed print on your cookie dough with every turn. You can see the intricate vines and flowers surrounding each heart.
Natural wood feels warm and comfortable while you roll out your treats. This tool is great for making impressive cookies without any extra frosting. You can display it on your counter with a bowl of flour for a cozy look. It inspires you to spend more time in the kitchen with your family.
Material Required List
- Plain wooden rolling pin
- Food safe wood oil
- Sandpaper
Equipment Required List
- Laser engraving machine or a wood carving set
- Clean cloth
- Soft brush
DIY Instruction Step By Step
- Sand the surface of your rolling pin until it is perfectly smooth.
- Clean away all the dust with a dry brush so the wood is clear.
- Draw your heart and vine pattern onto the wood with a light pencil.
- Use a carving tool to carefully cut out the shapes along your lines.
- Make sure each cut is at least a few millimeters deep for a good print.
- Brush away the wood shavings as you work to see your progress.
- Rub the entire pin with a piece of fine sandpaper to remove any rough spots.
- Wipe the wood with a clean cloth to prepare it for the oil finish.
- Apply food safe wood oil to the pin and let it soak in for several hours.
- Buff the wood with a dry cloth before you use it on your cookie dough.
9. Gold Rimmed Coupe Glasses
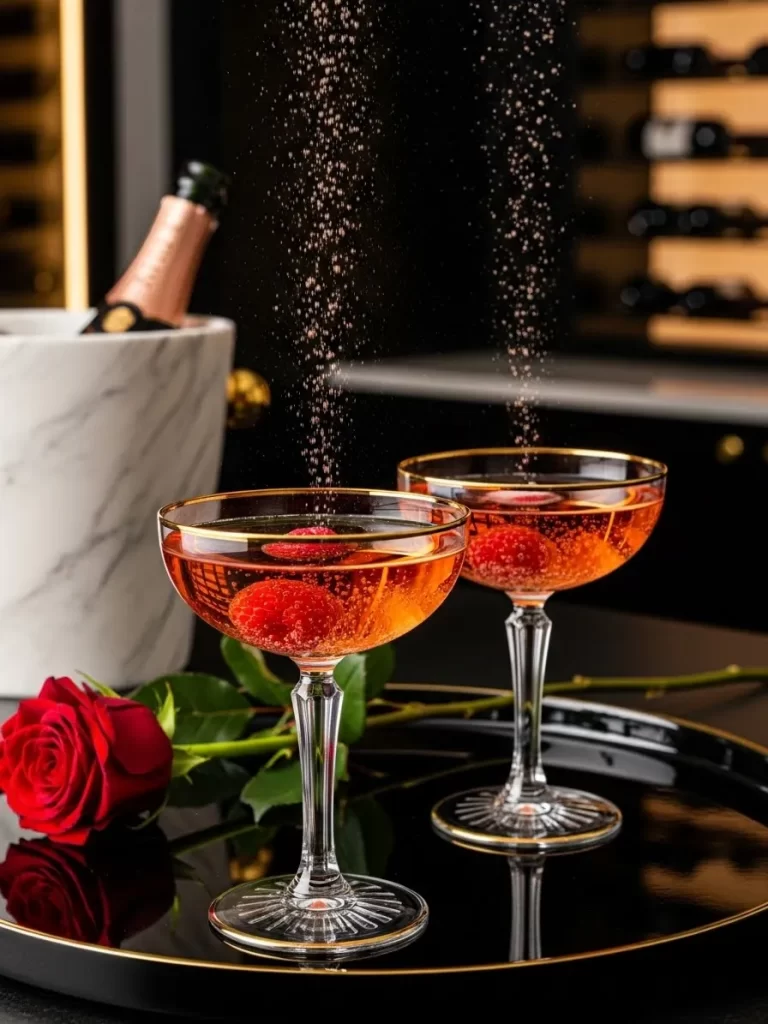
Special drinks deserve a glass that feels elegant and sophisticated. These coupe glasses feature a classic shape with a thin gold rim. The wide bowl allows the bubbles in your drink to sparkle and shine. You can drop a fresh raspberry into the liquid to add a pop of red.
Sparkling cider or pink lemonade looks beautiful in these clear stems. They sit gracefully on a black tray next to a single red rose. The gold edge catches the light from candles or overhead lamps. Using these glasses makes any evening feel like a grand celebration.
Material Required List
- Set of clear glass coupe stems
- Gold leaf paint for glass
- Rubbing alcohol
- Cotton pads
Equipment Required List
- Very fine tipped paint brush
- Small bowl
- Kitchen oven
DIY Instruction Step By Step
- Clean the rims of your glasses with a cotton pad and rubbing alcohol.
- Pour a small amount of gold paint into your bowl for easy access.
- Dip the tip of your brush into the paint and wipe off the extra.
- Paint a very thin and steady line along the top edge of each glass.
- Rotate the glass slowly while you work to keep the line even.
- Let the paint dry for at least four hours in a safe place.
- Check the rim for any thin spots and add a second coat if needed.
- Place the glasses in a cold oven and heat it to 300°F.
- Bake the glasses for twenty minutes to set the paint so it does not wash off.
- Allow the oven to cool completely before you take the glasses out.
10. Minimalist Wire Love Sign
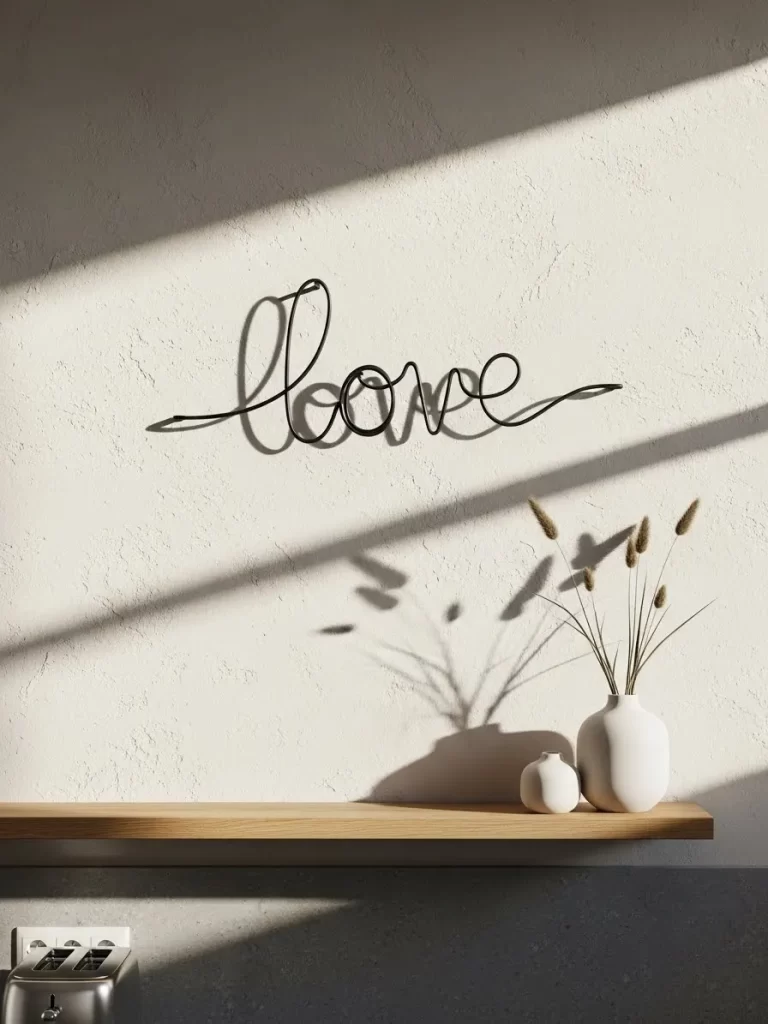
Decorating your walls can be simple and impactful at the same time. This wire sign spells out the word love in a smooth cursive font. The black metal stands out against a white or light colored wall. It casts a soft shadow that changes as the sun moves through the room.
Thin wire designs do not take up much visual space in a small kitchen. You can place this sign above a shelf or near a vase of dried grass. It brings a modern and artistic feel to your home decor. This piece is a gentle reminder of what matters most in your life.
Material Required List
- Thick black crafting wire
- Paper for a template
- Masking tape
Equipment Required List
- Needle nose pliers
- Wire cutters
- Hammer and small nails
- Pencil
DIY Instruction Step By Step
- Write the word love in cursive on a piece of paper in the size you want.
- Tape the start of your wire to the beginning of the first letter.
- Use your pliers to bend the wire slowly along the lines of your paper.
- Loop the wire carefully for the letters l and o to keep the curves smooth.
- Keep the wire flat against the table as you move to the next letter.
- Cut the wire at the end of the word with your wire cutters.
- Use the pliers to tuck any sharp ends under so they are safe.
- Hold the wire sign against your wall and mark the top loops with a pencil.
- Tap two small nails into the wall at your marks to act as hooks.
- Rest the wire loops on the nails so the word hangs straight.
11. Gingham Window Curtains
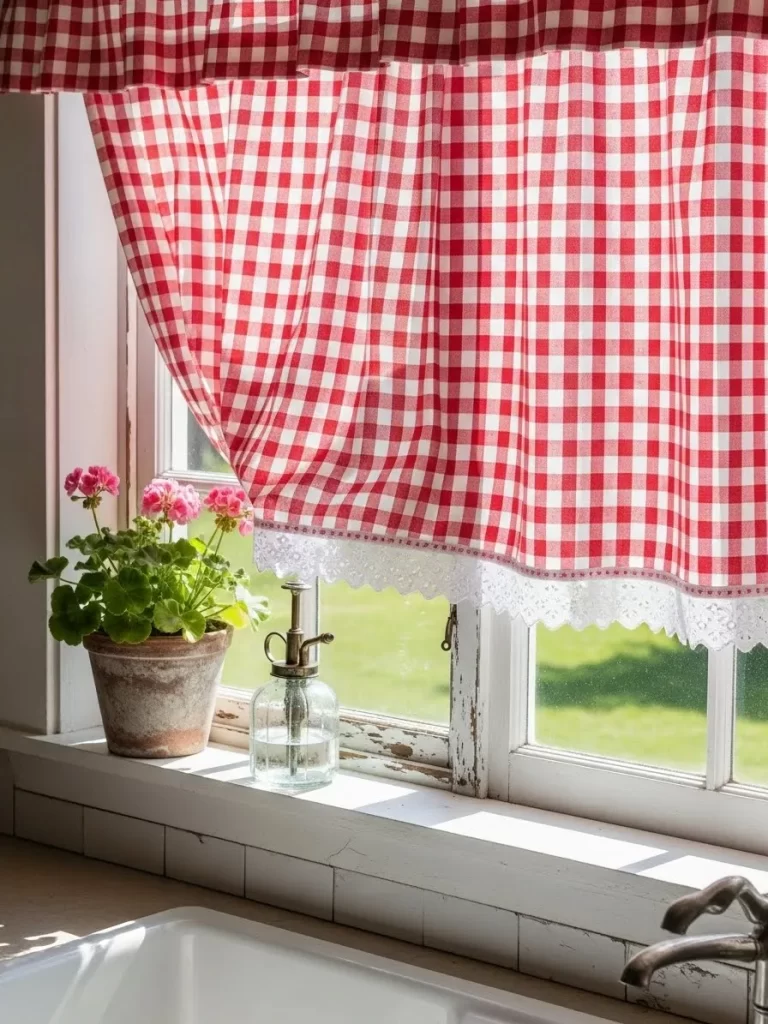
Classic patterns bring a cozy and familiar feel to your kitchen window. These red and white gingham curtains allow soft light to filter through. They feature a delicate lace trim along the bottom edge for a sweet finish. You can pair them with a potted plant on the sill for a fresh look.
Swapping out your curtains is one of the fastest ways to change a room. The bright red checks add a cheerful energy to your cooking area. These fabrics are easy to wash and stay looking bright for a long time. They frame your view of the garden with a touch of farmhouse style.
Material Required List
- Two yards of red gingham cotton fabric
- Three yards of white lace trim
- Matching red thread
- Curtain rod
Equipment Required List
- Sewing machine
- Fabric scissors
- Iron and ironing board
- Pins
DIY Instruction Step By Step
- Measure the width and height of your window before you cut your fabric.
- Cut two rectangular pieces of fabric that are slightly wider than your window.
- Fold the top edge over by three inches and sew a straight line to make a pocket.
- Iron the side edges over by half an inch and sew them down for a clean look.
- Pin the lace trim along the bottom edge of both fabric pieces.
- Sew the lace to the gingham using a slow and steady stitch.
- Press the entire curtain with a hot iron to remove any wrinkles.
- Slide the curtain rod through the top pockets of both pieces.
- Hang the rod on your window brackets and adjust the folds of the fabric.
12. Stuffed Heart Garland
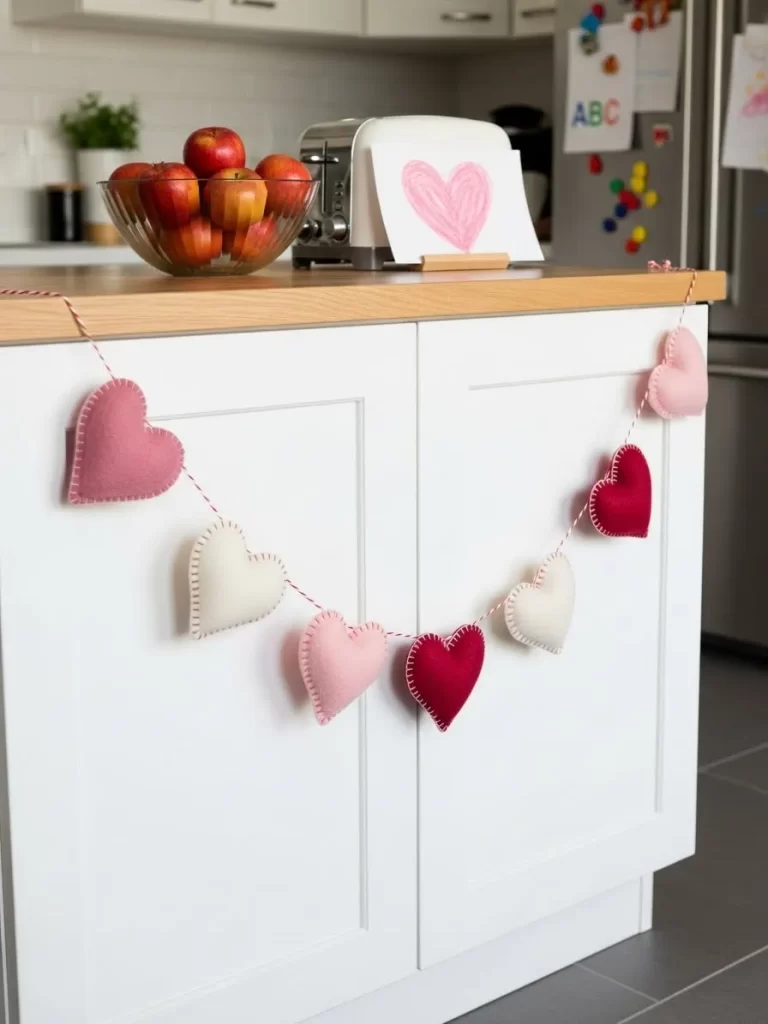
Soft decorations can hang from your island or mantel to add a playful touch. This garland features several stuffed hearts made from felt in pink and red. They are strung together on a red and white striped string. Small white stitches around the edges give the hearts a handmade look.
You can drape this across your cabinets to bring color to a plain white kitchen. The soft material is safe to use around children and pets. Each heart is filled with light stuffing to give it a 3D shape. This garland adds a layer of coziness to your hard kitchen surfaces.
Material Required List
- Sheets of felt in red and pink
- Polyester fiberfill stuffing
- Red and white baker twine
- White embroidery floss
Equipment Required List
- Large sewing needle
- Fabric scissors
- Pencil for tracing
- Cardboard for a template
DIY Instruction Step By Step
- Draw a heart shape on a piece of cardboard and cut it out to use as a guide.
- Trace the heart onto your felt sheets and cut out two pieces for every heart.
- Place two matching felt hearts together and start sewing around the edge.
- Use a simple running stitch with the white floss and leave a small opening.
- Push a small amount of stuffing into the heart through the opening.
- Sew the heart shut and tie a knot in the back of the thread.
- Repeat these steps until you have at least seven or eight stuffed hearts.
- Thread your twine through the top corner of each heart.
- Space the hearts out evenly along the string so the garland looks balanced.
- Tie loops at the ends of the twine and hang the garland on your island.
13. Ceramic Heart Spoon Rest

Keeping your counters clean is easier when you have a dedicated spot for your tools. This bright red spoon rest features a classic heart shape with a smooth finish. It sits right next to your stove to hold messy spoons while you cook. The deep red color stands out beautifully against a black stovetop.
Ceramic material is heat resistant and will not melt near your burners. You can easily wipe away soup or sauce with a damp cloth or sponge. The curved edges of the heart keep liquids from spilling onto your counter. This item is a functional addition that also acts as a small piece of decor.
Material Required List
- Air dry clay or ceramic clay
- Red glass paint or ceramic glaze
- Clear gloss spray
Equipment Required List
- Clay rolling pin
- Large heart shaped cookie cutter
- Smooth sponge
- Sandpaper
DIY Instruction Step By Step
- Roll out your clay on a flat surface until it is half an inch thick.
- Use the large heart cutter to press a shape out of the clay.
- Smooth the edges of the heart with a wet sponge to remove any bumps.
- Gently curve the sides of the heart upward to create a shallow bowl.
- Let the clay dry completely for twenty four hours in a cool spot.
- Sand any rough edges until the heart feels smooth to your touch.
- Apply two coats of bright red paint to the top and bottom of the clay.
- Let the paint dry for several hours before you add the clear gloss.
- Spray the heart with a gloss finish to give it a protective coat.
- Place the spoon rest on your stove once the sealer is no longer sticky.
14. Velvet Bow Cabinet Accents

Adding luxury to your kitchen can be as simple as tying a ribbon. These soft velvet bows attach to your cabinet knobs for an instant upgrade. They feature long tails that hang down and add movement to your room. The dusty rose color looks elegant against light gray or white cabinets.
You can easily remove these bows after the holiday without leaving a mark. The velvet material feels soft and brings a different texture to your cabinets. These accents work well in both large kitchens and small apartments. They are a subtle way to show your attention to detail.
Material Required List
- Five yards of wide velvet ribbon
- Small clear rubber bands
- Thin wire
Equipment Required List
- Sharp fabric scissors
- Measuring tape
DIY Instruction Step By Step
- Measure the length of the ribbon you need to create a large bow.
- Cut several pieces of ribbon that are all the same length.
- Create a loop with the ribbon and pinch the center for a bow shape.
- Wrap a small piece of thin wire around the center to hold the loops.
- Take a shorter piece of ribbon and wrap it over the wire to hide it.
- Glue or sew the ends of this small piece at the back of the bow.
- Trim the ends of the long ribbon tails at an angle to stop fraying.
- Slide a clear rubber band through the back of the bow loops.
- Stretch the rubber band over your cabinet knob until the bow is secure.
- Fluff the velvet loops so the bow looks full and sits straight.
15. Slogan Kitchen Floor Mat
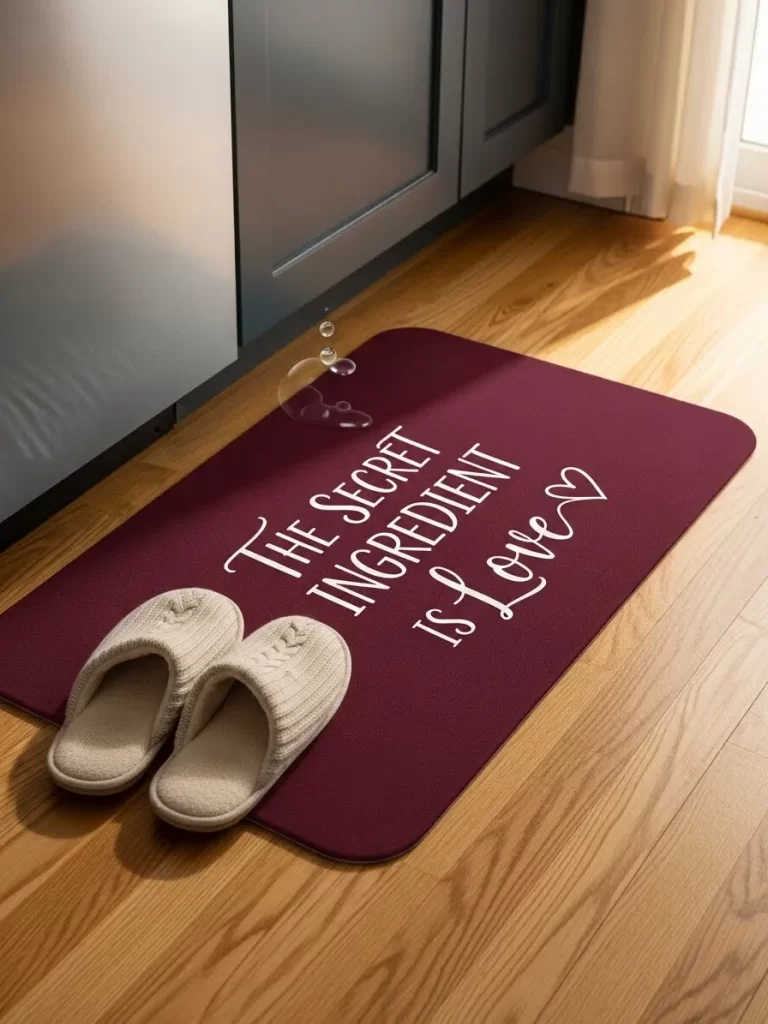
Comfort under your feet makes the time you spend at the sink much better. This deep burgundy floor mat features a sweet message about the secret ingredient. White cursive letters stand out clearly against the dark background. It provides a soft cushion for your legs while you wash dishes or prep food.
The rich color of the mat hides small spills and dirt between cleanings. You can place it in front of your stove or sink to add a pop of color. The non slip backing keeps the mat in place on your wooden or tile floors. This item combines a fun message with the comfort you need for daily chores.
Material Required List
- Plain burgundy kitchen mat
- White fabric paint or a paint pen
- Large paper for a stencil
Equipment Required List
- Painters tape
- Small stencil brush
- Pencil
DIY Instruction Step By Step
- Clean your mat to ensure there is no dust on the surface.
- Write your slogan on a piece of paper in a pretty font.
- Cut out the letters carefully with a craft knife to make a stencil.
- Tape the paper stencil onto the center of your mat so it stays still.
- Dip your stencil brush into the white paint and wipe off the extra.
- Dab the paint onto the mat through the letter holes using a vertical motion.
- Apply a second coat if the white color looks too thin on the mat.
- Peel off the tape and the paper stencil slowly while the paint is wet.
- Let the mat dry for twenty four hours before you step on it.
- Use a hair dryer on a low setting to help set the paint if needed.
16. Gold Heart Refrigerator Magnets
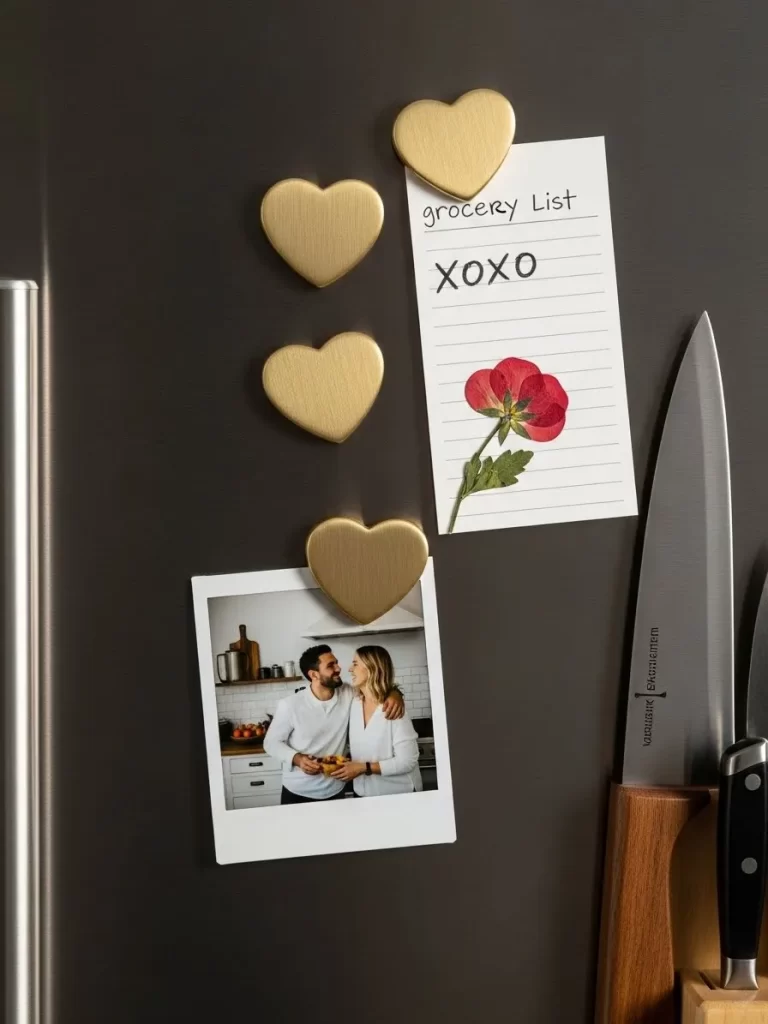
Even your appliances can join in on the holiday theme with small accents. These gold heart magnets feature a brushed metal finish for a modern look. They are strong enough to hold your grocery lists and family photos. You can arrange them in a vertical line to add a decorative touch to your fridge.
The gold color looks stunning against a dark stainless steel surface. Using heart shapes is a subtle way to keep the festive spirit alive. You can use them to display a polaroid of your favorite person or a flower. These magnets are small but they make a big impact on the overall feel.
Material Required List
- Set of wooden heart shapes
- Metallic gold spray paint
- Strong neodymium magnets
- Super glue
Equipment Required List
- Sandpaper
- Cardboard box for painting
- Cleaning cloth
DIY Instruction Step By Step
- Sand the wooden hearts until the edges are smooth and round.
- Wipe away the dust with a cloth so the paint sticks well.
- Place the hearts inside a cardboard box with the flat side facing up.
- Spray a light coat of gold paint over the hearts and let them dry.
- Turn the hearts over and spray the other side until they are fully gold.
- Let the paint dry for at least two hours in a warm room.
- Apply a small drop of super glue to the center of each magnet.
- Press the magnet onto the back of the gold heart and hold it.
- Let the glue cure overnight before you try to use the magnets.
- Place the hearts on your fridge to hold up your favorite notes.
17. Brass Candlesticks and Taper Candles
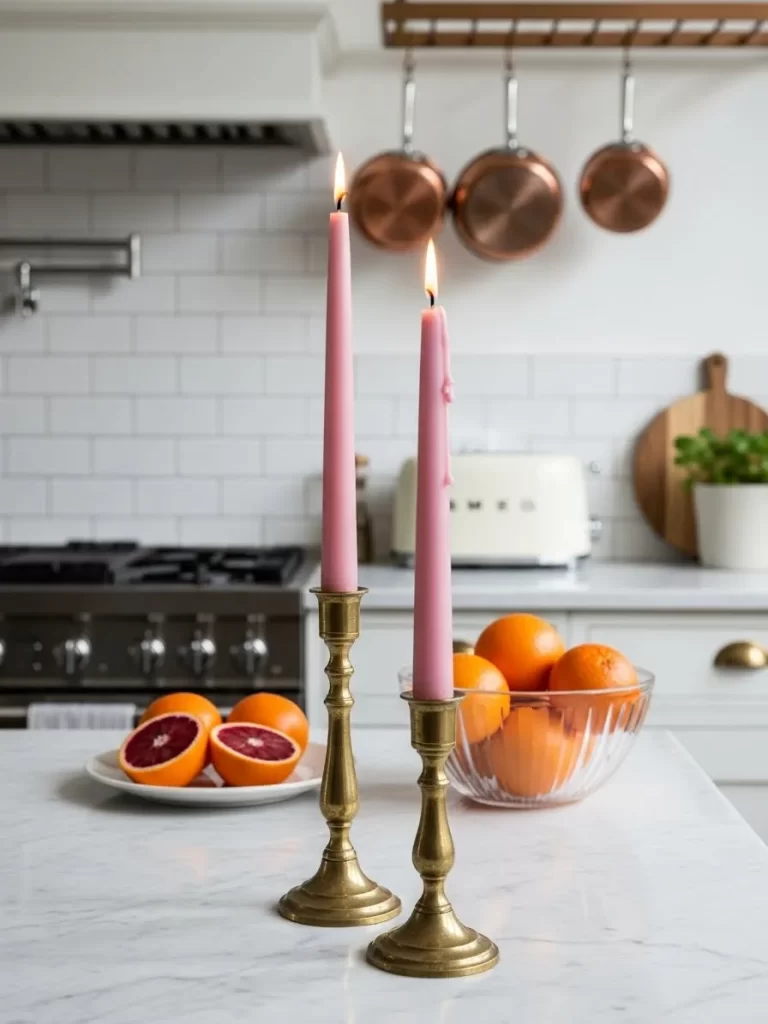
Lighting can change the entire mood of your kitchen during an evening meal. These vintage brass candlesticks feature a warm and glowing finish. They hold tall pink taper candles that add height to your kitchen island. The soft flickering light creates a cozy atmosphere for a late dinner.
Mixing different heights of candlesticks adds visual interest to your counter. The pink wax looks beautiful against the golden metal of the holders. You can place them near a bowl of oranges to create a vibrant scene. This is a simple way to bring a touch of class to your cooking area.
Material Required List
- Two brass candlestick holders
- Two pink taper candles
- Small decorative matches
Equipment Required List
- Soft cloth
- Brass polish
- Lighter or matches
DIY Instruction Step By Step
- Rub your brass holders with a soft cloth and polish to make them shine.
- Wipe away any old wax from the inside of the candle cups.
- Hold the bottom of a pink candle over a flame to melt the wax.
- Press the candle firmly into the holder while the wax is still soft.
- Hold it straight for a few seconds until the wax hardens.
- Repeat this with the second candle and the other holder.
- Place the candlesticks on your kitchen island or table.
- Trim the wicks of the candles to half an inch before you light them.
- Set a small box of matches nearby for easy access.
- Light the candles just before your guests arrive for a warm welcome.
18. Silicone Heart Spatula
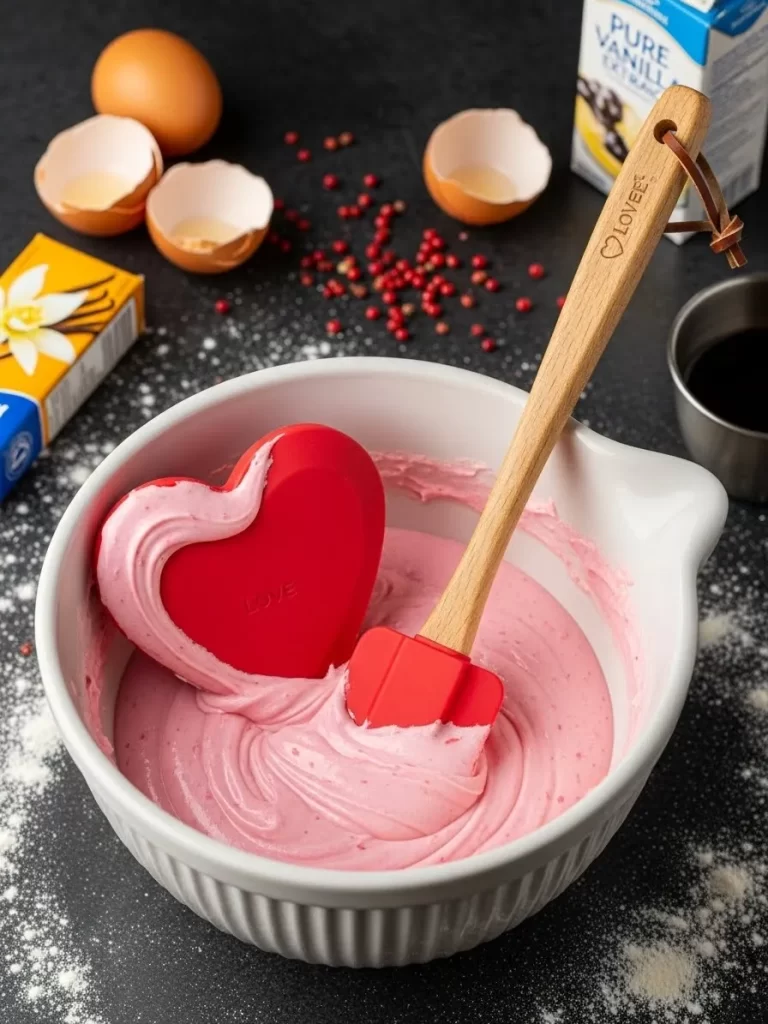
Cooking your favorite meals is more fun when you use themed tools. This red silicone spatula features a heart shaped head for mixing dough. It has a sturdy wooden handle that is comfortable to hold. You can use it to scrape every bit of pink frosting out of your mixing bowl.
Silicone is heat resistant and safe to use with all types of cookware. The smooth surface makes it easy to clean after you finish baking. You can display it in a ceramic jar on your counter for a pop of color. This tool is an excellent choice for someone who loves to bake.
Material Required List
- Plain silicone spatula with a wooden handle
- Fine point wood burning tool
- Food safe mineral oil
Equipment Required List
- Pencil
- Sandpaper
- Clean cloth
DIY Instruction Step By Step
- Remove the silicone head from the wooden handle if possible.
- Sand the wooden handle until it is smooth and clear of any finish.
- Use a pencil to draw a small heart or word on the handle.
- Plug in your wood burning tool and wait for it to get very hot.
- Trace your pencil lines slowly with the hot tip of the tool.
- Blow away any smoke so you can see your work clearly.
- Rub the wood with fine sandpaper once you finish the design.
- Wipe the handle with a clean cloth to remove any dust.
- Apply a coat of mineral oil to the wood to protect it.
- Slide the silicone head back onto the handle until it is secure.
19. Marble Pedestal Riser
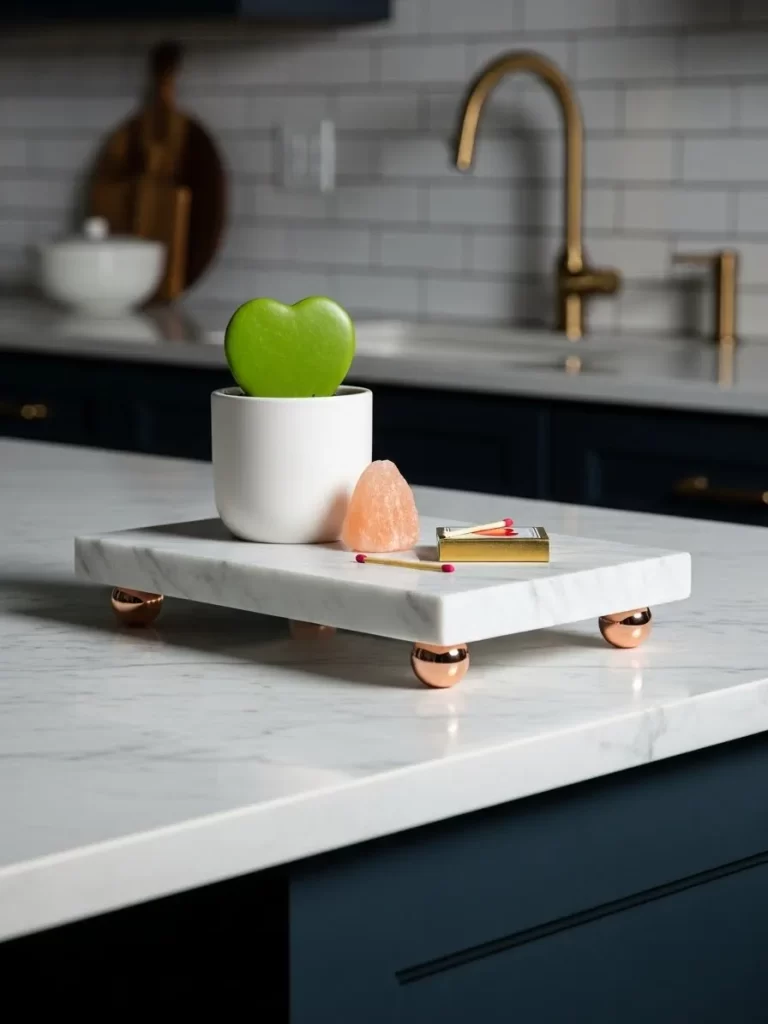
Elevating your small decor items helps them stand out on a flat counter. This white marble riser features four copper colored legs for a modern touch. It provides a clean base for a small heart shaped plant or a candle. The natural stone stays cool and is easy to wipe clean after use.
Using different heights on your counter makes your kitchen look professional. The white marble looks excellent against a dark countertop or backsplash. You can place your matches and a small salt rock on the riser for easy access. This piece is a smart way to organize your small essentials.
Material Required List
- Square marble tile or small marble board
- Four large copper drawer knobs
- Industrial strength glue
Equipment Required List
- Measuring tape
- Pencil
- Cleaning cloth
DIY Instruction Step By Step
- Clean the bottom of your marble tile with a damp cloth.
- Measure two inches in from each corner on the underside of the tile.
- Mark these spots with a pencil so you know where the legs go.
- Apply a generous drop of glue to the flat side of each copper knob.
- Press a knob onto each of your pencil marks on the tile.
- Hold each knob in place for a minute so the glue starts to set.
- Leave the tile upside down for twenty four hours so the glue cures.
- Turn the riser over and check that all the legs are steady.
- Place the marble riser on your kitchen island or near your sink.
- Arrange a small plant and some matches on top for a styled look.
20. XO Ceramic Cookie Jar
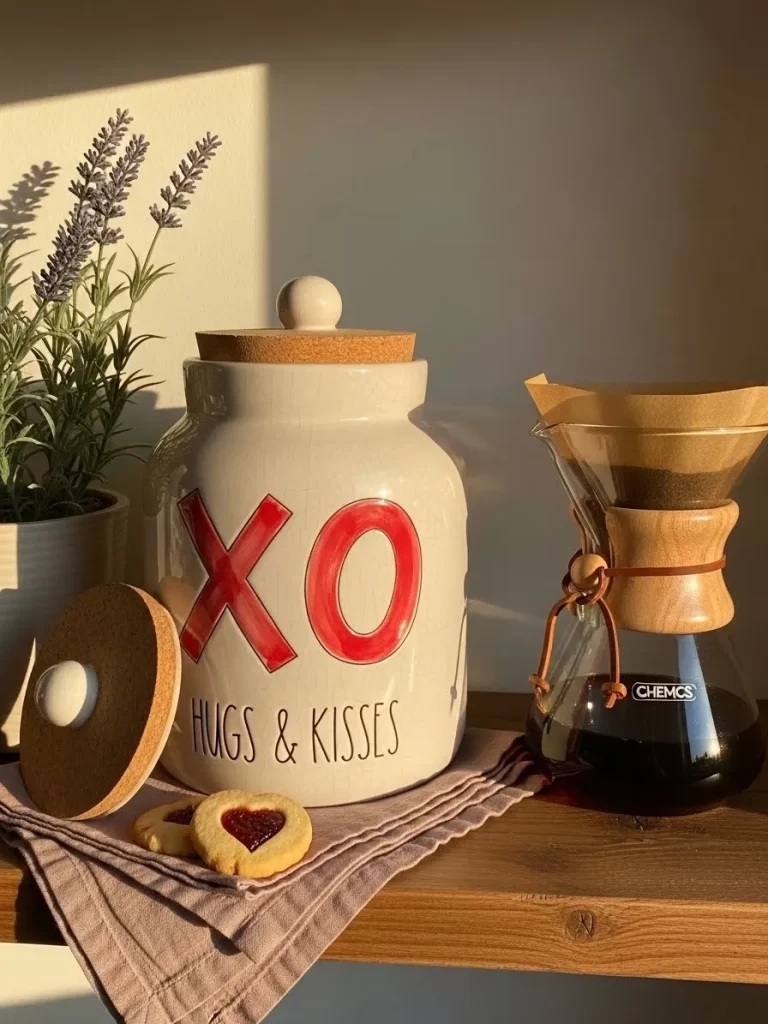
Storing your homemade treats is more stylish with a themed canister. This white ceramic jar features large red letters that spell out XO. It has a natural cork lid that keeps your cookies or coffee beans fresh. You can place it on your coffee bar next to a glass brewer for a complete look.
The crackle glaze on the ceramic gives the jar a vintage and cozy feel. You can pair it with a plate of heart shaped cookies for a sweet display. The neutral white color allows the red letters to really pop in your room. This jar is a great way to hide clutter while adding a decorative touch.
Material Required List
- Large plain white ceramic jar
- Red oil based paint marker
- Black oil based paint marker
- Round cork lid
Equipment Required List
- Rubbing alcohol
- Cotton pad
- Pencil
- Kitchen oven
DIY Instruction Step By Step
- Wipe the outside of your white jar with rubbing alcohol to remove dust.
- Draw the letters X and O on the front of the jar with a pencil.
- Write the words hugs and kisses in a smaller font below the letters.
- Use the red paint marker to fill in the large X and O shapes.
- Trace the smaller words with the black paint marker for a clean look.
- Let the paint dry for four hours so it does not smudge.
- Place the jar in a cold oven and set it to 300°F.
- Bake the ceramic for thirty minutes to ensure the paint is permanent.
- Let the jar cool down completely before you take it out of the oven.
- Place the cork lid on top and fill the jar with your cookies.
21. Heart Embroidered Bread Bag
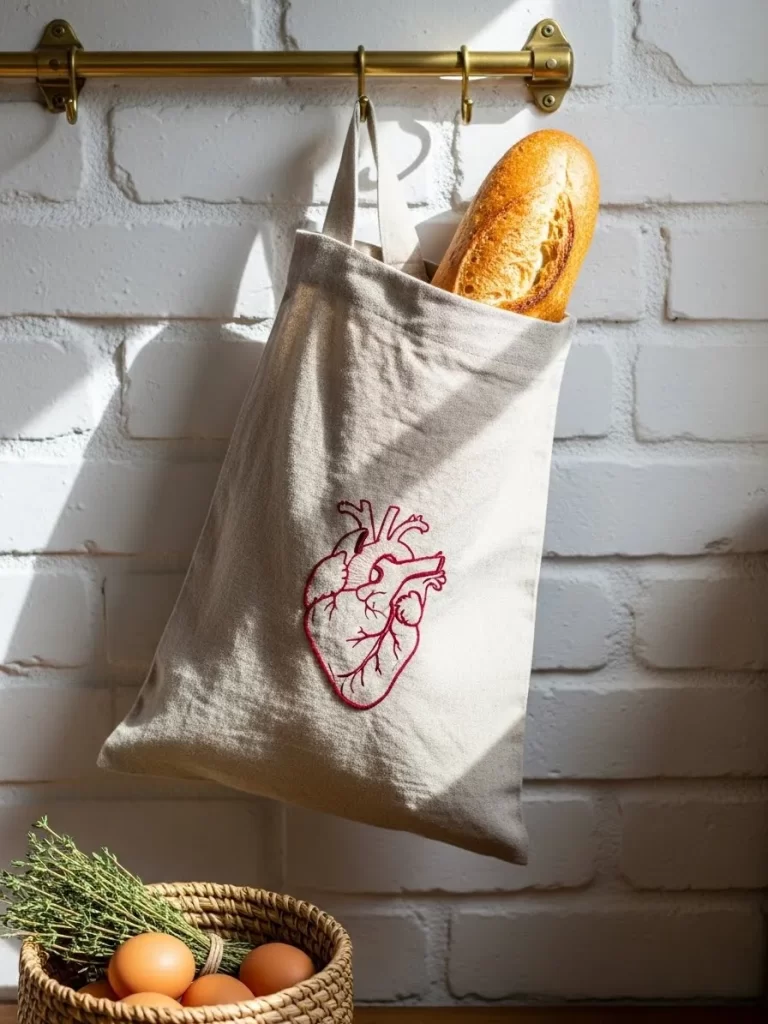
Keeping your fresh bread warm and covered adds a rustic charm to your kitchen. This linen bag features a detailed embroidery of a human heart in red thread. It hangs from a brass rail while holding a long baguette. The natural fabric allows the bread to breathe so it stays crusty and fresh.
Small textiles like this bag are useful for keeping your counters clear of crumbs. The red stitching stands out against the neutral cream colored linen. You can pair it with a basket of fresh eggs for a farmhouse look. This item is a thoughtful way to store your daily staples with style.
Material Required List
- Rectangular piece of linen fabric
- Red embroidery floss
- Cotton drawstring ribbon
Equipment Required List
- Sewing machine
- Hand sewing needle
- Fabric chalk
- Scissors
DIY Instruction Step By Step
- Fold your linen fabric in half with the pretty sides facing each other.
- Draw a heart shape on the front panel of the fabric with chalk.
- Use a hand needle and red floss to stitch the outline of the heart.
- Sew the side and bottom edges of the bag using a straight stitch.
- Fold the top edge over by two inches and sew a loop for the ribbon.
- Turn the bag right side out so the embroidery is on the front.
- Thread your drawstring ribbon through the top loop with a safety pin.
- Pull the ribbon tight to close the bag and tie it in a knot.
- Place a fresh loaf of bread inside and hang the bag on your wall.
22. Heart Labeled Syrup Bottles
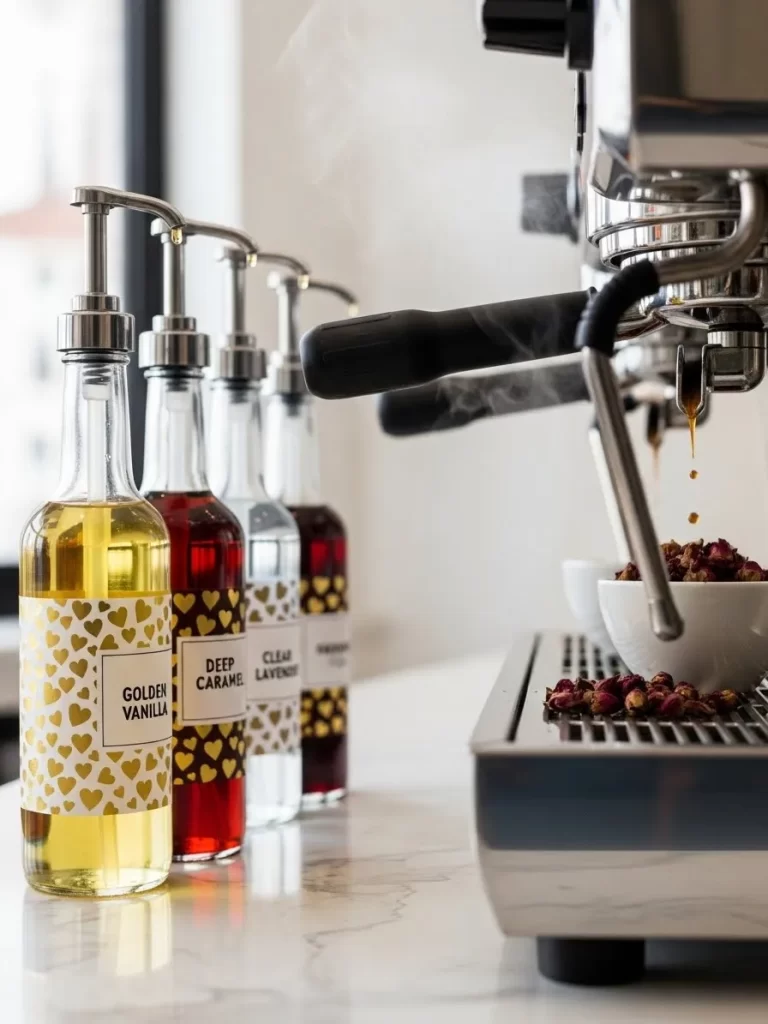
Your morning coffee routine feels more like a cafe experience with custom bottles. These clear glass containers hold different flavors of sweet syrup for your drinks. Each bottle features a gold and white label with many small heart shapes. They sit in a neat row next to your espresso machine on the counter.
Brass pumps on top allow you to add just the right amount of flavor to your cup. Seeing the vibrant colors of the syrups through the glass adds a pop of life. You can use these to organize your vanilla, caramel, and lavender flavors. This setup makes your coffee bar look very polished and intentional.
Material Required List
- Three tall glass syrup bottles
- Three brass pump tops
- White adhesive paper
- Gold paint pen
Equipment Required List
- Cleaning cloth
- Measuring tape
- Scissors
DIY Instruction Step By Step
- Wash your glass bottles with hot water and dry them completely.
- Measure the width of your bottle to see how big the labels should be.
- Cut three rectangles out of your white adhesive paper for the labels.
- Use your gold paint pen to draw many small hearts all over the paper.
- Write the name of each syrup flavor in the center of the labels.
- Peel the back off the paper and press the labels onto the glass.
- Make sure the labels are straight and there are no air bubbles.
- Fill each bottle with your favorite coffee syrups using a funnel.
- Screw the brass pump tops onto the bottles until they are very tight.
- Arrange the bottles in a line next to your coffee machine for use.
23. Festive Plaid Table Runner

Adding a runner is a quick way to bring color to a dark wooden island. This fabric features a classic red and green plaid pattern with yellow accents. It has a fringe of soft tassels at the ends that hang over the edge of the table. You can place a black teapot and a stack of books on top for a cozy scene.
Textiles protect your furniture from hot mugs and scratches while you work. The deep red tones in the fabric match your other holiday decorations. You can pair it with a magnifying glass and a warm cup of tea for a studious look. This runner makes your kitchen feel like a warm library or a mountain cabin.
Material Required List
- Two yards of plaid wool or cotton fabric
- Matching red thread
Equipment Required List
- Sewing machine
- Iron
- Fabric scissors
- Seam ripper
DIY Instruction Step By Step
- Measure the length of your table and add twelve inches for the overhang.
- Cut your fabric into a long rectangle that is fourteen inches wide.
- Fold the long edges over by half an inch and iron them flat.
- Sew a straight line along the long edges to keep the fabric from fraying.
- Pull out the cross threads at the short ends of the fabric to make fringe.
- Use a needle to pull threads one by one until the fringe is two inches long.
- Tie the remaining threads into small knots to secure the fringe in place.
- Press the entire runner with a hot iron to make it sit flat on your table.
- Lay the runner across your island or dining table in the center.
24. Pink Pressed Glass Fruit Bowl
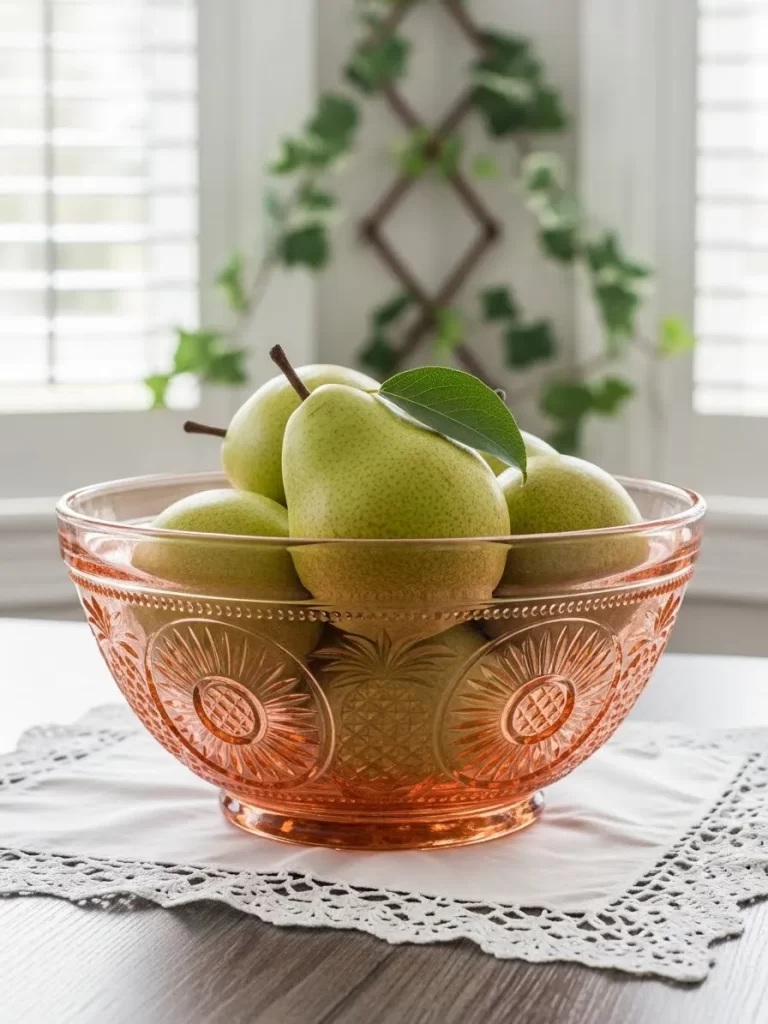
Storing fresh fruit in a beautiful vessel makes healthy snacks more appealing. This bowl is made from thick pink glass with intricate pressed patterns. It features pineapple and floral designs that catch the morning light. You can fill it with green pears for a striking color contrast on your table.
Heavy glass feels high quality and adds a vintage touch to a modern room. The scalloped rim gives the bowl a soft and feminine appearance. You can place it on a white lace doily to protect your wooden surfaces. This piece is an excellent centerpiece for a kitchen island or a dining nook.
Material Required List
- Large clear glass bowl
- Pink glass paint or tint
- Soft sponge
Equipment Required List
- Large plastic tub
- Rubber gloves
- Kitchen oven
DIY Instruction Step By Step
- Wash your glass bowl with soap and water and dry it with a soft cloth.
- Put on your rubber gloves to protect your hands from the glass tint.
- Fill your plastic tub with warm water and add a few drops of pink tint.
- Dip the bowl into the tinted water and hold it there for one minute.
- Lift the bowl out and check if the pink color is as dark as you want.
- Use a soft sponge to wipe away any drips for a smooth and even look.
- Let the bowl dry in a warm spot for at least four hours.
- Place the bowl in a cold oven and set it to 200°F.
- Bake the glass for twenty minutes to set the color permanently.
- Allow the oven to cool before you take the bowl out and fill it with fruit.
25. Be Mine Mini Chalkboard
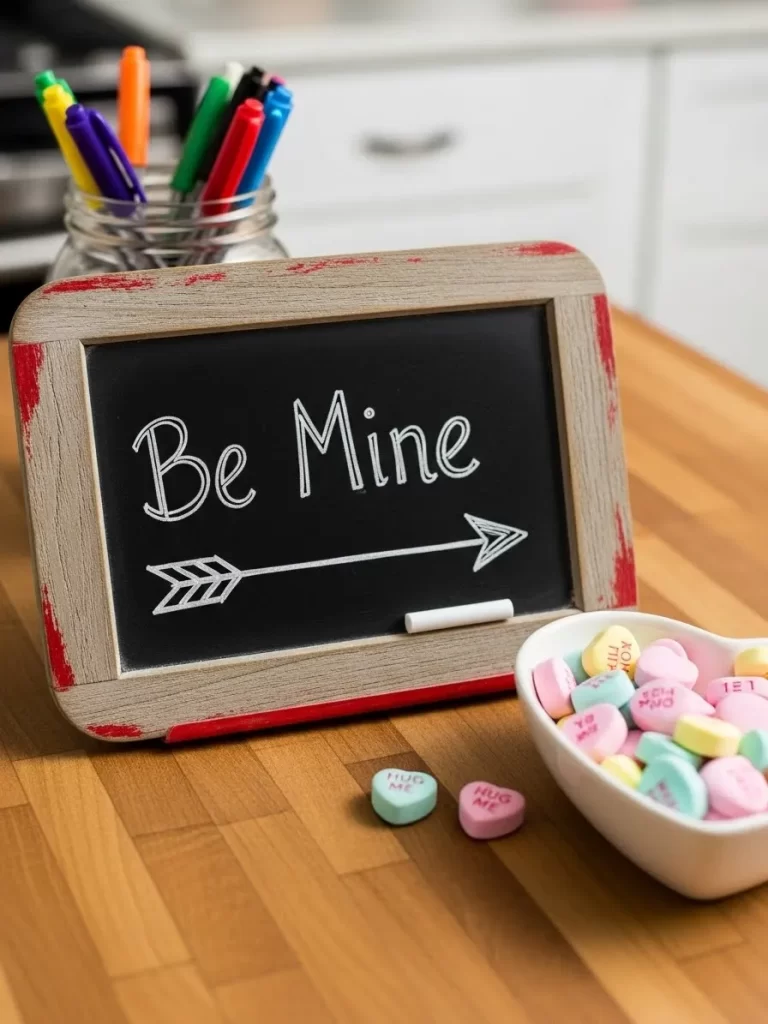
Sharing sweet messages with your family is easy with a small tabletop sign. This chalkboard features a rustic wooden frame with red paint accents on the edges. The words Be Mine are written in white chalk with a heart tipped arrow below them. You can place it next to a bowl of candy hearts for a playful display.
Using a chalkboard allows you to change your messages as often as you like. You can write your grocery list or a funny quote for your guests to see. The small size fits well on a counter or a shelf without taking up much space. It brings a touch of schoolhouse charm to your modern cooking area.
Material Required List
- Small wooden framed chalkboard
- Red acrylic paint
- White chalk or a chalk marker
- White ceramic bowl
- Box of candy hearts
Equipment Required List
- Small paint brush
- Sandpaper
- Damp cloth
DIY Instruction Step By Step
- Sand the edges of your wooden frame to make the surface slightly rough.
- Wipe away the dust with a damp cloth so the paint sticks well.
- Paint the outer edges of the wooden frame with a thin layer of red paint.
- Let the paint dry and then use a dry brush to rub some of it away for a rustic look.
- Use your white chalk to write a sweet message in the center of the board.
- Draw a simple arrow with a heart on the end below your words.
- Fill your small white bowl with colorful candy hearts.
- Place the chalkboard and the bowl of candy on your kitchen counter.
- Set a few markers or pens in a jar nearby to keep your counter organized.
26. Scalloped Edge Placemats
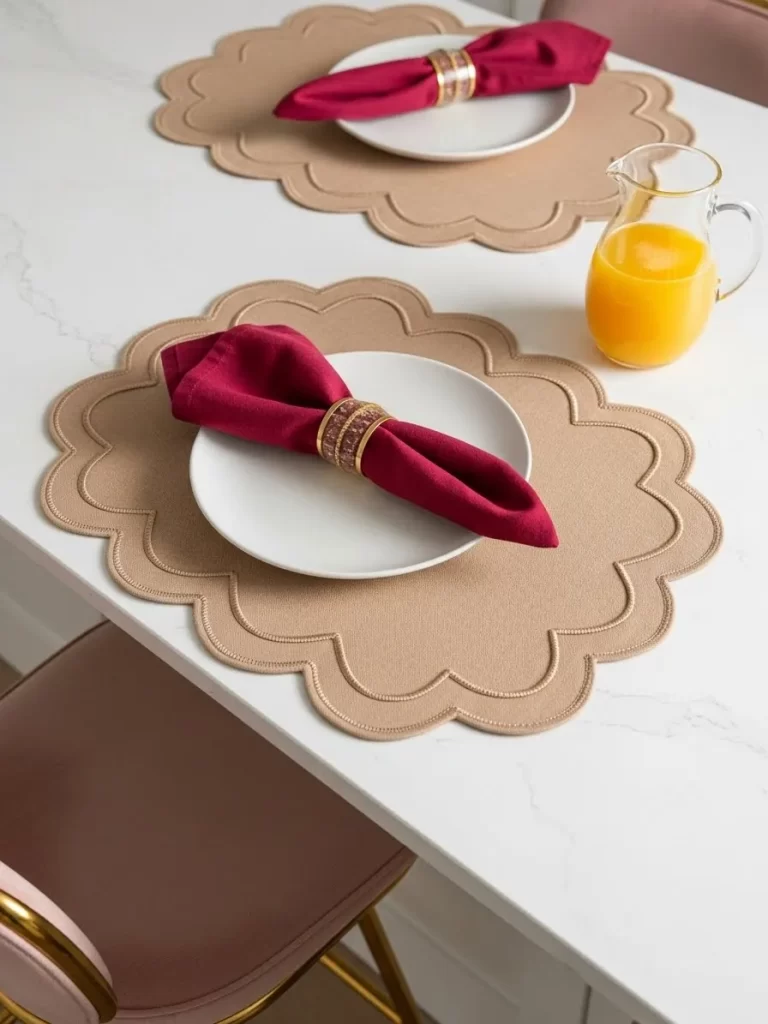
Dressing up your table for a meal makes the food taste even better. These tan placemats feature a large scalloped edge that looks like a cloud or a flower. They provide a soft base for your white plates and deep red napkins. The neutral color allows your colorful food and drinks to be the main focus.
Textured fabrics protect your table from heat and spills while you eat. You can pair them with a gold napkin ring for a touch of extra shine. These mats work well for a casual breakfast or a fancy holiday dinner. They are a smart way to add a layer of design to a plain white table.
Material Required List
- One yard of thick tan felt or canvas
- Matching tan thread
Equipment Required List
- Fabric scissors
- Large round bowl to use as a template
- Pencil
- Sewing machine
DIY Instruction Step By Step
- Lay your fabric flat on a table and place your round bowl on top.
- Trace around the bowl with a pencil to make a circle for your mat.
- Use a smaller cup to trace half circles all around the edge of the large circle.
- Cut out the scalloped shape carefully with your fabric scissors.
- Make sure each curve is smooth and even all the way around the mat.
- Sew a straight line one inch from the edge to keep the fabric from stretching.
- Repeat these steps to make as many placemats as you need for your family.
- Press the mats with a hot iron so they lay perfectly flat on your table.
- Place a white plate and a red napkin on each mat for a finished look.
27. Gold Heart Tea Infuser

Enjoying a warm cup of loose leaf tea is a great way to relax in the kitchen. This infuser features a shiny gold finish and a sweet heart shape. It sits inside a clear glass mug so you can watch the tea leaves expand. A small gold chain with a bell hangs over the side for easy removal.
Metal infusers are easy to clean and can be used hundreds of times. The gold color brings a touch of luxury to your afternoon tea break. You can pair it with a wooden honey dipper and a small bowl of dried rose buds. This tool makes the simple act of brewing tea feel like a special ritual.
Material Required List
- Stainless steel heart shaped tea infuser
- Metallic gold food safe plating or paint
Equipment Required List
- Small bowl
- Soft cloth
- Cleaning alcohol
DIY Instruction Step By Step
- Clean your stainless steel infuser with alcohol to remove any oils.
- Dip the infuser into a bowl of food safe gold plating liquid.
- Follow the directions on the package to ensure the metal is fully covered.
- Let the infuser dry on a clean cloth for at least twelve hours.
- Rinse the infuser with warm water to remove any extra liquid.
- Fill the heart with your favorite loose leaf tea and close it tight.
- Place the infuser in a glass mug and pour hot water over it.
- Let the tea steep for five minutes while you watch the colors change.
- Use the small chain to lift the heart out of the water when your tea is ready.
28. Red Striped Linen Napkins
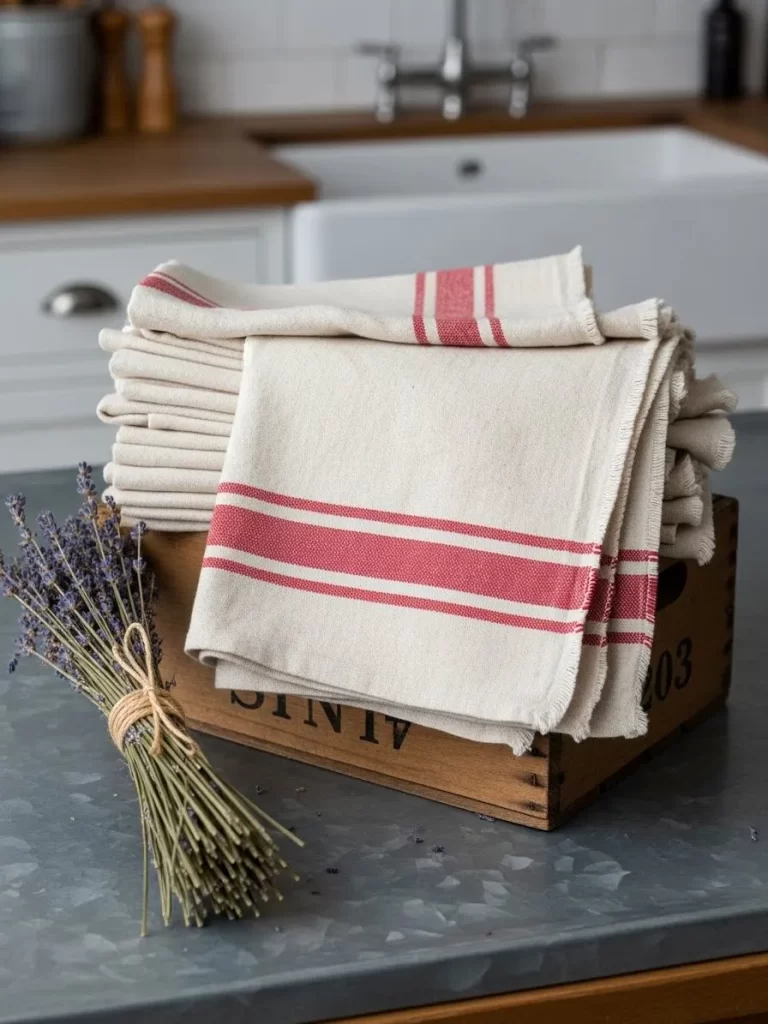
Textiles bring a soft and organic feel to a room filled with hard surfaces. These cream colored napkins feature simple red stripes along the edges. They are folded neatly and stacked inside a rustic wooden crate on the counter. You can pair them with a bunch of dried lavender for a fresh scent.
Using cloth napkins reduces waste and makes your meals feel more important. The linen fabric gets softer every time you wash it in the machine. They add a touch of classic French style to your modern kitchen design. These napkins are a useful accessory that also acts as a piece of decor.
Material Required List
- Two yards of cream linen fabric
- Red fabric paint
- Thin painters tape
Equipment Required List
- Sewing machine
- Iron
- Small sponge brush
- Measuring tape
DIY Instruction Step By Step
- Cut your linen fabric into eighteen inch squares for your napkins.
- Fold the edges over by half an inch and sew them down with a straight stitch.
- Lay a napkin flat and place two lines of painters tape along one edge.
- Leave a small gap between the tape lines for your red stripe.
- Dab the red fabric paint into the gap with your sponge brush.
- Peel off the tape carefully while the paint is still slightly wet.
- Let the paint dry for twenty four hours before you wash the napkin.
- Iron the back of the stripe to set the paint so it stays forever.
- Fold the napkins in half and stack them in a small wooden box or crate.
29. Amber Glass Cleaning Bottles
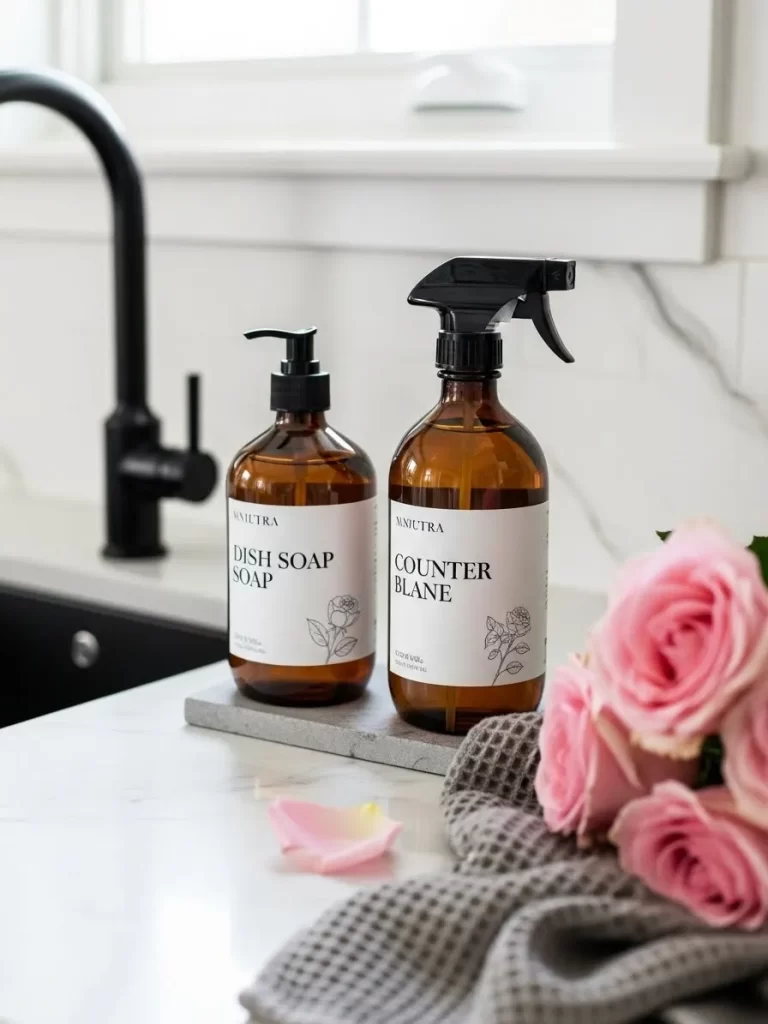
Organizing your cleaning supplies makes chores feel much more manageable. These amber glass bottles feature white labels for your soap and counter spray. Each label has a delicate black drawing of a rose in the corner. They sit on a small stone tray next to a gray waffle weave towel.
Glass bottles are more durable than plastic and look much better on your counter. The amber color protects the natural ingredients in your cleaners from the light. You can refill these many times with your own homemade cleaning solutions. This is a smart way to keep your sink area looking tidy and stylish.
Material Required List
- Two amber glass bottles
- One soap pump top and one spray top
- White adhesive label paper
- Black fine point marker
Equipment Required List
- Measuring tape
- Scissors
- Cleaning cloth
DIY Instruction Step By Step
- Wash your amber bottles with soap and let them dry completely.
- Measure the front of the bottle to see how big your labels should be.
- Cut two rectangles out of your white adhesive paper with your scissors.
- Use your black marker to draw a small rose in the bottom corner of each label.
- Write the words Dish Soap and Counter Spray in the center of the labels.
- Peel the back off the paper and press the labels onto the glass bottles.
- Fill one bottle with dish soap and the other with your favorite surface cleaner.
- Screw the pump and spray tops onto the bottles until they are tight.
- Place the bottles on a stone or marble tray next to your kitchen sink.
30. Trio of Bud Vases
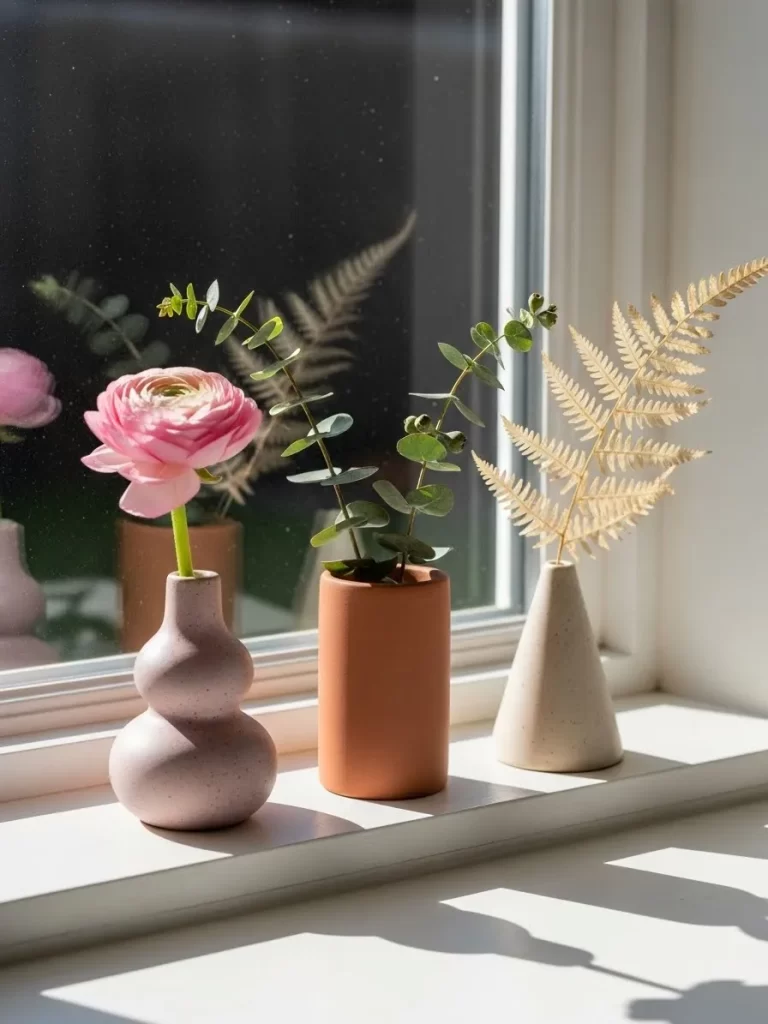
Displaying a single flower is a minimalist way to bring nature indoors. This set of three small vases features different shapes and earthy colors. One is a soft pink double bubble shape and another is a tall terra cotta cylinder. The third vase is a simple cream colored cone with a textured finish.
Small vases fit perfectly on a window sill where they can catch the sunlight. You can place one pink ranunculus and a sprig of eucalyptus in the different bottles. Mixing different heights and textures creates a balanced and interesting look. These items are a simple way to add life to your kitchen without any clutter.
Material Required List
- Three small ceramic or glass bottles
- Acrylic paint in pink, terra cotta, and cream
- Baking soda
Equipment Required List
- Small paint brushes
- Mixing bowl
- Newspaper to protect your table
DIY Instruction Step By Step
- Clean your small bottles to ensure there is no dust or labels left on them.
- Mix your acrylic paint with a teaspoon of baking soda to make it thick and textured.
- Apply a thin coat of the pink paint to the bubble shaped vase.
- Use the terra cotta paint for the tall cylinder bottle.
- Paint the cone shaped vase with the cream colored mixture.
- Let the first coat dry and then add a second layer for full coverage.
- Use a dry brush to add some small dots of a darker color for a stone look.
- Let the vases dry for twenty four hours in a warm room.
- Fill each vase with a little bit of water and a single fresh flower.
- Place the trio on your window sill or a small shelf to brighten the room.
31. Pink Salt and Pepper Mills
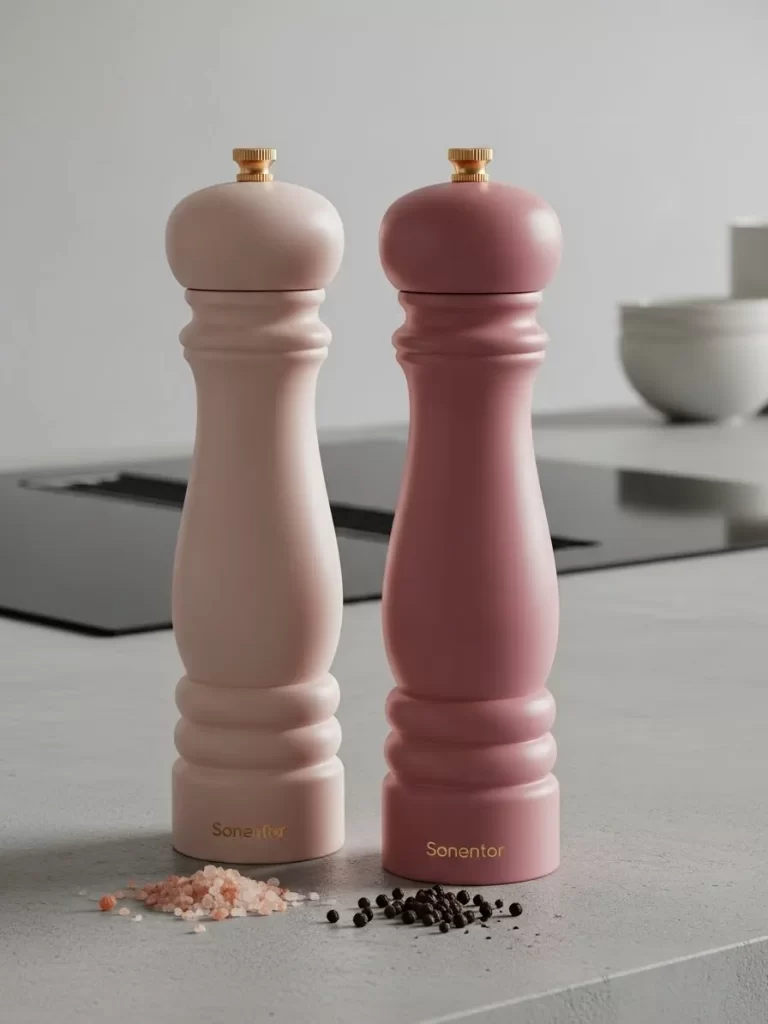
Adding functional decor to your counter makes seasoning your food more fun. This pair of wooden mills features two different shades of pink. One is a very pale blush and the other is a deep rose color. They have brass knobs on the top for adjusting the grind.
The smooth finish of the wood feels soft and high quality. You can set them on a gray stone tray to protect your counters from salt dust. These mills look wonderful next to a bowl of fresh pink salt. They are a great way to bring a feminine touch to a modern cooking space.
Material Required List
- Two wooden pepper mills
- Pink paint in two shades
- Clear wood sealer
- Brass knobs
Equipment Required List
- Sandpaper
- Small paint brushes
- Rubbing alcohol
DIY Instruction Step By Step
- Take the metal parts out of the wooden mills.
- Sand the wood until the old finish is completely gone.
- Wipe the wood with rubbing alcohol to remove any oils.
- Paint one mill with the light blush color and let it dry.
- Use the deep rose paint for the second mill.
- Apply a second coat of paint so the color is solid and even.
- Let the paint dry for four hours in a clean area.
- Apply a thin coat of clear sealer to protect the paint.
- Put the metal parts and the brass knobs back on the mills.
- Fill them with your favorite salt and pepper.
32. Heart Frosted Window Film
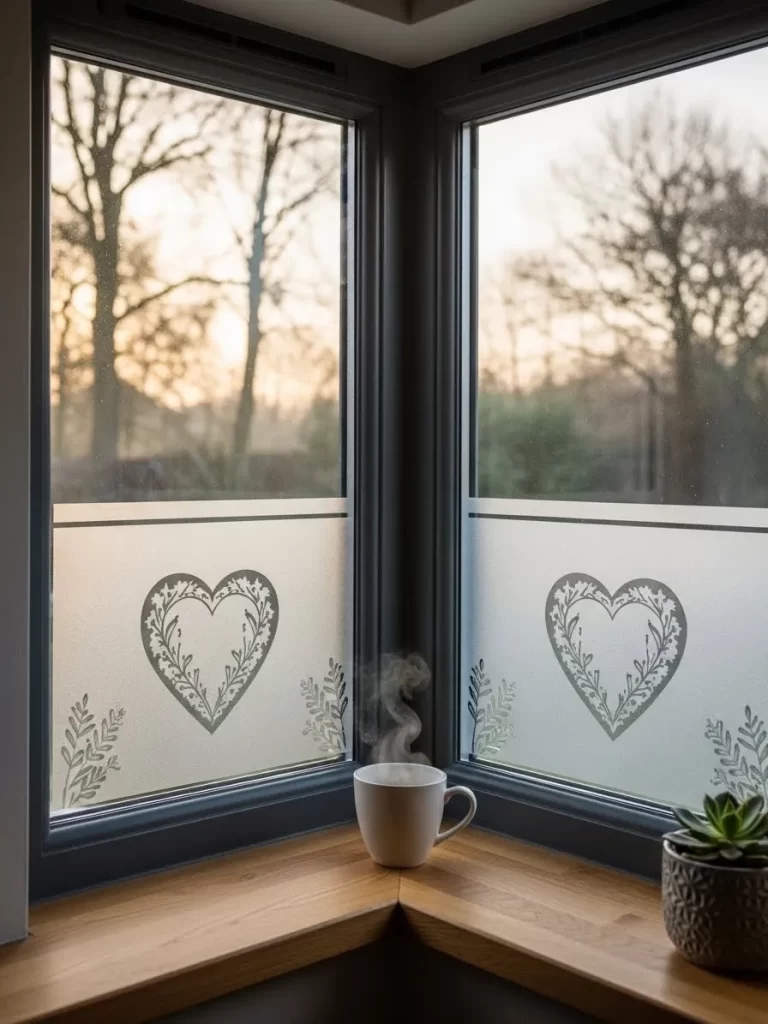
Creating privacy in your kitchen does not mean you have to block all the light. This frosted window film features a large heart made of leaves and vines. It sits in the center of your window pane and looks like etched glass. The design allows the morning sun to glow through softly.
Adding film is a fast way to update your windows without buying new glass. The frosted texture keeps people from seeing in while you cook. You can pair it with a white mug of coffee on the wooden sill. This item is a smart choice for a cozy and private kitchen nook.
Material Required List
- Roll of frosted window film
- Squeegee tool
- Spray bottle with water and soap
Equipment Required List
- Measuring tape
- Craft knife
- Ruler
DIY Instruction Step By Step
- Measure the size of your window pane with your tape.
- Cut a piece of film that is slightly larger than the glass.
- Clean the window with soap and water so it is perfectly clear.
- Spray a lot of soapy water onto the clean glass.
- Peel the backing off the window film.
- Place the film against the wet glass and move it into the center.
- Use a squeegee to push all the water and air bubbles out.
- Work from the center of the heart toward the edges of the film.
- Use a craft knife and a ruler to trim the extra film at the edges.
- Wipe the window dry with a soft cloth.
33. Heart Shaped Cast Iron Cocotte
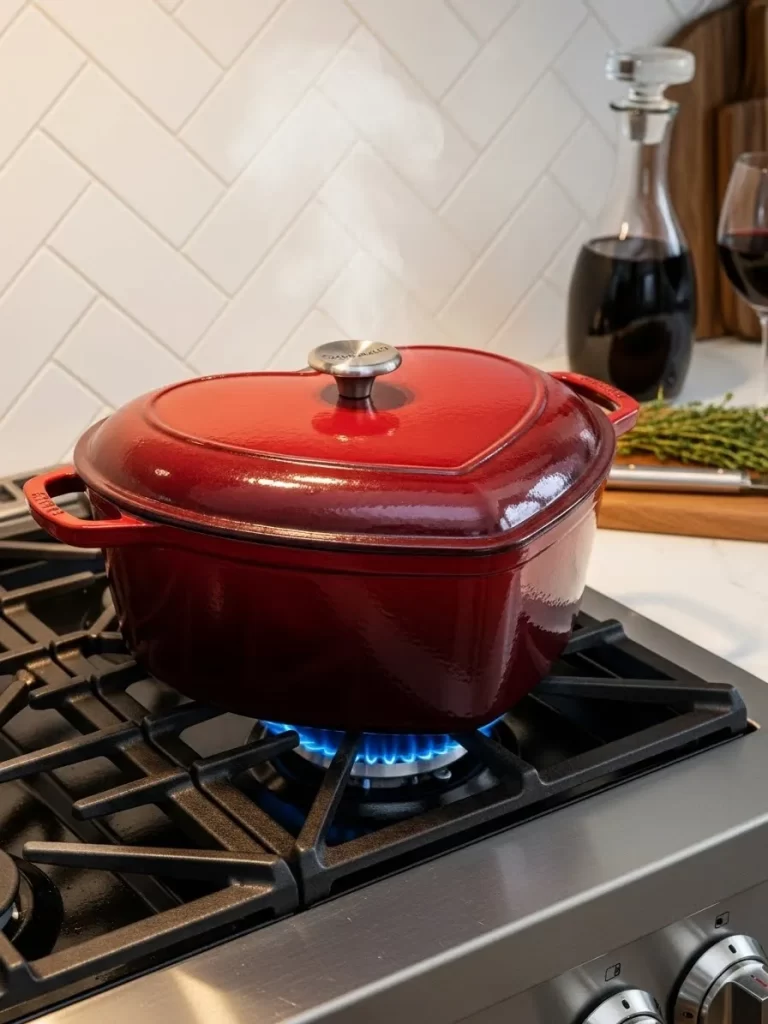
Heavy cookware can stay on your stove as a beautiful piece of decor. This deep red cast iron pot features a classic heart shape and a silver knob. It is perfect for simmering soups or baking fresh bread for your family. The vibrant red color looks stunning against a white tiled backsplash.
Steam rises from the heavy lid as your meal cooks slowly inside. Cast iron holds heat for a long time and keeps your food warm on the table. You can pair it with a bunch of fresh herbs like rosemary or thyme. This pot is a useful item that brings high style to your cooking routine.
Material Required List
- Plain cast iron cocotte
- Red high heat enamel paint
- Silver metallic paint
Equipment Required List
- Sandpaper
- Small sponge brush
- Rubbing alcohol
DIY Instruction Step By Step
- Clean the outside of your pot with rubbing alcohol to remove grease.
- Sand the surface of the pot until it feels slightly rough.
- Wipe away the dust so the paint stays on the metal.
- Apply a thin layer of red high heat paint to the outside of the pot.
- Do not paint the inside or the rim where the lid sits.
- Let the paint dry for two hours before you add a second coat.
- Paint the knob on the lid with the silver metallic paint.
- Let the pot dry for twenty four hours in a dust free area.
- Place the pot in your oven at 300°F for thirty minutes.
- Turn off the oven and let the pot cool down before you use it.
34. Lavender Pitcher Decor

Bringing a fresh scent into your room makes the air feel much cleaner. This white ceramic pitcher features a rustic crackle finish and a blue rim. It holds a large bunch of dried lavender tied with a simple string. You can place it on an open shelf next to your glass jars.
The purple color of the flowers looks excellent against a neutral wall. Lavender is known for helping people relax while they work in the kitchen. You can use a vintage scale nearby to create a farmhouse look. This piece is an easy way to add a natural element to your home.
Material Required List
- White ceramic pitcher
- Large bunch of dried lavender
- Brown twine string
Equipment Required List
- Scissors
- Damp cloth
DIY Instruction Step By Step
- Wipe your pitcher with a damp cloth to remove any dust.
- Check the bottom of the pitcher to make sure it is dry.
- Gather your dried lavender stems into a tight bundle.
- Wrap the twine string around the stems three times.
- Tie a small bow with the string and trim the ends with scissors.
- Place the bunch of lavender into the white pitcher.
- Pull a few stems to the sides so the arrangement looks full.
- Set the pitcher on a wooden shelf or your kitchen counter.
- Avoid putting water in the pitcher since the lavender is dried.
- Dust the flowers occasionally with a soft brush to keep them bright.
35. Fairy Lights in a Glass Jar
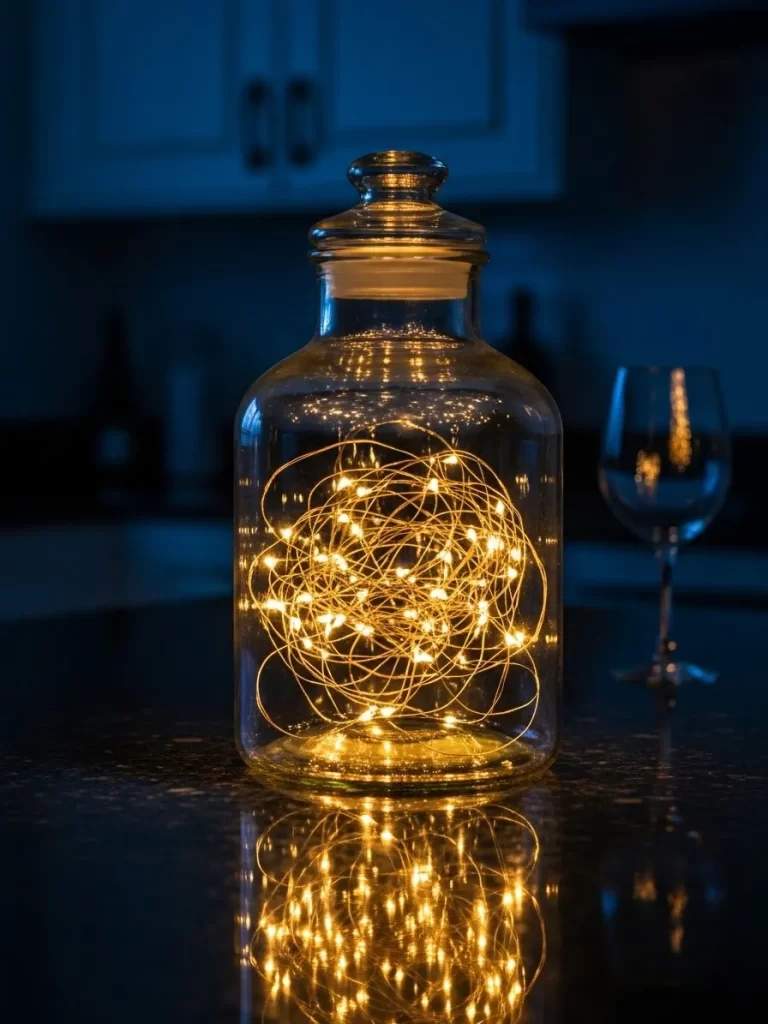
Soft lighting at night makes your kitchen feel like a magical space. This clear glass jar is filled with a string of tiny warm fairy lights. The wire is thin and almost vanishes when the lights are turned on. It sits on a dark counter and reflects the glow onto the surface.
You can use this as a night light so you can see without turning on big lamps. The gold glow brings a touch of warmth to a cold winter evening. You can pair it with a glass of wine for a relaxing end to your day. This item is a simple way to change the atmosphere of your room.
Material Required List
- Large glass jar with a lid
- One string of battery fairy lights
- Glass cleaning spray
Equipment Required List
- Soft cloth
- Batteries for the lights
DIY Instruction Step By Step
- Clean the inside and outside of your glass jar until it shines.
- Put the batteries into the small power box for your fairy lights.
- Turn the lights on to make sure they are working correctly.
- Unroll the wire slowly so you do not make any tangles.
- Push the end of the light string into the bottom of the jar.
- Coil the wire around in circles as you fill the jar to the top.
- Place the battery box at the very top of the lights.
- Put the lid on the jar to hide the battery box and the wires.
- Set the jar on your kitchen counter or a small shelf.
- Turn the lights on in the evening for a soft and warm glow.
Decorating your kitchen for the holiday brings joy to your daily routine. You spend so much time in this room every single day. Making it look beautiful is a gift to yourself and your guests.
Pick a few projects that match your personal style. You do not have to finish all thirty five items at once. Start with a simple towel or a sweet sign to set the mood.
Sharing your love through your home is a wonderful feeling. Your kitchen is now prepared for a season of warmth and celebration. Happy decorating to all our creative home chefs.
Key Takeaways
1 Decorating the kitchen adds a festive spirit to the busiest room in your home. 2 Small textiles and functional tools are great ways to add color without extra clutter. 3 Handmade projects allow you to customize your space on a low budget. 4 Mixing textures like wood and ceramic creates a cozy and professional look.