The holiday season often brings a rush. Noise and bright decorations can start to feel loud. Your home might feel more chaotic than comfortable. Clutter builds up on every surface. It feels hard to truly relax.

You deserve a space that feels restful. A home that is a true sanctuary from the busy world. You can achieve this. It does not take a complete overhaul.
The answer is in small, simple changes. This guide is about swapping out the stressful parts of holiday decor. We will replace them with quiet, simple, and beautiful alternatives. Here are 40 easy ways to create a home that feels calm.
1. Encase Your Glow

Tangled fairy lights in an old jar can look messy. They feel temporary. You can change this quickly. Swap that jar for a glass cloche with a wooden base. This simple change transforms the lights. They become a deliberate, elegant display.
The glass dome contains the light. It creates a soft, warm bubble of light. This feels much calmer than a busy string of lights. It looks like a captured piece of magic. The cloche turns simple lights into a sophisticated accent for a shelf or table.
DIY: Enchanted Light Cloche
Materials You Will Need:
- A glass cloche (a dome) with a wooden base.
- One strand of battery-powered micro fairy lights (warm white works well).
- Batteries for your light strand.
Step-by-Step Instructions:
- Prepare the Lights: Open the battery pack and insert the correct batteries. Turn the lights on to make sure they work.
- Position the Pack: Place the battery pack right in the center of the wooden base. This will be the hidden core of your display.
- Start Coiling: Take the end of the light string. Begin to loosely wrap and drape it over and around the battery pack. The first few wraps should focus on covering the pack.
- Build the Mound: Continue coiling the light string. Do not pull it tight. Create a loose, airy tangle. Bunch it up to create a small mound of lights that looks full.
- Check the Arrangement: Look at your light mound from all sides. Is the battery pack hidden? Are the lights spread out in a pleasing way? Adjust the tangle until you are happy with it.
- Place the Cloche: Hold the glass cloche by its top. Carefully lower it straight down over the light mound. Settle the glass edge securely onto the wooden base.
- Find Its Place: Set your new light on a bookshelf, entryway table, or mantel. The switch is hidden, but you can easily lift the cloche to turn it on or off.
2. Cluster Your Candles

A single candle can feel small. A matching set can look stiff. You can create a warmer glow by grouping different candle types. Mix tall tapers with wide pillars. Add a textured beeswax candle. This variety creates visual interest.
The different heights and shapes draw the eye. The combined flames produce a strong, gentle light. It feels more like a cozy fireplace. Placing them on a simple tray or plate keeps the collection tidy. This small cluster can anchor a coffee table or mantel.
DIY: A Balanced Candle Cluster
Materials You Will Need:
- A fire-proof tray or large ceramic plate.
- An odd number of candles (3 or 5 is a good start).
- A mix of types: 1-2 tall taper candles in holders, 2-3 pillar candles of different heights, and 1-2 votives.
- A lighter or matches.
Step-by-Step Instructions:
- Start with a Base: Place your tray on the table you want to decorate. This base protects your furniture and makes the display easy to move.
- Set Your Anchor: Place your largest candle first, usually a wide pillar. Put it slightly off-center.
- Add Height: Next, place your tallest candle (the taper in its holder). Position it near the pillar candle, but not too close. Think about creating a triangle shape.
- Fill the Gaps: Use your smaller pillar candles and votives to fill in the arrangement. Vary the spacing between them. You want it to look full, but not crowded.
- Check the Levels: Step back and look. Do the heights vary? Does it look balanced from the side you’ll see it most? Nudge the candles until the grouping looks natural.
- Light with Care: When ready, light the candles. Always light the ones in the back or center first, moving your hand outward.
3. Reshape Your Light

A basic round paper lantern is a common sight. It provides soft light. But changing the shape can update the entire feel of a room. A cylindrical or oval lantern adds a touch of modern structure. It’s an unexpected, yet simple, switch.
This change keeps the soft, diffused light you want. It just presents it in a more thoughtful package. The new shape can complement the lines of your furniture or windows. It’s a subtle swap that shows attention to detail.
DIY: Hanging a New Paper Lantern
Materials You Will Need:
- A new paper lantern shade (cylindrical, oval, or a different shape).
- A hanging light cord kit (the kind that loops over a ceiling hook or attaches to a ceiling fixture).
- A light bulb (check the wattage limit for your cord kit and lantern).
- A ceiling hook (if one is not already installed).
Step-by-Step Instructions:
- Safety First: If you are swapping this on an existing light fixture, turn off the power at the breaker box. If using a plug-in cord, unplug it.
- Remove the Old: Gently take down your old round lantern. Most just have a wire frame that expands them. Squeeze the frame to release it from the light cord.
- Prepare the New: Carefully unpack your new lantern. Most come folded. Find the metal expander frame that came with it.
- Expand the Lantern: Gently pull the lantern open into its full shape. Insert the light bulb into the socket on your light cord.
- Insert the Frame: Feed the light cord through the large opening of the lantern. Now, squeeze the metal expander and fit it inside. Most expanders have clips or hooks that will catch onto the light cord and the lantern’s top opening, holding the bulb in the center.
- Secure and Hang: Once the frame is secure and the bulb is centered, hang the light cord on your ceiling hook. If using a fixture, follow the kit’s instructions to attach it. Turn the power back on and enjoy.
4. Reflect the Glow

Candles are lovely, but they can feel scattered on a dark table. You can amplify their light by placing them on a mirrored tray. This simple addition doubles the warmth. It turns a few small flames into a bright, contained centerpiece.
The mirror reflects the light of each candle. This creates a much fuller, more active glow. The tray’s edge provides a clean boundary. A few small sprigs of greenery can be tucked in the gaps. This technique instantly creates a rich, festive mood.
DIY: Mirrored Tray Centerpiece
Materials You Will Need:
- A flat, mirrored tray. A simple picture frame with the glass painted with mirror-effect spray paint can also work.
- A collection of 5-7 small candles. Votives in glass or metallic holders are very effective.
- A few small snips of greenery (like pine, rosemary, or eucalyptus).
- A lighter or matches.
Step-by-Step Instructions:
- Clean the Surface: Wipe your mirrored tray with a clean cloth to remove any dust or fingerprints. A clean surface gives the best reflection.
- Arrange the Candles: Place your candles on the tray. Start with the largest or tallest one in the middle. Arrange the others around it. Don’t line them up; create a loose, natural cluster.
- Add Greenery: Take your small sprigs of greenery. Tuck them in the spaces between the candle holders. Lay them flat on the mirror. Be very careful that no greenery is close to any flame.
- Final Check: Look at the tray from all sides. Is it balanced? Are the candles stable? Make sure no leaves or twigs can catch fire.
- Light and Place: Light the candles. Carefully set the tray in the center of your coffee table or dining table.
5. Mix Your Textures

A plain sofa can feel cold. A sofa with matching pillows can feel boring. You can create a calm, inviting look by swapping flat pillows for ones with varied textures. Bring in a chunky knit, a soft velvet, or a sturdy weave.
This mix of surfaces makes the sofa look and feel coZier. You want to touch them. For the holidays, add one simple, typographic pillow. A “Ho Ho Ho” or “Joy” in a clean font is enough. It states the theme without shouting.
DIY: The Textured Pillow Layer
Materials You Will Need:
- Your existing sofa.
- 1-2 large, neutral pillows as a base (around 22-24 inches).
- 2-3 medium-sized “texture” pillows (18-20 inches). Look for knit, velvet, or faux fur.
- 1 “statement” pillow (a lumbar or a 16-inch pillow) with a simple holiday word or pattern.
Step-by-Step Instructions:
- Start with the Base: Place your two largest, most neutral pillows in the corners of the sofa. These are your anchors.
- Add the Texture: Place one texture pillow in front of each anchor pillow. Let them overlap slightly. This is where you bring in the cozy feel.
- Create the Center: If you have a fifth pillow (your second “texture” pillow), place it in the middle of the sofa. This connects the two sides.
- Place the Statement: Take your one holiday-themed pillow. Place it in front of one of the texture pillows, slightly off-center. It should be the final, fun piece.
- Fluff and Adjust: Step back. Do the colors work together? Is the “statement” pillow easy to see? Adjust the pillows, fluff them up, and “chop” the top (with a light karate chop) to give them a lived-in shape.
6. Mute Your Stockings

Bright red and white stockings are classic. They are also very loud. A wall of bright red can add to holiday stress. You can calm the entire room by swapping them for stockings in muted, earthy colors.
Think of soft grey, warm beige, or deep olive green. These natural tones feel restful. They blend with your everyday decor. The chunky knit texture still says “holiday,” but the color palette says “peace.” Simple ribbon name tags can complete the look.
DIY: Simple Velvet Ribbon Name Tags
Materials You Will Need:
- Plain, unfinished wooden or thick cardstock tags (from a craft store).
- A fine-tip permanent marker (black or gold).
- A spool of thin velvet ribbon in a color that matches your new stockings.
- Scissors.
Step-by-Step Instructions:
- Write the Names: Lay your tags on a flat surface. Use your best, simplest handwriting to write one name on each tag. Let the ink dry completely.
- Cut the Ribbon: For each stocking, cut a piece of velvet ribbon about 12-14 inches long.
- Attach Tag to Stocking: Find the hanging loop on your stocking. Thread one end of your ribbon through the loop on the stocking.
- Add the Tag: Take both ends of the ribbon and thread them through the hole in the name tag. Pull the tag down until it rests against the stocking’s loop.
- Tie a Simple Bow: With the two ends of the ribbon, tie a simple, small bow right above the tag.
- Trim the Ends: Use your scissors to snip the ends of the ribbon at an angle for a clean finish. Hang your stockings.
7. Contain Your Tree Base

A traditional tree skirt can look fussy. It gets rumpled, bunches up, and collects dust. You can get a cleaner, more structured look by swapping the skirt for a tree collar. A woven basket collar adds natural texture.
This simple change makes the tree look finished. It hides the metal stand completely. The collar provides a solid, neat base for the tree. It feels more intentional. A faux fur rug can be placed underneath for softness, but the collar does the real work.
DIY: Sizing and Installing a Tree Collar
Materials You Will Need:
- A tree collar (woven, metal, or fabric).
- Your artificial or real Christmas tree.
- A tape measure.
- The tree stand.
Step-by-Step Instructions:
- Measure Your Stand: Before you buy a collar, assemble your tree stand. Measure its total width (diameter) at its widest point.
- Check the Trunk: Measure the height of the stand, from the floor to the lowest branches of your tree. Your collar must be shorter than this, or the branches will get crunched.
- Shop for Size: Buy a tree collar that is wider than your stand’s diameter and shorter than your branch height.
- Place the Collar: This is the most important step. You must put the tree collar in place before you put the tree in the stand. Most collars are one solid piece. Place the collar on the floor where the tree will go.
- Set the Stand: Place the tree stand inside the tree collar.
- Assemble the Tree: Carefully place your tree trunk into the stand and secure it. This part is easier with two people (one to hold the tree, one to tighten the stand). Your tree is now assembled inside the collar.
8. Add a Touch of Fur

A bare bench or ottoman can look stark. It might be functional, but it isn’t cozy. You can instantly add warmth and luxury by draping a small faux fur throw over it. A grey or white pelt-style throw works well.
This one item adds a layer of soft texture. It invites you to sit down. It breaks up the flat surface of the furniture. During the holidays, this extra bit of “plush” makes the room feel warmer, even if the heat isn’t on.
DIY: How to Style a Faux Fur Throw
Materials You Will Need:
- A small-to-medium faux fur throw or pelt.
- A bench, ottoman, or the corner of a sofa.
Step-by-Step Instructions:
- Shake It Out: Give the faux fur throw a good shake. This fluffs up the fibers.
- Find the Center: Hold the throw by its center, letting the “legs” or corners hang down.
- Drape, Don’t Place: Gently lay the center of the throw onto one side of your bench or ottoman. Don’t spread it out flat like a blanket.
- Let it Spill: Allow one side of the throw to hang casually over the edge. Let the other side pool or bunch up on the seat.
- Adjust the Look: The goal is to look effortless. It should not be perfectly centered or squared. Nudge and “scrunch” the fabric until it looks soft and inviting. It should look like it was just tossed there.
9. Swap Ribbon for Velvet

Basic, shiny ribbon works. But it can look thin and cheap. You can make your gifts and decor feel much more luxurious by swapping that ribbon for wide velvet. The rich texture adds weight and softness.
The deep colors of velvet, like rust, olive, or blue, feel more sophisticated. They are also matte, which creates a calmer feel than shiny ribbon. A simple velvet bow on a wreath, a gift, or an ornament makes the whole item feel more special.
DIY: The Simple Velvet Bow
Materials You Will Need:
- A spool of wide (1.5 – 2 inch) velvet ribbon.
- Sharp scissors.
- (Optional) A thin piece of floral wire.
Step-by-Step Instructions:
- Cut Your Ribbon: Cut a long piece of ribbon. For a simple bow, you will need about 24-30 inches.
- Make Two Loops: Hold the ribbon in your hands. Make a loop on the left side, pinching the base. Make a matching loop on the right side, bringing it to the same center point. It should look like a floppy figure-eight.
- Cross and Tuck: Cross the right loop over the left loop. Now, take the ribbon that is on top and tuck it down and through the center hole (just like the first step of tying your shoes).
- Pull it Tight: Gently pull both loops to tighten the knot in the center. The velvet will grip, so pull slowly and firmly. Adjust the loops to be the same size.
- Finish the Tails: Once the knot is tight and the loops are even, trim the “tails” of the bow. Cut them at a sharp angle or in a “V” shape for a professional finish.
- Attach: Use the tails to tie the bow onto a gift. Or, twist a small piece of floral wire around the center knot to attach it to a tree.
10. Go Fresh and Natural

Artificial garlands are convenient. They also look the same every year. You can bring new life and a wonderful scent to your home by swapping plastic for fresh greenery. A thick, real garland on a table or doorway changes the room.
The natural texture and varied greens of pine, eucalyptus, and cedar feel calm. They connect your home to the outside. It’s a simple, classic decoration that always looks good. It does not need flashing lights.
DIY: A 5-Minute Greenery Centerpiece
Materials You Will Need:
- 3-4 different types of fresh greenery. (Buy a mixed bunch, or get snips of pine, eucalyptus, and cedar).
- A pair of garden shears or strong scissors.
- (Optional) A few pinecones or 1-2 pillar candles.
Step-by-Step Instructions:
- Find Your Spot: Clear a long, narrow space in the center of your dining table or down your mantel.
- Lay the Base: Take your longest, bushiest branches (like pine or cedar). Lay them down end-to-end to create the main length of your centerpiece.
- Add Your “Filler”: Take your next type of greenery (like eucalyptus). Cut it into smaller 8-10 inch pieces. Tuck these pieces into the base. Point them outwards and upwards to create fullness.
- Add Texture: Use your third greenery type (something leafy or a different color) to fill any last gaps.
- The Final Touch: If you have pinecones, place 3 or 5 of them down the center. If using candles, clear a safe, stable spot in the greenery and place your pillar candles.
- Clean Up: Sweep up any fallen needles. The greenery will last for a week or two, and you can mist it with water to keep it fresh.
11. Lighten Your Wreath

A thick, traditional pine wreath is a classic. It can also feel heavy and dark on a door. You can get a much lighter, more modern feel by swapping it for a hoop wreath. This design uses a simple metal ring as a base.
The greenery is often placed on just one side. This asymmetrical look feels airy and elegant. It leaves empty space, which helps the mind feel calm. A simple velvet ribbon for hanging is the only accent you need.
DIY: Modern Hoop Wreath
Materials You Will Need:
- A 12- or 14-inch metal hoop (craft store).
- Floral wire.
- Wire cutters.
- 2-3 types of fresh greenery (like pine, eucalyptus, and olive branches).
- A 3-foot piece of velvet ribbon.
- Shears for cutting greenery.
Step-by-Step Instructions:
- Prepare Greenery: Cut your greenery into smaller, 6-8 inch pieces. This makes them easier to attach.
- Create a Bundle: Take one piece of each greenery type (e.g., one pine, one eucalyptus). Lay them on top of each other to create a small, mixed bundle.
- Attach First Bundle: Place your first bundle onto the metal hoop, with the stems pointing to the left. Take a 6-inch piece of floral wire and wrap it tightly around both the stems and the hoop.
- Add Second Bundle: Create another mixed bundle. Place it just below the first one, overlapping the stems. The new bundle’s leaves should hide the wire from the first one. Wire this new bundle securely to the hoop.
- Continue Down: Keep making bundles and wiring them. Follow the curve of the hoop. You can cover half the hoop, or two-thirds. Stop when you are happy with the look.
- Add Ribbon: Take your velvet ribbon. Loop it around the top of the hoop, directly opposite your greenery. Tie a simple knot at the top to create a hanging loop.
12. Swap a Tree for Branches

A full-sized Christmas tree can overwhelm a room. It demands a lot of space and energy. For a calmer, minimalist feel, swap the big tree for a few bare branches. This is a common look in Scandinavian design.
Place tall, structural branches in a large, simple vase. The beauty is in the shapes and the empty space. You can hang just a few, special ornaments. This simple arrangement creates a quiet, sculptural moment in your room.
DIY: Minimalist Ornament Branch
Materials You Will Need:
- A tall, heavy vase (so it won’t tip over).
- 3-5 tall branches (you can find these in your yard or at a craft store).
- A small box of lightweight ornaments (like paper stars or small wooden figures).
- (Optional) Pruning shears.
Step-by-Step Instructions:
- Prepare the Vase: Make sure your vase is clean. If your branches are fresh, add a little water. If they are dry, you can add small stones to the bottom for extra stability.
- Trim Your Branches: Look at your branches. Are there any small, messy twigs? Trim them off with your shears. You want clean, strong lines.
- Arrange the Branches: Place the branches in the vase, one at a time. Put the tallest one in the center. Arrange the others around it. Turn the vase as you work. Look for a balanced, airy shape.
- Hang Ornaments: Hang 5-7 lightweight ornaments. Do not put one on every branch. Place them carefully. The goal is to draw attention to the branches, not cover them.
- Find a Spot: Place your vase on a dining table, an entryway console, or on the floor in a corner.
13. Grow Your Decor

A bright red poinsettia is a holiday staple. It is also very common. For a change, try a living bulb. An amaryllis or paperwhite bulb, potted in simple terracotta, is an elegant swap.
The process itself is a calm activity. You pot the bulb and wait. Watching the thick green stalk grow taller each day feels rewarding. The final bloom, especially a white one, is simple and beautiful. It is a living decoration that changes through the season.
DIY: Potting an Amaryllis Bulb
Materials You Will Need:
- One amaryllis bulb (from a nursery or garden center).
- A pot that is 1-2 inches wider than your bulb. It must have a drainage hole.
- A saucer to go under the pot.
- Good quality potting soil.
- Water.
Step-by-Step Instructions:
- Add Soil: Fill the pot about halfway with potting soil. Do not pack it down.
- Place the Bulb: Hold the amaryllis bulb at the top of the soil, in the center. The pointed end should face up. The roots should hang down into the pot.
- Fill Around Bulb: Add more soil. Fill the pot, packing the soil gently around the bulb.
- Leave the Top Out: This is the key. You must leave the top one-third of the bulb (the “shoulders”) sticking out of the soil. Do not bury the whole bulb.
- Water Well: Water the soil thoroughly until water comes out the drainage hole. Let it drain completely.
- Find a Spot: Place the pot in a warm, bright room. Do not water it again until you see the first green shoot appear. Then, water it whenever the top inch of soil feels dry.
14. String Up Some Scent

Plastic tinsel and shiny bead garlands can look harsh. They add clutter, not warmth. You can create a classic, fragrant garland using simple kitchen items. Dried citrus is the main ingredient.
When you dry thin slices of oranges or grapefruit, they look like stained glass. String them on twine. Add wooden beads, cinnamon sticks, and dried bay leaves. This simple strand looks beautiful in a window or on a mantel. It also smells wonderful.
DIY: Dried Orange and Spice Garland
Materials You Will Need:
- 2-3 large oranges.
- A baking sheet and parchment paper.
- An oven.
- A skewer or small nail.
- Twine or strong thread.
- A large-eye needle.
- Optional: Wooden beads, cinnamon sticks, bay leaves.
Step-by-Step Instructions:
- Preheat Oven: Set your oven to its lowest possible temperature (around 170-200°F or 80-90°C).
- Slice Oranges: Cut your oranges into thin, 1/4-inch slices. Thicker slices will take too long to dry.
- Blot Dry: Lay the slices on a paper towel. Blot them to remove as much extra juice as you can.
- Bake: Line a baking sheet with parchment paper. Place the slices in a single layer. Bake for 3-6 hours. You must flip them every hour. They are done when they are dry and not sticky.
- Cool and Poke: Let the slices cool completely. Use a skewer or nail to poke two holes near the top of each slice.
- String Your Garland: Thread your needle with twine. Start stringing your garland. You can create a pattern: bead, orange slice, bead, cinnamon stick, bead, bay leaf, bead, orange slice.
- Loop the Ends: When your garland is the length you want, cut the twine. Leave a few extra inches on each end and tie a small loop for easy hanging.
15. Gather Your Textures

A coffee table can collect small, random items. This looks cluttered. You can create a strong, calm centerpiece by gathering natural items into one bowl. A simple white or wooden bowl works well.
This is a great swap for small, fussy figurines. Fill the bowl with things you find on a walk. Add pinecones, whole walnuts, or interesting seed pods. The different textures and earthy colors feel calm. A few acorns painted gold can add a quiet sparkle.
DIY: Natural Texture Bowl
Materials You Will Need:
- A medium-sized, wide bowl (wood, ceramic, or metal).
- A variety of natural, dry items. This is your “filler.” (Examples: small pinecones, acorns, whole walnuts, dried lotus pods, star anise).
- (Optional) Gold craft paint and a small brush.
Step-by-Step Instructions:
- Prepare Your Items: Make sure all your natural items are clean and dry. You do not want to bring any bugs or dampness inside.
- (Optional) Add Gold: Take 4-5 of your acorns or walnuts. Use your brush to paint just the cap of the acorn, or one side of the walnut. Let them dry completely.
- Start with Filler: Pour your smallest items, like acorns, into the bottom of the bowl. This creates a base.
- Add Large Items: Place your largest items next. This could be 2-3 large pinecones or the dried lotus pods. Settle them into the filler.
- Place Medium Items: Use your medium-sized items, like walnuts, to fill the gaps.
- Add Gold Accents: Finally, place your few gold-painted items on top where they can be seen.
- Adjust: Look at the bowl. Is it full? Does it look balanced? Nudge items around until it looks full and textured. Place it on your table.
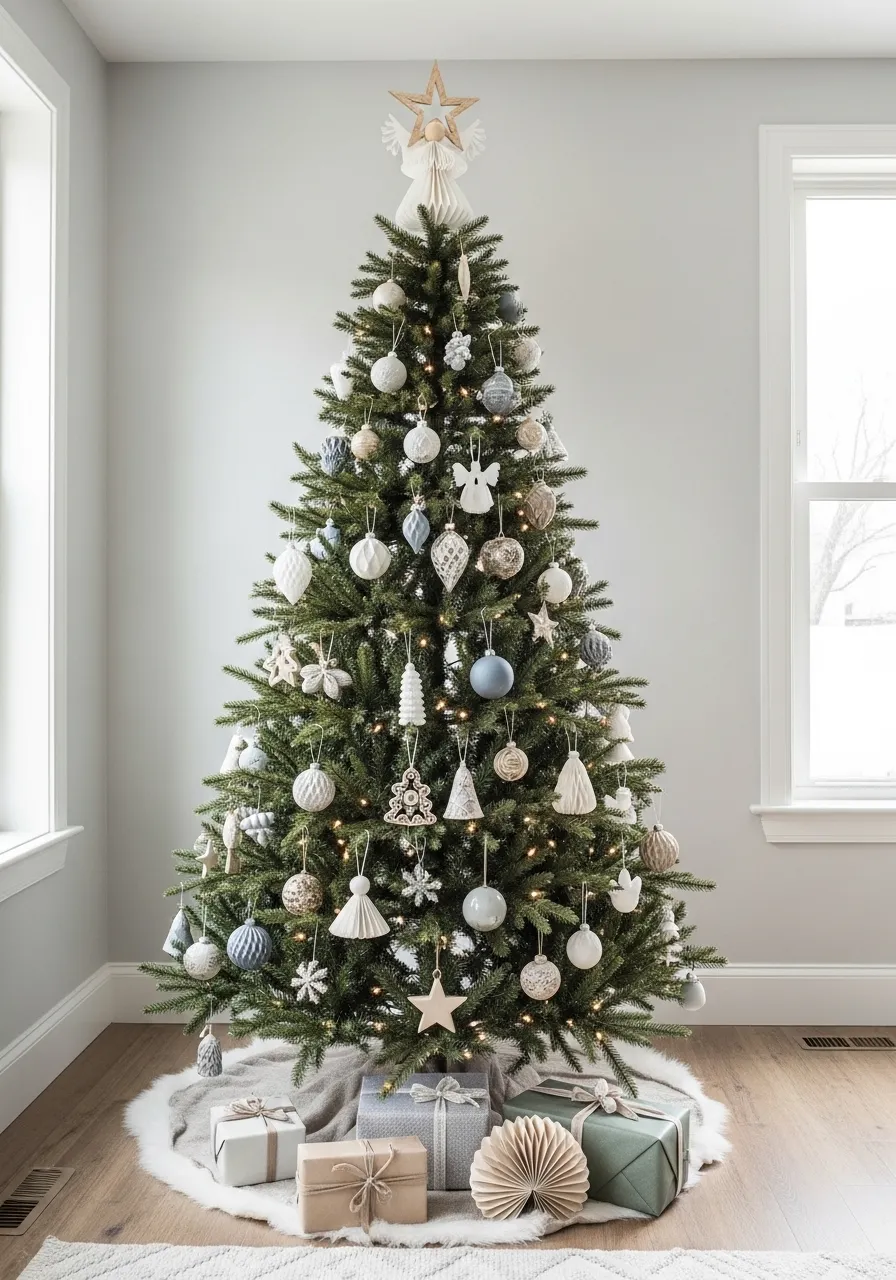
16. Limit Your Tree Palette

A tree with ornaments from every year holds many memories. It can also look chaotic. The mix of colors, shapes, and styles can overwhelm the eye. To create a truly calm tree, be strict with your color.
Choose only two or three colors. This tree uses soft blue, white, and a touch of natural wood. Because the color is limited, you can use many different shapes. The calm palette unifies the whole tree. It looks restful, clean, and intentional.
DIY: Sticking to a Tree Palette
Materials You Will Need:
- Your Christmas tree.
- All of your ornaments.
- 3-4 empty storage bins or boxes.
Step-by-Step Instructions:
- Choose Your Palette: Look at your room. What colors would feel calm? Pick 2-3. (Examples: “Blue, White, Silver” or “Green, Gold, Wood”).
- Pull All Ornaments: Take out all your ornament boxes. Spread them out so you can see what you have.
- Sort by Color: This is the most important step. Label your empty bins. Go through every ornament and sort them into the bins by color.
- Select Your Palette: Now, pull only the bins that match your chosen palette. Put the other bins (like “Red,” “Purple,” “Bright Pink”) away for this year.
- Decorate the Tree: Start with your lights. Then add your largest ornaments from your chosen palette. Spread them out.
- Fill with Medium and Small: Use your medium and small ornaments to fill in the gaps. Because every ornament fits your color rule, you cannot make a mistake. The tree will look cohesive.
17. Rethink Your Garland

A simple wood bead garland is a great natural decoration. But just wrapping it around the tree can look a bit plain. You can get more use from this simple item.
Instead of hiding it in the tree, make it a feature. A long strand looks beautiful draped across a mantel. A shorter strand can be coiled in a wooden bowl. You can also add a simple jute tassel to one end. This turns it into a new object. Hang it from a doorknob or on a hook.
DIY: Simple Jute Tassel
Materials You Will Need:
- A roll of jute twine.
- A 4-inch piece of stiff cardboard.
- Scissors.
- Your wood bead garland.
Step-by-Step Instructions:
- Wrap Your Jute: Take the end of the jute twine. Hold it against the cardboard. Wrap the twine around the 4-inch cardboard 15-20 times. The more you wrap, the fatter your tassel.
- Cut the Jute: Cut the twine from the roll.
- Tie the Top: Cut a new, 8-inch piece of twine. Slide it under all the loops at the top of the cardboard. Tie a single, tight knot. Do not cut the long ends of this piece.
- Cut the Bottom: Take your scissors. Slide them under all the loops at the bottom of the cardboard. Cut all the loops open.
- Tie the “Neck”: Cut another 8-inch piece of twine. Hold your tassel and smooth all the cut strands down. About one inch from the top loop, wrap this new piece of twine tightly around all the strands. Tie a secure knot.
- Attach to Garland: Use the long ends from Step 3 to tie your new tassel securely to the last bead on your garland.
- Trim: Hold your tassel by its neck. Use your scissors to trim the bottom ends so they are all one even length.
18. Soften Your Tree Base

A rigid tree collar gives a clean, structured look. But it can be bulky and hard to store. You can get a similar “basket” look with a softer, more relaxed item.
Swap that stiff collar for a woven belly basket. These baskets are flexible and have a wide base. The top half can be folded down. This creates a stable, round shape that works just like a collar. It hides the stand, but feels more modern. It is also much easier to fold and store.
DIY: Using a Belly Basket for a Tree
Materials You Will Need:
- A large, woven belly basket. (Choose one with a base wider than your tree stand).
- Your tree stand.
- Your artificial tree.
- A tape measure.
Step-by-Step Instructions:
- Measure Your Stand: Assemble your tree stand. Measure its diameter (the widest part).
- Check Your Basket: Measure the diameter of your basket’s base. It must be wider than your stand.
- Place the Stand: This is the most important step. Put the empty belly basket on the floor where your tree will go.
- Set Stand Inside: Place your tree stand in the center of the basket.
- Fold the Basket: Push the top half of the belly basket down and in. This creates the folded, “collar” shape. Press it down all the way around the tree stand.
- Assemble Tree: Carefully put your artificial tree into the stand, inside the basket. Secure the tree. The basket will now form a soft, round base.
19. Simplify Your Nativity

A traditional nativity set is often detailed and colorful. It can be a large, complex scene. For a much calmer, more modern feel, swap it for a stylized, minimalist set.
These sets use simple forms. The figures are often faceless, made of smooth wood or plain ceramic. The shapes suggest the people instead of showing every detail. This quiet, modern design feels less like a toy and more like a piece of art. It invites calm reflection.
DIY: Styling a Minimalist Nativity
Materials You Will Need:
- Your minimalist nativity set.
- A long, narrow table runner (in a natural fiber like linen or cotton).
- (Optional) 1-2 small, simple candle holders. A beeswax pillar candle is a good choice.
Step-by-Step Instructions:
- Create a Stage: Lay your table runner on the surface. This defines the “scene” and separates it from the wooden cabinet or table.
- Place the Center: Start with the central figures: the manger, Mary, and Joseph. Place them in the middle of the runner. Leave space between them.
- Add Background: Place your largest piece, like the angel, behind the central figures. This creates depth.
- Add Outer Figures: Place the other figures (shepherds, animals) on the sides. Point them towards the center, but leave space. The empty space is part of the calm look.
- Add Light: If you use a candle, place it off to one side, outside the group of figures. This balances the scene and adds a warm, low light. It should not be in the middle.
- Step Back: Look at the arrangement. Is it crowded? Try removing one or two figures. The goal is simplicity.
20. Use Light, Not Glitter

Glitter ornaments are bright. But they can look heavy and block the light. You can create a tree that truly glows by swapping some opaque bulbs for clear glass.
Look for ornaments that use the light. Elegant, clear glass icicles are a classic. Fluted glass balls catch the light from every angle. Simple clear orbs act like tiny lenses. These ornaments do not just hang; they sparkle. They refract the light from your tree’s strands, making the whole tree feel more alive.
DIY: Hanging Ornaments for Light
Materials You Will Need:
- Your tree, with its lights on.
- A mix of clear glass ornaments (icicles, fluted balls, plain balls).
- Standard ornament hooks.
Step-by-Step Instructions:
- Turn Lights On: You must do this with the tree lights on. You cannot see where the light is otherwise.
- Find the “Hotspots”: Look at your tree. Find the individual light bulbs on the strings.
- Hang Icicles: Take a glass icicle. Hang it on a sturdy branch directly below or next to a single light bulb. The light will shine down the icicle.
- Hang Fluted Balls: Take a fluted glass ball. Hang it in front of a light. The ridges on the glass will catch the light and scatter it.
- Hang Clear Orbs: Take a plain clear glass ball. Hang it in front of a light. It will magnify the light and create a bright spot.
- Space Them Out: Do not put all your glass ornaments in one place. Spread them all over the tree, near the lights. This will create a balanced, magical glow from within.
21. Focus on an Activity

A chocolate advent calendar is a daily sugar rush. It can add to the feeling of excess. You can create a calmer daily ritual by swapping the candy for an activity. A “kindness jar” is a simple, shared experience.
Each day, a new card suggests a small, simple act. “Read a holiday book,” “Walk to see the lights,” or “Donate to a food bank.” This changes the focus. It moves from getting to doing. It builds connection, not clutter.
DIY: The Kindness Prompt Jar
Materials You Will Need:
- A large, clean jar (a mason jar or any glass jar works).
- A piece of paper and tape (for the label).
- A pen.
- A stack of small cards or slips of paper (at least 24).
- A small bowl.
Step-by-Step Instructions:
- Label Your Jar: Write “Kindness Prompts” or “Our Holiday Activities” on your paper. Tape it to the front of your jar.
- Brainstorm Your List: Sit down with your family or by yourself. On a separate piece of paper, write down 24 simple, kind, or calm activities. (Examples: “Make hot chocolate for everyone,” “Write a nice note for a neighbor,” “Watch a holiday movie,” “Call a relative just to chat”).
- Write on Cards: Take your small cards or slips of paper. Write one activity on each.
- Fill the Jar: Fold each card once and put it into your jar.
- Set Up the Ritual: Place your jar on a main table. Beside it, place the small, empty bowl.
- Start the Tradition: Starting on December 1st, have someone pull one card from the jar each morning. Read the activity aloud. At the end of the day, place the completed card into the empty bowl.
22. Hang Your Cards

Holiday cards pile up. They clutter counters and the mantel. Taping them to a door frame looks messy and can peel paint. You can create a clean, organized display with a single ribbon.
This method turns your cards into a vertical, flowing decoration. A long, beautiful piece of velvet ribbon hangs from the wall. Simple clothespins attach the cards. It is an orderly, intentional way to show your cards. It keeps surfaces clear.
DIY: Vertical Card Display Ribbon
Materials You Will Need:
- A spool of wide, sturdy ribbon (velvet or grosgrain works well). Choose a long piece, about 5-6 feet.
- A small, removable wall hook (like a 3M Command hook).
- A small bow (optional).
- A small bag of mini-clothespins (from a craft store).
- Scissors.
Step-by-Step Instructions:
- Place Your Hook: Decide where you want your cards to hang. A narrow wall by a door or a fireplace is a good spot. Follow the instructions on the package to attach your removable hook.
- Hang Your Ribbon: Cut the top of your ribbon. Tie it in a knot to create a loop. Hang this loop on your hook. Let the ribbon fall straight down.
- Add a Bow (Optional): You can tie a small bow and use its wire to attach it to the hook, hiding the knot.
- Trim the Bottom: Let the ribbon hang. Cut the bottom at a clean angle. It should be a few inches above the floor.
- Clip Your Cards: As your holiday cards arrive, use the mini-clothespins to clip them to the ribbon. Start from the top and work your way down. Leave a little space between each card.
23. Tell a Story

A tree full of matching, color-coordinated balls looks clean. It can also feel a bit cold. It lacks history. You can make your tree feel much warmer by swapping some generic bulbs for dated ornaments.
These ornaments tell your family’s story. They mark a birth, a first home, or a special year. They are not a random collection. They are a timeline. A tree with these memories feels much more personal. It sparks conversation.
DIY: Simple “Year” Ornament
Materials You Will Need:
- A clear glass or plain white ceramic ball ornament.
- A metallic permanent marker (gold or silver) or vinyl number stickers.
- A piece of thin ribbon.
Step-by-Step Instructions:
- Clean the Ornament: Wipe the ornament with a clean, dry cloth to remove any dust or fingerprints.
- Decide on the Year: Choose the year you want to commemorate. This year, “2024,” or a past year that is special.
- Write the Year: If using a marker, take a deep breath. Place the ornament in your lap on a towel to keep it steady. Use your best, simplest handwriting to write the four numbers on the front.
- Use Stickers (Easier): If you are not confident in your handwriting, use vinyl number stickers. Peel and stick the four numbers. Make sure they are straight.
- Add a New Ribbon: Remove the wire hook. Take your thin ribbon and thread it through the ornament loop. Tie a simple knot to create a new, soft hanger.
- Let it Dry: If you used a marker, let the ornament sit for at least an hour before you hang it on the tree.
24. Simmer Your Scent

Artificial holiday sprays can be overwhelming. They smell strong and chemical. They can trigger headaches. You can create a much softer, more natural scent by simmering spices on your stove.
A small pot of water with orange peels, cranberries, and cinnamon sticks fills your home with a gentle, warm aroma. It smells real. The steam also adds a little humidity to the dry winter air. This is a classic, simple way to make your home feel welcoming.
DIY: Stovetop Holiday Potpourri
Materials You Will Need:
- A small saucepan.
- Water.
- 1 orange (or just the peels).
- A handful of fresh cranberries.
- 2-3 cinnamon sticks.
- 1-2 pieces of star anise (optional).
- A few whole cloves (optional).
- 1 small sprig of fresh rosemary or pine (optional).
Step-by-Step Instructions:
- Prepare Your Pot: Fill your saucepan about three-quarters full of water.
- Slice Your Fruit: Cut the orange into slices or half-moon shapes. Add them to the water.
- Add Your Ingredients: Add the handful of cranberries, the cinnamon sticks, and any of your optional spices (cloves, star anise). Add the rosemary sprig.
- Bring to a Simmer: Place the pot on a back burner of your stove. Turn the heat on high until it starts to boil.
- Turn to Low: As soon as it boils, turn the heat down to the lowest possible setting. You want a very gentle, slow simmer. Do not let it boil hard.
- Watch the Water: Let it simmer. Your house will start to smell wonderful. The only rule is to never leave it unattended. Check it every 30-45 minutes. Add more water as it evaporates. You can run this all afternoon.
25. Diffuse Your Scent

A holiday candle is nice, but the scent can be heavy. It is also a fire risk. You can get a cleaner, lighter scent by swapping the candle for an essential oil diffuser.
A diffuser uses water vapor to spread a very fine, controlled mist. You add just a few drops of oil. You can choose a simple scent, like pine or frankincense. The scent is lighter than a candle. Many diffusers also have a soft light and a quiet sound, adding to the calm.
DIY: Using a Holiday Diffuser Blend
Materials You Will Need:
- An ultrasonic essential oil diffuser.
- Water (filtered or tap, check your diffuser’s manual).
- Essential oils. (For a holiday scent, get: Pine or Fir, Orange, and Cinnamon or Clove).
Step-by-Step Instructions:
- Place Your Diffuser: Set your diffuser on a flat, stable surface where it will not be knocked over. Keep it away from wood that could be damaged by moisture.
- Add Water: Remove the top of your diffuser. Use a small cup to pour water into the reservoir. Do not fill past the “Max Fill” line.
- Add Your Oils: Create your holiday blend. Add the drops directly to the water. A good starting blend is: 3 drops of Pine, 2 drops of Orange, and 1 drop of Cinnamon.
- Replace the Top: Put the lid back on the diffuser securely.
- Turn it On: Plug in the diffuser. Choose your setting. Many have an “intermittent” setting that will make the oils last longer.
- Clean Regularly: Be sure to rinse out your diffuser every few days. This prevents oils from mixing and keeps it working well.
26. Melt Your Scent

A strong, scented candle can dominate a room. Sometimes you just want a little bit of fragrance. You can get more control by swapping a big candle for a wax melt warmer.
This small device uses a low-heat bulb or a tealight to gently melt a cube of scented wax. The scent is strong, but you control it. When you want the scent, you add a cube. When you are done, you turn it off. It is a simple, contained way to add fragrance.
DIY: Using a Wax Melt Warmer
Materials You Will Need:
- A wax melt warmer (electric or tealight).
- A pack of scented wax melts or “tarts.”
- If your warmer is not electric, a small, unscented tealight.
Step-by-Step Instructions:
- Set Up Your Warmer: Place your warmer on a flat, heat-resistant surface. If it is electric, plug it in.
- Add a Wax Cube: Take one or two cubes of wax from the package. Place them in the small dish or bowl at the top of the warmer. Do not add water.
- Turn it On: If electric, flip the switch. The light bulb inside will turn on and begin to heat the dish. If it is a tealight warmer, light the tealight and place it in the opening at the bottom.
- Let it Melt: After a few minutes, the wax will melt into a liquid pool. This will release the fragrance into the room.
- Turn it Off: When you are finished, turn off the warmer or blow out the tealight. The wax in the dish will cool and get hard again. You can reuse it.
- To Change Wax: When the wax loses its scent, turn the warmer on for 2-3 minutes. The wax will loosen. You can then pop the solid puck of wax out and put in a new cube.
27. Clear the Air

Holiday scents are often sweet. They are full of vanilla, cinnamon, and sugar. This can feel heavy. You can create a very different, calming mood by swapping sweet smells for earthy, resinous ones.
Incense, palo santo, or frankincense resin have been used for centuries. These scents are smoky, woody, and complex. They smell like a real forest or an old church. Lighting a stick of incense or a bit of resin is a calming ritual. It clears the air and resets the mood.
DIY: How to Burn Palo Santo
Materials You Will Need:
- One stick of Palo Santo wood.
- A lighter or matches.
- A fire-proof dish (ceramic, stone, or a shell).
Step-by-Step Instructions:
- Hold at an Angle: Hold your stick of Palo Santo wood in your hand.
- Light the End: Use your lighter or match to light the very end of the stick. Hold the flame to the wood for about 20-30 seconds, until it catches.
- Let it Burn: Allow the wood to have a real, active flame for about 30 seconds to a minute.
- Blow it Out: Gently blow out the flame. The end of the stick will now be glowing, and a plume of white, fragrant smoke will rise from it.
- Place in Dish: Place the smoking stick in your fire-proof dish.
- Enjoy the Scent: The smoke will only last for a minute or two before it goes out. This is normal. It is not meant to burn like an incense stick. It just gives a quick, powerful burst of scent. You can re-light it as needed.
28. Basket Your Gifts

A pile of gifts under the tree can look messy. The different paper, ribbons, and bags create a lot of visual chaos. You can calm this area by containing the gifts in a large basket.
This swap is simple. Get a large, sturdy, woven basket. Place it under the tree. As you wrap gifts, put them in the basket instead of on the floor. This keeps them tidy. The natural texture of the basket adds warmth. A simple velvet bow on the handle is a nice final touch.
DIY: Creating a Gift Basket
Materials You Will Need:
- A large, wide, and sturdy basket. (A laundry or log basket works well).
- A small piece of floral wire.
- A pre-made velvet bow or a 3-foot piece of velvet ribbon.
- All your wrapped gifts.
Step-by-Step Instructions:
- Attach the Bow: If you are adding a bow, do this first. Use a small piece of floral wire to securely attach your bow to one of the basket’s handles.
- Place the Basket: Slide the empty basket under your tree, next to the trunk.
- Add Gifts (Bottom): Place your largest, heaviest gifts in the basket first. This creates a stable base.
- Add Gifts (Middle): Add your medium-sized, rectangular gifts. “File” them in, standing them on their side if you can. This lets you fit more.
- Add Gifts (Top): Place your smallest, lightest, or most delicate gifts on top.
- Add Tissue (Optional): If the basket still looks a bit empty, you can tuck a few sheets of white tissue paper in the gaps to soften the look.
29. Contain Your Comfort

In winter, extra blankets and projects can pile up. A throw on the sofa, a knitting project, and a stack of books can make a calm room feel messy. You need a dedicated, soft spot for this “comfort clutter.”
A large, coiled rope basket is a great swap for a messy pile. These baskets are soft, so they will not scratch floors or snag blankets. They are sturdy and stylish. Tossing your extra throws or projects into the basket at the end of the night is a simple, two-second tidy.
DIY: Styling a Blanket Basket
Materials You Will Need:
- A large, soft basket (like coiled rope or fabric).
- 1-2 throw blankets.
- (Optional) 1-2 decorative pillows or a project (like a yarn bowl).
Step-by-Step Instructions:
- Place the Basket: Put your basket on the floor next to the arm of your sofa or in a corner.
- Add the First Blanket: Take your largest blanket. Fold it neatly in half the long way. Then, drape it into the basket. Let one end hang over the side. Tuck the rest inside.
- Add the Second Blanket: Take your second blanket. This one can be “stuffed” in to look cozier. Just feed it into the basket, letting it fill the space.
- Add “Toppers”: If you have a special pillow or a project, place it on top. This makes it look full and inviting.
- The Goal: The goal is to look full, soft, and accessible. You want to be able to reach in and grab a blanket easily.
30. Tame Your Entryway

The entryway is a magnet for chaos. Keys, mail, masks, and sunglasses create a messy pile. This is the first thing you see when you come home. It does not feel calm.
You can fix this with two simple items. Swap the messy pile for a sleek wooden tray. Add a small ceramic bowl. This is a “drop zone.” The tray holds the mail and sunglasses. The bowl holds the keys. Everything has a place. It is a simple system that brings instant order.
DIY: Creating a “Drop Zone” Tray
Materials You Will Need:
- An entryway table or shelf.
- A long, narrow tray (wood, metal, or lacquer).
- A small bowl (ceramic or stone).
- (Optional) A small vase with a sprig of greenery (like eucalyptus).
Step-by-Step Instructions:
- Clear the Surface: Remove everything from your entryway table. Wipe it clean.
- Place the Tray: Set your tray on the table. If the table is wide, place it to one side, not in the center.
- Place the Bowl: Set your small bowl on the tray. Place it on the right or left side. This bowl is now the “key bowl.”
- Add Greenery: If you have a small vase, place it on the tray as well, opposite the bowl. This adds a bit of life.
- Use the System: The next time you come in, train yourself. Put your keys in the bowl. Put your mail and sunglasses on the tray. It will take a few days, but this simple habit will keep your entry calm.
31. Neaten Your Logs

A pile of firewood by the hearth is cozy. It can also look like a messy stack of sticks. You can contain this rustic charm with a modern log holder. A metal holder with a fabric sling adds a touch of design.
This swap keeps the firewood tidy. It makes the pile look intentional, not just a heap. The shape of the holder adds a sleek line to your fireplace area. It is a simple way to bring structure to a natural, sometimes chaotic, element.
DIY: Arranging Firewood in a Modern Holder
Materials You Will Need:
- A modern firewood holder (metal with a fabric sling, or an upright metal rack).
- Seasoned firewood (cut to fit your holder).
- Work gloves (to avoid splinters).
Step-by-Step Instructions:
- Place the Holder: Position your log holder on your hearth or fireplace pad. Ensure it is stable.
- Select Your Wood: Choose pieces of firewood that are roughly the same length. They will fit better and look neater.
- Load the Bottom: Start by placing the largest, most uniform pieces of wood at the very bottom of the holder. This creates a strong base.
- Stack Evenly: Continue stacking the wood in layers. Try to keep the ends of the logs as even as possible on both sides of the holder.
- Fill the Gaps: Use smaller, thinner pieces of wood to fill any significant gaps. This makes the stack look full and prevents logs from falling out.
- Avoid Overfilling: Do not pile the wood higher than the sides of the holder. It should look contained, not spilling over. Step back and check. It should look like a neat stack.
32. Simplify Your Mantel

A busy mantel full of tiny figurines, ornaments, and garlands can feel overwhelming. It demands too much attention. You can create a calm, elegant look by simplifying your mantel decorations.
Swap busy garlands for one long, flowing green garland. Keep the colors of your stockings natural. Add a large, simple mirror that reflects light. Use only a few tall, white candles. This approach allows each item to breathe. It creates a serene focal point.
DIY: Elegant Greenery Mantel
Materials You Will Need:
- One long, fresh or realistic artificial garland (pine or cedar style).
- Floral wire or pipe cleaners.
- 2-3 sturdy command hooks (if you want the garland to drape).
- 4-6 neutral-colored stockings.
- 4-6 stocking hangers.
- A large mirror or piece of art for the center.
- A few tall candlesticks with white taper candles.
- A few small pillar candles.
Step-by-Step Instructions:
- Clear the Mantel: Remove everything from your mantel. Wipe it clean.
- Centerpiece First: Place your large mirror or artwork in the middle of the mantel. This anchors the display.
- Lay the Garland: Drape your garland along the mantel. Let it hang down naturally on both sides. If you want it to hang lower, use command hooks placed on the underside of the mantel to secure it.
- Add Candles: Place your tall candlesticks on one side of the mantel. Place a few small pillar candles on the other side. Group them in odd numbers (3 or 5).
- Hang Stockings: Attach your stocking hangers to the front edge of the mantel. Hang your neutral-colored stockings.
- Adjust and Light: Step back and adjust the garland, candles, and stockings. Light the candles. The goal is an uncluttered, peaceful scene.
33. Frame a Winter Scene

Holiday art can often be cartoonish or too bright. It might clash with your everyday decor. You can swap out busy art for a framed winter landscape. A photograph of misty trees or a snowy forest brings a natural quiet.
Choosing a muted, cool color palette, like blues and greens, creates a calming effect. The artwork does not shout “holiday.” Instead, it evokes the feeling of winter. This keeps your walls serene. You can always add a simple holiday phrase, like “Let It Snow!” if you want.
DIY: Hanging a Large Winter Print
Materials You Will Need:
- A large framed winter landscape print.
- A picture hanging kit (wire, hooks, picture hangers).
- A tape measure.
- A pencil.
- A hammer.
- (Optional) A picture light.
Step-by-Step Instructions:
- Choose Your Spot: Find a large, empty wall above a sofa or console table.
- Measure for Height: Hold the frame up to the wall. A good rule of thumb is to hang the center of the picture at eye level, or about 60-65 inches from the floor. If it is over a sofa, it should be about 6-8 inches above the back of the sofa.
- Mark the Spot: Once you have the height, make a light pencil mark on the wall where the top of the frame should be.
- Calculate Hook Position: Turn the frame over. Measure from the top of the frame down to where the hanging wire or hook is when the frame is level. Subtract this measurement from your mark on the wall. This is where your hanger will go.
- Install Hanger: Gently hammer your picture hanger into the wall at your calculated spot. Make sure it is straight.
- Hang the Art: Carefully hang your framed print. Adjust until it is level.
- Add Lighting (Optional): If you are adding a picture light, install it a few inches above the frame. This highlights the artwork and adds a gentle glow.
34. Streamline Your Entry

An entryway that serves many purposes can become a chaotic dump zone. Shoes, coats, and keys often create a messy pile. You can create calm by streamlining the furniture.
Swap individual hooks and a small shoe rack for a combined bench and shoe storage unit. A simple mirror above helps. Add a clean floating shelf for small items. This setup provides dedicated spots for everything. It is a purposeful way to manage daily clutter.
DIY: Creating an Organized Entryway
Materials You Will Need:
- A bench with integrated shoe storage.
- A coat rack (a simple wall-mounted one or a freestanding tree).
- A floating shelf (if not already there).
- A mirror.
- Small decorative items (vase, soap dispensers, small wreath).
Step-by-Step Instructions:
- Clear Everything: Remove all items from your entryway. Clear the floor, walls, and any existing furniture.
- Place the Bench: Position your bench with shoe storage. It should be the main anchor of the space.
- Install Coat Rack: Install your coat rack on the wall above or next to the bench. Make sure it is at a convenient height.
- Install Shelf: If you are adding a floating shelf, install it above the bench. This is for small items.
- Hang the Mirror: Hang your mirror above the shelf or bench. Make sure it is at a good height for a quick check before leaving.
- Style and Organize:
- Shoes: Place shoes neatly in the storage under the bench.
- Coats: Hang coats on the hooks.
- Shelf: Place a small vase with greenery, hand soap dispensers, and maybe a small decorative object on the shelf.
- Hooks: Hang a small, decorative wreath on one of the coat hooks for a touch of cheer.
35. Create a Reading Nook

A comfy chair alone can feel disconnected. It is just a place to sit. You can transform it into a calming sanctuary by adding layers of comfort and light. This creates a dedicated “quiet corner.”
Swap a bare chair for one draped with a chunky knit blanket. Add a soft pillow. Place a small side table next to it with a warm lamp. A floor cushion nearby adds another soft layer. This setup says “rest here.” It is a deliberate invitation to slow down.
DIY: Assembling a Cozy Reading Corner
Materials You Will Need:
- A comfortable armchair.
- A large, soft throw blanket (chunky knit or faux fur).
- A decorative pillow.
- A small side table.
- A small table lamp with a warm-toned bulb.
- A small basket for books.
- A floor cushion or pouf.
Step-by-Step Instructions:
- Position the Chair: Place your armchair in a corner or by a window.
- Drape the Blanket: Take your throw blanket. Drape it casually over the back and arm of the chair. Let one end fall to the floor. Do not fold it perfectly.
- Add the Pillow: Place your decorative pillow on the seat of the chair.
- Place Side Table: Position the side table next to the arm of the chair. It should be close enough to reach easily.
- Add Lamp: Put the table lamp on the side table. Plug it in.
- Add Storage: Place the small basket for books on the floor next to the table.
- Add Extra Seating/Comfort: Place the floor cushion or pouf in front of the chair.
- Final Touches: Add a single book to the table or cushion. When you are ready to relax, turn on the lamp and enjoy the quiet.
36. Set a Calm Soundscape

The holidays often mean more noise. News channels, loud music, and phone notifications fill the air. This constant input makes it hard to relax. You can calm your home by swapping loud media for gentle sounds.
Turn off the TV. Instead, play quiet classical music, nature sounds, or a crackling fireplace soundscape from a smart speaker. You can even light a real candle for added visual calm. This simple swap changes the energy of the room. It lets your mind rest.
DIY: Creating a Calming Audio Environment
Materials You Will Need:
- A smart speaker (Google Home, Amazon Echo) or a stereo system.
- Access to streaming music or soundscapes (Spotify, Pandora, YouTube).
- (Optional) An unscented pillar candle and a lighter.
Step-by-Step Instructions:
- Turn Off Other Noise: Turn off the television, radio news, and any distracting alerts on your phone.
- Choose Your Sound: Decide what kind of calm you want.
- Nature Sounds: Search for “rain sounds,” “forest sounds,” “ocean waves,” or “winter sounds” on your streaming service.
- Fireplace: Search for “crackling fireplace sounds” or “fireplace ambience.”
- Quiet Music: Search for “relaxing classical,” “ambient music,” or “meditation music.”
- Start Playing: Ask your smart speaker to play your chosen sound. For example, “Hey Google, play crackling fireplace sounds.”
- Set the Volume: Adjust the volume to a low, background level. It should be audible but not distracting.
- Add Visuals (Optional): Light a real candle or turn on a flameless candle. Watch the flame.
- Enjoy the Calm: Sit back and let the sounds and gentle light help you relax.
37. Embrace the Ritual

Tea time can be a hurried event. A mug thrown together. You can elevate this simple act into a calming ritual. This means more than just a cup. It is about the presentation.
Swap a random mug and teabag for a carefully arranged tray. Use a pretty teapot or glass carafe. Add a proper tea infuser. Include a small vase with greenery. This little setup on a tray makes the act of making tea feel special. It forces you to slow down.
DIY: Creating a Mindful Tea Tray
Materials You Will Need:
- A small, sturdy tray (wood or bamboo is nice).
- Your favorite mug.
- A small teapot or glass carafe for hot water.
- Loose leaf tea.
- A tea infuser (a small strainer).
- A tiny vase with a single sprig of greenery (eucalyptus or a small leaf).
- (Optional) A small candle.
Step-by-Step Instructions:
- Clean the Tray: Wipe your tray clean.
- Arrange the Items: Place your teapot or carafe on one side of the tray. Your mug goes on the other side.
- Add the Essentials: Put your tea tin and infuser on the tray. If using a candle, place it near the vase.
- Add the Greenery: Place your small vase with a sprig of fresh greenery. This adds life and beauty.
- Hot Water: Boil your water separately. Carry the tray to your preferred spot. Pour the hot water into your carafe.
- Enjoy the Process: This tray encourages you to savor the steps. Measure your tea, steep it carefully, and sip it slowly. This creates a moment of calm in your day.
38. Hide the Remotes

Remote controls, phones, and chargers pile up on coffee tables. They create visual noise. They remind you of screens and tasks. You can quickly calm your living room by hiding these items.
Swap an open basket for a lidded storage box. A fabric-covered box looks much nicer than a plastic one. All the remotes, charging cords, and small devices can disappear inside. This simple box instantly makes your surfaces look clean. Your living room will feel more restful.
DIY: Creating a Remote Control Box
Materials You Will Need:
- A decorative storage box with a lid. (Look for fabric-covered or woven wood).
- All your remote controls.
- Any charging cables or small devices (like earbuds) that clutter the table.
Step-by-Step Instructions:
- Gather Your Items: Collect all the remote controls, phones, and chargers that normally sit on your coffee table or end table.
- Clean the Box: Wipe out your storage box to ensure it is clean.
- Place in Box: Put all your remote controls into the box. Stack them neatly if you can.
- Add Cables: Tuck any charging cables or other small devices in beside the remotes.
- Close the Lid: Put the lid on the box.
- Place the Box: Set the box on your coffee table or end table. It can be placed to one side or in the center. Now, your remotes are out of sight, but still easy to grab when needed.
39. Wrap with Fabric

Traditional wrapping paper is often bright and shiny. It is also wasteful. You can create a calmer, more sustainable gift by using fabric. This ancient Japanese art is called Furoshiki.
Swap paper for a reusable cloth. Choose soft, natural fabrics with simple patterns. You can tie them with twine and add a sprig of greenery or a cinnamon stick. This method of wrapping feels more thoughtful. It creates a beautiful, soft package.
DIY: Simple Furoshiki Fabric Wrap
Materials You Will Need:
- A square piece of fabric (a scarf, a tea towel, or a cut piece of cotton or linen).
- Your gift (a box shape is easiest).
- Twine or a narrow ribbon.
- (Optional) A small sprig of greenery (pine, eucalyptus), or a cinnamon stick.
Step-by-Step Instructions:
- Lay Out Fabric: Lay your square fabric flat on a surface. Position it like a diamond, with one point facing you.
- Center the Gift: Place your gift directly in the center of the fabric.
- Bring Up Bottom Point: Take the fabric point closest to you. Bring it up and over the gift. Tuck it in if you can.
- Bring Up Top Point: Take the fabric point farthest from you. Bring it up and over the gift. You should now have two “tails” on the sides.
- Tie the Sides: Take the two side points. Bring them up over the top of the gift. Tie them in a simple, secure knot right in the middle.
- Add Embellishments: If using twine, wrap it around the knot a few times and tie a bow. Tuck a sprig of greenery or a cinnamon stick under the twine.
40. Frame the Outside

Christmas cards are beautiful. They can look cluttered when strung across a whole wall. You can create a much calmer, framed display by using just one window.
This swap turns your window into a framed piece of art. String small holiday cards or simple paper cut-outs on twine. Hang them within the window frame. The natural light highlights each little piece. It also keeps your walls free of clutter. This is a gentle, pretty way to celebrate.
DIY: Simple Window Card Garland
Materials You Will Need:
- Your favorite small holiday cards or simple paper cut-outs.
- Twine or thin string.
- Mini-clothespins (from a craft store).
- Scissors.
- Two small, removable hooks (like 3M Command hooks).
Step-by-Step Instructions:
- Choose Your Window: Pick a window that gets good light and is a good size for your garland.
- Install Hooks: Place one removable hook on each side of the inside window frame, near the top. Make sure they are level.
- Measure and Cut Twine: Cut a piece of twine that is slightly longer than the width of your window. You want a little slack, not a tight pull.
- Hang the Twine: Tie a small loop at each end of the twine. Hook these loops onto your command hooks.
- Attach Cards: Take your mini-clothespins. Use them to clip your small cards or paper cut-outs onto the twine.
- Adjust Spacing: Spread your cards out evenly along the twine. You can hang one garland across the top, or two garlands, one above the other.
- Enjoy the View: Step back. The light from the window will shine through your cards, creating a lovely, simple display.
A calm holiday home is not a distant dream. It is a choice. It is built from many small, thoughtful decisions.
You choose natural textures over shiny plastic. You swap loud clutter for a single, simple basket. You let a real orange simmer on the stove. These changes seem small. Their effect is powerful.
Your home should be a place to recharge. It can be a quiet, warm space for you and your family. Use these ideas to find your own holiday peace.
Key Takeaways
- Contain the Clutter: Use simple baskets, trays, and lidded boxes to hide remotes, gifts, and entryway messes.
- Choose Natural Scents: Swap heavy, artificial sprays for simmering pots, essential oil diffusers, or earthy incense.
- Soften Your Textures: Replace shiny or fussy fabrics with velvet ribbon, faux fur throws, and chunky knit pillows.
- Limit Your Palette: Trade a mix of every color for a calm, limited palette like blue and white, or simple earth tones.
- Embrace Natural Elements: Use fresh greenery, bare branches, and dried citrus instead of artificial garlands.
- Simplify Your Displays: Swap busy counters and mantels for one or two well-placed items, like a minimalist nativity or a bowl of pinecones.