Tired of stepping into a drab, dated bathroom every morning? You are not alone. That ugly, builder-grade space does not reflect your style or provide the peaceful sanctuary you deserve. It might seem like a full tear-out is the only solution.

Fortunately, transforming your bathroom does not require a massive loan or weeks of messy demolition. Often, the cheap look is caused by a few small, neglected details. Changing these tiny elements provides the biggest visual reward.
This comprehensive guide reveals 37 quick, budget-friendly DIY updates you can complete over a weekend. We focus on impactful changes, from swapping hardware to adding architectural trim, that instantly mimic the results of a luxury renovation. Prepare to unlock the true potential of your smallest room.
1 Modern Matte Black Mirror Frame
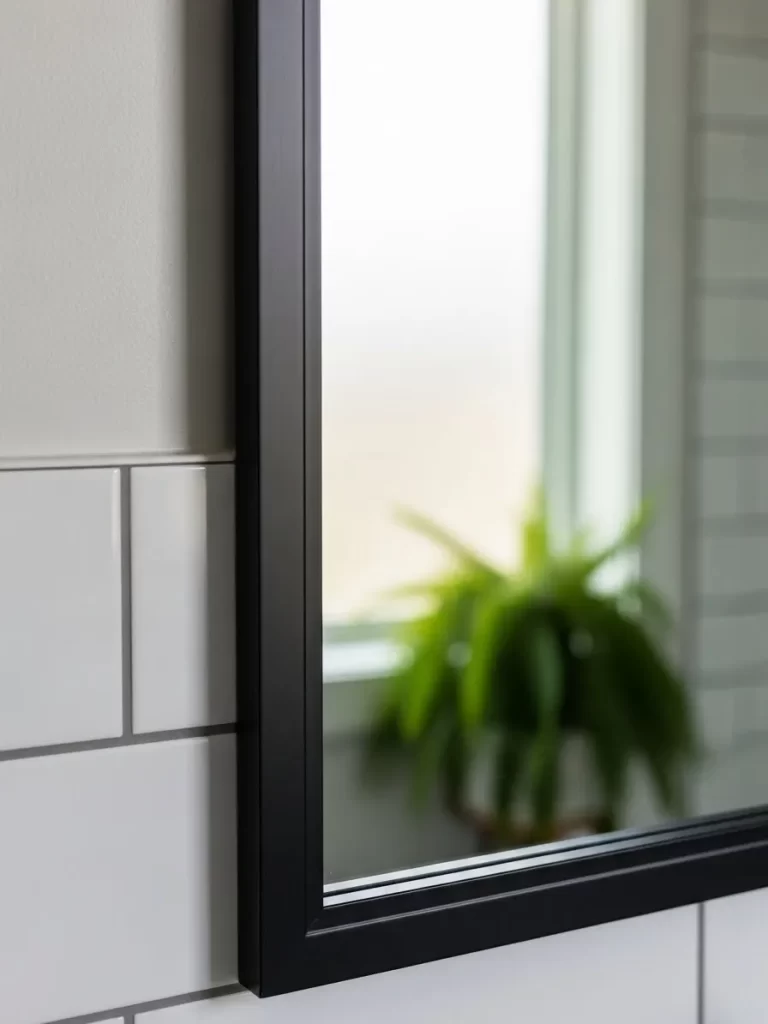
Standard builder-grade mirrors often make a bathroom look dated and unfinished. Adding a sleek matte black frame instantly grounds the space. It provides a sharp contrast against white subway tiles and light-colored walls, creating a high-end designer look without the custom price tag.
This simple upgrade hides weathered edges that frequently appear on older mirrors. The clean lines draw the eye and make the glass feel like an intentional piece of furniture rather than a cheap utility. It is an excellent way to add architectural interest to a flat wall.
Greenery reflected in the glass paired with the dark border adds a fresh, organic feel to the room. You can achieve this transformation in a single afternoon. It serves as a striking focal point that anchors your entire vanity area.
Material Required List
- Four lengths of MDF or pine casing trim
- Construction adhesive (ensure it is mirror-safe)
- Matte black paint and primer
- Painter’s tape
- Sandpaper (120 and 220 grit)
- Wood filler
Equipment Required List
- Miter box and hand saw (or a miter saw)
- Measuring tape
- Level
- Paintbrush or small foam roller
- Caulking gun
DIY Instructions Step by Step
- Measure your mirror accurately from edge to edge. Decide if you want the frame to sit on the glass or wrap around the outside edges.
- Cut your trim pieces at 45-degree angles using the miter box. Ensure the long side of the cut matches the total width and height of your mirror.
- Sand the rough edges of the wood until they feel smooth. Use the 120-grit paper first and finish with the 220-grit for a professional texture.
- Paint the trim before assembly. Apply a primer first, followed by two thin coats of matte black paint, allowing each layer to dry completely.
- Dry fit the pieces against the mirror to check for gaps. If the corners do not meet tightly, use a little wood filler and touch up with paint.
- Apply construction adhesive to the back of the first trim piece. Keep the glue away from the inner edge so it does not squeeze out and show in the mirror’s reflection.
- Press the trim onto the glass and use a level to make sure it is perfectly straight. Secure it with painter’s tape while the glue sets.
- Repeat for all sides until the frame is complete. Let the adhesive cure for 24 hours before removing the tape.
2 Vintage Brass Cabinet Pulls
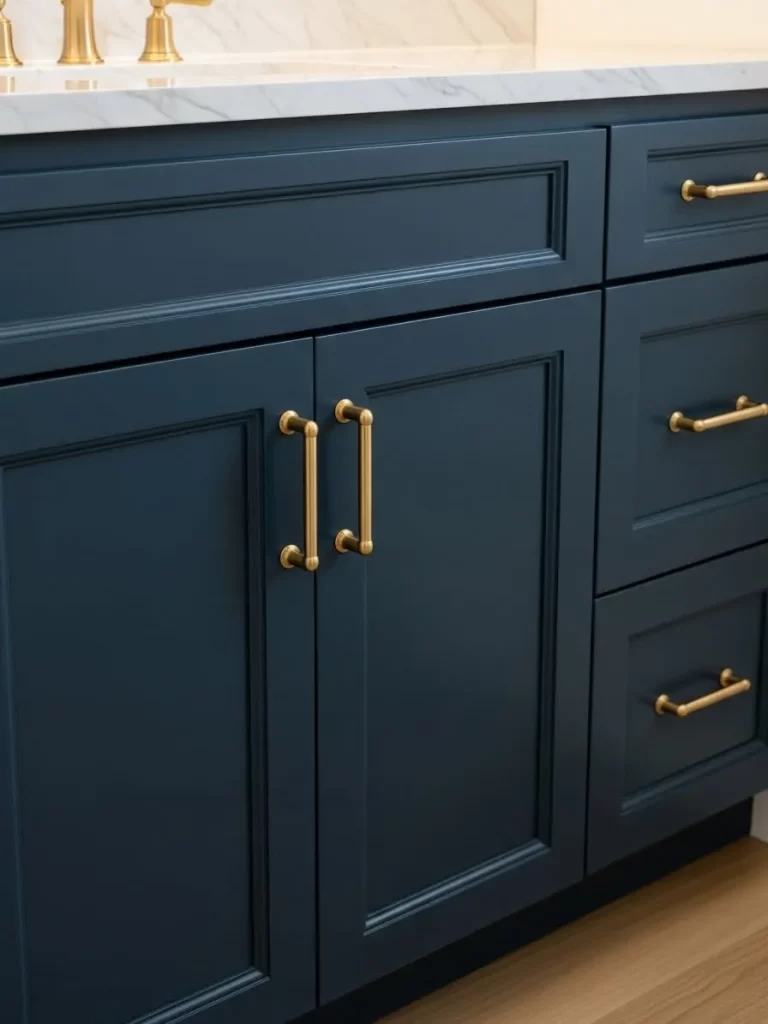
Swapping out old, grimy hardware for vintage brass pulls is the fastest way to make a dated vanity look high-end. The deep navy blue of the cabinetry provides a stunning backdrop for the warm, metallic tones. This combination creates a sophisticated and timeless aesthetic that feels custom-built rather than mass-produced.
Small details often carry the most weight in a room’s design. These slender, tubular pulls add a touch of modern elegance while maintaining a classic charm. They catch the light beautifully and provide a sturdy, high-quality feel every time you open a drawer.
Updating your hardware is a low-cost project that requires very little time. It bridges the gap between old fixtures and new decor. You can easily transform the entire mood of your bathroom with just a screwdriver and a few minutes of effort.
Material Required List
- Set of vintage brass or gold-finished pulls
- Wood filler (if the new pull size differs from the old ones)
- Matching touch-up paint (if needed)
Equipment Required List
- Screwdriver (Phillips or flathead depending on screws)
- Measuring tape or ruler
- Power drill (only if creating new holes)
- Cleaning rag and mild soap
DIY Instructions Step by Step
- Measure the distance between the centers of the existing screw holes on your cabinets to ensure the new pulls fit.
- Remove the old hardware by unscrewing them from the inside of the cabinet doors and drawers.
- Clean the surface behind the old pulls using a damp rag to remove any dirt or grease buildup.
- Check the fit of the new brass pulls by holding them up to the existing holes.
- Fill old holes with wood filler if your new pulls have different spacing, then sand and paint over the filler once dry.
- Insert the new screws through the back of the cabinet door into the base of the brass pull.
- Tighten the screws firmly with a screwdriver, but avoid over-tightening to prevent stripping the threads.
- Align the pulls to ensure they sit perfectly horizontal or vertical before the final tightening.
3 Modern Brass Globe Ceiling Light

Lighting can make or break the atmosphere of a bathroom. Replacing a boring, flush-mount light with a brass globe fixture adds an instant layer of luxury. The soft, milky glass diffuses light evenly, eliminating harsh shadows and creating an inviting glow that mimics an upscale spa.
The warm brass base ties in beautifully with other gold accents in the room. This specific design bridges the gap between mid-century modern and contemporary styles. It turns a functional necessity into a stylish statement piece that draws the eye upward.
A well-chosen ceiling light makes the space feel taller and more open. It is a bold upgrade that proves you do not need a massive budget to achieve professional-looking results. This simple change drastically improves how you see yourself in the vanity mirror.
Material Required List
- New brass globe light fixture
- Wire nuts
- LED bulb (warm white recommended)
- Electrical tape
Equipment Required List
- Step ladder
- Screwdriver set
- Voltage tester
- Wire strippers (if wires are frayed)
DIY Instructions Step by Step
- Turn off the power at the main circuit breaker to ensure you are working safely.
- Remove the old fixture by unscrewing the mounting hardware and carefully disconnecting the wires.
- Test the wires with a voltage tester to confirm no electricity is running through them.
- Install the mounting bracket that came with your new brass light to the ceiling junction box.
- Connect the wires by matching the colors: white to white (neutral), black to black (hot), and green or copper to the ground screw.
- Secure the connections with wire nuts and wrap them with electrical tape for extra safety.
- Attach the light base to the mounting bracket using the provided screws or decorative nuts.
- Screw in the bulb and then carefully attach the glass globe over the socket.
- Restore power at the breaker and test your new, elegant light source.
4 Curved Chrome Shower Rod
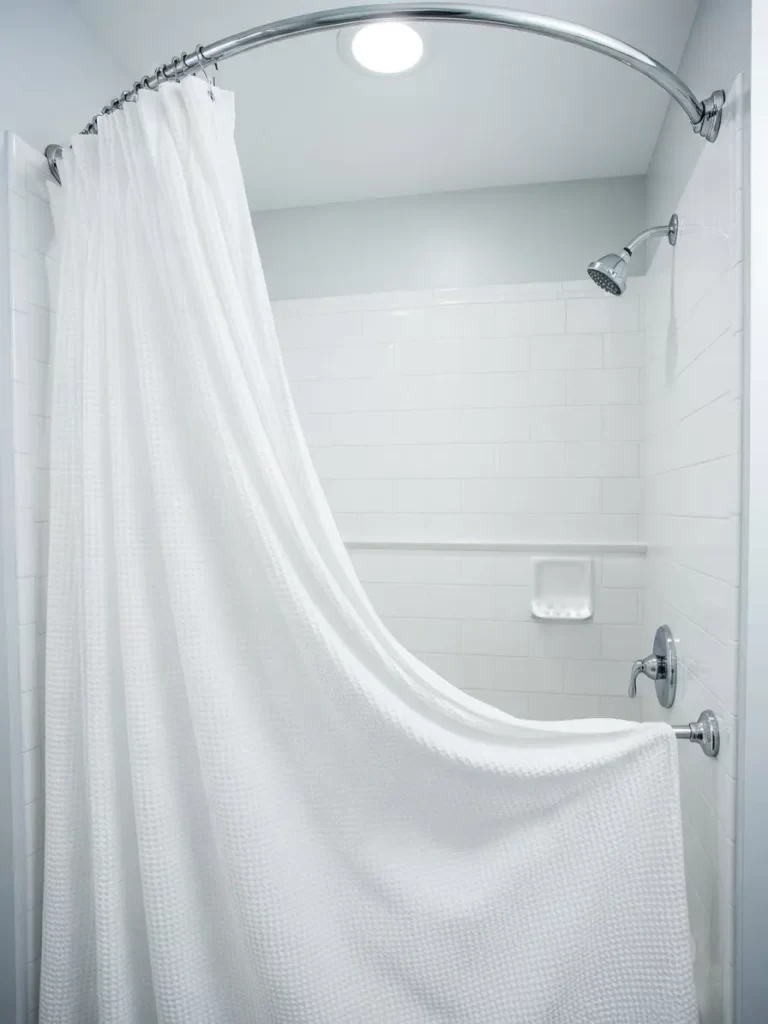
Standard straight rods can make a shower feel cramped and dark. A curved chrome rod arches outward, providing significantly more elbow room without changing the tub’s footprint. This simple architectural change makes the bathing area feel much more expansive and high-end.
The polished chrome finish adds a bright, reflective quality that looks incredibly clean. It pairs perfectly with white waffle-knit curtains to create a hotel-inspired vibe. This upgrade is as much about comfort as it is about visual appeal.
Installing a curved rod is a quick way to refresh the entire look of your shower alcove. It feels more permanent and substantial than a tension rod. You will notice the difference in space immediately during your morning routine.
Material Required List
- Curved shower rod kit
- Wall anchors (if not provided)
- White waffle-knit shower curtain
- Shower rings
Equipment Required List
- Power drill and drill bits
- Level
- Pencil
- Screwdriver
DIY Instructions Step by Step
- Position the rod brackets on the walls at the desired height, typically about 72 inches from the floor.
- Mark the screw holes with a pencil through the bracket openings to ensure accuracy.
- Use a level to verify both sides are aligned so your rod does not sit crooked.
- Drill pilot holes into the wall at your pencil marks. Use wall anchors if you are not hitting a stud.
- Attach the brackets to the wall using the provided screws and tighten them securely.
- Insert the rod into the brackets. Some models slide in, while others require a small set screw to lock them in place.
- Snap on the cover plates to hide the screws for a seamless, professional finish.
- Hang your shower curtain using stylish rings to complete the look.
5 Matte Black Designer Faucet

A leaking or crusty faucet is the clearest sign of a neglected bathroom. Upgrading to a matte black, high-arc faucet brings an immediate sense of modernity to the vanity. The contrast against a white marble or quartz countertop is sharp and visually stunning.
The minimalist design of this handle and spout combo feels very intentional and contemporary. It serves as a piece of functional art on your countertop. This finish is also excellent at hiding water spots compared to traditional polished metal.
This DIY task is manageable for anyone willing to follow a few steps. It changes the entire “hand-washing experience” into something that feels premium. You don’t need a plumber to get this designer result.
Material Required List
- Matte black faucet set
- Plumber’s putty or silicone sealant
- New supply lines (if old ones are worn)
- Plumber’s tape (Teflon tape)
Equipment Required List
- Basin wrench or adjustable wrench
- Bucket
- Old towel
- Screwdriver
DIY Instructions Step by Step
- Shut off the water valves located underneath the sink and turn on the faucet to drain any remaining water.
- Disconnect the supply lines from the old faucet using an adjustable wrench. Keep a bucket underneath to catch drips.
- Remove the old faucet by unscrewing the mounting nuts from under the sink.
- Clean the sink surface thoroughly to remove old putty or mineral deposits.
- Apply plumber’s tape to the threads of the new faucet to ensure a water-tight seal.
- Insert the new faucet through the holes in the sink or countertop.
- Tighten the mounting nuts from below until the faucet is held firmly in place and does not wiggle.
- Reattach the supply lines to the new faucet and the wall valves.
- Turn the water back on slowly and check for any leaks around the connections.
6 Classic Furniture-Style Vanity Feet
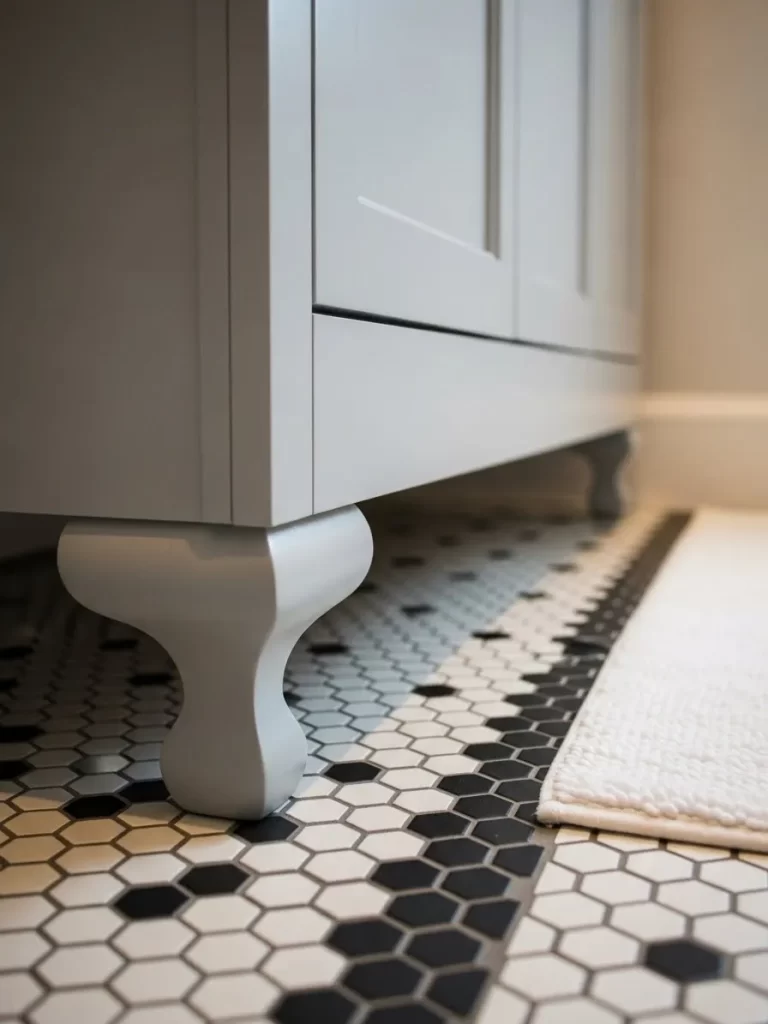
Most standard vanities sit flat on the floor, which can look bulky and uninspired. Adding decorative furniture feet to the base of your cabinet gives it a custom, built-in look. It lifts the piece and creates a sense of airiness that makes the bathroom feel larger.
This small addition transforms a basic boxy cabinet into a sophisticated piece of furniture. The elegant curves of the feet contrast beautifully with modern geometric floor tiles. It is a clever trick used by designers to add character to plain spaces.
You can paint the feet to match your vanity perfectly or leave them in a wood finish for a different vibe. This project is affordable and yields high-impact results. It effectively hides the “cheap” look of standard baseboard transitions.
Material Required List
- Four decorative furniture feet (bun feet or tapered style)
- Mounting plates
- Wood glue
- Paint or stain to match your vanity
Equipment Required List
- Power drill
- Measuring tape
- Screwdriver
- Sandpaper
DIY Instructions Step by Step
- Prepare the feet by sanding them and applying paint or stain that matches your vanity cabinet.
- Measure the base of your vanity to determine the best placement for the feet, usually at the four corners.
- Mark the screw holes for the mounting plates on the underside of the vanity frame.
- Drill pilot holes carefully, ensuring you do not drill all the way through the bottom shelf of the cabinet.
- Screw the mounting plates into the bottom of the vanity using the provided hardware.
- Apply a small dab of wood glue to the top of the feet for extra stability before attachment.
- Thread the feet into the mounting plates until they are tight and flush against the cabinet.
- Check for level to make sure the vanity is sitting evenly on the floor and does not rock.
7 Peel and Stick Patterned Floor Tile

Old, stained linoleum or boring ceramic tiles can be hidden without a sledgehammer. Patterned peel-and-stick tiles offer a sophisticated, cement-tile look for a fraction of the cost. The grey and white geometric design creates a high-contrast floor that masks imperfections.
This material is waterproof and durable enough for bathroom use. It allows you to experiment with bold patterns that would be too expensive or permanent with real stone. The result is a fresh, clean surface that feels soft underfoot.
Applying these tiles is a therapeutic and rewarding weekend project. It completely changes the room’s color palette and serves as a foundation for the rest of your decor. You can easily cut them to fit around toilets and corners with a simple blade.
Material Required List
- Boxes of peel-and-stick vinyl floor tiles
- Floor primer (optional but recommended for better stick)
- Rubbing alcohol
Equipment Required List
- Utility knife or heavy-duty scissors
- Metal straight edge or ruler
- Measuring tape
- Cleaning supplies (broom and mop)
DIY Instructions Step by Step
- Clean the existing floor extremely well to remove every bit of dust, hair, and grime.
- Wipe the floor with rubbing alcohol to ensure the surface is completely oil-free for maximum adhesion.
- Find the center of the room and draw a straight line to guide your first row of tiles.
- Peel the backing off the first tile and press it firmly into place along your guide line.
- Work your way outward toward the walls, ensuring the pattern lines up perfectly between tiles.
- Measure and cut tiles for the edges and around the toilet. Create a paper template for complex curves to avoid wasting tiles.
- Press down firmly on every tile with your hands or a floor roller to ensure they are locked in.
- Avoid mopping for at least 48 hours to let the adhesive fully bond to the subfloor.
8 Bohemian Distressed Runner Rug

Hard bathroom floors can often feel cold and sterile. Adding a long, distressed runner rug introduces warmth, texture, and a pop of color. The intricate patterns and earthy tones ground the space and make it feel like an extension of your living area.
A runner rug is a great way to soften the look of a long, narrow bathroom. It provides a comfortable surface for your feet while you get ready in the morning. This specific style works beautifully to hide any minor floor flaws you aren’t ready to fix yet.
Choosing a rug with various colors allows you to pull accents for towels and accessories. It is an easy way to introduce a “collected” and lived-in feeling to a room that is usually purely functional. This simple addition makes the space feel finished and cozy.
Material Required List
- Distressed bohemian-style runner rug
- Non-slip rug pad
- Fabric protector spray (optional)
Equipment Required List
- Measuring tape
- Vacuum cleaner
DIY Instructions Step by Step
- Measure the clear floor space in front of your vanity to choose the right length for your runner.
- Vacuum the floor thoroughly to remove any grit that could scratch your tile under the rug.
- Lay down a non-slip pad first. This is crucial in a bathroom to prevent sliding on wet floors.
- Trim the rug pad if it is visible beyond the edges of the rug using sharp scissors.
- Unroll the runner over the pad, centering it with your vanity or the hallway of the bathroom.
- Smooth out any ripples or bumps by hand, starting from the center and pushing toward the edges.
- Apply fabric protector if the rug is in a high-splash zone to help it resist water and stains.
- Weight down the corners with heavy books for a few hours if the ends are curling from being rolled up.
9 Curated Botanical Gallery Wall

Blank walls can make a bathroom feel like an afterthought. A curated gallery wall featuring botanical prints and abstract art adds personality and a sense of history. Using a mix of gold, black, and wood frames creates a sophisticated, eclectic look that feels very high-end.
The soothing green and blue tones in the artwork create a calming atmosphere. Placing art above the toilet or on an empty wall utilizes vertical space effectively. It transforms a functional room into a gallery-like experience.
Grouping different frame sizes together adds visual weight and interest. This is a low-effort way to tie your color scheme together. It brings life to the room without requiring any plumbing or major construction.
Material Required List
- Assorted art prints (botanicals, abstracts, or vintage sketches)
- Various picture frames
- Command strips or picture hanging hooks
- Kraft paper (for templating)
Equipment Required List
- Hammer
- Level
- Pencil
- Painter’s tape
DIY Instructions Step by Step
- Select your artwork and frames, aiming for a cohesive color palette but varied frame styles.
- Trace each frame onto kraft paper and cut out the shapes to use as templates.
- Tape the paper templates to the wall using painter’s tape to experiment with different layouts.
- Step back and adjust the arrangement until you find a balance that looks pleasing and intentional.
- Mark the hook placement on the paper templates by measuring where the wire or bracket sits on the back of the real frame.
- Drive your nails or hooks directly through the paper marks on the wall.
- Remove the paper and hang your actual frames onto the hooks.
- Use a level to make sure every piece of art is straight and professionally aligned.
10 Vertical Beadboard Wall Paneling
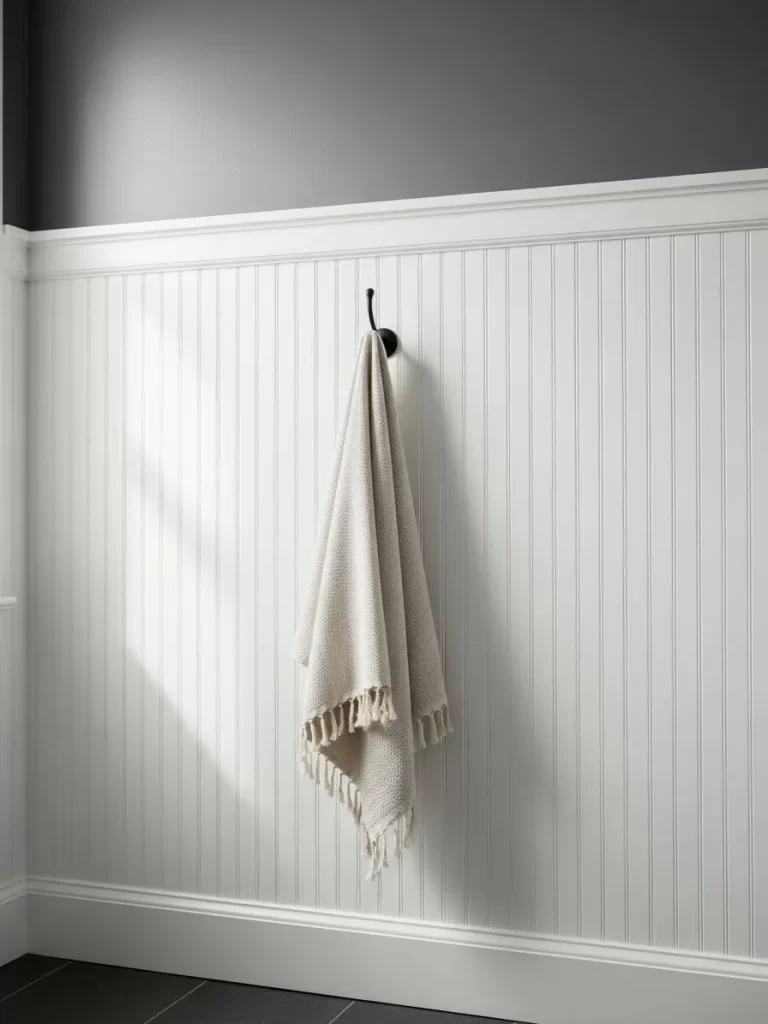
Flat, painted walls can feel a bit one-dimensional in a small bathroom. Installing vertical beadboard wainscoting adds instant texture and a classic “cottage core” charm. The clean white lines of the paneling contrast beautifully with a dark, moody upper wall color.
This update protects your walls from moisture and scuffs while adding architectural depth. It makes the ceiling feel higher due to the vertical lines drawing the eye upward. A simple chair rail cap on top provides a finished, polished look.
Beadboard is an affordable material that covers up old, uneven drywall perfectly. It is a timeless design choice that never goes out of style. This project gives your bathroom a custom, high-quality feel for very little investment.
Material Required List
- Beadboard panels (MDF or PVC for moisture resistance)
- Chair rail moulding
- Baseboard moulding
- Construction adhesive
- Finishing nails
- Caulk and paint
Equipment Required List
- Circular saw or table saw
- Jigsaw (for cutting around outlets)
- Level
- Caulking gun
- Hammer or nail gun
DIY Instructions Step by Step
- Measure the height and width of the walls you want to cover. Standard wainscoting is usually about 32 to 48 inches high.
- Cut your beadboard panels to size, making sure to account for any height added by the baseboards.
- Use a jigsaw to carefully cut out openings for any electrical outlets or plumbing pipes.
- Apply construction adhesive to the back of the panel in a zigzag pattern and press it firmly against the wall.
- Secure with finishing nails along the top and bottom edges where they will be covered by moulding.
- Install the baseboard at the bottom and the chair rail at the top to hide the raw edges of the beadboard.
- Fill nail holes with wood filler and caulk the seams between panels and at the corners for a seamless look.
- Paint the paneling with a durable, semi-gloss paint that can handle the humidity of a bathroom.
11 Bright White Beveled Subway Tile

Stained or yellowing grout can make an entire bathroom feel unhygienic and old. Refreshing your walls with bright white beveled subway tiles creates a crisp, reflective surface that bounces light around the room. The angled edges of the bevel add a subtle 3D effect that looks much more expensive than flat ceramic tile.
This classic design choice works with almost any decor style. It provides a clean backdrop for your vanity and fixtures while offering a timeless aesthetic. High-gloss finishes are particularly helpful in small spaces as they prevent the room from feeling closed in.
Installing new tile is a rewarding way to modernize your shower or backsplash. It provides a durable, water-resistant surface that stays looking new with minimal maintenance. You can achieve a professional-grade renovation look with just a bit of patience and precision.
Material Required List
- Beveled white subway tiles
- Pre-mixed white grout
- Tile adhesive (thinset)
- Spacers (1/16 or 1/8 inch)
- Painter’s tape
Equipment Required List
- Manual tile cutter or wet saw
- Notched trowel
- Grout float
- Large sponge and bucket
- Level
DIY Instructions Step by Step
- Clean the wall surface thoroughly to remove any old soap scum or loose paint.
- Find the center point of the area you are tiling and draw a level horizontal line to guide your first row.
- Apply the adhesive to the wall in small sections using the notched trowel held at a 45-degree angle.
- Press the first tile into the adhesive along your guide line and insert spacers at the corners.
- Continue the row across the wall, checking frequently with a level to ensure the tiles remain straight.
- Cut end pieces using a tile cutter to fit snugly against corners or edges.
- Let the adhesive set for at least 24 hours before removing the plastic spacers.
- Spread the grout over the tiles using a rubber float, pushing it deep into the gaps between tiles.
- Wipe away excess grout with a damp sponge after 20 minutes, being careful not to pull grout out of the seams.
12 Floor-to-Ceiling Luxury Window Drapery
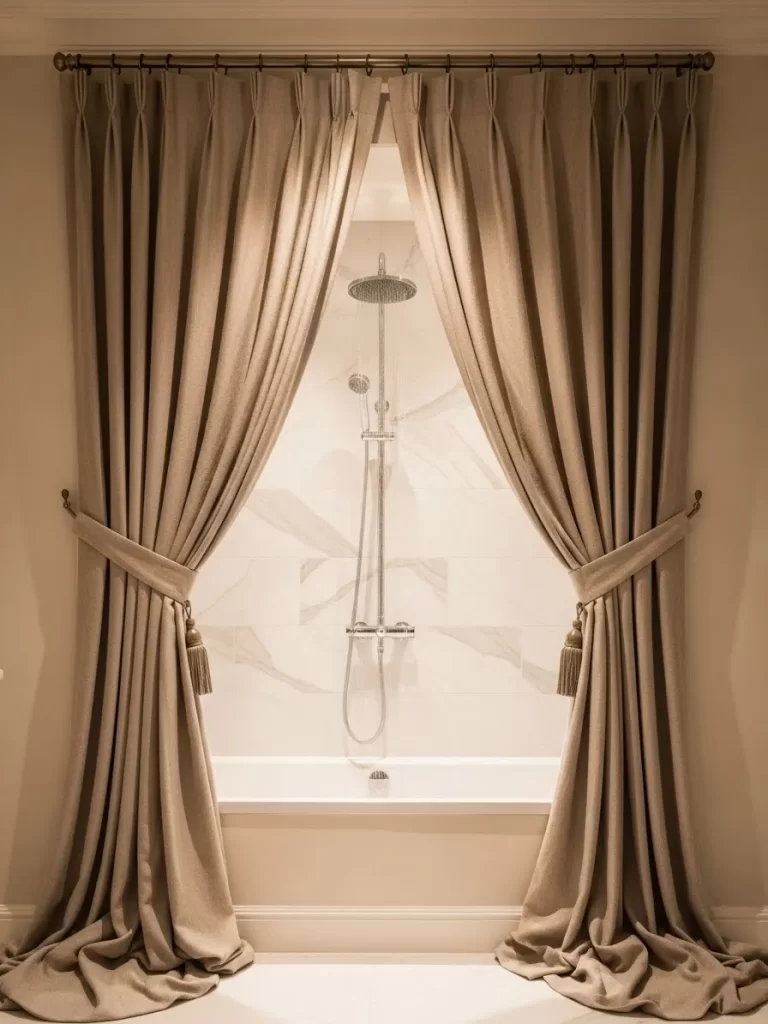
Standard plastic blinds often look flimsy and cheap in a bathroom setting. Hanging floor-to-ceiling drapes in a neutral, heavy fabric adds an unexpected layer of elegance and softness. This trick creates a dramatic focal point that mimics the look of a high-end hotel suite.
The vertical fabric lines lead the eye upward, making a small bathroom feel much taller. Using a warm beige or sand tone complements marble or light tile work perfectly. It provides a cozy, private atmosphere that transforms a functional tub into a relaxation zone.
Adding fabric to a bathroom also helps with acoustics, softening the echo common in rooms with many hard surfaces. You can easily pull them back to let in natural light during the day. This simple textile addition makes the space feel finished and “decorated” rather than just equipped.
Material Required List
- Pair of long, room-darkening curtain panels
- Sturdy curtain rod (brass or chrome to match fixtures)
- Wall anchors and screws
- Decorative tie-backs
Equipment Required List
- Power drill
- Measuring tape
- Screwdriver
- Step ladder
- Level
DIY Instructions Step by Step
- Measure the height from the ceiling to the floor to ensure your curtains are long enough to graze the ground.
- Mark the bracket locations about 4 to 6 inches above the window frame or near the ceiling for maximum height effect.
- Verify with a level that your marks are even on both sides of the window.
- Drill pilot holes and insert wall anchors to ensure the rod can support the weight of heavy fabric.
- Screw the brackets into the wall until they are firm and immovable.
- Slide the curtains onto the rod and place the rod into the brackets.
- Tighten the set screws on the brackets to lock the rod in place so it doesn’t slide when you pull the curtains.
- Steam the fabric once hung to remove any packing wrinkles for a professional, crisp appearance.
13 Uniform Amber Glass Apothecary Bottles

Cluttered counters covered in mismatched plastic soap and shampoo bottles instantly cheapen a bathroom. Switching to uniform amber glass bottles with custom labels creates a clean, organized look found in boutique spas. The dark glass hides the varied colors of different liquids, providing a cohesive and intentional aesthetic.
These bottles feel heavy and substantial in your hand, adding a tactile sense of luxury to your shower routine. The matte black pumps coordinate perfectly with modern faucets and hardware. It is an easy way to reduce visual noise in a small space.
This update is incredibly affordable and takes only a few minutes to set up. It turns your daily essentials into a decorative display that you don’t feel the need to hide. You can easily refill these from bulk containers to save money and reduce plastic waste.
Material Required List
- Set of amber glass pump bottles (16oz or 8oz)
- Waterproof vinyl labels (Shampoo, Conditioner, Body Wash)
- Funnel
Equipment Required List
- Measuring tape (to align labels)
- Cleaning cloth
DIY Instructions Step by Step
- Clean the glass surface with a damp cloth and dry it thoroughly to ensure the labels stick.
- Mark the label placement on the bottle using a piece of tape as a straight-edge guide.
- Peel the label carefully and apply it to the center of the bottle, smoothing out any air bubbles from the middle outward.
- Repeat for all bottles, ensuring the labels sit at exactly the same height for a professional look.
- Use a funnel to transfer your liquids from their original plastic packaging into the new glass bottles.
- Wipe away any spills from the outside of the glass before placing them in your shower or on the vanity.
- Arrange the bottles in a row or on a small tray to complete the curated, high-end display.
14 Natural Wood Floating Shelves
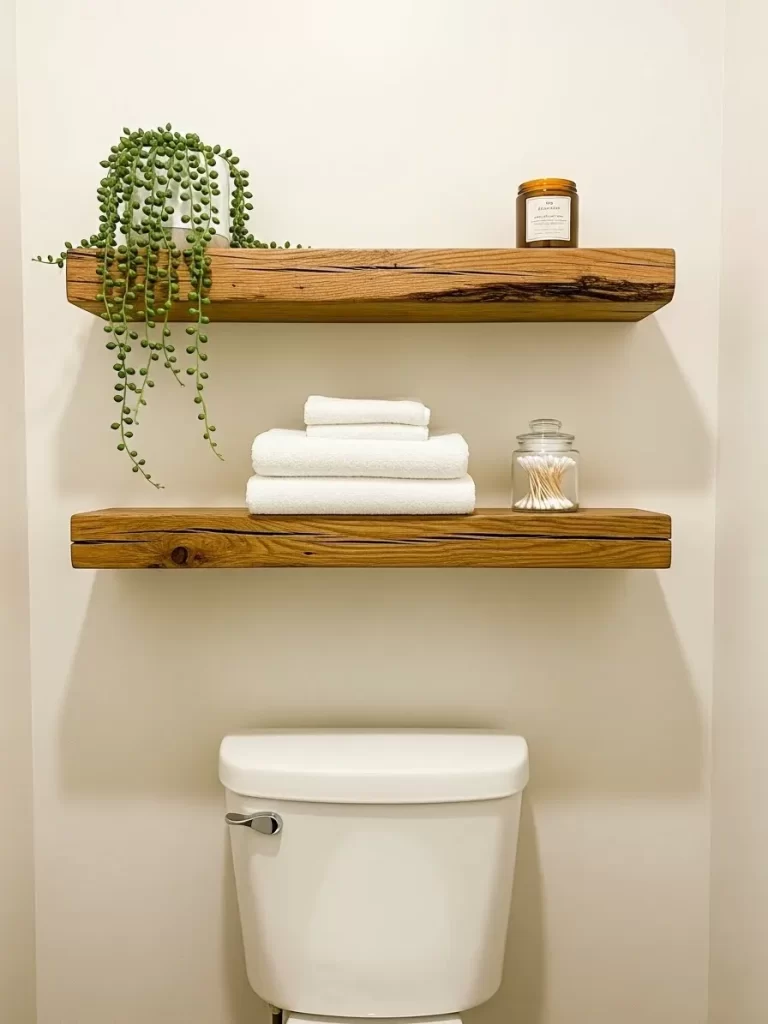
Wall space above the toilet is often underutilized or filled with bulky, dated cabinets. Installing thick, natural wood floating shelves adds warmth and provides a place for stylish storage. The raw grain of the wood contrasts beautifully with white walls and ceramic fixtures.
Floating shelves create a modern, “airy” look by eliminating visible brackets or supports. They offer a perfect spot for rolled white towels, small plants, or scented candles. This addition brings an organic, spa-like element into the room.
Adding vertical storage helps keep your countertops clear and organized. These shelves are sturdy enough to hold your daily essentials while looking like a custom architectural feature. It is a quick way to add character to a plain wall.
Material Required List
- Thick wood planks (Pine, Oak, or reclaimed wood)
- Internal floating shelf brackets
- Wood stain and sealer
- Heavy-duty wall anchors
Equipment Required List
- Power drill and long drill bits
- Level
- Measuring tape
- Stud finder
DIY Instructions Step by Step
- Sand the wood until it is smooth and apply your preferred stain to match the other wood tones in your house.
- Find the wall studs using a stud finder and mark them with a pencil.
- Hold the bracket against the wall at your desired height and use a level to ensure it is straight.
- Drill pilot holes into the studs and screw the bracket firmly into the wall.
- Measure the bracket arms and mark the corresponding spots on the back edge of your wood plank.
- Drill deep holes into the back of the wood using a drill bit that matches the diameter of the bracket arms.
- Slide the shelf onto the metal arms. If the fit is loose, apply a small amount of construction adhesive inside the holes.
- Verify the shelf is level and decorate with a few high-quality items to complete the look.
15 Modern Gold Framed Vanity Mirror
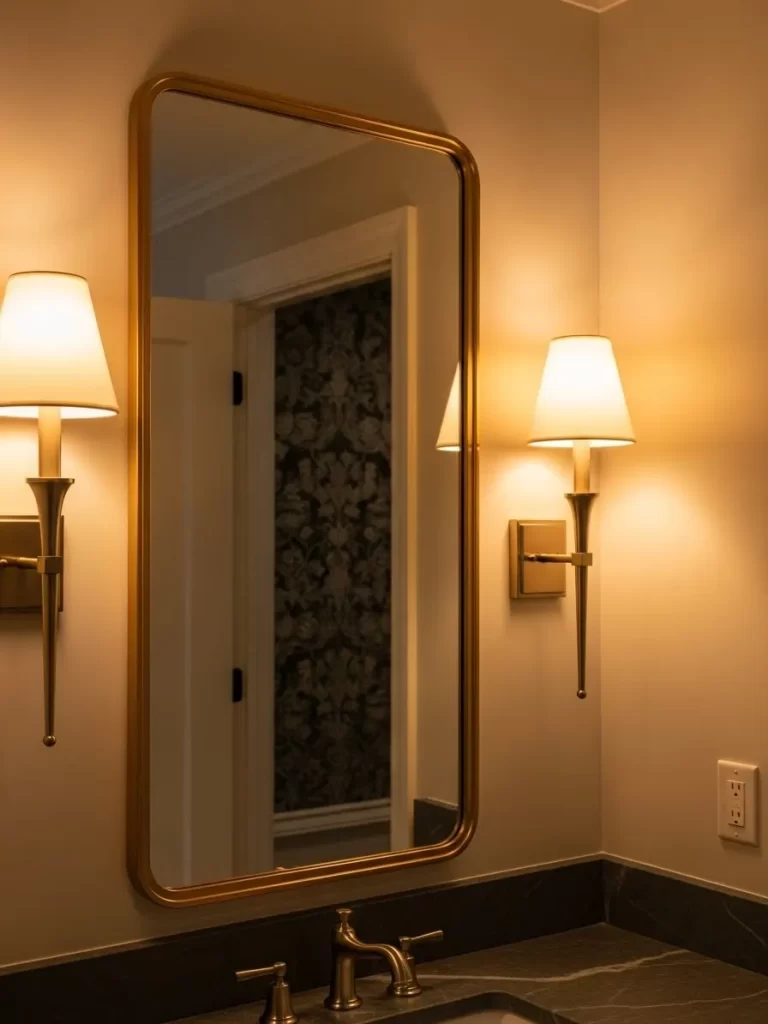
A basic, frameless mirror glued to the wall screams “standard apartment.” Upgrading to a large, rectangular mirror with a thin gold frame adds a touch of mid-century modern glamour. The metallic border acts like a piece of jewelry for your bathroom, tying together your brass faucets and lights.
The rounded corners of this specific style soften the harsh lines of a rectangular vanity. It makes the entire grooming area feel more like a high-end dressing room. This mirror reflects light across the room, making a small bathroom feel much more spacious.
Replacing a mirror is one of the most impactful changes you can make. It changes how you see yourself and your space every morning. This simple swap provides an instant designer finish that feels both modern and timeless.
Material Required List
- Gold-framed rectangular or pill-shaped mirror
- Heavy-duty picture hanging wire or D-rings
- Wall anchors (rated for the mirror’s weight)
Equipment Required List
- Power drill
- Measuring tape
- Level
- Pencil
DIY Instructions Step by Step
- Measure the width of your vanity and choose a mirror that is slightly narrower to maintain a balanced look.
- Find the center point of the vanity and mark it on the wall at eye level.
- Measure the distance from the top of the mirror to the hanging hardware on the back.
- Transfer this measurement to the wall, starting from your eye-level mark.
- Drill a hole for your wall anchor. If you aren’t hitting a stud, use a toggle bolt for extra security.
- Insert the screw into the anchor, leaving just enough of the head exposed to catch the mirror’s wire or ring.
- Lift the mirror carefully and hook it onto the screw. It is helpful to have a second person guide you.
- Adjust until level and wipe away any fingerprints with a glass cleaner for a sparkling finish.
16 Modern Gold Toilet Flush Handle
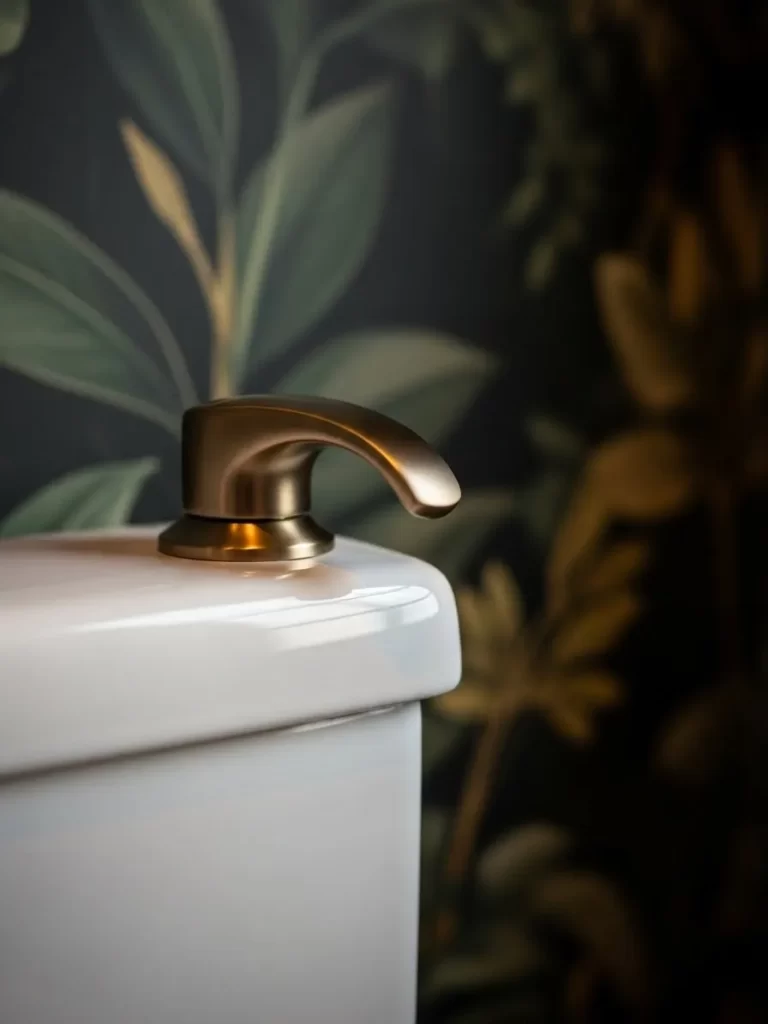
Most people overlook the toilet handle, but a cheap plastic lever can ruin the look of a nice bathroom. Swapping it for a sleek, brushed brass handle is a “micro-luxury” that makes the entire fixture feel upgraded. It is a small detail that shows you have thought about every inch of the design.
The metallic finish coordinates with your new faucets and cabinet pulls, creating a truly cohesive look. This specific curved design feels ergonomic and sturdy under your hand. It turns a mundane utility into a stylish accent.
This DIY takes less than five minutes and requires no special plumbing skills. It is an incredibly low-cost way to make an old toilet look more contemporary. You will be surprised at how much this tiny change improves the overall “vibe” of the room.
Material Required List
- Universal brushed brass toilet tank lever
- Cleaning cloth
Equipment Required List
- Adjustable wrench
- Pliers
DIY Instructions Step by Step
- Remove the tank lid and set it aside carefully on a towel so it doesn’t scratch or break.
- Unhook the chain that connects the current handle to the flapper at the bottom of the tank.
- Unscrew the nut holding the old handle in place. Note that these are often “reverse-threaded,” meaning you turn right to loosen.
- Slide the old handle out and wipe the hole in the porcelain to remove any slime or mineral buildup.
- Insert the new brass handle through the hole from the outside.
- Slide the nut over the arm on the inside and tighten it with your wrench until it is snug.
- Reconnect the chain to the new handle arm, ensuring there is just a little bit of slack so the flapper seals correctly.
- Flush the toilet to test the movement, then replace the lid.
17 High-Pressure Chrome Rain Shower Head

Standard shower heads often provide a weak, uneven spray that feels more like a chore than a relaxation. Upgrading to a wide, polished chrome rain shower head transforms your daily routine into a spa-like experience. The square, minimalist design offers a modern look that mimics high-end hotel bathrooms.
This fixture uses advanced nozzles to provide consistent water pressure even in homes with low flow. Polished chrome reflects light beautifully and is incredibly easy to keep clean from mineral deposits. It provides a broad, immersive spray that covers you completely, making every shower feel like a luxurious escape.
You can complete this installation in just a few minutes with basic household tools. It is a high-impact change that instantly elevates the visual appeal of your shower stall. This single upgrade bridges the gap between a basic utility room and a private sanctuary.
Material Required List
- New high-pressure rain shower head
- Teflon tape (plumber’s tape)
- Soft cleaning cloth
Equipment Required List
- Adjustable wrench or pliers
- Step ladder (if the shower arm is high)
DIY Instructions Step by Step
- Turn off the shower faucets completely to ensure no water is flowing while you work.
- Wrap a cloth around the old shower head nut to protect the finish if you plan to reuse it elsewhere.
- Loosen the old shower head by turning the nut counter-clockwise with an adjustable wrench.
- Unscrew the rest by hand once it is loose and remove it from the shower arm.
- Clean the threads of the shower arm thoroughly to remove old tape or white mineral crust.
- Apply new Teflon tape by wrapping it tightly around the threads three to four times in a clockwise direction.
- Screw the new rain shower head onto the arm by hand until it is finger-tight.
- Give it a final snug turn with the wrench, but do not over-tighten as this can crack the internal seals.
- Turn on the water to test the spray and check for any leaks around the connection.
18 Sleek Modern Replacement Fan Cover
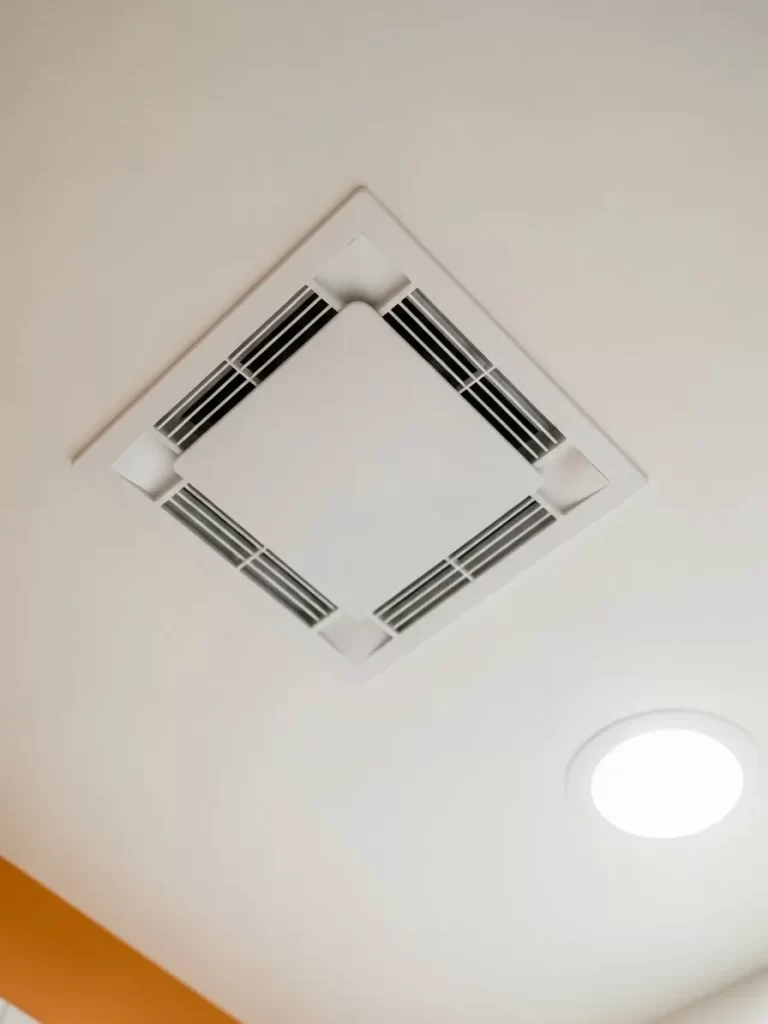
Old bathroom exhaust fans are often yellowed, dusty, and visually distracting on a clean ceiling. Replacing just the plastic cover with a modern, low-profile white grille instantly freshens the room’s upper view. This simple swap hides the ugly mechanical parts of the fan while improving airflow efficiency.
The clean, geometric lines of a new cover blend seamlessly into a white ceiling, making the fan almost disappear. Many modern covers are designed to be much quieter and easier to clean than older louvers. It is a small detail that makes the entire ceiling look recently renovated and well-maintained.
This is one of the easiest visual upgrades you can perform in a bathroom. It requires no electrical work and takes less than five minutes. You will notice how much “cleaner” the room feels once that dated, dusty plastic is gone.
Material Required List
- Universal replacement fan cover (ensure it matches your fan brand/size)
- Damp microfiber cloth
Equipment Required List
- Step ladder
- Flashlight (to see internal clips)
DIY Instructions Step by Step
- Switch off the bathroom fan at the wall switch to ensure it is not spinning while you work.
- Climb your ladder and gently pull the old cover down a few inches away from the ceiling.
- Squeeze the metal spring clips on either side of the cover to release them from the internal slots.
- Lower the old cover and use your damp cloth to wipe away any dust or cobwebs from the fan housing.
- Unpack your new cover and identify the two metal “V” shaped spring wires.
- Pinch the first spring wire and insert the ends into the small slots inside the fan housing.
- Repeat with the second spring on the opposite side while holding the cover close to the ceiling.
- Push the cover upward until the springs pull it tight and flush against the drywall.
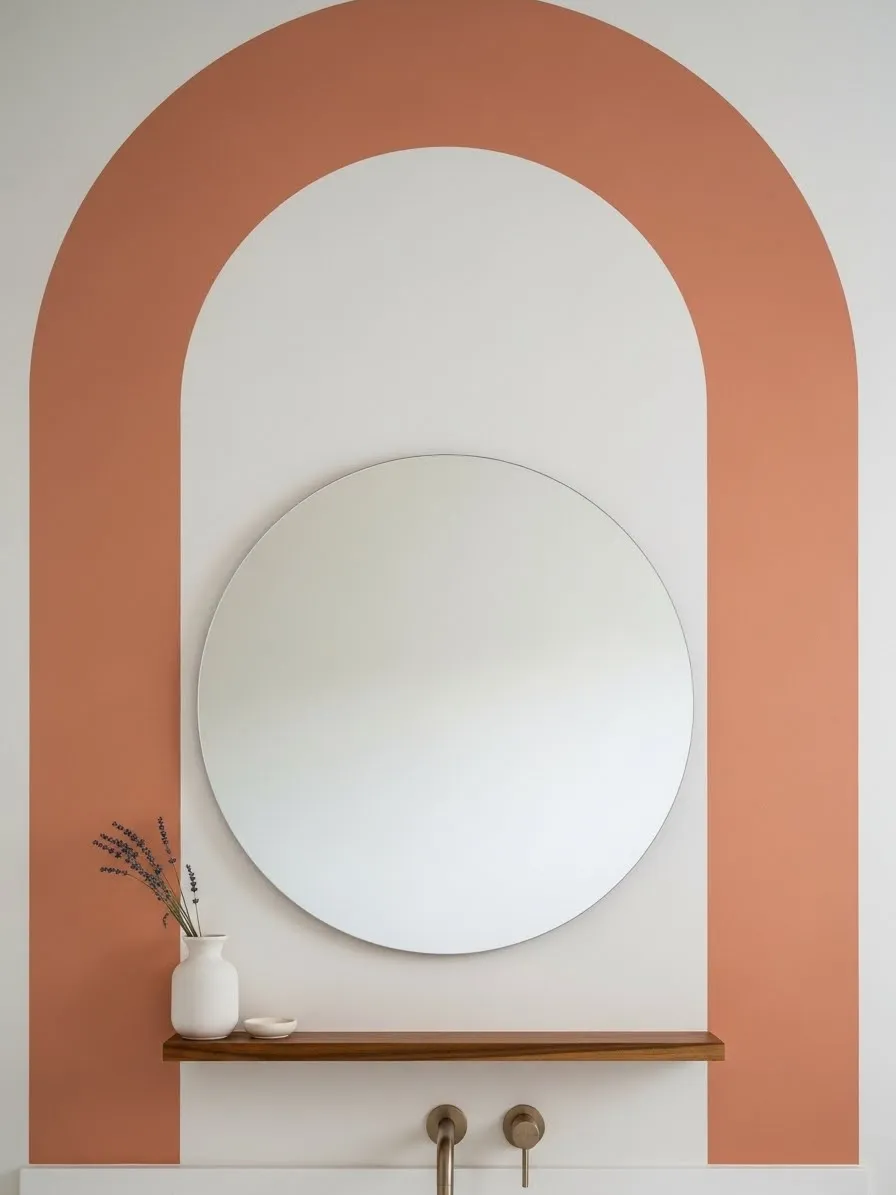
19 Terracotta Minimalist Painted Wall Arch
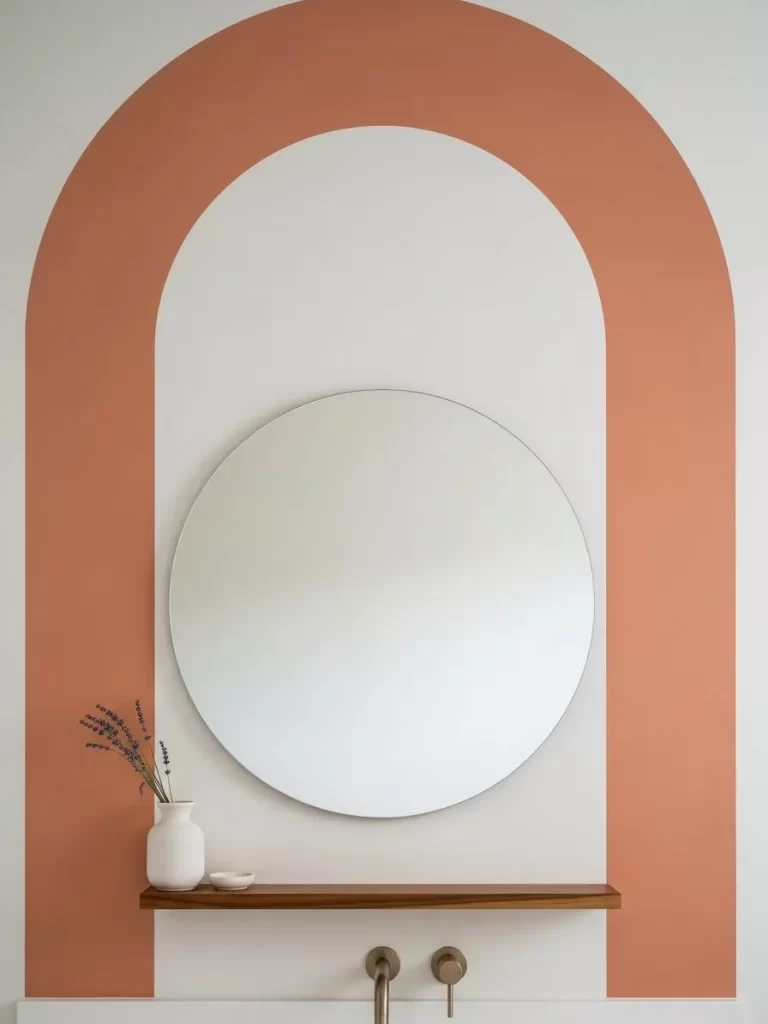
A flat, single-color wall can make a small bathroom feel boxed in and uninspired. Painting a simple geometric arch in a warm terracotta or earthy tone adds architectural depth without construction. This design element creates a beautiful frame for a mirror or a floating shelf, making the area feel like an intentional focal point.
The soft curve of the arch breaks up the hard right angles of the vanity and tiles, adding a sense of organic movement. It provides a modern, designer touch that feels custom and artistic. This project is a cost-effective way to introduce a bold color without overwhelming the entire space.
You can easily customize the size and color to match your existing accessories like rugs or towels. It is a creative weekend project that yields high-impact results with just a small amount of paint. The result is a sophisticated, “Pinterest-worthy” accent wall.
Material Required List
- Small can of interior paint (satin or eggshell finish)
- Painter’s tape
- Thumbtack or small nail
- Length of string
- Pencil
Equipment Required List
- Measuring tape
- Level
- Small angled paintbrush
- Mini foam roller and tray
DIY Instructions Step by Step
- Measure the width of the area you want the arch to cover and mark the center point on the wall.
- Decide on the height of the vertical sides and use a level to draw two perfectly straight lines upward from the floor.
- Find the center of your arch’s top by measuring exactly between your two vertical lines at the height where the curve begins.
- Insert a thumbtack at this center point and tie one end of your string to it.
- Tie your pencil to the other end of the string, ensuring the length matches half the width of your arch (the radius).
- Hold the string taut and rotate the pencil in a semi-circle to draw the perfectly curved top of your arch.
- Apply painter’s tape along the straight vertical lines, but do not tape the curve.
- Use an angled brush to carefully “cut in” and paint along your pencil curve by hand.
- Fill in the rest of the arch using your mini roller for a smooth, even finish.
- Peel the tape away while the paint is still slightly damp to ensure a crisp, professional edge.
20 Hand-Crafted Walnut Bathtub Caddy

A bare bathtub can feel cold and purely functional rather than a place for rest. A custom-made walnut wood tray adds a layer of warmth and provides a dedicated space for your book, candles, and soaps. The rich, dark grain of the walnut looks incredibly high-end against the white porcelain of the tub.
This tray is not only beautiful but also highly functional for long, relaxing soaks. It creates a dedicated “moment” in your day, turning a standard bath into a luxury experience. The natural wood element introduces an organic texture that balances the hard surfaces of the bathroom.
Building your own tray allows you to size it perfectly for your specific tub dimensions. It is a straightforward wood project that even a beginner can finish in an afternoon. This accessory is the ultimate finishing touch for a spa-inspired bathroom.
Material Required List
- One walnut board (measure your tub’s width plus 2 inches)
- Two small scrap wood strips (for the bottom “stoppers”)
- Wood glue
- Waterproof polyurethane sealer
- Sandpaper (120 and 220 grit)
Equipment Required List
- Handsaw or miter saw
- Measuring tape
- Pencil
- Paintbrush (for sealer)
DIY Instructions Step by Step
- Measure the total width of your bathtub from the outer edge to the wall side.
- Cut your walnut board to this exact length so it sits securely across the entire tub opening.
- Sand the board thoroughly, starting with 120-grit and finishing with 220-grit until the wood is silky smooth.
- Determine the stopper placement by measuring the distance between the inside edges of your bathtub walls.
- Flip the board over and mark these two points on the bottom side.
- Glue your small wood strips just inside these marks so the tray cannot slide off the edges of the tub.
- Let the glue dry for at least two hours before moving the board.
- Apply three thin coats of waterproof polyurethane sealer to all sides of the wood.
- Allow 24 hours to cure before placing the tray over your tub to ensure it is fully protected from steam and water.
21 Brass Triple Towel Hook Rack
Cramming multiple damp towels onto a single rod prevents them from drying and looks messy. A triple hook rack in brushed brass provides a stylish and efficient solution for shared bathrooms. The warm gold finish adds a touch of sophistication to your walls while keeping your textiles organized.
Hooks allow for better airflow around the fabric, helping your towels stay fresh for longer. This specific design features traditional curves that match vintage or transitional decor beautifully. It turns a boring wall into a functional and decorative display area.
Installing a hook rack is a very quick project that frees up floor and counter space. It creates a structured look that feels much more expensive than its actual cost. You can easily hang different colored towels to add a layered, lived-in feel to the room.
Material Required List
- Triple brass hook rack
- Heavy-duty wall anchors
- Screws (matching the hook finish)
Equipment Required List
- Power drill and bits
- Level
- Pencil
- Screwdriver
DIY Instructions Step by Step
- Decide on the height, usually about 60 to 70 inches from the floor for adult convenience.
- Hold the rack against the wall and use a level to ensure the base is perfectly straight.
- Mark the screw holes on the wall with your pencil through the mounting holes.
- Drill pilot holes at your marks. If you aren’t hitting a stud, use the wall anchors.
- Tap the anchors in until they are flush with the wall surface using a hammer.
- Align the rack over the holes and drive the screws in with your screwdriver.
- Cover the screws with the decorative caps if your kit included them for a seamless look.
- Test the hooks with a few towels to ensure they are solid and secure.
22 Privacy Frosted Window Film

Standard clear glass windows in a bathroom often force you to keep the blinds closed all day. Applying a pinstripe frosted film provides complete privacy while still flooding the room with natural light. This modern pattern adds a subtle architectural texture that looks much more high-end than a plain frosted sheet.
The vertical stripes complement high ceilings and add a contemporary edge to the window frame. This solution is waterproof and holds up perfectly in humid environments. It is an excellent way to hide an unappealing view without losing the benefit of the sun.
Film application is a reversible and non-damaging project, making it great for renters. It instantly makes the bathroom feel brighter and more open. You get the benefit of a “fancy” etched glass look for the price of a few rolls of vinyl.
Material Required List
- Pinstripe frosted window film
- Spray bottle with water and a drop of dish soap
- Microfiber cloth
Equipment Required List
- Utility knife or sharp scissors
- Squeegee or old credit card
- Measuring tape
- Steel ruler
DIY Instructions Step by Step
- Measure the glass panes of your window carefully and add an extra inch to each dimension for a buffer.
- Cut the film using your steel ruler and utility knife to ensure the lines are perfectly straight.
- Clean the glass multiple times until it is completely free of dust, hair, and fingerprints.
- Mist the glass heavily with your soapy water solution. This allows you to slide the film into place easily.
- Peel the backing off the film and spray the sticky side with the water solution as well.
- Press the film onto the glass, starting from the top and letting it float on the water layer.
- Use a squeegee to push the water and air bubbles out from the center toward the edges.
- Trim the excess film along the edges of the window frame using your knife for a perfect fit.
23 Textured White Ceramic Backsplash
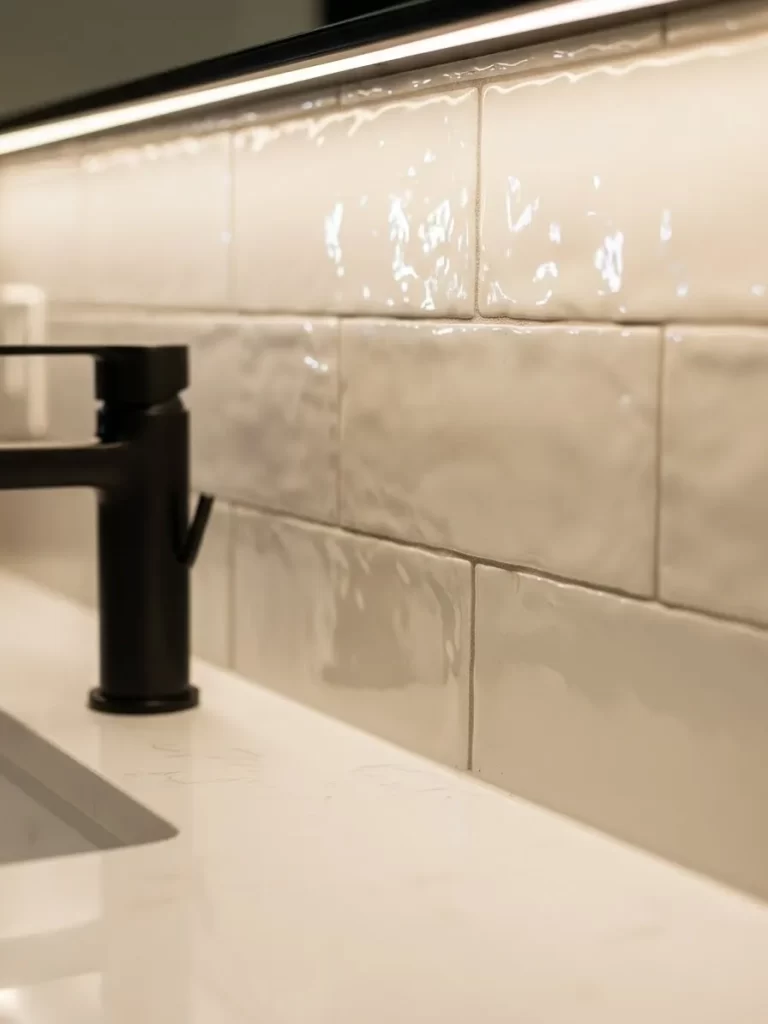
Flat paint behind a vanity is prone to water damage and looks unfinished. Adding a textured white ceramic tile backsplash introduces a luxury tactile element to the room. The subtle waves in the tile catch the light, creating a dynamic surface that changes throughout the day.
This material is incredibly durable and protects your walls from daily splashes and stains. It provides a clean, bright foundation that makes your matte black faucets pop. The result is a high-contrast, modern aesthetic that feels like a custom designer choice.
Tiling a small area like a backsplash is a great introduction to masonry work. It doesn’t require many tiles but makes a huge impact on the overall value of the bathroom. This simple addition makes the vanity area feel like a high-end furniture installation.
Material Required List
- Textured white ceramic tiles
- Tile adhesive
- White grout
- Spacers
Equipment Required List
- Notched trowel
- Grout float
- Sponge
- Manual tile cutter
DIY Instructions Step by Step
- Protect your countertop with painter’s tape and plastic sheeting before starting.
- Apply adhesive to the wall in a thin, even layer using your notched trowel.
- Set the first row of tiles directly on the countertop, using spacers to maintain a small gap for grout.
- Press each tile firmly into the adhesive, checking with a level to ensure they stay straight.
- Cut end tiles to fit against the side walls using your manual cutter.
- Wait 24 hours for the adhesive to cure before removing the spacers.
- Push grout into the joints using a rubber float, working in diagonal strokes across the tile faces.
- Clean the surface with a damp sponge after 15 minutes to remove the grout haze.
24 Smart Bidet Toilet Seat Upgrade
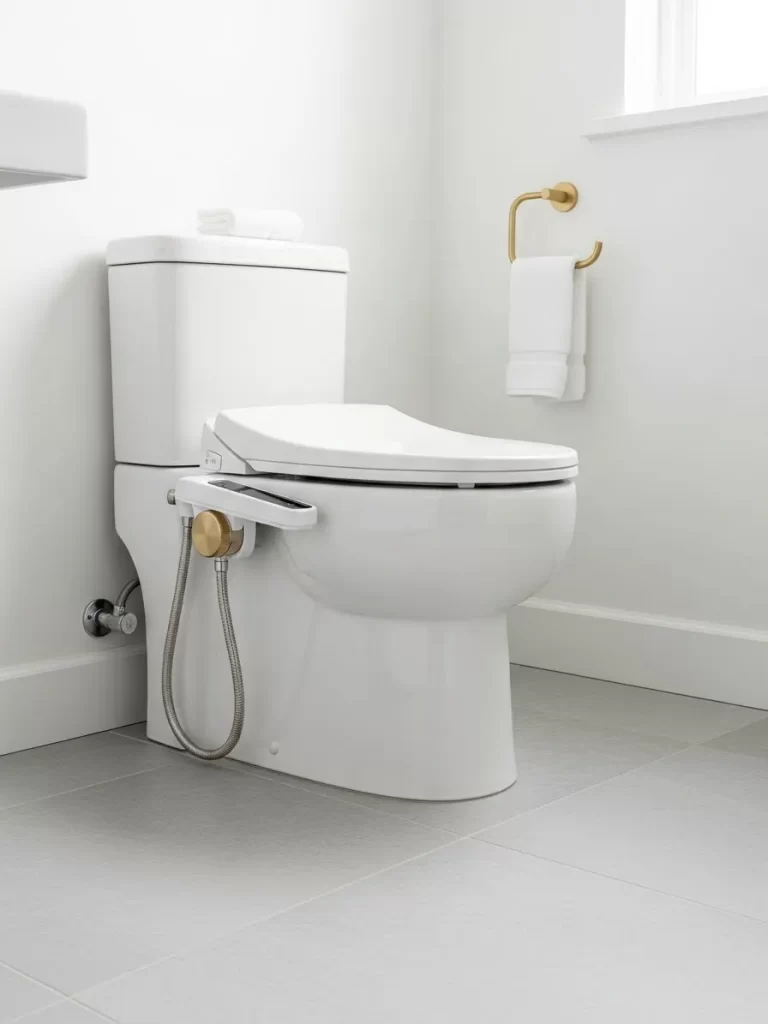
A standard toilet can feel dated and purely functional compared to modern luxury standards. Swapping your regular seat for a smart bidet model with a gold-accented side control adds a high-tech spa feel. The sleek, low-profile design fits seamlessly onto your existing porcelain fixture.
Bidets offer superior hygiene and reduce the need for excessive paper products. This specific model features a warm gold dial that coordinates with your other brass hardware. It is a functional luxury that visitors will notice and appreciate immediately.
Installing a bidet seat is a straightforward task that requires no major plumbing changes. It simply taps into your existing water line. This single change drastically improves your daily comfort and modernizes the most used seat in the house.
Material Required List
- Smart bidet toilet seat kit
- T-valve adapter (usually included)
- Plumber’s tape
Equipment Required List
- Adjustable wrench
- Screwdriver
- Cleaning supplies
DIY Instructions Step by Step
- Turn off the water at the valve behind the toilet and flush to empty the tank.
- Remove the old seat by unscrewing the bolts underneath the back of the bowl.
- Clean the porcelain rim thoroughly while the seat is off.
- Install the mounting plate that came with the bidet using the new bolts provided.
- Disconnect the water hose from the bottom of the toilet tank and attach the T-valve.
- Connect the bidet hose to the side of the T-valve and the other end to the bidet seat.
- Slide the bidet seat onto the mounting plate until it clicks into place.
- Turn the water back on and check for leaks before testing the control dial.
25 Modern Black and Gold Entry Door
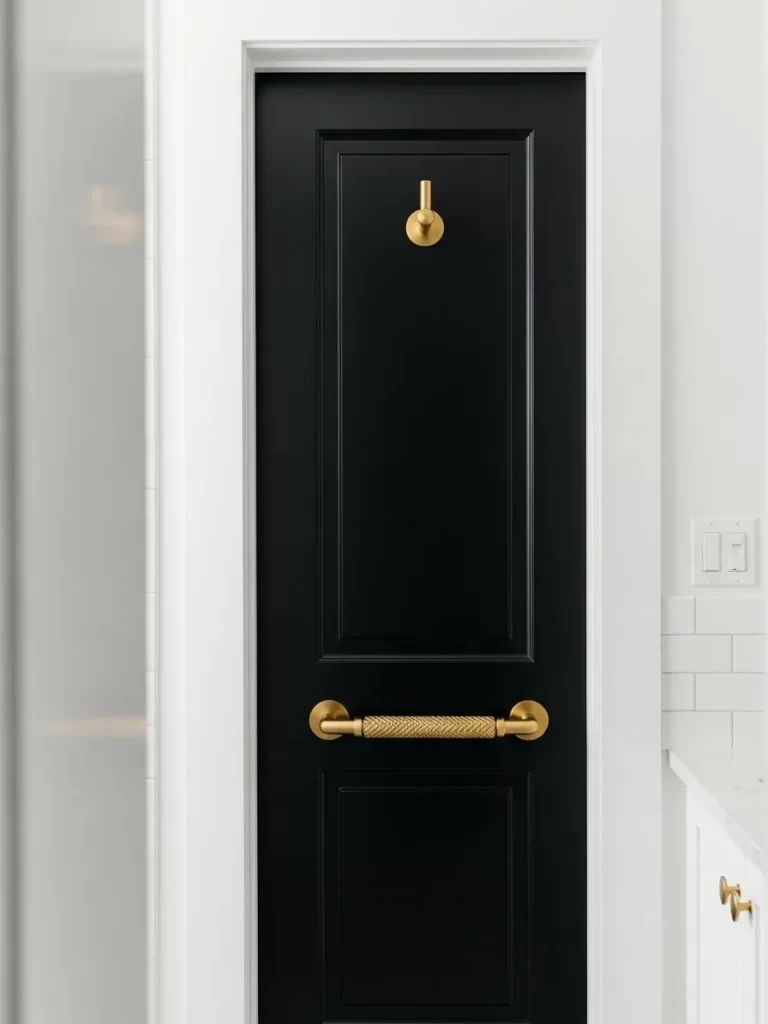
The back of a bathroom door is often an overlooked white slab that feels generic. Painting the door a deep matte black and adding a heavy-duty gold handle creates a dramatic, high-end entrance. This contrast adds a layer of sophistication that anchors the entire room’s design.
Black doors hide scuffs and fingerprints better than light colors and look more like architectural features. The textured gold handle provides a luxurious touchpoint every time you enter or exit. It is a bold move that pays off by making the space feel more expensive.
This project is a simple way to tie together all the black and gold accents in the bathroom. It acts as a frame for the room when the door is open. You can transform a cheap builder-grade door into a custom-looking piece with just a quart of paint.
Material Required List
- Matte black interior door paint
- Brushed gold lever handle and deadbolt
- Painter’s tape
- Sandpaper
Equipment Required List
- Screwdriver
- Small foam roller
- Angled paintbrush
- Sawhorses (optional)
DIY Instructions Step by Step
- Remove the door from its hinges and lay it flat on sawhorses for a smoother finish.
- Remove all old hardware like handles and locks using your screwdriver.
- Sand the surface lightly to scuff up the old paint so the new black paint adheres better.
- Tape off any areas you don’t want to paint, such as the hinges or glass inserts.
- Apply two thin coats of matte black paint using the foam roller for the flat panels and a brush for the trim.
- Let the paint dry completely for at least 4-6 hours between coats.
- Install the new gold hardware by screwing the handles into the existing holes.
- Rehang the door on the hinges and enjoy the high-contrast, modern look.
26 Grand Crown Moulding and Trim
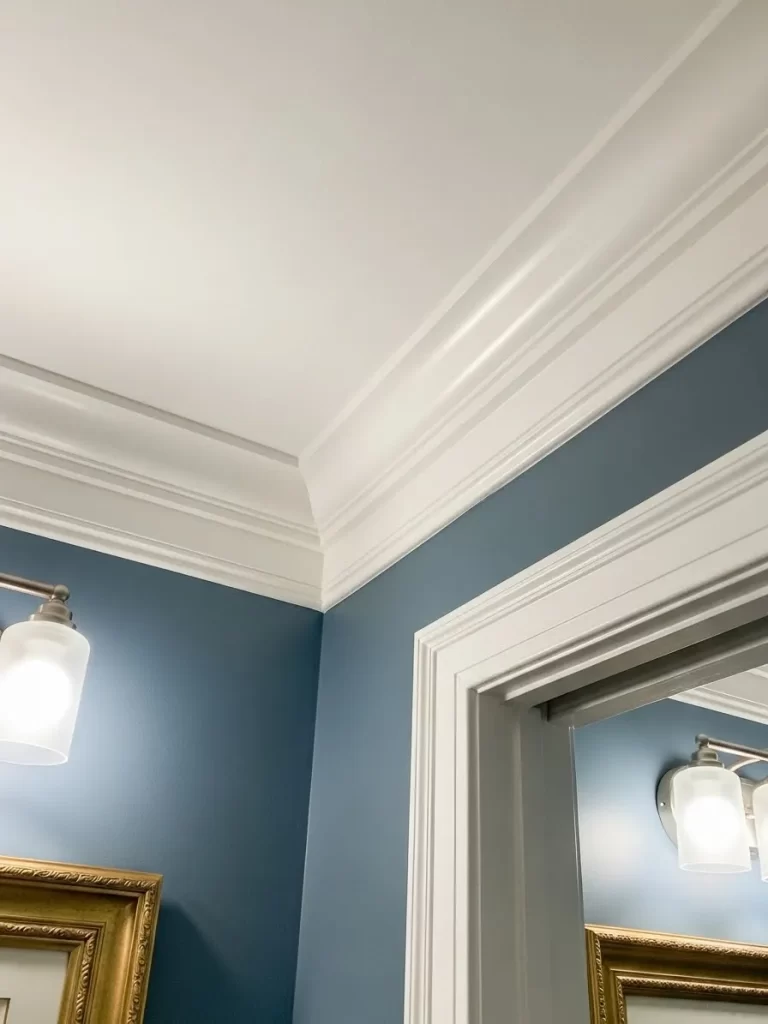
Low ceilings or plain wall-to-ceiling transitions can make a bathroom feel unfinished. Adding wide, multi-tiered crown moulding provides a classic architectural “cap” that makes the room feel taller. The crisp white trim against a deep blue wall creates a stunning, high-contrast border.
Moulding hides uneven gaps where the drywall meets the ceiling and adds a sense of permanence. It is a hallmark of custom home design that instantly signals quality. This detail makes even a small bathroom feel like a formal, well-designed space.
While cutting miters can seem daunting, pre-angled corner blocks make this a beginner-friendly project. It is a low-cost material that yields a very high visual return. You will be amazed at how much “sturdier” and more expensive the room looks with this addition.
Material Required List
- Lengths of primed MDF crown moulding
- Finishing nails
- White caulk
- Wood filler
Equipment Required List
- Miter saw or miter box
- Nail gun or hammer
- Level
- Caulking gun
DIY Instructions Step by Step
- Measure each wall length and buy about 10% extra material to account for cutting errors.
- Cut your lengths to size. If you aren’t comfortable with complex angles, use “miterless” corner blocks.
- Hold the moulding against the ceiling and wall, ensuring it sits flat against both surfaces.
- Nail the trim into the wall studs and ceiling joists using a finishing nail gun every 12-16 inches.
- Fill the nail holes with wood filler and sand them smooth once dry.
- Apply a thin bead of caulk along the top and bottom edges where the wood meets the drywall.
- Smooth the caulk with a wet finger for a seamless transition that looks like part of the wall.
- Apply a final coat of semi-gloss white paint to hide any scuffs or filler marks.
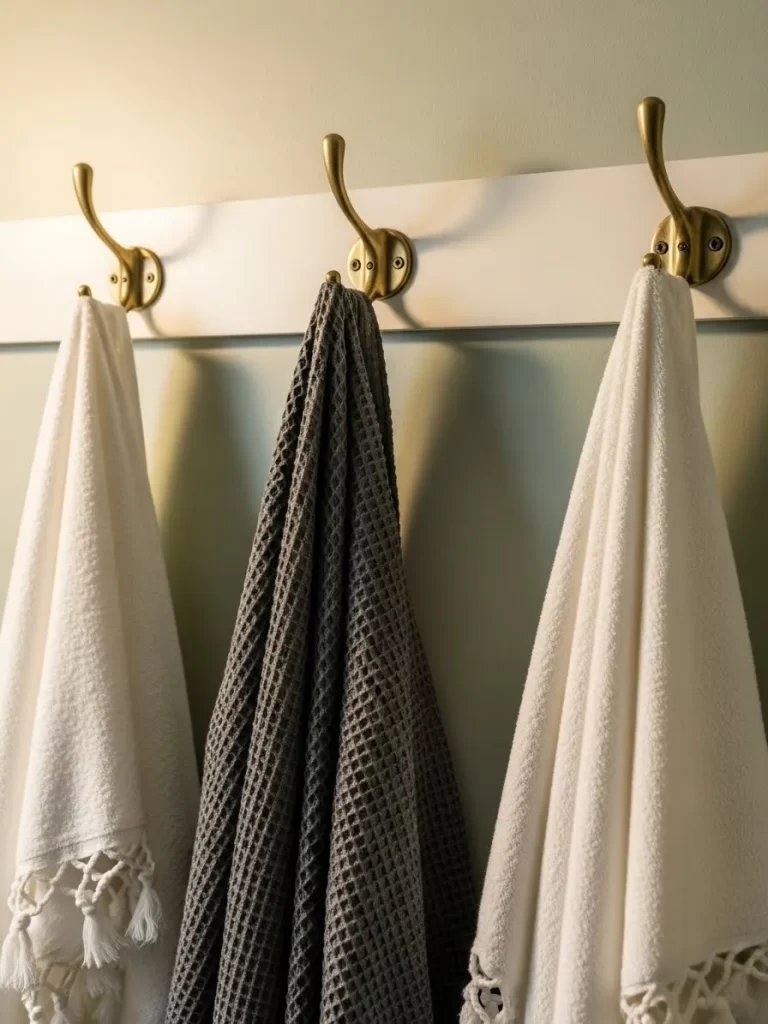
27 Luxury Grey Waffle-Knit Towels
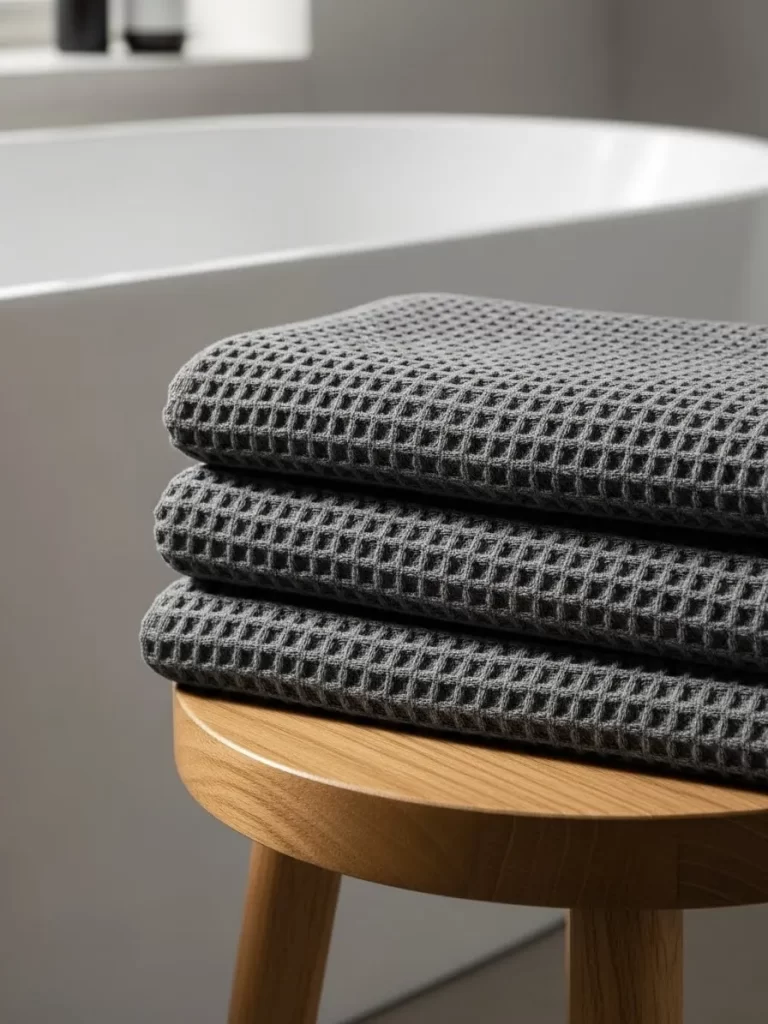
Thin, scratchy towels are a sure sign of a low-budget bathroom. Swapping them for thick, grey waffle-knit towels adds a sophisticated texture and a spa-like feel. The deep charcoal color provides a modern contrast against white tiles and light wood accents.
The waffle-knit pattern isn’t just for looks; it increases surface area for faster drying and gentle exfoliation. These towels look beautiful when folded neatly on shelves or hanging from brass hooks. It is a textile upgrade that you can feel every time you step out of the shower.
Investing in high-quality linens is the easiest way to add luxury without any tools. They bring a sense of softness and comfort to a room that is often dominated by hard surfaces. It is the final “layer” that makes a bathroom renovation feel complete.
Material Required List
- Set of charcoal grey waffle-knit bath towels
- Matching hand towels and washcloths
Equipment Required List
- Washing machine (to pre-wash for maximum fluff)
DIY Instructions Step by Step
- Remove all old, mismatched towels from the bathroom to clear the visual clutter.
- Wash your new towels in cold water with a cup of white vinegar to set the color and remove factory softeners.
- Tumble dry on low with wool dryer balls to increase the loft of the waffle weave.
- Fold the bath towels into thirds lengthwise, then in half to create a clean, rounded edge for display.
- Hang the hand towels on your brass hooks, ensuring the edges are even.
- Roll the washcloths into tight cylinders and place them in a small basket or on a shelf for a boutique hotel look.
28 Custom Marble Outlet Cover Upgrade
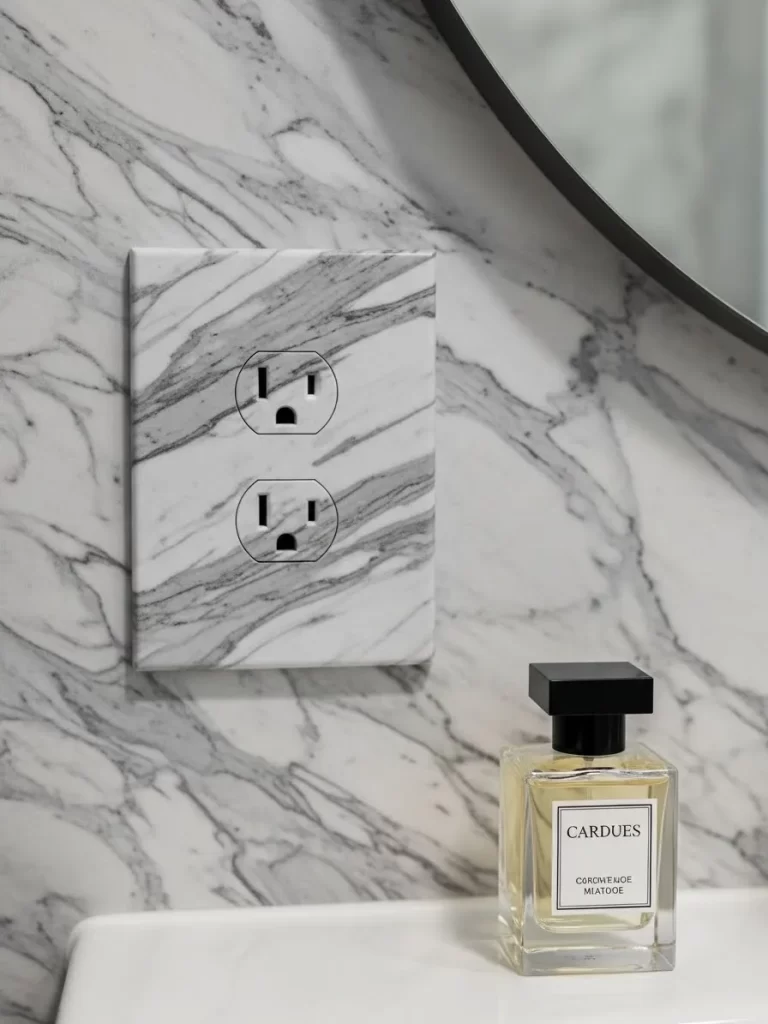
Generic white plastic outlet covers look cheap and often turn yellow over time. Replacing them with marble-patterned covers provides a seamless look that blends into high-end stone backsplashes. It is a small detail that eliminates a visual “eye sore” and makes your walls look custom-finished.
The grey veining of the marble cover matches perfectly with white marble countertops. This simple swap makes the outlet feel like a decorative choice rather than a functional necessity. It is one of those tiny details that professional designers never overlook.
Replacing a cover takes less than sixty seconds and requires only a single screwdriver. It is a very low-cost way to add a layer of sophistication to your vanity area. You can find these in various stone patterns to match whatever tile or paint you have.
Material Required List
- Marble-patterned outlet and switch covers
- Matching screws (usually included)
Equipment Required List
- Small flathead or Phillips screwdriver
DIY Instructions Step by Step
- Unscrew the single screw in the center of your old plastic outlet cover.
- Pull the old cover off and wipe away any dust or paint buildup from the wall around the outlet.
- Align the new marble cover over the outlet, ensuring the openings line up perfectly.
- Insert the screw through the center hole of the new cover.
- Tighten the screw until the cover is flush against the wall, but do not over-tighten as it could crack the plate.
- Check that it is level and adjust slightly before the final snug turn of the screwdriver.
29 Organic Greenery and Hanging Plants
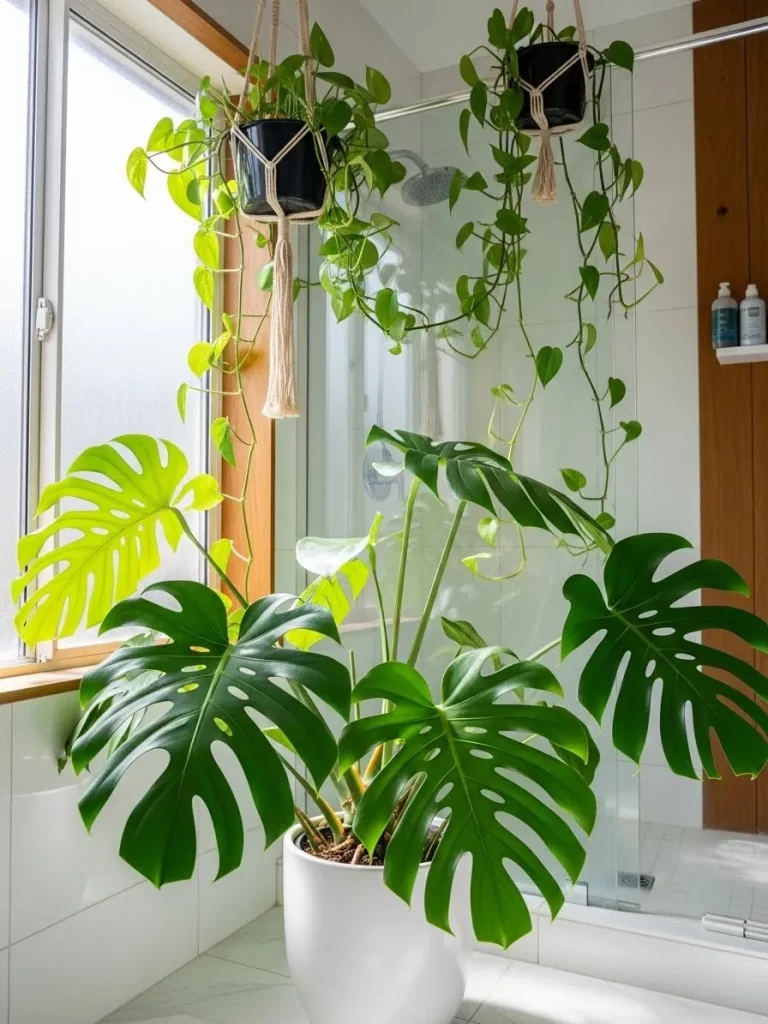
A bathroom without plants can feel cold and lacking in life. Adding a large Monstera or hanging Pothos introduces vibrant green tones that make the space feel fresh and organic. Plants help soften the hard lines of tile and glass while naturally purifying the air.
The humid environment of a bathroom is actually a paradise for many tropical plants. Hanging them from macramé holders utilizes vertical space and keeps your counters clear. It creates a lush, “indoor jungle” vibe that makes your morning routine feel like a walk in a garden.
Choosing white ceramic pots keeps the look clean and modern. Plants are an affordable way to add color and movement to an empty corner. They bring a sense of peace and vitality that no piece of hardware can replicate.
Material Required List
- Humidity-loving plants (Monstera, Pothos, Ferns)
- White ceramic pots with drainage
- Macramé hanging planters
- Ceiling hooks
Equipment Required List
- Power drill
- Measuring tape
- Ladder
DIY Instructions Step by Step
- Identify the brightest spots in your bathroom, as even humidity-loving plants need some light.
- Pot your plants in high-quality soil using white ceramic pots for a cohesive look.
- Mark your ceiling spots for the hanging plants, ensuring they aren’t in the way of doors or cabinets.
- Drill a pilot hole into the ceiling and screw in a heavy-duty swag hook.
- Place your potted plant into the macramé holder carefully.
- Hang the planter from the hook and adjust the length so it sits at eye level.
- Place larger floor plants in corners or next to the tub to fill empty architectural gaps.
- Water your plants regularly, taking advantage of the natural steam from your shower to keep them thriving.
30 Modern Under-Vanity Motion Lighting
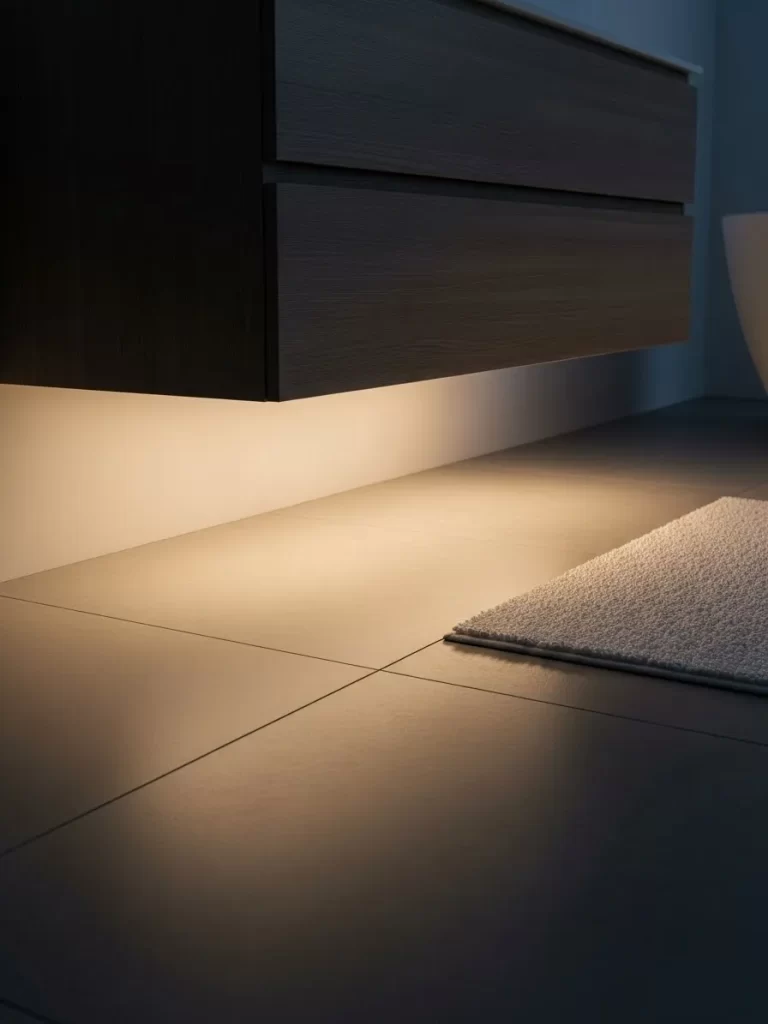
Fumbling for a light switch in the middle of the night can be jarring and disruptive to sleep. Installing a strip of warm LED motion lights under your vanity creates a soft, high-end “glow” that guides your way. This feature is common in luxury hotels and gives your bathroom a futuristic, custom-built feel.
The hidden light source highlights your floor tiles and makes the vanity appear to be floating. It provides just enough light for safety without waking you up completely. It is a functional upgrade that also serves as a stunning decorative element.
Most modern LED strips are peel-and-stick and battery-powered, requiring zero electrical knowledge. This project takes about ten minutes but adds a “wow factor” that guests will love. It is a clever way to make a basic bathroom feel premium and well-thought-out.
Material Required List
- Motion-activated LED light strip (warm white)
- Batteries or USB charging cable
- Rubbing alcohol
Equipment Required List
- Measuring tape
- Scissors (if the strip is trimmable)
DIY Instructions Step by Step
- Measure the length of the bottom edge of your vanity cabinet.
- Clean the underside of the cabinet with rubbing alcohol to remove any dust or oils so the adhesive sticks.
- Trim the LED strip at the designated cut marks if it is longer than your vanity.
- Peel the adhesive backing off the strip slowly as you press it onto the bottom of the cabinet.
- Mount the motion sensor in a spot where it can “see” your feet as you enter the room, but isn’t visible.
- Install the batteries or plug in the power source according to the manufacturer’s instructions.
- Test the motion sensor by walking into the room in the dark to ensure the placement is correct.
- Secure any loose wires with small adhesive clips for a clean, professional finish.
31 Elegant Striped Roman Window Shade
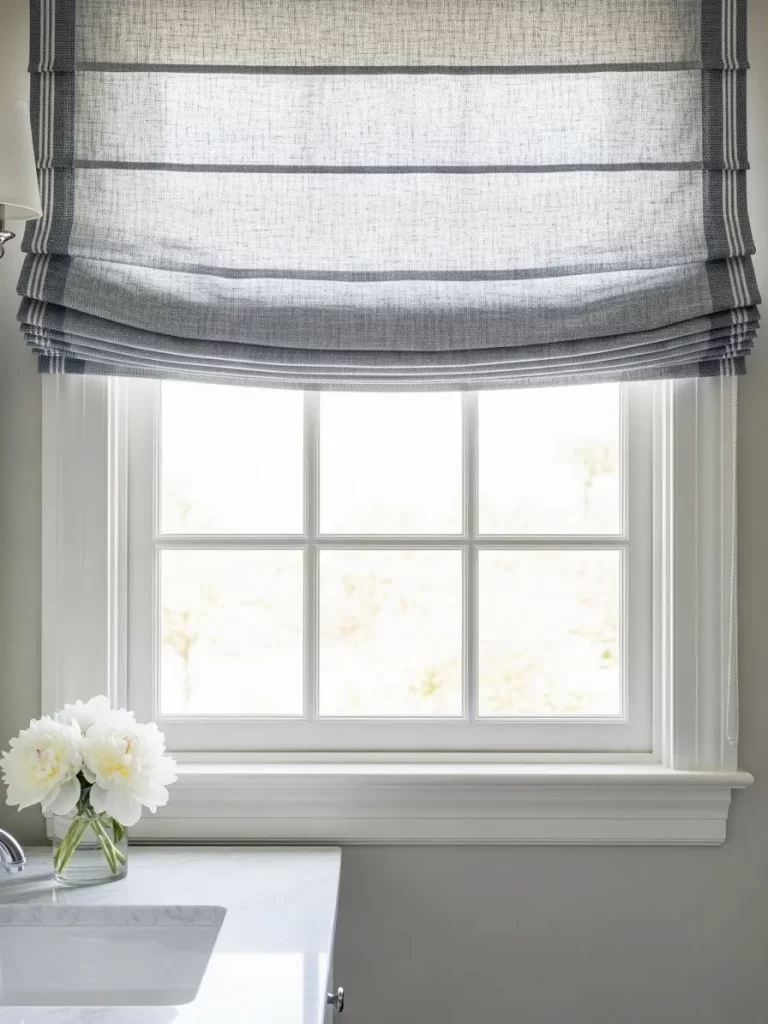
Standard horizontal blinds can look corporate and cold in a bathroom setting. Swapping them for a custom-tailored Roman shade in a soft grey and white stripe adds a high-end textile layer. The thick fabric provides excellent privacy while the horizontal folds introduce an architectural softness to the window frame.
This window treatment creates a cozy, furnished feeling that elevates the room beyond a simple utility space. It allows you to control natural light with precision, creating a soft glow that is very flattering. The classic pattern pairs beautifully with marble countertops and white trim for a timeless aesthetic.
Installing a Roman shade is a simple way to bring pattern and color into your design without a major commitment. It effectively hides the “naked” look of a bare window and provides a professional, finished appearance. This single change can make your vanity area feel like a high-end dressing room.
Material Required List
- Striped Roman shade (sized to your window)
- Mounting brackets and screws
- Drywall anchors (if not hitting a stud)
Equipment Required List
- Power drill and bits
- Screwdriver
- Measuring tape
- Level
- Pencil
DIY Instructions Step by Step
- Measure the inside width of your window frame at the top, middle, and bottom to ensure you order the correct shade size.
- Hold the mounting brackets against the top inside corners of the window frame or on the wall above it.
- Mark the screw holes with a pencil to ensure your placement is accurate and level.
- Drill pilot holes at your marks. If you are mounting to drywall, tap in your plastic anchors until they are flush.
- Screw the brackets into place firmly, checking one last time with a level.
- Snap the headrail of the Roman shade into the brackets until you hear a clear click.
- Test the lift mechanism to ensure the shade raises and lowers smoothly without catching.
- Steam the fabric gently to remove any shipping creases so the folds hang perfectly.
32 Curated Marble and Brass Vanity Tray
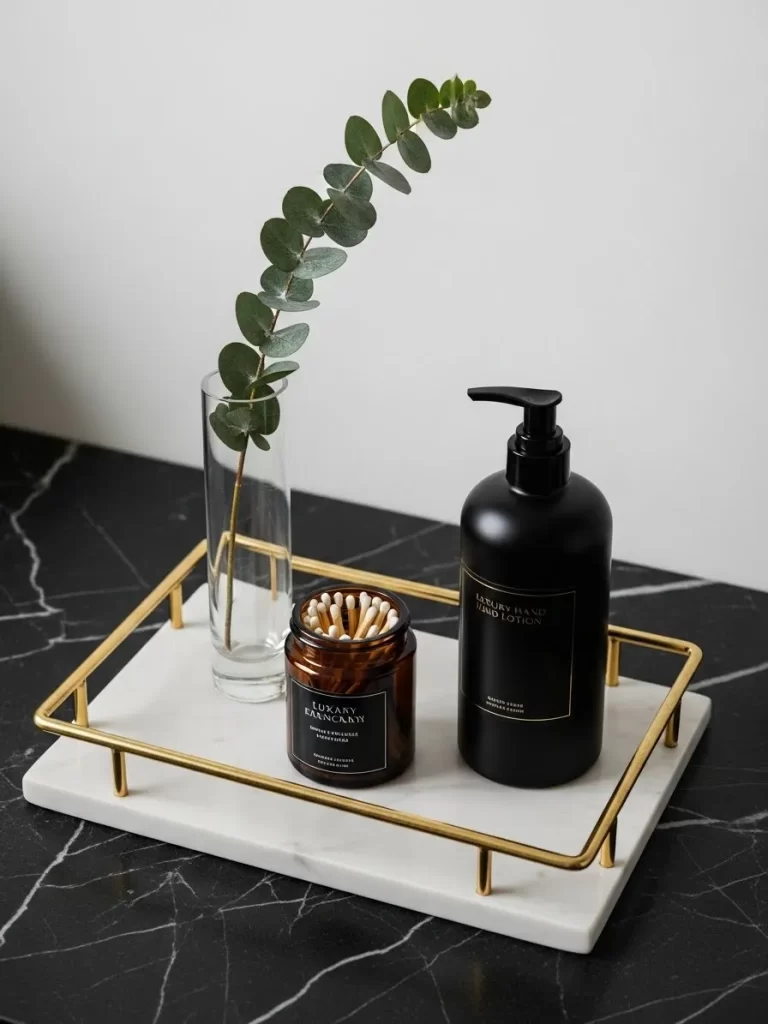
A cluttered countertop covered in loose toiletries can make even an expensive bathroom look messy. Using a curated marble tray with a thin brass rim instantly organizes your daily essentials into a stylish display. This simple grouping technique turns random bottles into a deliberate design statement.
The white marble base provides a luxurious, heavy surface that protects your vanity from water rings and spills. Pairing it with a matte black soap dispenser and amber jars creates a sophisticated, high-contrast palette. This small detail makes your morning routine feel much more organized and special.
A tray is the easiest way to add a layer of “styled” luxury to your bathroom. It defines a specific zone for your most-used items, keeping the rest of the counter clear and airy. It is a low-cost upgrade that provides a massive boost to the room’s visual order.
Material Required List
- Marble vanity tray with brass accents
- Matte black soap dispenser
- Amber glass apothecary jars
- Fresh eucalyptus or greenery spray
Equipment Required List
- Microfiber cleaning cloth
DIY Instructions Step by Step
- Clear everything off your vanity counter and wipe the surface down until it sparkles.
- Place the marble tray in a corner or between your sinks to ground the area.
- Transfer your soap and lotions into matching matte black or amber bottles for a uniform look.
- Fill small jars with cotton swabs or matches to keep them organized but accessible.
- Arrange the items on the tray, placing the tallest objects in the back and smaller ones in front.
- Add a small vase with a single green stem to introduce an organic, fresh element.
- Step back and adjust the spacing so the tray looks balanced but not overcrowded.
33 Bold Sky Blue Designer Ceiling
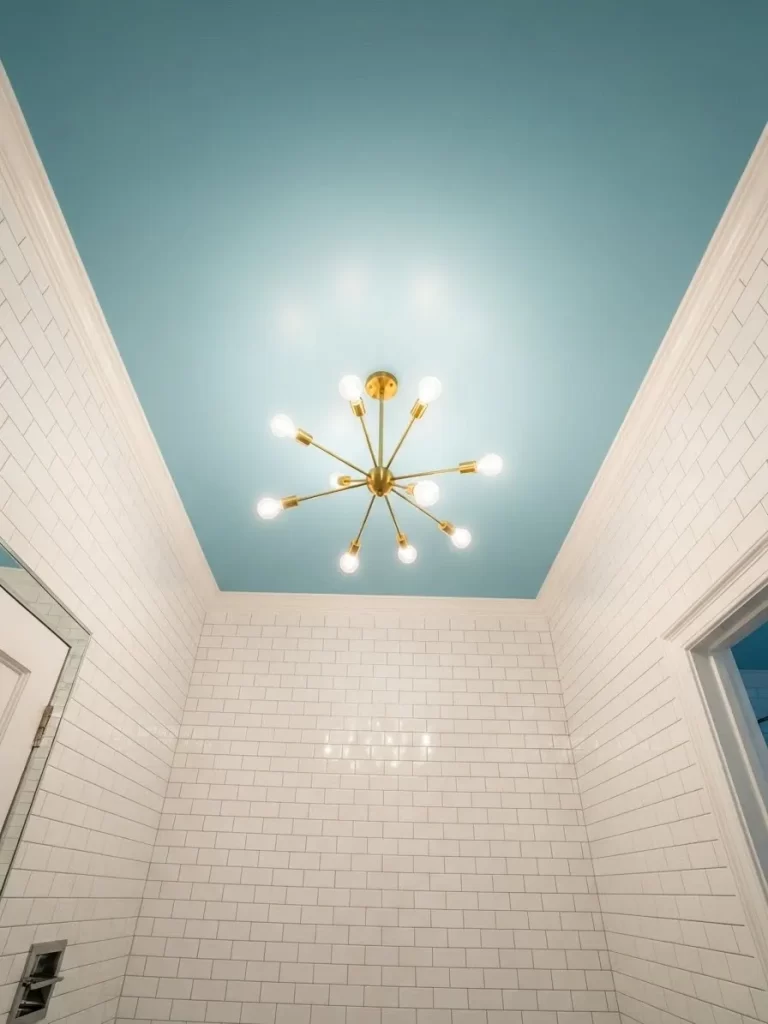
Most people leave their bathroom ceilings white, which can feel uninspired and flat. Painting the ceiling in a vibrant sky blue creates an unexpected “pop” of color that makes the room feel brighter and more expansive. It draws the eye upward and provides a stunning contrast to white subway tiles.
This design trick mimics the feeling of an open sky, making a small or windowless bathroom feel much less claustrophobic. It creates a beautiful backdrop for a modern brass chandelier or flush mount light. The result is a high-energy, custom look that feels very brave and designer-forward.
Using a semi-gloss or satin finish on the ceiling helps reflect light downward onto your vanity mirror. It is a cost-effective way to completely change the mood of the room in just a few hours. This bold choice signals a home that is curated with confidence.
Material Required List
- One gallon of sky blue interior paint (moisture-resistant)
- High-quality painter’s tape
- Drop cloths
- Ceiling primer
Equipment Required List
- Paint roller with extension pole
- Angled sash brush (for corners)
- Paint tray and liners
- Step ladder
DIY Instructions Step by Step
- Clear the room or cover everything with drop cloths to protect from paint drips.
- Tape off the top of your walls and any crown moulding with high-quality painter’s tape.
- Clean the ceiling to remove any dust or cobwebs that could ruin the paint finish.
- Cut in the edges with your angled brush, painting a three-inch border around the perimeter.
- Prime the ceiling if you are covering a dark color or if the surface is bare drywall.
- Roll on the first coat of sky blue paint using an extension pole, working in small sections.
- Apply a second coat once the first is completely dry to ensure even color coverage.
- Remove the tape carefully while the paint is still slightly tacky for the cleanest possible lines.
34 Soft-Close Designer Toilet Seat
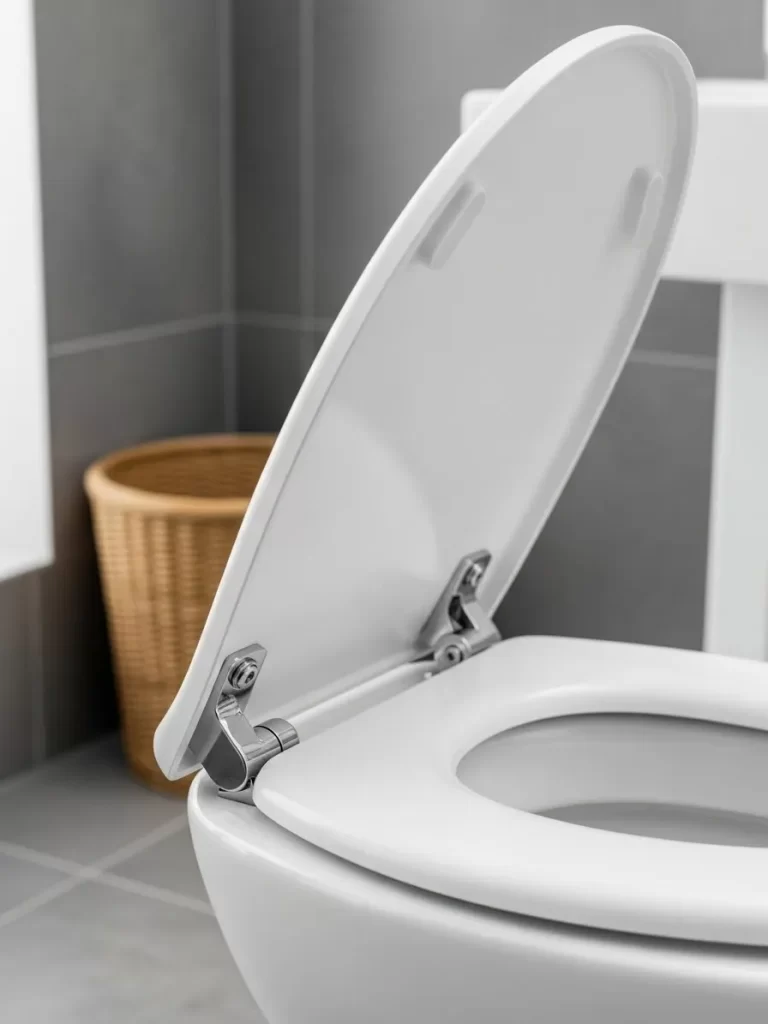
A slamming toilet seat is a small annoyance that can make a bathroom feel low-quality. Upgrading to a modern, soft-close seat with sleek chrome hinges provides a quieter and more refined experience. The thin, low-profile design fits the porcelain perfectly for a more integrated look.
This upgrade is as much about function as it is about aesthetics. The slow-descend mechanism prevents damage to the bowl and eliminates loud noises in the middle of the night. It is a subtle luxury that makes the most basic fixture in the room feel more premium.
Installing a new seat is an excellent time to deep clean areas that are usually hard to reach. It is a quick and affordable task that improves the hygiene and feel of the room. You will notice the difference in quality every single time it is used.
Material Required List
- Soft-close toilet seat (verify round vs. elongated)
- Mounting bolts and nuts (usually included)
Equipment Required List
- Flathead screwdriver
- Adjustable wrench
- Deep-cleaning spray and rags
DIY Instructions Step by Step
- Remove the old seat by popping the plastic covers at the back and unscrewing the bolts from underneath.
- Scrub the mounting holes and the back of the toilet rim thoroughly while the seat is removed.
- Place the new seat on the bowl, aligning the hinges with the holes in the porcelain.
- Insert the new bolts through the hinges and the bowl holes.
- Thread the nuts onto the bolts from underneath and tighten them by hand.
- Align the seat perfectly with the front and sides of the bowl before doing the final tightening.
- Tighten the nuts with a wrench until the seat is firm and does not wiggle.
- Snap the decorative covers over the hinges to hide the screw heads for a clean finish.
35 Natural Wood Blanket Ladder Storage
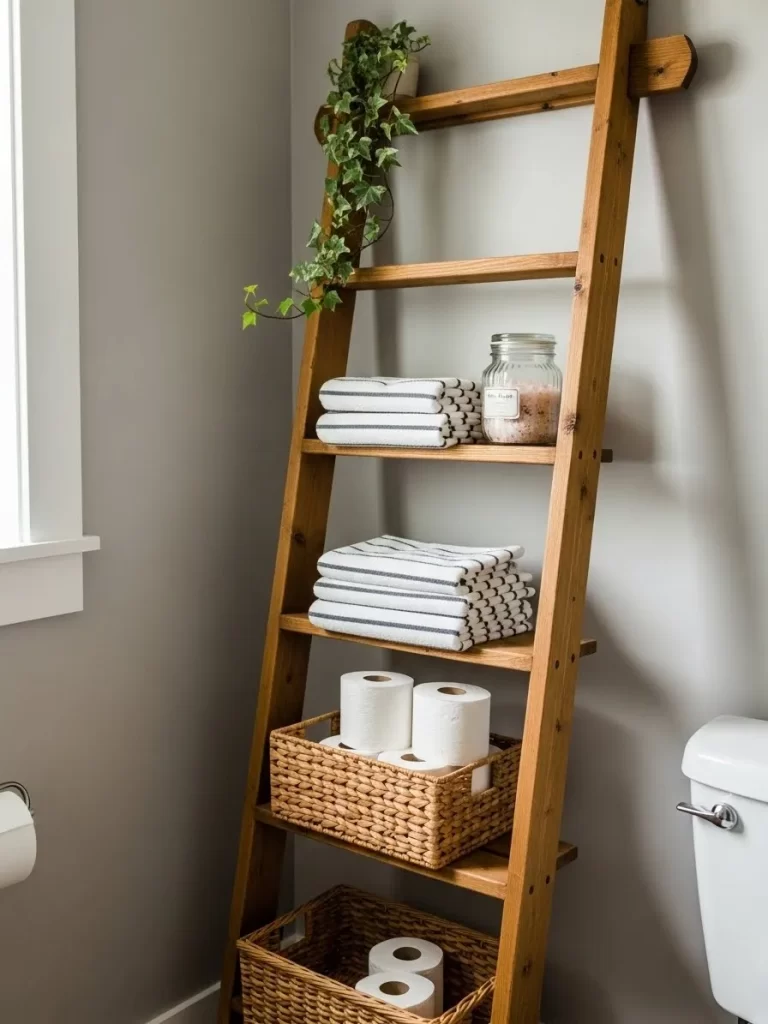
Wall space in a bathroom is often wasted or cluttered with bulky cabinets. A tall, leaning blanket ladder in a warm wood finish provides an airy and stylish way to store extra towels. It adds a rustic, organic texture that softens the look of cold tiles and metal fixtures.
The vertical design utilizes height without taking up much floor space, making it great for small rooms. You can drape patterned towels or even hang small baskets from the rungs for extra organization. It creates a layered, lived-in luxury that feels like a boutique hotel.
This piece is versatile and can be moved easily if you decide to change your layout. It requires no drilling into the walls, making it a perfect solution for renters. It is a functional piece of furniture that serves as an architectural accent.
Material Required List
- Wooden blanket ladder (pine or oak)
- Clear wood sealer or stain
- Small felt pads (for the feet)
Equipment Required List
- Sandpaper (220 grit)
- Rags or paintbrush
DIY Instructions Step by Step
- Sand the ladder lightly to ensure there are no splinters that could catch on your towels.
- Apply a wood stain if you want to change the color, or a clear sealer to protect it from bathroom humidity.
- Let the finish dry completely in a well-ventilated area for 24 hours.
- Stick felt pads to the bottom of the ladder feet to protect your floors and prevent sliding.
- Lean the ladder against a clear wall, ensuring the angle is secure and stable.
- Drape your towels over the rungs, alternating colors or textures for a more decorative look.
- Add a hanging plant to one of the top rungs to introduce more life and color.
36 Professional-Grade Bathtub Caulking

Molding or cracked caulk around a bathtub is the fastest way to make a bathroom look neglected. Stripping old sealant and applying a fresh, bright white bead of silicone provides a crisp and hygienic finish. This simple maintenance task makes your tub look brand new and prevents hidden water damage.
A clean, smooth line of caulk acts as a frame for your tiles and tub, making the entire area look professionally finished. It eliminates the dark gaps where grime and mildew tend to hide. This is a high-impact “invisible” renovation that every bathroom eventually needs.
Using a high-quality, mold-resistant silicone ensures your results last for years. It is a satisfying project that yields an immediate visual reward. You can achieve a factory-perfect look with just a little patience and a steady hand.
Material Required List
- 100% silicone bathroom caulk (white or clear)
- Caulk remover spray
- Rubbing alcohol
- Painter’s tape
Equipment Required List
- Caulking gun
- Utility knife or caulk removal tool
- Small bucket of soapy water
- Paper towels
DIY Instructions Step by Step
- Remove the old caulk using a utility knife or removal tool, being careful not to scratch the tub.
- Clean the joint thoroughly with rubbing alcohol to remove any oily residue or lingering mildew.
- Apply painter’s tape about 1/8 inch above and below the joint to create a guide for a perfectly straight line.
- Cut the caulk tube at a 45-degree angle, making the opening about the same size as the gap you are filling.
- Run a steady bead of silicone along the joint, keeping even pressure on the caulking gun.
- Smooth the bead with a wet finger or a caulking tool to press the silicone into the gap.
- Peel the tape immediately while the caulk is still wet to reveal a crisp, professional edge.
- Let it cure for at least 24 hours before using the shower to ensure a waterproof seal.
37 Matte Black Double Vanity Faucet

A double vanity is a luxury feature, but dated faucets can hold back the entire room’s potential. Upgrading to a pair of matte black, high-arc faucets creates a modern and cohesive focal point. The dark finish provides a sharp, sophisticated contrast against white marble or quartz tops.
These fixtures feature a minimalist curved spout and dual handles that offer a custom, designer feel. The matte finish is excellent at hiding water spots and fingerprints, keeping your vanity looking pristine. It is a bold architectural choice that ties together other black accents like mirrors or frames.
Swapping two faucets at once ensures your vanity looks balanced and intentional. It is a straightforward project that drastically improves the “daily use” feel of your bathroom. This final touch completes your luxury DIY renovation with a high-end, professional look.
Material Required List
- Two matte black faucet sets
- Plumber’s tape (Teflon tape)
- Supply lines (if needed)
- Silicone sealant
Equipment Required List
- Adjustable wrench
- Basin wrench
- Bucket and old towels
- Cleaning scrub
DIY Instructions Step by Step
- Shut off the water valves under the sink and open the faucets to drain the pipes.
- Disconnect the old lines using a wrench, keeping a bucket underneath to catch any spills.
- Remove the old faucets and scrub the countertop holes to remove any old gunk or mineral buildup.
- Apply plumber’s tape to the threads of your new faucet to ensure a leak-proof connection.
- Insert the new faucet through the holes, ensuring the gasket or silicone seal is properly seated on the base.
- Tighten the mounting nuts from under the sink until the faucet is locked firmly in place.
- Reconnect the water lines and turn the valves back on slowly.
- Test both faucets for leaks and wipe away any installation marks for a beautiful, finished result.
You now have 37 powerful strategies to fix an ugly bathroom without breaking the bank. Each DIY update, whether it is new hardware or a painted ceiling arch, works together to elevate the entire space. Small, thoughtful details add up to create a massive visual change.
Remember that luxury design is about intention and cohesion, not cost. By applying high-end finishes, clean lines, and curated storage, you have successfully faked a custom renovation. Start small, gain confidence, and watch your ugly bathroom become the sanctuary you always wanted.
Key Takeaways
Focus on the Details
Hardware, lighting, and textiles are the fastest ways to change the mood of a room. Swapping a plastic flush handle or an old light fixture offers the most dramatic impact for minimal time investment.
Contrast is King
Matte black or brass fixtures used against white tile or paint instantly signal modern luxury. This high contrast anchors the room and makes simple materials look intentionally designed.
Add Architecture
Use trim, beadboard, or painted arches to give plain walls depth and character. These additions hide imperfections and make your small space feel layered and custom-built.
Manage Visual Clutter
Organize daily essentials onto trays or into uniform glass bottles for a clean, spa-like aesthetic. Eliminating visual noise on the counter is crucial for achieving a high-end feel.