
Windows often go unnoticed during holiday decorating. Most people focus on the mantle or the table but skip the glass entirely. You can change that this February with a bit of creativity. Your home deserves to glow with affection from the inside out.

Sharing your holiday spirit with neighbors is a kind gesture. It turns a simple house into a welcoming landmark on your street. These ideas range from simple clings to grand floral displays. There is something here for every skill level and every budget.
Let us explore how to bring romance to your window panes. These projects are fun for the whole family to try together. You will find that a decorated window makes even the coldest winter days feel much warmer.
1 Floating Rose Flower Curtain
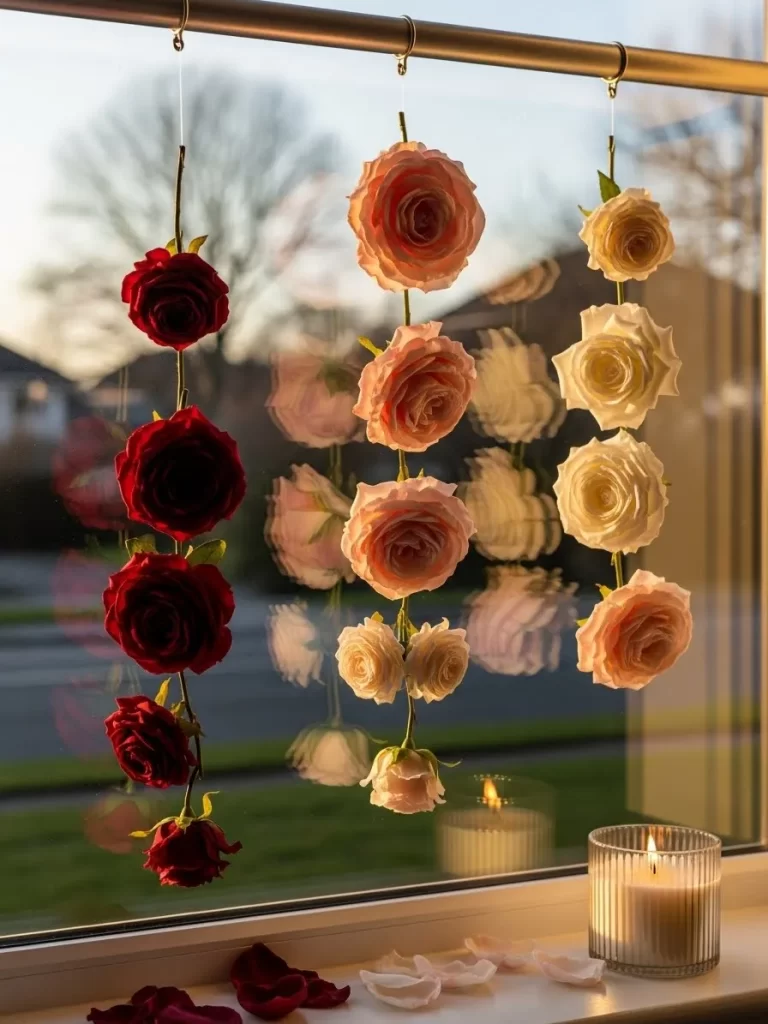
Transform your plain window into a romantic scene with this floating floral display. Red and pink roses appear to hang suspended in midair against the glass. The natural sunlight catches the petals creating a soft and welcoming glow during the day. It looks effortless but makes a striking statement that everyone will admire from the street. This arrangement works well for a living room to share the love with your neighbors.
Adding lit candles to the windowsill beneath the blooms enhances the mood greatly. When evening approaches the flickering candlelight illuminates the flowers from below for a cozy feel. Loose petals scattered on the sill complete this lovely Valentine look. You can easily customize the flower colors to match your personal style or home decor. This project brings a touch of nature indoors while celebrating the most romantic time of year with elegance.
Material Required
- Artificial roses in red and pink
- Clear fishing line
- Curtain rings with clips
- LED candles
- Loose rose petals
Equipment Required
- Scissors
- A sturdy curtain rod
- A measuring tape
DIY Instructions
- Measure the height of your window and cut several pieces of clear fishing line to that length.
- Tie the end of one fishing line securely around the stem of an artificial rose.
- Attach more roses along the same line about six inches apart until you reach the bottom.
- Repeat this process to create five or six separate floral strands.
- Clip the top of each line to a curtain ring and slide them onto your rod.
- Place candles on the windowsill and scatter loose petals around them to finish the look.
2 Luxurious Red Velvet Bows
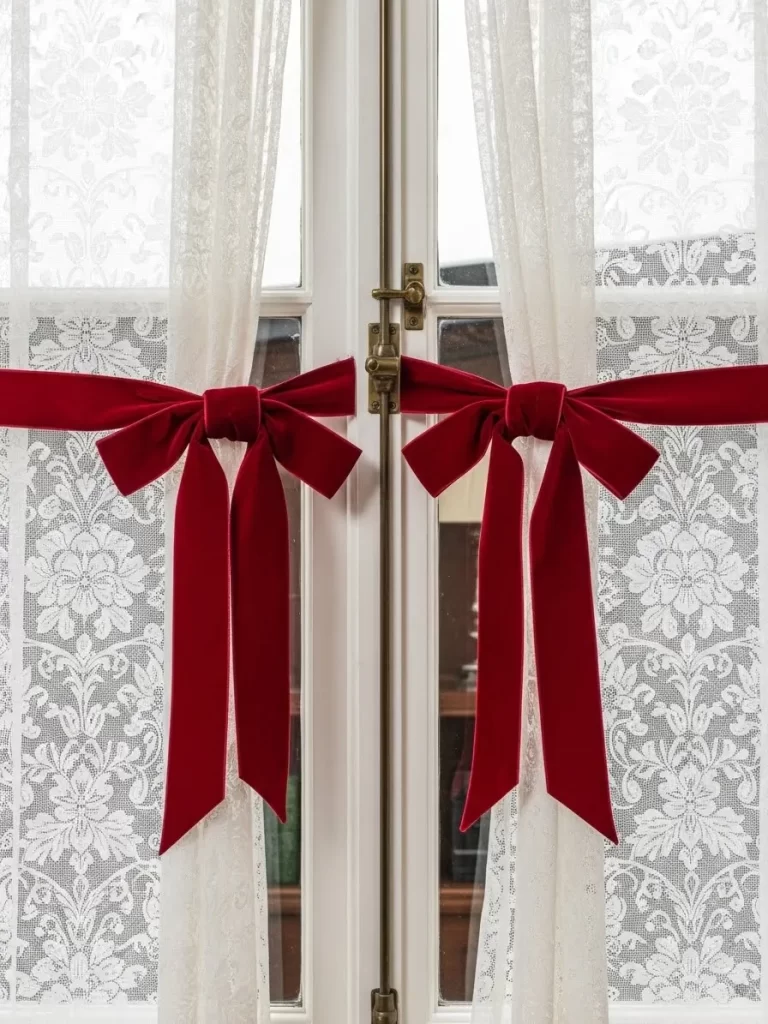
Add a touch of elegance to your windows with rich red velvet. These large bows bring a classic romantic feel to any room. They look stunning against white lace curtains and catch the eye of anyone passing by your home. The deep crimson fabric creates a beautiful contrast with the soft light of a winter afternoon. You can easily adjust the height to suit your view and the size of your window.
This simple addition transforms ordinary drapes into a festive display for the holiday of love. The texture of the velvet adds a sense of luxury and warmth to your interior design. It is a timeless choice that never goes out of style. You can reuse these bows every year to keep your tradition alive. They provide a high end look with very little effort or cost.
Material Required
- Wide red velvet ribbon
- Thin floral wire
- Matching red thread
Equipment Required
- Sharp fabric scissors
- Measuring tape
- Sewing needle
DIY Instructions
- Cut two equal lengths of velvet ribbon about three feet long each.
- Fold one ribbon into two large loops to form the top of the bow.
- Cross the loose ends over each other in the center to create the tails.
- Pinch the center of the loops tightly with your fingers and wrap floral wire around it.
- Cut a small strip of ribbon and wrap it around the wire to hide it.
- Sew the small strip in place at the back and attach the bow to your curtain tie backs.
3 Floating Rose Petal Orbs
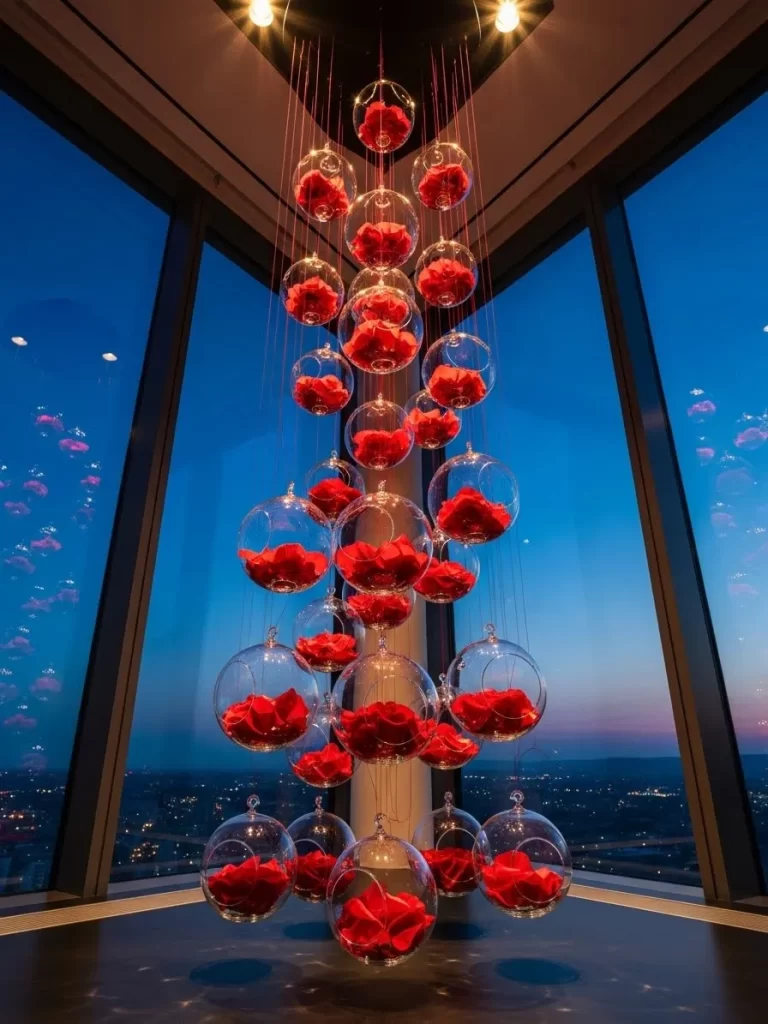
Modern elegance meets botanical beauty in this striking window arrangement. Clear glass spheres hang from the ceiling at different heights to create visual interest. Each orb holds a cluster of bright red rose petals that seem to float in the air. This setup works beautifully in a corner window or a large glass pane with a view. The blue evening sky provides a dramatic backdrop for the vivid red flowers inside.
It offers a sophisticated alternative to traditional bouquets while keeping your space feeling open and airy. The glass reflects the indoor lights to add a gentle sparkle to your room. You can change the petals to match different holidays throughout the year. This decoration is a great conversation starter for guests who visit during the Valentine season. It combines art and nature in a way that feels fresh and exciting.
Material Required
- Clear glass hanging globes
- Silk red rose petals
- Clear nylon string
- Ceiling hooks
Equipment Required
- Sturdy ladder
- Scissors
- Microfiber cloth
DIY Instructions
- Use a soft cloth to clean the glass globes so they shine clearly in the light.
- Gently place a small handful of silk rose petals inside each glass sphere.
- Cut the nylon string into various lengths to create a tiered effect when hanging.
- Tie one end of the string to the small loop at the top of the globe.
- Use a ladder to screw the ceiling hooks into the area near your window.
- Hang each string onto a hook and ensure the globes are spaced out evenly.
4 Love Letter Light Strand
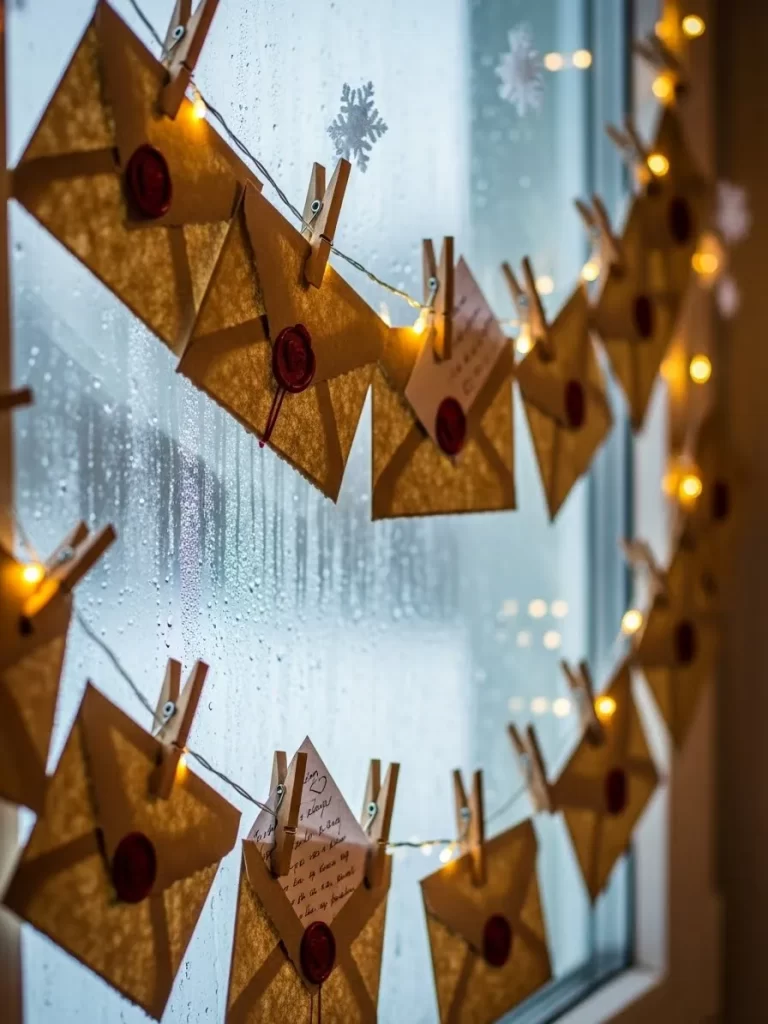
Brighten a rainy February day with this glowing display of affection. Small tan envelopes hang from a string of warm white fairy lights. Each one features a red wax seal for an old world romantic touch. Personal messages or favorite poems can hide inside these tiny letters for a special surprise. The soft glow of the bulbs reflects off the window glass during the dark night hours.
It creates a cozy and intimate atmosphere that celebrates the art of written love. This decor piece adds a vintage charm to any bedroom or study window. You can involve your family by having everyone write a small note to put inside. The lights provide a warm ambiance that makes your home feel welcoming. It is a creative way to use light and paper to tell a story.
Material Required
- LED fairy lights
- Small tan envelopes
- Red wax sticks
- Small paper inserts
Equipment Required
- Wooden clothespins
- Wax seal stamp
- Lighter
DIY Instructions
- Write short love notes on paper slips and tuck them into the envelopes.
- Melt a small amount of red wax onto the envelope flap and press the stamp into it.
- Wait for the wax to cool and harden before moving the envelopes.
- Drape your fairy lights across the window frame and secure them with tape or clips.
- Use wooden clothespins to attach one envelope near each light bulb on the strand.
- Plug in the lights and adjust the letters so they hang straight and face forward.
5 Cozy Heart Window Nook
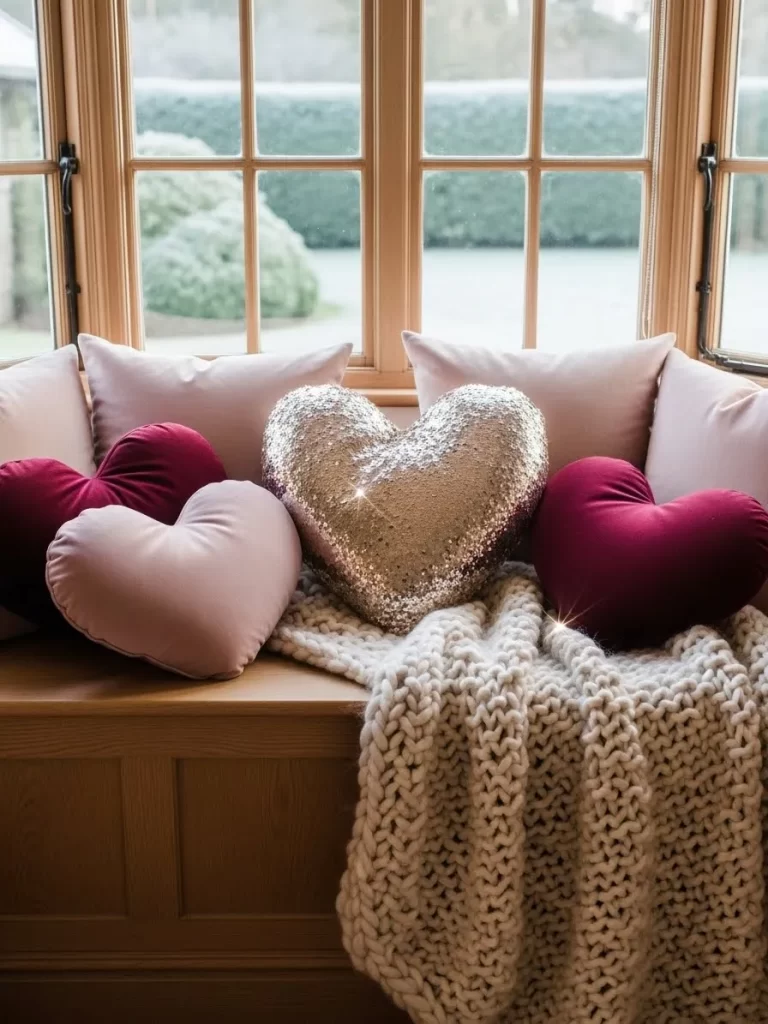
Turn your window seat into the ultimate relaxation spot for Valentine day. A mix of velvet and sequined heart pillows adds texture and sparkle to your bench. The deep burgundy and soft pink tones create a warm color palette for winter. A chunky knit blanket draped over the seat invites you to curl up with a book. This arrangement focuses on comfort while still celebrating the festive season of love.
It makes the window a central focal point of your home interior where you can relax. The gold sequins catch the light and add a touch of glamour to the space. You can easily swap these pillows out as the seasons change. This setup is a great way to make a large window feel more personal and warm. It provides a suiting place for a morning coffee or an afternoon nap.
Material Required
- Burgundy velvet heart pillows
- Gold sequin heart pillow
- Pink rectangular pillows
- Cream chunky knit blanket
Equipment Required
- Vacuum cleaner
- Lint roller
DIY Instructions
- Clean the window bench thoroughly with a vacuum to remove all dust and debris.
- Lay the chunky knit blanket across the center of the bench in a relaxed drape.
- Place the pink rectangular pillows at each end of the bench to act as a base.
- Lean the burgundy heart pillows against the pink ones at a slight angle.
- Position the gold sequin heart pillow right in the center of the display.
- Fluff each pillow and smooth out the blanket until the area looks inviting.
6 Eucalyptus and Berry Wreath
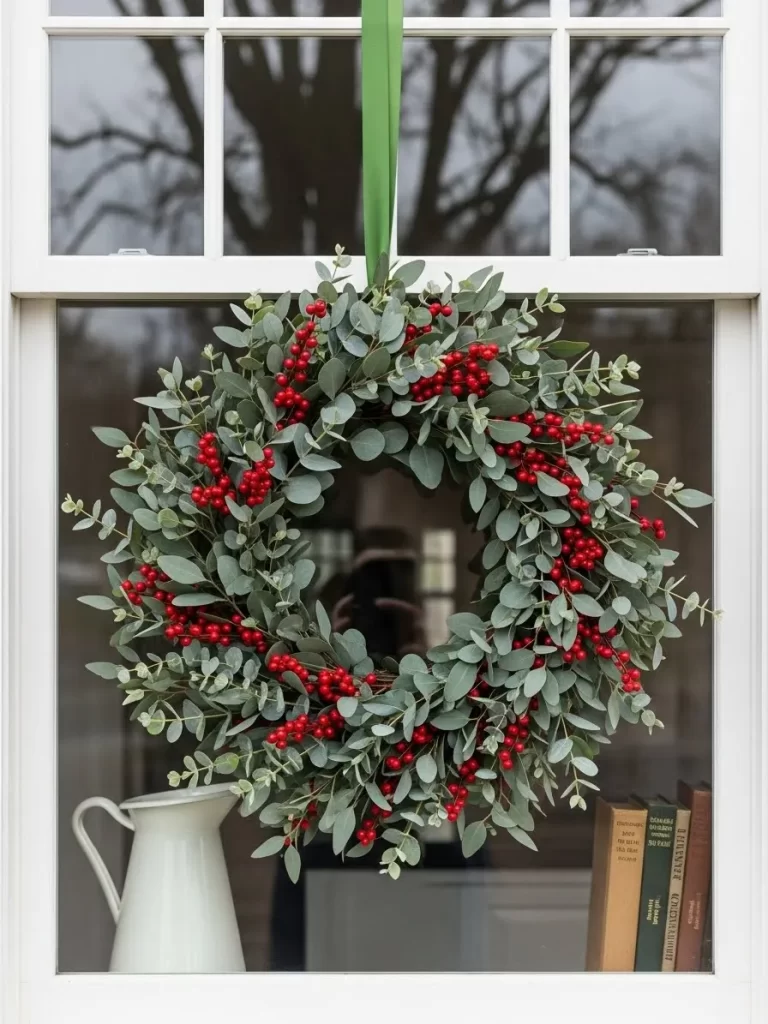
Bring a fresh and natural look to your window with a lush green wreath. Soft eucalyptus leaves provide a silvery green base for pops of bright red berries. This combination feels organic and vibrant against a clean white window frame. A simple green ribbon holds the wreath in place for a professional finish. It serves as a lovely reminder of spring during the cold winter months.
Passersby will enjoy this tasteful and timeless decoration that highlights your home. The wreath adds a touch of life and color to the glass without blocking your view. You can hang this on the inside or the outside of your window. It is an excellent choice for those who prefer a more subtle and natural holiday style. This project is quick to assemble but lasts for a long time.
Material Required
- Grapevine wreath base
- Artificial eucalyptus branches
- Red berry sprigs
- Wide green satin ribbon
Equipment Required
- Wire cutters
- Floral tape
- Suction cup hook
DIY Instructions
- Use wire cutters to trim the eucalyptus branches into smaller pieces with short stems.
- Insert the stems into the grapevine base and secure them with floral tape.
- Work your way around the circle until the entire wreath looks full and green.
- Tuck the red berry sprigs into the leaves at regular intervals for a splash of color.
- Loop the green ribbon through the center of the wreath and tie a knot at the top.
- Attach a suction cup hook to the window glass and hang the ribbon loop on it.
7 Tulle and Twinkle Drape
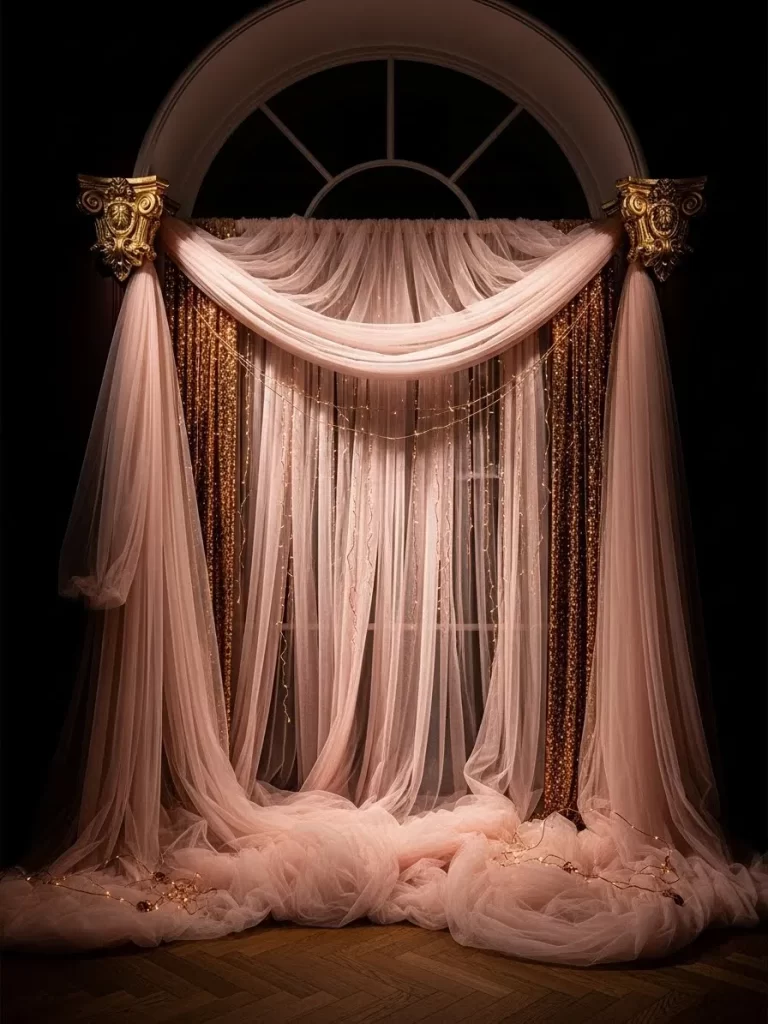
Create a dreamlike setting with layers of soft pink tulle fabric. The sheer material gathers gracefully to frame the window with a whimsical touch. Golden columns on either side add a regal feeling to the entire display. Hidden fairy lights sparkle through the fabric like distant stars in the night sky. This setup creates a soft glow that feels both magical and romantic for a bedroom.
It is an excellent choice for a master suite to set a peaceful mood for the holiday. The fabric adds a soft texture that contrasts beautifully with the hard glass of the window. You can adjust the drapes to let in as much or as little light as you want. This decoration makes a bold statement and transforms the entire look of your room. It feels like a scene from a romantic fairy tale come to life.
Material Required
- Light pink tulle fabric
- Warm white fairy lights
- Gold decorative wall brackets
- Clear safety pins
Equipment Required
- Sturdy ladder
- Measuring tape
- Fabric steamer
DIY Instructions
- Install the gold brackets on the wall at the top corners of your window frame.
- Use a ladder to drape the fairy lights across the top of the window.
- Find the center of your tulle fabric and drape it over the middle of the lights.
- Pull the ends of the fabric over the gold brackets and let them fall to the floor.
- Use a fabric steamer to remove any wrinkles from the hanging tulle layers.
- Secure the lights behind the fabric with safety pins so the wires stay hidden.
8 Candy Heart Window Clings
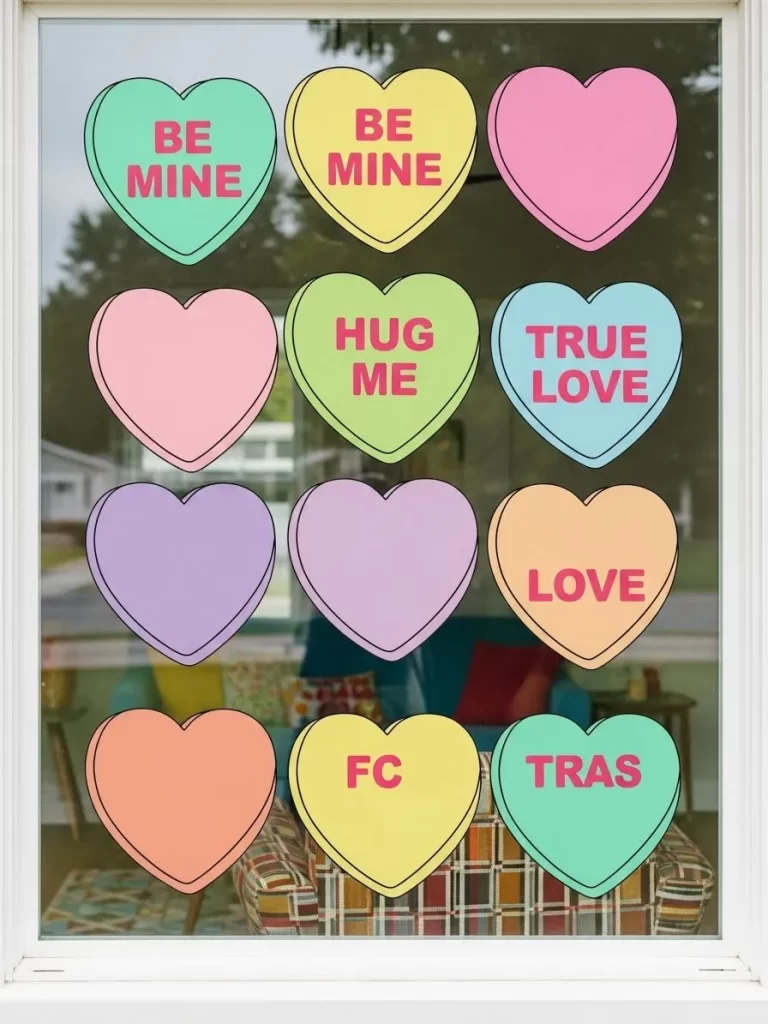
Capture the playful side of the holiday with giant conversation hearts. These colorful decals feature classic phrases like Be Mine and Hug Me in bold letters. The pastel colors look cheerful against the clear glass of any window. Kids and adults alike will smile at this nostalgic candy themed decor in your home. You can arrange them in a neat grid or scatter them randomly for a fun look.
They allow plenty of natural light to enter the room while adding a festive pop of color. These clings are easy to apply and remove without leaving any sticky residue behind. You can even make your own phrases to personalize the message for your family. This is a great way to decorate large windows quickly and on a budget. It brings a sense of joy and lightheartedness to your Valentine celebration.
Material Required
- Vinyl window cling paper
- Pink permanent marker
- Soapy water
Equipment Required
- Heart shaped stencil
- Sharp scissors
- Plastic squeegee
DIY Instructions
- Trace heart shapes onto the colored vinyl paper using your heart stencil.
- Cut out each heart carefully with scissors making sure the edges are smooth.
- Use a pink marker to write fun holiday phrases in the center of the hearts.
- Clean your window with soapy water and leave the glass slightly damp.
- Press each heart against the wet glass and move it into the desired position.
- Use the squeegee to push out any air bubbles from the center to the edges.
9 Shimmering Lip Gallery
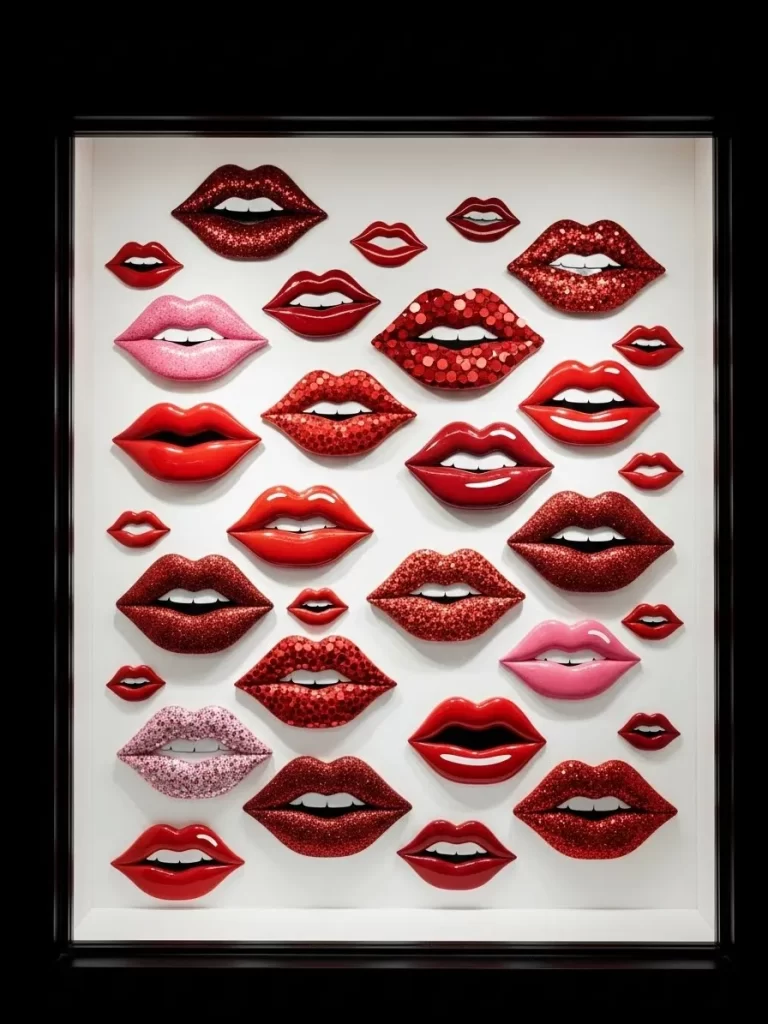
Make a bold and trendy statement with a collection of decorative lips. Various shades of red and pink fill the window space with high shine and glitter. Some lips feature a glossy finish while others sparkle with bright red sequins. This artistic approach feels modern and full of energy for a fashion forward home. Each piece reflects the light differently to create a dynamic visual experience for everyone.
It is a unique way to celebrate the holiday with a touch of glamour and style. This gallery wall for your window is suiting for a dressing room or a teen bedroom. The different textures and colors keep the display interesting and vibrant. You can mix and match the sizes to create a sense of movement across the glass. It shows off your creative personality while honoring the spirit of Valentine day.
Material Required
- Foam lip shapes
- Red and pink glitter
- Glossy red spray paint
- Clear adhesive strips
Equipment Required
- Drop cloth
- Soft paintbrush
- Craft tray
DIY Instructions
- Place your foam shapes on a drop cloth in a space with good air flow.
- Spray half of the lips with glossy red paint and let them dry for an hour.
- Apply a thin layer of glue to the rest of the lips using your paintbrush.
- Shake glitter over the wet glue while holding the lips over a craft tray.
- Tap the edges to remove excess glitter and let them dry completely.
- Attach the lips to your window using clear adhesive strips in a random pattern.
10 Burlap Be Mine Banner
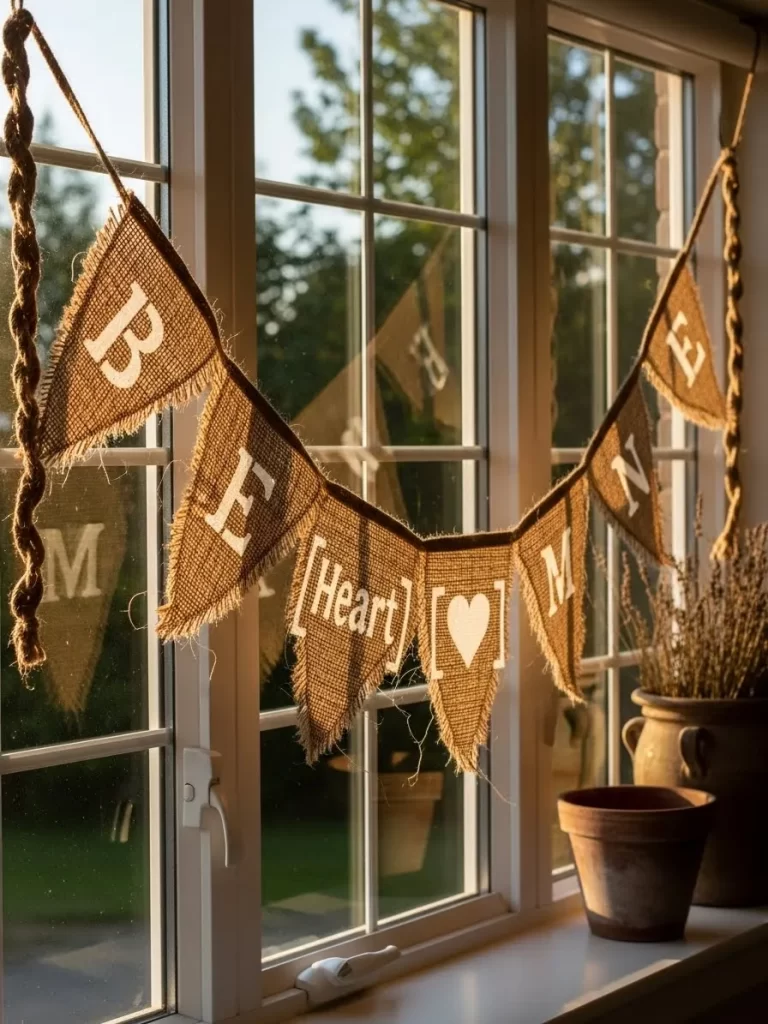
Rustic charm meets romantic sentiment with this simple burlap bunting. The triangular flags feature white stenciled letters that spell out a sweet message for your loved ones. Rough edges and natural fibers give the decor a hand made feel that is very inviting. A thick twisted rope holds the banner across the window pane for a sturdy look. It pairs beautifully with terracotta pots and dried flowers.
This decoration adds warmth and character to your home without feeling overly formal or stiff. It is a great project for those who love the farmhouse aesthetic or country style. The neutral colors ensure it fits in with any existing room decor you might have. You can hang it in a kitchen or a dining area to add a festive touch. This banner is durable and can be enjoyed for many years to come.
Material Required
- Natural burlap fabric
- White acrylic craft paint
- Thick jute rope
- Fabric glue
Equipment Required
- Letter stencils
- Sponge brush
- Scissors
DIY Instructions
- Cut the burlap into six equal triangles that are eight inches tall each.
- Place a letter stencil on a triangle and dab white paint over it with a sponge.
- Repeat this for each letter until you have spelled out the message.
- Lay the jute rope across your table and fold the top of each flag over it.
- Apply a line of fabric glue inside the fold and press it down to the rope.
- Tie the ends of the rope to your window latch or curtain rod to hang it.
11 Cozy Cafe Chalk Art
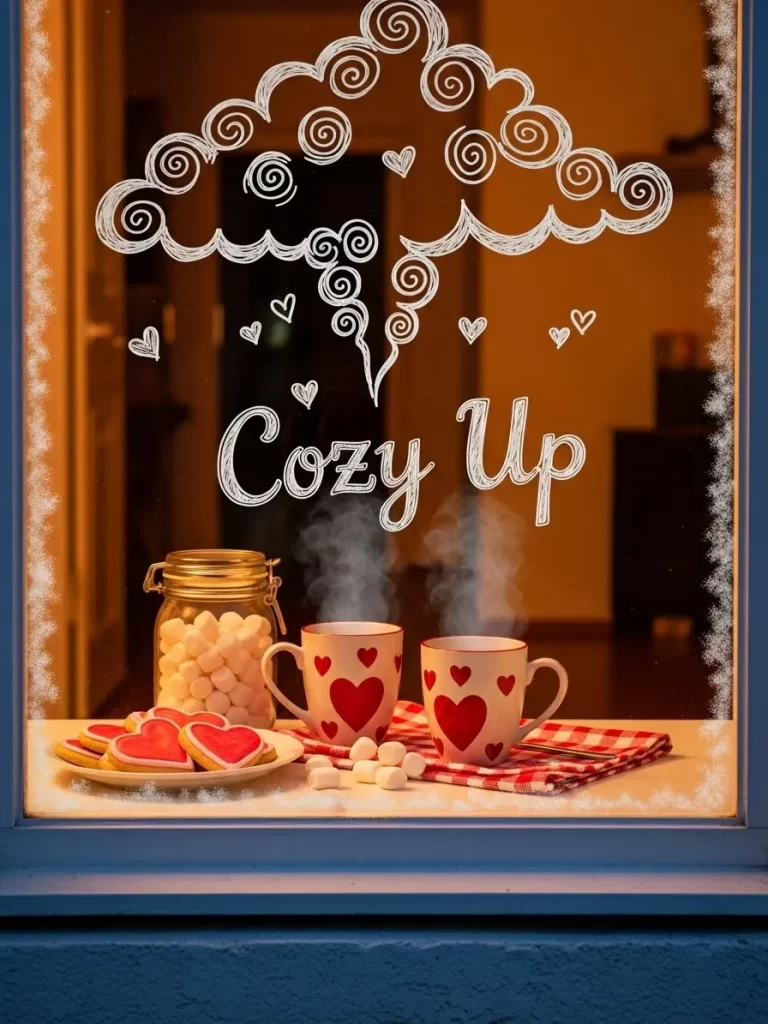
A charming cafe scene brings warmth to your kitchen window during the cold winter months. White chalk drawings of steam clouds and hearts float above real mugs of hot cocoa. This whimsical touch turns a simple window into a miniature bakery display for your family. Setting up a tray with marshmallows and heart cookies completes the inviting look on your windowsill.
The contrast between the dark night and the bright white drawings creates a magical feel inside your home. Guests will love this creative way to celebrate the season of love with a personal touch. You can easily wipe the glass clean and start a new design whenever you feel inspired. This project is a fun way to practice your drawing skills while decorating. It makes every morning coffee feel like a special holiday event.
Material Required
- White liquid chalk markers
- Red and white mugs
- Marshmallows
- Heart shaped cookies
- Red checkered napkin
Equipment Required
- Microfiber cloth
- Glass cleaner
DIY Instructions
- Clean the glass surface thoroughly with window cleaner and a microfiber cloth.
- Use the white chalk marker to draw large fluffy clouds at the top of the pane.
- Write the words Cozy Up in large cursive letters in the center of the window.
- Draw several small hearts floating around the text to fill the empty spaces.
- Place two mugs filled with cocoa on a tray directly beneath your drawings.
- Arrange the heart cookies and marshmallows on a plate to finish the scene.
12 Flamingo Love Birds
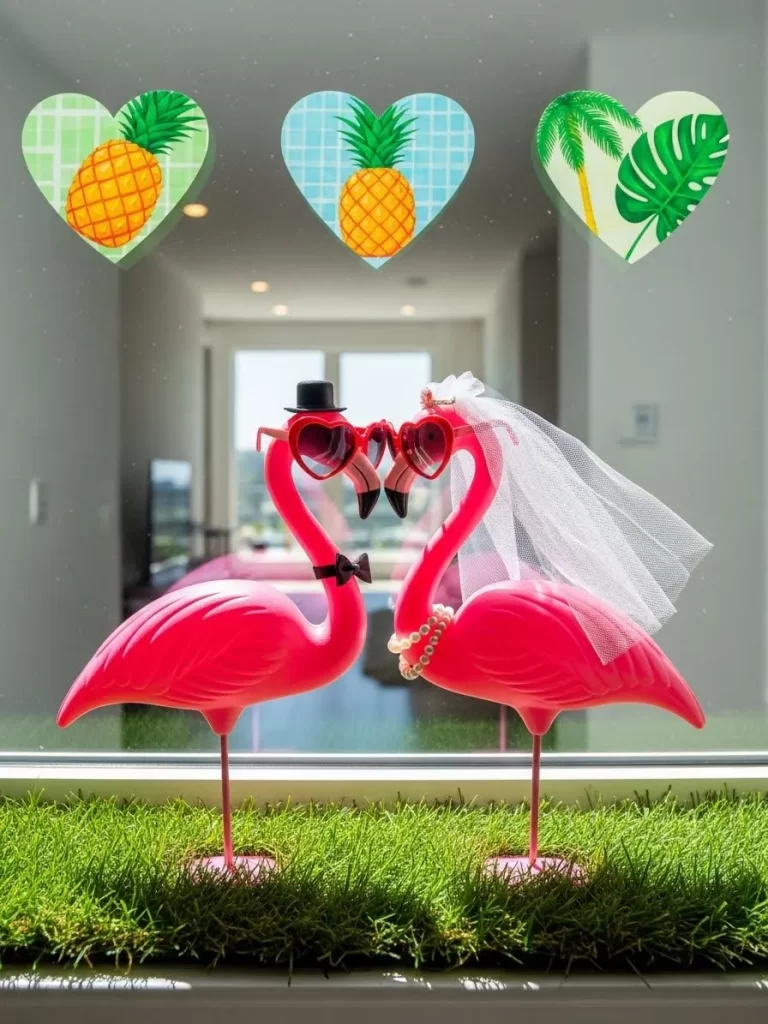
Tropical vibes meet romantic charm with these bright pink flamingo figurines. A bride and groom duo stands proudly on a patch of green grass on your windowsill. This unexpected theme adds a splash of color and humor to your Valentine decor this year. Pineapple and palm leaf heart stickers on the glass reinforce the summer love theme. The combination of pink and green makes your window stand out.
It is a delightful way to show that love can be a tropical adventure even in winter. These figurines add a playful and unique element to your home that children will adore. You can use this theme if you live in a warm climate or just want to feel like you are at the beach. The bright colors reflect the sunlight and make the room feel much brighter. It is a fresh take on traditional holiday decorations that feels modern and fun.
Material Required
- Pink flamingo figurines
- Miniature top hat and veil
- Heart shaped sunglasses
- Artificial grass strip
- Pineapple heart stickers
Equipment Required
- Scissors
- Double sided tape
DIY Instructions
- Cut a strip of artificial grass to match the length of your interior windowsill.
- Use double sided tape to secure the grass strip so it does not slide.
- Place a miniature top hat on one flamingo and a veil on the other.
- Put heart shaped sunglasses on both birds to give them a cool holiday look.
- Position the flamingos on the grass so their heads lean toward each other.
- Stick the pineapple heart decals onto the window pane at eye level.
13 Heart Balloon Wonderland
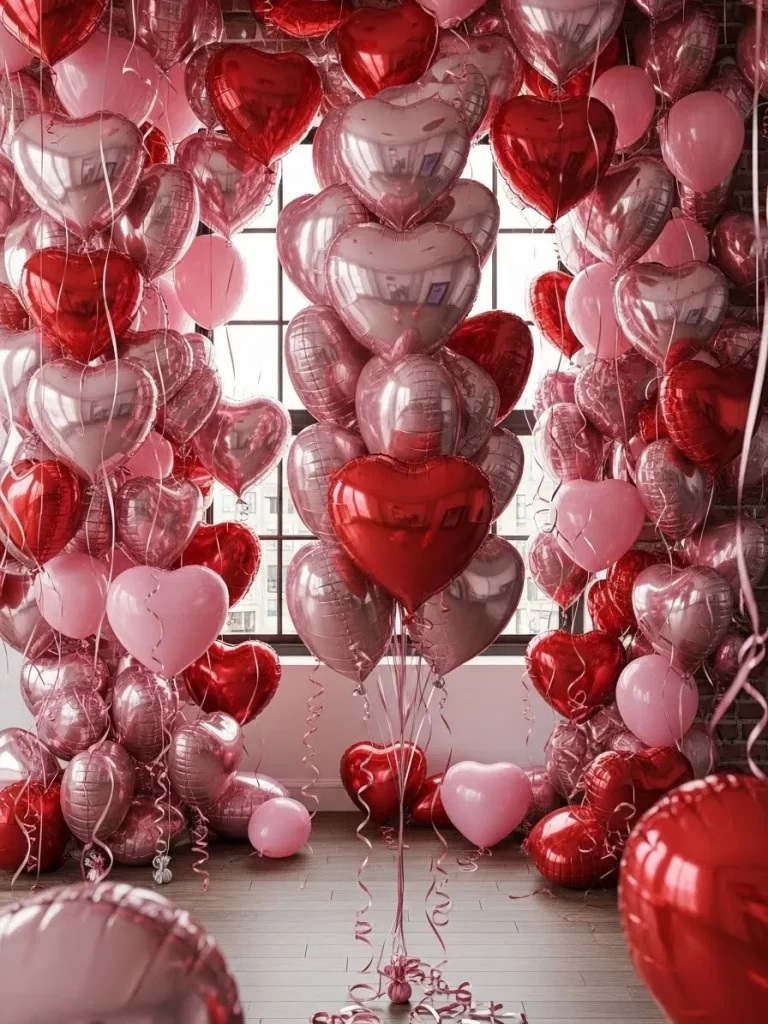
Filling a room with balloons creates an instant celebration that feels grand and exciting for everyone. Shiny red pink and silver heart shapes float against the window and walls in clusters. This high energy display makes a massive impact for a surprise Valentine party or dinner. The metallic surfaces reflect the light from the window to brighten the entire space during the day.
Using different sizes of balloons adds depth and variety to the arrangement across the room. This setup transforms a standard living area into a festive dream world that anyone would adore. You can tie the balloons to weights or let them float to the ceiling for a fuller look. This is a suiting way to fill a large space with color without spending a lot of money. It creates a joyful atmosphere that makes the holiday feel truly special.
Material Required
- Mylar heart balloons
- Pink latex heart balloons
- Curling ribbon
- Balloon weights
Equipment Required
- Helium tank
- Scissors
DIY Instructions
- Fill all the heart shaped balloons with helium using a tank or a local store.
- Tie a long piece of curling ribbon to the base of each balloon securely.
- Use the edge of your scissors to pull the ribbon tight and create decorative curls.
- Group five balloons together and tie their ribbons to a single balloon weight.
- Place these clusters in front of your window to create a colorful backdrop.
- Let a few single balloons float to the ceiling to fill the upper corners of the room.
14 Black Cupid Silhouettes
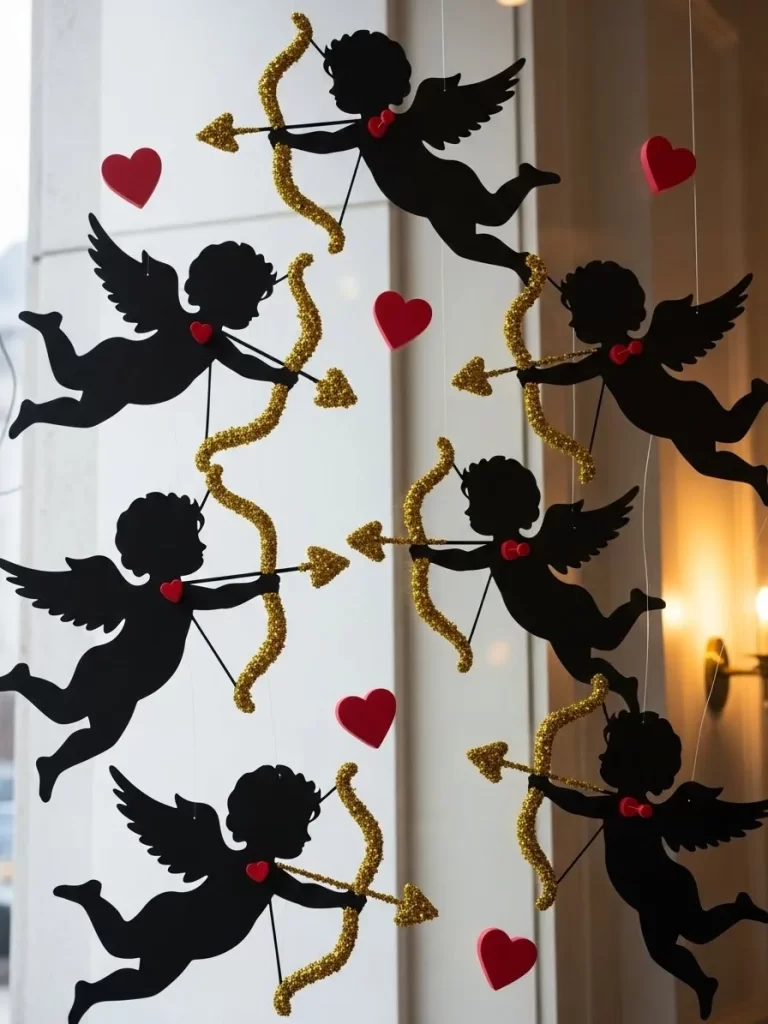
Classical art meets modern style with these striking black cupid cutouts for your window. Each silhouette depicts a small angel holding a bow with a shimmering gold arrow. These figures appear to be flying across the glass to deliver love to your home. The dark color provides a bold contrast against a bright white wall or a sunny window pane. Small red hearts scattered between the cupids add a touch of color.
This sophisticated arrangement feels both playful and elegant for a dining room or an entryway window. The gold glitter catches the light and adds a bit of sparkle to the silhouettes. You can arrange them in a line or have them scattered as if they are chasing each other. It is a timeless design that adds a professional look to your holiday decorating. This project is easy to do with paper but results in a high end visual effect.
Material Required
- Black cardstock
- Gold glitter paper
- Red foam hearts
- Clear fishing line
Equipment Required
- Cupid stencils
- Scissors
- Glue stick
- Hole punch
DIY Instructions
- Trace cupid shapes onto black cardstock and cut them out with sharp scissors.
- Cut small arrow shapes out of gold glitter paper and glue them to the cupids.
- Punch a tiny hole in the top wing of each black cupid figure.
- Thread a piece of clear fishing line through the hole and tie a knot.
- Tape the other end of the line to the top of your window frame.
- Stick red foam hearts onto the glass between the cupids to finish the scene.
15 Lace Doily Heart Garland
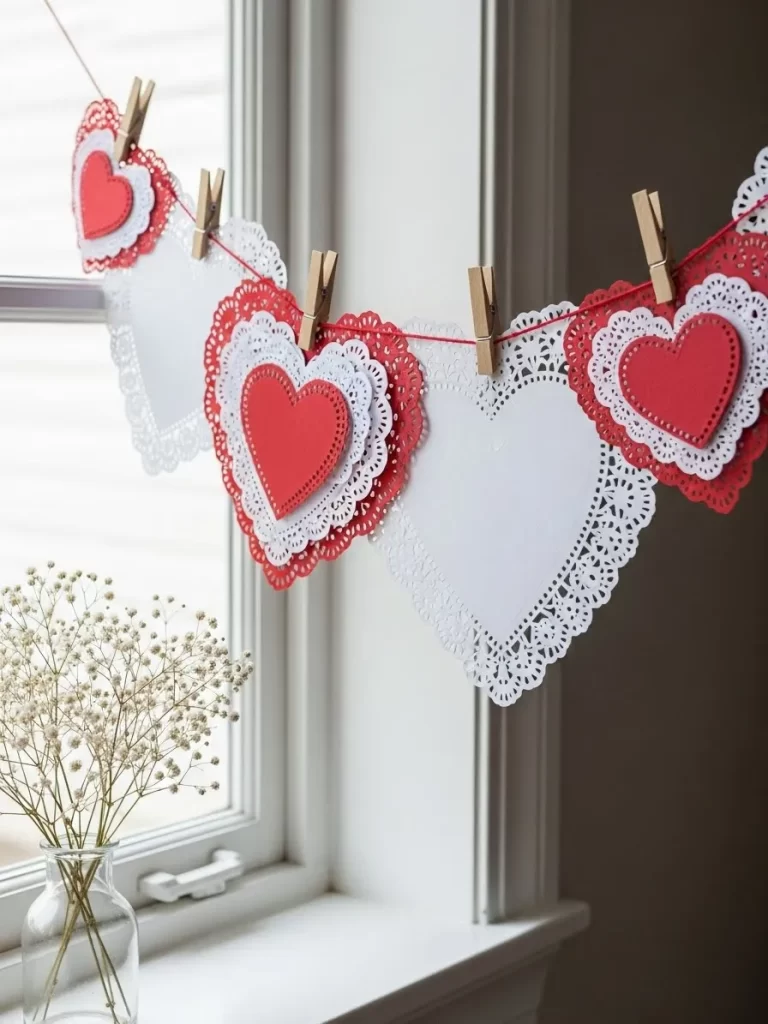
Delicate paper doilies create a vintage feel that is soft and romantic for your window. Layering red hearts over white lace circles adds a beautiful pop of color to the display. This garland looks lovely draped across a window where the light can shine through the intricate patterns. Simple wooden clips hold the hearts in place for a charming hand made look that feels very cozy.
A vase of white flowers nearby enhances the gentle and sweet atmosphere of the room. This project is a wonderful way to use simple craft supplies to make something stunning. You can make the garland as long or as short as you need to fit your space. It is a great activity for a quiet afternoon and adds a lot of charm to your home. The white and red combination is a classic choice that looks beautiful in any setting.
Material Required
- White paper doilies
- Red cardstock
- Red string
- Wooden clothespins
Equipment Required
- Heart shaped hole punch
- Scissors
- Glue
DIY Instructions
- Use a large heart punch to cut shapes out of the white paper doilies.
- Cut smaller hearts out of red cardstock and glue them into the doily centers.
- Measure the width of your window and cut a piece of red string to match.
- Secure the string across the top of the window frame using small tacks or tape.
- Use wooden clothespins to clip each lace heart onto the hanging string.
- Space the hearts about four inches apart so they hang evenly across the glass.
16 Recycled Book Page Hearts
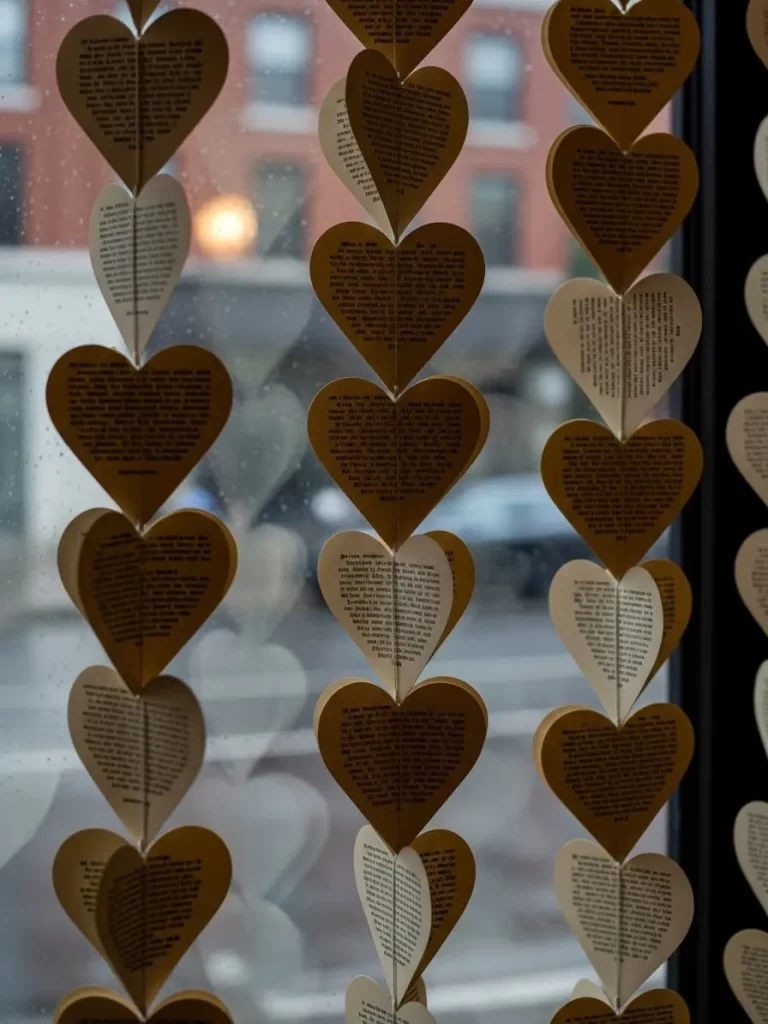
Give old books a new life with this creative and scholarly window display for your home. Vertical strands of hearts made from printed pages create a unique textured look on the glass. The sepia tones of the paper offer a neutral alternative to bright holiday colors for a subtle style. The text on the pages adds a layer of mystery and interest to the decor for your guests.
These strands sway gently in the breeze when the window is open during the day. It is a thoughtful choice for a home office or a cozy reading nook in your bedroom. You can use pages from a favorite romance novel to make the project even more special. This decoration feels artistic and sophisticated while remaining very easy to assemble. It shows your love for literature and holiday spirit at the same time.
Material Required
- Old book pages
- Thin white thread
- Clear tape
Equipment Required
- Heart template
- Pencil
- Scissors
- Glue
DIY Instructions
- Tear several pages from an old book and trace heart shapes onto them.
- Cut out the hearts and fold them slightly down the middle for a 3D effect.
- Lay a long piece of white thread on your table and apply glue to the hearts.
- Press the hearts onto the thread about three inches apart from each other.
- Wait for the glue to dry completely so the hearts do not slide off the line.
- Tape the top of the thread to your upper window frame so the strands hang down.
17 Watercolor Coffee Filter Hearts

Brighten your glass panes with these colorful sun catchers made from simple coffee filters. The dye creates a soft watercolor effect that looks beautiful when the sun shines through the window. Shades of pink and purple blend together to form a vibrant mosaic on your glass. These lightweight hearts stick easily to the glass with just a bit of clear tape. They are a fun and messy project that results in a professional looking display.
This is a great way to add a lot of color to a large window quickly and easily. Each heart will have a unique pattern of colors that no other heart has. You can arrange them in a rainbow pattern or group them by shade for a different look. This project is suiting for families who want to craft together during the holiday season. The finished hearts glow like stained glass and make the room feel very bright and happy.
Material Required
- White coffee filters
- Washable markers
- Water
- Clear tape
Equipment Required
- Spray bottle
- Scissors
- Cookie sheet
DIY Instructions
- Flatten several coffee filters and cut them into large heart shapes with scissors.
- Use your markers to draw colorful scribbles and dots all over the paper hearts.
- Place the hearts on a cookie sheet so they do not make a mess on your table.
- Lightly spray the hearts with water and watch the colors bleed together.
- Let the filters dry completely until the paper is stiff again.
- Use small pieces of clear tape to attach the hearts to your window in rows.
18 Photo String Memory Wall
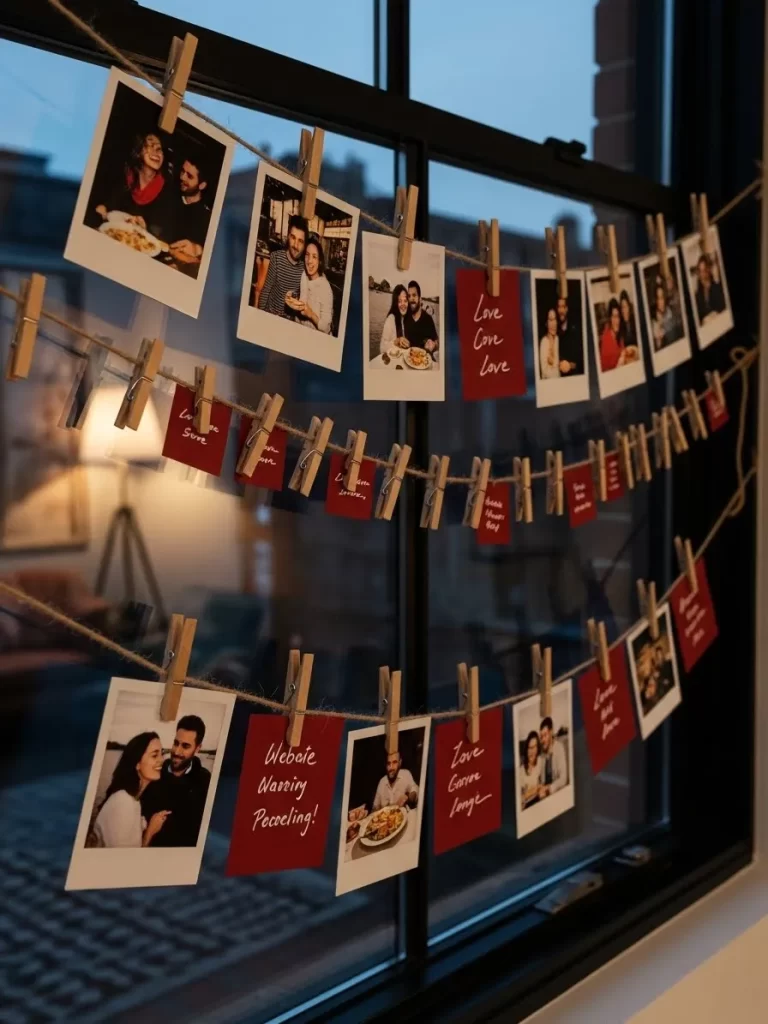
Celebrate your own love story by displaying favorite photos in your window this year. Two rows of twine hold pictures of happy moments and romantic dinners from your past. Small red cards with sweet messages are mixed in to add a festive touch to the display. Warm fairy lights draped around the strings make the photos glow at night for a cozy feel. This personal decoration turns your window into a visual diary of your relationship.
It is a deeply meaningful way to decorate for the holiday of love with your partner. You can look back at your favorite memories every time you walk by the window. This setup works well in a living room where you spend a lot of time together. It is easy to update the photos as you make new memories throughout the year. The combination of light and personal images creates a very touching and romantic atmosphere.
Material Required
- Printed photos
- Red cardstock
- Jute twine
- Fairy lights
Equipment Required
- Wooden clothespins
- Scissors
- Tape
DIY Instructions
- Cut two long pieces of jute twine that fit across the width of your window.
- Tape the ends of the twine to the sides of the window frame at two levels.
- Cut small squares of red cardstock and write short love notes on them.
- Use wooden clothespins to clip your photos and the red cards along the twine.
- Wrap a strand of fairy lights loosely around the twine to highlight the images.
- Turn on the lights in the evening to create a glowing wall of happy memories.
19 Cupid Love Chalk Border
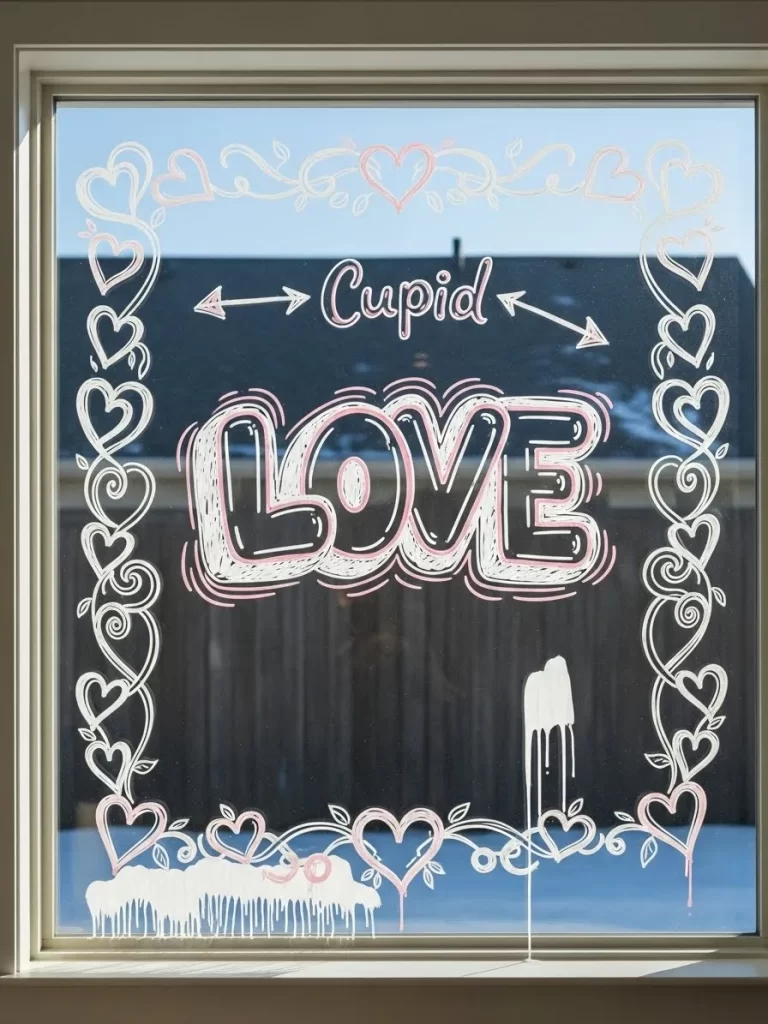
Frame your view with a detailed chalk marker border featuring hearts and winding vines. The word LOVE is written in large bold letters with a pink shadow effect for more depth. A playful cupid figure at the top adds a traditional holiday element to the window art. This hand drawn art looks like a professional storefront display that you can do at home. The white ink is easy to see during the day and glows under indoor lights.
It is a simple way to add a lot of detail without buying expensive ornaments or drapes. You can customize the border to include names or dates that are special to you. This project allows for a lot of creativity and can be changed as often as you like. It is a great way to express your artistic side while celebrating the holiday. The finished design makes your window look like a beautiful piece of framed art.
Material Required
- White liquid chalk markers
- Pink liquid chalk markers
Equipment Required
- Ruler
- Window cleaner
- Paper towels
DIY Instructions
- Clean the window glass with spray and dry it with paper towels for a clear base.
- Use a ruler and white marker to draw a straight border near the edge of the glass.
- Add hand drawn vines and small hearts along the border to make it look organic.
- Write the word LOVE in large block letters in the center of the window pane.
- Use the pink marker to draw a shadow on the right side of each white letter.
- Draw a small cupid silhouette at the top center of the border to finish the look.
20 Stained Glass Tissue Hearts
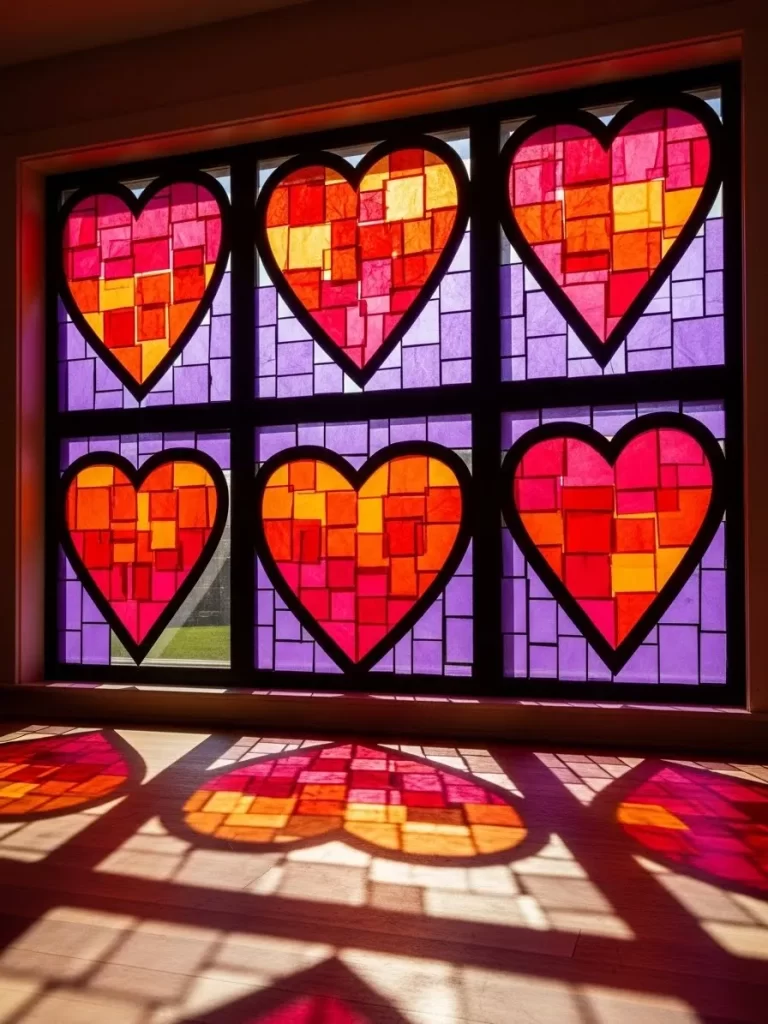
Create the look of expensive stained glass using simple colorful tissue paper and black frames. Large black heart outlines are filled with small squares of red and orange paper for warmth. When the light hits the window the floor fills with beautiful colors that dance in the sun. This project adds a sophisticated architectural feel to your home decor this season. The geometric patterns inside the hearts look modern and very artistic.
It is a stunning way to use light as part of your Valentine day decorations for the family. The dark frames make the bright colors pop and create a high contrast look on the glass. You can make these in many different sizes to fill a whole window with color. It is a rewarding project that looks much more difficult to make than it actually is. Your window will become a glowing masterpiece that everyone will admire throughout the holiday.
Material Required
- Black construction paper
- Red and orange tissue paper
- Clear contact paper
Equipment Required
- Scissors
- Glue stick
DIY Instructions
- Cut a large heart shape out of black construction paper and remove the center.
- Cut your red and orange tissue paper into many small random squares.
- Lay a piece of clear contact paper on your table with the sticky side facing up.
- Press the black heart frame onto the contact paper so it stays in place.
- Fill the center of the heart with overlapping tissue paper squares.
- Cover the back with another piece of contact paper and tape it to your window.
21 Natural Birch Twig Heart
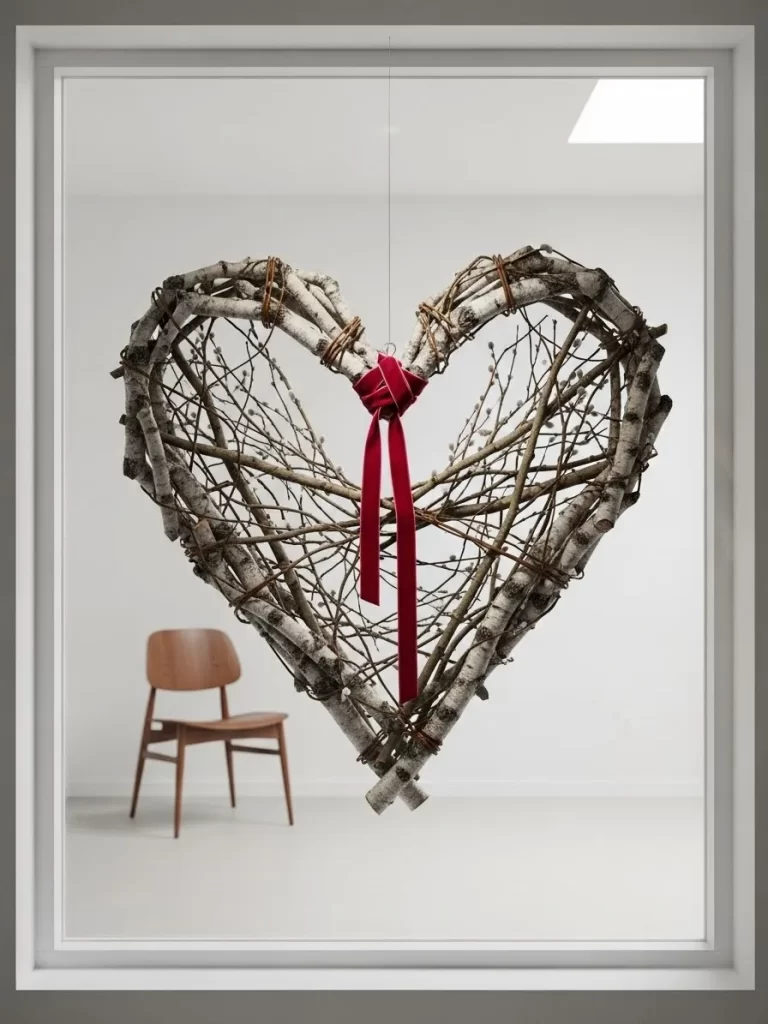
Bring a rustic and earthy vibe to your home with a large heart wreath made of twigs. Dried birch branches are woven together to create a sturdy and organic shape for your window. A single red velvet ribbon tied at the center adds a necessary touch of holiday color.
This decoration looks stunning in a large window with a clean white background. It offers a minimalist and timeless approach to Valentine decor that feels very grounded. The natural textures provide a warm contrast to the smooth surfaces of a modern home.
Material Required
- Dried birch twigs or flexible branches
- Thin brown floral wire
- Red velvet ribbon
- Clear hanging string
Equipment Required
- Pruning shears
DIY Instructions
- Gather two equal bundles of flexible twigs and tie them together at one end with wire.
- Bend the bundles away from each other to form the top two curves of a heart.
- Bring the bottom ends of the bundles together and secure them tightly with more wire.
- Tuck smaller twigs into any gaps in the frame to make the heart look full and thick.
- Tie a large red velvet bow around the center point where the two curves meet at the top.
- Attach a piece of clear string to the back of the wreath and hang it from your curtain rod.
22 Neon Triple Heart Light
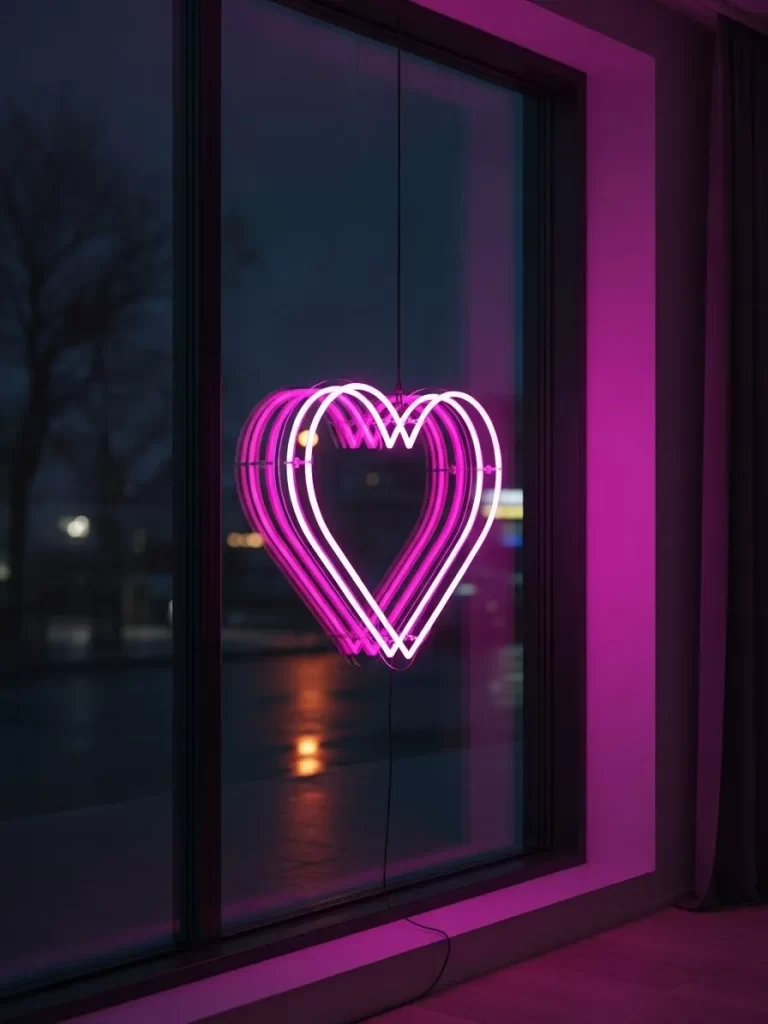
Add a modern and electric pulse to your evening with a neon pink heart light. Three overlapping heart outlines create a sense of movement and depth on your glass. The vibrant glow reflects off the window to illuminate the sidewalk outside your home.
This high tech decoration is perfect for a trendy apartment or a festive Valentine party. It provides a constant and bright source of light that sets an energetic romantic mood. The bold pink color makes a strong statement that can be seen from far away.
Material Required
- Battery operated neon heart light
- Clear suction cup hooks
- Clear tape
Equipment Required
- None
DIY Instructions
- Clean the center of your window pane to ensure the suction cup can hold firmly.
- Press the suction cup hook against the glass and pull down on the hook to lock it.
- Hang the neon heart light onto the hook using the small loop on the back of the device.
- Run the power cord along the edge of the window frame and secure it with clear tape.
- Turn on the light or plug it into a nearby outlet to start the pink glow.
- Ensure the light is perfectly centered so it looks professional from both inside and outside.
23 Gold Concentric Heart Mobile

Celebrate the holiday with a sleek and geometric gold heart display for your window. Multiple heart frames hang inside one another to create a beautiful 3D effect in the air. The metallic gold finish catches every bit of light to add a touch of luxury to your room.
This mobile looks like a piece of modern art and spins gently with the natural air flow. The clean lines make it a sophisticated choice for a formal living area or a bedroom. It offers a subtle and elegant way to honor the season without being overwhelming.
Material Required
- Thin gold metal wire
- Small gold jewelry chain
- Gold metallic spray paint
Equipment Required
- Wire cutters
- Needle nose pliers
DIY Instructions
- Use wire cutters to snip five different lengths of gold wire for your heart shapes.
- Bend each piece of wire into a heart shape ranging from very small to quite large.
- Use the pliers to twist the ends of each heart together at the top center point.
- Link the hearts together using small pieces of gold chain so they hang inside each other.
- Attach a longer chain to the top of the largest heart for hanging the entire mobile.
- Hook the chain to your curtain rod and adjust the height so it is perfectly centered.
24 Soft White Heart Strands
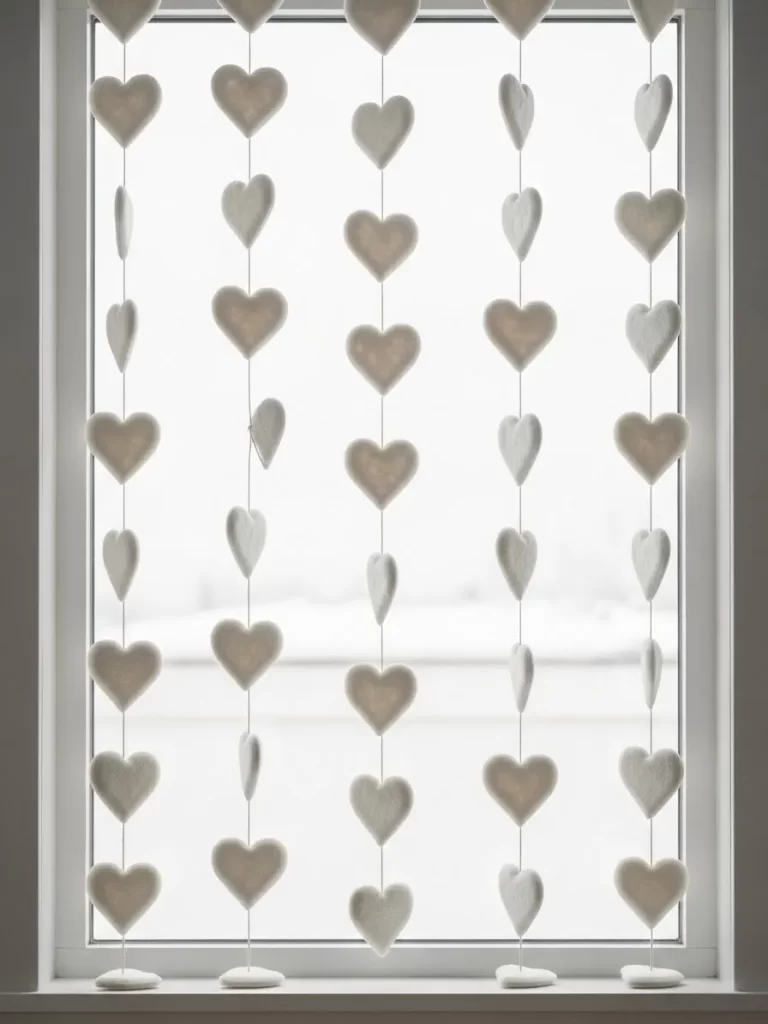
Create a winter wonderland feel with vertical strands of soft white plush hearts. These decorations look like falling snow against your window glass during the day. The neutral white color keeps your room feeling bright and airy while still being festive.
This setup is perfect for a nursery or a cozy bedroom window this February. The soft texture of the hearts adds a tactile and comforting element to your decor. It provides a gentle backdrop that complements any existing color scheme in your home.
Material Required
- White felt fabric
- Cotton batting for stuffing
- White embroidery thread
- Clear fishing line
Equipment Required
- Sewing needle
- Sharp scissors
- Heart stencil
DIY Instructions
- Trace many small hearts onto the white felt and cut out two pieces for every heart.
- Sew the edges of two pieces together but leave a small one inch opening at the bottom.
- Stuff the heart with a little bit of cotton batting until it is puffy and soft.
- Sew the opening shut and repeat this process until you have twenty plush hearts.
- Use a needle to thread five hearts onto a long piece of clear fishing line.
- Tape several of these strands to the top of your window frame in a neat row.
25 Succulent Heart Row
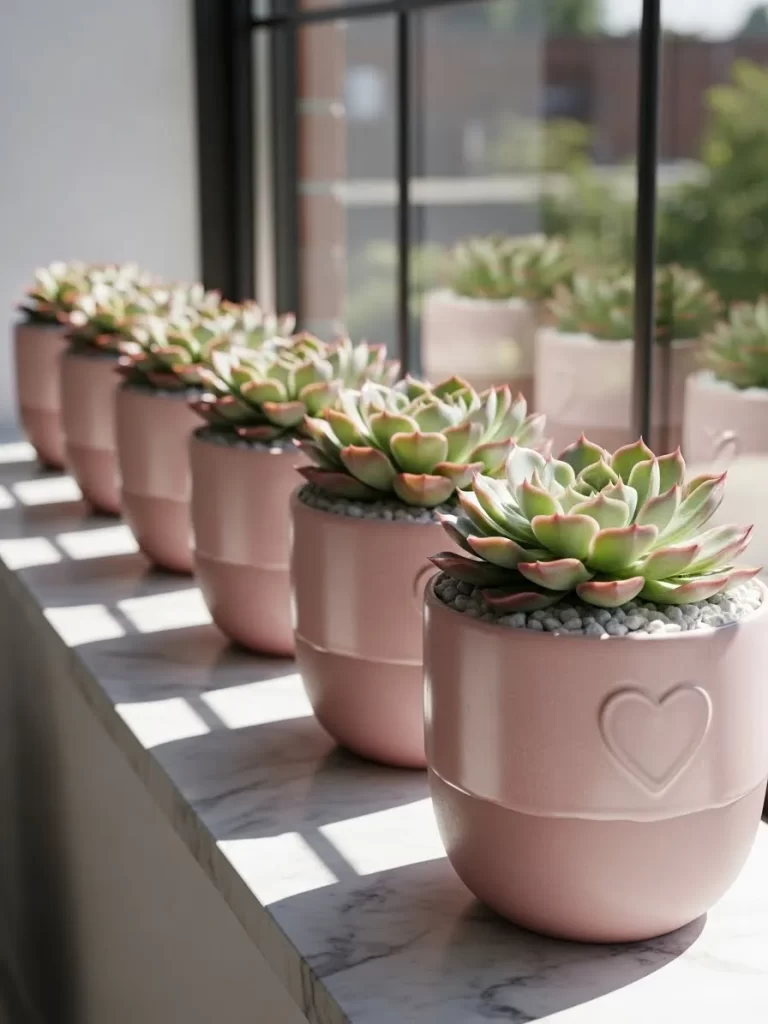
Bring some life to your windowsill with a row of pink ceramic succulent pots. Each container features an embossed heart for a sweet and subtle holiday detail. The fresh green plants offer a living contrast to the pastel pink tones of the ceramic.
This is an excellent way to decorate a sunny kitchen or bathroom window for Valentine day. These plants are very easy to care for and will last much longer than cut flowers. Arranging them in a straight line creates an organized and peaceful look for your space.
Material Required
- Six small pink ceramic pots with heart designs
- Small succulent plants
- White decorative pebbles
- Fresh potting soil
Equipment Required
- Small garden trowel
- Watering can
DIY Instructions
- Fill each pink ceramic pot halfway with fresh potting soil using your trowel.
- Gently remove a succulent from its plastic container and place it in the center of the pot.
- Add more soil around the edges of the plant until it sits firmly in the ceramic.
- Top the soil with a thin layer of white pebbles for a clean and professional look.
- Wipe any dust or dirt off the outside of the pots with a damp cloth so they shine.
- Line the pots up along your sunniest windowsill so the plants can thrive.
26 Red Line Art Face Decal
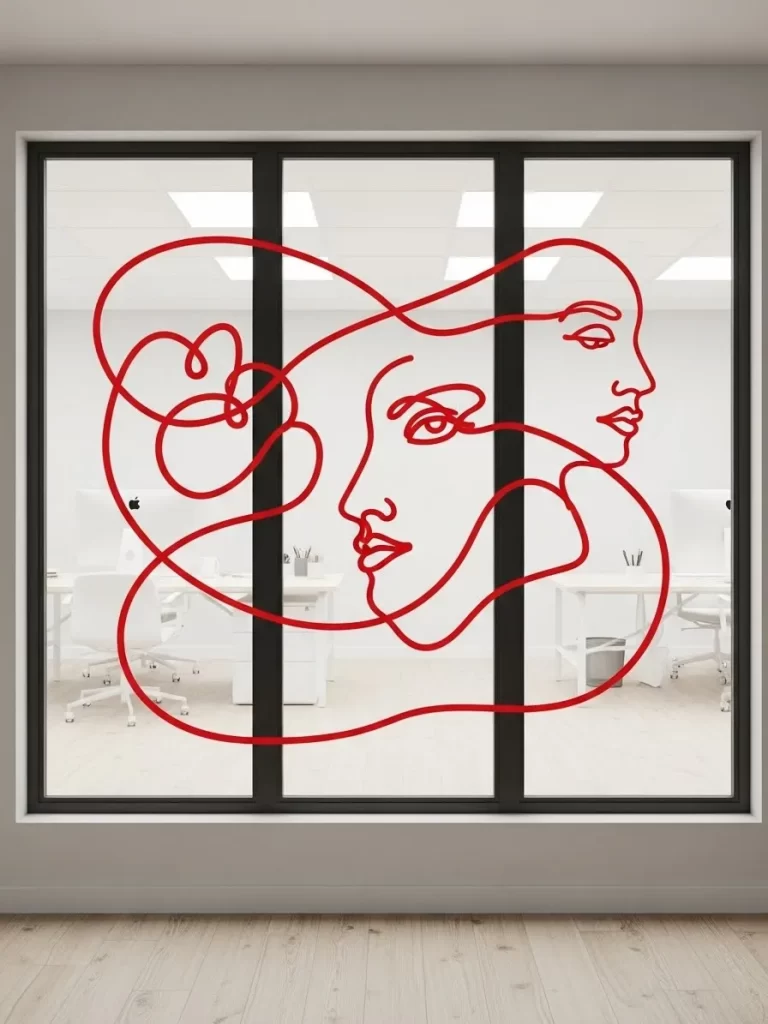
Make a bold and artistic statement with a large red line art decal on your window. This modern design features two faces entwined in a single continuous line for a striking look. The bright red color makes the intricate details pop against your office or living room background.
It turns your window into a temporary gallery piece that looks very professional and chic. This style is perfect for a creative studio space or a modern home office. It provides a high impact visual with a very simple and clean application process.
Material Required
- Red vinyl contact paper
- Clear transfer tape
- Soapy water in a spray bottle
Equipment Required
- Craft knife or cutting machine
- Squeegee
- Marker
DIY Instructions
- Draw a continuous line art design onto the back of the red vinyl paper with a marker.
- Use a craft knife to cut out the thin lines of your drawing very carefully.
- Peel away the excess vinyl so only your red line design remains on the paper backing.
- Apply a piece of transfer tape over the top of the vinyl design and press firmly.
- Spray the window glass with a little soapy water to help you position the decal easily.
- Press the decal onto the glass and use a squeegee to remove all the air and water.
27 Origami Bird Love Flight
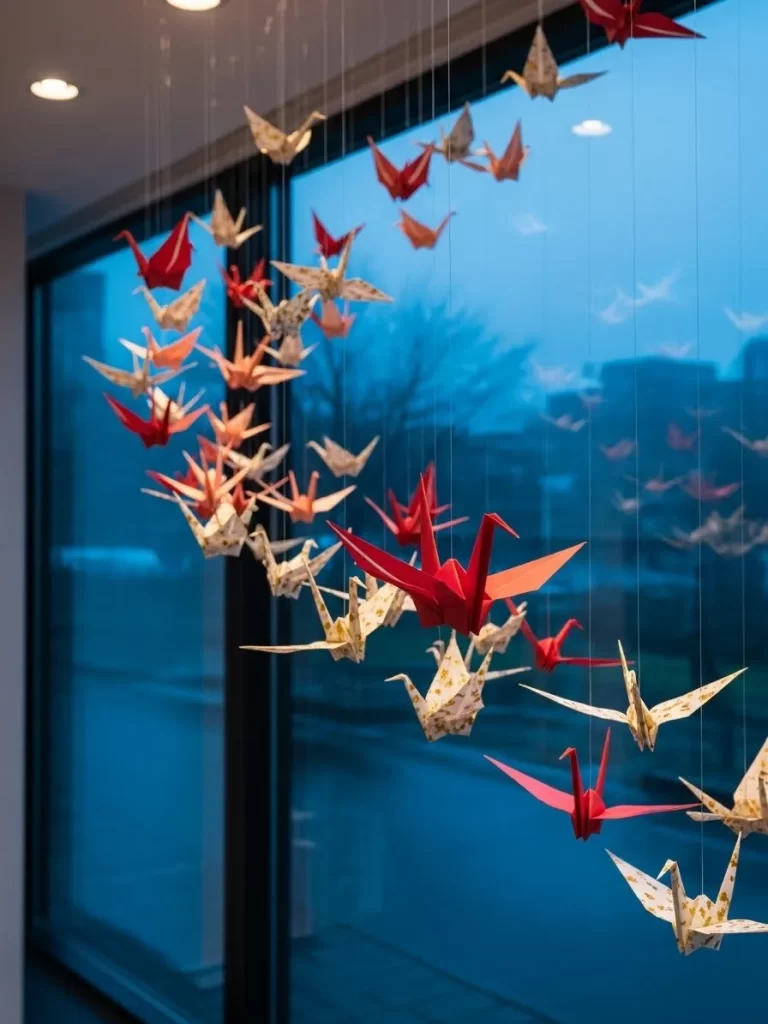
Add a sense of graceful movement to your window with a swarm of colorful origami birds. Red pink and patterned paper cranes hang at different heights to create a spiraling flight. This decoration feels light and full of life as the birds sway in the air.
It is a great way to use up colorful paper scraps to make something beautiful for your home. The intricate folds of the birds add a lot of detail and charm to your window space. This project is a calm and rewarding activity for a quiet afternoon.
Material Required
- Square origami paper in red and pink
- Clear sewing thread
- Small glass beads
Equipment Required
- Scissors
- Sewing needle
DIY Instructions
- Fold twenty small paper cranes using various shades of red and pink paper.
- Use a needle to pull a piece of clear thread through the center of each bird.
- Tie a small glass bead at the bottom of the thread to act as a decorative weight.
- Space three or four birds along each thread by tying small knots under their bodies.
- Attach the top of the thread to your ceiling or window frame with clear tape.
- Hang several threads at different levels to create the look of a flying flock.
28 Hanging Velvet Heart Branch

Combine natural outdoor elements with soft textures for a unique window display. A single green branch hangs horizontally with a large plush velvet heart suspended below. The deep red fabric looks rich and elegant against the green leaves and snowy view.
This minimalist setup is perfect for a window that looks out onto a winter landscape. It brings a touch of nature inside while keeping the holiday spirit alive and well. The simple design allows each individual element to shine without being crowded.
Material Required
- A sturdy tree branch
- Artificial eucalyptus leaves
- Large red velvet heart ornament
- Red string or twine
Equipment Required
- Scissors
- Clear tape or small hooks
DIY Instructions
- Clean your branch and wrap a few eucalyptus leaves around one end of it for color.
- Tie two pieces of red string to the branch about twelve inches apart for hanging.
- Attach the other ends of these strings to the top of your window frame with hooks.
- Tie a single red string to the top of your large red velvet heart ornament.
- Hang the heart from the center of the branch so it sits at eye level in the window.
- Adjust the strings until the branch is level and the heart hangs steadily.
29 Bright Love Story Clings
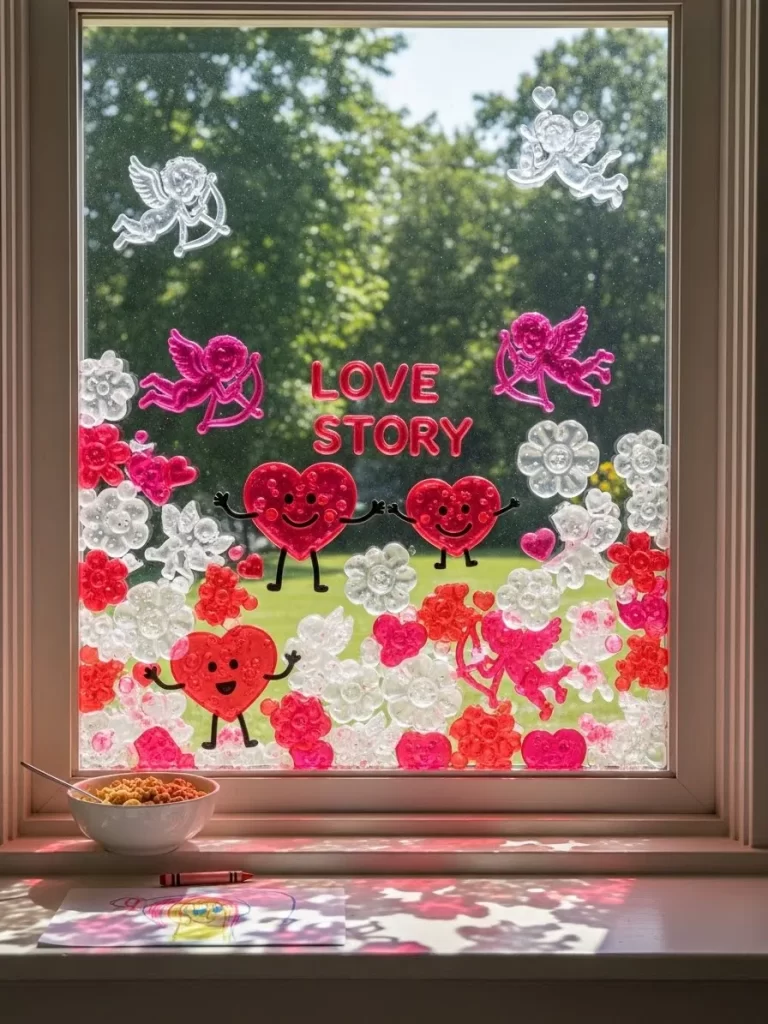
Celebrate a classic love story with these fun and squishy gel window clings for your home. Smiling heart characters and pink cupids fill the glass with vibrant color and joy. The translucent material glows beautifully when the sun shines through the window.
This is an easy and fun way to decorate a child’s playroom or a kitchen window. These clings are very durable and can be moved around as many times as you like. They add a cheerful and lighthearted vibe to your space that everyone will enjoy.
Material Required
- Store bought gel window clings (hearts and cupids)
- Glass cleaner
Equipment Required
- Microfiber cloth
DIY Instructions
- Clean the lower half of your window glass with spray and a microfiber cloth for a good grip.
- Peel the gel hearts and cupid characters off their plastic backing sheet carefully.
- Press the gel shapes firmly against the clean glass starting from the center of each piece.
- Arrange the hearts so they look like they are interacting with each other for a fun scene.
- Use small flower and star shapes to fill in any empty spaces at the bottom of the glass.
- Wipe away any fingerprints from around the clings to keep the window looking sharp.
30 Pom Pom Heart Curtain Frame
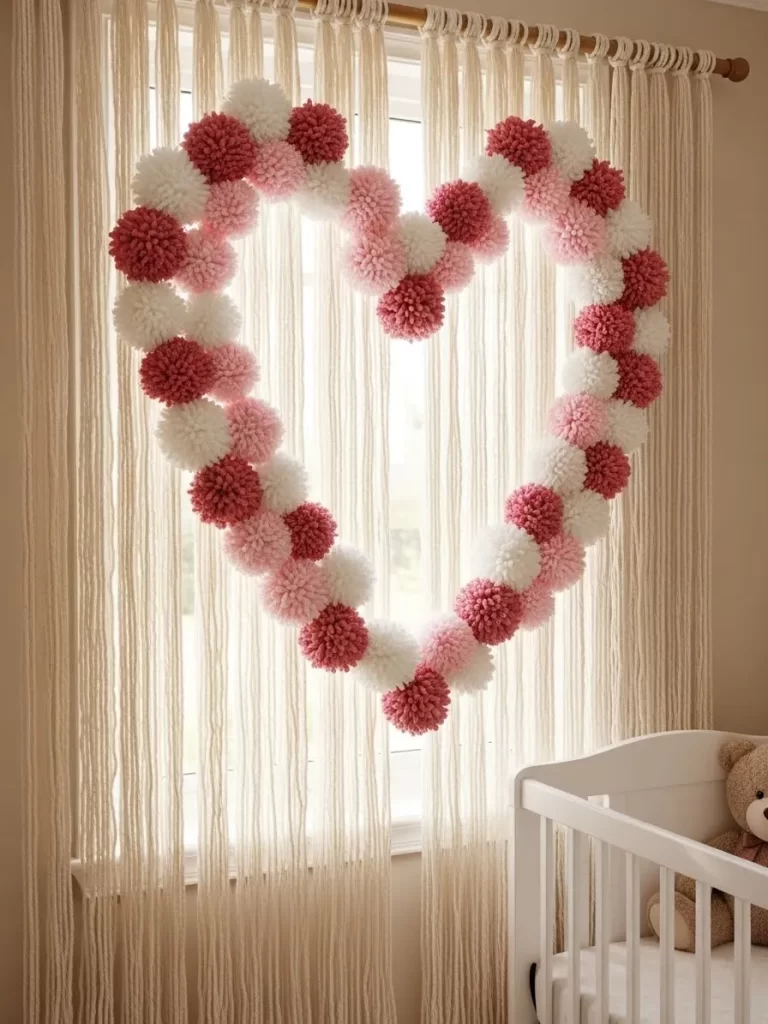
Frame your window with a giant heart made of soft and fuzzy yarn pom poms for a cozy look. Shades of red pink and white blend together to create a textured border on your drapes. This large scale decoration looks great against neutral white curtains in a bedroom.
It adds a soft and whimsical feeling to a nursery or a child’s bedroom window this season. The different sizes of pom poms give the heart a lot of visual depth and interest. This project is a wonderful way to bring a lot of color and warmth into a room.
Material Required
- Yarn in red pink and white
- Large piece of sturdy cardboard
- Strong craft glue
- White curtains
Equipment Required
- Pom pom maker or a fork
- Scissors
DIY Instructions
- Make thirty large pom poms using different colors of yarn and trim them so they are neat.
- Cut a large heart shape outline out of your piece of cardboard with scissors.
- Apply a thick layer of craft glue to the front of the cardboard heart frame.
- Press your yarn pom poms into the glue until the entire cardboard frame is hidden.
- Let the glue dry for several hours until the pom poms are held firmly in place.
- Use small safety pins to attach the cardboard heart to the front of your curtains.
31 Fingerprint Heart Cards
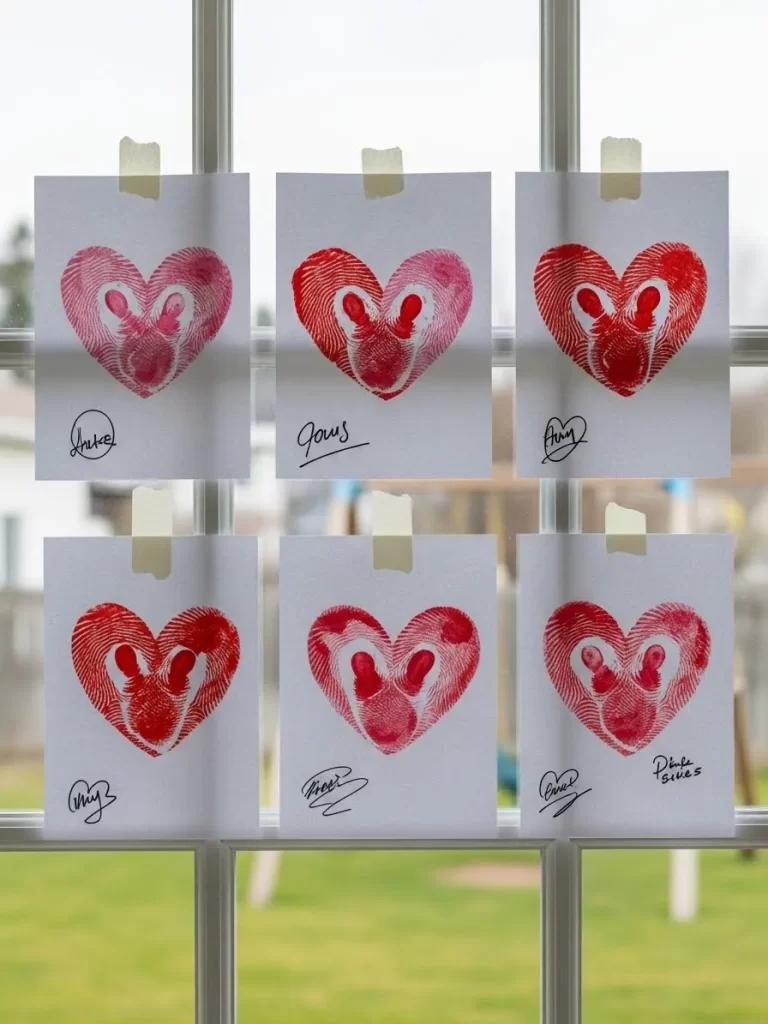
Involve the whole family in your holiday decorating with these personal fingerprint heart cards. Each card features a heart made from two fingerprints to represent a unique bond. Taping these cards in a grid on your window shares your family love with the neighborhood.
This project is a sweet and simple way to create a meaningful display with your children. The red and pink ink looks bright against the white paper and clear glass. It is a nostalgic decoration that focuses on the people who make your home special.
Material Required
- White index cards
- Red and pink ink pads
- Clear tape
- Black fine tip marker
Equipment Required
- None
DIY Instructions
- Give each family member a white index card and have them choose an ink color.
- Press a thumb into the ink pad and then press it onto the card at an angle.
- Press the thumb into the ink again and press it next to the first mark to form a heart.
- Use the black marker to sign each card with a name or a short holiday message.
- Arrange the cards in two rows of three on your window at eye level.
- Use a small piece of clear tape at the top of each card to secure it to the glass.
32 Teddy Bear Tea Party

Create a heartwarming scene on your windowsill with a miniature teddy bear tea party. Two fuzzy bears sit at a table set with heart shaped treats and tiny tea cups. This charming display adds a sense of innocence and sweet romance to your home.
Warm fairy lights in the background create a cozy glow that makes the scene feel alive. This is an adorable idea for a child’s bedroom or a cozy corner in your living room. It invites you to pause and appreciate the small and sweet moments of the holiday.
Material Required
- Two small teddy bears
- Red checkered fabric scrap
- Miniature tea set
- Red felt hearts
- Globe fairy lights
Equipment Required
- None
DIY Instructions
- Clear your windowsill and lay down a red checkered fabric scrap to act as a tablecloth.
- Place two small teddy bears sitting opposite each other at the miniature table.
- Set the tiny tea cups and saucers in front of the bears for a realistic party look.
- Arrange several small red felt hearts on a plate in the center of the table.
- Drape a strand of globe fairy lights along the back of the sill to provide warm light.
- Add small XOXO stickers to the window glass behind the bears to finish the scene.
33 Tinsel Pipe Cleaner Hearts
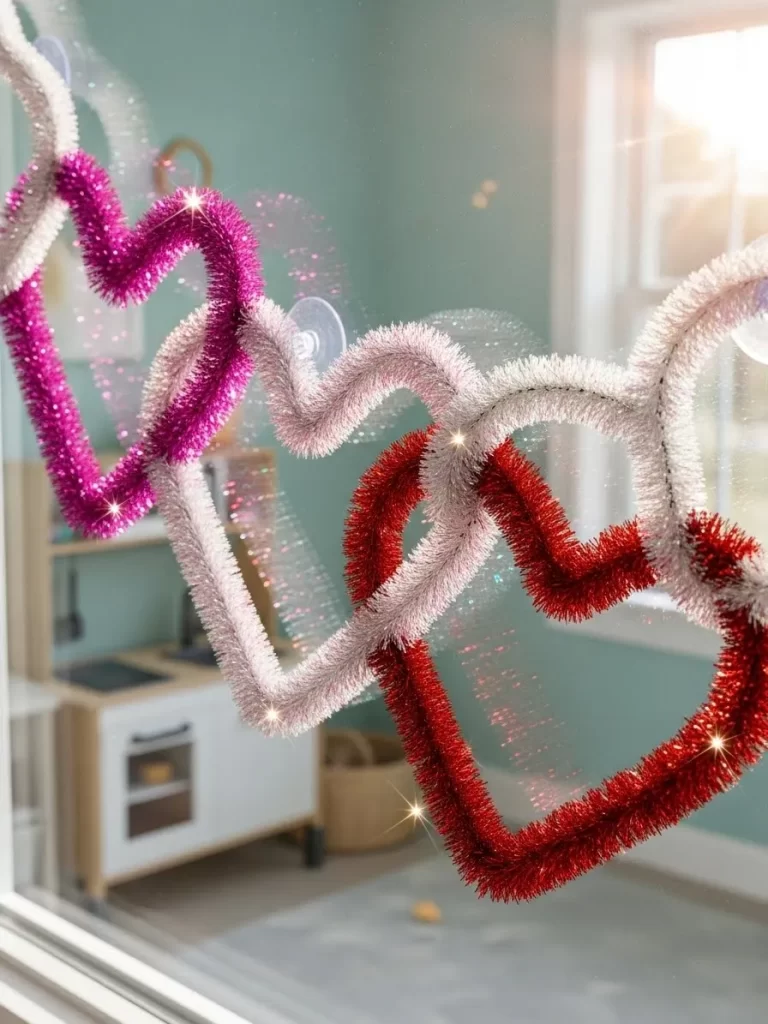
Add some sparkle and shine to your glass with these colorful tinsel pipe cleaner hearts. Vibrant pink red and silver tinsel creates a festive and glowing garland for your window. This project is incredibly easy to make and provides a lot of holiday texture.
The metallic tinsel reflects the winter sun and glows beautifully under your indoor lights at night. These hearts are lightweight and can be draped across the glass with simple suction cups. It is a fun and budget friendly way to add a bit of glamour to your space.
Material Required
- Tinsel pipe cleaners in pink red and silver
- Clear suction cup hooks
Equipment Required
- Scissors
DIY Instructions
- Take one tinsel pipe cleaner and bend it in half to find the center point.
- Curve the two ends downward and twist them together at the bottom to form a heart.
- Repeat this process with several pipe cleaners in different festive colors.
- Link the hearts together by twisting their sides to create a long sparkling chain.
- Attach three suction cup hooks to your window in a slightly curved line.
- Hang your tinsel heart chain onto the hooks so it swags gracefully across the glass.
34 Giant Sticky Note Heart
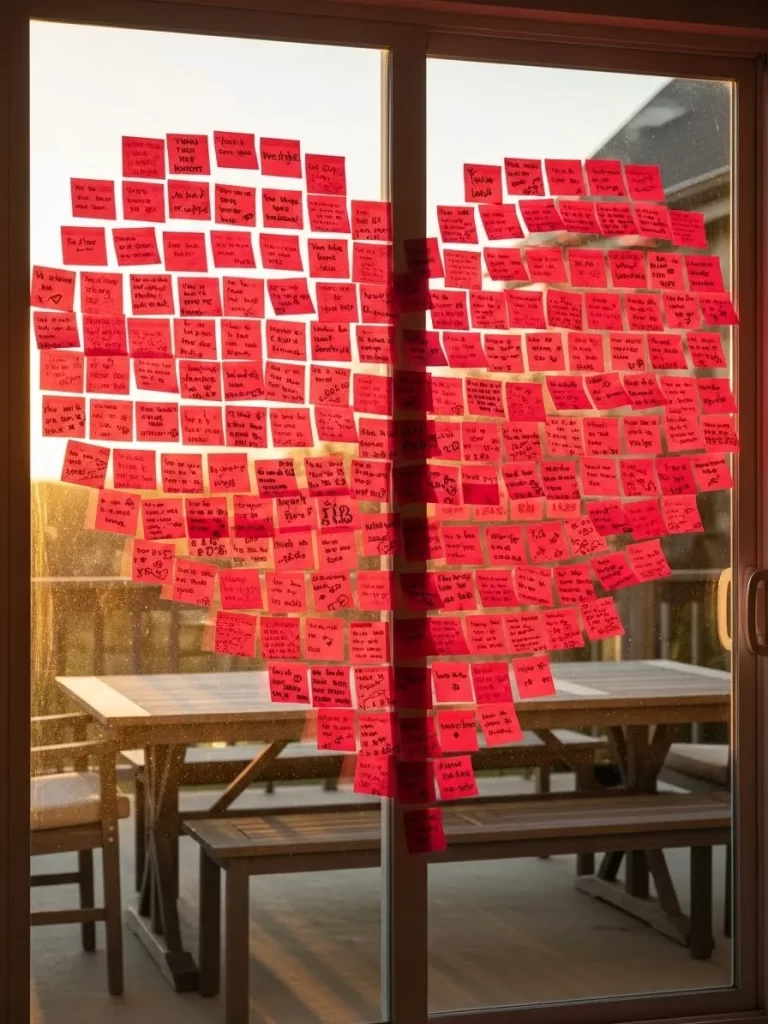
Create a massive and colorful heart on your window using nothing but red sticky notes. This clever project allows you to write hundreds of tiny love notes for your partner or family. The bright red paper looks striking against the outdoor light and fills the whole pane.
It is a wonderful way to express your feelings in a grand and very visual way. You can involve the whole family by having everyone write a note before sticking it up. This decoration is easy to install and even easier to remove after the holiday is over.
Material Required
- Three packs of red sticky notes
- Black permanent marker
Equipment Required
- None
DIY Instructions
- Clean your window glass so the sticky notes can adhere firmly for the whole month.
- Start at the bottom center of the window and place one sticky note as your anchor point.
- Work your way upward and outward to form the two large curves of a heart shape.
- Fill in the entire center of the heart outline with more red sticky notes in neat rows.
- Use the black marker to write short messages or reasons why you love your family on the notes.
- Step back and adjust any notes that are crooked to ensure the heart looks symmetrical.
35 Chalkboard Poem Pane
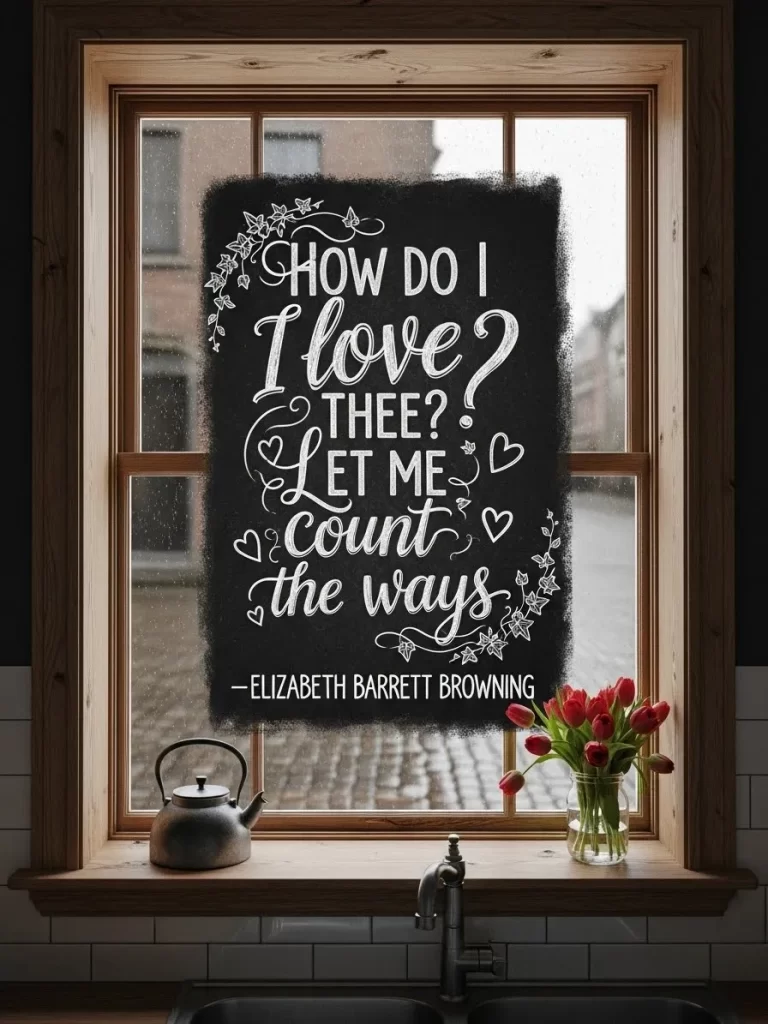
Turn your window into a piece of classic literature with a chalkboard style poem display. A large black background features a famous love quote written in beautiful white calligraphy. This sophisticated look is perfect for a kitchen or a home library this season.
The contrast between the black paint and white ink makes the text very easy to read from a distance. You can add decorative ivy and small hearts around the edges for a finished look. It is a thoughtful way to bring deep meaning and beauty to your Valentine decor.
Material Required
- Black chalkboard window film
- White liquid chalk markers
- Fresh red tulips in a jar
Equipment Required
- Squeegee
- Scissors
DIY Instructions
- Cut a large rectangle of black chalkboard film and apply it to the center of your window.
- Use a squeegee to remove all air bubbles so the film looks perfectly smooth on the glass.
- Choose a famous love poem and write it onto the black film with a white chalk marker.
- Add decorative flourishes and small hearts around the text to fill the black space.
- Draw a few ivy vines in the corners to give the artwork a professional and framed feel.
- Place a jar of fresh red tulips on the sill in front of the window to add natural color.
36 Cascading Red Bloom Wall
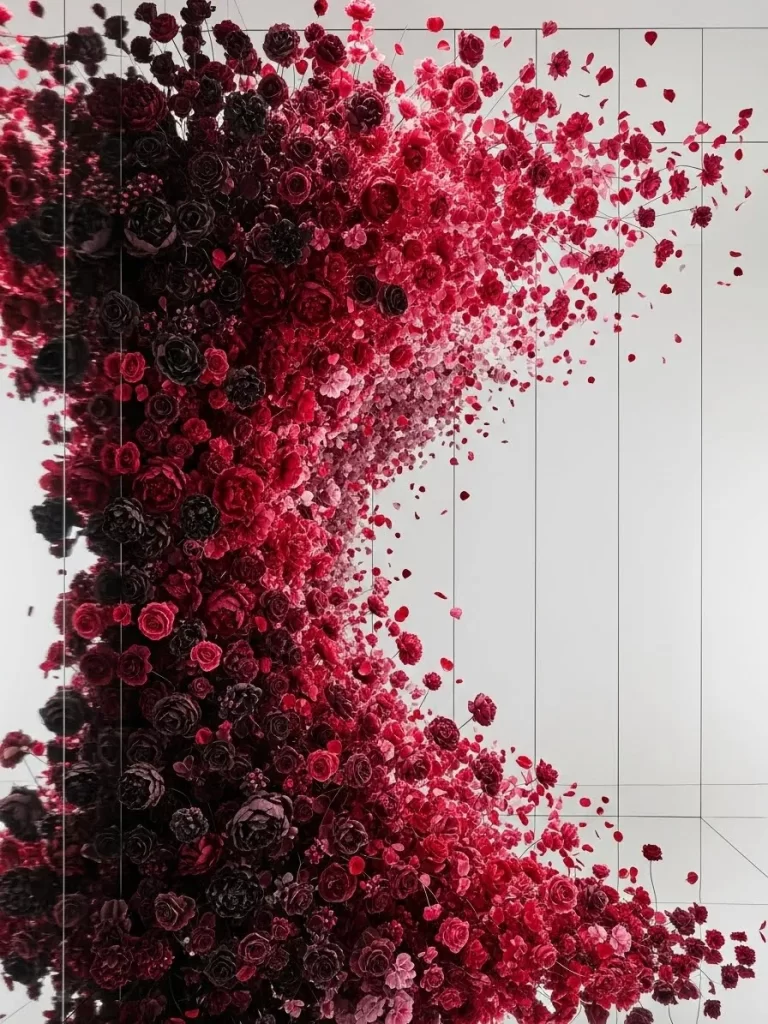
Create a breathtaking floral installation that seems to explode across your window and wall. Thousands of red and pink artificial flowers are arranged in a dynamic swirling pattern. This high end look turns your living room into a professional gallery space for the holiday.
The deep burgundy tones at the base fade into bright pinks to create a beautiful ombre effect. This massive display is perfect for a romantic photo backdrop or a special dinner setting. It celebrates the abundance and beauty of love in a grand and unforgettable way.
Material Required
- Artificial roses and peonies in red and pink
- Floral foam blocks
- Double sided mounting tape
Equipment Required
- Wire cutters
- Glue gun
DIY Instructions
- Cut your floral foam blocks into thin slices and tape them to the wall in a swirling pattern.
- Use wire cutters to trim the stems of your artificial flowers to about two inches long.
- Start at the bottom with your darkest red flowers and push them firmly into the foam.
- Move upward and start mixing in lighter red and pink blooms to create a color gradient.
- Use a glue gun to attach single petals around the edges of the main swirl for a floating look.
- Continue adding flowers until the foam blocks are completely hidden and the wall looks lush.
37 Golden Heart Mannequin Date

Set a glamorous and high fashion scene in your window with two dressed mannequins. A couple sits at a romantic dinner table beneath a strand of floating gold origami hearts. This sophisticated display looks like a luxury boutique window in a major city.
The deep blue velvet suit and red satin dress create a classic and elegant color palette. This is a grand way to celebrate the holiday if you have a large front window to decorate. It adds a sense of high drama and high style to your home for the Valentine season.
Material Required
- Two full size mannequins
- Red satin evening dress
- Blue velvet suit
- Small table and two chairs
- Gold origami hearts
Equipment Required
- Clear fishing line
- Tape
DIY Instructions
- Dress the mannequins in their formal holiday attire and pose them sitting in the chairs.
- Set a small table between them with a white cloth and two glasses of sparkling juice.
- Place a single red rose in a slim vase in the center of the table for a romantic touch.
- Fold several hearts from gold metallic paper and thread them onto clear fishing line.
- Hang these golden hearts from the ceiling directly over the center of the dinner table.
- Add a small battery operated candle to the table to provide a warm and intimate glow.
38 Floating Red Heart Jewelry Box
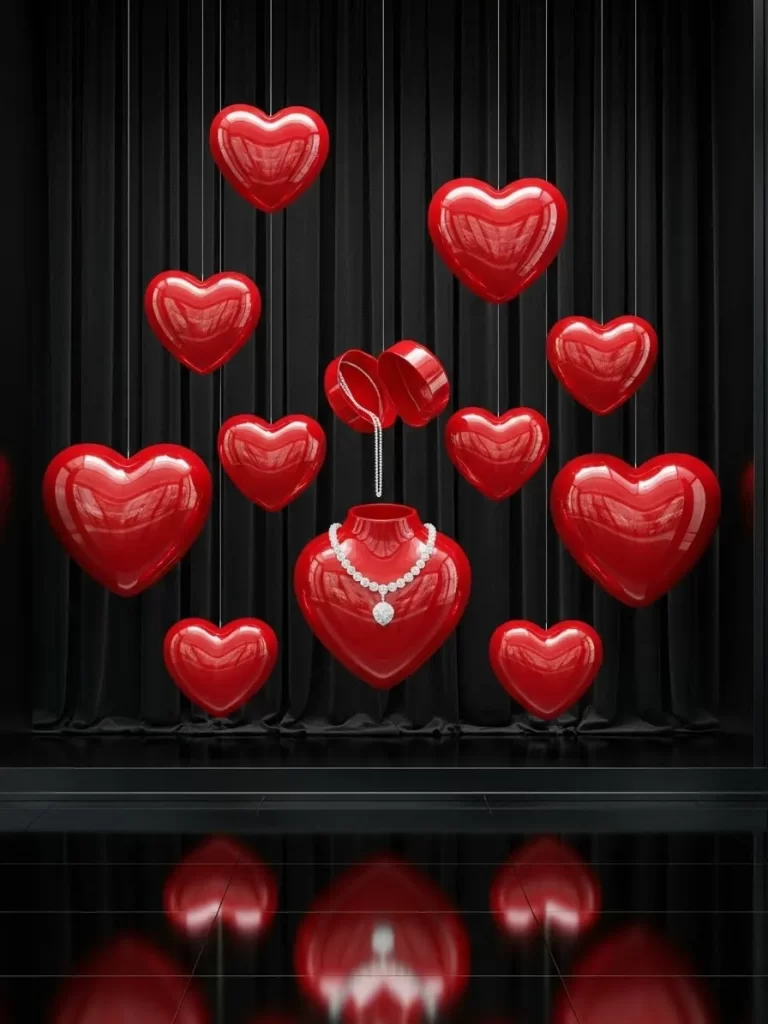
Create a high gloss and luxurious window display with floating red hearts and fine jewelry. A central heart shaped pedestal holds a shimmering diamond necklace for a grand romantic gesture. Smaller hearts float around the center to create a sense of magic and wonder.
The deep black background makes the bright red hearts and sparkling gems pop with high contrast. This display is perfect for a master bedroom window or a high end dressing area. It represents the ultimate in holiday glamour and shows a deep appreciation for fine things.
Material Required
- Large red heart shaped jewelry box
- Selection of fine jewelry or replicas
- Glossy red heart ornaments
- Black velvet window drapes
Equipment Required
- Clear fishing line
- Small tacks
DIY Instructions
- Hang black velvet drapes behind your window to create a dark and luxurious background.
- Secure your large heart shaped jewelry box to a central pedestal or a small shelf.
- Drape a sparkling necklace or bracelet over the heart so it catches the indoor light.
- Tie clear fishing line to several glossy red heart ornaments in various sizes.
- Hang these hearts from the top of the window frame so they appear to float in the air.
- Adjust the heights of the floating hearts so they frame the central jewelry piece perfectly.
39 Giant Pink Paper Flower Wall
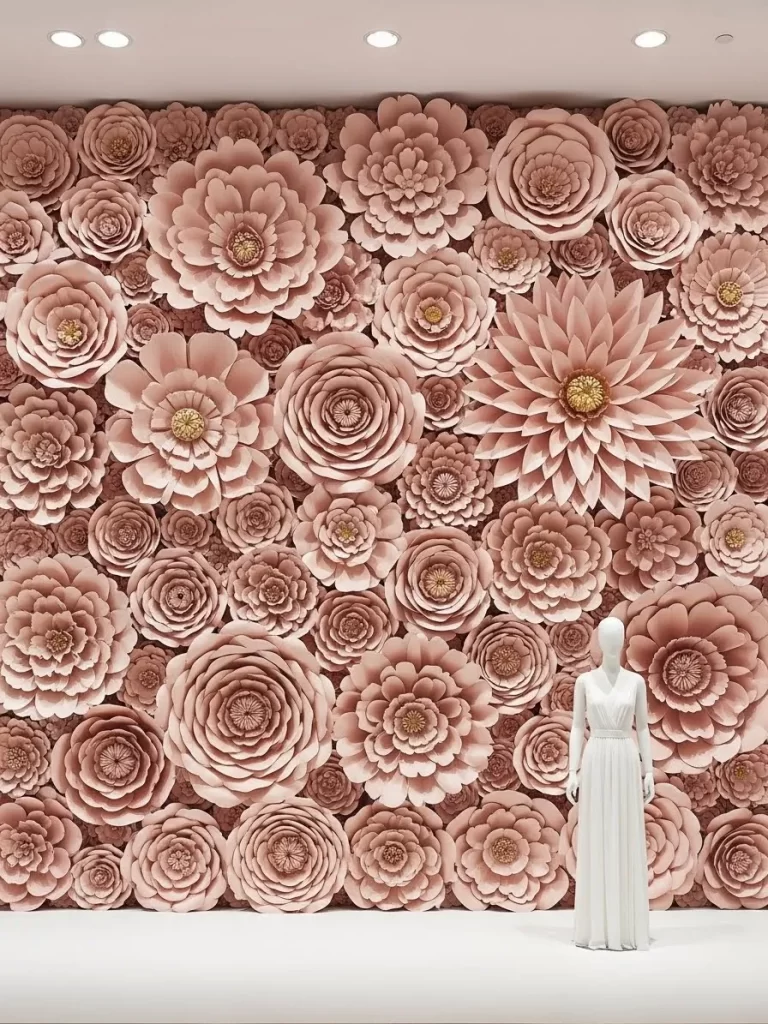
Turn your window into a lush botanical garden with dozens of giant pink paper flowers. Large hand crafted dahlias and roses overlap to cover the entire glass surface with texture. This soft and feminine look creates a beautiful and private screen for your room.
The various shades of pink and peach create a warm and welcoming glow inside your home. These paper flowers are incredibly detailed and add a sense of high end craft to your decor. It is a stunning way to block a boring view and replace it with something truly beautiful.
Material Required
- Pink and peach heavy cardstock
- Strong double sided mounting tape
Equipment Required
- Paper flower templates
- Glue gun
- Scissors
DIY Instructions
- Use templates to cut out hundreds of petals in different sizes from the pink cardstock.
- Curl the edges of the petals with your scissors to give them a natural and realistic shape.
- Glue the petals in layers starting from the outside and working toward the center of the flower.
- Add a gold paper center to each flower to represent the stamen and add a bit of shine.
- Apply mounting tape to the back of your finished flowers and press them onto the window.
- Overlap the flowers of different sizes until the entire glass pane is covered in blooms.
40 Neon Coffee Valentine Sign

Combine your love for caffeine and romance with a bright neon lightbox display. A large sign reading Coffee Is My Valentine sits in your window surrounded by glowing red lights. This trendy and modern look is perfect for a kitchen or a home coffee bar.
The warm red glow creates a cozy and inviting atmosphere for those cold February mornings. Adding small bowls of red chocolates and old film reels gives the scene a cool vintage feel. It is a fun and stylish way to celebrate your favorite daily ritual during the holiday.
Material Required
- Large cinema lightbox
- Red neon light tubing or LED strips
- Bowl of red heart chocolates
- Vintage decorative items
Equipment Required
- Clear tape
DIY Instructions
- Place the letters for Coffee Is My Valentine into the slots of your large lightbox.
- Set the lightbox in the center of your windowsill where it can be seen from the street.
- Wrap the red neon tubing or LED strip around the sign to create a glowing border.
- Place a bowl of red wrapped chocolates next to the sign for guests to enjoy.
- Add a few vintage items like old film reels or cameras to give the display some character.
- Plug in all the lights and adjust the position until the red glow fills the window space.
41 Social Media Love Frame

Create an interactive and modern window display with a glowing social media frame. A neon pink heart frame features your handle and a custom hashtag like Love Your Look. This trendy idea turns your window into a fun photo spot for your friends and family.
The bright pink light creates a beautiful glow that looks amazing in photos and on social feeds. It is a great way to engage with your community and share the holiday spirit online. This modern approach feels fresh and very relevant for the social media age.
Material Required
- Custom neon pink window decal
- Pink LED strip lights
- Glass cleaner
Equipment Required
- Microfiber cloth
- Clear tape
DIY Instructions
- Clean the window thoroughly to ensure your decal can stick without any air bubbles.
- Apply your custom neon heart decal to the center of the glass at chest height.
- Stick the LED light strip around the edge of the decal to make the frame glow.
- Use pink vinyl letters to add your social media handle and hashtag below the heart.
- Add a small pink arrow pointing toward the center of the frame to encourage photos.
- Hide the power cord along the window frame with tape and plug it in to start the glow.
42 Rainbow Heart Message Board
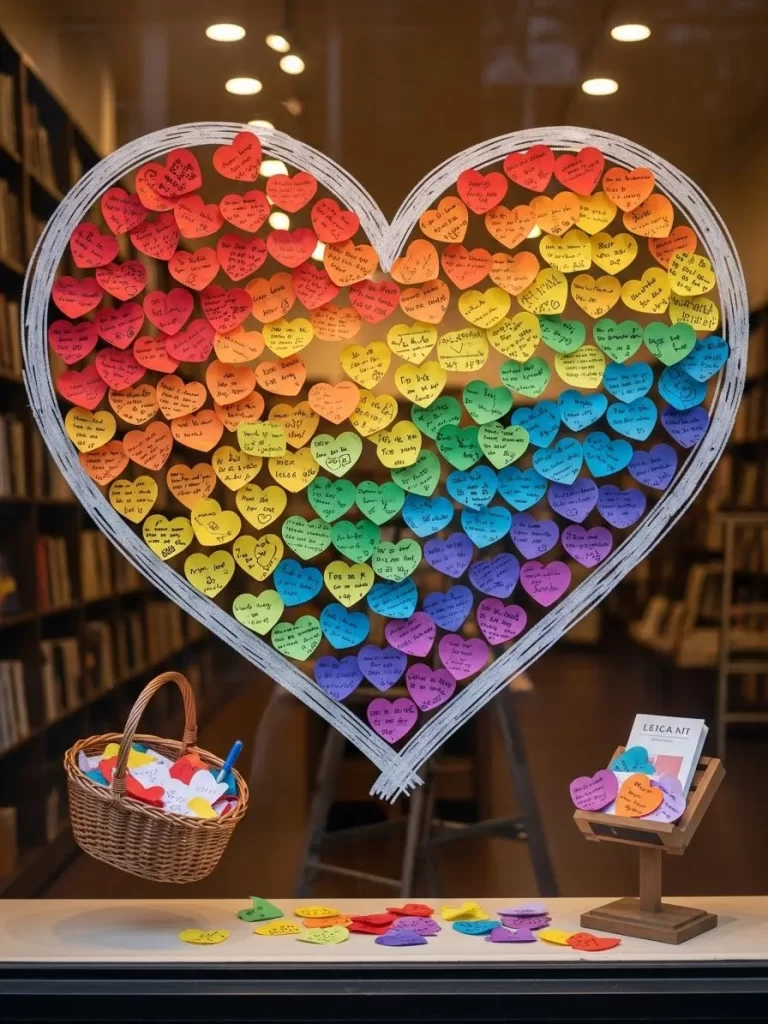
Celebrate the full spectrum of love with a giant rainbow heart made of colorful notes. Hundreds of small hearts in every color of the rainbow are arranged to form one massive heart. Each small heart features a handwritten message of kindness and affection from your friends.
This vibrant and inclusive display fills your window with positive energy and bright color. A basket of blank hearts on the sill invites visitors to add their own messages to the board. It is a beautiful community project that celebrates love in all its wonderful forms.
Material Required
- Small paper hearts in rainbow colors
- Large wooden heart frame
- Fine tip markers
- Woven basket
Equipment Required
- Craft glue or tape
DIY Instructions
- Cut out hundreds of small paper hearts in red orange yellow green blue and purple.
- Mount a large heart shaped frame made of light wood onto your window glass.
- Start at the top with red hearts and glue them in a horizontal band across the frame.
- Move downward through the colors of the rainbow until the whole frame is filled.
- Set a basket of blank hearts and markers on the sill with a sign asking for messages.
- As guests write notes have them glue their hearts onto the frame to grow the display.
Key Takeaways
Light plays a major role in window decor success. Use fairy lights or candles to make your display visible at night. This ensures your hard work looks great around the clock.
Texture adds depth to your holiday arrangements. Combine soft tulle with hard glass for a professional look. Mix different fabrics like velvet and burlap to keep things interesting for the eyes.
Personalization makes the holiday feel more special. Include photos or handwritten notes in your window displays. This turns simple decorations into cherished family memories that guests will admire.
Decorating your windows for Valentine Day is a wonderful way to celebrate. It adds a layer of charm that everyone can see. You do not need to spend a lot of money to make a big impact. These projects prove that simple materials can create stunning results.
Your home should be a reflection of the love you share. Whether you choose a rustic banner or a modern neon sign your effort will shine through. We hope these ideas inspire you to pick up a craft kit today.
Make this season memorable by adding a personal touch to your view. Love is in the details of your home decor. Happy crafting and enjoy the beautiful light in your home this year.