Many store candles lack a soul. They often sit in basic containers that do nothing for your room aesthetic. You might feel that your current collection looks a bit flat and uninspired.

Changing your lighting is one of the fastest ways to improve the mood of a living space. Handmade wax creations allow you to add personal touches that reflect your own style. These projects help you build a home that feels warm and filled with care.
You do not need to be a professional crafter to succeed with these ideas. Every project listed here uses simple steps that anyone can follow. Get ready to transform your plain jars into beautiful pieces of art.
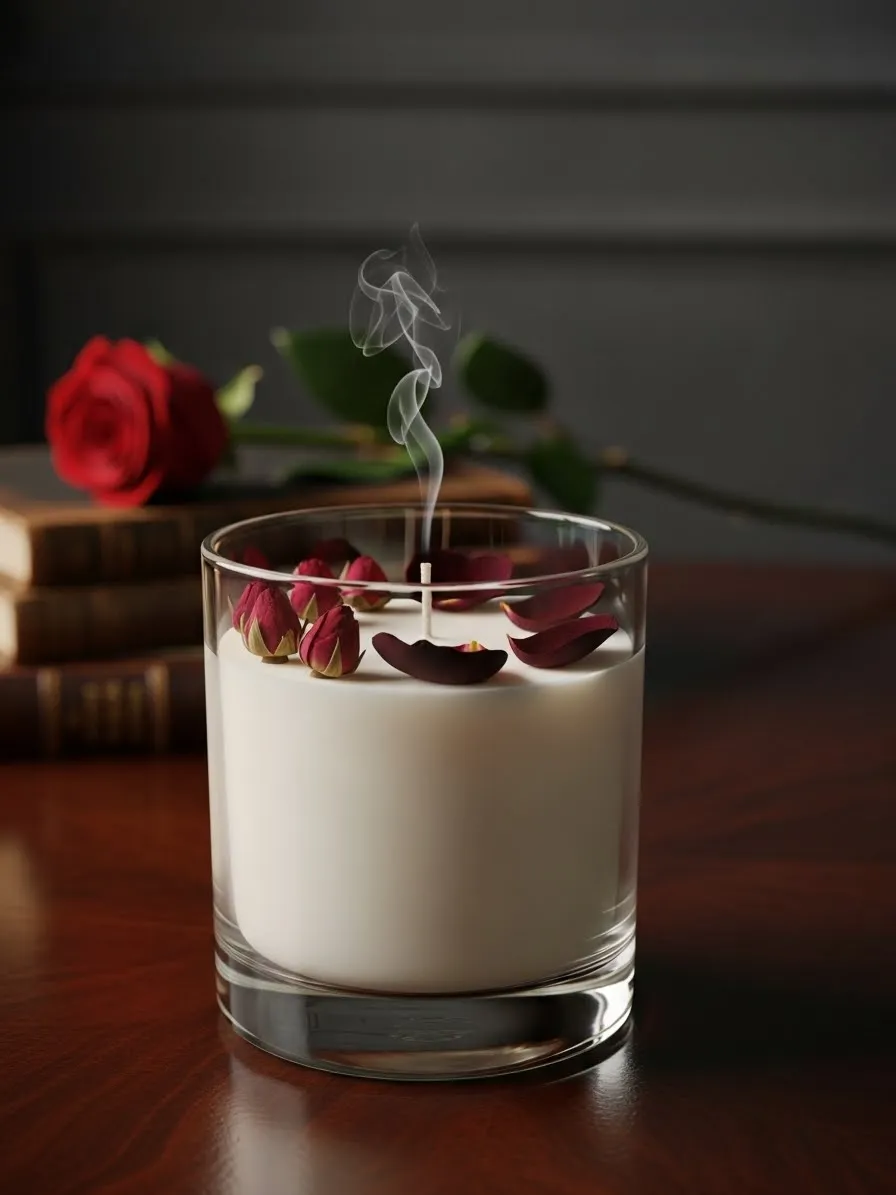
1 Romantic Rosebud Glass Candle

Transform a standard glass jar into a stunning piece of art. This simple project uses creamy white wax as a clean base for deep red botanicals. The contrast creates an elegant look that instantly elevates your home decor.
Small dried rosebuds and petals sit gently on the surface to add a touch of nature. This design feels sophisticated and timeless on any tabletop. It makes a thoughtful gift or a charming addition to your own living space during the season of love.
Material Required List
- Soy wax flakes
- Small dried rosebuds
- Dried rose petals
- Pre waxed cotton wick
- Clear glass cylinder jar
- Rose scented fragrance oil
Equipment Required List
- Large glass bowl or double boiler
- Digital thermometer
- Wick centering tool or two pencils
- Scissors
- Hot glue gun or wick sticker
DIY Instructions
- Clean your glass jar thoroughly with rubbing alcohol to remove any dust or fingerprints.
- Apply a small dot of hot glue to the bottom of the wick tab and press it firmly into the center of the jar floor.
- Use a centering tool or two pencils tied together to keep the top of the wick standing straight up.
- Measure out enough soy wax flakes to fill your jar twice.
- Melt the wax slowly using a double boiler until it reaches 185 degrees Fahrenheit.
- Stir in your rose fragrance oil gently for two minutes to ensure it blends well with the liquid wax.
- Let the wax cool down to roughly 135 degrees Fahrenheit before pouring it slowly into the glass jar.
- Wait for the wax to start becoming opaque and firm on top but still soft enough to hold items.
- Place your dried rosebuds and petals carefully around the edge of the wick using tweezers.
- Allow the candle to sit overnight to fully harden.
- Trim the wick to a quarter inch height before you light it for the first time.
2 The Midnight Letter Wax Seal Candle

This moody centerpiece captures the essence of a secret love note written by candlelight. Deep navy wax serves as the canvas for elegant cursive text pressed into the sides. A striking red wax seal drips down the front to create a focal point that demands attention.
It brings a dark academia vibe to your study or bedroom. The heavy texture makes it look like a vintage artifact from another era. You can feel the history in every embossed line as the flame dances above the square silhouette. Lighting this candle sets a mysterious mood for late night reading sessions. It transforms a boring corner into a scene from a classic novel.
Material Required List
- Large square pillar candle in navy blue
- Red sealing wax beads
- Parchment paper
- Small piece of red ribbon
- Scented oil in sandalwood or old paper
Equipment Required List
- Wax seal stamp with a Celtic or floral design
- Metal melting spoon
- Small tea light candle
- Embossing heat tool or hair dryer
- Lettering stencil or rubber stamps
DIY Instructions
- Take your blue pillar candle and clean the surface with a soft cloth to remove any oils.
- Use an embossing heat tool to lightly soften the surface of one side of the candle.
- Press your letter stencils or rubber stamps into the softened wax to create the look of written text.
- Move the heat tool across the wax surface slowly so you do not melt the candle too much.
- Place three red wax beads into your metal melting spoon.
- Hold the spoon over a lit tea light candle until the red wax turns into a smooth liquid.
- Pour the melted red wax slowly onto the front of the candle where you want the seal to sit.
- Let the wax drip naturally down the side for a realistic look.
- Press your metal seal stamp firmly into the center of the warm red wax puddle.
- Hold the stamp still for thirty seconds before pulling it away carefully.
3 Sparkling Heart Champagne Candle
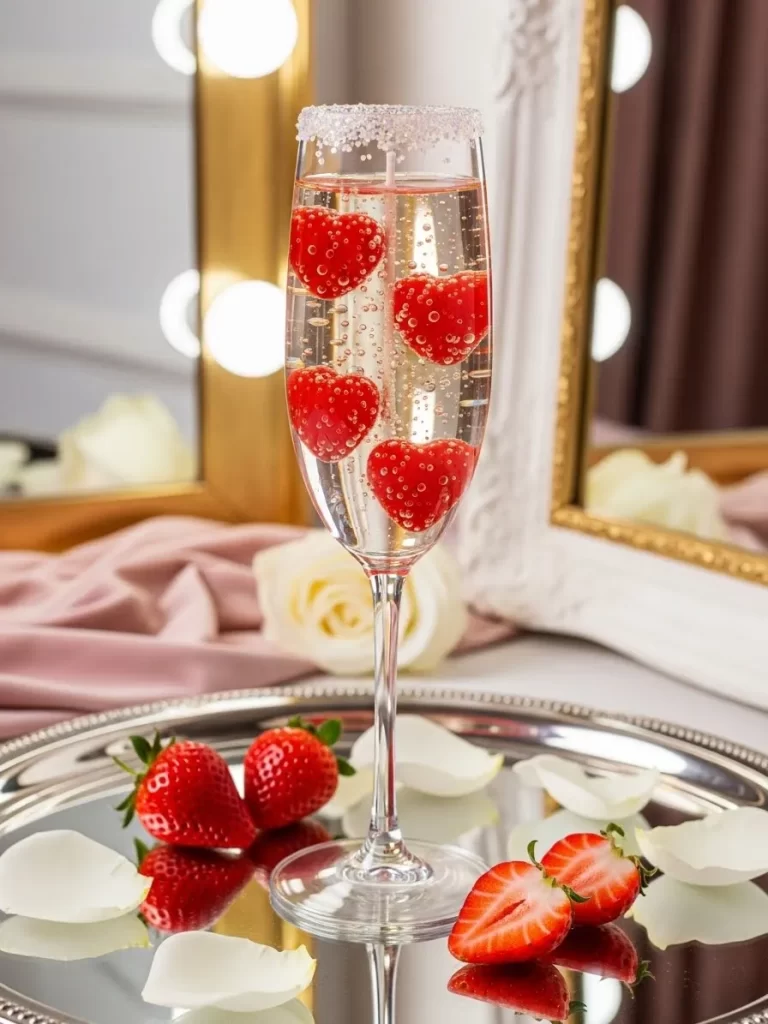
Celebrate your romance with a candle that mimics a bubbly glass of champagne. Clear gel wax holds tiny red heart shapes that appear to float mid air. The rim is coated in shimmering white crystals to suggest a sugary finish.
This design adds a playful yet classy touch to your dinner table. Guests will marvel at the realistic bubbles trapped within the clear vessel. It captures the light beautifully and glows with a soft pink hue when lit. This piece serves as both a decoration and a conversation starter during a romantic evening. Its whimsical look fits any Valentine celebration.
Material Required List
- High density clear gel wax
- Red wax heart inserts or embeds
- Glass champagne flute
- White coarse sanding sugar or glass glitter
- Zinc core wick
- Light corn syrup
Equipment Required List
- Small pot for melting gel wax
- Wooden stir stick
- Scissors
- Hot glue gun
- Small paintbrush
DIY Instructions
- Wash and dry your champagne flute to ensure the gel wax stays clear.
- Use a small paintbrush to apply a thin layer of corn syrup around the very top rim of the glass.
- Dip the sticky rim into a bowl of white sanding sugar to create a frosted appearance.
- Apply a dot of hot glue to the bottom of your wick and center it at the base of the flute.
- Heat your gel wax in a small pot over low heat until it looks like clear syrup.
- Do not stir the wax too fast or you will create too many bubbles.
- Pour a small layer of clear gel into the bottom of the glass.
- Use tweezers to drop a few red wax hearts into the warm gel so they stay in place.
- Let that layer cool for ten minutes before pouring more gel on top.
- Repeat the process of adding hearts at different heights to make them look like they are floating.
- Allow the candle to cool completely for four hours.
4 Earthy Chamomile and Honey Bowl Candle
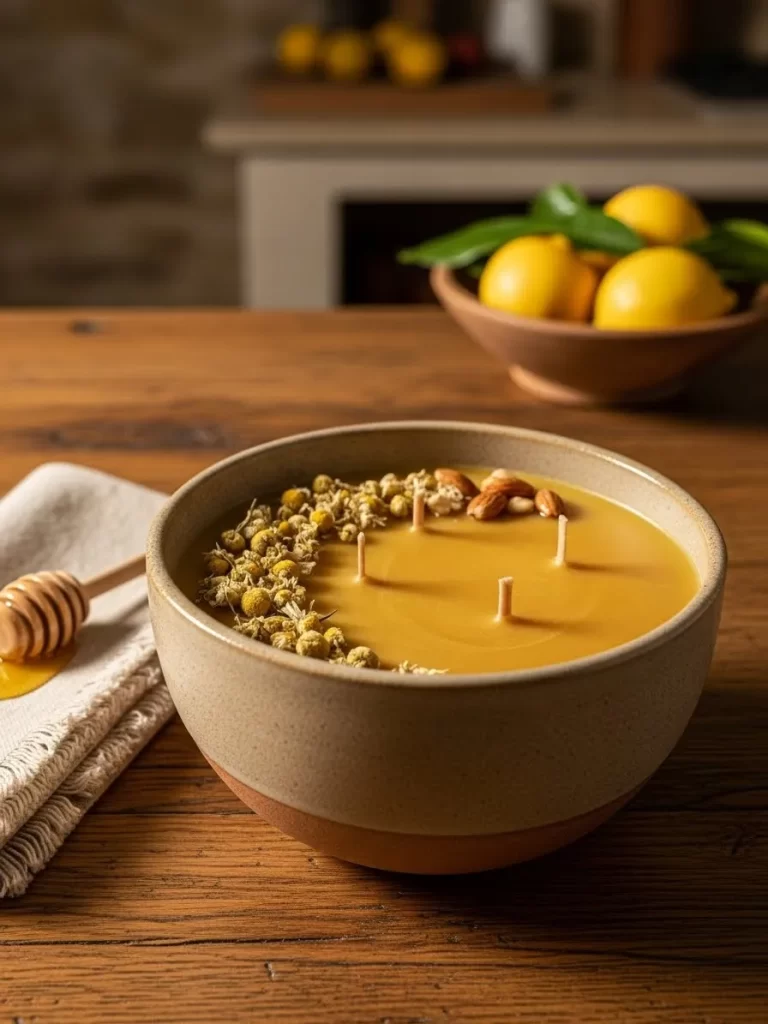
Bring the warmth of a sunny meadow into your home with this natural bowl candle. Golden yellow wax fills a rustic ceramic dish to create a wide pool of light. Dried chamomile flowers and whole almonds line the edge for a cozy, organic feel.
This multi wick design provides a bright glow that fills even large rooms. The combination of textures looks beautiful on a coffee table or kitchen island. It offers a grounded aesthetic for those who prefer nature inspired decor over flashy red items. This candle smells as good as it looks when you add honey fragrance.
Material Required List
- Beeswax or yellow paraffin wax
- Three cotton wicks
- Ceramic or clay bowl
- Dried chamomile flower heads
- Whole raw almonds
- Honey scented fragrance oil
Equipment Required List
- Double boiler or a pot inside another pot of water
- Wick centering sticks or chopsticks
- Metal spoon
- Kitchen scale
- Thermometer
DIY Instructions
- Select a ceramic bowl that can handle heat and wipe the inside clean.
- Place three wicks in a triangle shape at the bottom of the bowl using hot glue to secure them.
- Keep the wicks upright by resting them against chopsticks laid across the top of the bowl.
- Melt your beeswax in the top part of a double boiler until it is fully liquid.
- Add your honey scent to the melted wax and stir slowly for sixty seconds.
- Pour the yellow wax into the bowl until it is about half an inch from the top.
- Let the wax sit until a skin forms on the surface.
- Gently press your dried chamomile flowers and almonds into the soft wax around the outer edge.
- Avoid placing any decorations too close to the wicks to prevent them from catching fire.
- Let the candle harden in a cool spot away from direct sunlight.
5 Gilded Rose Quartz Crystal Candle

Harness the energy of love with a candle shaped like raw rose quartz. Soft pink gradients mimic the natural variation of real gemstones. Edges are dipped in shimmering gold leaf to add a luxurious sparkle that catches every ray of sunlight.
This sculptural piece works as a standalone work of art even when unlit. It stands tall with multiple jagged points that give it a realistic crystal appearance. Place it on your vanity to invite peace and affection into your daily routine. The gold accents highlight the sharp ridges and make the candle look expensive.
Material Required List
- Pink pillar wax
- White pillar wax
- Gold leaf sheets
- Gold leaf adhesive or sizing
- Single cotton wick
- Rose geranium essential oil
Equipment Required List
- Silicone crystal cluster mold
- Small soft paintbrush
- Pot for melting wax
- Skewer or needle
- Utility knife
DIY Instructions
- Mix your pink and white wax together in different ratios to get a marbled look.
- Melt the wax until it reaches the temperature recommended on the package.
- Pour the wax into your silicone crystal mold and let it cool slightly.
- Use a long needle to poke a hole through the center of the wax for your wick.
- Pull the wick through the hole and secure it at the bottom.
- Remove the candle from the mold once it feels cold to the touch.
- Use a utility knife to trim any rough edges at the base of the crystal.
- Apply a thin layer of gold leaf adhesive to the very tips of the wax crystals.
- Wait for the adhesive to become tacky before pressing the gold leaf sheets onto the wax.
- Brush away the excess gold with a dry, soft brush.
6 Sweet Parisian Macaron Dessert Candle
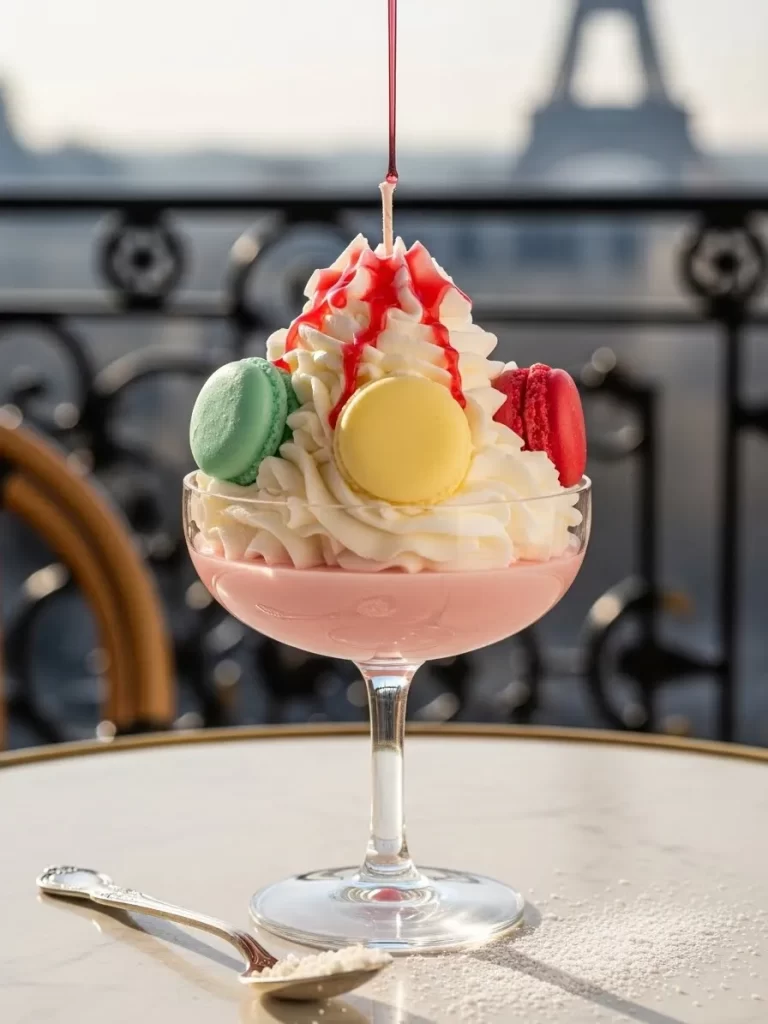
Transport your senses to a French bakery with this decadent dessert candle. Pink wax fills the base of a stem glass while fluffy white whipped wax sits on top. Colorful macarons are tucked into the cream to complete the sugary look.
Red wax sauce drizzles down the sides to add a pop of vibrant color. This whimsical creation looks good enough to eat and adds a fun spirit to your kitchen. The layers of texture make it a visual treat for anyone who loves baking.
Material Required List
- Soy wax for the base
- High fragrance paraffin for the whipped topping
- Pre made wax macaron embeds
- Red gel wax for the sauce
- Coup glass or dessert dish
- Cotton wick
Equipment Required List
- Electric hand mixer or whisk
- Piping bag with a star tip
- Heat proof glass bowl
- Thermometer
- Small spoon
DIY Instructions
- Glue your wick to the bottom of the coup glass and keep it centered.
- Pour pink soy wax into the glass until it reaches the halfway point.
- Allow this base layer to harden completely.
- Melt white wax and let it cool until it starts to look cloudy and thick.
- Use a hand mixer to whip the white wax until it looks like stiff whipped cream.
- Spoon the whipped wax into a piping bag fitted with a star tip.
- Pipe a large swirl of the wax cream on top of the pink base.
- Press your wax macarons into the whipped wax while it is still soft.
- Melt a small amount of red gel wax and use a spoon to drizzle it over the top.
- Let the entire dessert candle set for at least six hours before moving it.
7 Sophisticated Matte Black Lounge Candle
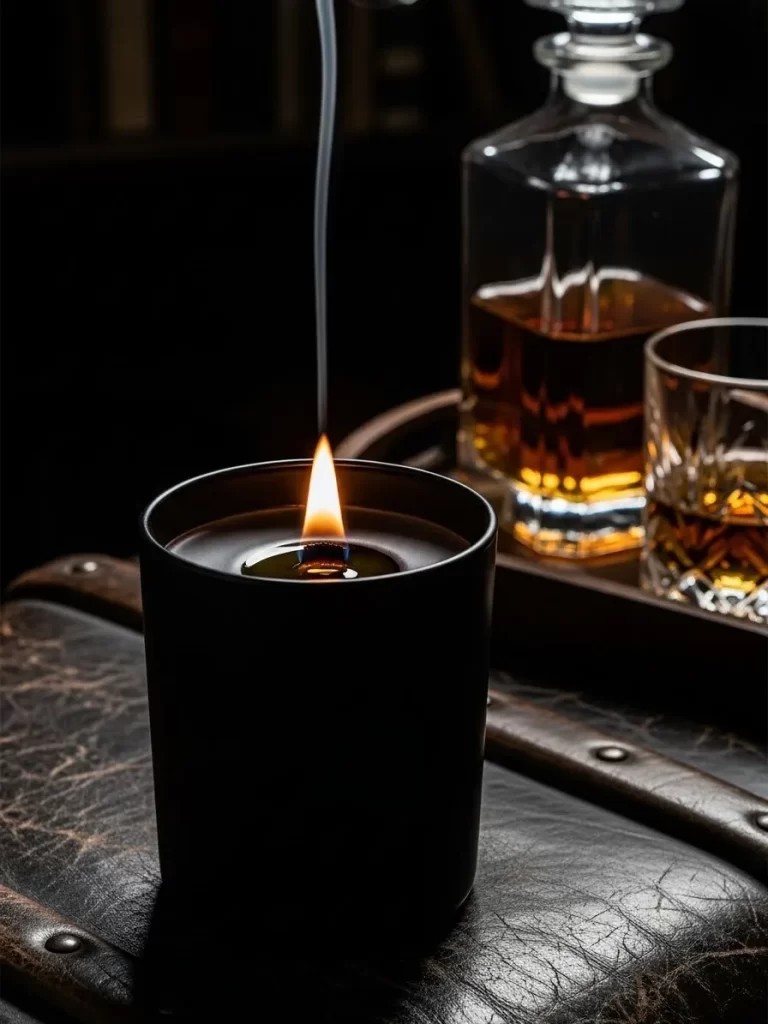
Choose a bold look with a matte black candle that exudes masculine charm. The dark container creates a sharp contrast with the warm golden flame at the center. It sits atop a leather surface to suggest a high end lounge atmosphere.
This minimalist design proves that simple styles often make the strongest statement. The sleek finish fits into modern or industrial interiors without clashing with existing colors. It provides a steady glow that makes any evening feel more intimate and relaxed.
Material Required List
- Coconut wax blend
- Black candle dye
- Matte black glass jar or tin
- Wood wick and metal clip
- Cedarwood and bourbon fragrance oil
Equipment Required List
- Pouring pitcher
- Stirring spoon
- Scissors
- Heat gun
- Paper towels
DIY Instructions
- Wipe the inside of your black jar to ensure there is no debris.
- Snap your wood wick into the metal clip and glue it to the center of the jar.
- Melt your coconut wax in a pouring pitcher over a low heat source.
- Add the black dye blocks or liquid drops until the wax looks like dark ink.
- Stir in your bourbon and cedarwood fragrance oils for two minutes.
- Pour the black wax slowly into the jar to avoid creating air bubbles.
- Leave about half an inch of space at the top of the container.
- Let the wax cool at room temperature for several hours.
- Use a heat gun to smooth out the top surface if it looks uneven after cooling.
- Trim the wood wick so it sits just above the wax line.
8 Hidden Message Rose Gold Tin Candle
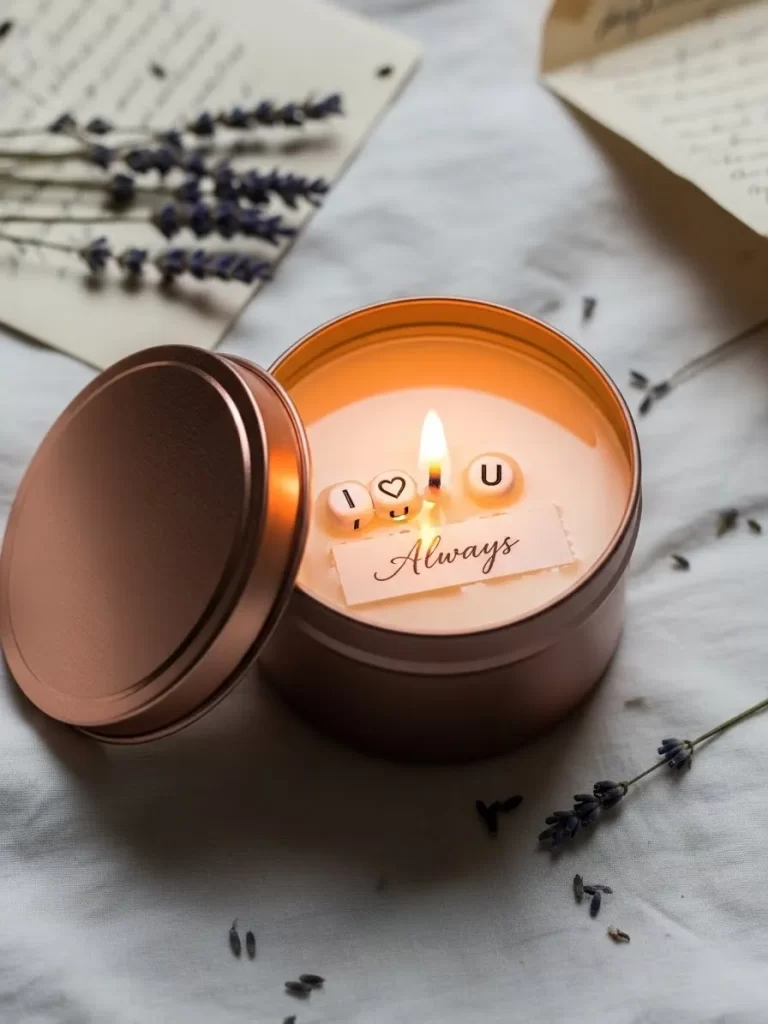
Hide a special note inside your gift with this clever hidden message candle. Small letter beads spell out your feelings as the wax melts away. A tiny paper tag rests on the surface to hint at the surprise waiting underneath the flame.
The rose gold tin looks elegant and keeps the wax contained for a clean burn. This project allows you to customize the message for your partner or friend. It turns a regular gift into a memorable experience they will cherish long after the wax is gone.
Material Required List
- Soy wax flakes
- Rose gold metal tin with lid
- White plastic letter beads
- Small cardstock tag
- Cotton wick
- Lavender fragrance oil
Equipment Required List
- Tweezers
- Glue dots
- Small bowl for melting wax
- Pen
- Wick holder
DIY Instructions
- Fix the cotton wick to the center of the rose gold tin using a glue dot.
- Melt your soy wax and stir in the lavender scent.
- Pour a thin layer of wax into the bottom of the tin and let it harden.
- Arrange your letter beads on top of the hardened wax to spell a message.
- Pour another thin layer of wax over the beads just until they are covered.
- Wait for that layer to get firm before filling the rest of the tin with wax.
- Write a word like ALWAYS on a small piece of paper.
- Place the paper tag on the surface of the liquid wax near the edge.
- Keep the wick centered while the wax cools overnight.
- Put the lid on the tin to keep the scent fresh until you are ready to use it.
9 Pressed Pansy Floral Taper Candles
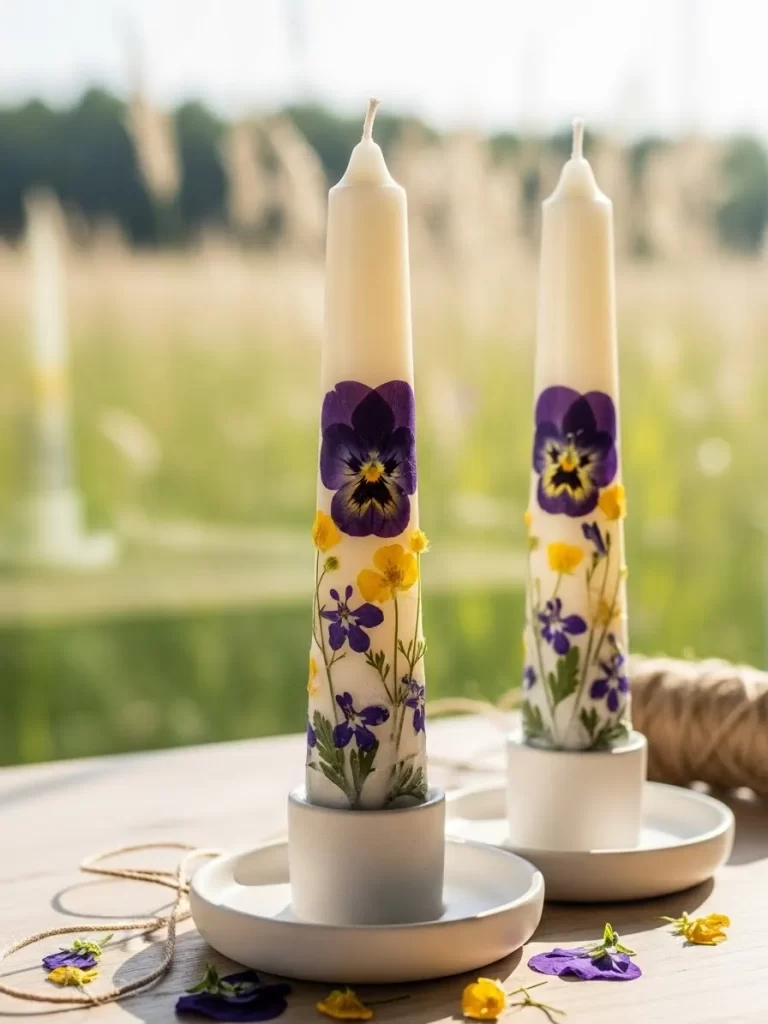
Decorate your dining table with these graceful floral tapers. Real pressed pansies and yellow wildflowers are fused onto the surface of plain white candles. The vibrant purple petals stand out against the ivory wax for a fresh spring look.
These slender candles add height and elegance to any centerpiece. They look like they were plucked straight from a cottage garden. Your dinner guests will appreciate the delicate craftsmanship and natural beauty these bring to your Valentine feast.
Material Required List
- Two white taper candles
- Pressed dried pansies
- Small dried yellow flowers
- Extra clear paraffin wax
- Lavender or floral scent
Equipment Required List
- Small paintbrush
- Heat gun or a large spoon
- Candle holder
- Tweezers
- Small metal tray
DIY Instructions
- Place your taper candles in holders so they stay upright while you work.
- Use tweezers to pick up a pressed pansy and decide where you want it on the candle.
- Heat a metal spoon over a flame and gently press the back of it against the flower and the candle.
- The heat will melt a tiny bit of wax to act as glue for the flower.
- Repeat this process with the yellow flowers until the bottom half of the candle is decorated.
- Melt a small amount of clear paraffin wax in a tray.
- Use a paintbrush to coat the flowers with a thin layer of clear wax to seal them.
- Make sure the layer is thin so the flowers stay visible.
- Let the wax dry for ten minutes.
- Wipe away any drips from the candle base before lighting.
10 Vibrant Sunset Layered Glass Candle

Capture the colors of a romantic evening sky in a single glass jar. Deep purple fades into bright pink and finishes with a warm orange top layer. This striking gradient creates a cheerful mood in any room of your house.
The smooth transitions between colors look professional and polished. Each layer reveals a different shade as the candle burns down through the hours. This bright accessory provides a modern pop of color that stands out against neutral walls.
Material Required List
- Transparent soy wax
- Purple, pink, and orange wax dye
- Straight sided glass jar
- High quality cotton wick
- Citrus fragrance oil
Equipment Required List
- Three separate pouring cups
- Stirring sticks
- Wick centering tool
- Thermometer
- Timer
DIY Instructions
- Center your wick in the glass jar and secure it with a clip at the top.
- Divide your melted wax into three separate pouring cups.
- Add purple dye to the first cup, pink to the second, and orange to the third.
- Pour the purple wax into the bottom of the jar and wait twenty minutes.
- The wax should be firm enough to hold a second layer but still warm to the touch.
- Pour the pink wax slowly over the back of a spoon to avoid mixing the colors.
- Wait another twenty minutes for the pink layer to set.
- Pour the orange wax as the final top layer.
- Allow the candle to sit undisturbed for twelve hours to prevent the layers from separating.
- Trim the wick and enjoy the colorful glow.
11 Crimson Pomegranate Crackle Candle
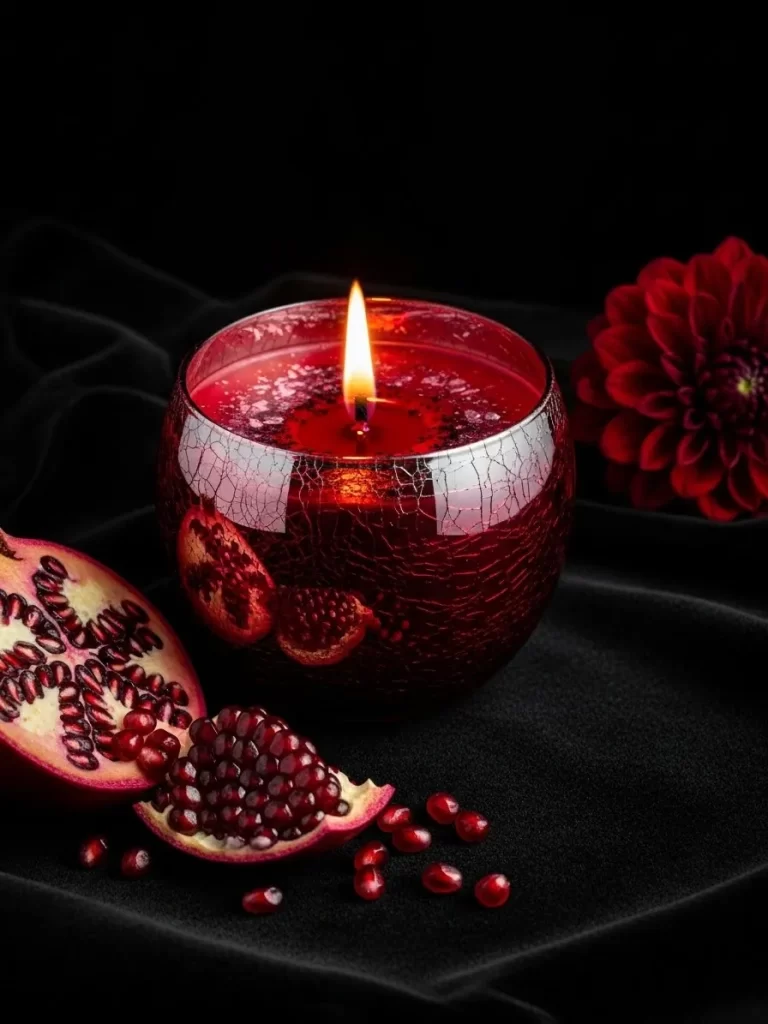
Rich red tones meet a vintage aesthetic in this striking glass candle. The vessel features a crackled finish that catches the light and adds a layer of mystery. Fresh pomegranate seeds and dark floral elements surround the jar to create a moody setting.
This piece brings a deep energy to a dark room or a candlelit dinner. The vibrant wax color stays bold as it burns. It serves as a beautiful focal point for those who love rich textures and classic holiday colors.
Material Required List
- Red paraffin wax
- Crackle glass round bowl
- Pomegranate scented oil
- Cotton braided wick
- Red wax dye chips
Equipment Required List
- Wax melting pot
- Stirring tool
- Wick sticker
- Thermometer
- Scissors
DIY Instructions
- Clean the crackle glass bowl with a dry cloth to ensure the wick sticks properly.
- Peel the backing off a wick sticker and press it to the bottom of your cotton wick tab.
- Firmly push the wick tab into the center of the glass bowl.
- Melt your red wax in a pot until it becomes a smooth liquid.
- Add the red dye chips if you want a deeper crimson color.
- Stir in the pomegranate scent for at least sixty seconds so it mixes well.
- Pour the wax into the glass bowl while it is still quite hot.
- Keep the wick upright and centered while the wax cools down.
- Let the candle sit for a full day before you trim the wick.
- Cut the wick to one quarter inch before lighting.
12 Vintage Lace and Velvet Pillar
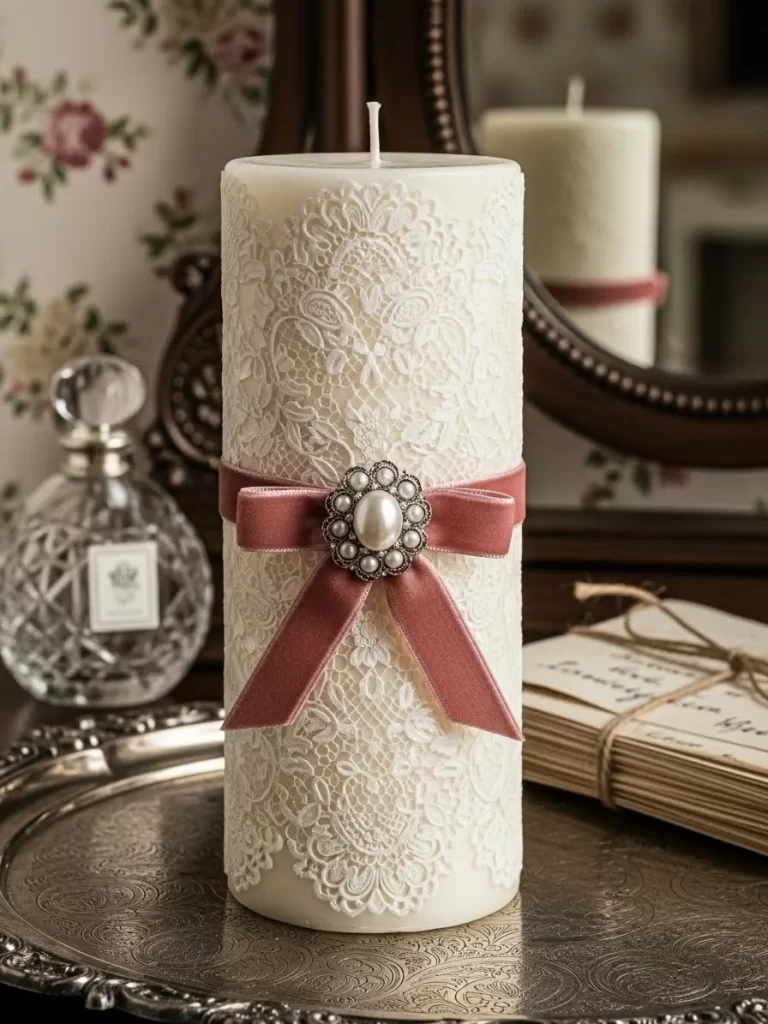
Soft textures and classic elegance define this beautiful pillar candle. Delicate white lace wraps around the entire body of the wax to create a bridal inspired look. A dusty rose velvet ribbon cinches the center, held together by a shimmering pearl brooch.
This design feels like an heirloom piece from a different time. It stands tall and proud, making it a great addition to a mantel. The combination of lace and velvet provides a tactile experience that looks high end.
Material Required List
- White ivory pillar candle
- Wide white lace trim
- Dusty rose velvet ribbon
- Pearl and crystal brooch
- Clear drying craft glue
Equipment Required List
- Fabric scissors
- Measuring tape
- Small glue brush
- Straight pins
DIY Instructions
- Measure the circumference of your pillar candle using the measuring tape.
- Cut a piece of lace trim that is half an inch longer than the candle width.
- Wrap the lace around the candle and apply a thin line of glue to the overlap.
- Hold the lace in place for a minute until the glue starts to grip the wax.
- Cut a length of velvet ribbon and wrap it over the center of the lace.
- Glue the ends of the ribbon at the back of the candle.
- Pin the pearl brooch through the velvet ribbon at the very front.
- Ensure the brooch is centered and the pin is pushed fully into the wax.
- Check that all edges are secure and no glue is visible on the lace.
- Set the candle on a silver tray for a regal display.
13 Espresso Martini Foam Candle
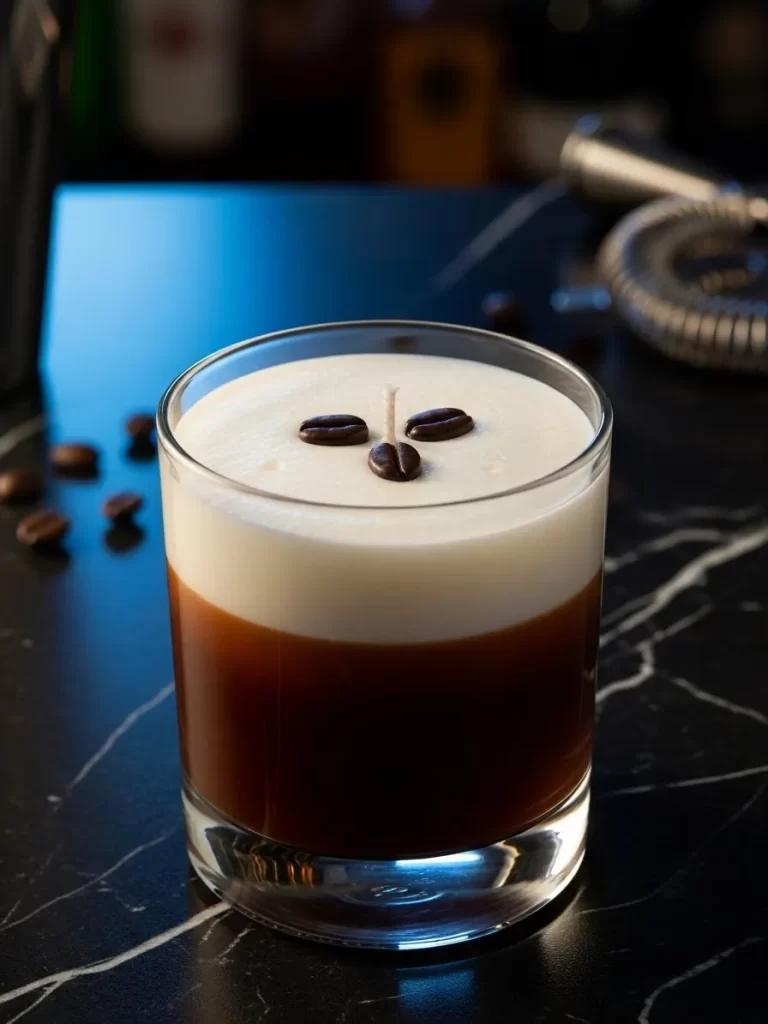
Awaken your senses with a candle that looks just like your favorite caffeinated cocktail. The bottom layer features a dark, rich brown wax that mimics a fresh brew of espresso. A thick layer of creamy white whipped wax sits on top to look like frothy milk foam.
Three dark coffee beans are placed in the center for a realistic finish. This piece adds a fun vibe to a kitchen or a home bar area. It smells like a cozy cafe and provides a warm glow that makes any morning feel special.
Material Required List
- Coffee scented soy wax
- Dark brown wax dye
- Clear rocks glass
- Vanilla scented white wax
- Whole coffee beans
- Cotton wick
Equipment Required List
- Hand whisk or electric mixer
- Small melting pots
- Thermometer
- Spoon
- Wick holder
DIY Instructions
- Secure your wick to the bottom of the rocks glass with a dot of glue.
- Melt the first batch of wax and add the dark brown dye.
- Pour the dark wax into the glass until it is three quarters full.
- Let this base layer cool until it is completely hard.
- Melt the white vanilla wax and let it cool until it starts to thicken.
- Use a whisk to whip the white wax until it becomes fluffy and airy.
- Spoon the whipped wax onto the dark base to create a foam top.
- Place three coffee beans in a triangle shape on the soft white surface.
- Make sure the wick stays centered through the foam layer.
- Allow the entire candle to set for four hours.
14 Selenite and Sage Zen Bowl
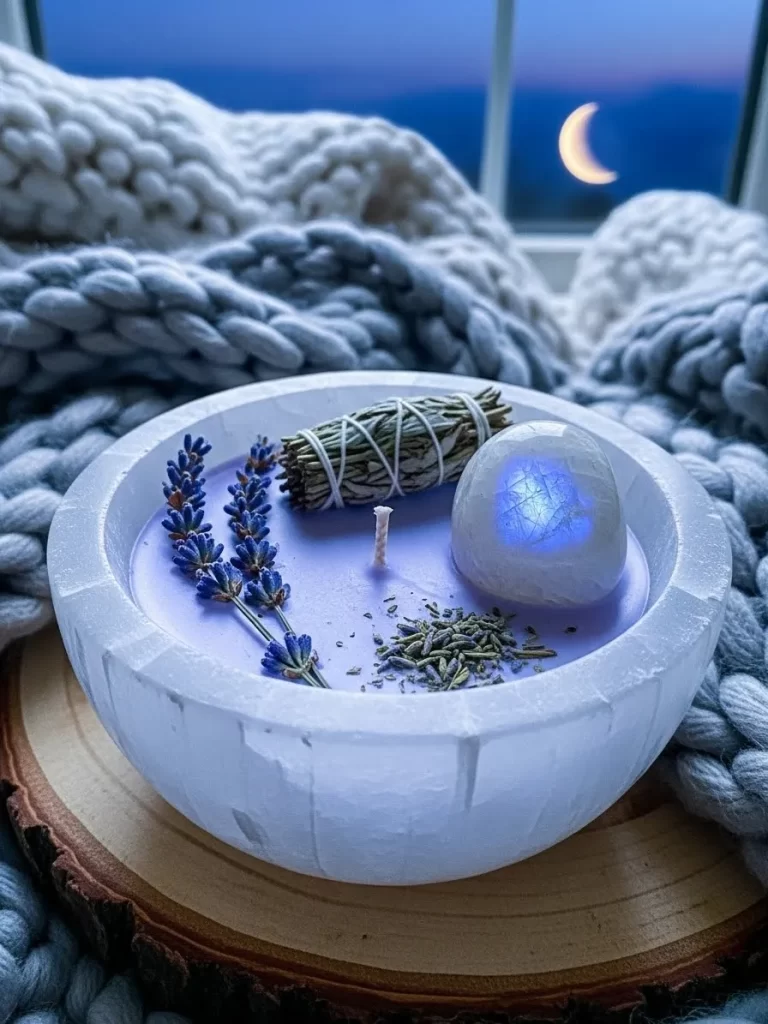
Create a peaceful sanctuary in your home with this calming ritual candle. A smooth white bowl holds soft lavender wax that promotes relaxation and sleep. A raw selenite crystal and a bundle of dried sage rest on the surface to clear the energy of your room.
Sprinkles of dried lavender buds add a natural texture and a soft herbal scent. This candle is excellent for meditation or a long soak in the tub. It combines the beauty of crystals with the warmth of a steady flame.
Material Required List
- Soy wax flakes
- Lavender essential oil
- Round white ceramic bowl
- Raw selenite crystal stone
- Mini dried sage bundle
- Dried lavender buds
- Cotton wick
Equipment Required List
- Double boiler
- Tweezers
- Wick centering tool
- Scissors
- Heat gun
DIY Instructions
- Attach the wick to the center of your ceramic bowl.
- Melt the soy wax until it is clear and liquid.
- Stir in the lavender oil slowly to keep the scent strong.
- Pour the wax into the bowl and let it cool until a thin film forms.
- Use tweezers to place the selenite stone on one side of the wick.
- Lay the small sage bundle next to the crystal carefully.
- Sprinkle the dried lavender buds around the remaining wax surface.
- Ensure no botanicals are touching the wick directly.
- Let the candle cure for at least twelve hours.
- Trim the wick to a safe length before your first use.
15 Frosted Eucalyptus and Gold Leaf Jar
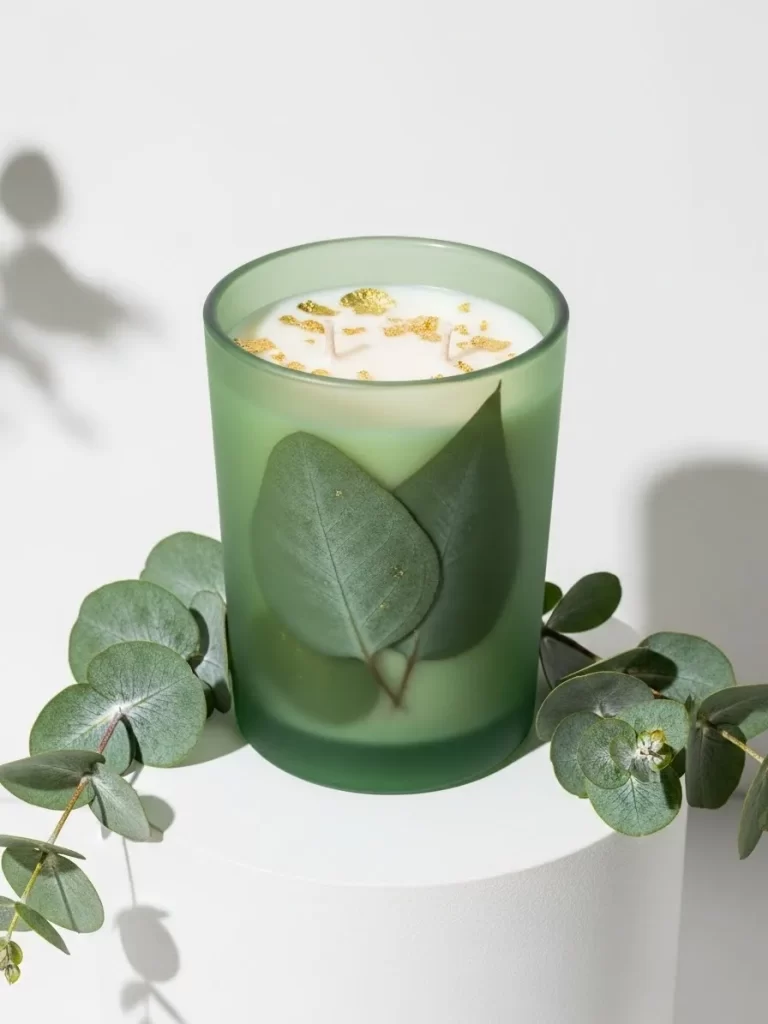
Refresh your space with the clean and airy look of this frosted green candle. Large eucalyptus leaves are pressed against the glass to create a botanical silhouette. Flecks of gold leaf float on the top of the white wax to add a hint of luxury.
The frosted green glass softens the light of the flame for a cozy atmosphere. This design brings the outdoors inside and feels very fresh. It is a sophisticated way to decorate a guest bathroom or a bright home office.
Material Required List
- White soy wax
- Frosted green glass jar
- Dried flat eucalyptus leaves
- Gold leaf flakes
- Eucalyptus fragrance oil
- Two cotton wicks
Equipment Required List
- Small paintbrush
- Clear craft glue
- Melting pitcher
- Wick stickers
- Wooden stir stick
DIY Instructions
- Apply a tiny bit of glue to the front of your flat eucalyptus leaves.
- Press the leaves against the inside wall of the frosted glass jar.
- Wait for the glue to dry so the leaves do not move when you pour the wax.
- Stick two wicks to the bottom of the jar to ensure an even burn.
- Melt your white soy wax and add the eucalyptus fragrance.
- Pour the wax slowly into the jar to avoid disturbing the leaves.
- Let the wax cool until the top starts to get firm.
- Use a dry brush to sprinkle gold leaf flakes over the wax surface.
- Push the gold flakes slightly into the wax so they stay in place.
- Allow the candle to harden fully for twenty four hours.
16 Salted Dark Chocolate Scented Candle
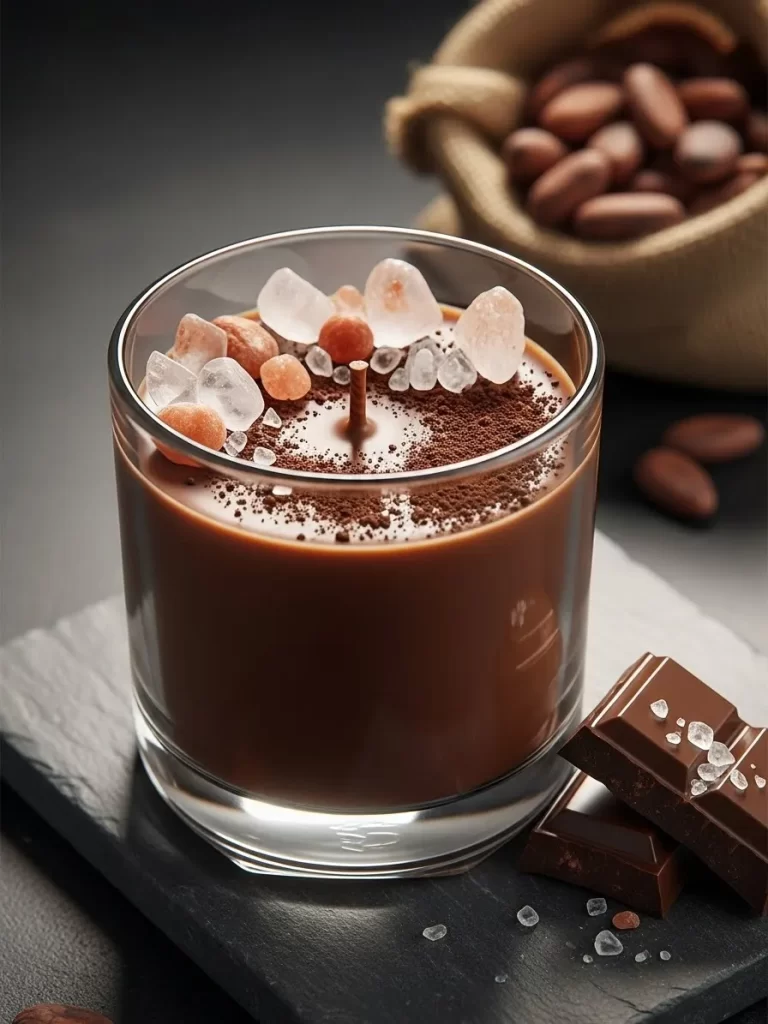
Indulge your sweet tooth with a candle that captures the rich aroma of gourmet chocolate. The deep brown wax fills a clear glass to showcase its smooth and creamy texture. A dusting of real cocoa powder and large sea salt crystals decorate the top surface.
This project makes your home smell like a luxury chocolate shop. It looks very realistic sitting on a slate tray. The contrast of the white salt against the dark wax is visually striking and modern. It is a wonderful gift for any foodie.
Material Required List
- Dark chocolate scented wax
- Brown wax dye
- Coarse sea salt crystals
- Unsweetened cocoa powder
- Clear straight sided glass
- Cotton wick
Equipment Required List
- Melting pot
- Small sifter
- Spoon
- Wick holder
- Paper towels
DIY Instructions
- Secure your wick to the base of the glass and keep it straight.
- Melt the wax and add enough dye to get a dark chocolate color.
- Stir in the chocolate scent for a few minutes.
- Pour the wax into the glass and leave an inch of space at the top.
- Wait for the wax to cool until it is no longer liquid but still soft.
- Use a small sifter to lightly dust cocoa powder over the center.
- Drop a few large salt crystals around the edges of the candle.
- Clean any stray powder from the rim of the glass with a paper towel.
- Let the candle sit until it is cold to the touch.
- Trim the wick and pair it with a real chocolate bar for a gift.
17 Celestial Zodiac Starry Night Candle
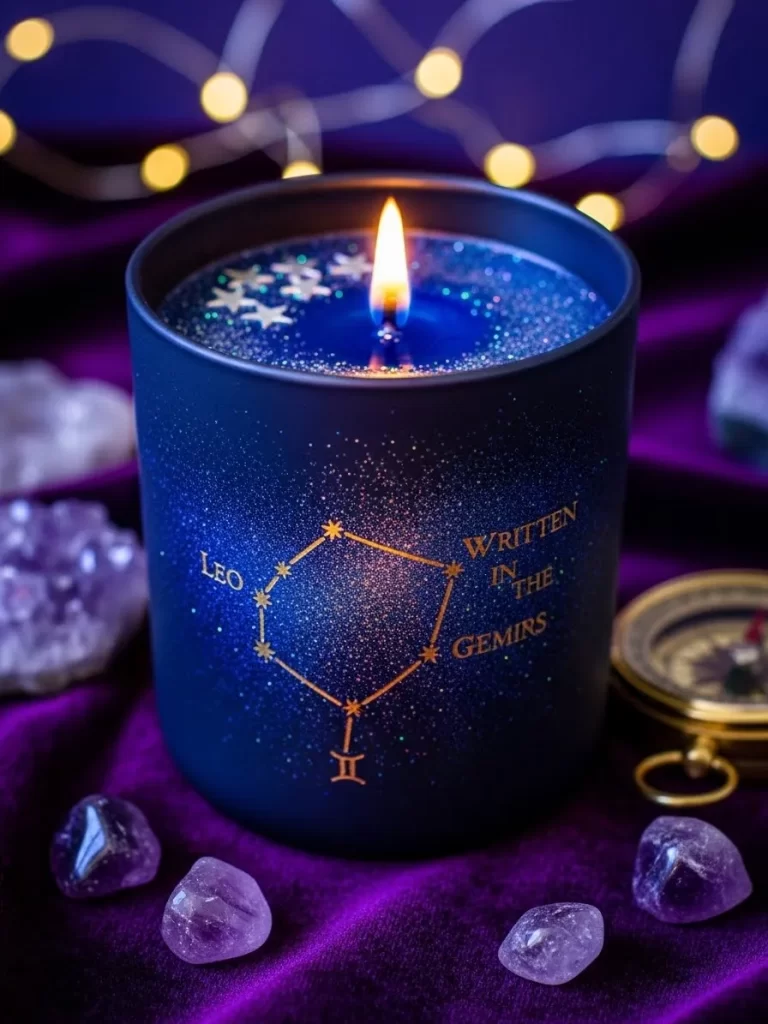
Look to the stars with a deep blue candle that features your own zodiac sign. The dark matte jar is decorated with a golden constellation that sparkles under the light. Shimmering glitter and tiny stars are embedded in the top layer of wax to mimic the night sky.
This personal touch makes the candle feel unique and special. It brings a magical vibe to a bedside table or a bookshelf. The gold accents against the navy blue glass create a high contrast look that is very trendy.
Material Required List
- Navy blue wax dye
- Soy wax
- Matte blue candle jar
- Gold metallic paint pen
- Fine silver glitter
- Star shaped wax embeds
Equipment Required List
- Constellation stencil
- Melting pitcher
- Wick sticker
- Small brush
- Thermometer
DIY Instructions
- Use a gold paint pen and a stencil to draw a constellation on the jar.
- Let the paint dry completely before you touch the glass.
- Stick your wick to the bottom of the blue jar.
- Melt the wax and add the navy blue dye for a deep color.
- Pour the wax into the jar and let it start to cool.
- Stir a pinch of fine silver glitter into the top inch of wax.
- Drop small star embeds onto the surface while the wax is still tacky.
- Make sure the stars are spread out to look like a galaxy.
- Allow the candle to cool in a draft free area.
- Polish the outside of the jar to remove any fingerprints.
18 Pink Satin Ribbon Vanity Candle
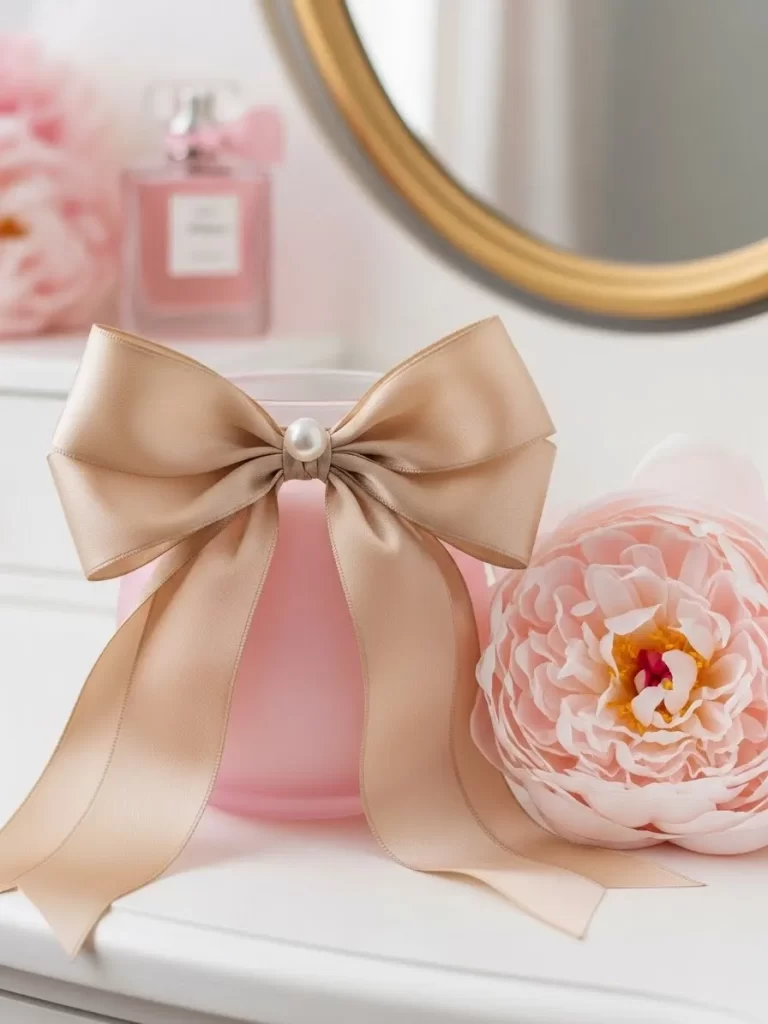
Add a touch of glam to your dressing table with this soft pink frosted candle. The vessel is wrapped in a large, luxurious satin bow that feels very chic. A single cream pearl sits at the knot of the bow to provide a classic finish.
This candle looks lovely next to perfume bottles and floral arrangements. The frosted glass gives the flame a soft glow that is very flattering. It is a simple way to make a plain candle look like a designer item.
Material Required List
- Pink scented soy wax
- Frosted pink glass jar
- Wide champagne satin ribbon
- Flat back cream pearl
- Cotton wick
Equipment Required List
- Hot glue gun
- Fabric scissors
- Wick holder
- Pouring pot
- Ruler
DIY Instructions
- Center and glue your wick to the bottom of the pink jar.
- Melt your pink wax and pour it carefully into the container.
- Let the candle cool and harden for several hours.
- Cut a long piece of satin ribbon and wrap it around the jar.
- Tie a large, floppy bow at the front of the candle.
- Trim the ends of the ribbon at an angle to prevent fraying.
- Use a small dot of hot glue to attach the pearl to the center of the knot.
- Make sure the bow is tight so it does not slide down the glass.
- Adjust the loops of the bow until they look symmetrical.
- Set the candle on your vanity and enjoy the elegant look.
19 Rustic Cinnamon Dough Bowl Candle

Fill your large living spaces with the cozy charm of a wooden dough bowl candle. This long, hand carved vessel holds several wicks to create a massive pool of light. Real cinnamon sticks and dark spices are scattered across the surface for an organic feel.
The wide design provides a rustic look that works well on a dining table. It brings a farmhouse aesthetic to your home and smells like a warm day. This candle is a great conversation piece that lasts for many hours.
Material Required List
- Large wooden dough bowl
- Beeswax or soy wax blend
- Six wood wicks with metal clips
- Cinnamon sticks
- Star anise and cloves
- Spiced orange fragrance oil
Equipment Required List
- Large melting pot
- Heat gun
- Wick stickers
- Metal spoon
- Scissors
DIY Instructions
- Seal the inside of the wooden bowl with a thin layer of melted wax.
- Let the sealant dry to ensure the bowl does not leak.
- Space your six wicks evenly in a straight line down the center of the bowl.
- Glue the wick clips to the bottom and make sure they are secure.
- Melt a large amount of wax and add your spices and scent.
- Pour the wax into the bowl until it is almost at the top.
- Allow the wax to set until it becomes opaque and firm.
- Press cinnamon sticks and star anise into the wax near the ends of the bowl.
- Use a heat gun to smooth out any ripples on the surface.
- Trim all the wicks to the same height for an even burn.
20 Heart Shaped Succulent Garden Candle
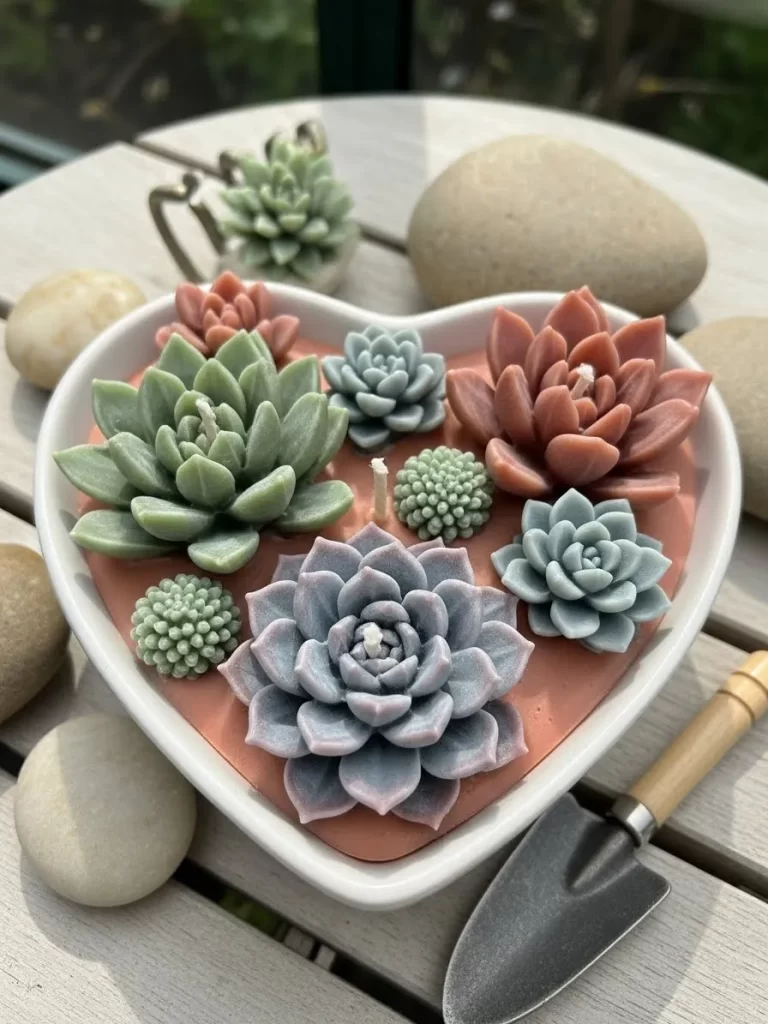
Combine your love for plants and candles with this succulent garden design. A white heart shaped bowl is filled with terracotta colored wax as a base. Various wax succulents in shades of green and purple are “planted” on top to look like a real garden.
This piece is a great alternative to real plants. It stays looking fresh and provides a lovely scent when lit. The heart shape makes it an excellent gift for a friend. It looks beautiful on a sunroom shelf.
Material Required List
- Terracotta colored base wax
- Green and purple succulent wax embeds
- Heart shaped ceramic bowl
- Three cotton wicks
- Aloe and agave fragrance oil
Equipment Required List
- Succulent silicone molds
- Melting pitcher
- Wick centering tool
- Small spoon
- Tweezers
DIY Instructions
- Create your succulent embeds by pouring colored wax into silicone molds.
- Let the wax plants cool completely before popping them out of the molds.
- Place three wicks in a triangle shape in the heart bowl.
- Melt the terracotta wax and stir in the agave scent.
- Pour the base wax into the bowl and let it get thick.
- Use tweezers to arrange the wax succulents on the surface.
- Group different sizes and colors together for a natural look.
- Make sure the succulents do not cover the wicks.
- Let the entire garden set for six hours until very firm.
- Place the bowl on a wooden tray with some real stones for extra detail.
21 Golden Honeycomb Beeswax Tapers
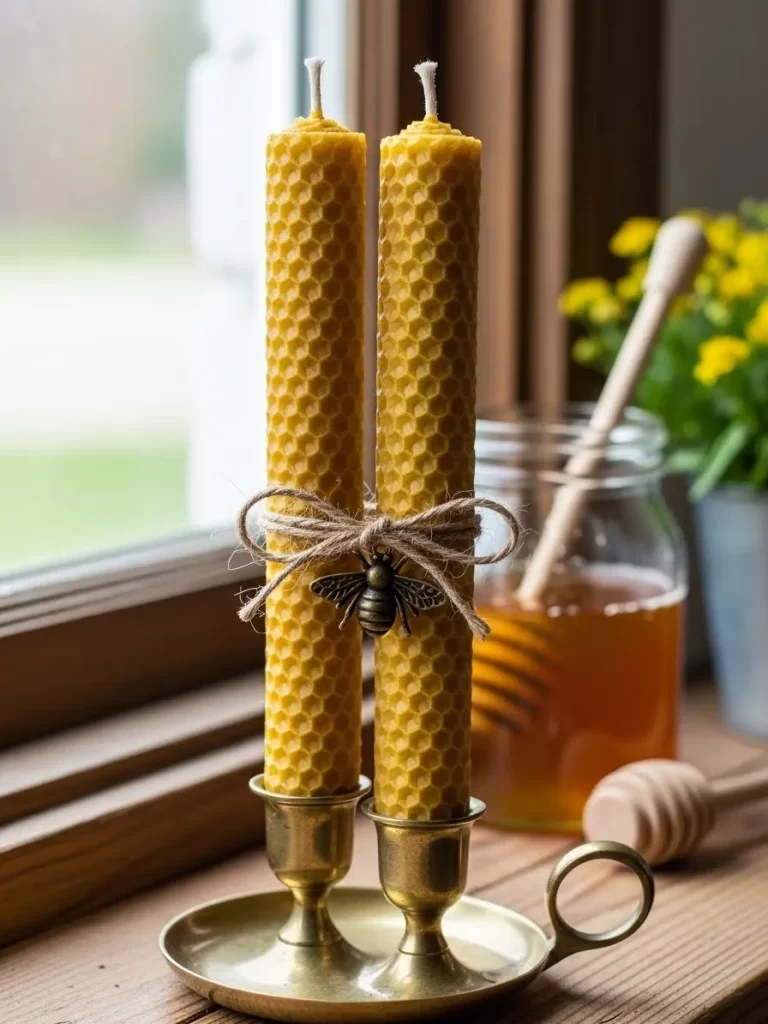
Bring the sweet scent of a summer meadow into your home with these textured tapers. Real beeswax sheets feature a classic hexagonal pattern that adds a rustic touch. These slender candles stand tall in brass holders to create a warm display.
Natural materials offer a clean burn and a soft yellow glow. A simple twine bow and a tiny metal bee charm complete the look. You will love how the light reflects off the golden wax surface during a quiet evening.
Material Required List
- Yellow beeswax honeycomb sheets
- Cotton taper wicking
- Natural jute twine
- Small bronze bee charms
- Brass candle holders
Equipment Required List
- Sharp craft knife
- Metal ruler
- Cutting mat
- Hair dryer or heat gun
DIY Instructions
- Lay one beeswax sheet flat on your cutting mat.
- Use a ruler and craft knife to cut the sheet into a long rectangle shape.
- Cut a piece of cotton wick that is one inch longer than the height of your wax sheet.
- Use a hair dryer on a low setting to lightly warm the edge of the wax until it feels soft and tacky.
- Place the wick along the warmed edge of the wax sheet.
- Press the wax firmly over the wick to lock it in place.
- Roll the wax sheet tightly and evenly away from you to form a cylinder.
- Keep the edges aligned so the bottom of the candle stays flat.
- Press the final edge down firmly to seal the candle closed.
- Tie a piece of twine around the center of the taper and slide a bee charm onto the string.
22 Floating Cherry Blossom Heart Candles
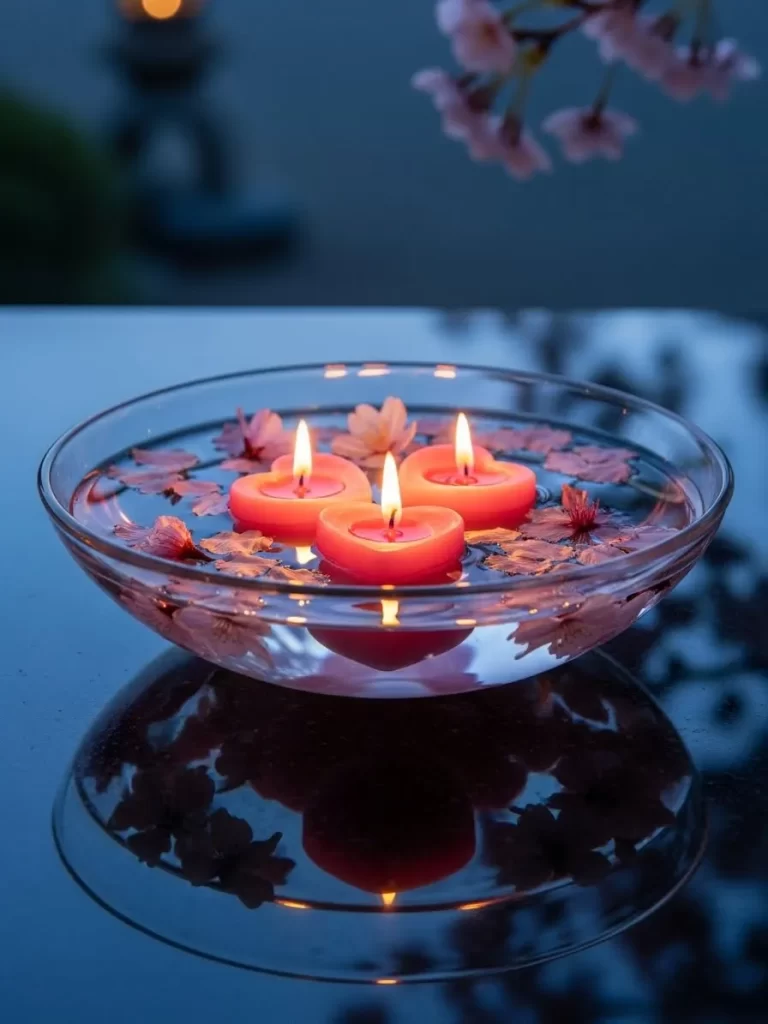
Soft pink hearts drift lazily across a clear pool of water in this serene arrangement. Fresh cherry blossoms surround the flickering flames to create a dreamy garden atmosphere. This centerpiece works wonderfully for a romantic dinner.
The reflection of the fire on the water surface multiplies the light beautifully. It feels light and airy compared to traditional heavy pillar candles. Setting this up takes very little time. The combination of flowers and water brings a sense of peace to any room.
Material Required List
- Pink paraffin wax
- Floating candle wicks
- Large clear glass bowl
- Fresh or silk cherry blossoms
- Water
Equipment Required List
- Heart shaped silicone mold
- Small melting pot
- Thermometer
- Ladle
DIY Instructions
- Melt your pink wax in a pot until it reaches 160 degrees.
- Pour the liquid wax carefully into the heart shaped silicone molds.
- Let the wax cool for about ten minutes until a thin skin forms on top.
- Insert a short floating candle wick into the center of each heart.
- Allow the hearts to harden completely for at least two hours.
- Pop the wax hearts out of the mold gently.
- Fill your large glass bowl with clean room temperature water.
- Place the wax hearts onto the water surface so they float.
- Scatter your cherry blossoms around the candles in the water.
- Light the wicks carefully using a long match.
23 Vintage Bourbon Decanter Candle
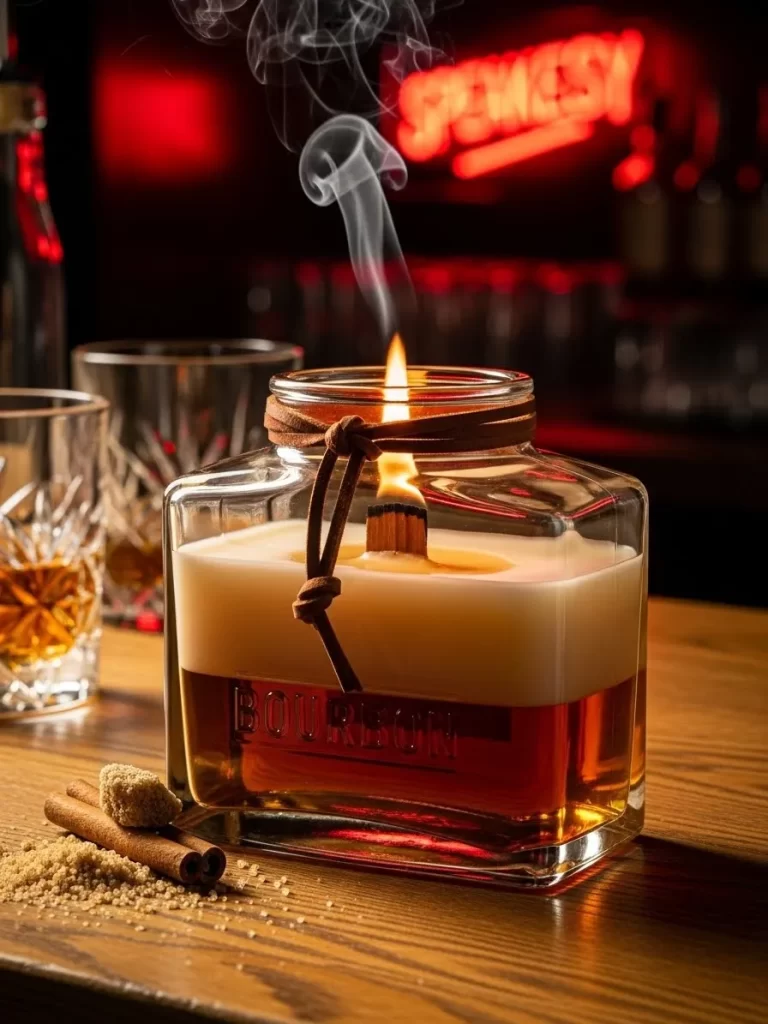
Repurpose a classic glass bottle into a masculine and sophisticated accent piece. Rich amber liquid wax fills the base to mimic the look of aged spirits. A thick white top layer suggests a smooth head of foam for a realistic beverage appearance.
A leather cord tied around the neck adds a rugged finish. This candle fits remarkably well in a home bar or a dark study. It brings a sense of old world luxury and warmth to your seating area.
Material Required List
- Clear square glass bourbon jar
- Amber colored wax
- White soy wax
- Wood wick with metal clip
- Brown leather cord
- Bourbon or vanilla scent oil
Equipment Required List
- Double boiler
- Heat gun
- Wick sticker
- Scissors
DIY Instructions
- Clean the inside of the glass jar to remove any residue.
- Use a wick sticker to attach the wood wick to the center of the jar floor.
- Melt the amber wax and stir in your chosen fragrance oil.
- Pour the amber wax into the jar until it is two thirds full.
- Let this layer cool until it is solid enough to support a second pour.
- Melt a small amount of white soy wax.
- Pour the white wax slowly over the amber layer to create the foam effect.
- Use a heat gun to smooth the top if any bubbles appear.
- Wrap the leather cord around the neck of the jar and tie a simple knot.
- Trim the wood wick to a quarter inch height.
24 Modern Marble Swirl Pillar
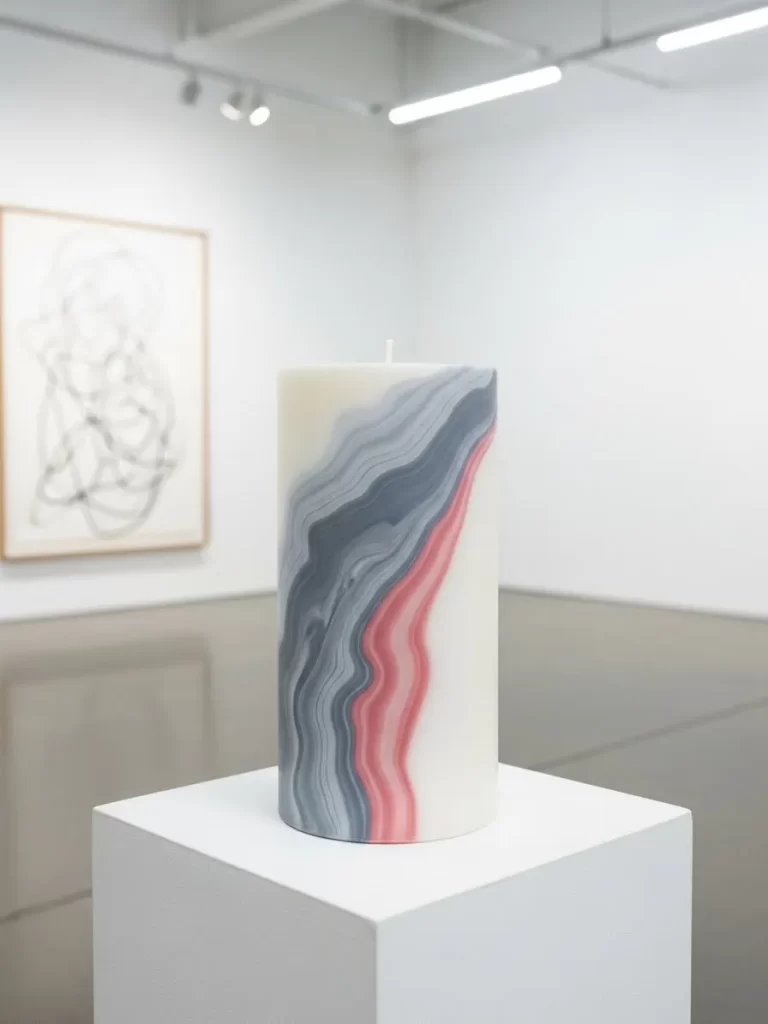
Elevate your interior design with a candle that doubles as a piece of contemporary art. Flowing waves of gray and soft pink dance across a crisp white background. Each pillar features a unique pattern that looks like natural stone.
This striking silhouette stands out on a minimalist pedestal. It provides a sophisticated pop of color without overwhelming your space. The smooth finish and bold lines make it a focal point in any modern room.
Material Required List
- White pillar wax
- Gray and pink wax dye chips
- Long cotton wick
- Unscented oil for the mold
Equipment Required List
- Tall cylinder candle mold
- Three small melting cups
- Skewer
- Wick pin
DIY Instructions
- Coat the inside of your candle mold with a tiny bit of oil.
- Thread your wick through the mold and secure it tightly at both ends.
- Melt your white wax and divide it into three separate cups.
- Add gray dye to one cup and pink dye to another, leaving the third cup white.
- Pour a small amount of white wax into the mold.
- Alternately pour small splashes of the gray and pink wax into the center.
- Use a long skewer to gently swirl the colors together in a figure eight motion.
- Continue layering the colors until the mold is full.
- Let the candle sit for twenty four hours to cool completely.
- Remove the candle from the mold and trim the wick.
25 Vintage Floral Teacup Candle
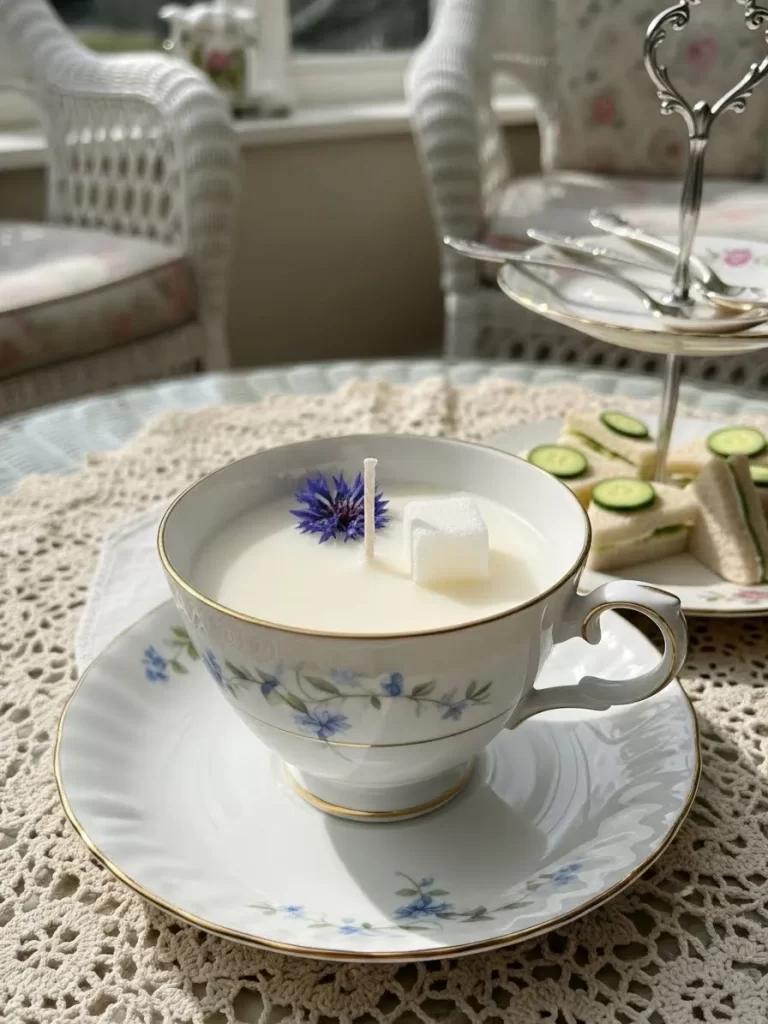
Transform a delicate china cup into a whimsical source of light. Creamy wax fills the vessel, topped with a single blue cornflower and a clever wax sugar cube. This design captures the charm of a traditional tea party.
It sits beautifully on a lace tablecloth. The gold rim of the cup sparkles as the flame dances near the edge. This project allows you to reuse antique pieces in a functional way. It makes a lovely gift for anyone who enjoys tea.
Material Required List
- Vintage ceramic teacup and saucer
- White soy wax flakes
- One dried blue cornflower
- Small square of white wax for the sugar cube
- Pre waxed cotton wick
Equipment Required List
- Hot glue gun
- Pouring pitcher
- Wick centering tool
- Metal spoon
DIY Instructions
- Wash your teacup and dry it thoroughly before starting.
- Glue the wick tab to the center of the teacup.
- Melt your soy wax until it is clear and liquid.
- Pour the wax into the teacup, leaving half an inch of space at the top.
- Place a wick centering tool across the rim to keep the wick straight.
- Wait for the wax to turn white and start to harden.
- Press the small wax sugar cube into the surface near the wick.
- Gently place the dried cornflower next to the sugar cube.
- Allow the wax to set for several hours until firm.
- Set the finished teacup on its matching saucer for display.
26 Retro Strawberry Milkshake Jar
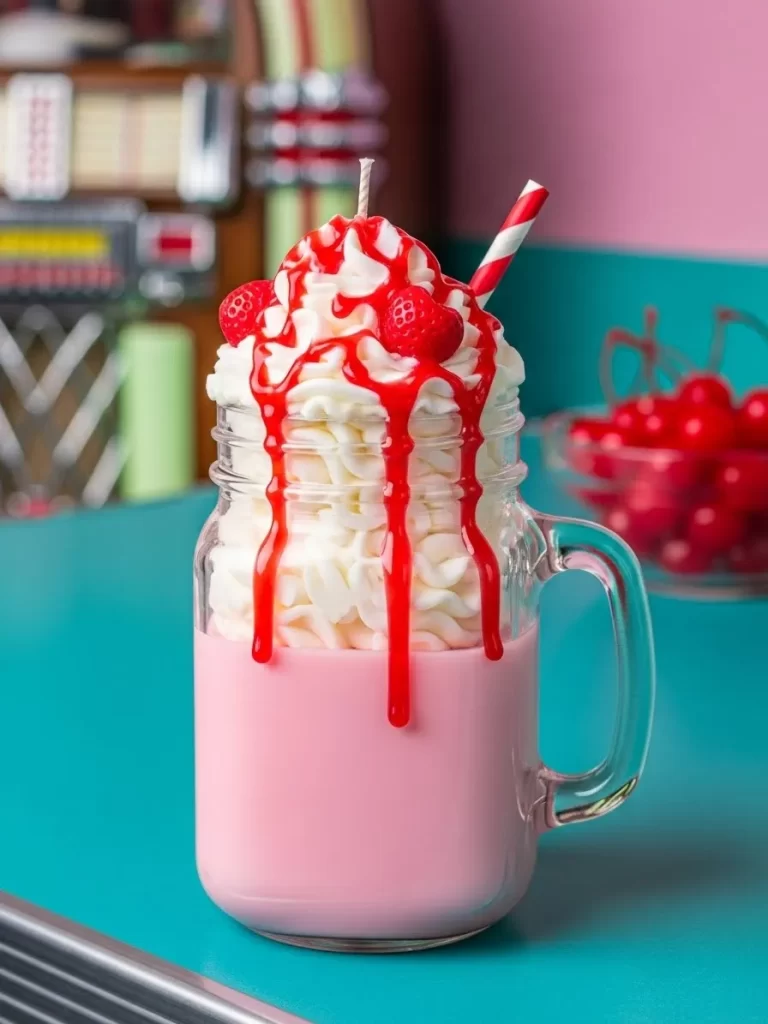
Brighten your kitchen with a nostalgic treat that never melts. Vibrant pink wax serves as the base, topped with a towering swirl of whipped white wax. A red drizzle and a striped straw add to the fun soda fountain aesthetic.
This playful candle brings a cheerful energy to your breakfast nook. It looks incredibly realistic and invites a sense of joy. The bold colors make it a standout accessory that guests will notice.
Material Required List
- Pink soy wax
- White paraffin wax
- Red gel wax for the syrup
- Large glass mason jar with handle
- Red and white striped paper straw
- Cotton wick
Equipment Required List
- Electric hand mixer
- Piping bag with a large star tip
- Small spoon
- Scissors
DIY Instructions
- Attach your wick to the bottom of the mason jar.
- Melt the pink wax and pour it into the jar until it is half full.
- Let the pink layer harden completely.
- Melt the white wax and let it cool until it starts to thicken.
- Whip the white wax with a hand mixer until it looks like thick cream.
- Transfer the whipped wax into a piping bag.
- Pipe a large mountain of “cream” on top of the pink wax.
- Melt the red gel wax and spoon it over the whipped top so it drips down.
- Stick a paper straw into the whipped wax at an angle.
- Trim the wick so it sticks out of the very top of the whipped wax.
27 Sleek Tuxedo Black Pillar
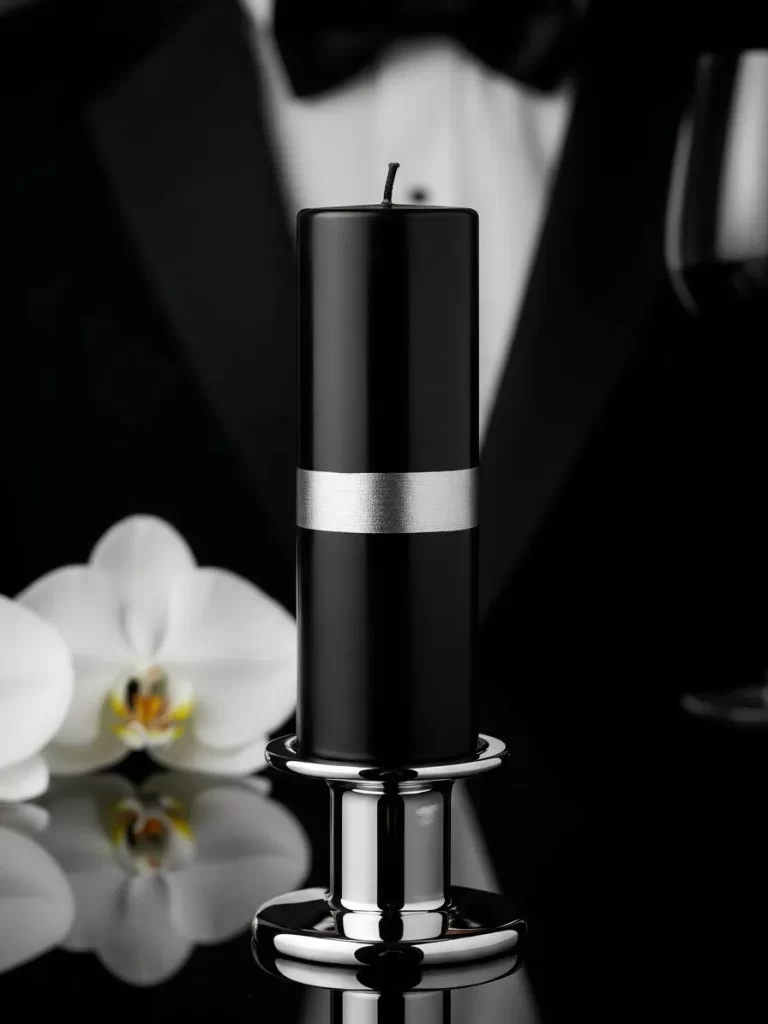
Choose a bold and formal look with a deep black candle featuring a metallic accent. A wide silver band wraps around the center to provide a sharp contrast. This design exudes confidence and looks magnificent in a formal dining setting.
It stands as a symbol of modern elegance and simple beauty. The steady flame reflects off the silver surface to create a tiny glimmer. This piece works best for those who appreciate clean lines and a high fashion aesthetic.
Material Required List
- Black pillar candle
- Silver metallic ribbon or silver leaf
- Clear craft glue
- White orchid for the display base
Equipment Required List
- Measuring tape
- Scissors
- Small paintbrush
- Soft cloth
DIY Instructions
- Wipe the black candle with a soft cloth to remove any dust.
- Measure the middle of the candle to find the center point.
- Cut a strip of silver ribbon that fits exactly around the circumference.
- Apply a thin layer of glue to the back of the ribbon.
- Wrap the ribbon around the center of the candle and press firmly.
- Hold the ends of the ribbon until the glue dries.
- If using silver leaf, apply adhesive in a band around the center.
- Carefully press the silver leaf sheets onto the sticky area.
- Brush away the excess leaf with a dry brush for a clean edge.
- Place the candle on a silver tray next to a white orchid.
28 Pastel Terrazzo Square Candle
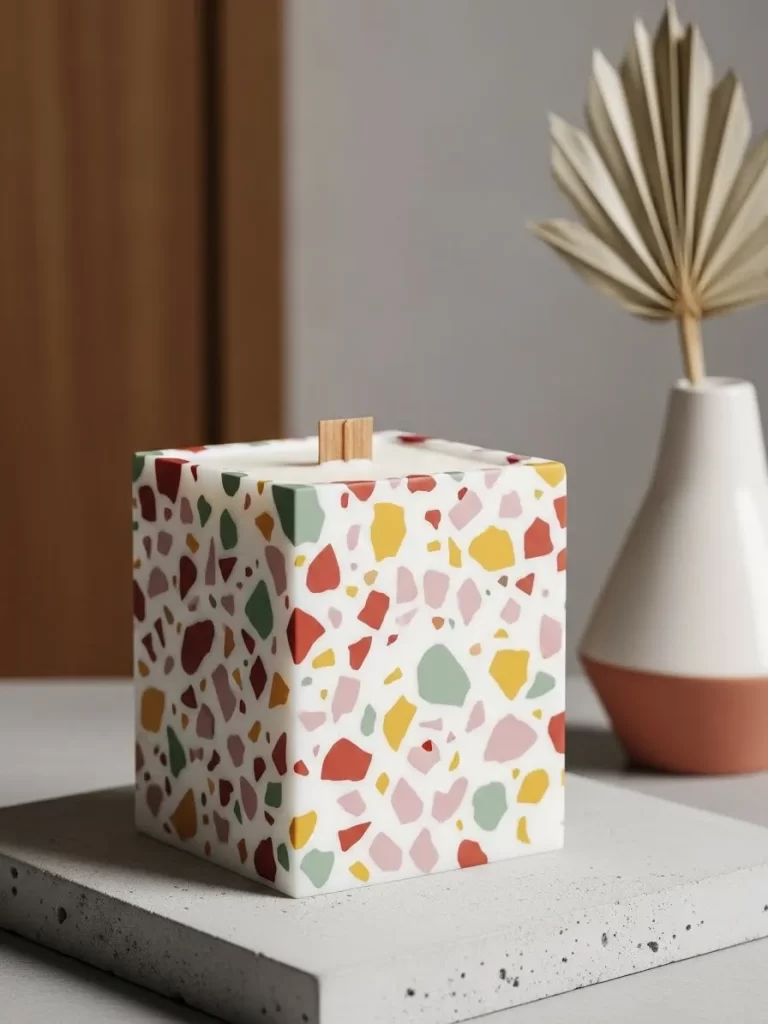
Embrace the latest home decor trends with a custom terrazzo inspired wax block. Colorful geometric chips are embedded into a white base to create a mosaic effect. This square pillar offers a sturdy look for your coffee table or desk.
The variety of muted tones allows it to blend with many different color palettes. It brings a sense of playful sophistication to your bedroom. This project is a great way to use up leftover wax scraps.
Material Required List
- White soy pillar wax
- Small scraps of colored wax
- Square candle mold
- Cotton wick
- Unscented pillar wax for the base
Equipment Required List
- Sharp knife
- Melting pot
- Wick holder
- Stirring stick
DIY Instructions
- Cut your colored wax scraps into small, irregular geometric chunks.
- Secure the wick in the center of the square mold.
- Fill the mold with the colored wax chunks, spreading them out evenly.
- Melt your white base wax and let it cool slightly.
- Pour the white wax slowly into the mold over the colored pieces.
- Tap the sides of the mold gently to release any air bubbles.
- Let the candle cool completely for at least six hours.
- Remove the candle from the mold carefully.
- Use a soft cloth to polish the sides and make the colors pop.
- Trim the wick to a half inch before using.
29 Neon Pink Glitter Statement Candle
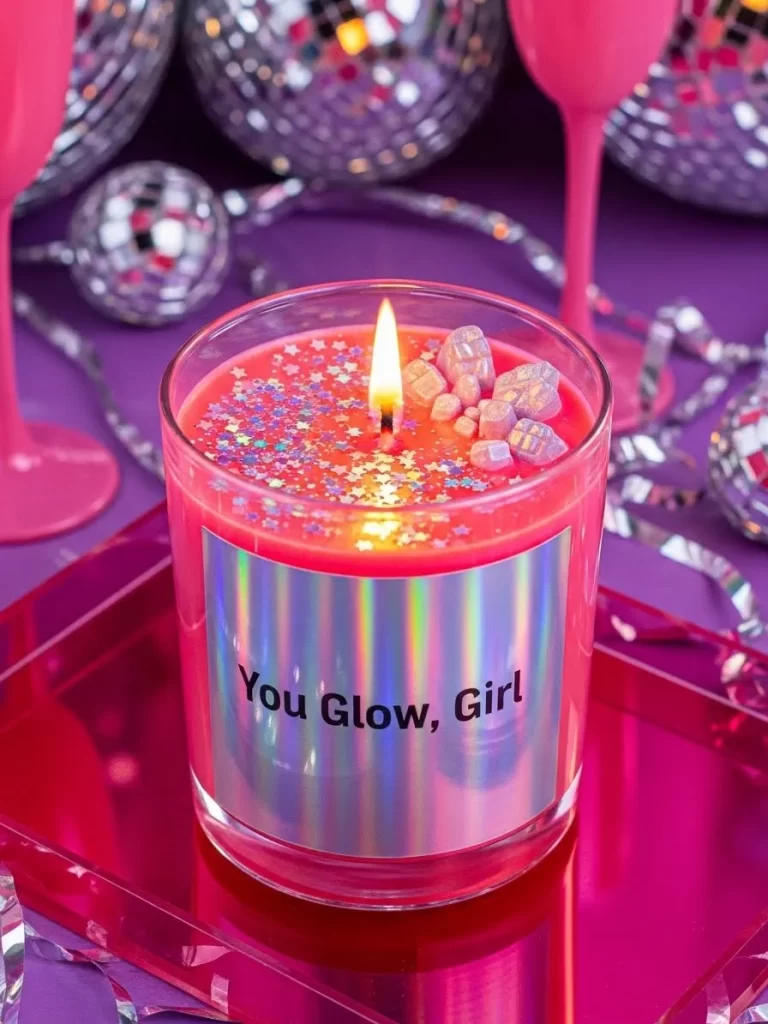
Make a loud statement with a vibrant pink jar candle that celebrates self love. A shimmering silver label reminds you to keep shining every day. The top is encrusted with iridescent glitter for maximum sparkle.
This energetic piece is a wonderful addition to a creative workspace. It glows with a bright light that lifts the mood of the entire room. You will feel inspired by its bold message and dazzling appearance.
Material Required List
- Neon pink scented wax
- Clear glass jar
- Silver holographic label paper
- Iridescent chunky glitter
- Small pink wax crystals
- Cotton wick
Equipment Required List
- Computer and printer for the label
- Glue dots
- Melting pitcher
- Spoon
DIY Instructions
- Print your message onto the holographic label paper and cut it to size.
- Stick the label firmly to the front of the clear glass jar.
- Attach the wick to the bottom of the jar using a glue dot.
- Melt the neon pink wax and pour it into the jar.
- Let the wax cool until the top starts to get slightly firm.
- Sprinkle a thick layer of iridescent glitter over the entire surface.
- Press several pink wax crystals into the glitter layer.
- Ensure the wick remains clear of any glitter or crystals.
- Allow the candle to set for four hours in a cool place.
- Clean the outside of the jar to ensure the label shines brightly.
30 Coastal Driftwood and Sea Glass Bowl
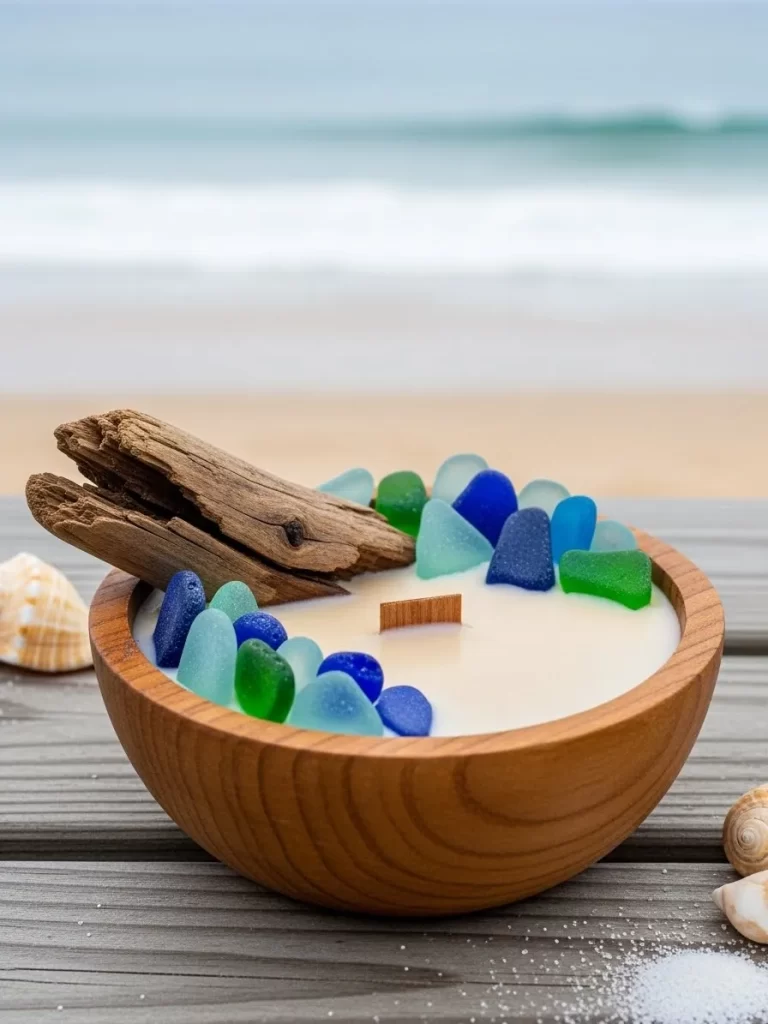
Bring the calming essence of the ocean to your doorstep with this natural arrangement. A rustic wooden bowl holds smooth white wax and a weathered piece of driftwood. Frosty bits of sea glass line the edges to mimic a shoreline.
The wood wick provides a gentle crackling sound that reminds you of a beach bonfire. It offers a relaxed vibe for a coastal home. This candle helps you unwind after a long day by invoking memories of the sea.
Material Required List
- White soy wax
- Round wooden bowl
- One small piece of cleaned driftwood
- Blue and green tumbled sea glass
- Wide wood wick and clip
- Sea salt and orchid fragrance oil
Equipment Required List
- Wick sticker
- Melting pot
- Thermometer
- Heat gun
DIY Instructions
- Check that your wooden bowl is leak proof.
- Apply a wick sticker to the metal clip and center the wood wick in the bowl.
- Melt the soy wax and stir in the sea salt fragrance oil.
- Pour the wax into the bowl until it is nearly full.
- Wait for the wax to start turning opaque and thick.
- Gently press the driftwood piece into the wax on one side of the wick.
- Arrange the sea glass pieces around the edges of the bowl.
- Use a heat gun to smooth any uneven spots around the decorations.
- Let the candle sit undisturbed for twelve hours to cure.
- Trim the wood wick so it is level with the driftwood piece.
31 Monogrammed Crimson Seal Candle
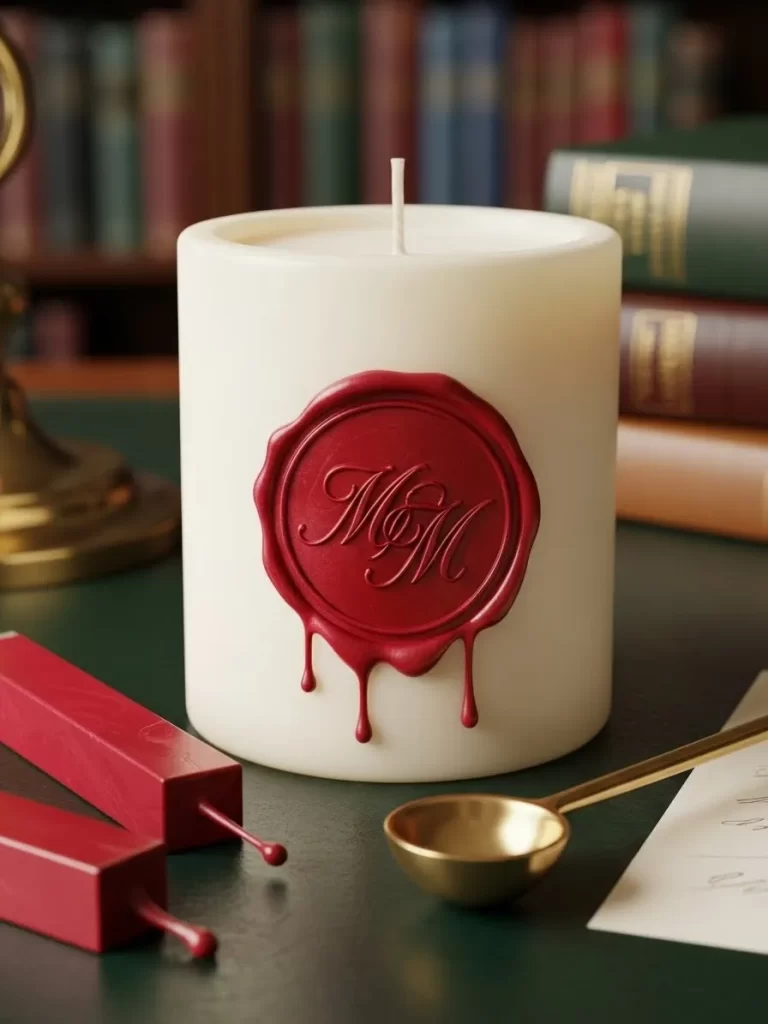
Personalize your home with a candle that carries your own signature. A large, creamy white pillar serves as the background for a bold red wax seal. The monogrammed center makes it feel like a royal decree for your living room.
This design is simple but carries a massive amount of weight. It looks stunning in a home office or on a bookshelf next to leather bound volumes. The contrast between the ivory wax and the deep red seal is visually powerful.
Material Required List
- Ivory pillar candle
- Red sealing wax sticks
- Parchment paper for practice
- Signature fragrance oil
Equipment Required List
- Personalized metal monogram stamp
- Heat tool
- Melting spoon
- Tea light candle
DIY Instructions
- Clean the side of the ivory candle with a soft paper towel.
- Melt two segments of red sealing wax in your spoon over a flame.
- Pour the liquid wax onto the center of the candle side.
- Allow it to run down the side slightly to create three distinct drips.
- Wait five seconds for the wax to thicken before stamping.
- Press your monogram stamp firmly into the center of the red wax pool.
- Pull the stamp away after twenty seconds with a quick motion.
- Let the seal harden completely before touching the area.
32 Cotton Candy Sky Globe Candle

Gaze into a miniature sunset with this swirling orb of color. Soft pink and light blue wax are piped into a round glass bowl to look like fluffy clouds. Shimmering glitter and tiny stars suggest a magical evening atmosphere.
This candle brings a whimsical and youthful energy to your space. It glows with a soft light that changes as the different colors of wax melt together. It is an choice choice for a sunroom or a bright bedroom.
Material Required List
- Pink and blue soy wax
- Round glass globe bowl
- Iridescent star glitter
- Cotton candy scent oil
- Single cotton wick
Equipment Required List
- Two piping bags with star tips
- Hand mixer
- Wick holder
- Melting pitcher
DIY Instructions
- Glue your wick to the bottom of the round glass bowl.
- Melt your pink and blue wax in separate containers.
- Let the wax cool until it reaches a consistency like frosting.
- Whip both colors with a hand mixer until they are airy.
- Fill one piping bag with pink wax and the other with blue.
- Pipe alternating swirls of the two colors into the bowl around the wick.
- Sprinkle the star glitter onto the top of the piped wax.
- Let the globe sit for eight hours to set the whipped shape.
33 Light of My Life Black Lantern
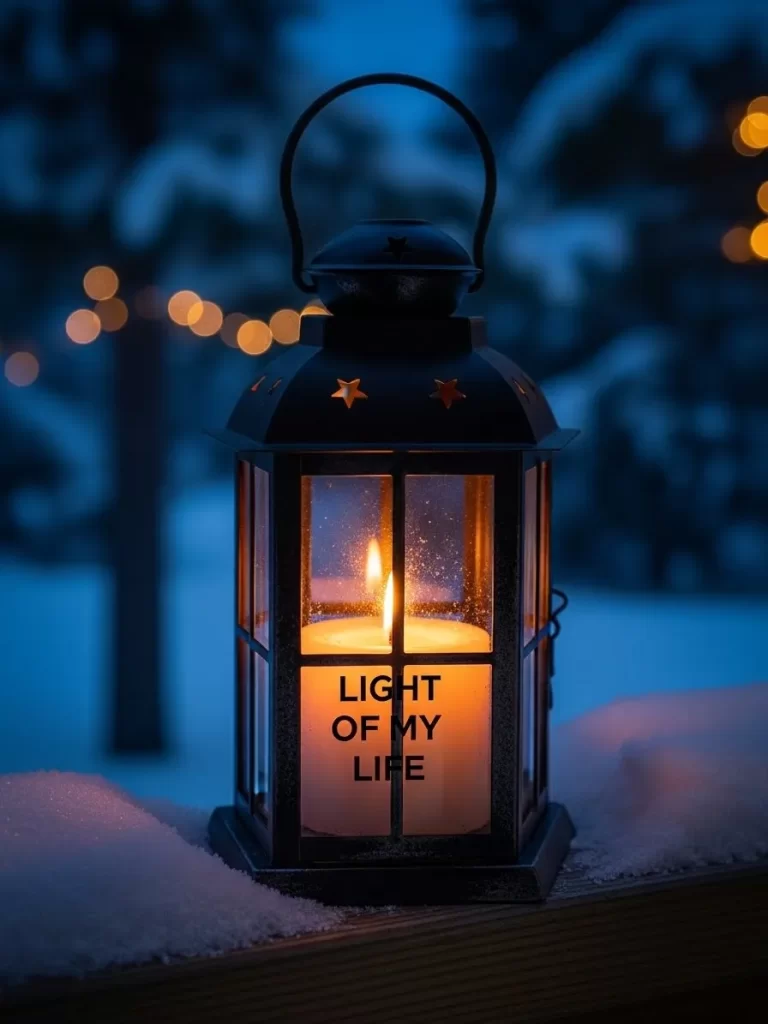
Turn a vintage style lantern into a permanent message of love. The black metal frame houses a simple white candle with a bold black decal. The glowing letters stand out beautifully when the candle is lit in a dark room.
This piece is versatile enough for both indoor and outdoor use. It adds a cozy touch to a snowy porch or a dark hallway. The lantern protects the flame and creates interesting shadows through the glass panes.
Material Required List
- Black metal lantern with glass panes
- White pillar candle
- Black vinyl lettering decal
- Unscented soy wax
Equipment Required List
- Tweezers
- Scissors
- Cloth for cleaning glass
DIY Instructions
- Clean the glass panes of your lantern until they are crystal clear.
- Wipe the surface of the white pillar candle to ensure the decal sticks.
- Carefully apply the vinyl lettering to the front of the candle.
- Use a flat edge to smooth out any air bubbles under the decal.
- Place the candle inside the lantern and make sure it is level.
- Close the lantern door and find a prominent spot for display.
34 Rose Quartz Infusion Wood Wick Candle
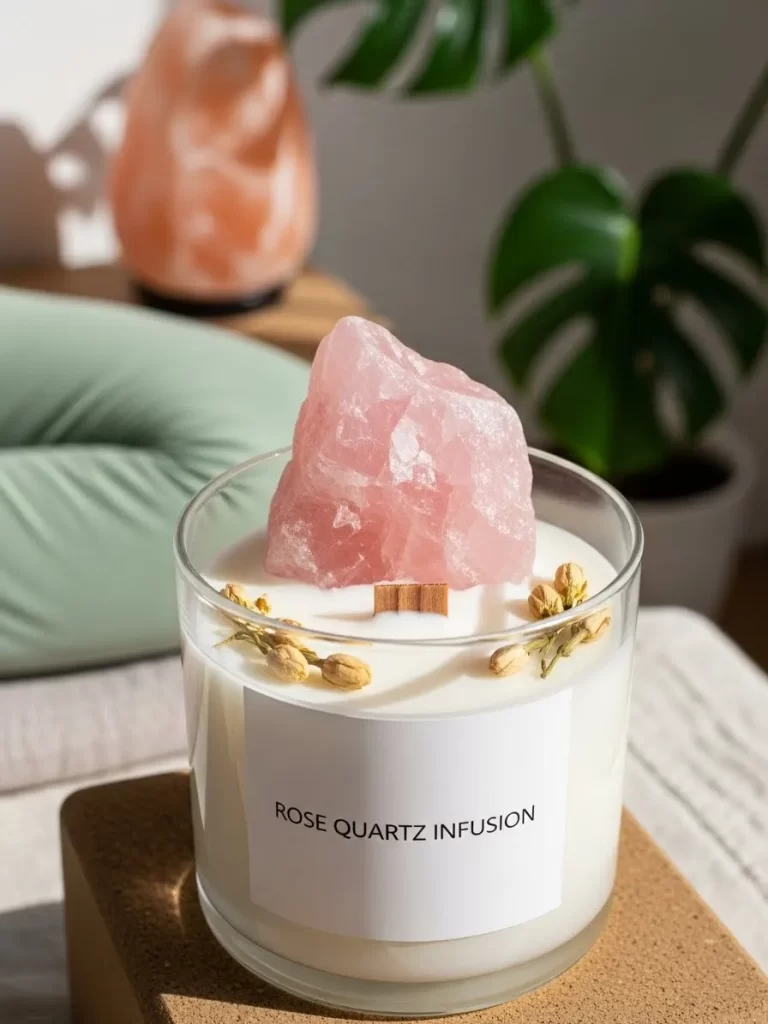
Combine the power of crystals with the soothing sound of a crackling fire. A large, raw rose quartz stone sits atop white wax inside a clear jar. Dried jasmine buds are scattered around the edges to add a soft floral touch.
The wood wick provides a unique sensory experience while the crystal creates a focal point. This design is for those who practice mindfulness or meditation. It looks clean and sophisticated in any contemporary setting.
Material Required List
- White soy wax
- Clear wide mouth glass jar
- Raw rose quartz stone
- Dried jasmine buds
- Wood wick and clip
- Rose and oud fragrance oil
Equipment Required List
- Wick sticker
- Melting pot
- Thermometer
- Heat gun
DIY Instructions
- Center the wood wick in the glass jar and secure it with a clip.
- Melt your soy wax and stir in the rose and oud fragrance.
- Pour the wax into the jar and let it start to cool.
- Place the raw rose quartz stone on the surface once the wax is thick.
- Use tweezers to arrange jasmine buds around the crystal.
- Ensure the wood wick is not blocked by the stone or flowers.
- Allow the candle to sit for twenty four hours before lighting.
35 The Lovely Pair Pear Candles
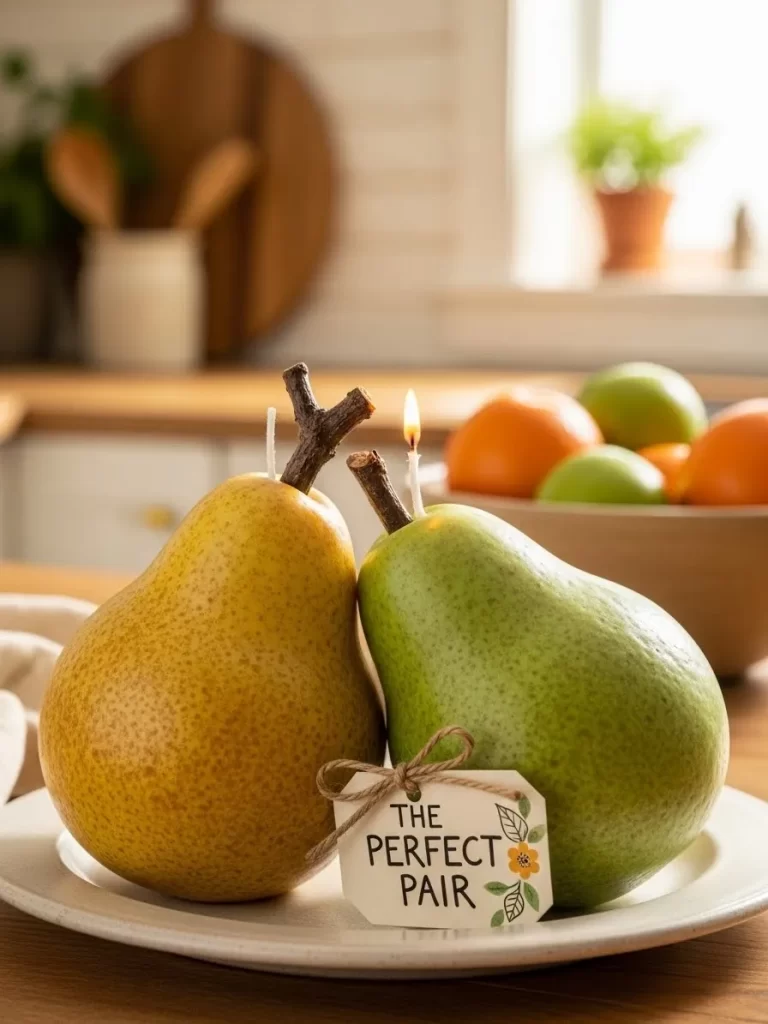
Celebrate your partnership with a duo of candles shaped like fresh pears. One is cast in a soft yellow wax and the other in a vibrant green. A natural twig stem and a small paper tag complete the realistic fruit appearance.
These candles look charming as a pair on a kitchen counter or a dining table. They offer a unique twist on traditional candle shapes and bring a fresh energy to your home. They make a thoughtful gift for an anniversary or a housewarming party.
Material Required List
- Yellow and green paraffin wax
- Two small twigs for stems
- Two cotton wicks
- Twine
- Cardstock for tags
Equipment Required List
- Pear shaped silicone mold
- Skewer
- Scissors
- Pen
DIY Instructions
- Melt the yellow and green wax in separate containers.
- Pour the green wax into one pear mold and the yellow into another.
- Use a skewer to create a wick hole through the center of each pear.
- Insert the cotton wicks and secure them at the top.
- Push a small twig into the top of each pear to act as the stem.
- Remove the pears from the molds once they are cold and solid.
- Write your message on the cardstock tags and attach them with twine.
- Place the pair together on a white plate for a lovely display.
Key Takeaways
- Repurpose vintage items like teacups to save money and add charm.
- Add dried botanicals to give your wax a natural and organic look.
- Use wax seals and ribbons for a sophisticated and high end finish.
- Play with gradients and layers to create visual interest in clear jars.
- Select scents like rose or sandalwood to enhance the romantic mood.
Crafting your own home decor brings a sense of pride that shopping cannot match. You have explored many ways to add color and scent to your surroundings. These thirty five ideas offer something for every taste and skill level.
The holiday of love is a great time to focus on small details that make life feel richer. Your home will surely benefit from the soft flickering light of these custom candles. Enjoy the process of creating something truly your own.