Transforming your bathroom into a romantic retreat does not require a massive renovation. Most homeowners overlook this functional space when decorating for special occasions. You deserve a sanctuary where you can wash away the stress of the day.

Valentine Day offers the chance to embrace soft textures and warm lighting. These small changes create an atmosphere of intimacy and peace. You can turn a basic routine into a luxury experience with just a few mindful updates.
Think about the sensory details that make a spa feel high end. Soft fabrics and floral scents lift your mood instantly. This guide provides affordable ways to refresh your room for the season of love.
1 Scalloped Blush Bath Mat
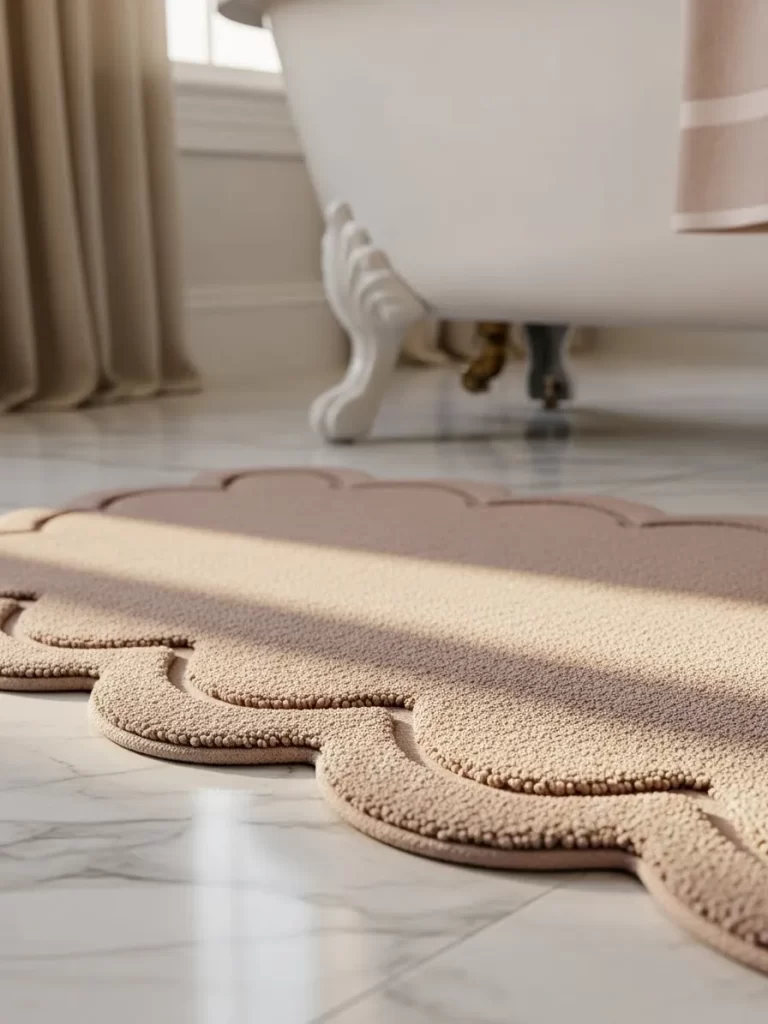
Soften your cold bathroom tiles with a touch of romance. This scalloped bath mat brings a gentle curve to an often sharp and clinical space. A muted rose hue adds warmth without feeling overwhelming or childish.
Stepping onto this plush surface feels like a luxury spa experience right at home. The thick texture absorbs water quickly while keeping your feet cozy after a long soak. It sits beautifully against white marble floors and adds a subtle Valentine charm to your daily routine.
Choose this soft accent to transform the vibe of your room instantly. Every morning feels a bit more special when you greet the day with such comfort. Such a simple swap makes your space feel intentional and curated for relaxation.
Material required list
- Cotton bath rug
- Marking pencil
- Fabric glue or fray check liquid
Equipment required list
- Heavy duty fabric scissors
- Circular bowl or plate to use as a template
DIY instruction step by step
- Find a clean and flat work area to lay out your cotton rug.
- Turn the rug over so you are working on the bottom side.
- Position your circular bowl so only half of it sits on the rug edge.
- Draw a line around the curve of the bowl with your pencil.
- Shift the bowl over and align it with the end of your last mark.
- Continue drawing these half circles until you cover the entire border.
- Use your heavy duty scissors to cut along the pencil lines very slowly.
- Dab fabric glue or fray check liquid along the raw cut edges to prevent unraveling.
- Leave the mat to dry for at least three hours before you use it.
2 Warm Amber Sconces
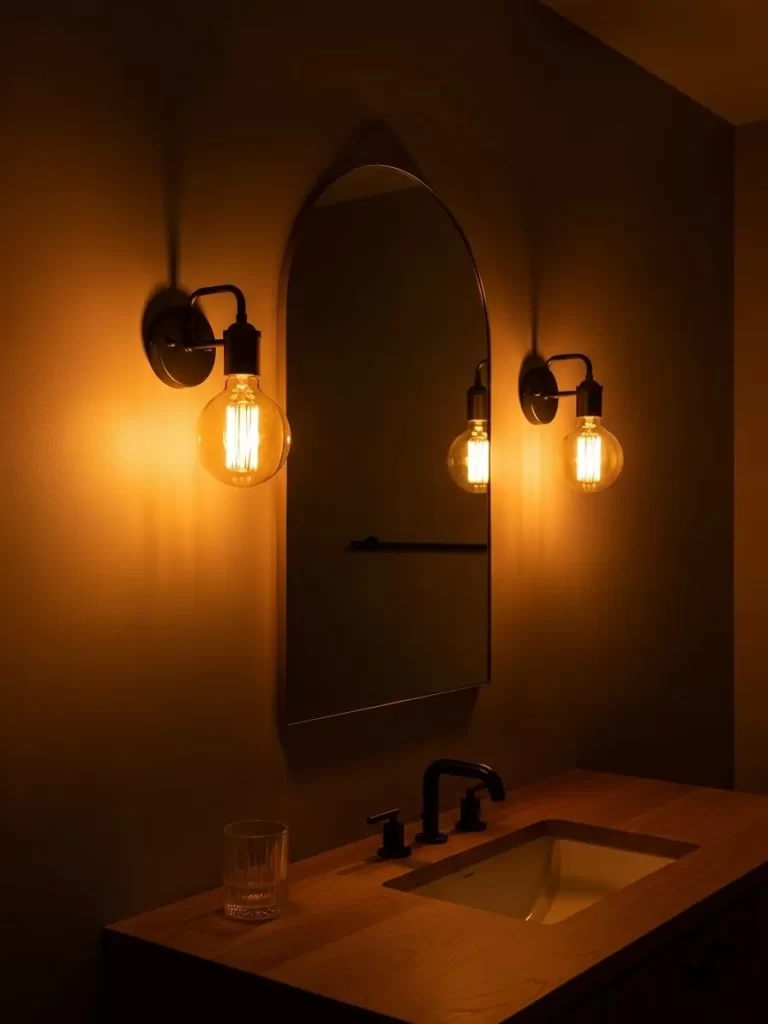
Lighting changes the mood of a room faster than any other update. These warm amber sconces cast a soft glow that mimics candlelight. An arched mirror reflects the golden hues to make the space feel larger and more inviting.
Soft lighting helps you relax during a nighttime soak. It replaces the harsh glare of overhead bulbs with a comforting embrace. This simple switch turns a basic bathroom into a high end sanctuary for your evening routine.
Every evening feels more peaceful when you dim the lights. This specific hardware choice adds a vintage charm to a modern vanity. You will enjoy the calm atmosphere while you prepare for a restful sleep.
Material required list
- Two battery operated wall sconces
- Command strips or heavy duty mounting tape
- Warm tone LED light bulbs
Equipment required list
- Level tool
- Measuring tape
- Pencil
DIY instruction step by step
- Decide the height where you want your lights to sit on the wall.
- Use your measuring tape to ensure both sides are equal distances from the mirror.
- Mark the wall lightly with your pencil at the top of the mounting plate.
- Place the level tool against your mark to make sure the light will sit straight.
- Apply the command strips to the back of the sconce mounting bracket.
- Press the bracket firmly against the wall for thirty seconds to ensure a strong bond.
- Screw your warm LED bulbs into the sockets of the sconces.
- Turn on the battery power using the small switch located at the base.
3 Frosted Blush Soap Dispensers
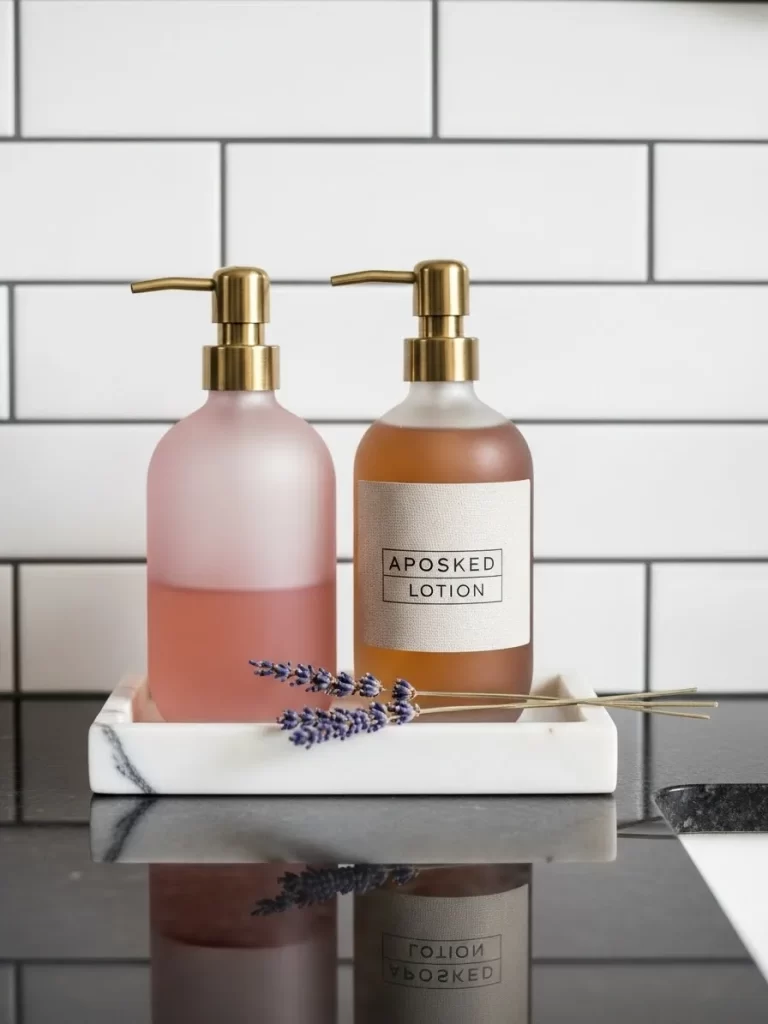
Clear plastic bottles often look cluttered and messy. These frosted glass dispensers offer a sophisticated look for your favorite lotions and soaps. A small sprig of lavender adds a natural touch of color and a faint scent to the vanity.
Placing the bottles on a marble tray keeps the counter organized. It prevents water rings and drips from staining your stone surfaces. You gain a tidy and intentional look that feels like a boutique hotel bathroom.
Matching containers create a sense of harmony in the room. This small change removes ugly brand labels from your line of sight. Your sink area becomes a focal point of beauty instead of a chore to clean.
Material required list
- Two frosted glass pump bottles
- One small marble or stone tray
- Liquid hand soap and body lotion
- Dried lavender stems
Equipment required list
- Funnel
- Paper towels
DIY instruction step by step
- Clear everything off your bathroom counter and wipe the surface dry.
- Unscrew the pump tops from your new frosted glass bottles.
- Place your funnel into the neck of the first bottle.
- Pour your liquid soap slowly into the bottle until it is nearly full.
- Repeat this process with your lotion for the second bottle.
- Wipe any spills off the sides of the glass with a damp paper towel.
- Screw the pump tops back on tightly and test the spray.
- Arrange both bottles on the marble tray.
- Tuck the lavender stems behind the bottles for a touch of nature.
4 Textured Neutral Shower Curtain
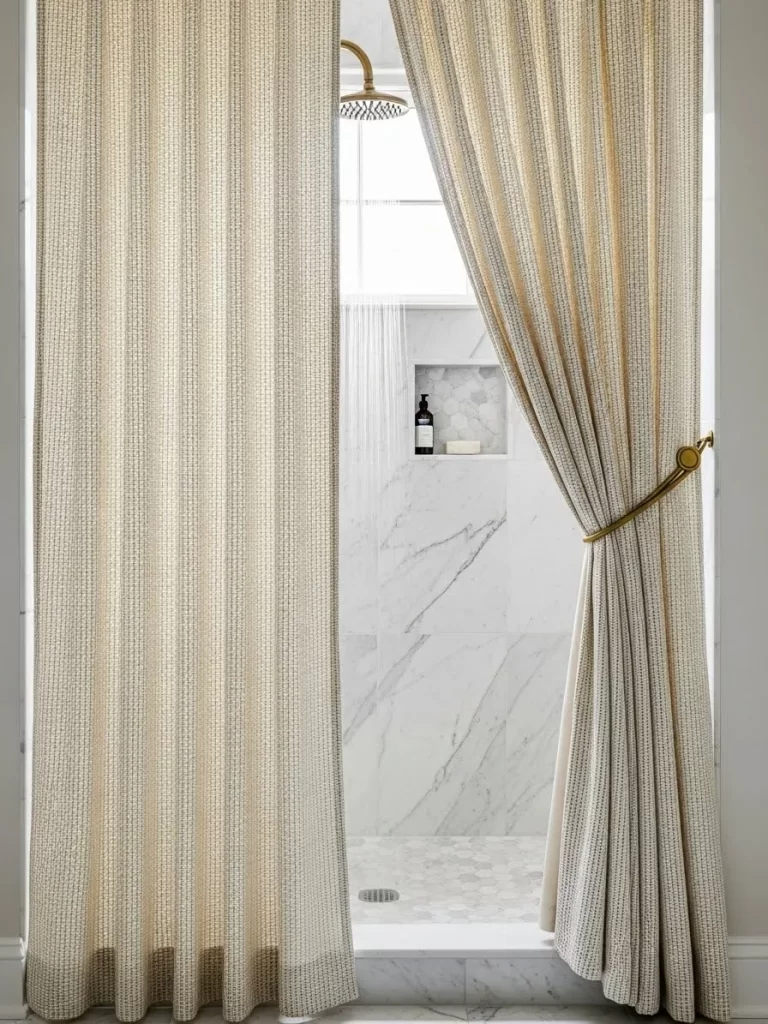
Most shower curtains are purely functional and lack any real style. This waffle weave fabric adds deep texture and visual interest to the room. Using a gold tie back allows light to enter the shower area while looking elegant.
Neutral tones create a calm environment for your morning. The heavy fabric hangs beautifully and feels much more expensive than standard plastic liners. It softens the hard surfaces of the tile and marble nearby.
Fabric curtains bring a cozy feel to a wet room. This simple textile swap makes the ceiling look taller if you hang the rod high. Your shower becomes a private retreat behind these thick folds.
Material required list
- Fabric waffle weave shower curtain
- Waterproof plastic liner
- Decorative gold curtain tie back
- Shower curtain rings
Equipment required list
- Stepladder
- Handheld steamer
DIY instruction step by step
- Remove your old shower curtain and rings from the rod.
- Slide your new gold rings onto the shower rod.
- Attach the waterproof liner to the rings first.
- Hook the fabric waffle curtain onto the same rings so it faces the room.
- Spread the curtain out fully across the tub.
- Use your handheld steamer to remove any wrinkles from the fabric.
- Install the gold tie back hook on the wall next to the shower.
- Gather the fabric in the middle and tuck it into the gold hook.
5 Singular Rose Bud Vase
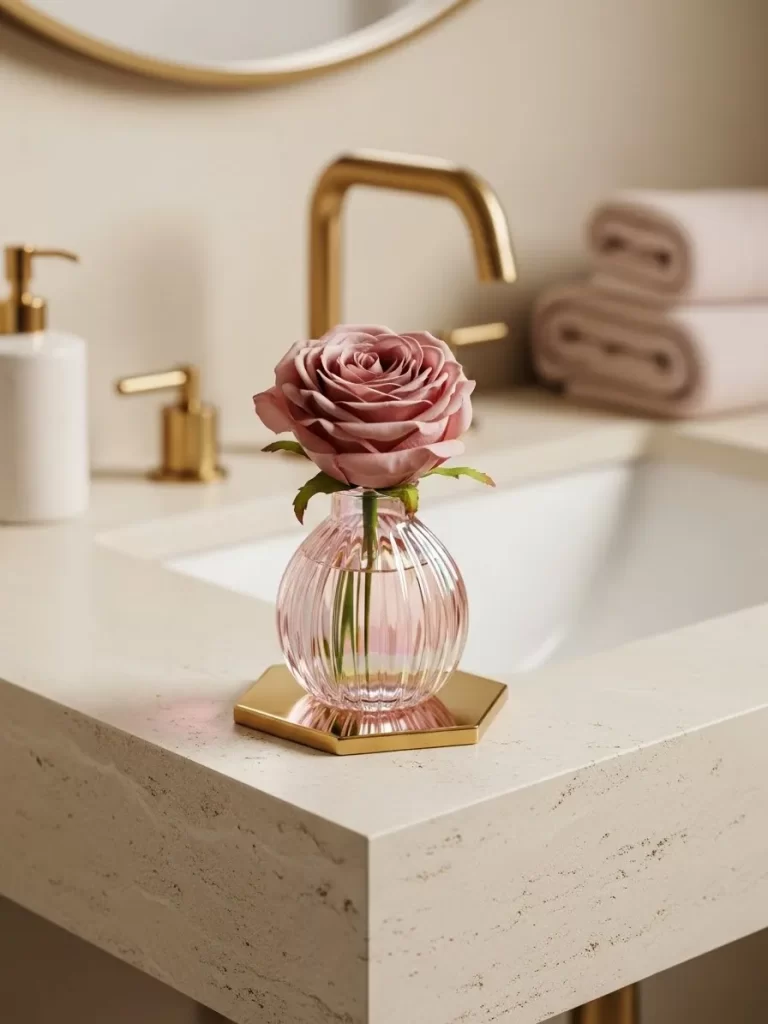
Flowers bring life to any dull corner of a home. This fluted glass vase holds a single pink rose that stands out against the cream countertop. Placing it on a gold hexagonal coaster adds a layer of shine and protects your stone.
Minimalist decor works well in small bathrooms. One beautiful bloom provides enough color to celebrate the season of love. This tiny addition makes your vanity feel like a curated art piece every time you wash your hands.
Fresh scents lift your mood instantly when you walk into the room. This rose serves as a daily reminder to slow down and enjoy the small things. You can change the flower weekly to keep the look fresh and seasonal.
Material required list
- One fluted glass bud vase
- One fresh or high quality silk rose
- Gold hexagonal coaster
- Fresh water
Equipment required list
- Flower shears or sharp scissors
DIY instruction step by step
- Clean your glass vase with warm soapy water to make it sparkle.
- Fill the vase halfway with cool tap water if using a real flower.
- Hold your rose next to the vase to see how much stem you need to cut.
- Trim the bottom of the rose stem at a forty five degree angle.
- Remove any leaves that would sit below the water line to prevent rot.
- Place the rose into the vase so the head sits just above the rim.
- Set the gold coaster on a dry spot of your bathroom vanity.
- Position the vase in the center of the coaster.
6 Dark Wood Tub Caddy
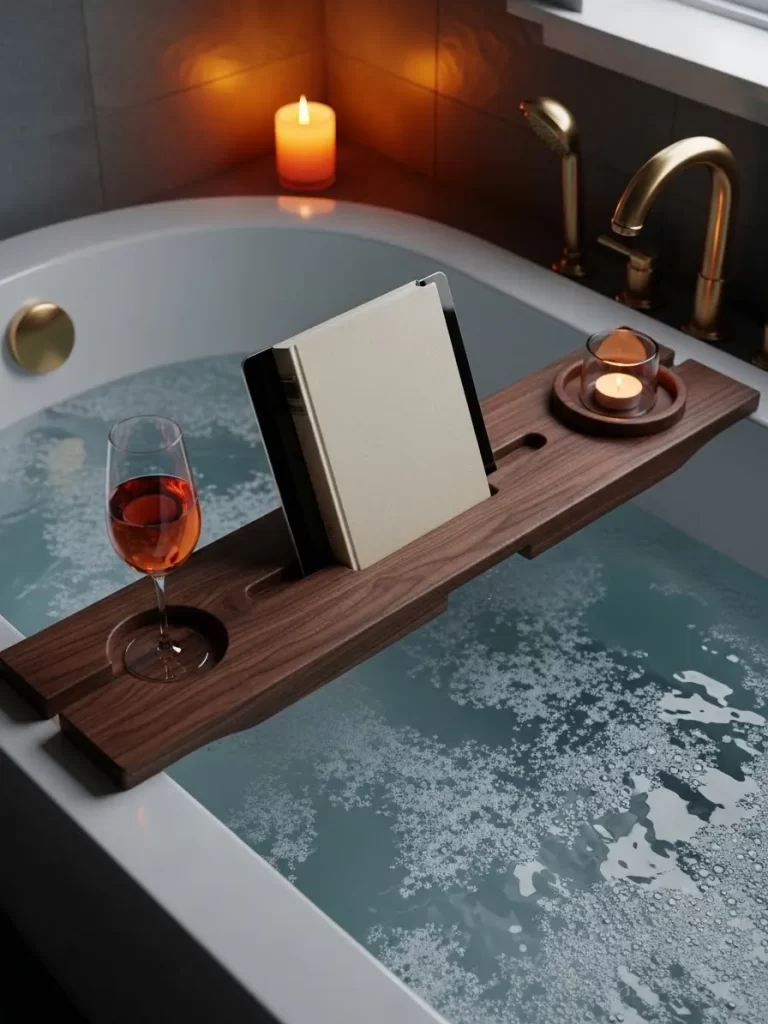
A long bath requires a place for your personal essentials. This dark walnut tray stretches across the tub to hold a book and a glass of wine. It keeps your items dry and within reach so you never have to leave the warm water.
Wood adds an organic element to the cool porcelain of the bath. The rich grain of the timber looks stunning against white soap bubbles. This caddy invites you to linger and enjoy a slow evening of self care.
Sturdy trays provide a stable surface for your electronics or candles. This accessory turns a regular bath into a full spa experience. You can relax knowing your belongings are safe from the water below.
Material required list
- One wooden bathtub caddy
- One glass of rose wine
- A favorite book or tablet
- Small candle in a glass holder
Equipment required list
- Soft cloth
- Wood polish
DIY instruction step by step
- Wipe your wooden caddy with a soft cloth to remove any dust.
- Apply a small amount of wood polish to keep the surface water resistant.
- Place the caddy across the width of your bathtub while it is empty.
- Adjust the sliding arms if your caddy has an adjustable width feature.
- Ensure the tray sits level and does not wobble on the edges of the tub.
- Fill your bathtub with warm water and your favorite bubbles.
- Set your book in the center slot of the tray.
- Slide your wine glass into the designated holder.
- Light the small candle and place it on the flat section of the wood.
7 Fringed Waffle Towels
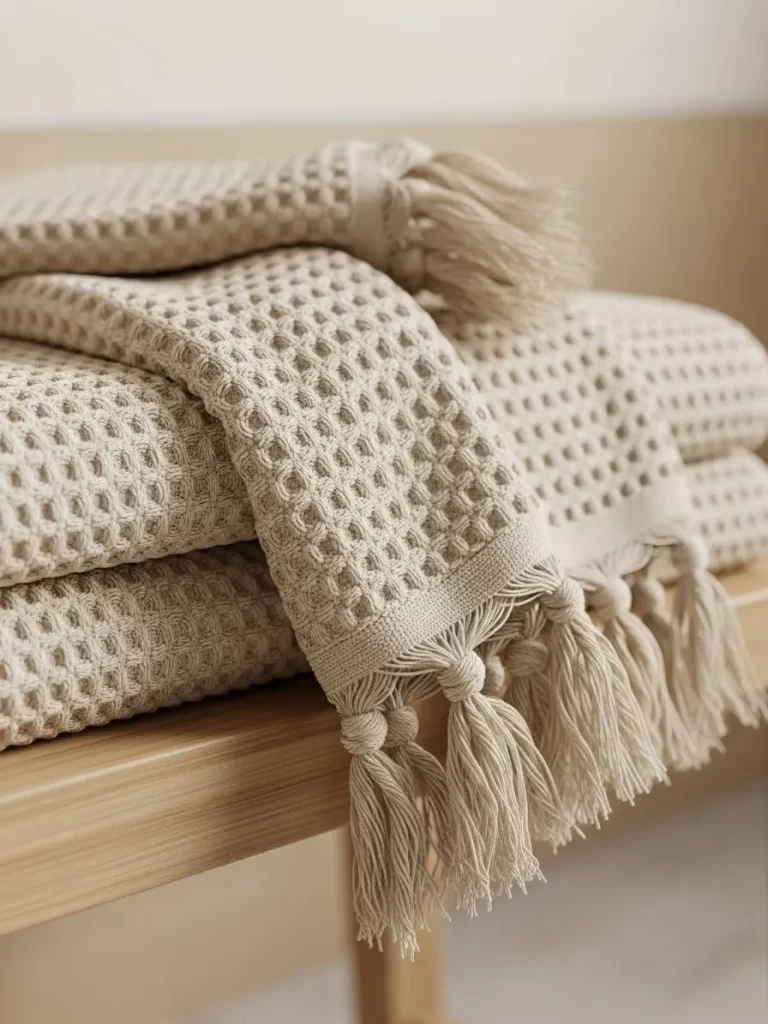
Thick towels are a staple for any quality spa experience. These waffle weave cloths feature delicate tassels that add a bohemian touch to your storage. The beige color remains timeless and blends into any existing color scheme.
Folding them neatly on a bench creates an inviting display for guests. These towels feel soft against the skin and dry much faster than standard terry cloth. They provide a tactile luxury that you will appreciate every single day.
Natural fibers help the skin breathe after a hot shower. This texture gently exfoliates as you dry off. High quality linens are an investment in your daily comfort and well being.
Material required list
- Set of waffle weave bath towels
- Fabric softener or wool dryer balls
Equipment required list
- Washing machine
- Wooden bench or towel rack
DIY instruction step by step
- Wash your new towels on a gentle cycle before the first use.
- Dry them with wool dryer balls to keep the waffle texture fluffy.
- Lay one towel flat on a clean table with the tassels facing you.
- Fold the towel in half lengthwise to create a long rectangle.
- Fold it in half again so the edges meet perfectly.
- Smooth out any lumps with your hands.
- Stack the folded towels on top of each other on your wooden bench.
- Arrange the tassels so they hang over the front edge of the stack.
8 Matte Black Mood Candle
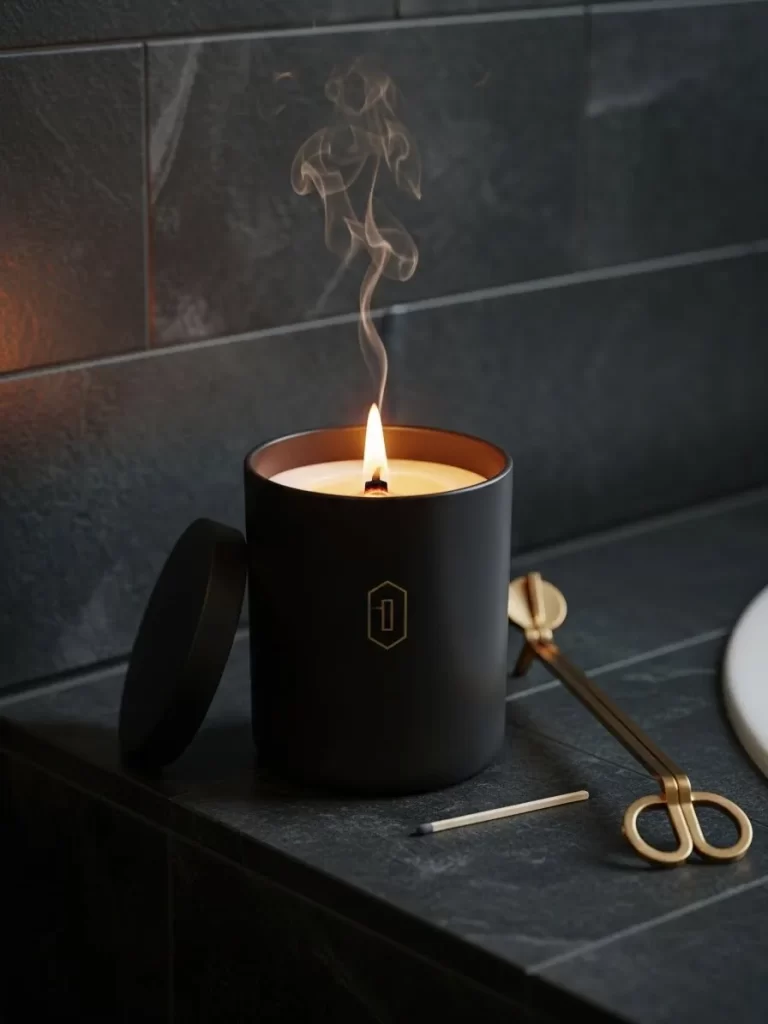
Scented candles set the stage for a romantic night at home. This matte black jar looks modern and sleek on a dark tiled ledge. The flickering flame creates dancing shadows that help quiet your mind after a busy workday.
Keeping a gold wick trimmer nearby ensures a clean burn every time. It prevents soot from building up and keeps the candle looking new. This small ritual of lighting a match signals that it is finally time to unwind.
Dark colors provide a beautiful contrast to white bathroom fixtures. This jar acts as a small piece of sculpture even when the candle is not lit. You can enjoy the subtle fragrance as it fills the small space.
Material required list
- One matte black jar candle
- One gold wick trimmer
- One box of long matches
Equipment required list
- Small damp cloth
DIY instruction step by step
- Wipe the surface where you plan to put the candle to remove any moisture.
- Use your gold wick trimmer to snip the wick to one quarter of an inch.
- Remove the trimmed piece of wick and throw it away.
- Place the candle jar on a flat and heat resistant surface.
- Strike a match and hold it to the wick until the flame catches.
- Let the candle burn until the melted wax reaches the edges of the jar.
- Place the gold trimmer next to the candle for a styled look.
- Keep the matches nearby in a small decorative tray.
9 Quilted Glass Canisters
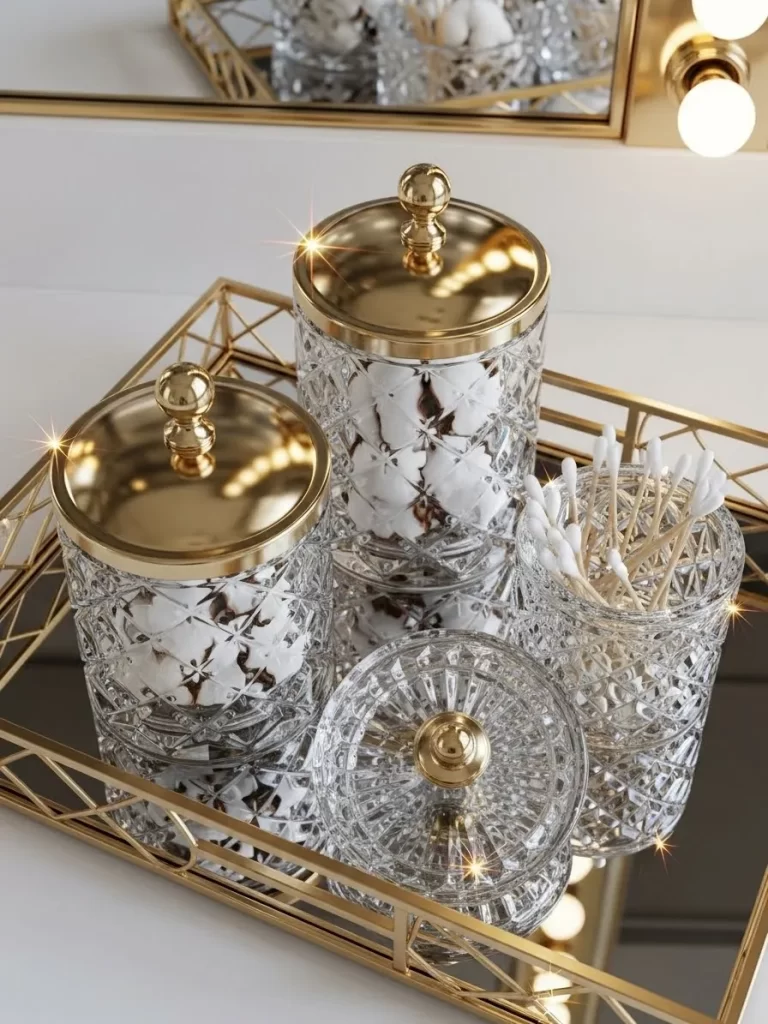
Organization can be beautiful with the right storage containers. These quilted glass jars store cotton swabs and pads in plain sight. Gold lids match your faucets and bring a sense of cohesion to the entire room.
A mirrored tray reflects the sparkle of the glass for extra glamour. It organizes small items that usually clutter up your vanity drawers. This setup proves that even your daily hygiene products deserve a stylish home.
Transparent glass makes it easy to see when you are running low on supplies. This prevents the frustration of running out of essentials during your routine. You will feel more organized and in control of your space.
Material required list
- Set of three quilted glass jars with gold lids
- One gold metal vanity tray
- Cotton swabs
- Cotton round pads
Equipment required list
- Glass cleaner
- Microfiber cloth
DIY instruction step by step
- Spray your glass jars and the vanity tray with glass cleaner.
- Wipe them with a microfiber cloth until they are shiny and streak free.
- Open the largest jar and fill it with your cotton round pads.
- Fill the medium jar with cotton swabs so they stand up straight.
- Place the lids back on the jars and ensure they are straight.
- Arrange the jars on the gold tray from tallest to shortest.
- Position the tray in a corner of your vanity or near the mirror.
- Leave one jar open if you want easier access to your items.
10 Minimalist Gold Robe Hook
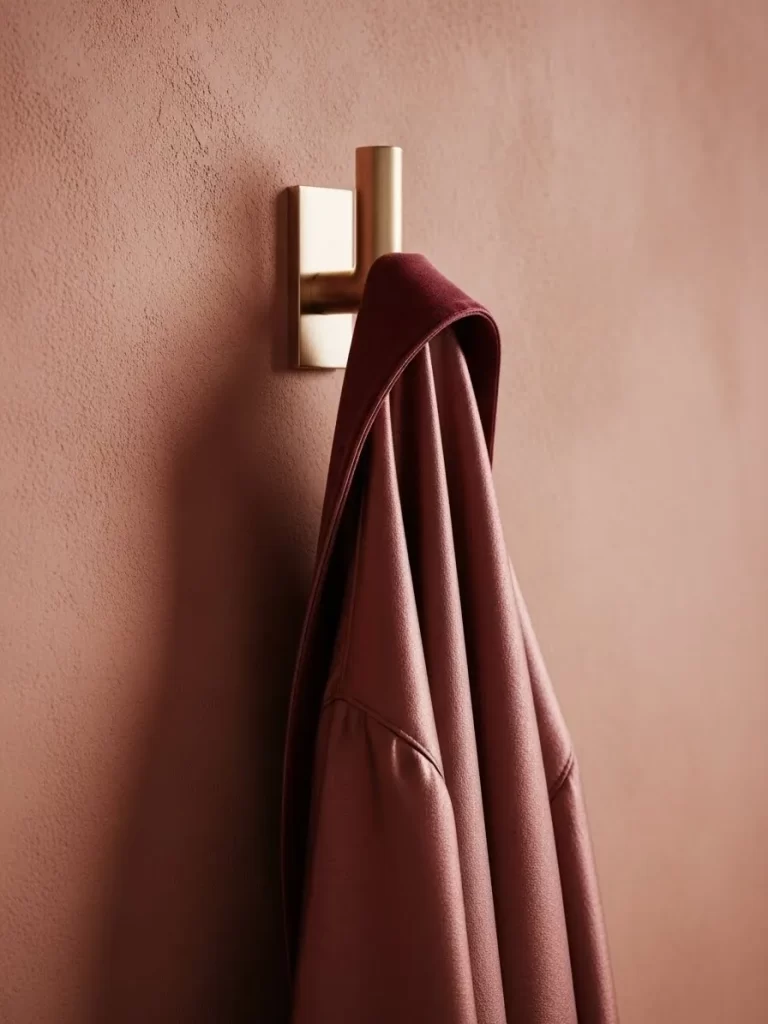
Hanging your robe should feel like a deliberate act of comfort. This brushed gold hook provides a sturdy place for a soft mauve dressing gown. The warm metal finish pops against a muted terracotta wall for a modern look.
Wall hooks save floor space and keep your fabrics dry after use. A dedicated spot for your lounge wear makes your post bath transition feel seamless. This simple hardware update adds a touch of gold that feels regal and high end.
Choose a hook with a simple shape to maintain a clean look. This accessory holds heavy fabrics without bending or pulling away from the wall. You will love the convenience of having your robe within reach.
Material required list
- One brushed gold wall hook
- Wall anchor and screw
- Mauve or pink velvet robe
Equipment required list
- Power drill
- Drill bit
- Screwdriver
- Pencil
DIY instruction step by step
- Hold the gold hook against the wall at shoulder height.
- Mark the screw holes with your pencil while holding the hook steady.
- Use your power drill to create a small hole on each of your pencil marks.
- Push the plastic wall anchors into the holes until they are flush with the wall.
- Align the hook over the anchors.
- Drive the screws through the hook and into the anchors using your screwdriver.
- Tighten the screws until the hook does not move.
- Hang your favorite soft robe on the hook to finish the look.
11 Ceramic Mist Diffuser
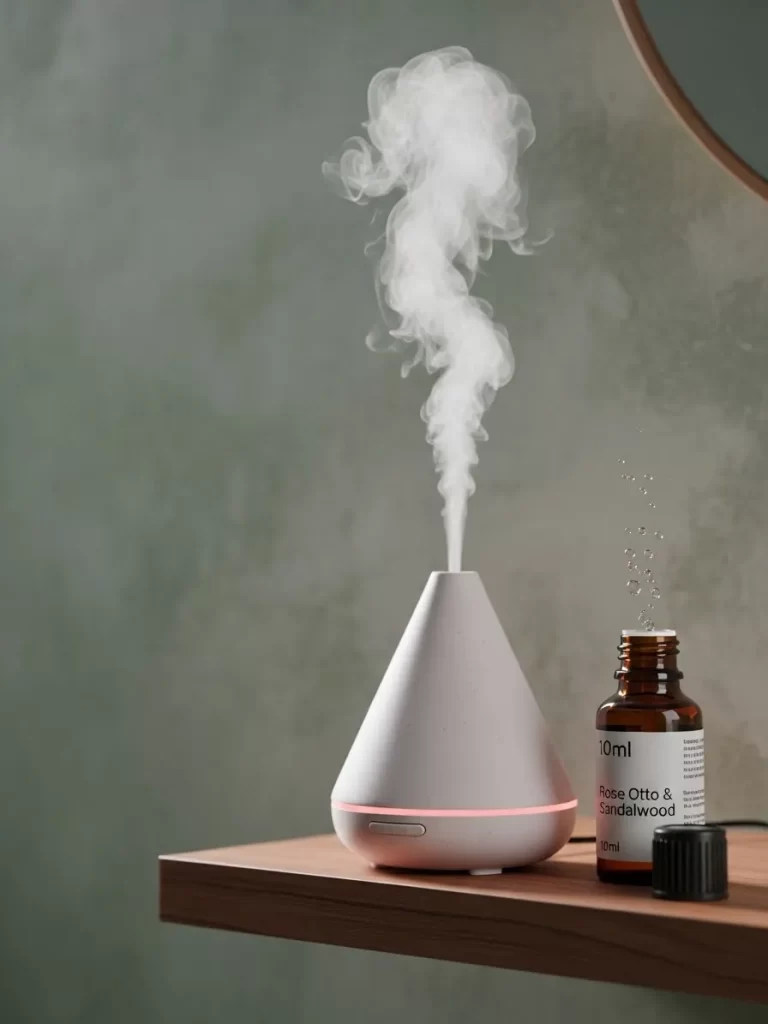
Scent is a powerful way to change how you feel in a room. This white ceramic diffuser releases a cool mist that carries the aroma of roses. A dark amber bottle of essential oil sits nearby to remind you to breathe deeply.
Using a diffuser is a safer alternative to burning candles all day. It adds moisture to the air which helps keep your skin hydrated during winter. You will feel your stress melt away as the floral scent fills the bathroom.
Simple designs blend into any decor style effortlessly. The soft pink light at the base adds a romantic touch to your countertop. You can customize the scent to match your mood for the day.
Material required list
- Electronic ceramic mist diffuser
- Rose Otto and Sandalwood essential oils
- Distilled water
Equipment required list
- Small measuring cup
- Power outlet
DIY instruction step by step
- Remove the ceramic cover from the base of your diffuser.
- Fill your measuring cup with distilled water.
- Pour the water into the internal tank up to the fill line.
- Add five drops of rose oil and three drops of sandalwood oil to the water.
- Place the ceramic cover back onto the base securely.
- Plug the power cord into the nearest wall outlet.
- Press the power button once to start the continuous mist.
- Set the timer for one hour to refresh the room before your bath.
12 Romantic Line Art Frame

Empty walls make a bathroom feel cold and unfinished. This thin gold frame contains a delicate line drawing of a couple. The minimalist style adds a romantic theme without cluttering the visual space of the room.
Hanging art above the tub creates a gallery feel in your private spa. It gives you something beautiful to look at while you soak and relax. The textured paper of the print adds a touch of luxury to the wall.
Art is a simple way to express your personality in a functional room. This piece uses soft lines to convey a sense of intimacy and peace. You can swap the art seasonally to keep your bathroom feeling fresh.
Material required list
- One gold picture frame
- Line art print on textured paper
- Hanging wire or brackets
Equipment required list
- Measuring tape
- Hammer
- Small nail or picture hook
- Pencil
DIY instruction step by step
- Open the back of your frame and remove the sample image.
- Place your line art print inside and center it carefully.
- Close the back of the frame and secure the metal tabs.
- Measure the width of the wall above your bathtub.
- Mark the center point with your pencil at eye level.
- Hold the frame against the wall to check the position.
- Tap the picture hook into the wall at your mark using a hammer.
- Hang the frame and use your eyes to ensure it is level.
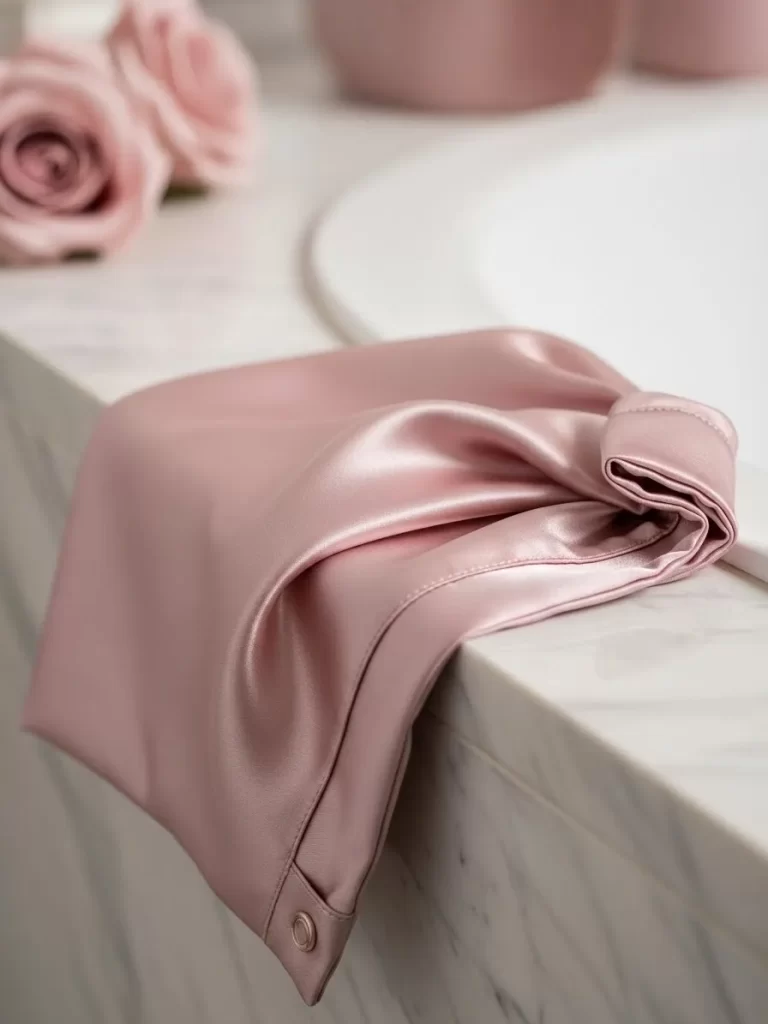
13 Velvet Trimmed Hand Towel
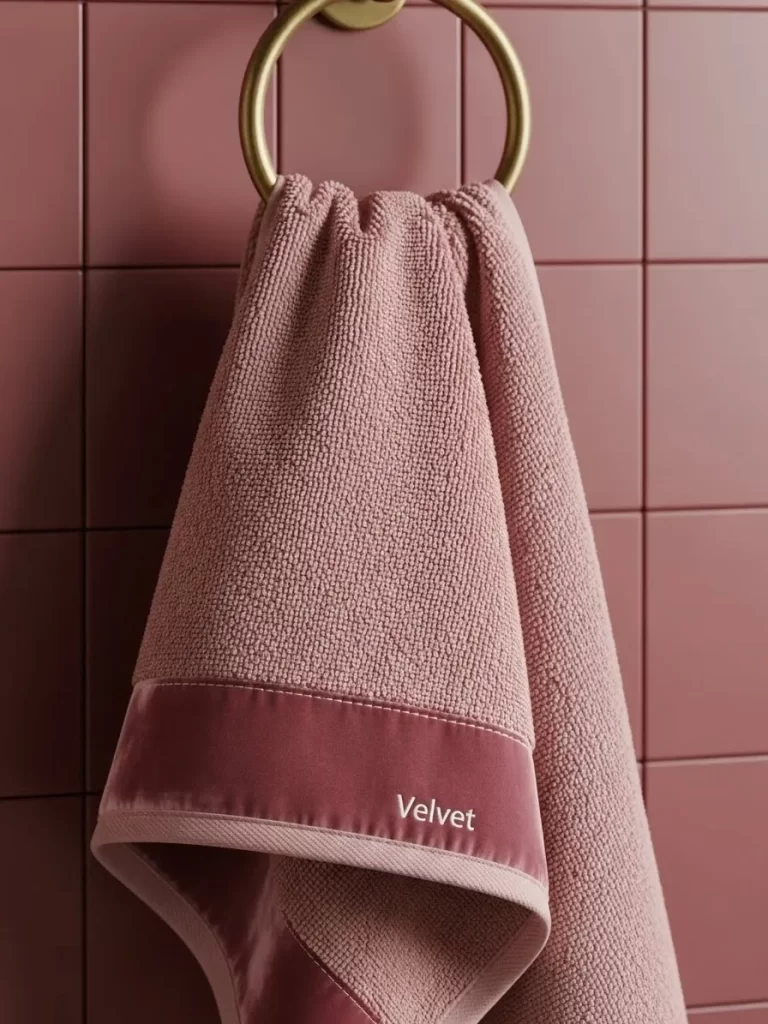
Textiles are the easiest way to add color to a tiled room. This mauve hand towel features a luxurious velvet border for a rich look. The soft loops of cotton feel gentle against your skin every time you wash your hands.
Gold towel rings complement the warm pink tones of the fabric. Hanging a fresh towel makes the space look clean and ready for guests. This small swap brings a high end spa feeling to your daily routine.
Soft colors help create a relaxing environment for self care. This specific shade of pink is sophisticated and grown up. You will enjoy the tactile contrast between the rough towel and the smooth velvet.
Material required list
- Mauve cotton hand towel with velvet trim
- Gold metal towel ring
Equipment required list
- Screwdriver
- Measuring tape
DIY instruction step by step
- Locate the best spot on the wall near your sink for the towel ring.
- Mount the gold ring bracket to the wall according to the package instructions.
- Slide the gold ring into the bracket and tighten the hidden screw.
- Shake out your new velvet trimmed towel to remove any lint.
- Fold the towel into thirds lengthwise so the velvet trim is visible.
- Loop the top of the towel through the gold ring.
- Pull the fabric down so it hangs evenly on both sides.
- Straighten the velvet border so it faces the front of the room.
14 Hammered Copper Storage Canister
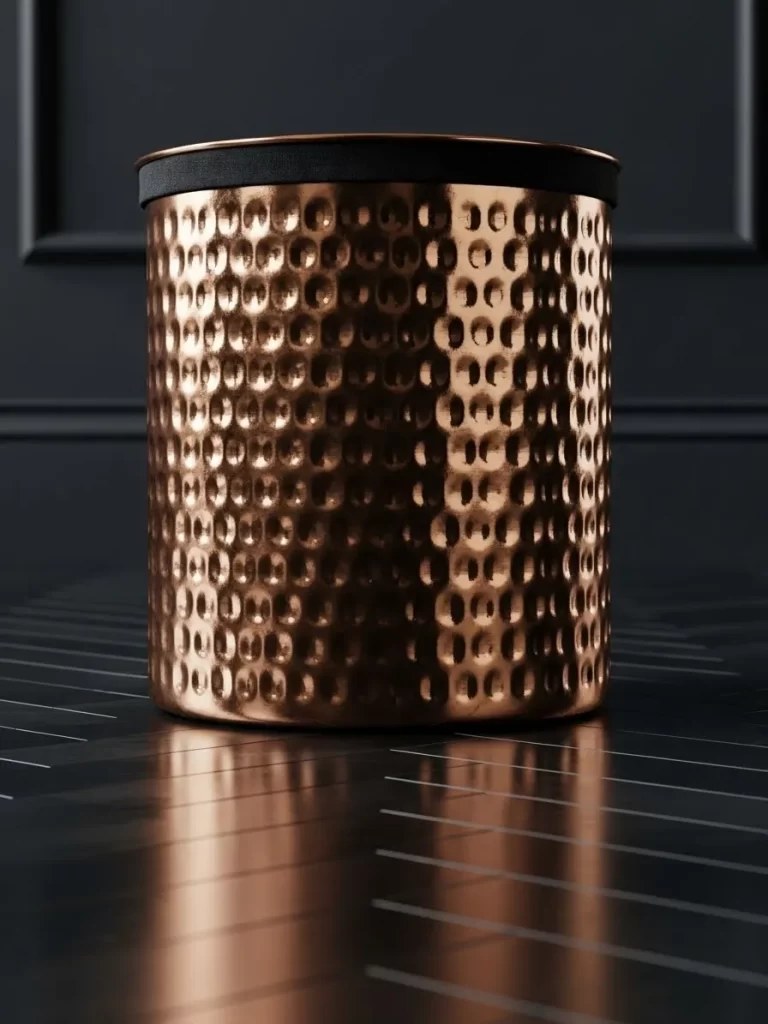
Metal accents bring warmth and shine to a dark bathroom. This hammered copper canister stores your large items while looking like a piece of art. The textured surface catches the light and adds depth to your vanity or shelf.
Using canisters keeps your counters free from clutter and dust. A black lid provides a modern contrast to the warm glow of the copper. This container is sturdy enough to hold heavy items like hair tools or large bath bombs.
Copper is a timeless material that ages beautifully over time. It adds a touch of industrial chic to a romantic Valentine theme. You will love how the metallic finish glows under soft bathroom lighting.
Material required list
- One hammered copper canister
- Black rubber or plastic lid
- Items to store inside
Equipment required list
- Soft microfiber cloth
- Copper cleaner
DIY instruction step by step
- Polish the exterior of your copper canister with a microfiber cloth.
- Apply a small amount of copper cleaner if the metal looks dull.
- Buff the surface in circular motions until the shine returns.
- Wipe the inside of the container with a damp cloth to remove dust.
- Dry the interior completely before adding any items.
- Place your larger bathroom essentials inside the canister.
- Press the black lid onto the top until it creates a seal.
- Position the canister on a flat surface away from direct water spray.
15 Marble and Wood Accent Stool
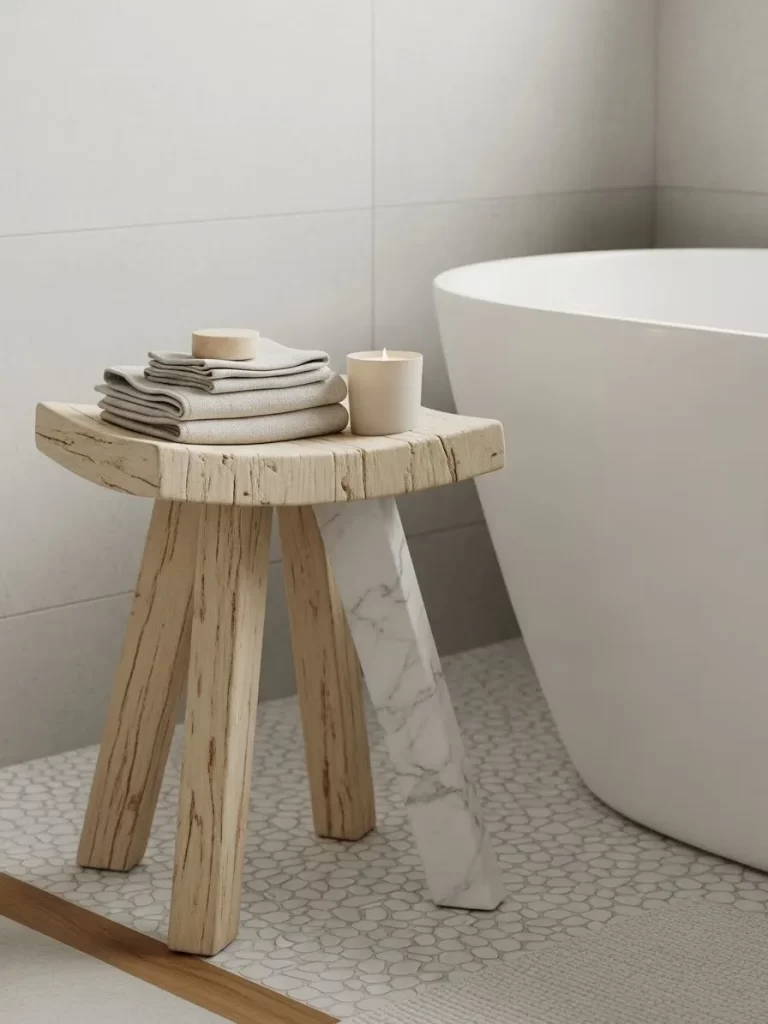
Furniture in the bathroom adds a sense of luxury and scale. This tripod stool features a unique mix of raw wood and polished marble. It provides a convenient place to set your towels or a candle next to the tub.
Natural materials bring an organic feel to a tiled space. The white marble leg matches your floors while the wood adds a rustic charm. This piece is functional as a seat or a side table for your bath.
Choosing a small stool keeps the floor plan open and airy. It is easy to move around depending on where you need a surface. You will appreciate having your essentials at arm length while you relax.
Material required list
- Small accent stool with wood and marble legs
- Small scented candle
- Set of folded washcloths
Equipment required list
- Level surface
DIY instruction step by step
- Clear a spot on the floor next to your bathtub or shower.
- Place the stool on the floor and check that it does not wobble.
- Adjust the position until all three legs sit firmly on the tile.
- Wipe the top surface of the stool with a dry cloth.
- Fold two light gray washcloths into neat squares.
- Stack the washcloths on the wooden part of the stool top.
- Place a small candle in a glass jar next to the towels.
- Light the candle to create an inviting look for your next bath.
16 Arched Backlit Vanity Mirror
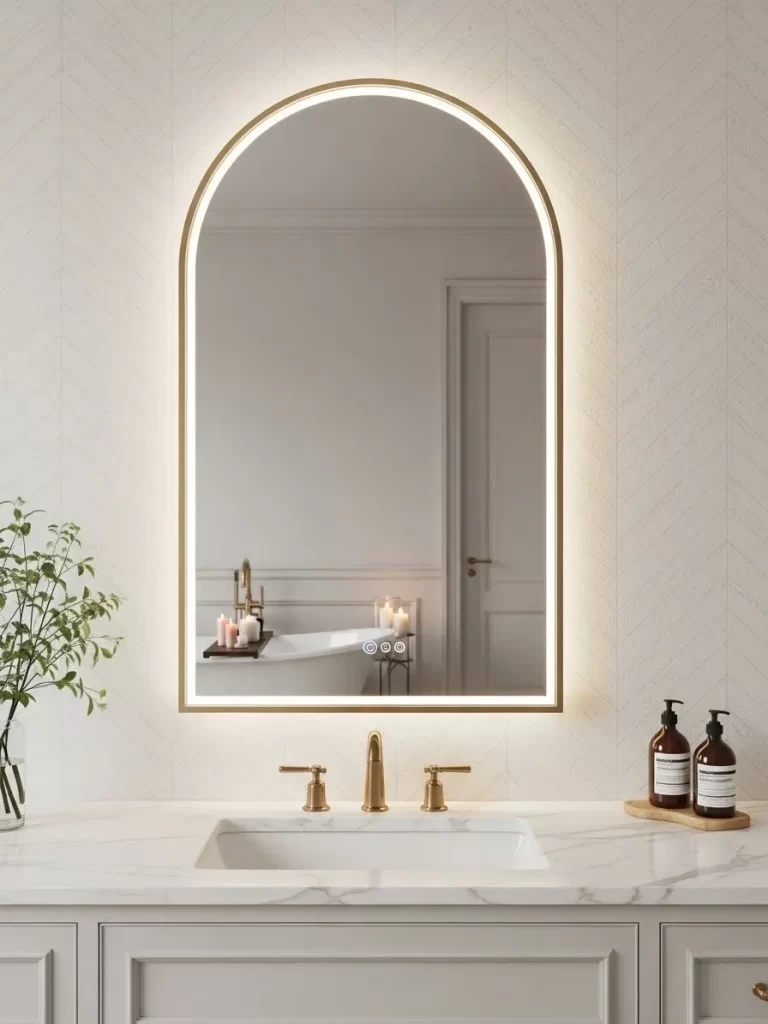
The mirror is the center of every bathroom design. This large arched mirror features a built in light that glows from behind the glass. It creates a soft halo effect on the wall that makes your morning routine feel special.
Backlit mirrors provide even lighting for your face without shadows. The gold frame adds a touch of elegance to the minimalist design. This update turns a simple sink area into a high end beauty station.
Arched shapes soften the straight lines of your cabinetry and tiles. This mirror makes the ceiling feel higher and the room feel more open. You will enjoy the modern look and the functional glow it provides.
Material required list
- One arched backlit mirror with gold frame
- Wall mounting hardware
- Electrical connection or battery pack
Equipment required list
- Level tool
- Power drill
- Drill bit
- Screwdriver
- Pencil
- Measuring tape
DIY instruction step by step
- Measure the width of your vanity to find the center point.
- Mark the wall with your pencil where the top of the arch will sit.
- Use your level to draw a straight line for the mounting bracket.
- Drill holes into the wall at the marked spots for your anchors.
- Hammer the plastic anchors into the holes until they are flush.
- Screw the mounting bracket into the wall anchors tightly.
- Lift the mirror and hook the back onto the wall bracket carefully.
- Connect the power source and touch the sensor to turn on the light.
17 Rose and Jasmine Bath Salts
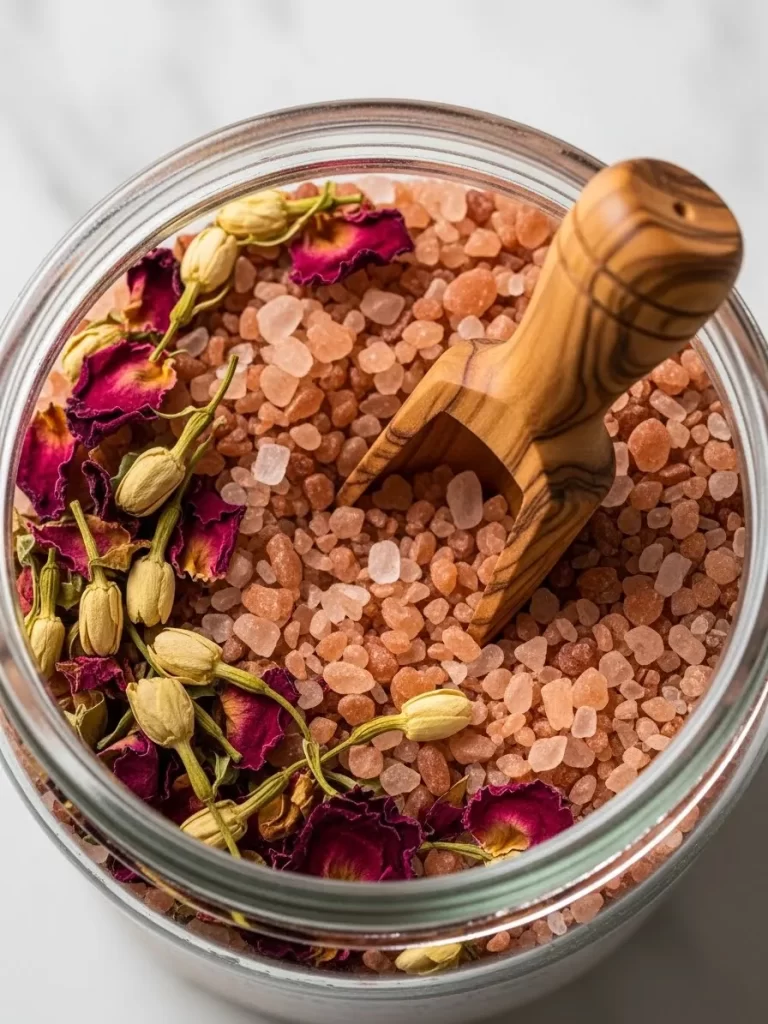
A spa experience is not complete without a soothing soak. These pink Himalayan bath salts are mixed with dried rose buds and jasmine. The minerals in the salt help relax your muscles while the flowers scent the water.
Storing your salts in a glass jar makes them a part of your decor. A small wooden scoop adds a natural touch and makes it easy to use. This simple addition turns a standard bath into a romantic ritual.
Floral baths are a wonderful way to treat yourself on Valentine Day. The steam carries the scent of fresh flowers throughout the entire house. You will leave the tub feeling refreshed and smelling like a garden.
Material required list
- Pink Himalayan bath salts
- Dried rose petals and jasmine buds
- Large glass storage jar
- Small wooden scoop
Equipment required list
- Mixing bowl
- Large spoon
DIY instruction step by step
- Pour two cups of pink Himalayan salt into a clean mixing bowl.
- Add a handful of dried rose petals to the salt.
- Toss in a few jasmine buds for a complex floral scent.
- Mix the ingredients gently with a large spoon until combined.
- Use your funnel to pour the mixture into a clean glass jar.
- Place the wooden scoop inside the jar so it sits on top of the salt.
- Seal the jar with a lid to keep the moisture out.
- Set the jar on your tub ledge or a shelf for a pretty display.
18 Sculpted Seashell Bath Soap
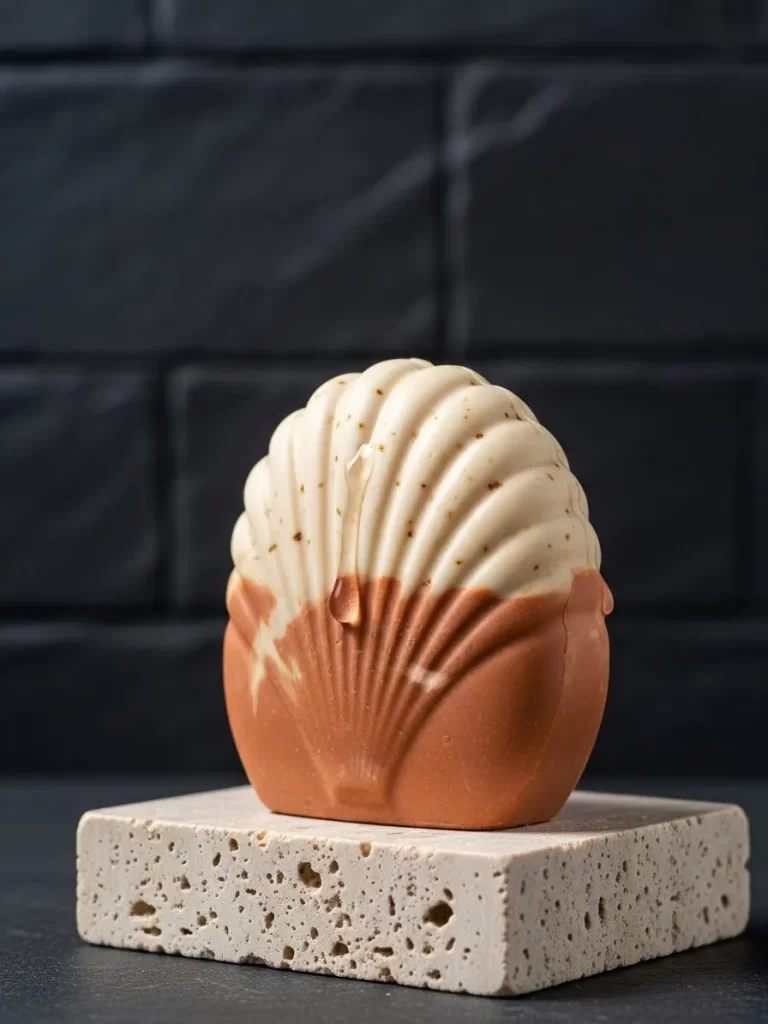
Small details make the biggest difference in a guest bathroom. This artisan soap is sculpted into the shape of a realistic seashell. The two tone design features a creamy white top and a warm terracotta base.
Placing the soap on a stone plinth keeps it dry between uses. It acts as a small sculpture on your vanity until you are ready to use it. This organic shape brings a touch of the ocean to your romantic spa theme.
Handmade soaps often contain natural oils that are better for your skin. This shell soap is almost too beautiful to use but feels wonderful once it lathers. You can display a few together for a coastal look.
Material required list
- One sculpted seashell soap bar
- One small square stone or concrete riser
Equipment required list
- Paper towel
DIY instruction step by step
- Clean your stone riser with a damp paper towel to remove dust.
- Dry the stone completely so the soap does not stick.
- Place the stone riser on the corner of your sink or vanity.
- Position the seashell soap so it stands upright on the stone.
- Turn the detailed side of the shell toward the center of the room.
- Ensure the soap is far enough from the faucet to stay dry.
- Replace the soap once the edges become rounded from use.
- Use a small brush to clean the stone riser every few days.
19 Organized Marble Vanity Tray
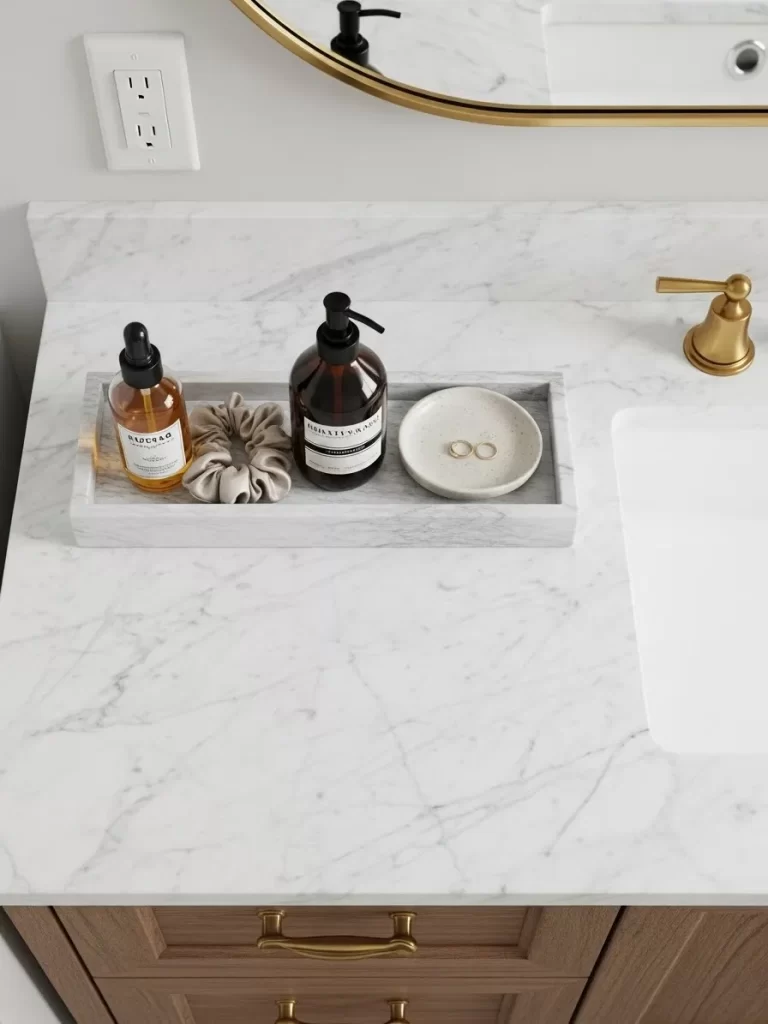
Clutter on the vanity can make a bathroom feel stressed and messy. This long marble tray provides a designated home for your daily essentials. It holds your bottles and jewelry in one place while looking clean and expensive.
Marble is a durable material that handles water and humidity well. The gray veins in the stone add a natural pattern to your white countertop. This tray makes it easy to lift everything at once when you need to clean the sink.
Keeping your most used items on a tray makes them feel like a collection. A small dish for your rings prevents them from falling down the drain. You will feel more calm when your space is organized and beautiful.
Material required list
- One rectangular marble vanity tray
- Small ceramic jewelry dish
- Glass bottles for oils or serums
Equipment required list
- Glass cleaner
- Microfiber cloth
DIY instruction step by step
- Clear all the small items off your bathroom counter.
- Clean the marble tray with a damp cloth and dry it immediately.
- Place the empty tray in the center of your vanity or near the wall.
- Set the ceramic jewelry dish on one end of the tray.
- Arrange your glass serum bottles next to the dish from tallest to shortest.
- Place your hair ties or scrunchies in a neat pile in the middle.
- Check that nothing is hanging over the edge of the marble.
- Enjoy the extra space you have created on your countertop.
20 Amber Crystal Drawer Knobs
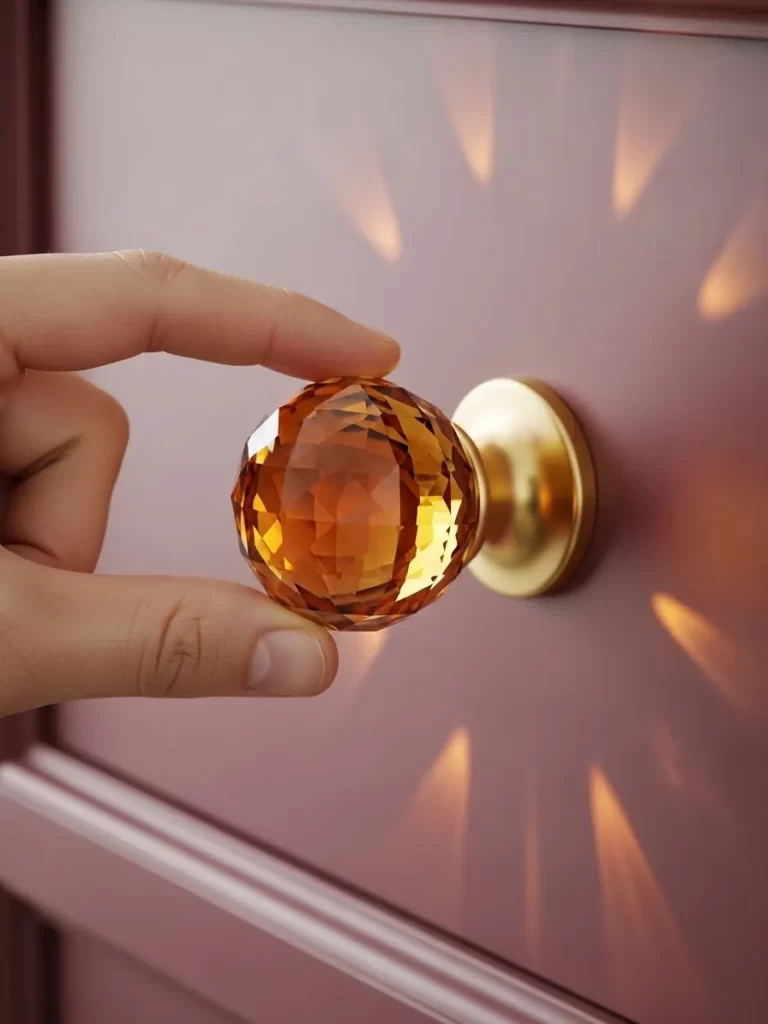
Updating your hardware is the fastest way to make old cabinets look new. These crystal knobs feature a deep amber color that glows when the light hits them. The faceted glass reflects patterns onto your drawer fronts for a magical effect.
Gold bases on the knobs match your other bathroom fixtures perfectly. This small change adds a jewelry like quality to your vanity area. You will enjoy the heavy and high quality feel of the glass every time you open a drawer.
Crystal accents bring a touch of vintage glamour to a modern room. They look stunning against dark or muted cabinet colors like plum or charcoal. This is an affordable swap that makes a massive visual impact.
Material required list
- Set of amber crystal drawer knobs
- Matching screws
Equipment required list
- Screwdriver
- Old towel
DIY instruction step by step
- Open your bathroom drawer and locate the screw on the inside.
- Place an old towel on the floor below the drawer to catch any dropped parts.
- Turn the screw counter clockwise with your screwdriver to remove the old knob.
- Pull the old knob off the front of the drawer.
- Push the new screw through the hole from the inside of the drawer.
- Hold the amber crystal knob against the front of the drawer.
- Turn the knob clockwise onto the screw until it is finger tight.
- Use your screwdriver to tighten the screw the rest of the way.
21 Matte Black Rain Shower
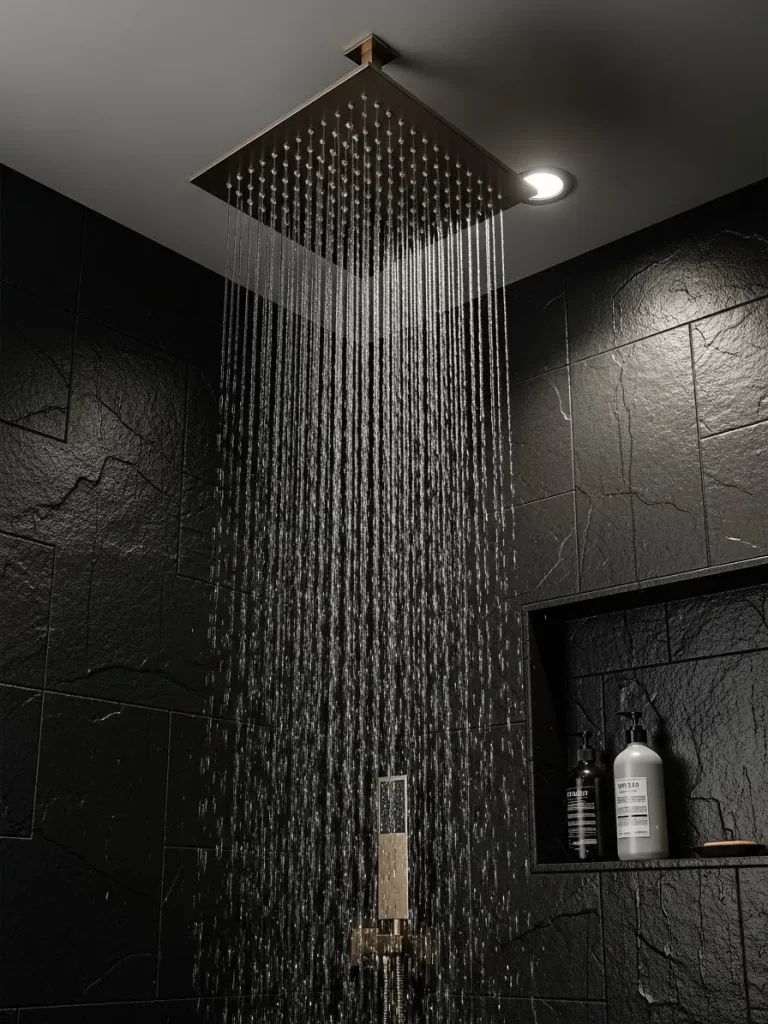
Transform your daily wash into a summer storm experience. This wide rainfall head pours water straight down for a relaxing soak. It looks bold against dark slate tiles and adds a modern edge to your room.
The large square design provides wide coverage to warm your whole body at once. You will notice how much quieter the water flows compared to old fixtures. This change brings a sleek architectural feel to your shower.
Changing a shower head is one of the simplest home upgrades you can do. It improves your water pressure and saves on your monthly utility bill. You will feel like you are in a five star hotel every morning.
Material required list
- One matte black square rainfall shower head
- Roll of white plumbers tape
Equipment required list
- Adjustable wrench
- Old toothbrush
- Thick towel
DIY instruction step by step
- Turn off the water supply to the bathroom before you begin.
- Drape a thick towel over the shower drain to catch any small parts.
- Grip the old shower head with your wrench and turn it counter clockwise.
- Remove the old head and clean the pipe threads with an old toothbrush.
- Wrap plumbers tape clockwise around the pipe threads three times.
- Screw the new rainfall head onto the pipe by hand first.
- Use the wrench to tighten the connection another half turn.
- Turn on the water and check for any leaks around the pipe.
22 Woven Wicker Slipper Basket
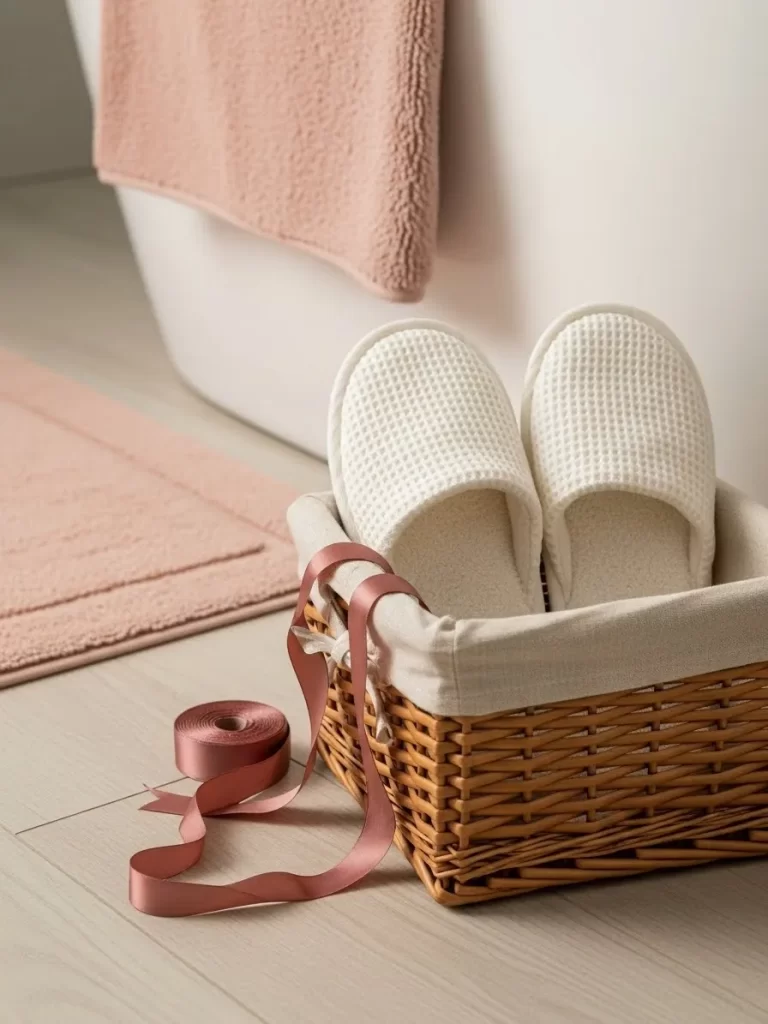
Keep your feet warm and clean with a dedicated spot for your spa slippers. This small wicker basket sits neatly on the floor near the bathtub. A soft fabric liner keeps the wicker from catching on the delicate fabric of your shoes.
Adding a silk ribbon to the handle brings a touch of romance to the look. It makes the basket feel like a gift waiting for you at the end of the day. This simple storage solution keeps your bathroom floor looking tidy and organized.
Soft white slippers offer the ultimate comfort after a long hot soak. Placing them in a basket ensures they are always dry and ready to wear. You will love the cozy feeling of slipping into them every single evening.
Material required list
- One small wicker basket with a fabric liner
- One pair of white waffle weave slippers
- One yard of dusty rose silk ribbon
Equipment required list
- Fabric scissors
DIY instruction step by step
- Wipe the inside of your new basket to remove any loose wicker bits.
- Place the fabric liner inside the basket and smooth out the edges.
- Slide your white slippers into the basket so the toes point upward.
- Cut a length of silk ribbon using your fabric scissors.
- Thread the ribbon through the weave on the side of the basket.
- Tie a large decorative bow on the outside of the wicker.
- Trim the ends of the ribbon at an angle to prevent fraying.
- Set the basket on the floor next to your bath mat or tub.
23 Eucalyptus Shower Bundle
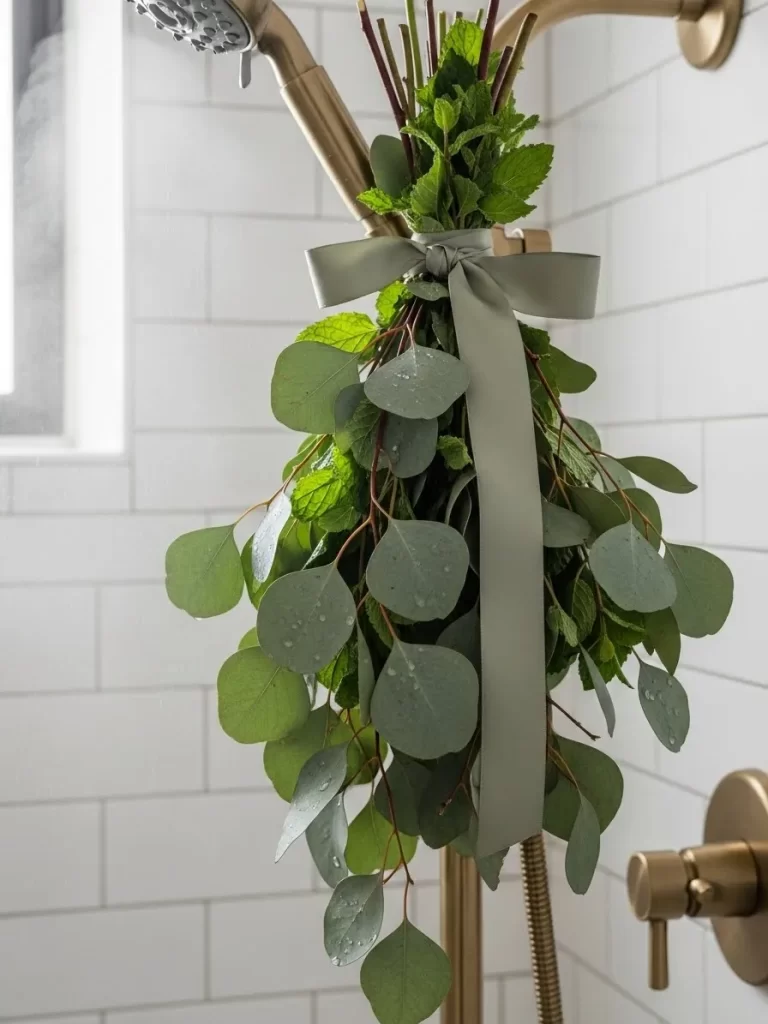
Bring the scent of a fresh forest into your bathroom with a bunch of greenery. This bundle of eucalyptus and mint hangs directly from your shower arm. The steam from the water releases the natural oils for a refreshing aroma.
Tying the branches with a simple ribbon keeps them organized and looking pretty. This natural decor helps clear your mind and soothe your breathing as you wash. It is an affordable way to add life and color to white tiled walls.
Fresh herbs make the air feel crisp and clean without using chemicals. You can enjoy the scent for several weeks before the branches need to be replaced. Your shower will become your favorite place to wake up in the morning.
Material required list
- Five fresh eucalyptus branches
- Three sprigs of fresh mint
- One yard of gray or green ribbon
Equipment required list
- Garden shears or sharp scissors
- Step stool
DIY instruction step by step
- Lay your greenery on a table and remove any leaves from the bottom four inches.
- Gather the branches together so the tops are at the same height.
- Wrap your ribbon tightly around the bare stems multiple times.
- Tie a double knot to ensure the branches stay together when wet.
- Leave a long loop of ribbon at the top for hanging.
- Use your step stool to reach the shower arm behind the shower head.
- Tie the ribbon loop over the pipe so the leaves hang downward.
- Ensure the leaves are not blocking the water flow from the head.
24 Tall Lidded Woven Hamper
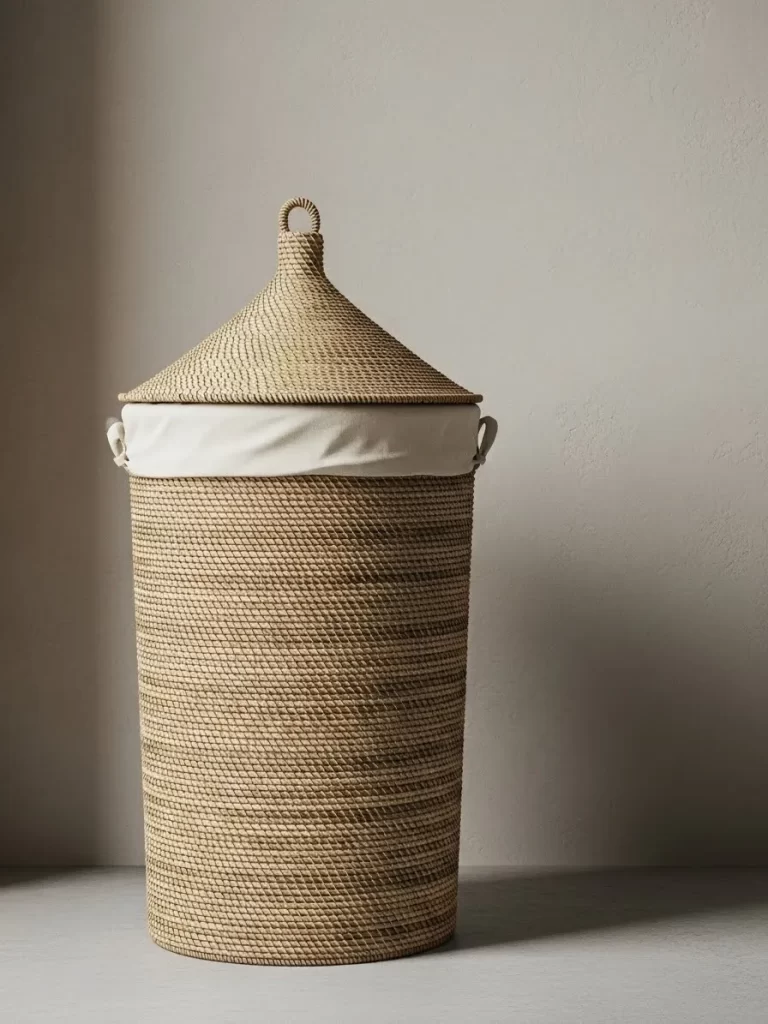
Hide your laundry in style with a tall woven basket. This hamper features a pointed lid that adds height and interest to a plain corner. A white fabric liner protects your clothes and makes it easy to carry them to the wash.
Natural fibers bring a warm and organic texture to your bathroom design. The sturdy weave ensures the basket keeps its shape even when it is full. This piece acts as a functional sculpture that keeps your floor clear of clutter.
Using a hamper with a lid keeps the room looking clean and polished. It prevents guests from seeing your dirty linens when they use the bathroom. You will appreciate how this one item improves the overall look of the space.
Material required list
- One tall woven basket with a pointed lid
- One matching fabric hamper liner
Equipment required list
- None
DIY instruction step by step
- Find an empty corner in your bathroom away from the direct spray of the shower.
- Wipe the floor area to remove any dust or moisture before placing the basket.
- Open the lid of the hamper and set it aside for a moment.
- Push the fabric liner into the basket and hook it over the rim.
- Smooth out the liner so it sits flat against the bottom of the weave.
- Put the pointed lid back onto the hamper to check the fit.
- Use the basket to store your used towels and clothes every day.
- Lift the liner out by the handles when it is time to do laundry.
25 Glass Hurricane Wall Sconce
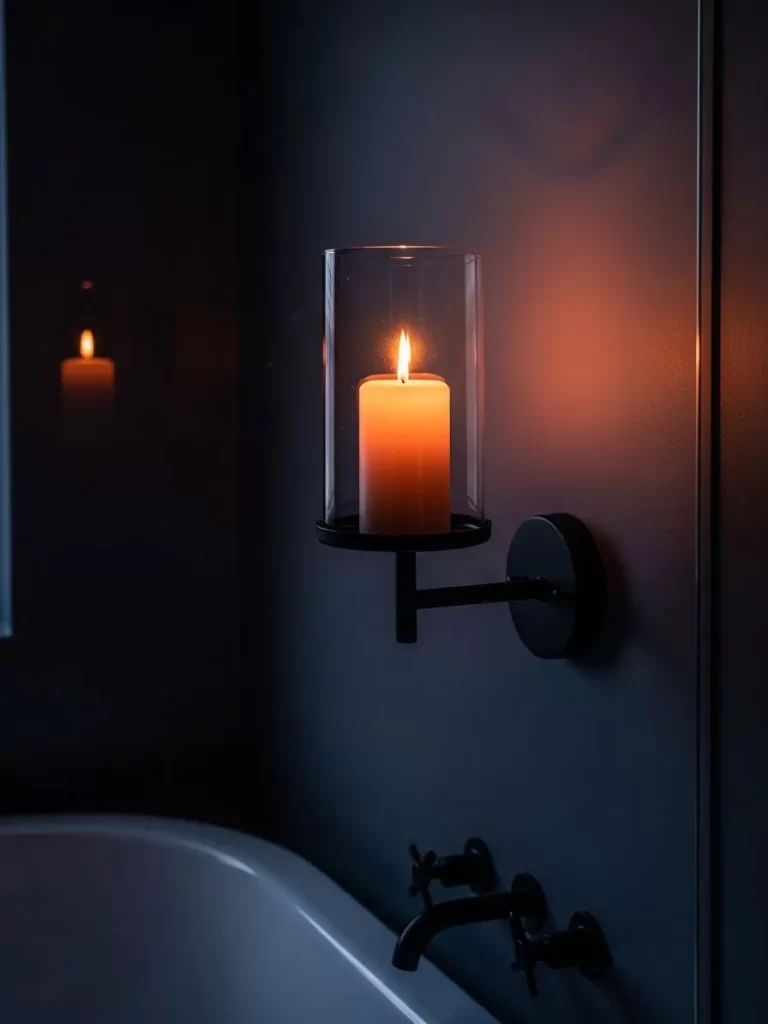
Candlelight creates the most romantic atmosphere for a relaxing night at home. This wall mounted sconce features a black metal base and a clear glass cylinder. It protects the flame from drafts so you gain a steady and calming glow.
Mounting candles on the wall saves precious space on your vanity or tub ledge. The reflection of the flame against a dark wall adds a sense of mystery and depth. This hardware update makes your bathroom feel like an ancient spa.
Choose a tall pillar candle to ensure the light lasts through many long baths. The glass hurricane is easy to remove for cleaning or replacing the wax. You will love the peaceful mood this single light source creates.
Material required list
- One wall mounted candle sconce with glass hurricane
- One white unscented pillar candle
- Wall anchors and screws
Equipment required list
- Power drill
- Screwdriver
- Level tool
- Pencil
DIY instruction step by step
- Decide on the best wall for your candle that is away from curtains.
- Hold the metal sconce base against the wall and mark the holes with a pencil.
- Use your level to ensure the marks are perfectly straight.
- Drill holes at your marks and push the plastic anchors into the wall.
- Screw the metal base into the anchors until it is very firm.
- Place your pillar candle into the center of the metal holder.
- Slide the glass hurricane over the candle and onto the base.
- Light the candle carefully using a long match or a lighter.
26 Woven Toilet Tank Tray

The space on top of a toilet tank is often wasted or looks cluttered. This shallow woven tray creates a neat and intentional area for your extra supplies. It holds a candle and a gold spray bottle while hiding the cold porcelain.
Woven textures add a rustic charm to a part of the room that is usually ignored. A small bunch of white flowers brings a fresh and lively feel to the display. This setup makes your bathroom look curated and thoughtful for every guest.
Decorative trays help keep small items from sliding off the curved tank lid. You can organize your essentials so they are always within reach but look beautiful. Your bathroom will feel much more cohesive with this simple addition.
Material required list
- One rectangular woven tray
- One scented candle in a red glass jar
- One gold metal spray bottle
- One small sprig of dried baby breath
Equipment required list
- None
DIY instruction step by step
- Clear the top of your toilet tank and wipe it dry with a cloth.
- Place the woven tray in the center of the tank lid.
- Set the red glass candle on the left side of the tray.
- Position the gold spray bottle next to the candle for a bit of shine.
- Lay the sprig of baby breath across the front of the items.
- Adjust the items until they look balanced and pleasing to the eye.
- Light the candle whenever you want to refresh the air in the room.
- Ensure the tray is not blocking the flush button on the top of the tank.
27 Textured Grasscloth Wallpaper
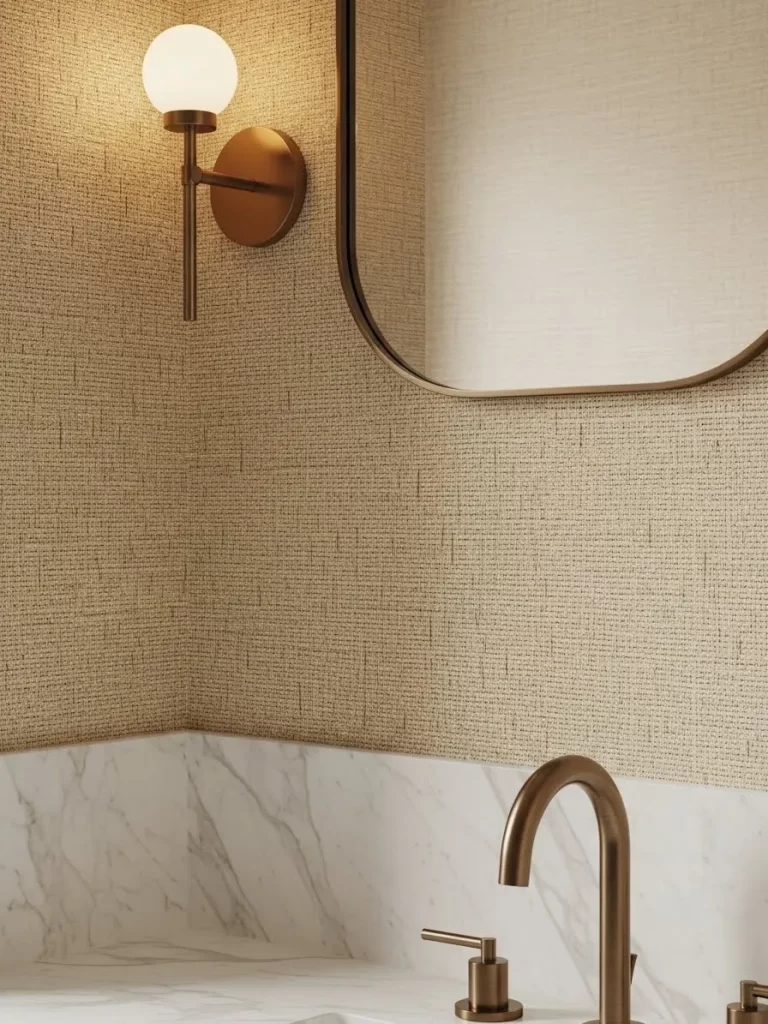
Walls with texture feel much warmer and more luxurious than flat paint. This grasscloth wallpaper adds a subtle pattern and a natural beige tone to the room. It creates a soft backdrop that makes your gold fixtures stand out.
A round globe sconce provides a modern contrast to the organic wall covering. Lighting like this creates a soft wash of light that highlights the weave of the paper. Your bathroom will feel cozy and expensive with this simple textile update.
Neutral colors on the walls allow you to change your decor throughout the year. This paper is durable and brings a high end designer look to a small space. You will enjoy the tactile feel of the walls every time you enter.
Material required list
- Rolls of grasscloth wallpaper
- Wallpaper paste
- One gold wall sconce with a globe bulb
Equipment required list
- Measuring tape
- Utility knife
- Wallpaper brush
- Level tool
DIY instruction step by step
- Clean your walls and remove any old paint or loose debris.
- Measure the height of your wall and cut a strip of paper with your knife.
- Apply wallpaper paste to the back of the strip using a large brush.
- Use your level to draw a straight vertical line on the wall as a guide.
- Press the paper onto the wall and smooth it out with your brush.
- Trim the excess paper at the ceiling and floor with your utility knife.
- Repeat this process until the entire wall area is covered.
- Install your gold globe sconce over the paper according to the instructions.
28 Embroidered Floral Fringe Towel
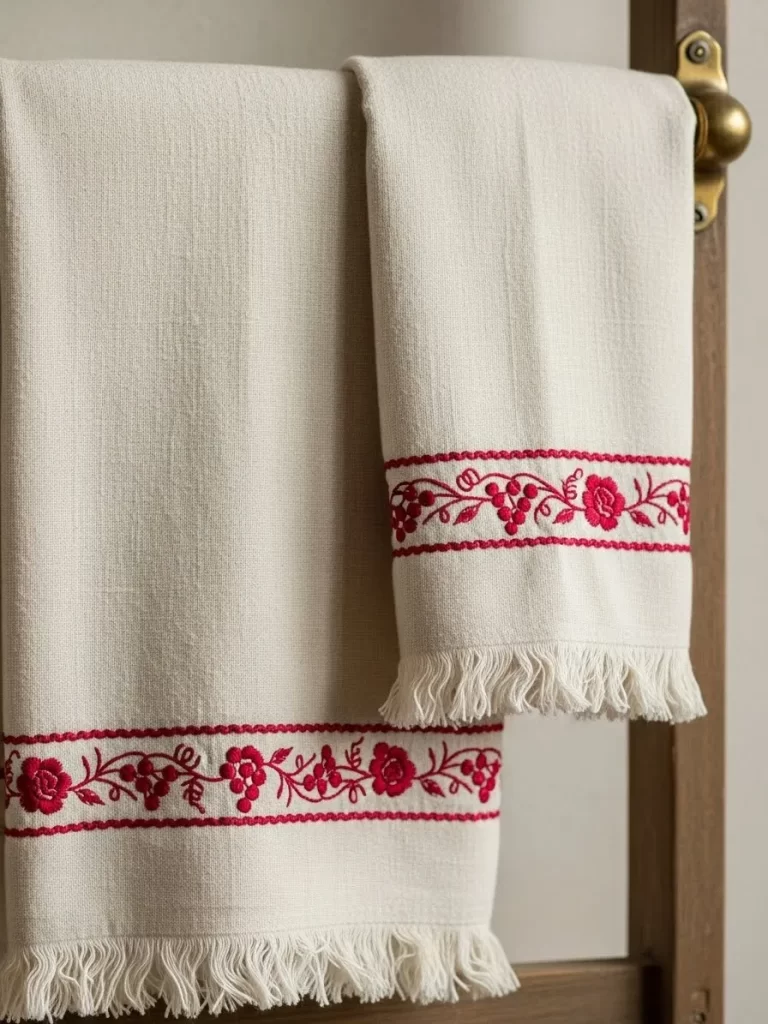
Details like embroidery make a standard towel feel like a vintage find. This cream cotton towel features a delicate red floral pattern along the border. Soft white fringe adds a bohemian touch that feels light and airy.
Hanging these towels on a wooden ladder provides a relaxed and stylish look. The red thread adds a pop of color that celebrates the season of love. These linens are soft against your skin and look beautiful even when they are just hanging.
Mixing different textures like cotton and embroidery adds depth to your room. These towels are a simple way to bring a touch of traditional charm to a modern space. You will appreciate the extra care put into these decorative pieces.
Material required list
- One cream cotton towel with red embroidery
- One wooden towel ladder or rack
Equipment required list
- None
DIY instruction step by step
- Wash your embroidered towel on a gentle cycle to soften the fabric.
- Dry the towel on low heat to protect the delicate fringe.
- Lay the towel flat on a table with the embroidery facing upward.
- Fold the towel in half lengthwise so the floral pattern is centered.
- Drape the towel over the middle rung of your wooden ladder.
- Adjust the fabric so the fringe hangs evenly at the bottom.
- Smooth out any wrinkles with your hands for a clean look.
- Place the ladder against a dry wall near your sink or tub.
29 Crystal Water Decanter Set
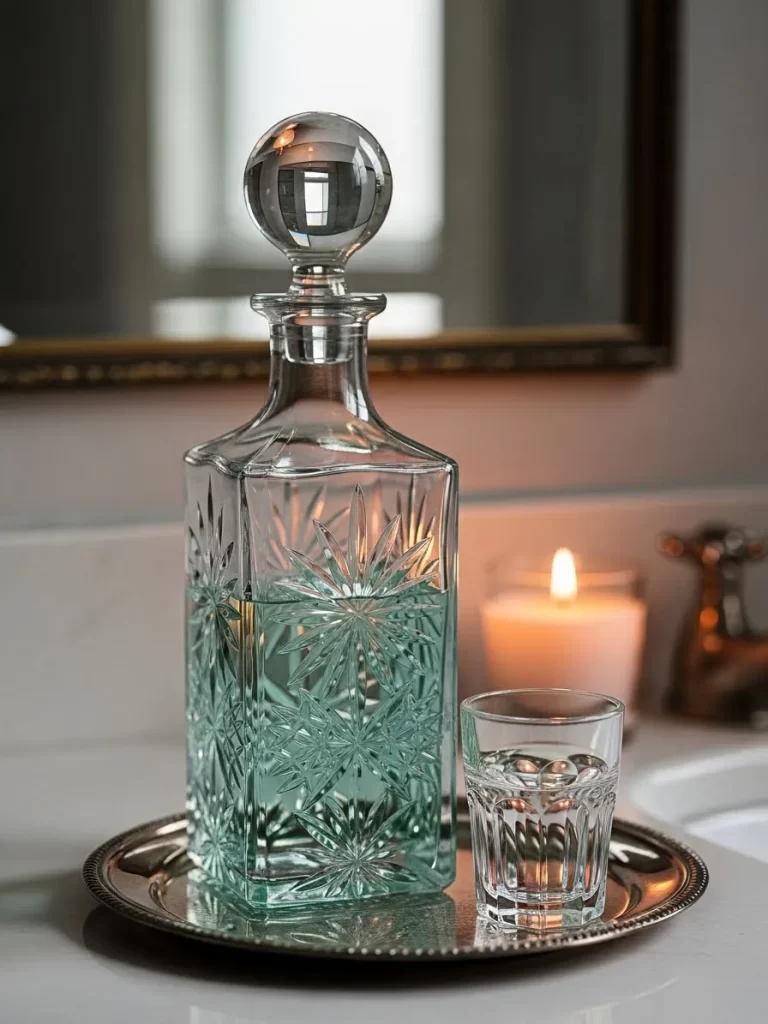
Staying hydrated is an important part of any wellness and spa routine. This heavy crystal decanter allows you to keep fresh water on your vanity. A matching glass serves as a lid to keep the water clean and dust free.
Placing the set on a silver tray adds a layer of shine to your countertop. The faceted glass catches the light from your candles and creates a sparkling effect. This setup turns a simple drink of water into a luxury ritual.
Using glass instead of plastic bottles is much better for the environment. It also looks far more sophisticated and intentional in a romantic bathroom. You will feel more pampered with this beautiful set within reach.
Material required list
- One crystal water decanter with a matching glass
- One small silver or chrome serving tray
- Fresh filtered water
Equipment required list
- Glass cleaner
- Microfiber cloth
DIY instruction step by step
- Wash your crystal decanter and glass with warm soapy water.
- Polish the glass with a microfiber cloth until it is streak free.
- Clean your silver tray and place it on a dry spot on your vanity.
- Fill the decanter with cold filtered water up to the neck.
- Place the decanter in the center of the silver tray.
- Turn the matching glass upside down and place it over the decanter opening.
- Ensure the set is stable and away from the edge of the counter.
- Refill the water every morning to keep it fresh and cool.
30 Modern Bluetooth Speaker Accent
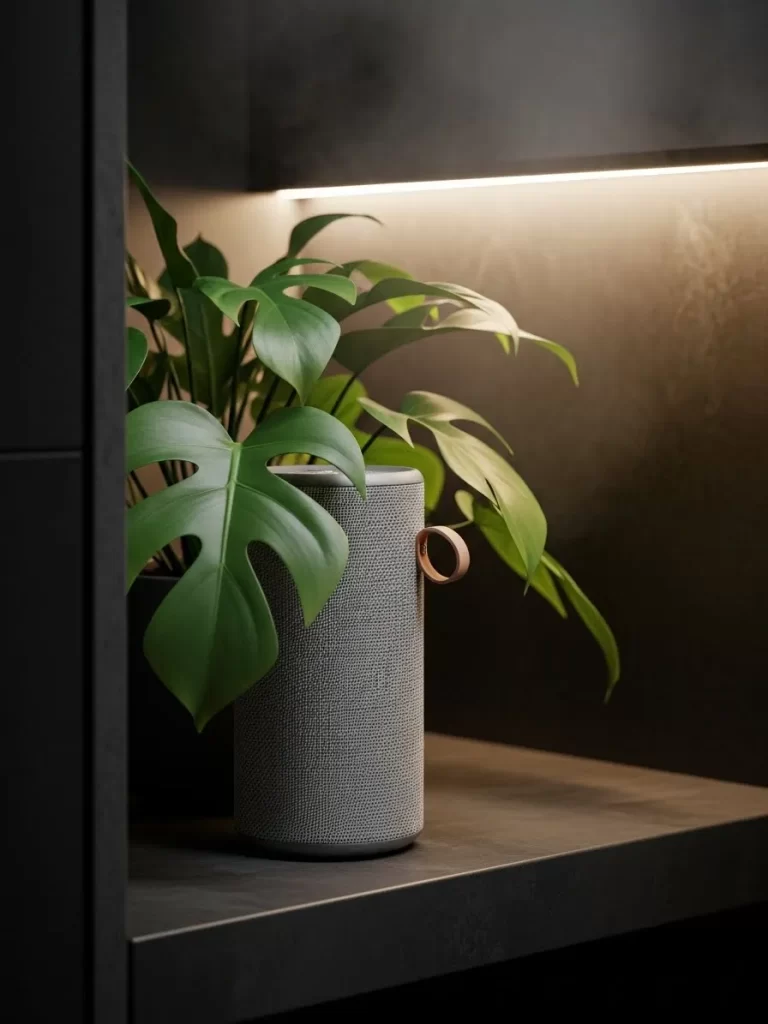
Music helps to drown out the noise of the world during your spa time. This sleek gray speaker blends perfectly into a modern bathroom shelf. A large green leaf from a nearby plant adds a touch of life to the technology.
Soft lighting from a built in shelf light makes the speaker look like part of the wall. You can play calming nature sounds or romantic music while you soak in the tub. This small device makes a huge impact on the overall vibe of the room.
Choosing a waterproof speaker ensures that humidity does not damage the electronics. It is easy to hide behind a plant if you want a more minimalist look. You will love the convenience of controlling your mood with just one touch.
Material required list
- One portable bluetooth speaker in a neutral color
- One large potted Monstera or Philodendron plant
Equipment required list
- Smartphone or tablet
- Charging cable
DIY instruction step by step
- Charge your speaker fully before placing it in the bathroom.
- Find a high shelf that is away from direct water splashes or steam.
- Wipe the shelf clean and place your potted plant on one side.
- Set the speaker next to the plant pot so the leaves partially cover it.
- Turn on the speaker and pair it with your smartphone via bluetooth.
- Test the volume to ensure it is loud enough to hear over the running water.
- Use the speaker to play a relaxing spa playlist during your next bath.
- Plug the speaker in to charge once a week to keep it ready for use.
31 Mauve Velvet Bench
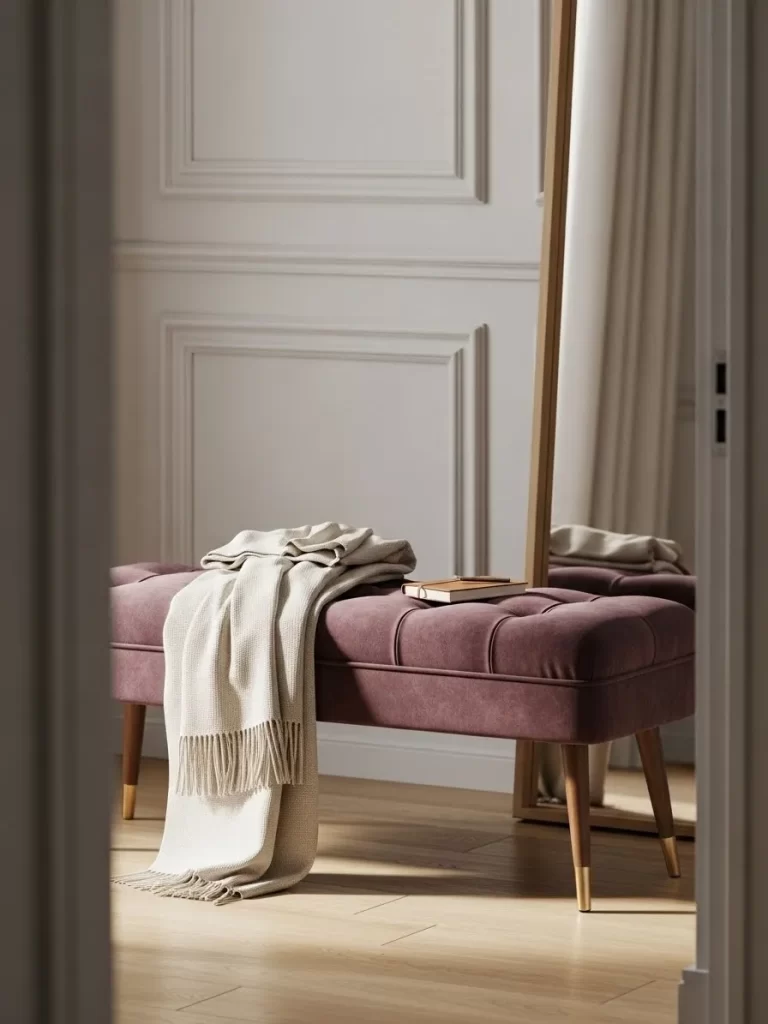
Large bathrooms often feel empty without a piece of statement furniture. This plush mauve bench features deep tufting and gold tipped legs for a royal look. A soft beige throw blanket adds an extra layer of warmth to the seating area.
Placing a bench near the window creates a beautiful spot to relax while you wait for the tub to fill. It provides a convenient place to set your robe or a book. This specific color adds a sophisticated romance to your Valentine theme.
Furniture in the bathroom makes the space feel more like a living area. The velvet fabric is soft to the touch and looks rich under natural light. You will appreciate the added comfort this piece brings to your morning routine.
Material required list
- One tufted velvet bench
- One textured beige throw blanket
- One small leather journal
Equipment required list
- None
DIY instruction step by step
- Measure your floor space to ensure the bench does not block any pathways.
- Unpack the bench and attach the gold legs using the provided screws.
- Tighten the screws until the legs are firm and the bench does not wobble.
- Place the bench in a dry corner or under a large mirror.
- Fold your throw blanket in half lengthwise.
- Drape the blanket over one side of the bench at a slight angle.
- Place the leather journal on top of the blanket to anchor it.
- Check that the bench is level on your bathroom tile.
32 Tiered Marble Skincare Stand
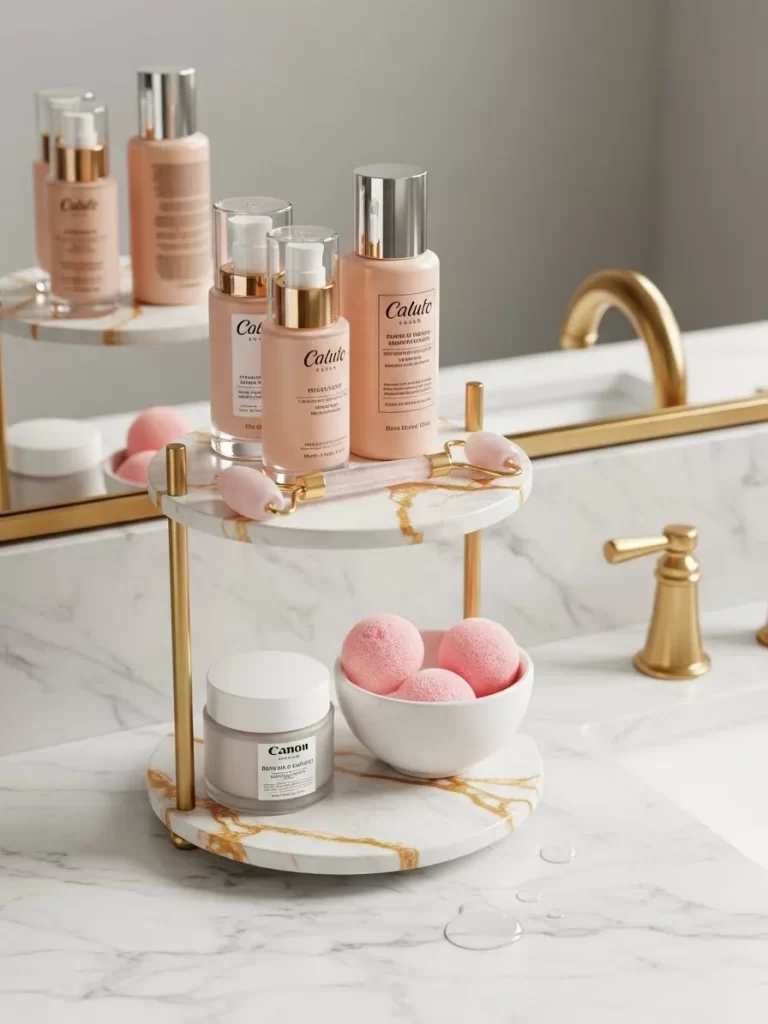
Display your beauty products like a work of art with a tiered stand. This marble and gold organizer features two levels to hold your serums and creams. A pink rose quartz face roller sits on the top shelf for a touch of luxury.
Using a tiered stand saves valuable space on your vanity countertop. It organizes your skincare routine so you can find every bottle easily. The white marble surface stays cool and feels expensive against your fingertips.
Matching your skincare bottles to the decor creates a unified look. This setup turns your daily hygiene into a pampering session. You will feel more motivated to care for your skin when the products look this beautiful.
Material required list
- Two tier marble and gold vanity stand
- Set of pink and white skincare bottles
- Rose quartz face roller
- Small ceramic bowl
Equipment required list
- Microfiber cloth
DIY instruction step by step
- Assemble the vanity stand by screwing the gold pillars into the marble plates.
- Wipe both marble surfaces with a dry microfiber cloth to remove dust.
- Place the stand in the center of your vanity or near the sink.
- Arrange your tallest skincare bottles on the bottom tier.
- Set your smaller jars and the ceramic bowl on the top tier.
- Place the rose quartz roller inside the ceramic bowl.
- Fill the bowl with pink bath bombs or cotton rounds.
- Group items by height to create a balanced and stylish look.
33 Woven Storage Baskets
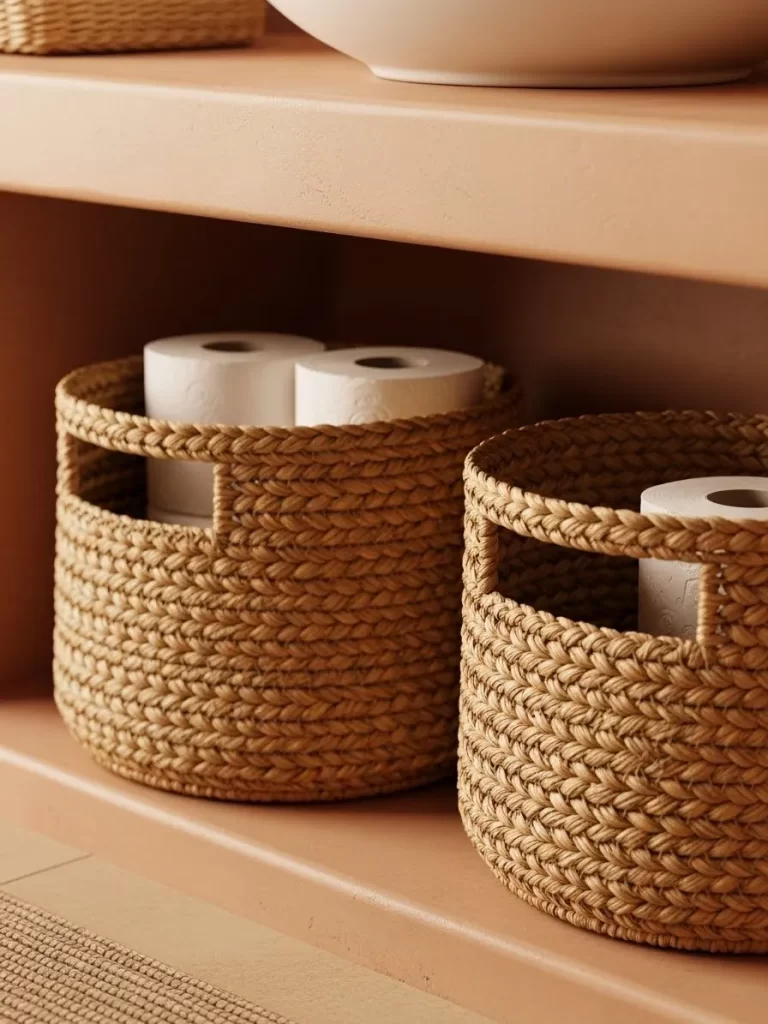
Hide your extra paper rolls and cleaning supplies in textured baskets. These round woven containers feature built in handles for easy lifting. The warm honey tone of the wicker complements a terracotta shelf beautifully.
Open shelving looks much cleaner when you use matching baskets for organization. They prevent small items from falling over and create a sense of order. This natural material brings a cozy and organic feel to the room.
Woven baskets are durable and handle the humidity of a bathroom well. You can store everything from towels to hair tools inside them. Your storage area will become a feature of the room instead of something to hide.
Material required list
- Set of three round woven baskets
- Extra rolls of white bath tissue
Equipment required list
- None
DIY instruction step by step
- Clear off your bathroom shelves and wipe them clean.
- Unpack your woven baskets and shake out any loose fibers.
- Place two rolls of bath tissue inside each basket so they sit upright.
- Slide the baskets onto your shelf so the handles face the room.
- Space the baskets evenly across the length of the shelf.
- Store smaller items in the back of the baskets to keep the front looking tidy.
- Use the bottom shelf for the heaviest items to keep the unit stable.
- Enjoy the clean and organized look of your new storage solution.
34 Pink Silk Sleep Mask
Indulge in a moment of peace with a soft silk sleep mask. This mauve accessory rests on a marble ledge next to a fresh rose. The smooth fabric is gentle on your skin and helps you relax after a hot evening bath.
Silk is a natural fiber that breathes well and feels cool against the face. Keeping a mask in the bathroom reminds you to take a break from screens. This small item adds a layer of luxury to your self care ritual.
Pairing the mask with matching towels creates a cohesive spa vibe. It is the final touch for a truly romantic and restful night. You will wake up feeling refreshed and pampered every single time.
Material required list
- One mauve silk sleep mask
- One fresh rose bloom
Equipment required list
- None
DIY instruction step by step
- Hand wash your silk sleep mask in cool water with gentle soap.
- Lay the mask flat on a towel to air dry away from direct sunlight.
- Clean a small area of your marble vanity or tub ledge.
- Fold the silk mask neatly in half so the elastic strap is hidden.
- Place the mask on the dry marble surface.
- Set a single fresh rose bloom next to the mask.
- Keep this set ready for when you finish your nighttime bath.
- Store the mask in a small silk pouch when you are not using it.
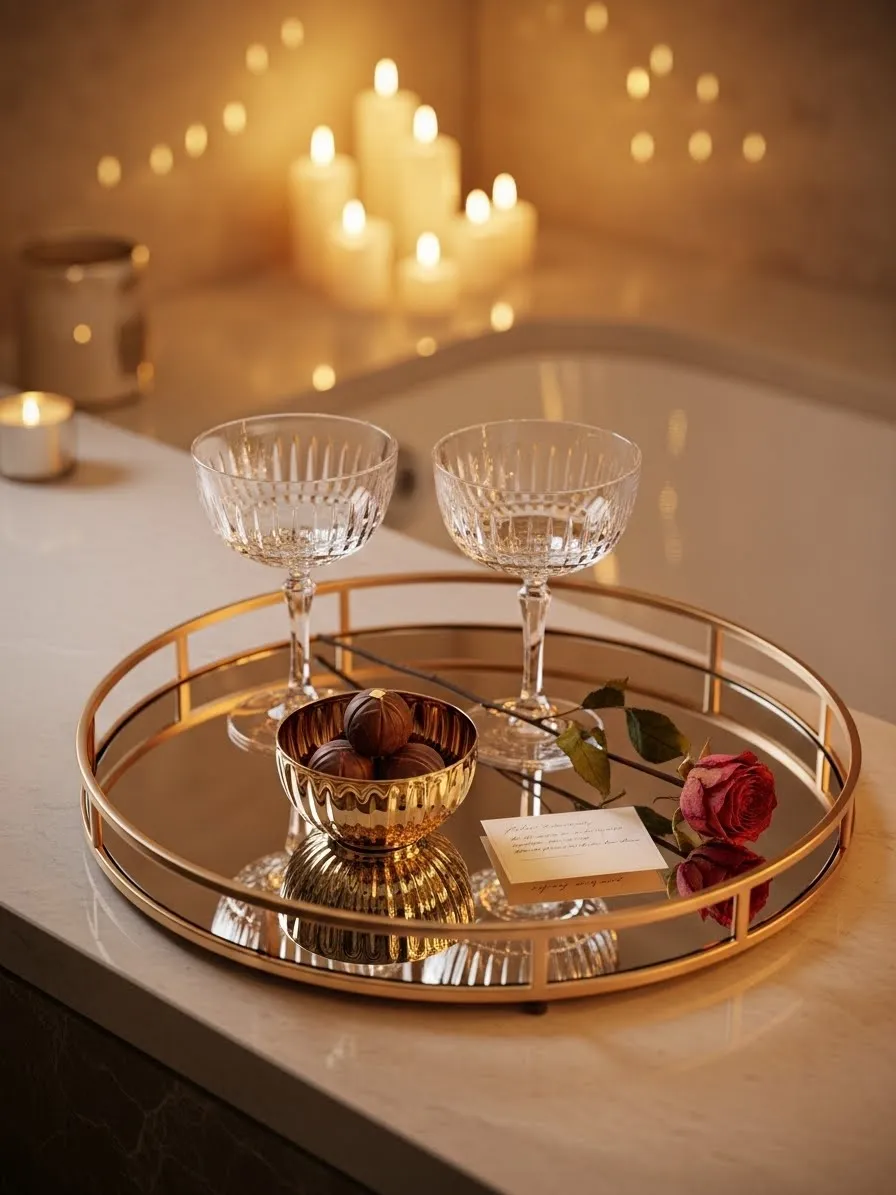
35 Valentine Celebration Tray

Celebrate the season of love with a romantic tray for two. This gold mirrored tray holds two crystal champagne glasses and a bowl of chocolates. A single red rose adds a classic touch of passion to the display.
Mirrored surfaces reflect the glow of nearby candles for extra sparkle. This setup is the ultimate way to surprise a partner after a long day. It turns your bathroom into a private and high end lounge for an evening.
Small details like a handwritten note make the moment feel personal. The contrast between the gold metal and the red rose is stunning. You will create a memory that lasts much longer than the chocolates.
Material required list
- One round gold mirrored tray
- Two crystal champagne glasses
- One gold bowl filled with dark chocolates
- One long stem red rose
- One small handwritten note card
Equipment required list
- Glass cleaner
DIY instruction step by step
- Polish the mirrored tray with glass cleaner until it is shiny.
- Place the tray on a stable spot on your vanity or a stool.
- Set the two champagne glasses on the back half of the tray.
- Position the bowl of chocolates in the front left corner.
- Lay the red rose across the center of the tray at a slight angle.
- Tuck the note card under the stem of the rose.
- Fill the glasses with your favorite sparkling drink.
- Light several white pillar candles around the tray to finish the scene.
Key Takeaways
- Lighting serves as the foundation for a romantic mood.
- Soft textiles like velvet and waffle weave add necessary comfort.
- Natural elements such as eucalyptus and roses bring life to the space.
- Organization through trays and canisters removes visual stress.
- Scented candles and diffusers engage your senses for deep relaxation.
Creating a romantic bathroom vibe is about choosing elements that spark joy and relaxation. You do not need a huge budget to make a significant impact on your home. Small swaps lead to a more intentional and beautiful life.
Take the time to enjoy these new additions during your evening routine. Your bathroom should be a place where you feel pampered and calm. These ideas help you celebrate love in the most private corner of your house.
Sharing these updates with a partner makes the experience even better. Every detail works together to build a sanctuary for two. Start your transformation today and enjoy the results throughout the month.