
Winter is finally fading, yet your home might still feel trapped under a layer of drab, heavy decor. That stale energy of the colder months keeps your space feeling basic, uninspired, and far from the bright vitality of spring. The good news is that a major renovation is unnecessary to introduce fresh, vibrant color.

You do not need to wait until April showers bring May flowers to start your seasonal refresh. Small, intentional swaps are the secret to transforming a room instantly. Focus on textiles, accessories, and natural elements to inject life into every corner of your house.
We have compiled thirty-five simple, high-impact changes that trade heavy tones for light, airy palettes. From swapping out dark bath towels to introducing zesty citrus displays, these moves use color and texture to mimic the feeling of a blooming garden. Get ready to banish the boring and welcome the best season early this year.
1. Pastel Linen Cushion Covers
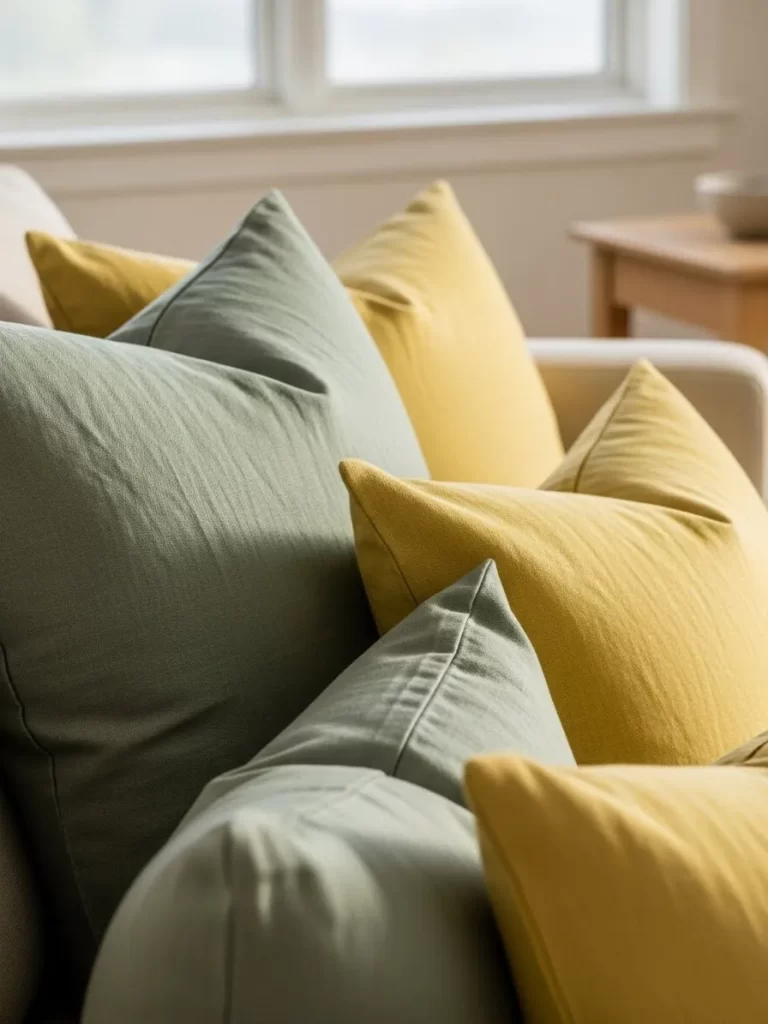
Dull living rooms often feel heavy and stagnant during the transition between seasons. These soft sage green and mustard yellow cushions provide an instant remedy for a tired sofa. The muted tones mimic the first buds of spring without feeling overwhelming or loud.
Textured linen fabric adds a layer of sophisticated comfort to your seating area. Light catches the weave of the material to create a warm, inviting atmosphere. This simple addition breathes fresh life into neutral furniture by introducing organic colors found in nature.
Switching out dark winter pillows for these airy alternatives makes your space feel larger and brighter. You can mix and match these specific shades to create a balanced visual flow. It is a cost-effective way to update your home aesthetic without buying new furniture.
Material Required List
- Two yards of linen or cotton blend fabric in sage green
- Two yards of linen or cotton blend fabric in mustard yellow
- Matching all-purpose polyester thread
- High-quality pillow inserts (20 by 20 inches)
- Fabric marking pen or tailor’s chalk
Equipment Required List
- Sharp fabric scissors or a rotary cutter
- Sewing machine
- Measuring tape or a long ruler
- Sewing pins or fabric clips
- Iron and ironing board
DIY Instruction Step by Step
- Measure Your Fabric: Lay your linen flat on a clean table and use your measuring tape to mark a square that is 21 inches by 21 inches. This includes an extra inch for the edges where you will sew.
- Cut the Panels: Use your fabric scissors to carefully cut two squares of the same size for every pillow you want to make. Ensure the edges are straight so the cushion looks professional.
- Pin the Pieces: Place two squares together with the colorful “good” sides facing each other. Push sewing pins through the edges every three inches to keep the fabric from sliding.
- Sew the Three Sides: Place the fabric under the sewing machine needle and sew along three sides using a straight stitch. Leave a half-inch gap between the needle and the edge of the fabric.
- Leave an Opening: Start sewing the fourth side but stop after about three inches. Leave a large hole in the middle of this side so you can fit the pillow insert inside later.
- Turn and Press: Reach through the hole and pull the fabric inside out so the bright color is now on the outside. Use your iron to flatten the seams so the edges look crisp and sharp.
- Stuff the Cover: Fold your pillow insert in half and slide it through the opening. Wiggle the corners of the insert until they fill the corners of your new linen cover.
- Close the Gap: Fold the raw edges of the opening inward so they stay hidden. Use a needle and thread to sew the small hole shut with tiny, invisible stitches to finish your project.
2. Serene Sky Blue Bedding
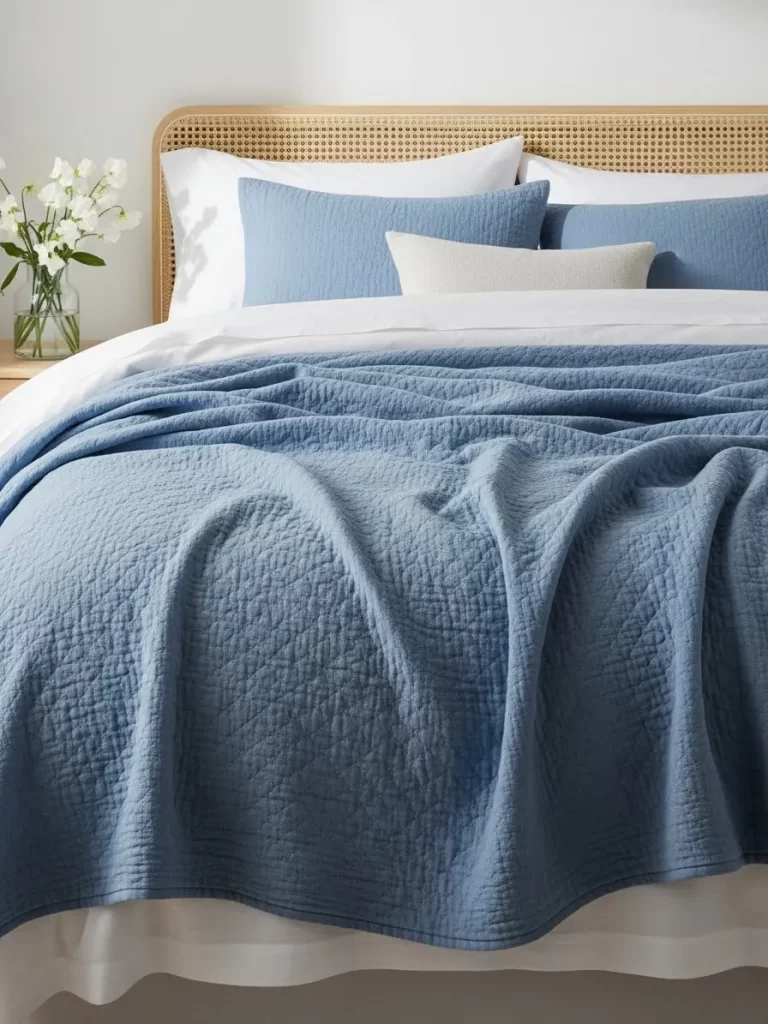
Heavy winter duvets often make a bedroom feel cramped and dark. This sky blue quilted coverlet offers a refreshing change that mirrors a clear morning. The cool tone brings a sense of calm to your sleeping sanctuary.
Subtle stitched texture adds visual depth without cluttering the room. Soft cotton fabric allows your skin to breathe as the nights grow warmer. It pairs beautifully with crisp white sheets for a clean appearance.
Introducing this soft blue hue helps lower the visual temperature of a room. It creates a serene backdrop that makes waking up feel more energetic. This simple fabric swap transforms the most important room in your home into a bright retreat.
Material Required List
- 5 yards of blue cotton fabric
- 5 yards of thin cotton batting
- 5 yards of backing fabric
- High-quality blue thread
- Fabric marking pen
Equipment Required List
- Sewing machine
- Large flat floor space
- Quilting pins
- Long metal ruler
- Sharp fabric scissors
DIY Instruction Step by Step
- Layer the Fabric: Spread your backing fabric on a clean floor with the colorful side facing down. Place the cotton batting on top, followed by your blue top fabric facing up.
- Pin the Layers: Smooth out all wrinkles from the center toward the edges. Use quilting pins every four inches across the entire surface to keep the layers from shifting.
- Mark the Pattern: Use a long ruler and a fabric marker to draw straight diagonal lines across the top. Space these lines two inches apart to create a diamond pattern.
- Sew the Grid: Stitch along your marked lines starting from the center and moving toward the edges. This technique prevents the fabric from bunching up in one direction.
- Trim the Edges: Cut away any excess batting or uneven fabric from the sides once the quilting is finished. Ensure all four corners are perfectly square.
- Finish the Border: Sew long strips of fabric around the raw edges of your quilt. This hides the messy internal layers and gives your bedding a polished look.
3. Zesty Citrus Centerpiece
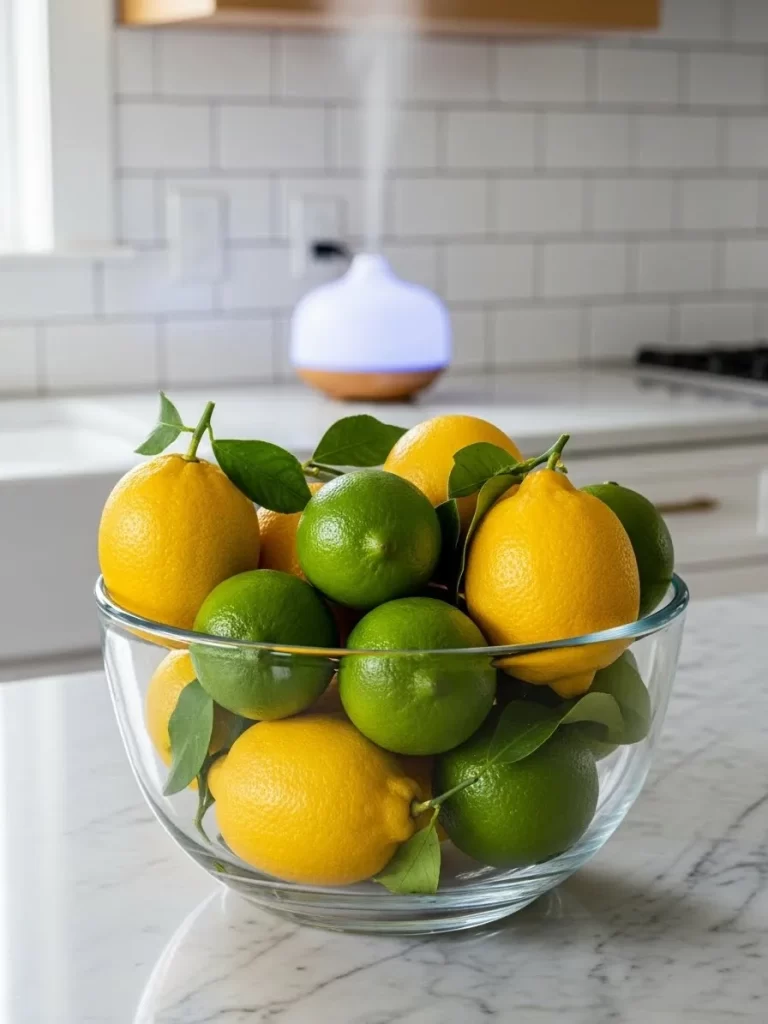
Kitchens often lack color when fruit is hidden away in the dark pantry. A clear glass bowl filled with bright lemons and limes serves as a functional piece of art. The sharp contrast between sunny yellow and deep green creates an energetic focal point.
Citrus fruits naturally signal the arrival of warmer weather and fresh garden flavors. Placing this display on a marble countertop adds a touch of organic luxury to the heart of the home. The glossy skins reflect light to make the entire room feel more vibrant.
This swap requires no permanent changes and takes only minutes to assemble. It fills the air with a faint, clean scent that beats any artificial room spray. Using real fruit ensures your decor remains grounded and authentic for the season.
Material Required List
- Large clear glass bowl
- 10 fresh yellow lemons
- 10 fresh green limes
- Small bunch of fresh green leaves
Equipment Required List
- Gentle dish soap
- Microfiber cleaning cloth
- Glass cleaner
DIY Instruction Step by Step
- Clean the Glass: Wash your glass bowl with warm soapy water to remove any dust. Dry it thoroughly with a microfiber cloth so the glass sparkles under your kitchen lights.
- Prep the Fruit: Rinse your lemons and limes under cool water to remove any grocery store wax. Pat them dry until the skins are shiny and bright.
- Create the Base: Place a layer of lemons at the bottom of the bowl. Set them slightly on their sides to create a stable foundation for the next layer.
- Add Green Tones: Tuck several green limes into the gaps between the yellow lemons. Mixing the colors as you go ensures the green and yellow are distributed evenly.
- Build a Mound: Continue stacking the fruit toward the center to create a slight peak. Do not pack them too tightly to prevent the fruit at the bottom from bruising.
- Final Touch: Slide a few fresh green leaves between the fruits near the top. The dark green leaves make the bright citrus colors pop and add a garden-fresh feel.
4. Waffle Weave Earth Tones
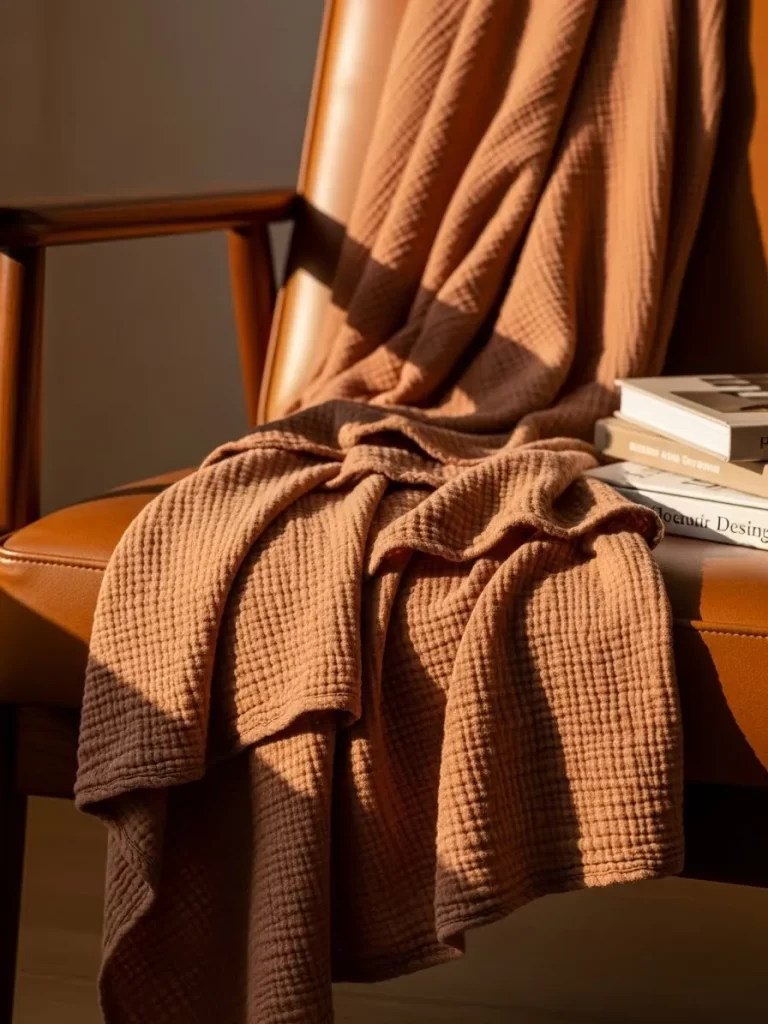
Natural textures provide a bridge between winter coziness and spring lightness. This terracotta waffle-weave throw adds warmth without the weight of a heavy wool blanket. The rich, earthy orange tone brings a sun-kissed glow to any leather chair.
The honeycomb pattern traps just enough heat to keep you comfortable during chilly evenings. It drapes elegantly over furniture to create a lived-in and welcoming vibe. This specific shade complements wooden accents and neutral wall colors beautifully.
Swapping a chunky knit for this breathable cotton texture updates your seating area instantly. It feels soft against the skin and looks expensive despite its simplicity. This piece is easy to wash and maintains its beautiful look over time.
Material Required List
- 3 yards of waffle-weave cotton fabric
- Matching terracotta thread
- Fabric softener
Equipment Required List
- Standard sewing machine
- Iron with steam setting
- Fabric scissors
- Sewing pins
DIY Instruction Step by Step
- Pre-wash the Material: Toss your cotton fabric in the washing machine before you start sewing. Waffle-weave shrinks significantly so you want that to happen before you finish the edges.
- Press the Edges: Dry the fabric on low heat and then iron the edges flat. This makes it much easier to fold and sew a straight line later.
- Square the Ends: Lay the fabric on a flat surface and ensure the ends are straight. Cut away any frayed threads or uneven sections so you have a clean rectangle.
- Fold the Hem: Turn the edge of the fabric over by half an inch and pin it down. Fold it over another half inch to hide the raw edge completely inside.
- Sew the Perimeter: Stitch slowly along the inner fold of your hem all the way around. Use a slightly longer stitch length to accommodate the thickness of the weave.
- Steam Finish: Give the finished edges a final blast of steam with your iron. This sets the stitches and helps the blanket drape naturally over your favorite chair.
5. Watercolor Gallery Wall
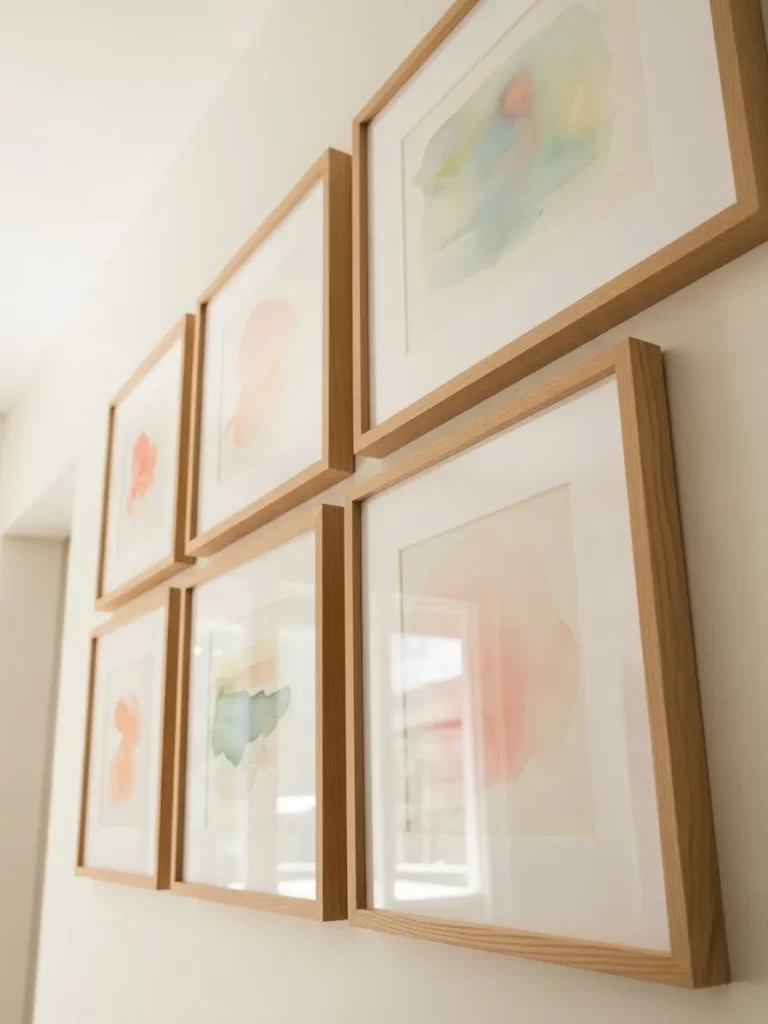
Empty walls can make a home feel cold and unfinished during the spring thaw. A collection of light watercolor prints brings a soft, artistic energy to your hallways. These pastel washes of pink and blue mimic the colors of a blooming garden.
Using matching light wood frames creates a cohesive and organized look. The white matting around each piece of art allows the colors to stand out. This arrangement fills a large space while remaining airy and light.
Watercolor art feels personal and gentle which fits the mood of the new season. You can easily switch the prints as the year progresses to keep your home feeling fresh. This gallery style turns a plain wall into a sophisticated focal point.
Material Required List
- 6 matching light wood frames
- 6 watercolor art prints
- Acid-free white mats
- Picture hanging hooks
Equipment Required List
- Bubble level
- Hammer
- Measuring tape
- Pencil
- Painter’s tape
DIY Instruction Step by Step
- Plan the Layout: Lay your frames out on the floor in two rows of three. Move them around until you like the spacing between each frame.
- Frame the Art: Open the back of each frame and place your watercolor print inside. Ensure the art is centered perfectly within the white mat before closing.
- Mark the Center: Use your pencil to mark the center of the wall at eye level. This is where the middle of your gallery wall will sit.
- Align the Grid: Use a long piece of painter’s tape and a bubble level to create a straight horizontal line. This keeps your rows from looking crooked.
- Install the Hooks: Measure the hanging point on the back of the frames and mark the wall. Hammer your hooks into the marks starting from the center.
- Hang and Adjust: Place the frames on the hooks and step back to check the alignment. Use your level one last time to ensure every frame is perfectly straight.
6. Tall Eucalyptus Arrangement

Floral displays do not always need bright petals to make a statement. These tall, silvery green eucalyptus stems bring a modern botanical feel to a room. The height of the branches draws the eye upward to make your ceilings feel taller.
A simple cylindrical glass vase keeps the focus entirely on the organic shapes of the leaves. The muted green color works with any existing decor while adding a necessary touch of life. These branches last much longer than traditional flowers.
Placing a large arrangement on the floor or a low table fills an empty corner beautifully. The leaves release a subtle, clean fragrance that refreshes the air naturally. This is the fastest way to introduce a garden element into a minimalist home.
Material Required List
- 7 long eucalyptus branches
- Large heavy glass cylinder vase
- Clean filtered water
- Floral food packet
Equipment Required List
- Sharp garden shears
- Measuring tape
- Cleaning cloth
DIY Instruction Step by Step
- Prep the Vase: Wash your glass vase with warm soapy water to remove any streaks. Fill it halfway with water and stir in the floral food.
- Measure the Stems: Hold a branch next to the vase to determine the height. The tallest branch should be about double the height of the vase.
- Cut the Base: Use your garden shears to trim the bottom of the stems at a 45-degree angle. This allows the branches to soak up water more effectively.
- Clean the Stems: Remove any leaves from the bottom few inches of the branches. No leaves should be sitting below the water line to prevent bacteria.
- Arrange the Greenery: Place the thickest branches in first to create a sturdy base. Let them lean outward to create a full and natural shape.
- Final Placement: Set the arrangement in an empty corner or on a low side table. Change the water every few days to keep the display looking fresh.
7. Marble and Gold Starburst Coasters
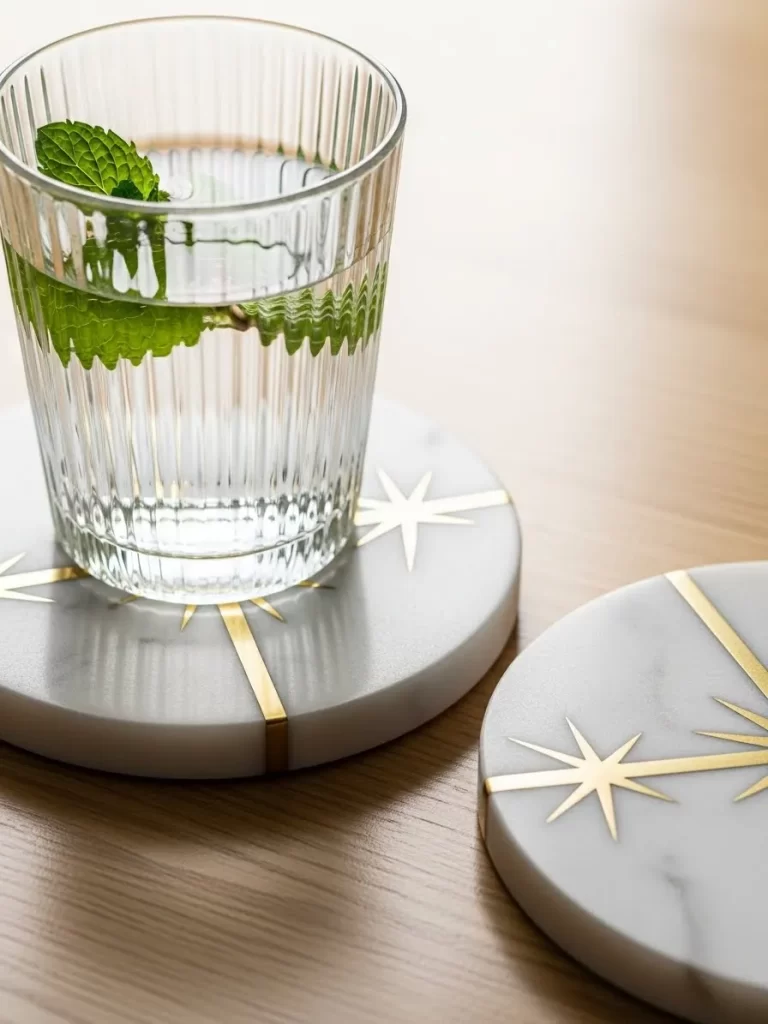
Small details often have the biggest impact on how a room feels. These white marble coasters featuring gold starburst patterns add a hint of luxury to your coffee table. The cool stone surface is functional while the metallic accents catch the sun.
Marble brings a natural, timeless element into your living space that pairs well with spring colors. The bright white stone helps lift the mood of dark wooden furniture. These accessories are perfect for holding a refreshing glass of water or tea.
Using high-quality materials for everyday items makes your home feel more curated. These coasters protect your surfaces while acting as miniature sculptures. It is a simple swap that replaces bulky old coasters with something sleek.
Material Required List
- Plain circular marble coasters
- Gold metallic paint pen
- Clear spray sealant
- Adhesive felt pads
Equipment Required List
- Fine-tip paintbrush
- Pencil
- Ruler
- Soft cloth
DIY Instruction Step by Step
- Clean the Marble: Wipe your marble coasters with a damp cloth to remove any dust. Let them dry completely so the gold paint sticks properly.
- Sketch the Design: Use a pencil and ruler to lightly mark the center of the coaster. Draw a small dot to act as your starting point.
- Draw the Starburst: Use your gold paint pen to draw straight lines coming out from the center dot. Make some lines long and others short for a varied look.
- Let it Dry: Set the coasters aside for at least two hours in a dust-free area. Do not touch the gold until it is completely dry to avoid smudging.
- Seal the Surface: Spray a light coat of clear sealant over the top of the coasters. This protects the gold design from being ruined by moisture from glasses.
- Add Felt Pads: Flip the coasters over and stick four small felt pads to the bottom. This prevents the heavy marble from scratching your wooden table tops.
8. Minimalist Botanical Line Art
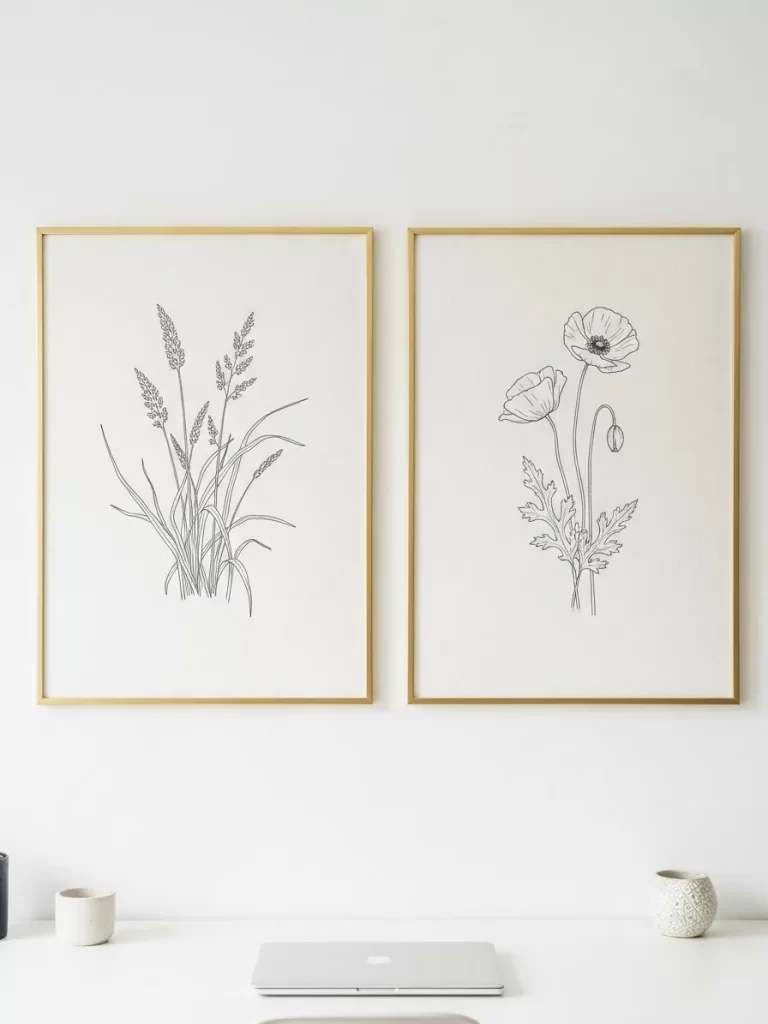
Spring decor does not have to be colorful to be effective. These black and white botanical sketches provide a clean, sophisticated nod to the season. The delicate lines of poppies and wild grasses feel light and airy against a white wall.
Thin gold frames add a touch of warmth and elegance without distracting from the art. This style of decor works perfectly in a home office or a quiet reading nook. It offers a calm visual break from busier patterns in the room.
Pairing two similar sketches side-by-side creates a sense of balance and symmetry. This minimalist approach proves that you can celebrate nature with simple, understated pieces. These prints bring the outside in while maintaining a modern aesthetic.
Material Required List
- 2 matching gold frames
- 2 botanical line-art prints
- Acid-free white backing board
- Hanging wire
Equipment Required List
- Microfiber cloth
- Small hammer
- Measuring tape
- Pencil
DIY Instruction Step by Step
- Clean the Glass: Wipe both sides of the frame glass with a soft cloth. Any dust inside the frame will be very visible against the white background of the art.
- Center the Print: Lay your botanical sketch on the white backing board. Use a ruler to make sure there is an equal amount of space on all sides.
- Assemble the Frame: Place the glass back into the frame followed by the art. Press the metal tabs down firmly to lock everything in place securely.
- Mark the Wall: Measure the center of your wall and mark two points at the same height. Space them about four inches apart for a balanced look.
- Install the Nails: Tap your picture nails into the wall at your marked points. Ensure they are tilted slightly upward to hold the weight of the frames.
- Hang and Align: Place the frames on the nails and step back to check the symmetry. Adjust them until the gap between the two frames looks perfectly straight.
9. Sage Green Waffle Shower Curtain
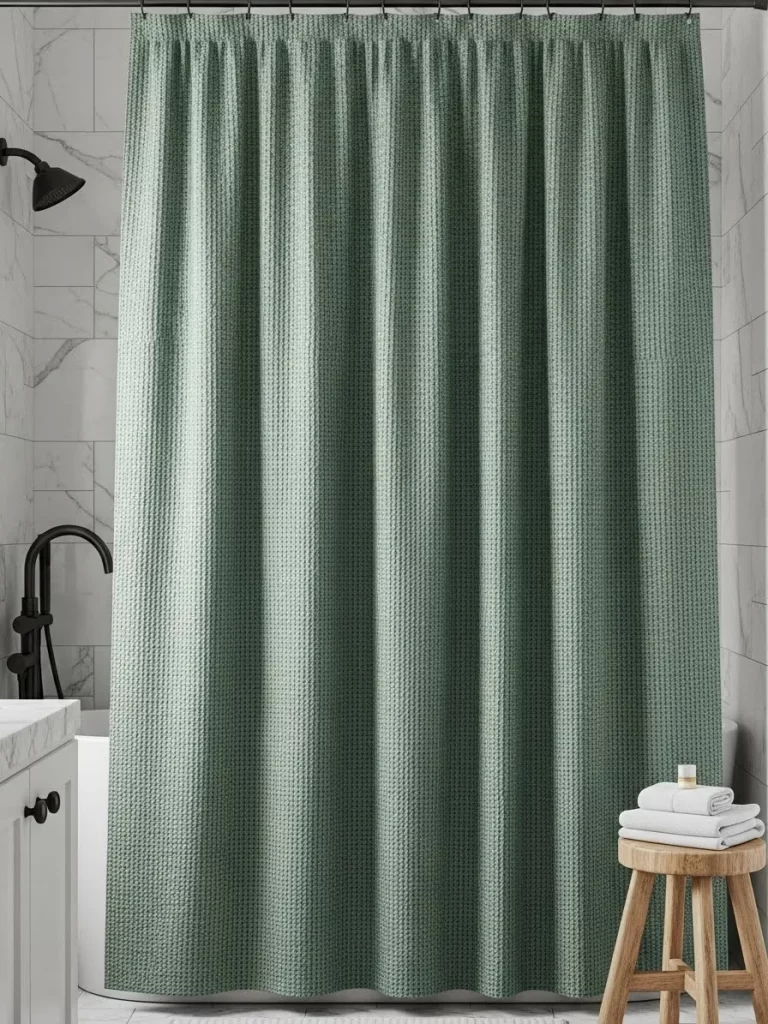
Bathrooms are often the most overlooked rooms when it comes to seasonal updates. A heavy plastic curtain can make a small space feel claustrophobic and cheap. This sage green waffle-weave curtain adds instant spa-like texture and a soft pop of color.
The fabric drapes beautifully to create soft vertical lines that make the room feel taller. Sage is a neutral, calming green that reminds you of fresh spring herbs. It pairs perfectly with white towels and marble tiles for a high-end look.
This simple change makes your morning routine feel more luxurious and refreshed. The breathable fabric allows air to circulate which keeps your bathroom feeling less steamy. It is an easy way to introduce color into a typically sterile environment.
Material Required List
- 5 yards of sage green waffle fabric
- 12 metal shower rings
- Heavy-duty sewing thread
- Fabric interfacing
Equipment Required List
- Sewing machine
- Grommet kit
- Iron
- Fabric shears
DIY Instruction Step by Step
- Measure and Cut: Determine the height of your shower and add six inches for the hems. Cut a large rectangle from your sage green waffle fabric.
- Reinforce the Top: Fold the top edge down by three inches and slide a strip of interfacing inside. This makes the fabric strong enough to hold the metal rings.
- Sew the Hems: Stitch along the top and bottom edges using a straight line. Fold the side edges over and sew them to prevent the fabric from fraying.
- Mark the Holes: Use a pencil to mark twelve even spots along the top reinforced border. The first and last marks should be one inch from the edges.
- Install the Grommets: Use your grommet tool to punch holes through your marks. Snap the metal grommets into place to create a professional and durable opening.
- Hang the Curtain: Slide your shower rings through the grommets and onto the rod. Pair it with a clear liner on the inside to protect the fabric from water.
10. Ceramic and Brass Hardware

Replacing cabinet hardware is the ultimate secret swap for a basic home. Standard builder-grade knobs often look boring and industrial. These smooth white ceramic knobs with brass bases add a vintage, handcrafted feel to your furniture.
The bright white ceramic echoes the look of fresh spring blossoms and clean linens. Brass accents provide a warm, golden glow that feels much more inviting than cold chrome. This small change makes an old dresser look custom-made.
You can complete this entire project in under thirty minutes with very few tools. It is a tactile update that you will notice every time you open a drawer. This is the perfect way to add personality to your furniture without using a paintbrush.
Material Required List
- 10 white ceramic knobs
- Mounting screws
- Small metal washers
Equipment Required List
- Phillips head screwdriver
- Cleaning cloth
- Ruler
DIY Instruction Step by Step
- Remove the Old Knobs: Open your drawer and use a screwdriver to remove the screws from the back of the old hardware. Pull the old knob off and set it aside.
- Clean the Surface: Wipe the area around the hole with a damp cloth to remove any dust. This ensures the new brass base sits flush against the wood.
- Insert the Screw: Push the new screw through the hole from the inside of the drawer. Use a washer if the wood is very thin to provide more stability.
- Attach the Knob: Hold the ceramic knob against the outside of the drawer and thread it onto the screw. Turn the knob clockwise until it is tight.
- Tighten with Tools: Use your screwdriver to finish tightening the screw from the inside. Hold the knob steady so it does not spin while you finish the job.
- Repeat and Style: Continue this process for all drawers on the furniture piece. This creates a unified and high-end look that refreshes the entire room instantly.
11. Textured Jute Entryway Runner

The entryway is the first thing guests see when they enter your home. A basic rug can often feel flat and uninteresting during the transition to spring. This natural jute runner with seafoam green borders adds texture and a coastal vibe to your hall.
Natural fibers like jute are durable enough to handle muddy spring boots and shoes. The green border brings a subtle pop of color that feels fresh and organic. It anchors the space and makes a long hallway feel much more intentional.
Sunlight hitting the woven fibers creates a warm and earthy glow in your home. This rug is easy to clean and adds a layer of comfort to hard wood floors. It is a practical yet stylish way to introduce spring tones right at your front door.
Material Required List
- Plain jute runner rug
- Seafoam green fabric paint
- Masking tape
- Fabric medium
Equipment Required List
- Large foam brush
- Measuring tape
- Heavy books
DIY Instruction Step by Step
- Flatten the Rug: Unroll your new jute runner and place heavy books on the corners. Let it sit for a day so the edges stop curling up from the roll.
- Measure the Border: Use your measuring tape to mark a line three inches from the edge all the way around. This will be the area you paint green.
- Tape the Lines: Lay masking tape along the inside of your marks. Press the tape down firmly so the paint does not leak into the center of the rug.
- Paint the Jute: Use the foam brush to dab the seafoam green paint onto the border. You may need two coats because jute is very absorbent.
- Remove the Tape: Pull the masking tape off while the paint is still slightly damp. This creates the sharpest line between the green and the natural tan jute.
- Let it Cure: Allow the rug to dry in a sunny spot for a full 24 hours. Place it in your entryway to greet guests with a fresh spring welcome.
12. Striped Pleated Lampshade
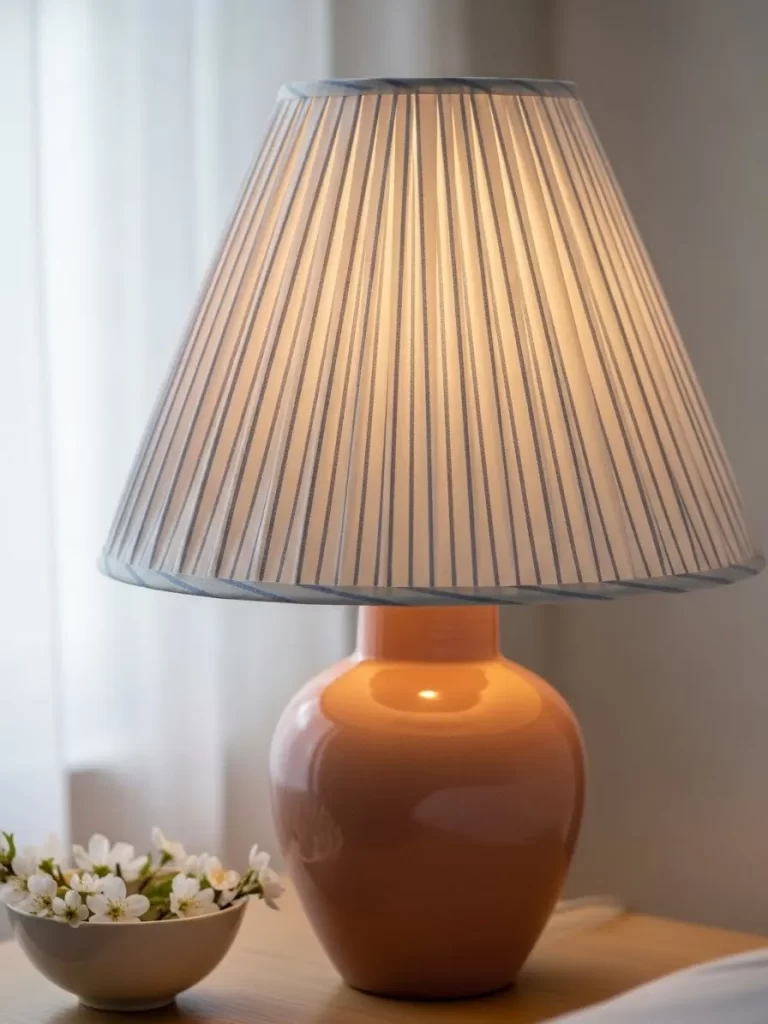
Standard white lampshades can look a bit plain in a cozy bedroom. A pleated shade with soft blue stripes adds a traditional and charming touch to your bedside lamp. The vertical lines create visual height and a sense of order.
Light filters through the pleats to create beautiful shadows on the walls at night. The blue and white pattern feels classic and reminds one of spring nautical themes. It is an easy way to update an old lamp base without replacing the whole unit.
Pairing this shade with a colorful ceramic base creates a high-contrast and trendy look. This swap brings a layer of pattern into the room that feels sophisticated and thoughtful. It instantly upgrades the style of your lighting for the new season.
Material Required List
- White pleated lampshade
- Blue velvet ribbon
- Clear fabric glue
- Small clips
Equipment Required List
- Measuring tape
- Sharp scissors
- Tweezers
DIY Instruction Step by Step
- Measure the Length: Use your tape measure to find the vertical length of one pleat. Cut your blue ribbon into strips that match this exact height.
- Apply the Glue: Put a very thin line of fabric glue down the back of the ribbon strip. Do not use too much or it will soak through the velvet.
- Set the Ribbon: Use tweezers to place the ribbon into the center of a pleat. Press it down firmly from top to bottom so it sticks to the shade.
- Secure the Ends: Use a small clip at the top and bottom of the pleat to hold the ribbon in place. This prevents the ribbon from sliding while the glue dries.
- Create the Stripes: Skip every other pleat to create an even striped pattern around the shade. Continue this process until the entire shade is decorated.
- Final Assembly: Let the glue dry for four hours before removing the clips. Place the shade back on your lamp to enjoy the custom striped look.
13. Sheer Linen Window Panels

Heavy drapes can block the beautiful spring sunshine and make a room feel closed off. These off-white sheer linen curtains allow natural light to flood your living space. The thin fabric catches the breeze to add movement and life to the room.
Linen has a natural texture that looks relaxed and high-end at the same time. These curtains offer privacy without sacrificing the brightness of a sunny afternoon. They create a soft view of the garden as it begins to bloom.
Installing these panels from floor to ceiling makes your windows appear much larger. The neutral tone works perfectly with any color palette you choose for the season. This is the most effective way to change the atmosphere of a room instantly.
Material Required List
- 10 yards of sheer linen fabric
- Matching white thread
- Curtain rod
- Hanging rings
Equipment Required List
- Sewing machine
- Iron with steam
- Measuring tape
- Pins
DIY Instruction Step by Step
- Calculate the Length: Measure from your curtain rod to the floor and add eight inches for hems. Cut your sheer linen into two equal rectangles.
- Iron the Folds: Fold the bottom edge up by four inches and iron it flat. Fold it again another four inches and pin it to create a weighted hem.
- Sew the Bottom: Use a straight stitch to sew the bottom hem in place. The extra weight of the double fold helps the sheer fabric hang perfectly straight.
- Make the Rod Pocket: Fold the top edge down by three inches and sew across. This creates the space for the curtain rod to slide through the fabric.
- Finish the Sides: Fold the side edges over by half an inch and sew them down. This prevents the edges from fraying when the curtains are moved.
- Steam and Hang: Slide the panels onto your rod and hang them up. Use a steamer to remove any remaining wrinkles so the linen looks light and airy.
14. Emerald Glass Kitchen Dispenser
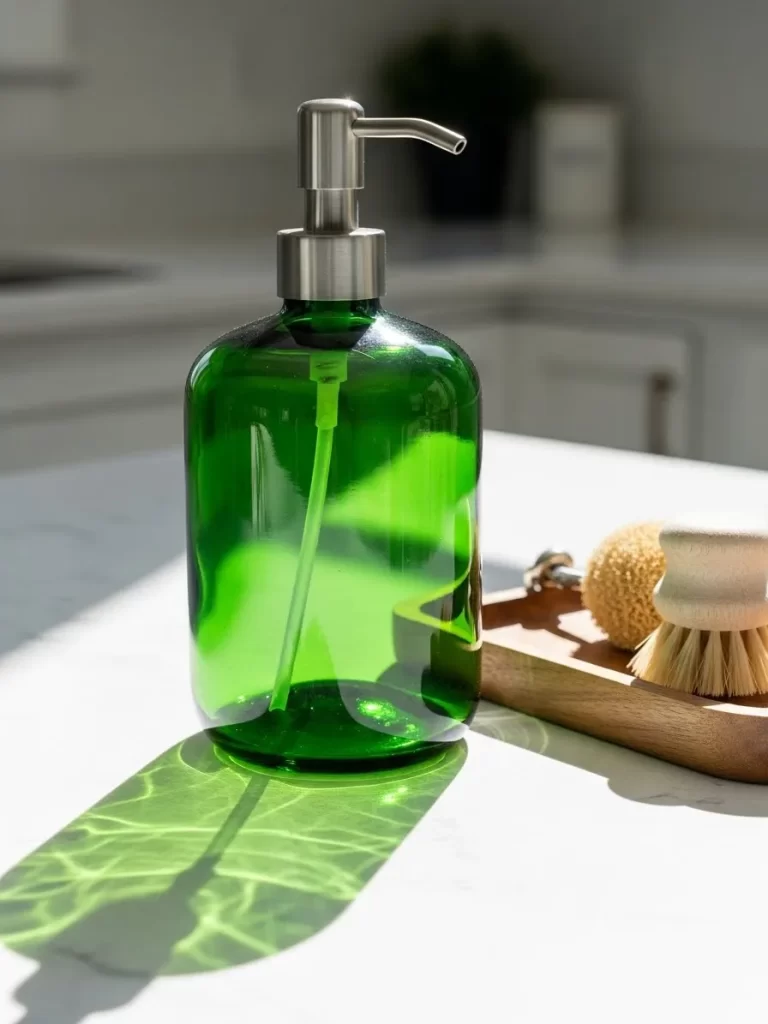
Kitchen sinks are usually cluttered with colorful plastic soap bottles that look messy. An emerald green glass dispenser adds a jewel-toned pop of color to your countertop. The deep green glass glows when the sun hits it through the window.
Using a glass dispenser is an eco-friendly choice that looks far more expensive than plastic. The stainless steel pump provides a modern finish that matches most kitchen faucets. It turns a boring daily chore into a more pleasant and stylish experience.
This small change keeps your sink area looking tidy and coordinated for spring. You can fill it with clear soap to let the green color of the glass shine. It is a functional piece of decor that fits perfectly with a fresh garden theme.
Material Required List
- Emerald green glass bottle
- Stainless steel soap pump
- Clear liquid soap
- Waterproof label
Equipment Required List
- Small funnel
- Cleaning cloth
- Dish soap
DIY Instruction Step by Step
- Wash the Bottle: Clean your new glass bottle with warm soapy water and dry it well. Make sure the outside is free of oils so the label sticks.
- Apply the Label: Peel the backing off your waterproof label and place it on the front of the bottle. Press firmly from the center to remove air bubbles.
- Fill the Bottle: Place a small funnel into the mouth of the emerald bottle. Pour clear liquid soap inside until it is about an inch from the top.
- Attach the Pump: Insert the pump straw into the bottle and twist the cap until it is tight. Ensure the nozzle is pointing toward the front of the label.
- Wipe the Drips: Use a clean cloth to wipe away any soap that may have spilled on the glass. This keeps the emerald color looking clear and bright.
- Place and Style: Set the dispenser on your kitchen counter next to the sink. Add a small wooden tray or a scrub brush to complete the look.
15. Arched Gold Wall Mirror

Dark hallways often feel narrow and uninviting during the winter months. A large arched mirror with a thin gold frame helps bounce light into every corner. The curved top adds a soft architectural element to a room full of square furniture.
Mirrors reflect the colors of your spring plants and flowers to double their visual impact. The gold frame provides a warm, sunny glow that feels like natural light. It is a timeless piece that makes any small space feel twice as big.
Placing a mirror opposite a window is a classic designer trick to brighten a room. It captures the view of the outdoors and brings it inside your home. This swap adds a touch of elegance and height to your wall decor.
Material Required List
- Large arched gold mirror
- Heavy-duty wall anchors
- Steel screws
- Bubble level
Equipment Required List
- Power drill
- Pencil
- Measuring tape
- Stud finder
DIY Instruction Step by Step
- Locate the Studs: Use a stud finder to find the wooden beams behind your wall. This is the safest way to hang a heavy mirror without it falling.
- Measure the Back: Find the distance between the hanging hooks on the back of the mirror. This ensures you drill your holes at the correct width apart.
- Mark the Height: Use your pencil to mark where you want the top of the mirror to sit. Transfer your width measurements to the wall at this height.
- Drill the Holes: Use your power drill to create holes at your marks. Push a plastic wall anchor into each hole for extra support.
- Drive the Screws: Insert the steel screws into the anchors using your drill. Leave about a quarter inch of the screw head sticking out from the wall.
- Hang the Mirror: Lift the mirror and hook the back onto the screws. Check it with a bubble level to make sure the arch is perfectly straight.
16. Minimalist Ceramic Shelf Display
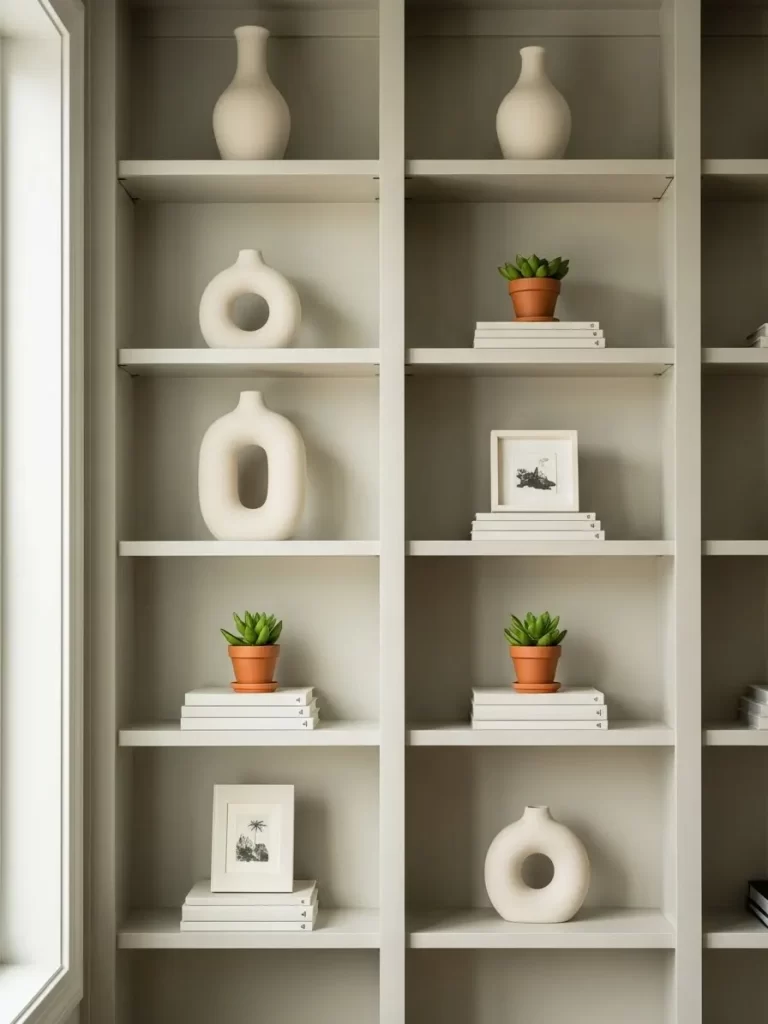
Bookshelves often get cluttered with old papers and dark objects during the winter. A minimalist arrangement of matte white ceramic vases creates a clean and peaceful look. These organic shapes add a touch of modern art to your living room.
Using a monochromatic color scheme for your accessories makes the whole shelf look organized. Small terracotta pots with green succulents provide a natural contrast to the white vases. This setup feels light and fits the “less is more” spring aesthetic.
Spacing your items out allows the eye to rest and appreciate each piece of decor. You can stack a few white books horizontally to create different heights for your display. This simple reorganization makes your storage feel like a curated gallery.
Material Required List
- 3 matte white ceramic vases
- 2 small succulents in pots
- 4 white hardcover books
- Small framed line art
Equipment Required List
- Microfiber dusting cloth
- Measuring tape
- Level
DIY Instruction Step by Step
- Empty the Shelves: Remove everything from your bookshelf and wipe it down with a cloth. Starting with a clean space makes it easier to visualize the design.
- Create a Pedestal: Place your white books in a horizontal stack on one shelf. This adds height and variety to the arrangement of the vases.
- Group the Vases: Place the white ceramic vases in a group of three. Put the tallest vase in the back to create a sense of depth and layers.
- Add Greenery: Set a small succulent next to the vases to introduce a pop of natural color. The green leaves bring life to the white and wood tones.
- Layer the Art: Lean a small framed print against the back wall of the shelf. This fills the vertical space and acts as a beautiful backdrop for the vases.
- Check the Spacing: Step back and look at the shelf from across the room. Ensure there is enough empty space between items so the shelf feels airy and light.
17. Woven Rattan Serving Tray
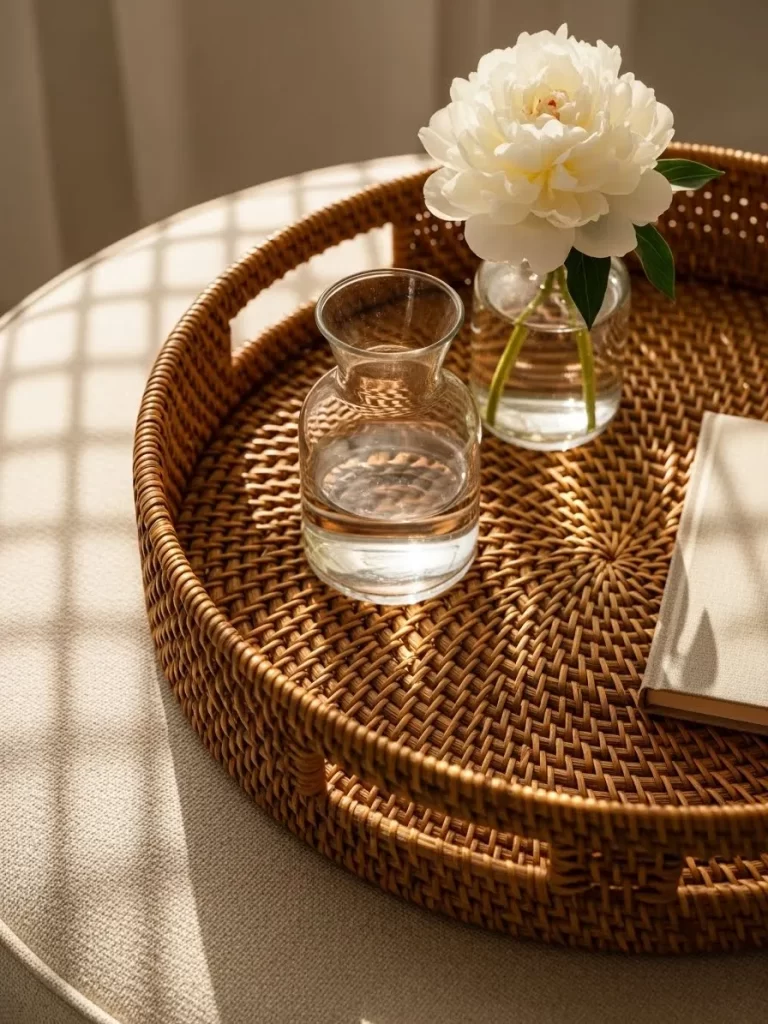
Coffee tables can look messy when remote controls and magazines are scattered everywhere. A round woven rattan tray gathers these items into one beautiful, organized spot. The natural wood tones add warmth and texture to a metal or glass table.
Rattan is a classic spring material that feels casual and light for the new season. Placing a small vase of white peonies on the tray introduces a soft floral scent to the room. It is a portable piece of decor that you can easily move.
The circular shape breaks up the straight lines of your furniture for a more organic feel. It acts as a frame for your favorite accessories and keeps them looking tidy. This simple swap makes your living room feel more finished and inviting.
Material Required List
- 16-inch round rattan tray
- Glass bud vase
- 1 fresh white peony
- Linen-covered notebook
Equipment Required List
- Sharp scissors
- Soft cleaning cloth
- Water
DIY Instruction Step by Step
- Clean the Rattan: Use a dry cloth to wipe any dust out of the woven fibers of the tray. Avoid using water as natural wood can warp if it gets damp.
- Find the Center: Place the rattan tray in the middle of your coffee table. This creates a central focal point that organizes all of your small items.
- Add Vertical Height: Fill your bud vase with water and place it on one side of the tray. Trim the flower stem so the peony sits just above the vase rim.
- Stack the Items: Place your remote controls and notebook neatly on the other side of the tray. Stacking items makes them look like intentional decor pieces.
- Style with Color: Ensure the green leaves of the peony are visible against the brown rattan. This small touch of color makes the tray feel spring-ready.
- Final Adjustment: Turn the tray so the prettiest part of the weave faces the seating area. This ensures you have the best view while relaxing on the sofa.
18. Warm Glow Floor Lamp
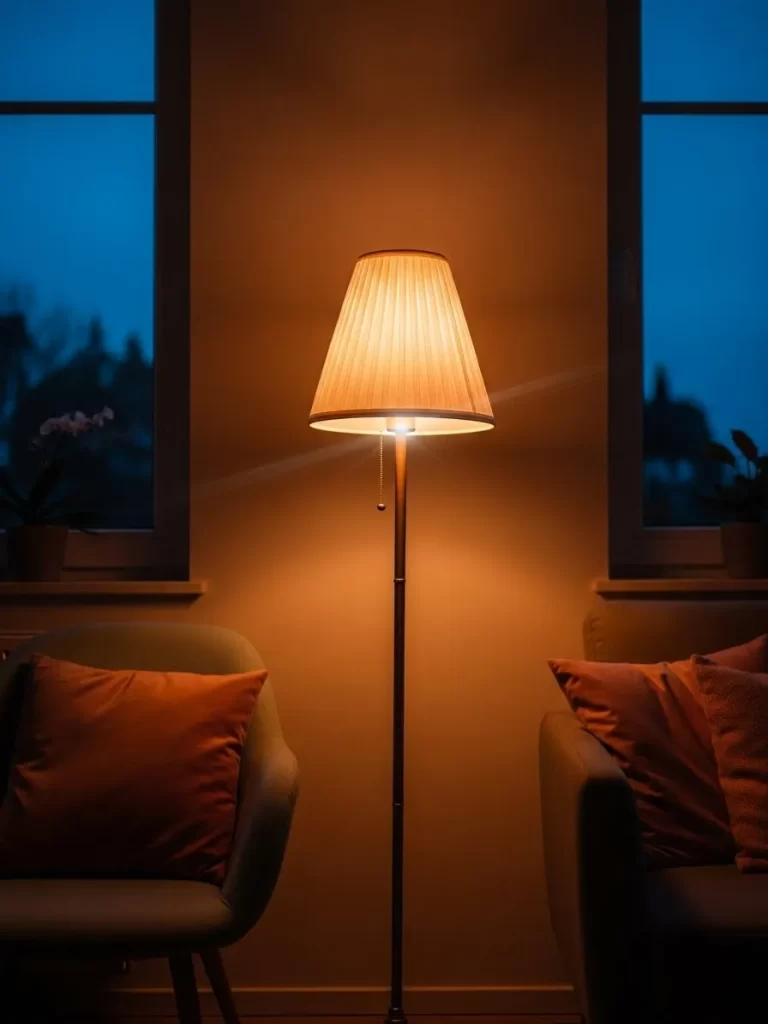
Lighting changes the entire mood of a room once the sun goes down in the evening. A tall, thin floor lamp with a linen shade creates a soft and golden atmosphere. This type of light feels much more relaxing than harsh overhead bulbs.
The simple design of the lamp base keeps the room looking modern and uncluttered. A warm-toned bulb mimics the glow of a sunset and makes the room feel cozy. It is the perfect addition to a reading corner or next to a sofa.
Soft light enhances the colors of your spring pillows and blankets in the room. It creates a welcoming environment for quiet evenings at home after a long day. This lighting swap is an easy way to add both height and warmth to your space.
Material Required List
- Slim metal floor lamp base
- Tapered linen lampshade
- Warm-tone LED bulb
- Clear cord clips
Equipment Required List
- Phillips head screwdriver
- Extension cord (if needed)
- Cleaning cloth
DIY Instruction Step by Step
- Assemble the Rod: Screw the metal sections of the lamp base together starting from the bottom. Make sure each joint is tight so the lamp does not tilt.
- Install the Bulb: Screw your warm-tone LED bulb into the socket at the top of the lamp. These bulbs create a much softer glow than standard white ones.
- Attach the Shade: Place the linen shade over the bulb and tighten the small ring to hold it. Ensure the shade is level so the light spreads evenly.
- Position the Lamp: Place the lamp in a dark corner or next to your favorite armchair. This provides focused light for reading without being too bright.
- Hide the Wires: Use clear clips to run the lamp cord along the top of your baseboard. This keeps the room looking tidy and prevents anyone from tripping.
- Test the Light: Turn on the lamp in the evening to check the atmosphere. The warm glow should make the spring colors in your room look soft and inviting.
19. Scalloped Green-Trimmed Towels

White towels are a bathroom staple but they can sometimes feel a bit plain and boring. A set of plush white towels with scalloped edges and green embroidery adds a vintage touch. This small detail brings a garden-inspired feel to your towel rack.
The green trim ties in with other spring elements like plants or green soap dispensers. Scalloped edges add a feminine and soft shape to a room full of hard surfaces. It is a quick way to make your guest bathroom feel like a hotel.
High-quality cotton towels feel soft against the skin and dry quickly after a shower. This subtle use of color is perfect if you want to update your decor without painting. These towels look beautiful whether they are hanging up or folded on a shelf.
Material Required List
- 2 plush white bath towels
- Sage green scalloped trim
- White sewing thread
- Fabric glue
Equipment Required List
- Sewing machine
- Sharp fabric scissors
- Iron
- Sewing pins
DIY Instruction Step by Step
- Prep the Towels: Wash and dry your new towels before you start sewing. This allows the cotton to shrink so the trim does not bunch up later in the wash.
- Measure the Trim: Lay the sage green trim across the bottom edge of the towel. Cut the trim so it is one inch wider than the towel itself.
- Pin the Edge: Use sewing pins to hold the trim along the bottom hem of the towel. Fold the extra half-inch of trim around to the back for a clean look.
- Sew the Trim: Use a straight stitch on your machine to attach the green trim to the towel. Go slowly to ensure the scalloped edge stays perfectly straight.
- Press the Seam: Use a warm iron to flatten the stitches and the trim. This makes the decoration look like it was part of the towel when you bought it.
- Hang to Dry: Place the finished towels on your bathroom rack with the scalloped edge facing out. This adds an instant layer of spring color to the room.
20. Natural Wood Bistro Set
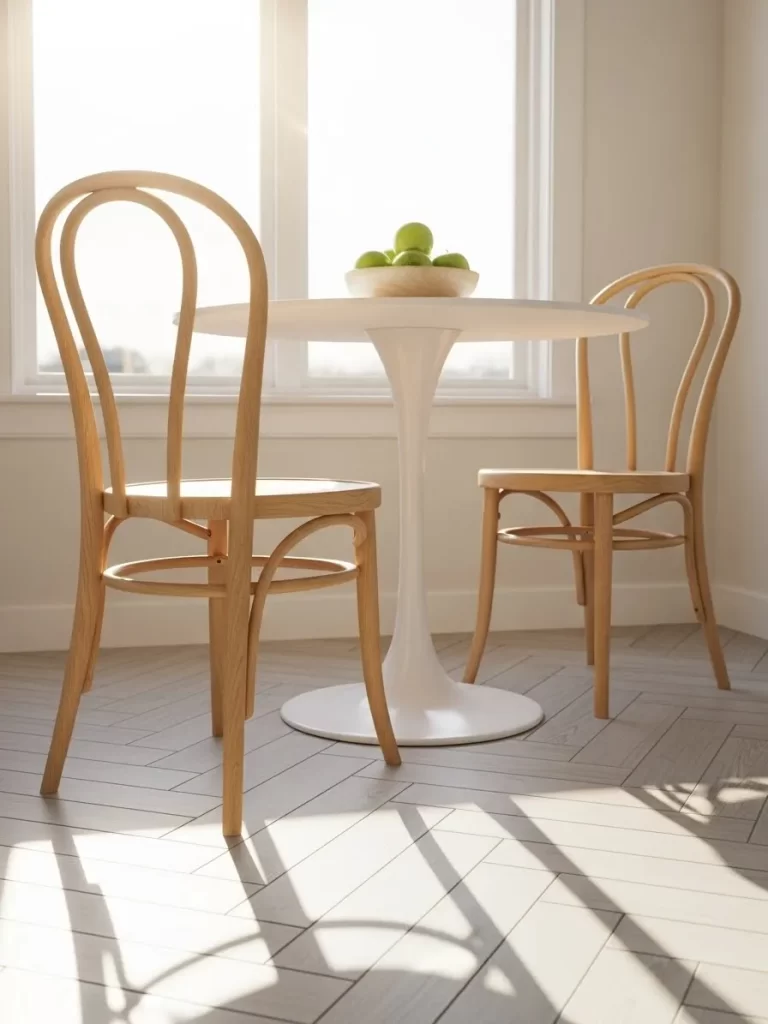
Bulkier dining tables can feel too heavy for a light and airy spring home theme. A slim, natural wood bistro set creates a charming spot for morning coffee by the window. The light oak finish brings a touch of nature into your dining nook.
Curved wooden chairs add a classic European feel to your living space. This set takes up very little floor space which makes the room feel larger and more open. It is a perfect way to create a dedicated zone for relaxing in a small apartment.
The warm wood tones pair beautifully with a bowl of green fruit or a vase of flowers. This furniture swap replaces heavy pieces with something that feels fresh and new. It encourages a slower and more intentional start to your spring mornings.
Material Required List
- Round white pedestal table
- 2 light oak bentwood chairs
- 4 felt floor protectors
- Wooden bowl of green apples
Equipment Required List
- Allen wrench
- Bubble level
- Soft cleaning cloth
- Measuring tape
DIY Instruction Step by Step
- Assemble the Table: Attach the pedestal base to the round top using the included bolts. Tighten them firmly so the table is stable and does not shake.
- Check the Level: Place the table in its new spot and use a bubble level on the top. Adjust the feet at the bottom until the table is perfectly flat.
- Protect the Floor: Stick felt pads to the bottom of the table base and each chair leg. This prevents the wood from scratching your hardwood or tile floors.
- Set Up the Chairs: Place the two bentwood chairs on opposite sides of the table. Spacing them out helps the corner feel more open and less crowded.
- Style the Center: Put a wooden bowl filled with fresh green apples in the middle of the table. The green fruit provides a perfect pop of natural spring color.
- Wipe it Down: Use a soft cloth to remove any dust from the assembly process. Your new bistro nook is now ready for a fresh and bright spring breakfast.
21. Natural Cane Sideboard
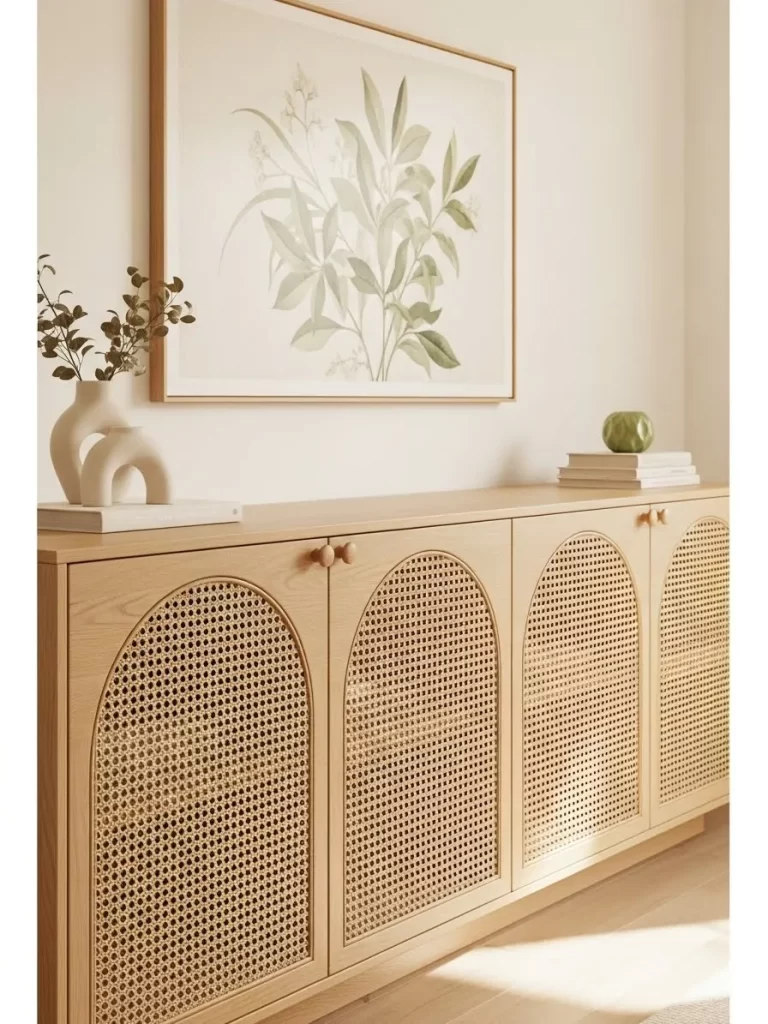
Ornate or dark cabinets often make a hallway feel heavy and dated. This light oak sideboard with arched cane door panels introduces a breezy, organic texture to your home. The natural straw color of the cane creates a soft visual bridge to the outdoors.
This piece offers plenty of storage while maintaining an airy appearance. Light passes through the woven mesh to prevent the furniture from looking like a solid, bulky block. It serves as the perfect foundation for displaying your favorite spring vases and books.
Pairing the warm wood with a large botanical print above it creates a cohesive garden theme. This swap replaces “basic” solid furniture with something that has character and architectural interest. It instantly turns a transition space into a high-end design feature.
Material Required List
- Light oak or pine sideboard with cane inserts
- Ceramic arc-shaped vases in beige
- Small green glass decorative orb
- Oversized botanical art print
Equipment Required List
- Furniture levelers
- Soft microfiber cloth
- Measuring tape
DIY Instruction Step by Step
- Check the Balance: Place your sideboard against the wall and use a bubble level on the top surface. Adjust the screw-in feet at the bottom until the unit is perfectly flat.
- Clean the Surfaces: Wipe down the wood and the woven cane panels with a dry microfiber cloth. Avoid using wet sprays on natural cane as it can cause the fibers to expand or warp.
- Center the Art: Measure the width of the sideboard and find the middle point on the wall. Hang your botanical print so the bottom of the frame is about six inches above the wood surface.
- Layer the Vases: Place two ceramic vases of different heights on one side of the sideboard. Overlapping them slightly creates a more professional and curated look than spacing them far apart.
- Add a Pop of Green: Set a small green glass orb or a single air plant on top of a small stack of books. This introduces the spring color theme in a subtle, sophisticated way.
- Final Polish: Ensure all doors are aligned and closing properly. This functional storage piece now doubles as a beautiful spring focal point in your room.
22. Sage Green Knitted Pouf

Standard footstools often look too formal or industrial for a relaxed spring living room. This round, chunky knitted pouf in a soft sage green adds cozy texture and a splash of color. It is a versatile piece that functions as extra seating or a comfortable footrest.
The woven pattern provides a handcrafted feel that softens the sharp lines of modern furniture. Sage green acts as a “new neutral” that brings the freshness of a garden indoors. It feels light enough for the warmer months while still providing a sense of comfort.
This swap is perfect for breaking up a large area of plain flooring. The organic shape and soft material make the room feel more inviting and less structured. It is an easy way to move away from a “basic” setup without a major investment.
Material Required List
- 20-inch round knitted cotton pouf in sage green
- Lightweight sage green throw blanket with fringe
- Matching green linen cushion
Equipment Required List
- Fabric shaver (to remove any fuzz)
- Lint roller
DIY Instruction Step by Step
- Position the Pouf: Place the knitted pouf on the rug near your favorite armchair or sofa. Angle it slightly so it looks natural and easy to reach for a footrest.
- Prep the Fabric: Run a lint roller over the knitted surface to remove any stray threads or dust. If the knit looks fuzzy, use a fabric shaver to keep the texture looking crisp.
- Layer the Textiles: Drape a matching sage green throw blanket over the edge of the nearby chair. This carries the color upward and creates a unified visual flow in the corner.
- Fluff the Filling: Give the pouf a firm shake or pat it into a perfect circle. Over time, the internal beans may shift, so a quick fluff keeps it looking like a high-end piece.
- Create a Vignette: Place a small wooden tray on top of the pouf if you want to use it as a temporary side table. This adds functionality and a different material into the mix.
- Style the Space: Ensure the pouf is not blocking a main walking path. It should feel like a cozy addition that enhances the comfort of your seating area.
23. Terracotta Medallion Rug

Plain beige or grey carpets can make a large room feel empty and uninspired. This oversized area rug features an intricate terracotta and blue medallion pattern that anchors the furniture. The warm orange tones mimic the glow of a spring sunset.
The faded, vintage-style print adds a layer of history and sophistication to a basic room. It introduces multiple spring colors at once without overwhelming the senses. This rug protects your floors while providing a soft surface for bare feet as the weather warms.
A patterned rug also helps hide small spills or dust, making it practical for high-traffic areas. It defines the living zone and makes a large open-plan space feel more intimate. Swapping a solid rug for this detailed design instantly elevates the entire room.
Material Required List
- 8×10 terracotta and blue medallion area rug
- Non-slip rug pad
- Low-profile wooden coffee table
Equipment Required List
- Heavy-duty vacuum
- Scissors (to trim rug pad)
- Measuring tape
DIY Instruction Step by Step
- Prepare the Floor: Clear all furniture out of the room and vacuum the floor thoroughly. Any hidden debris can cause bumps or wear spots under your new rug.
- Lay the Pad: Roll out your non-slip rug pad and trim it with scissors so it is two inches smaller than the rug on all sides. This keeps the pad hidden.
- Center the Rug: Unroll the medallion rug over the pad. Measure from the walls to the edges of the rug to ensure it is sitting perfectly straight in the room.
- Smooth the Creases: Walk over the rug or use a heavy book to flatten any ripples caused by the shipping roll. Let it sit for a few hours to relax into the floor.
- Arrange the Furniture: Place the front legs of your sofa and chairs on the outer edges of the rug. This “tucks” the furniture in and makes the room feel cohesive.
- Add the Table: Set a light wood coffee table in the center of the medallion. The simple wood grain allows the detailed pattern of the rug to remain the star of the show.
24. Minimalist Ash Wood Wall Clock
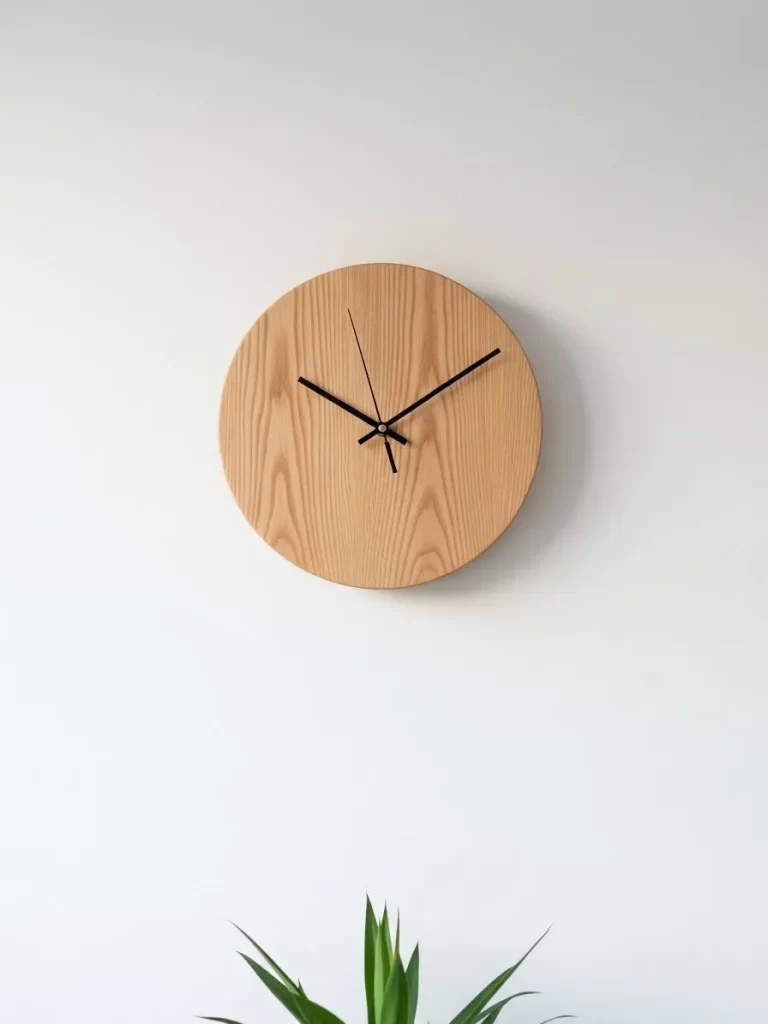
Heavy plastic or metal clocks can feel too industrial for a light spring aesthetic. This circular wall clock made from solid ash wood features a clean, grain-forward design. The light blonde wood brings an organic warmth to a plain white wall.
Without numbers or bulky frames, this piece acts more like a sculpture than a utility item. The thin black hands provide a sharp contrast that makes it easy to read from across the room. It embodies a “less is more” philosophy that refreshes a cluttered space.
Ash wood is known for its beautiful, flowing grain patterns which add subtle movement to your decor. This swap is a great way to introduce natural materials at eye level. It helps your home feel more grounded and connected to the natural world.
Material Required List
- 12-inch circular ash wood wall clock
- AA battery
- Small picture hanging nail or screw
- Single green leaf in a tiny vase (for styling below)
Equipment Required List
- Hammer
- Bubble level
- Measuring tape
- Pencil
DIY Instruction Step by Step
- Install the Battery: Flip the clock over and insert a fresh AA battery. Set the current time by turning the small dial on the back of the movement box.
- Determine the Height: Find a spot on the wall that is at eye level, typically 57 to 60 inches from the floor. Mark the center point lightly with a pencil.
- Check the Studs: Use a stud finder or tap the wall to ensure you aren’t hitting any wires. For a lightweight wooden clock, a simple nail is usually enough.
- Hammer the Nail: Drive your nail into the mark at a slight upward angle. Leave about half an inch of the nail head sticking out to catch the clock’s hanging slot.
- Hang the Clock: Carefully slide the clock onto the nail. Use your bubble level on the top of the clock movement or align it by eye until it is perfectly vertical.
- Style the Area: Place a small plant or a single green stem on a shelf below the clock. This creates a vertical “nature zone” that highlights the ash wood.
25. Weathered Terracotta Herb Pots
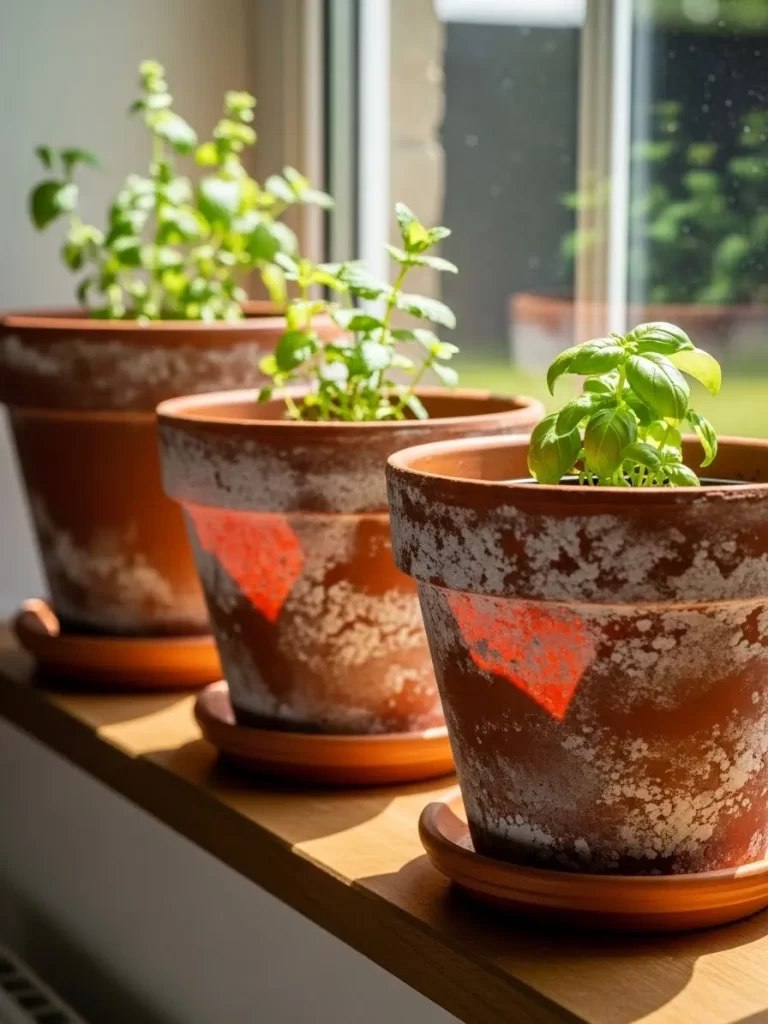
Plastic nursery pots often look messy and unfinished when sitting on a bright windowsill. These weathered terracotta pots with a “dusted” white finish add a rustic, garden-house charm. They are the perfect vessels for growing fresh spring basil and mint.
The porous clay allows the plant roots to breathe and prevents overwatering. The natural orange hue of the terracotta becomes more vibrant when it catches the morning sun. Grouping three pots together creates a mini indoor garden that feels intentional.
This swap brings life and functional color into your kitchen. Fresh herbs provide a wonderful scent and a bright green pop against a neutral backsplash. It is a simple way to transition your kitchen from winter storage to spring growth.
Material Required List
- 3 small terracotta pots (varied sizes)
- White lime wash or watered-down white acrylic paint
- Fresh herb plants (Basil, Mint, Oregano)
- High-quality potting soil
Equipment Required List
- Small sponge or rag
- Trowel or large spoon
- Watering can
DIY Instruction Step by Step
- Create the Weathered Look: Dip a damp sponge into white paint and lightly dab it onto the outside of the dry terracotta pots. Wipe some away to leave a dusty, aged finish.
- Let them Dry: Allow the pots to dry completely for about an hour. This finish won’t rub off when you handle the pots later for watering.
- Add Drainage: Ensure your pots have holes at the bottom. Place a small stone over the hole to keep soil from falling out while still letting water escape.
- Plant the Herbs: Fill the pots halfway with potting soil. Gently remove your herbs from their plastic containers and place them in the center of the terracotta.
- Fill the Gaps: Spoon more soil around the sides of the plants until they are secure. Press down lightly with your fingers to remove any large air pockets.
- Water and Place: Give the herbs a small drink of water and set them on a sunny windowsill. The combination of green leaves and orange clay is a classic spring look.
26. Blue Cloth-Bound Book Stack
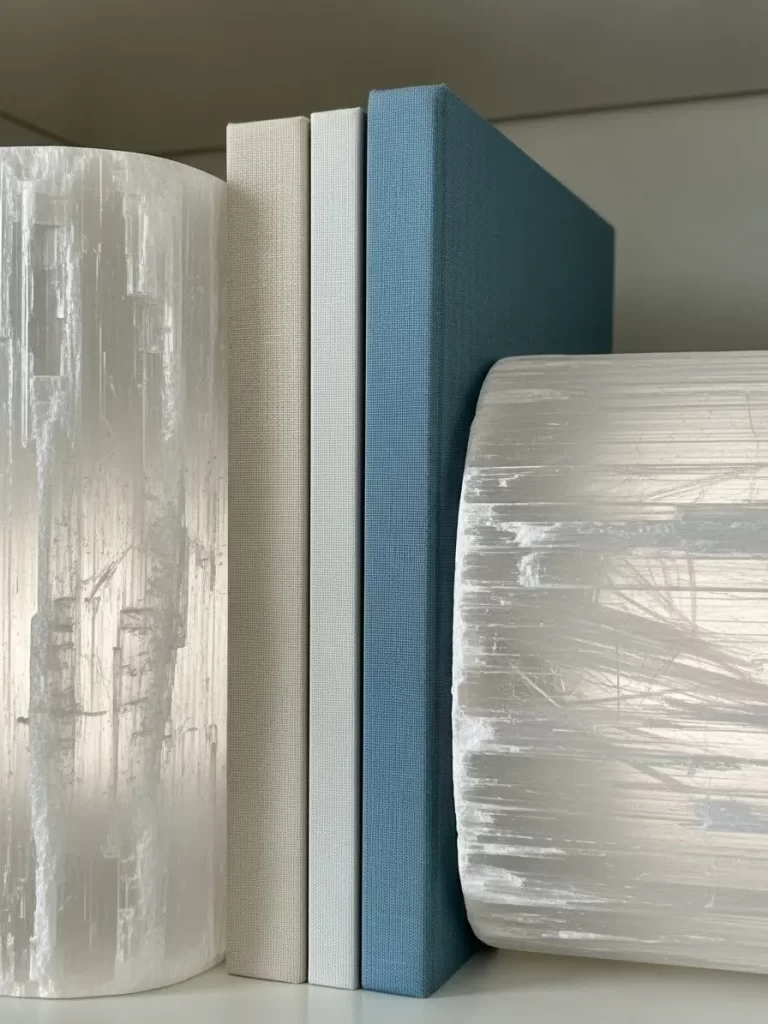
Loose papers or mismatched book spines can make a shelf look busy and disorganized. A curated stack of cloth-bound books in varying shades of blue creates a calm, clean focal point. This simple arrangement introduces a sophisticated “library” feel to a basic shelf.
The texture of the cloth covers adds a tactile quality that paper jackets often lack. Using a single color family like blue creates a sense of order and visual harmony. It is a great way to fill empty space while keeping the look airy and intentional.
You can top the stack with a natural element like a white crystal or a small piece of coral. This adds height and a different texture to the display. This swap turns a messy storage area into a thoughtful piece of room decor.
Material Required List
- 3 to 5 books with blue cloth covers
- 2 large white selenite crystal logs
- Small white ceramic vase
Equipment Required List
- Microfiber cloth
- Ruler (for spacing)
DIY Instruction Step by Step
- Remove the Jackets: Take the glossy paper dust jackets off your books to reveal the beautiful cloth texture underneath. Save the jackets in a drawer for later use.
- Sort by Size: Place your largest blue book at the bottom of the stack. Layer the others on top, moving from largest to smallest to create a stable pyramid shape.
- Align the Spines: Ensure all the book spines are facing outward toward the room. Line them up so the stack looks neat and professional from a distance.
- Add the Crystals: Place a white selenite log vertically next to the books to act as a bookend. Place another one horizontally on top of the stack for a layered look.
- Style the Shelf: Set a small white vase on the other side of the books. This balances the blue tones with crisp white, making the whole display pop.
- Final Dusting: Give the cloth covers a quick wipe with a dry microfiber cloth. Your shelf now looks like it belongs in a high-end design magazine.
27. Teal Ceramic Garden Stool
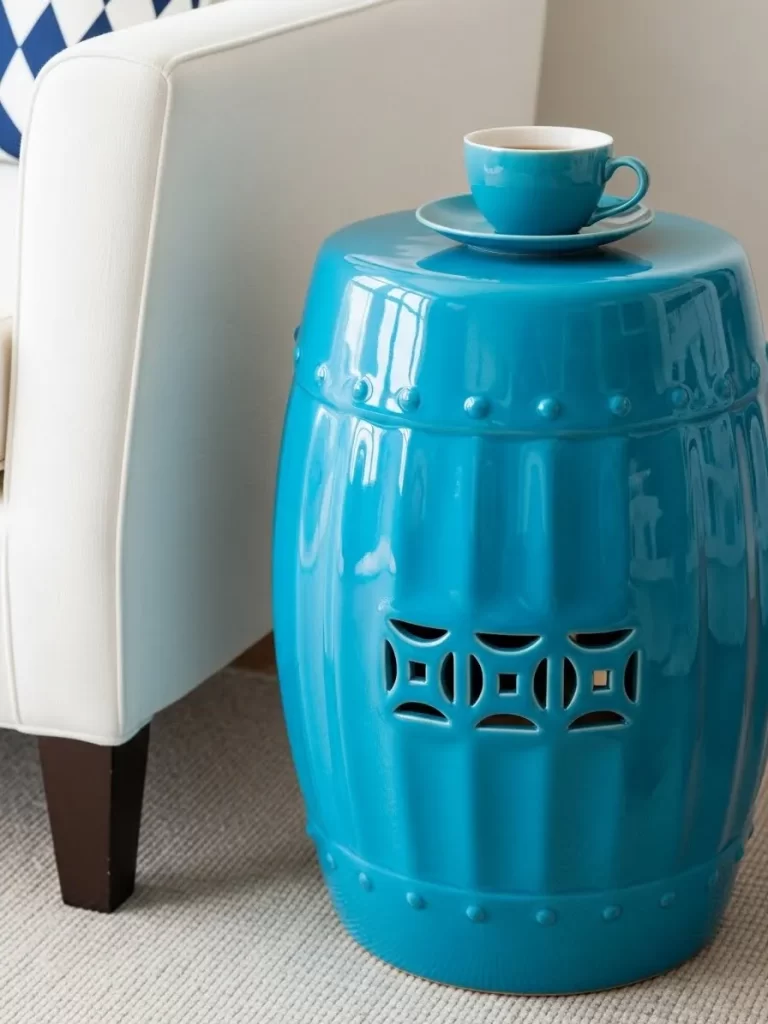
Standard side tables can sometimes feel a bit “leggy” and cluttered in a small seating area. This solid teal ceramic garden stool provides a bold pop of color and a unique drum shape. Its glossy finish reflects light, making a dark corner feel much brighter.
The cut-out patterns on the sides add a touch of global style and visual interest. This piece is incredibly versatile—it can be used as a table, an extra seat, or just a decorative accent. Teal is a vibrant spring color that works well with both warm and cool tones.
Because it is ceramic, it is also durable and easy to wipe clean. This swap replaces a basic wooden table with a piece that has more personality and shine. It adds a professional “decorator” touch to any living room or bedroom.
Material Required List
- 18-inch teal ceramic garden stool
- Matching teal teacup and saucer
- Small round wooden tray (optional)
Equipment Required List
- Glass cleaner
- Soft cloth
DIY Instruction Step by Step
- Clean the Surface: Spray a small amount of glass cleaner on a soft cloth and wipe down the entire stool. This removes any fingerprints and makes the teal glaze shine.
- Choose the Spot: Place the stool next to a white sofa or a leather armchair. The bright teal color will stand out beautifully against these neutral backgrounds.
- Check for Stability: Ensure the stool is sitting flat on the rug or floor. Ceramic stools can be heavy, so make sure it isn’t wobbling on an uneven surface.
- Style the Top: Place a small wooden tray on top if the surface is slightly rounded. This gives you a flat area to set down a drink or a book.
- Add a Personal Touch: Set a teal teacup or a small candle on the stool. This makes the piece feel integrated into the room rather than just a standalone object.
- Enjoy the View: Step back and notice how the glossy teal surface catches the light from the window. It is a simple way to bring a high-impact color into your home.
28. Braided Seagrass Pet Bed

Pet furniture is often made of unsightly plastic or fuzzy fabric that clashes with your decor. This circular pet bed made of thick braided seagrass brings a beautiful natural texture to your floor. The woven rope edges add a handcrafted, coastal feel to the room.
The neutral tan color of the seagrass blends seamlessly with wooden floors and light rugs. A soft, off-white cushion inside provides a comfortable spot for your pet while keeping the look clean. It turns an everyday pet essential into a stylish piece of furniture.
Seagrass is a sustainable and durable material that stands up well to daily use. This swap allows you to keep your pet’s favorite spot right in the living room without compromising your style. It feels fresh, organic, and perfect for a spring home update.
Material Required List
- Round braided seagrass basket (low sides)
- Circular off-white pet cushion
- Small linen blanket (to drape inside)
Equipment Required List
- Scissors (to remove labels)
- Vacuum with brush attachment
DIY Instruction Step by Step
- Prep the Basket: Remove any shipping labels or plastic tags from the seagrass braid. Use a vacuum brush to remove any loose fibers from the weaving.
- Insert the Cushion: Place the soft white cushion inside the seagrass basket. Push the edges down so the cushion sits snugly against the woven walls.
- Add a Soft Layer: Fold a small linen blanket and drape it over one edge of the bed. This adds a layer of comfort and introduces a “lived-in” texture to the piece.
- Pick a Sunny Spot: Place the pet bed near a window where your pet can enjoy the spring sunshine. The natural seagrass looks beautiful when hit by direct light.
- Tuck it In: Position the bed in a corner or next to a side table. This keeps it out of the main walking path while still being a part of the room’s design.
- Final Polish: Ensure the braided rope edge is facing outward. This is the most decorative part of the bed and should be the main thing people see.
29. Floral Watercolor Stationery
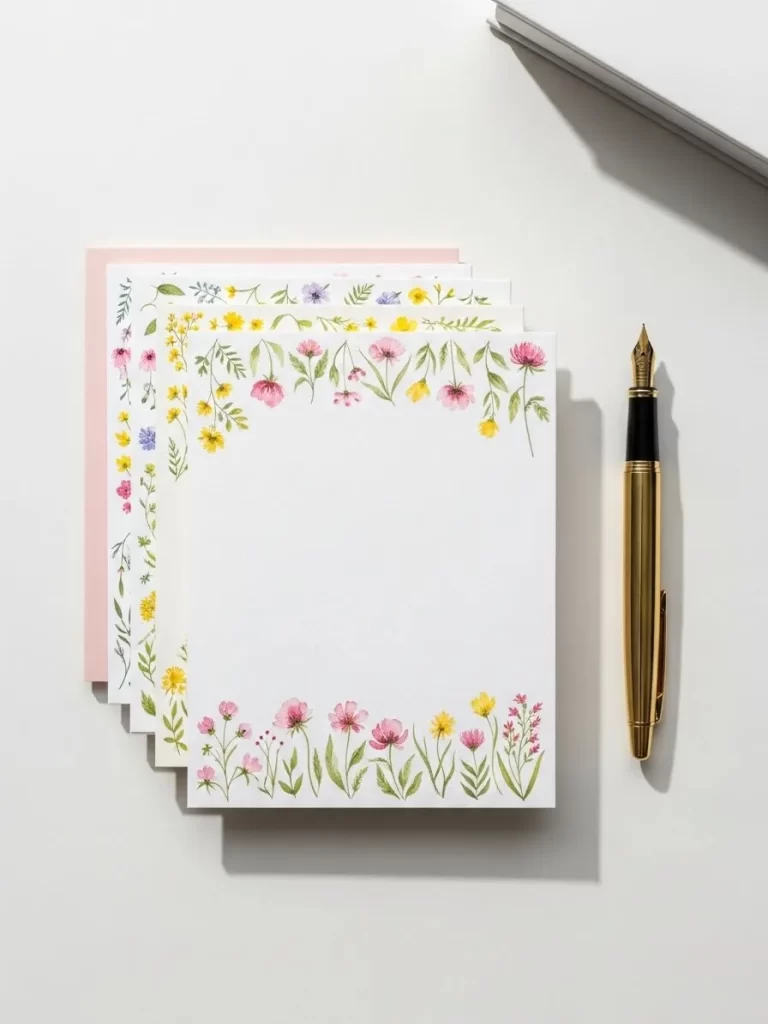
In a digital world, the art of hand-writing a note can feel very special and personal. This set of stationery features soft watercolor floral borders in pink, yellow, and green. It is a small “swap” for your desk that brings the beauty of a spring garden to your workspace.
The delicate flower designs add a feminine and artistic touch to your home office. Using high-quality paper and a gold pen makes the act of writing feel like a luxurious ritual. It is a simple way to introduce seasonal colors into your daily routine.
Displaying a few sheets on a desktop tray acts as a miniature piece of art. It brightens up a basic desk and serves as a reminder to connect with friends and family. This detail proves that spring updates can be small, functional, and beautiful.
Material Required List
- Set of floral watercolor stationery sheets
- Matching pink or cream envelopes
- High-quality gold fountain pen
- Small brass paperweight
Equipment Required List
- Desktop organizer tray
- Letter opener (optional)
DIY Instruction Step by Step
- Organize the Sheets: Place a small stack of the floral stationery in a desktop tray. Ensure the colorful floral borders are facing upward and are visible.
- Prep the Envelopes: Tuck the matching envelopes behind the paper sheets. Having everything in one place makes it more likely that you will actually use them.
- Position the Pen: Lay your gold pen across the top of the stationery. The metallic shine of the gold pairs beautifully with the soft watercolor pastels.
- Add a Paperweight: Place a small brass or glass paperweight on the corner of the stack. This keeps the paper from curling and adds another layer of style.
- Set the Scene: Place the tray near your computer or a desk lamp. The colors of the flowers will pop under the light and make your workspace feel more inviting.
- Write a Note: Use the kit to send a quick “happy spring” message to someone. This functional decor piece is best enjoyed when it is actually put to use.
30. Sage Green Silicone Kitchen Set

Old, mismatched plastic spatulas can make a kitchen counter look cluttered and “basic.” This set of sage green silicone utensils with natural wood handles provides a clean, unified look. The soft green color brings a garden-fresh feel to your cooking area.
The marble-patterned ceramic crock keeps the tools organized and easy to reach. Silicone is a practical material that is heat-resistant and gentle on your pans. This swap combines modern functionality with a soft, natural aesthetic.
Replacing dark or neon kitchen tools with this muted green set instantly brightens the room. It feels more “designer” and less like a standard hardware store purchase. It is a small change that makes your daily meal prep feel more like a spring celebration.
Material Required List
- 8-piece sage green silicone utensil set (with wood handles)
- Marble-patterned ceramic utensil crock
- Small sprig of fresh rosemary (for styling)
Equipment Required List
- Dish soap
- Warm water
- Microfiber towel
DIY Instruction Step by Step
- Wash the Tools: Wash your new silicone spatulas and spoons in warm soapy water. Dry them thoroughly with a microfiber towel to avoid water spots on the handles.
- Prep the Crock: Wipe out the inside of your marble ceramic crock. Ensure it is dry before placing any wooden handles inside to prevent moisture buildup.
- Group the Utensils: Place the most-used tools, like the spatula and the large spoon, toward the front. This makes them easier to grab while you are cooking.
- Vary the Heights: Some tools may be taller than others. Arrange them so the heights are varied, which creates a more interesting and “full” look in the crock.
- Position on Counter: Set the crock next to your stove on a clean countertop. The marble and sage green colors work perfectly with white tile or stone surfaces.
- Add a Fresh Scent: Tuck a small sprig of fresh rosemary or thyme into the crock. This adds a tiny burst of extra green and a wonderful herb scent to your kitchen.
31. Navy Bordered Coir Doormat
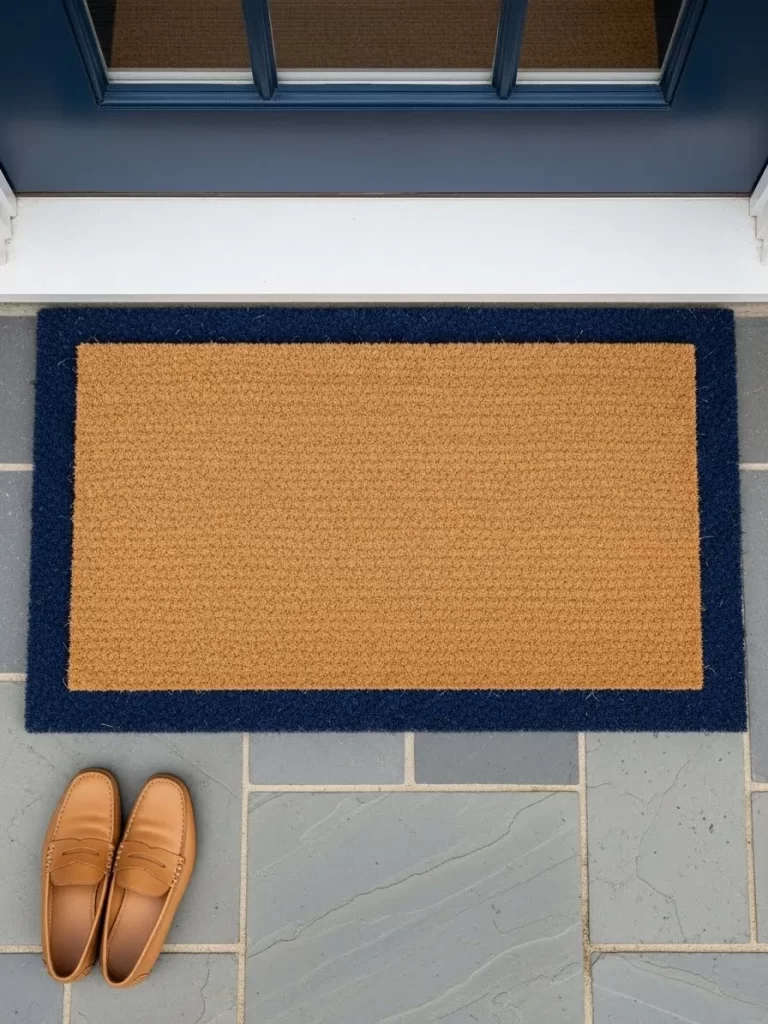
Front porches often look neglected after the long winter months. A natural coir doormat with a crisp navy blue border offers a structured and welcoming transition into your home. The deep blue frame provides a nautical touch that feels fresh and classic for the new season.
The stiff coconut fibers are excellent for trapping spring mud and rain from your shoes. This simple accessory protects your interior floors while adding immediate curb appeal. It creates a clean, intentional look that moves away from basic, unadorned mats.
Pairing this mat with a pair of leather loafers or a potted plant completes the entryway scene. It is a durable choice that stands up to heavy foot traffic without losing its vibrant color. This small update makes a strong first impression on every guest who visits.
Material Required List
- Plain natural coir doormat (18 by 30 inches)
- Exterior-grade navy blue acrylic paint
- High-quality painter’s tape
- Clear outdoor spray sealer
Equipment Required List
- Large stencil brush or foam roller
- Measuring tape
- Utility knife
- Stiff bristle brush (for cleaning)
DIY Instruction Step by Step
- Clean the Surface: Use a stiff bristle brush to scrub the doormat and remove any loose coconut fibers. This ensures the paint sticks directly to the mat rather than to dust.
- Measure the Frame: Use your measuring tape to mark a line two inches from the edge on all four sides. This will be the thickness of your navy blue border.
- Apply the Tape: Lay painter’s tape along the inside of your marks. Press the tape down very firmly with your fingers to prevent paint from bleeding into the natural section.
- Paint the Border: Dip your stencil brush into the navy paint and dab it onto the outer edge. Use a “pouncing” motion to push the paint deep into the thick fibers for full coverage.
- Apply a Second Coat: Wait one hour for the first layer to dry, then apply a second coat of paint. This ensures the navy color looks solid and professional against the tan background.
- Peel the Tape: Carefully remove the painter’s tape while the second coat is still slightly damp. This creates the sharpest possible line between the colors.
- Seal and Dry: Once the paint is completely dry, spray a light layer of outdoor sealer over the border. Let the mat sit for 24 hours before placing it at your front door.
32. Modern Candelabra Fireplace Insert

Empty fireplaces can look like dark, hollow voids when they are not in use during the spring. A minimalist black metal candelabra filled with white taper candles turns the hearth into a glowing focal point. The clean vertical lines of the candles add height and a sense of calm.
Using candles instead of logs keeps the living room feeling cool and bright as the weather warms. The flickering light provides a cozy atmosphere without the heat or mess of a real fire. This arrangement feels modern and replaces the “basic” look of an empty firebox.
The stark contrast between the white candles and the black metal frame creates a sophisticated visual. It is an easy way to repurpose your fireplace for the warmer months. This setup brings an elegant, spa-like energy to the center of your home.
Material Required List
- 12-hole black metal candle holder
- 12 tall white dripless taper candles
- White brick-patterned contact paper (if backing needs a refresh)
- Small box of long matches
Equipment Required List
- Level
- Microfiber cloth
- Vacuum with hose attachment
DIY Instruction Step by Step
- Clean the Hearth: Remove all old ash and logs from your fireplace. Use a vacuum hose to clean every corner of the brick so the area looks bright and fresh.
- Wipe the Metal: Use a soft cloth to remove any dust from your black candelabra. A clean matte finish looks much more expensive and intentional.
- Secure the Holder: Place the metal stand in the exact center of your fireplace. Use a level to ensure the floor is even so your candles do not tilt to one side.
- Prep the Candles: Gently shave the bottom of your taper candles with a knife if they are too wide for the holes. They should stand perfectly straight without wobbling.
- Insert the Tapers: Place the longest candles in the center of the holder and the shorter ones toward the edges. This creates a balanced, triangular shape that is pleasing to the eye.
- Melt the Base: Light one candle and let a few drops of wax fall into the holder holes before inserting the tapers. This acts as a “glue” to keep the candles secure.
- Final Check: Step back and look at the arrangement from the sofa. Ensure the candles are all at the same angle to maintain that clean, minimalist aesthetic.
33. Woven Hyacinth Table Setting
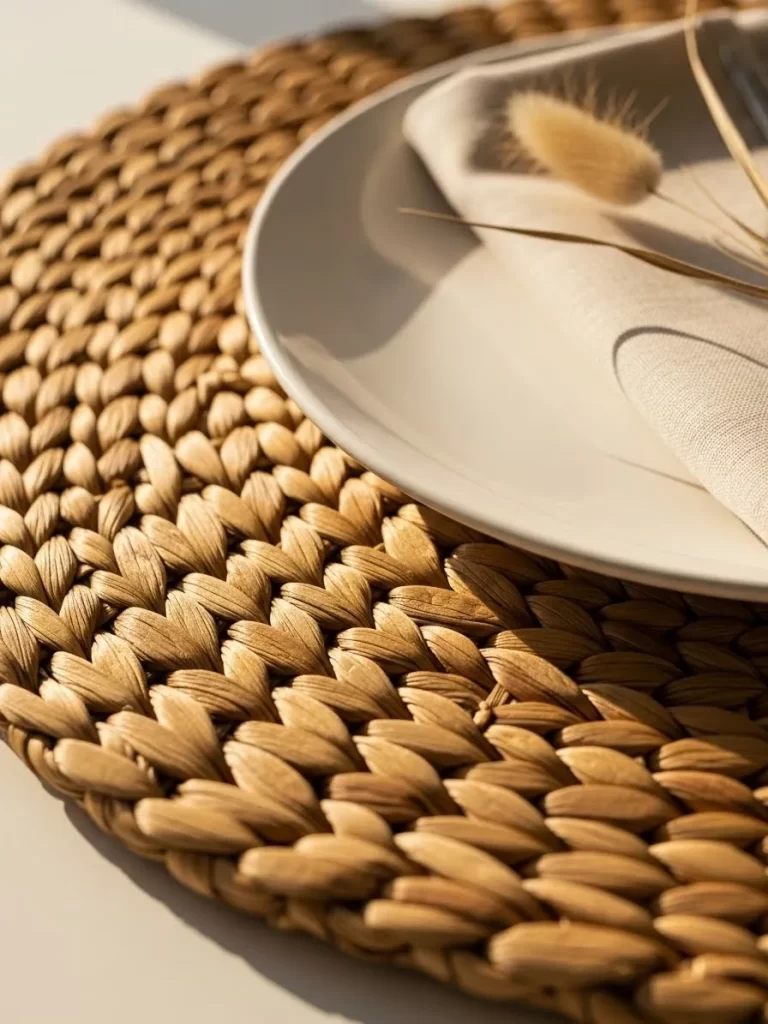
Dining tables often feel too formal when covered with heavy cloths and metal chargers. A round woven water hyacinth placemat introduces a chunky, natural texture that feels relaxed for spring. The warm golden tones of the weave glow under morning light.
Layering a simple white ceramic plate and a linen napkin over the mat creates a balanced, organic look. The thick braided edge adds a handcrafted feel that moves away from basic, flat table settings. It brings a touch of the garden directly to your mealtime.
These mats are durable and easy to clean, making them practical for daily use. They protect your table surface while acting as a beautiful base for seasonal dishes. This swap is the fastest way to make a casual breakfast feel like a special event.
Material Required List
- 4 round woven water hyacinth placemats
- 4 off-white linen napkins
- 1 bunch of dried bunny tail grass
- Hemp twine
Equipment Required List
- Sharp scissors
- Damp cloth
DIY Instruction Step by Step
- Clean the Mats: Wipe your woven placemats with a damp cloth to remove any stray fibers or dust. Avoid soaking them, as water hyacinth can lose its shape if it gets too wet.
- Position the Base: Place the mats on your table at each seat. Ensure they are spaced evenly so the table looks organized and inviting.
- Layer the Plates: Set your favorite white or cream ceramic plates in the center of each woven mat. The contrast between the smooth plate and rough weave is very stylish.
- Fold the Napkins: Create a simple rectangle fold with your linen napkins and place them across the center of each plate. This adds a soft, vertical element to the design.
- Prep the Grass: Cut four small stems of bunny tail grass to about five inches long. These soft, fluffy tops perfectly match the natural spring theme.
- Tie the Detail: Use a piece of hemp twine to tie a small sprig of grass to each napkin. This adds a professional “decorator” touch that takes only seconds to complete.
- Final Layout: Place your silverware and glassware around the mats. The natural tones will make any meal look fresh and curated for the new season.
34. Acrylic Wall Command Center
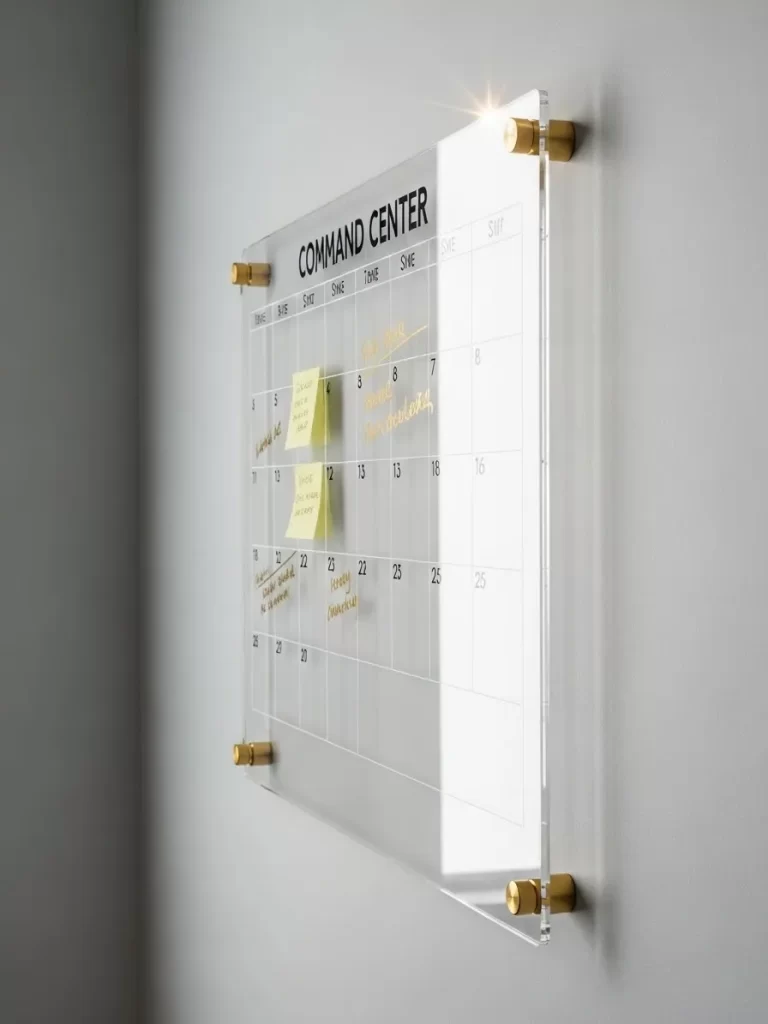
Kitchen walls often become cluttered with messy paper calendars and sticky notes. A clear acrylic wall calendar with gold mounting hardware provides a sleek and modern way to stay organized. The transparent surface allows your wall color to show through, keeping the room feeling airy.
Writing with a gold or white dry-erase marker adds a touch of luxury to your daily planning. This “command center” replaces basic paper planners with a permanent, high-end design feature. It turns a boring task into a beautiful part of your kitchen decor.
The metallic gold standoff bolts add a jewelry-like finish to the wall. This swap keeps your family schedule in plain sight without creating visual clutter. It is the perfect blend of functionality and sophisticated spring style.
Material Required List
- 24 by 36 inch clear acrylic board
- 4 gold standoff mounting bolts
- Gold dry-erase marker
- 2 yellow sticky note pads
Equipment Required List
- Power drill with masonry bit
- Bubble level
- Pencil
- Measuring tape
DIY Instruction Step by Step
- Position the Board: Hold the acrylic board against the wall at eye level. Use your bubble level to ensure the top edge is perfectly straight.
- Mark the Holes: Use a pencil to draw a small dot through each of the four pre-drilled holes in the acrylic corners. This is where your bolts will go.
- Drill the Wall: Set the board aside and drill holes into your marks. If you are drilling into drywall, push a plastic anchor into each hole for extra support.
- Install the Bases: Screw the bottom half of the gold standoff bolts into the wall. These will act as the “legs” that hold the board away from the surface.
- Mount the Acrylic: Hold the board up so the corner holes line up with the standoff bases. Thread the gold caps through the acrylic and into the bases.
- Hand-Tighten: Spin the gold caps until they are snug against the board. Do not over-tighten, or you might crack the acrylic surface.
- Plan Your Week: Use your gold marker to draw a grid and write in your spring events. Stick a few yellow notes on the side for quick reminders that pop against the clear board.
35. Cherry Blossom Glass Centerpiece
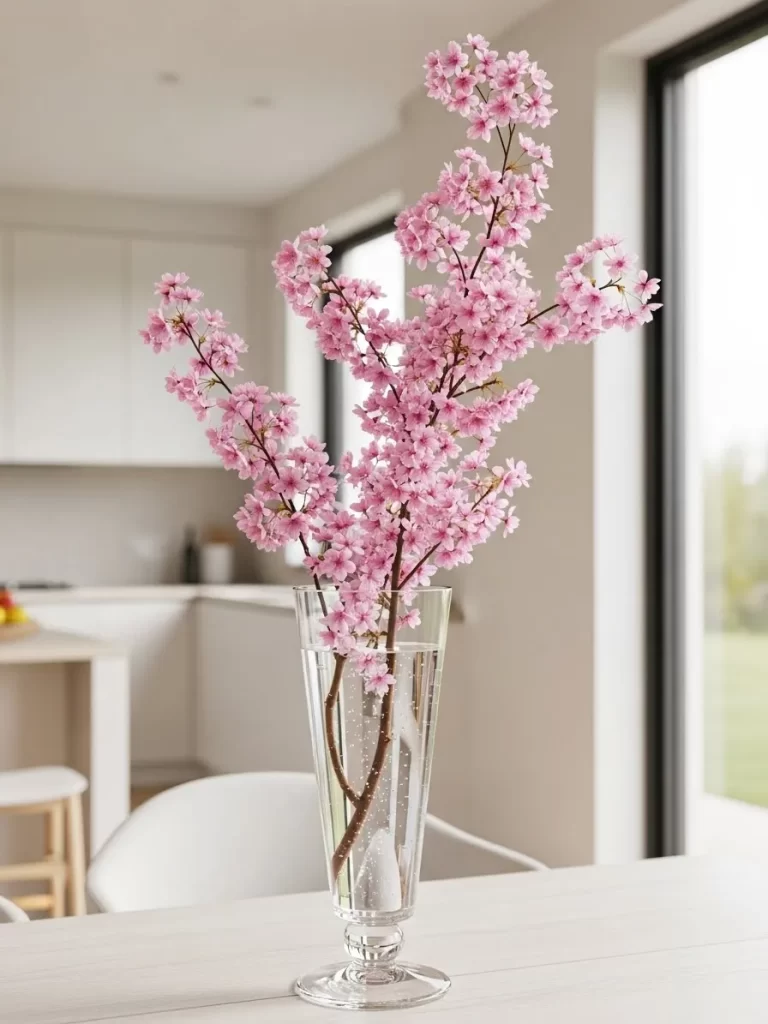
Dark corners of a dining room can feel heavy and disconnected from the changing season. A tall, clear glass vase filled with blooming pink cherry blossom branches brings instant life and height to the space. The delicate petals add a soft, romantic touch of color.
Natural branches offer an organic shape that feels much more authentic than artificial flowers. The height of the arrangement draws the eye upward, making your room feel more grand and spacious. It captures the very essence of spring in a single, simple display.
The clear water and glass vase maintain a sense of lightness and transparency. This swap replaces small, basic table decor with a high-impact botanical statement. It is the ultimate way to celebrate the arrival of the new season indoors.
Material Required List
- 3 tall fresh cherry blossom or plum branches
- Extra-tall tapered glass vase
- Clean filtered water
- Flower preservative liquid
Equipment Required List
- Heavy-duty garden shears
- Measuring tape
- Microfiber cloth
DIY Instruction Step by Step
- Prep the Vase: Wash your tall glass vase with warm soapy water and dry it with a microfiber cloth. It must be crystal clear to look its best.
- Fill with Water: Pour clean, room-temperature water into the vase until it is three-quarters full. Add a few drops of flower preservative to keep the blossoms from wilting.
- Measure the Height: Hold a branch next to the vase. The tallest part should be about one and a half times the height of the container for a balanced look.
- Cut the Wood: Use heavy-duty garden shears to cut the bottom of the woody stems at a sharp angle. This helps the branch drink more water through the hard bark.
- Score the Stems: Cut a small “X” into the bottom inch of each branch. This opens up more surface area for the water to enter the stem.
- Arrange the Stems: Place the branches into the vase one at a time. Let them lean in different directions to mimic how they grow on a tree in nature.
- Place the Display: Set the vase in the center of your table or on a sideboard. Ensure it is in a spot where it won’t be easily knocked over, as tall branches can be top-heavy.
Transforming a basic home into a vibrant sanctuary does not require endless spending or complex projects. We have seen how thirty-five simple exchanges—from a sage green knitted pouf to a clean acrylic wall calendar—can inject warmth, light, and personality into your space. These small, mindful changes add up to create a massive impact on your home’s overall feel.
The key to a successful spring refresh lies in choosing pieces that are both functional and visually appealing. Focus on natural textures like cane, rattan, and linen, coupled with organic colors like terracotta, sky blue, and fresh sage green. Introducing these colors early elevates your mood and makes your home feel cohesive.
You now possess the tools and inspiration needed to break free from dull decor. Start with one simple swap in your kitchen or living room today. Embrace the lighter side of home design and let the energy of spring flow through every room.
Key Takeaways
Focus on Natural Textures: Prioritize materials like linen, jute, rattan, and natural wood. These textures soften hard lines and create an organic, relaxed atmosphere suitable for spring.
Use Green as a New Neutral: Sage green, emerald glass, and fresh eucalyptus are essential colors. They bring the calming, fresh feeling of the outdoors inside without overwhelming a room.
Swap Small for Big Impact: Hardware, coasters, towels, and soap dispensers are low-cost items that make a significant difference. Replacing these small, basic pieces elevates the entire space instantly.
Layer the Light: Choose sheer window panels and warm-toned floor lamps to maximize brightness. This helps bounce light around the room, making it feel airy and open after the darker winter months.
Embrace Monochromatic Display: Group accessories in a single color family, such as blue cloth-bound books or white ceramic vases. This creates visual harmony and turns cluttered areas into curated displays.