
Walking into a messy room often feels heavy. Your home should be a sanctuary rather than a source of constant stress. Too much stuff usually hides the beauty of your living space and makes daily life harder.

You do not need an entire month to transform your surroundings. Small and focused tasks make a massive difference in how you feel about your home. A single weekend provides enough time to reclaim your peace of mind and order.
These forty five projects target the most common problem areas in every house. We focus on quick wins that provide immediate visual rewards for your effort. Let us turn that chaos into a calm and functional environment right now.
1 Custom Wooden Kitchen Drawer Dividers

Messy kitchen drawers often make cooking feel like a chore. You spend way too much time hunting for a whisk or a spatula buried under random tools. This simple project brings immediate order to your culinary space by giving every utensil a specific home.
Natural wood inserts look much better than cheap plastic bins. They create a high end appearance that matches your cabinetry. You will feel a sense of calm every time you pull the handle to grab a measuring spoon.
Organizing your tools helps you see exactly what you own. You might find you have three identical ladles taking up valuable room. Clearing the chaos allows you to focus on making great meals instead of digging through a jumble of metal and silicone.
Material Required List
- Thin wood strips (Poplar or Oak work well)
- Wood glue
- Small finishing nails
- Sandpaper (120 and 220 grit)
Equipment Required List
- Measuring tape
- Pencil
- Small hand saw or miter saw
- Hammer
- Damp cloth
DIY Instructions
- Empty your drawer completely and wipe it clean to remove any crumbs or dust.
- Measure the inside width, depth, and height of the drawer carefully with your tape measure.
- Group your utensils on the counter to decide how many sections you need and how wide they should be.
- Mark the wood strips using your pencil based on the internal measurements of the drawer.
- Cut the wood pieces slowly with your saw to ensure the ends are straight and square.
- Smooth any rough edges on the cut wood using the sandpaper until they feel soft to the touch.
- Place the main long dividers into the drawer first to check the fit before adding glue.
- Apply a thin bead of wood glue to the ends of the shorter cross dividers.
- Press the pieces together firmly and use finishing nails if you want extra strength for heavy items.
- Wipe away any extra glue immediately with a damp cloth so it does not dry into a lump.
- Let the glue dry for several hours before placing your utensils back into their new designated slots.
2 Refrigerator Door Condiment Zoning
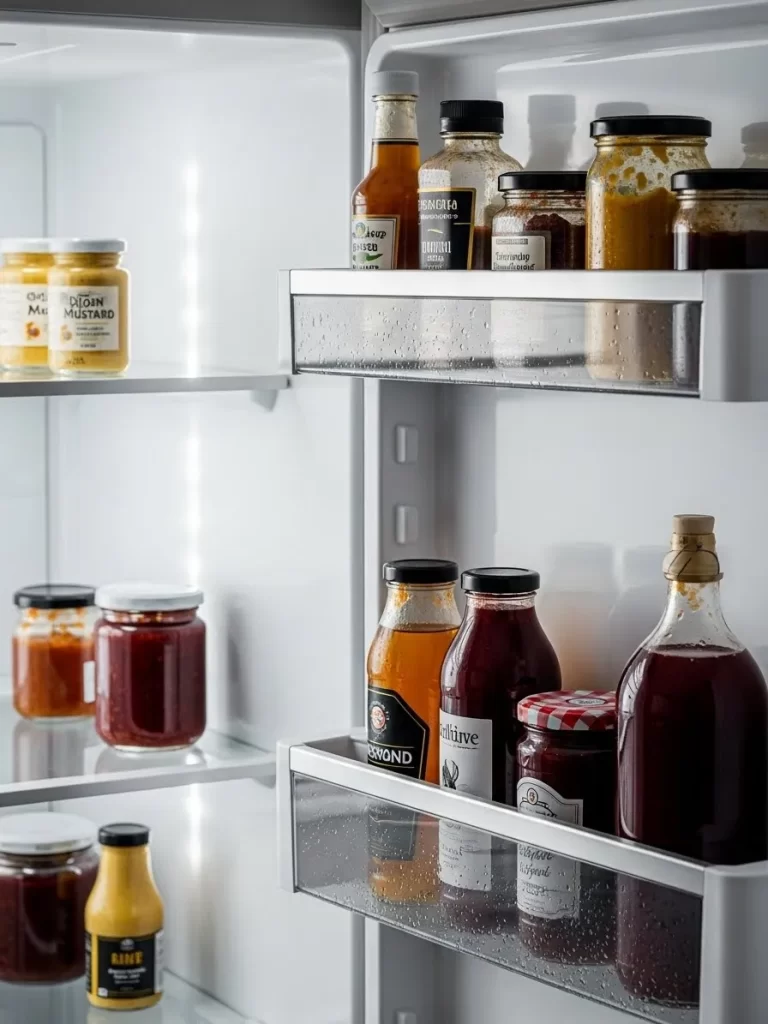
A chaotic fridge door makes it hard to find what you need during meal prep. Most people just shove jars wherever they fit after a grocery trip. This project focuses on grouping your sauces and spreads by type to save time and prevent food waste.
Clear visibility helps you track expiration dates and stock levels easily. By placing similar items together, you avoid buying a third jar of mustard you already own. Your morning routine becomes faster when the jam and butter stay in the same spot every day.
Keep your most used items at eye level for quick access. This simple logic keeps the interior looking tidy and professional. You will appreciate the clean lines every time you reach for a cold drink or a snack.
Material Required List
- Mild dish soap
- Microfiber cloth
- Adhesive labels (optional)
Equipment Required List
- Large cooler
- Trash bag
- Permanent marker
DIY Instructions
- Move all perishable items into a cooler to keep them safe and cold while you work.
- Take every single jar and bottle out of the refrigerator door and side shelves.
- Check the dates on every container and toss anything that has expired into the trash.
- Wipe down the empty shelves with warm, soapy water to remove sticky rings or spills.
- Dry the surfaces thoroughly with a clean cloth to prevent streaks.
- Group your condiments into categories such as spicy, sweet, or savory.
- Place the tallest bottles in the back and smaller jars in the front so you can see everything.
- Store frequently used items like milk or butter in the most accessible middle shelf area.
- Put the fresh food back in and enjoy the organized view.
3 Under Sink Utility Station

The area beneath the kitchen sink often becomes a graveyard for old sponges and half empty bottles. Leaky pipes or tangled cords make this dark cabinet feel unmanageable and dirty. This project utilizes clear containers to maximize the vertical space around your plumbing.
Using transparent bins allows light to reach the back of the cabinet. You can instantly see if you are low on glass cleaner or dish soap without crouching down. It also protects your cabinet floor from potential drips or chemical rings.
Adding a small motion sensor light makes a massive difference in functionality. No more fumbling in the dark for a fresh sponge or a trash bag. This transformation turns a hidden mess into a highly efficient cleaning hub.
Material Required List
- Clear plastic bins
- Battery operated LED light
- All purpose cleaner
- New sponges and scrubbers
Equipment Required List
- Flashlight
- Measuring tape
- Handheld vacuum or broom
DIY Instructions
- Pull everything out of the cabinet so you can inspect the floor for any water damage.
- Vacuum the base of the cabinet to remove dust and old debris.
- Scrub the base and walls with a strong cleaner and let the surfaces dry completely.
- Measure the height of your pipes to ensure your new bins will slide underneath them.
- Sort your supplies and discard any nearly empty bottles or items you never use.
- Place your most used cleaners into the clear bins for easy grabbing.
- Mount the LED light to the top of the cabinet using the adhesive backing.
- Slide the bins into place, keeping the items you use daily right at the front.
- Store extra sponges or rolls of trash bags in the back where they stay out of the way.
4 Uniform Spice Drawer Alignment

Mismatched spice containers create a visual jumble that makes a kitchen look cluttered. Different heights and colors of lids distract the eye and hide the ingredients you need. Switching to uniform glass jars creates a sleek aesthetic that simplifies your cooking process.
Square or round glass jars with clear labels allow you to find seasonings in seconds. This organization prevents the frustration of burning a dish while searching for a specific spice. It also makes the drawer look incredibly clean and organized.
Tiered inserts or dividers keep the jars from rolling around when you open the drawer. You will love the satisfying click of the jars resting in their rows. This weekend task provides a high reward visual upgrade for very little effort.
Material Required List
- Set of uniform glass spice jars
- Pre printed or custom labels
- Small funnel
Equipment Required List
- Damp paper towel
- Scissors
- Pen and paper
DIY Instructions
- Remove all current spice tins and bottles from your drawer or cabinet.
- Wipe out the drawer with a damp towel to remove any spilled powders or seeds.
- Compare your old spices to the number of new jars you have available.
- Check for freshness by smelling the spices and throw away any that lost their scent.
- Use a small funnel to pour the seasonings from the old containers into the new glass jars.
- Apply the labels to the lids or the sides of the jars, making sure they are straight.
- Lay the jars in the drawer in alphabetical order or by how often you use them.
- Ensure the labels are facing up so you can read them without picking up the jar.
5 Glass Food Storage Tower

Plastic containers with missing lids are a major source of kitchen stress. They stain easily and often refuse to stack neatly, leading to a mess when you open the door. Upgrading to glass containers with locking lids solves this problem while keeping your food fresher.
Glass is non porous and does not hold onto smells or colors from old meals. These containers stack safely in tall towers, taking up much less horizontal shelf space. You can move them straight from the fridge to the microwave without worry.
Seeing your leftovers clearly encourages you to eat them rather than letting them spoil. This project turns a messy drawer into a beautiful, functional display. Your kitchen will look more modern and feel much more professional.
Material Required List
- Matching glass container set
- Lid organizer rack
- Shelf liner
Equipment Required List
- Recycling bin
- Microfiber cloth
DIY Instructions
- Clear out your entire food storage cabinet and lay everything on the counter.
- Match every lid to its base and set aside any pieces that are missing their partner.
- Donate or recycle your old, stained plastic containers to make room for the new set.
- Clean the cabinet shelf thoroughly to remove any sticky residue.
- Group the glass containers by size, nesting the smaller ones inside the larger ones.
- Place the lids in a dedicated lid organizer so they stand upright and remain easy to grab.
- Stack the heavy, large containers at the bottom of the pile for stability.
- Arrange the stacks on your shelf with the most frequently used sizes at the front.
6 Minimalist Coffee Mug Culling
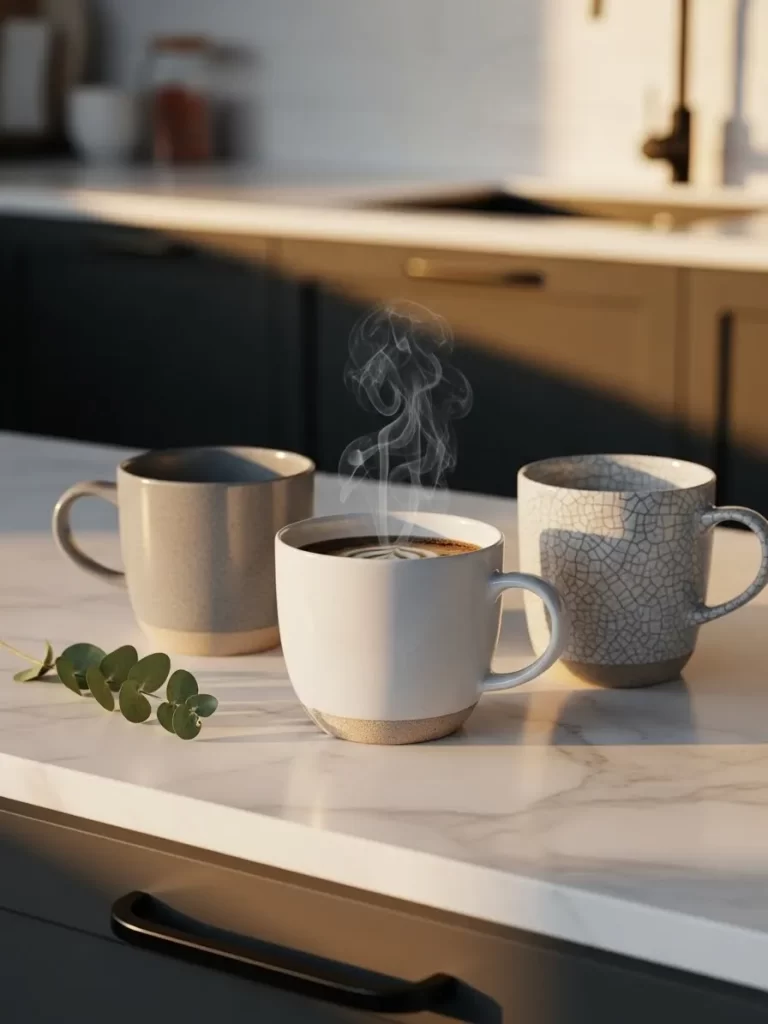
Coffee mugs tend to multiply over time as we collect them from vacations and gifts. Too many mugs crowd your cabinets and make it difficult to reach the ones you actually like. Thinning your collection to a few favorite pieces creates a peaceful morning atmosphere.
Choosing high quality mugs gives your kitchen a sophisticated, cohesive look. You don’t need twenty mismatched cups if you only drink two cups of coffee a day. Keeping only what you use makes the countertop feel open and airy.
The one in, one out rule works wonders for this specific area of the home. If you buy a new favorite mug, let an old one go. This habit ensures your cabinets stay tidy and stress free forever.
Material Required List
- Box for donations
- Wrapping paper
- Mild ceramic cleaner
Equipment Required List
- Sponge
- Drying rack
DIY Instructions
- Take every mug out of your cabinet and line them up on your kitchen counter.
- Pick up each mug and decide if it brings you joy or if you actually use it.
- Set aside mugs that are chipped, stained, or have uncomfortable handles.
- Choose a specific number of mugs that fit comfortably on your shelf without crowding.
- Place the unwanted mugs into a donation box and wrap them carefully.
- Wash your favorite mugs by hand to make them sparkle.
- Wipe down the cabinet shelf before putting the remaining mugs back inside.
- Arrange the mugs in neat rows with the handles all facing the same direction.
7 Bulk Pantry Decanting

Open bags of flour and pasta look messy and often lead to accidental spills. This project uses large glass jars to store dry goods in a way that is both beautiful and practical. Decanting your pantry items protects them from pests and keeps them fresh for much longer.
Matching jars with black labels create a high end look that feels like a professional kitchen. You can see exactly how much rice or sugar you have left at a single glance. This prevents the emergency grocery run when you realize you are out of a key ingredient.
Uniform storage allows you to use every inch of your pantry shelving efficiently. It turns a cluttered storage room into an organized zone you will want to show off. Cooking becomes a more joyful experience when your ingredients are easy to find.
Material Required List
- Large glass airtight canisters
- Chalkboard labels
- White paint pen
Equipment Required List
- Step stool
- Vacuum with hose attachment
- Funnel
DIY Instructions
- Empty your pantry shelves one by one so you are not overwhelmed by the mess.
- Vacuum the corners of the shelves to remove any spilled grains or dust.
- Wipe the shelves down with a damp cloth and let them dry completely.
- Group similar items together, such as baking, grains, and pastas.
- Pour dry goods into the glass jars using a funnel to avoid making a mess.
- Write the name of the item on a label and stick it onto the front of the jar.
- Note the expiration date on the bottom of the jar using a piece of tape.
- Place the heaviest and largest jars on the lower shelves for safety.
- Arrange the jars in rows, keeping the things you use most often at eye level.
8 Wardrobe Coat Tapering

Heavy coats take up a lot of room in a closet and often look bulky and disorganized. This project involves sorting through your outerwear to keep only the pieces that fit well and suit your lifestyle. A streamlined coat closet makes leaving the house in the morning much smoother.
Using matching hangers provides a high end look and prevents clothes from slipping off. It also ensures that all coats hang at the same height, which instantly makes the space look more organized. You will finally have room to breathe between your favorite jackets.
Seasonal rotation is the secret to a functional closet. Store heavy parkas in the summer and light raincoats in the winter to save space. This weekend project creates a calm entry point for your home that guests will notice.
Material Required List
- Matching wooden or slim hangers
- Fabric garment bags
- Cedar blocks
Equipment Required List
- Full length mirror
- Lint roller
- Donation bags
DIY Instructions
- Remove every coat from the closet and lay them across your bed.
- Try on each item to ensure it still fits comfortably and looks good.
- Set aside any coats that are torn, stained, or haven’t been worn in over a year.
- Use a lint roller to remove hair or dust from the coats you decide to keep.
- Replace all mismatched plastic or wire hangers with your new sturdy ones.
- Group the coats by length or by color to create a visually pleasing line.
- Hang the coats back in the closet with the zippers or buttons facing the same way.
- Place cedar blocks in the corners of the closet to keep the air smelling fresh.
9 Honeycomb Sock Organization
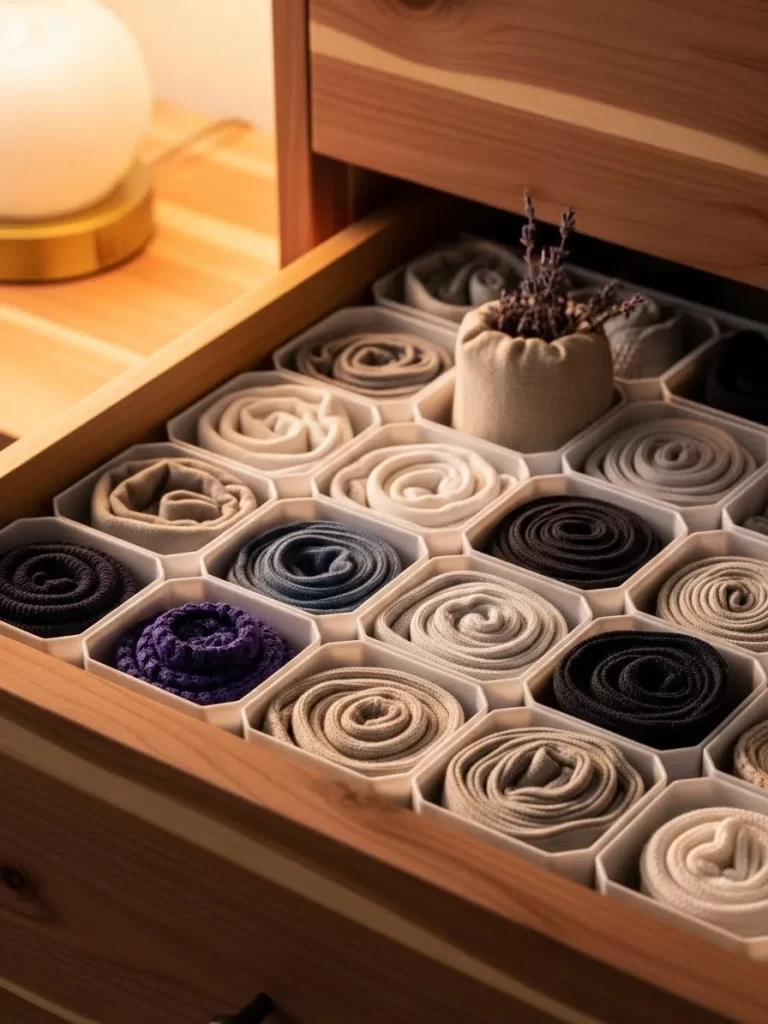
Searching for a matching pair of socks in a deep drawer is a common morning frustration. Most people just toss laundry in, creating a tangled mountain of fabric. This honeycomb divider system gives every pair of socks its own dedicated cell.
This method keeps your socks rolled neatly so the elastic does not stretch out over time. You can see every color and pattern at once, making it easy to coordinate with your outfit. It feels like shopping in a boutique every time you get dressed.
The dividers are easy to assemble and can be trimmed to fit any drawer size. This project is a great way to handle the small clutter that often goes ignored. You will love the tidy, geometric look of your newly organized clothing.
Material Required List
- Plastic or fabric honeycomb drawer divider set
- Lavender sachet
- Drawer liner
Equipment Required List
- Scissors
- Tape measure
DIY Instructions
- Empty your sock drawer and sort the socks into pairs, discarding any that are missing a mate.
- Wipe the inside of the drawer to remove any dust or lint.
- Measure the length and width of the drawer to see how many dividers you need.
- Snap the honeycomb pieces together according to the package instructions.
- Trim the edges of the divider with scissors so it fits snugly against the drawer walls.
- Drop the divider into the drawer and ensure it does not shift when you pull the handle.
- Roll each pair of socks into a tight cylinder rather than folding them into a ball.
- Place one pair into each hexagonal hole, grouping them by color or type.
10 Tiered Mudroom Shoe Rack
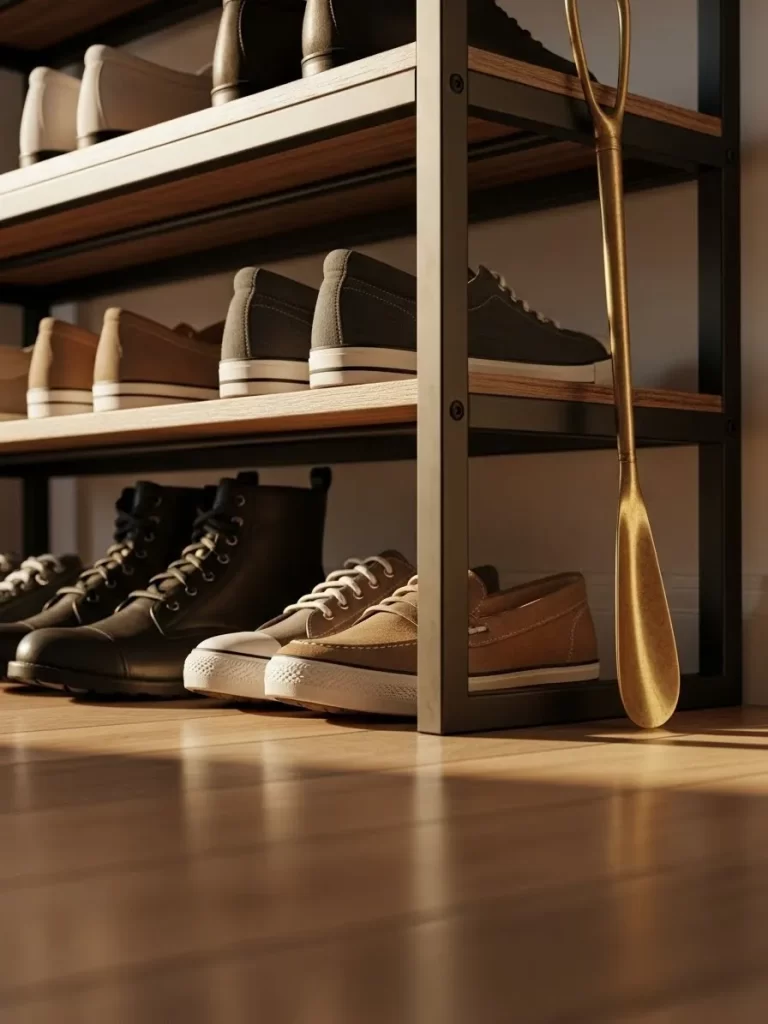
Shoes piled up by the front door create a tripping hazard and make the entryway look messy. A tiered rack provides a specific place for every pair, keeping the floor clear and open. This project organizes your footwear by height, ensuring that boots and sneakers all have a home.
Using a metal and wood rack adds a modern touch to your home decor. It allows air to circulate around your shoes, which helps them dry faster and stay fresh. You will find it much easier to sweep or mop the floor when the shoes are elevated.
Keep a shoe horn nearby to make putting on your favorite boots even easier. This setup encourages family members to take off their shoes the moment they walk inside. It is a simple habit that keeps the rest of your home much cleaner.
Material Required List
- Multi tier shoe rack
- Floor mat
- Decorative shoe horn
Equipment Required List
- Screwdriver
- Microfiber cloth
- All purpose spray
DIY Instructions
- Gather every pair of shoes from the entryway and move them to a different room.
- Clean the floor where the rack will sit to remove any dirt or mud.
- Assemble the shoe rack following the manufacturer’s guide, ensuring all screws are tight.
- Place the rack against the wall, making sure it does not block the path of the door.
- Clean your shoes by wiping off any visible dirt before placing them on the rack.
- Put heavy boots on the bottom shelf to provide a stable base for the unit.
- Arrange sneakers and flats on the middle shelves, grouped by the person who owns them.
- Place slippers on the top shelf where they stay away from floor dust.
11 Structured Handbag Station

Purses often end up scattered on floors or slumped in the bottom of closets. This makes them lose their shape and makes it hard to find the right bag for your outfit. A structured station with internal dividers keeps your accessories upright and ready to go.
Organizing your bags by size or color creates a beautiful display that looks like a high end retail store. You can quickly swap your essentials from one bag to another without searching. This project protects your investment by keeping delicate fabrics off the ground.
Material Required List
- Bag organizer insert
- Soft cleaning cloth
- Dust bags
Equipment Required List
- Measuring tape
- Level
DIY Instructions
- Collect all your handbags and purses from around the house.
- Empty every pocket and shake out any crumbs or loose change.
- Sort the bags into groups based on their size and how often you use them.
- Wipe the exterior of each bag with a soft cloth to remove dust.
- Insert the bag organizer into your favorite tote to keep items from shifting.
- Place larger bags on the shelf first, using the dividers to keep them standing.
- Store smaller clutches inside larger bags if you need to save extra space.
- Keep your everyday bag in the most accessible spot for a quick exit.
12 Seasonal Accessory Binning

Winter hats and gloves tend to create a tangled mess in entryways. These small items get lost easily and make it difficult to find a matching set when you are in a rush. Using labeled wooden bins at the bottom of a closet keeps these accessories contained and tidy.
Sorting items by type allows everyone in the house to find their gear instantly. The bins slide out easily, making it simple for children to reach their own mittens. This setup turns a chaotic pile of wool into an orderly system.
Material Required List
- Matching wooden bins
- Metal label holders
- Cedar sachet
Equipment Required List
- Screwdriver
- Permanent marker
DIY Instructions
- Gather all winter accessories and check for any holes or stains.
- Group the items into categories like hats, gloves, and scarves.
- Measure the bottom of your closet to ensure the bins will fit side by side.
- Wipe out the inside of each bin to remove any dust.
- Place a cedar sachet in each bin to keep the wool smelling fresh.
- Screw the label holders onto the front of each bin.
- Fold the scarves neatly and stack the hats on top of each other.
- Slide the bins under your hanging coats to use that empty floor space.
13 Cozy Window Nook Simplification

A window seat should be a place of rest, but it often becomes a landing spot for mail. Clearing the surface and adding a few purposeful items turns it back into a peaceful retreat. A simple tissue box and a couple of soft pillows are all you need for comfort.
Keeping this area minimal encourages you to sit down and enjoy the view. You can see the light coming through the glass without moving piles of books or laundry. This small change makes your entire living room feel more intentional and calm.
Material Required List
- Decorative throw pillows
- Stylish tissue box cover
- Soft throw blanket
Equipment Required List
- Handheld vacuum
- Glass cleaner
DIY Instructions
- Remove everything from the window seat and wipe the surface with a damp cloth.
- Clean the window glass until it sparkles so you have a clear view outside.
- Vacuum the cushion or the bench to remove any dust or pet hair.
- Choose two pillows that match your room’s colors and place them in the corners.
- Put a standard tissue box into a decorative cover that hides the cardboard.
- Drape a soft blanket over the edge for a touch of warmth and texture.
- Resist the urge to put books or electronics back onto the seat.
14 Living Room Remote Tray
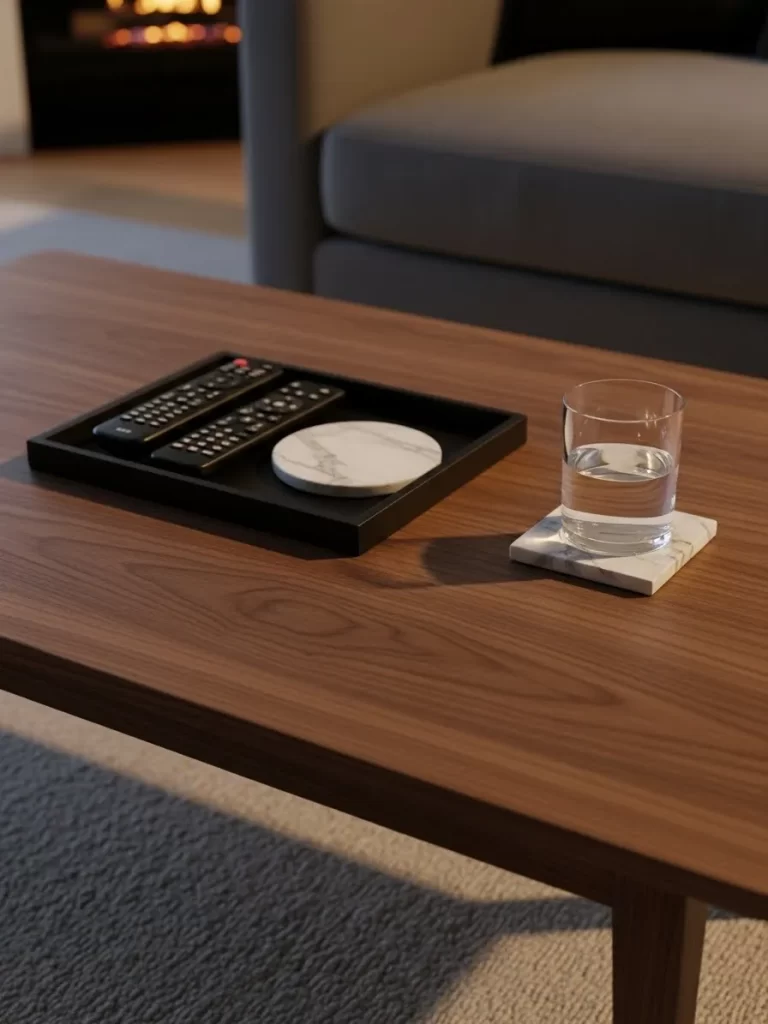
Multiple remote controls scattered across a coffee table look messy and disorganized. This project uses a small, sleek tray to house all your electronics and coasters in one designated spot. It prevents the frustration of losing the TV remote between the couch cushions.
A low profile tray keeps your tabletop looking intentional and tidy. It creates a clear boundary for where items belong, making it easier to clean the rest of the table. You will appreciate the clean lines when you sit down to relax in the evening.
Material Required List
- Small decorative tray
- Set of stone coasters
- Felt pads
Equipment Required List
- Microfiber cloth
- Furniture polish
DIY Instructions
- Clear everything off your coffee table and wipe the surface with furniture polish.
- Stick felt pads onto the corners of the bottom of your tray to protect your table.
- Place the tray in the center or to one side of the table.
- Set your TV and soundbar remotes inside the tray, side by side.
- Stack your coasters neatly in one corner of the tray so they are ready for drinks.
- Keep the rest of the table surface completely clear of any other objects.
15 Clear Toy Sorting Bags

Loose building blocks often end up in a giant, disorganized toy box. This makes it impossible for children to find the specific pieces they want without dumping everything out. Clear zippered bags allow kids to see the contents of each set without making a mess.
Storing toys in transparent bags makes cleanup much faster for parents and children alike. The bags are durable and easy to stack in a closet or on a shelf. This project keeps sets together and prevents expensive toys from getting lost.
Material Required List
- Heavy duty clear zippered pouches
- Large teddy bear (for decor)
- Small labels
Equipment Required List
- Vacuum
- Sorting bins
DIY Instructions
- Dump all the loose toys onto a large rug or clean floor area.
- Sort the toys into specific categories like blocks, animals, or cars.
- Wipe down any dirty toys with a damp cloth before packing them away.
- Place each group of toys into its own clear zippered bag.
- Squeeze out the excess air before zipping the bag closed to save space.
- Stack the bags neatly on a low shelf where your child can reach them easily.
16 Aesthetic Bookcase Spacing

A bookshelf stuffed with too many volumes looks heavy and can make a room feel small. This project focuses on adding breathing room between your favorite titles and decorative objects. By leaving some shelf space empty, you create a sophisticated look that highlights your best pieces.
Mixing horizontal and vertical book stacks adds visual interest to your library. Adding a small plant or a geometric sculpture breaks up the rows of paper and ink. Your collection will look more like a curated gallery and less like a storage unit.
Material Required List
- Small potted succulent
- Geometric decorative object
- Bookends
Equipment Required List
- Level
- Duster
DIY Instructions
- Remove all books and objects from your shelves and dust the surfaces thoroughly.
- Sort your books by color or size to create a more cohesive appearance.
- Place a small stack of books horizontally on one shelf to act as a pedestal.
- Set a decorative object or a small plant on top of the horizontal book stack.
- Lean a few books vertically next to the stack, leaving a few inches of empty space.
- Continue this pattern across the other shelves, making sure no shelf is completely full.
- Step back frequently to look at the balance of the entire bookcase.
17 Floating Medicine Cabinet Risers

Medicine cabinets are often deep and narrow, causing small bottles to get hidden in the back. You end up buying duplicates because you cannot see what you already have. Clear acrylic risers create tiny steps that allow every bottle of vitamins or aspirin to be visible.
Lighting up the interior with a slim LED strip makes a huge difference in the morning. You can quickly find your thermometer or cotton swabs without a struggle. This project turns a dark, cluttered cabinet into a clean and professional health station.
Material Required List
- Clear acrylic tiered risers
- Adhesive LED light strip
- Small glass jars
Equipment Required List
- Glass cleaner
- Scissors
DIY Instructions
- Empty the cabinet and check the expiration dates on all medications and ointments.
- Dispose of old medicine safely according to your local rules.
- Clean the glass shelves until they are completely transparent.
- Measure the width of the shelves to ensure your risers will fit inside.
- Peel the backing off the LED strip and stick it along the inside frame of the cabinet.
- Place the acrylic risers onto the shelves, starting from the back.
- Arrange your bottles on the risers with the tallest items on the top step.
- Put small loose items like cotton swabs into clear glass jars on the bottom shelf.
18 Streamlined Makeup Pouch
A large makeup collection can quickly become overwhelming and messy. This project involves choosing your daily essentials and keeping them in one high quality, quilted pouch. It simplifies your morning routine by removing the need to dig through a giant vanity drawer.
Keeping your most used brushes and palettes in a single bag also makes travel much easier. You can simply grab the pouch and go, knowing you have everything you need. This minimalist approach keeps your powders and creams fresh and organized.
Material Required List
- Quilted makeup pouch
- Soft makeup brush
- Daily essentials
Equipment Required List
- Rubbing alcohol
- Cotton pads
DIY Instructions
- Empty all your makeup onto a clean towel or counter.
- Wipe the outside of every compact and bottle with a cotton pad and alcohol.
- Pick out the few items you use every single morning without fail.
- Set aside special occasion colors or products you rarely use in a separate drawer.
- Place your daily essentials into the quilted pouch, keeping the brush on top.
- Clean your makeup brush with a specialized cleaner and let it dry before storing.
- Zip the bag and store it on your counter or in a top drawer for easy access.
19 Spa Style Shower Niche
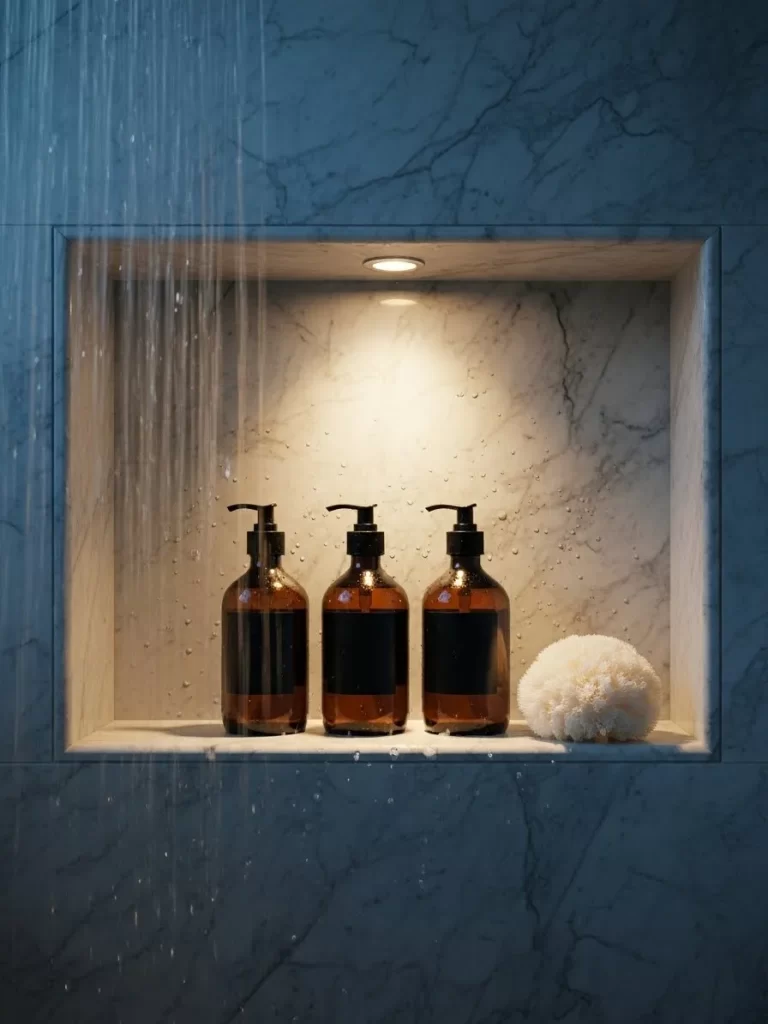
Bar soap and mismatched plastic bottles make a shower look cluttered and uninviting. This project replaces messy packaging with uniform amber glass pump bottles. It creates a high end hotel feel every time you step into the water.
Adding a small waterproof light to the niche highlights your beautiful new bottles. The uniform look is calming and helps you relax after a long day. You will enjoy the organized aesthetic and the smooth function of the high quality pumps.
Material Required List
- Three matching amber glass pump bottles
- Waterproof adhesive labels
- Large sea sponge
Equipment Required List
- Squeegee
- Bathroom cleaner
DIY Instructions
- Scrub your shower niche thoroughly to remove any soap scum or mildew.
- Squeegee the area dry so the new bottles have a clean surface to sit on.
- Fill the amber bottles with your favorite shampoo, conditioner, and body wash.
- Apply the waterproof labels carefully to the front of each bottle.
- Place the bottles in a neat row inside the niche, spaced evenly apart.
- Add a natural sea sponge to the side for a touch of texture.
- Remove any old plastic bottles from the shower floor.
20 Linen Closet Towel Stacking
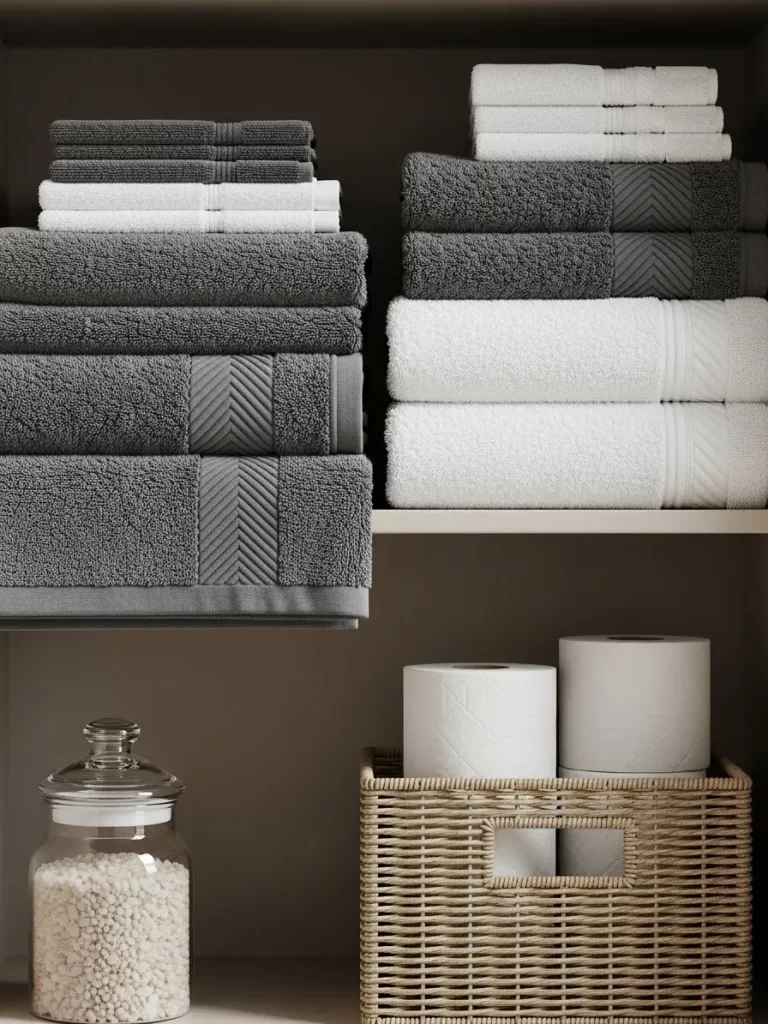
Towels often end up in messy piles that lean over and fall when you try to pull one out. This project focuses on folding your linens into neat, uniform rectangles and stacking them by size. It turns your linen closet into an organized space that feels like a fresh laundry room.
Using a large basket for extra toilet paper or bulky items keeps the shelves looking tidy. Grouping your towels by color adds a professional touch to the display. You will love the clean look of your organized stacks every time you reach for a fresh towel.
Material Required List
- Large woven basket
- Glass jar
- Scented drawer liner
Equipment Required List
- Measuring tape
- Cleaning cloth
DIY Instructions
- Remove all towels and linens from the closet and wipe the shelves clean.
- Sort the towels by size: bath towels, hand towels, and washcloths.
- Fold each towel into a consistent rectangle, making sure the edges are hidden.
- Stack the largest bath towels on the middle shelf at eye level.
- Place hand towels and washcloths in smaller stacks next to the bath towels.
- Fill your large woven basket with toilet paper rolls and place it on the bottom shelf.
- Fill a glass jar with your laundry pods or bath salts for a decorative touch.
- Arrange the stacks by color, moving from darkest to lightest for a clean look.
21 Desktop Mail Sorting Station
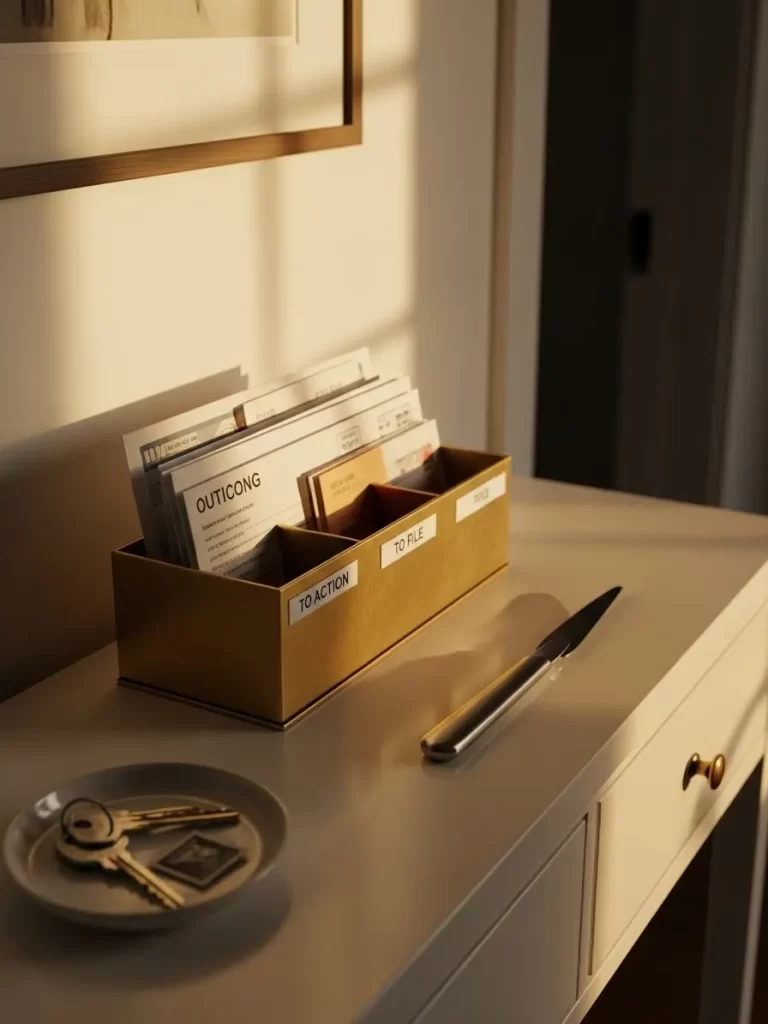
Piles of paper on a desk create mental clutter and make it easy to miss important deadlines. This project uses a divided metal organizer to categorize mail as soon as it enters the house. It turns a messy stack of envelopes into a functional system that looks like a high end office.
Labeling each section for actions like “File” or “Action” keeps your workflow smooth. Having a dedicated tray for your keys prevents them from scratching your desk surface. This small addition makes your workspace feel more professional and organized.
Material Required List
- Metal desk organizer
- Small ceramic key tray
- Adhesive labels
Equipment Required List
- Letter opener
- Microfiber cloth
DIY Instructions
- Clear everything off your desk surface and wipe it down with a soft cloth.
- Sort through your current pile of mail and throw away any junk or catalogs.
- Place the metal organizer in a corner of your desk within arm’s reach.
- Apply labels to the sections of the organizer for “Action” and “To File.”
- Slide your current important documents into the corresponding slots.
- Set the small key tray next to the organizer to hold your daily essentials.
- Use the letter opener to open envelopes immediately rather than letting them sit.
22 Home Screen Digital Declutter

Digital clutter is just as stressful as physical mess but often goes unnoticed. This project involves organizing your phone apps into clean folders and setting a calming, minimalist wallpaper. It reduces the urge to mindlessly scroll and helps you find the tools you need instantly.
Deleting unused apps frees up storage and makes your device run much faster. Grouping apps by function, like “Finance” or “Health,” keeps your home screen looking tidy. You will feel a sense of clarity every time you unlock your phone for a fresh start.
Material Required List
- Minimalist wallpaper image
- Screen cleaning cloth
Equipment Required List
- Smartphone
- Charging cable
DIY Instructions
- Wipe your phone screen with a soft cloth to remove fingerprints and dust.
- Scroll through every page of your apps and delete any you haven’t used recently.
- Long press an app icon and drag it on top of another to create a folder.
- Name your folders based on their category, such as “Social” or “Work.”
- Move your most used apps to the bottom row of the screen for easy access.
- Change your wallpaper to a simple landscape or a neutral color.
- Turn off non essential notifications to keep your lock screen clean.
23 Minimalist Workspace Alignment

A cluttered desk with tangled cords makes it very hard to focus on your work. This project focuses on clearing everything except your computer and a single decorative piece. A clean wood surface and a neutral mouse pad create a grounding environment for productivity.
Hiding cables behind the desk makes the area look much more professional. A simple mountain wallpaper on your screen brings a touch of nature to your indoor office. You will find it much easier to stay on task when your eyes are not distracted.
Material Required List
- Felt mouse pad
- Cable management clips
- Small decorative stone
Equipment Required List
- Handheld vacuum
- Wood polish
DIY Instructions
- Unplug all electronics and move them off the desk so you can clean the wood.
- Polish the desk surface with a soft cloth to bring out the natural grain.
- Vacuum any dust from the back of your monitor and keyboard.
- Place the new mouse pad in the center of your working area.
- Use cable clips to route your power cords along the back edge of the desk.
- Set your monitor at eye level to prevent neck strain during work.
- Place one small decorative object in a corner for visual balance.
24 Labeled Closet Storage Crates
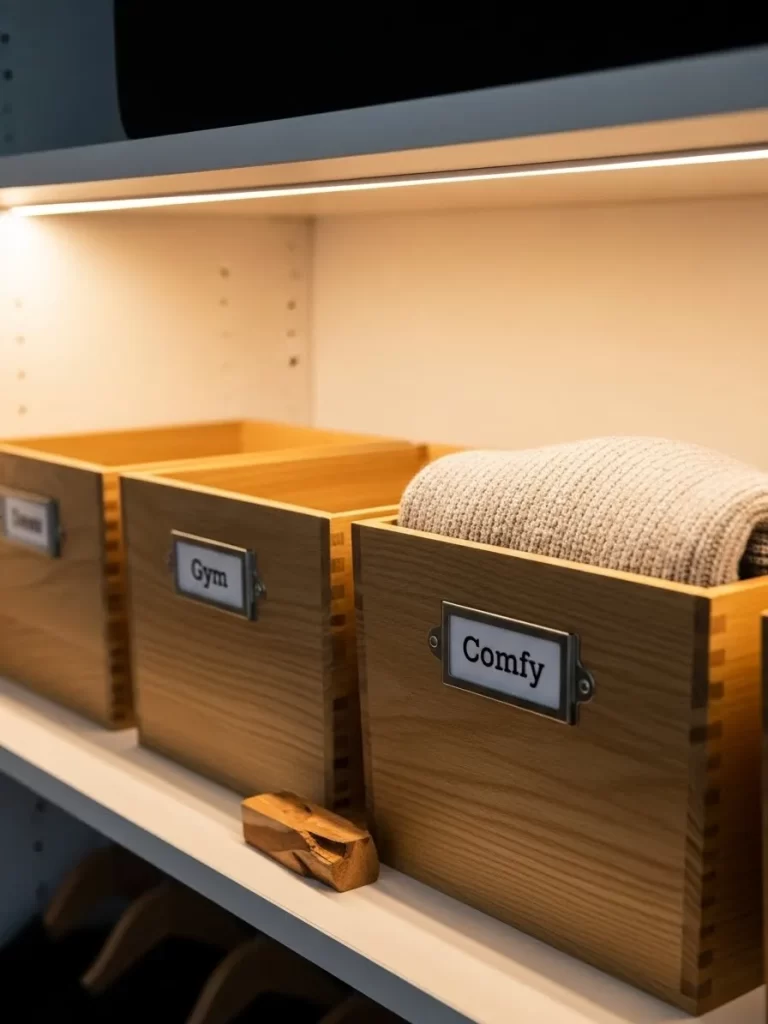
High shelves in a closet often become a jumble of out of season clothes. This project uses uniform wooden crates with clear labels to organize these hard to reach areas. It allows you to see exactly where your items are stored without using a ladder.
Matching crates provide a cohesive look that elevates the appearance of your wardrobe. Adding a small LED light strip under the shelf makes finding your items much easier. This system ensures that every item has a designated home that is easy to maintain.
Material Required List
- Matching wooden crates
- Metal label holders
- Adhesive LED light strip
Equipment Required List
- Screwdriver
- Step stool
- Permanent marker
DIY Instructions
- Empty the top shelves of your closet and wipe away any accumulated dust.
- Sort your items into categories like “Gym Gear” or “Winter Sweaters.”
- Place a cedar block in each crate to keep fabrics smelling fresh.
- Screw the metal label holders onto the front center of each wooden crate.
- Write the category names clearly on cards and slide them into the holders.
- Fold your items neatly and place them into the corresponding crates.
- Mount the LED light strip to the underside of the shelf for visibility.
- Slide the crates onto the shelf with the labels facing out for reading.
25 Uniform Hanger Wardrobe Refresh

Mismatched hangers make even the most expensive clothes look messy and disorganized. This project involves replacing every hanger in your closet with high quality, uniform wooden ones. It ensures that all your shirts and jackets sit at the same height for a sleek look.
Using sturdy hangers also prevents your clothes from getting shoulder bumps or slipping off. Sorting your garments by type and then by color creates a visually calming gradient. You will actually enjoy getting dressed when your closet looks this organized.
Material Required List
- Bulk set of matching wooden hangers
- Closet scent sachet
Equipment Required List
- Lint brush
- Donation bag
DIY Instructions
- Remove all clothing from your closet and place it on your bed.
- Toss any broken or thin wire hangers into a recycling bin.
- Sort through your clothes and put any unused items into a donation bag.
- Brush away any lint or dust from your favorite jackets and shirts.
- Place each item onto a new matching wooden hanger, ensuring it is centered.
- Hang your clothes back in the closet, grouping them by category.
- Within each category, arrange the items from lightest color to darkest color.
- Hang a fresh scent sachet on the rod to keep the air fresh.
26 Under Bed Rolling Storage

The space under your bed is often wasted or filled with random dust. This project utilizes large felt bins on wheels to store linens or off season shoes. The rolling mechanism allows you to access your items easily without having to crawl.
Using bins with leather handles adds a touch of luxury to a functional solution. It keeps your items dust free and out of sight, making your bedroom feel much larger. This is a great way to hide clutter while keeping it within reach.
Material Required List
- Large felt rolling storage bins
- Vacuum seal bags
- Lavender sachet
Equipment Required List
- Measuring tape
- Handheld vacuum
DIY Instructions
- Vacuum the floor under your bed thoroughly to remove all dust.
- Measure the height between the floor and your bed frame for fit.
- Place bulky items into vacuum seal bags to save extra space.
- Set the items into the felt bins with a lavender sachet for freshness.
- Ensure the wheels on the bins are clean and move smoothly.
- Slide the bins under the bed, keeping the handles facing outward.
- Use one bin for shoes and another for linens to stay organized.
27 Nightstand Surface Curation

A nightstand often becomes a magnet for loose change and old receipts. This project focuses on clearing the surface and keeping items that help you relax. A single candle, a book, and a small tray for jewelry create a peaceful environment.
Using a glass carafe for water looks much better than a plastic bottle. A dedicated dish for your glasses and rings prevents them from getting lost. This simple setup makes your bedroom feel like a high end hotel suite.
Material Required List
- Small jewelry dish
- Glass water carafe
- Scented soy candle
Equipment Required List
- Microfiber cloth
- Wood cleaner
DIY Instructions
- Clear everything off your nightstand and wipe the surface with a cloth.
- Polish the wood or metal until it shines for a clean foundation.
- Place a small tray on one side to hold your glasses at night.
- Fill the glass carafe with fresh water and set it on a coaster.
- Set your current favorite book in the center of the stand.
- Place a single candle nearby to provide soft light before sleep.
- Remove any electronics or chargers that you do not need nearby.
28 Reusable Tote Bag Tapering

Reusable grocery bags often create a giant, messy pile in your kitchen pantry. This project involves folding your canvas bags into flat rectangles and stacking them vertically. It makes it easy to grab exactly what you need for a trip.
Grouping your bags by material keeps the storage area looking organized and tidy. Storing them in a larger, sturdy tote prevents them from falling over or tangling. You will love the clean look of your organized bag station.
Material Required List
- One large, sturdy canvas tote
- Fabric freshener spray
Equipment Required List
- Flat surface for folding
- Cleaning cloth
DIY Instructions
- Gather every reusable bag from your car, pantry, and kitchen areas.
- Shake out any crumbs and wash any bags that look dirty.
- Lay a bag flat on a table and fold the handles inward.
- Fold the bag in half vertically, then in thirds horizontally for size.
- Repeat this process for all your canvas bags so they match.
- Place the folded bags vertically into your large “container” tote bag.
- Roll your mesh or net bags and place them at one end.
- Store the entire set in your pantry for easy access later.
29 Laundry Room Supply Hub
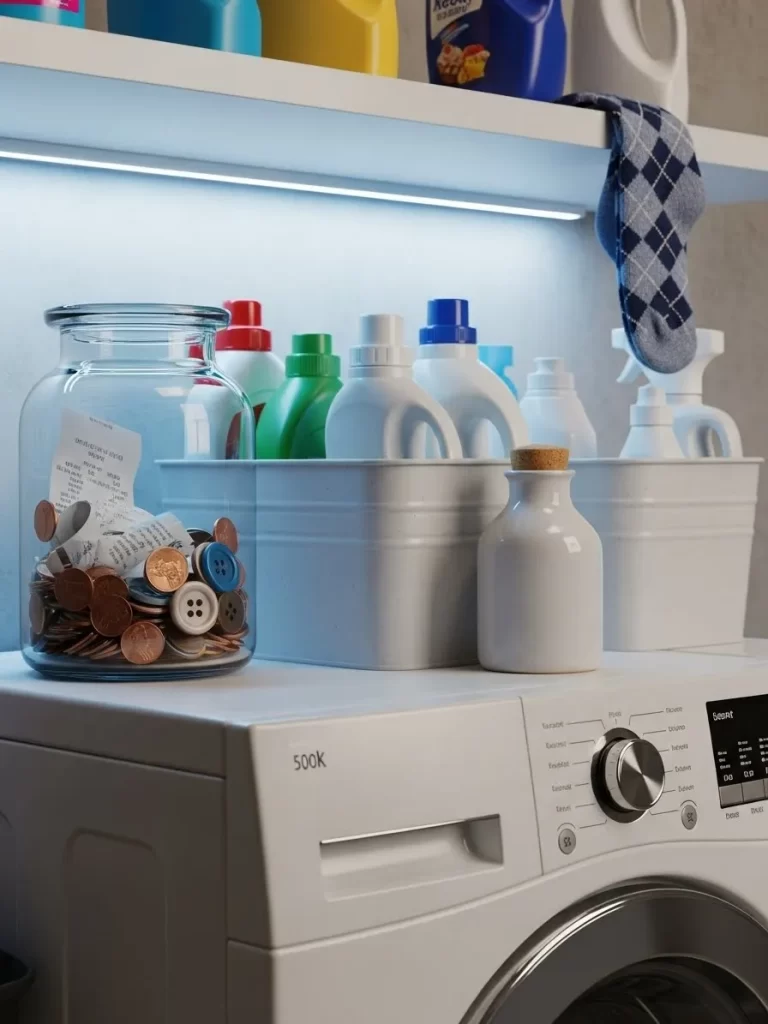
Laundry rooms can quickly become messy with sticky detergent bottles and loose buttons. This project uses white metal bins to hide colorful packaging and a glass jar for lost items. It turns a chore heavy room into a bright, organized space.
Installing a slim LED light bar under your shelves provides better visibility for stains. Keeping a small ceramic bottle for scent beads adds a decorative touch. You will find that doing laundry is much more pleasant when supplies are tidy.
Material Required List
- White metal storage bins
- Large glass lost and found jar
- Small ceramic bottle
Equipment Required List
- Adhesive LED light bar
- Damp sponge
DIY Instructions
- Clear off the top of your washing machine and wipe it clean.
- Remove any old detergent bottles or empty boxes from your shelves.
- Mount the LED light bar under the shelf above your machine.
- Place your detergent bottles into the white metal bins to hide labels.
- Fill the glass jar with any coins you find in pockets.
- Transfer your laundry scent beads into the small ceramic bottle.
- Arrange the bins side by side on the shelf for access.
30 Glove Box Document Filing

The glove box in a car is usually a catch all for old napkins. This project uses a simple brown folder to keep your registration and insurance documents safe. Adding a small flashlight and a tire gauge ensures you are prepared for situations.
Organizing your car documents prevents stress during a traffic stop or an emergency. Keeping your charging cables neatly coiled with a simple tie prevents them from tangling. This small task makes your car interior feel much more professional.
Material Required List
- Small brown folder or envelope
- Mini LED flashlight
- Tire pressure gauge
Equipment Required List
- Cable ties
- Microfiber cloth
DIY Instructions
- Empty everything out of your glove box and wipe the interior.
- Sort through the papers and throw away any old receipts.
- Place your registration and insurance documents into the brown folder.
- Label the folder clearly so it is easy for anyone to find.
- Coil your phone charging cables and secure them with a tie.
- Place the document folder at the back of the glove box.
- Set the flashlight and tire gauge neatly in the remaining space.
31 Pegboard Tool Wall
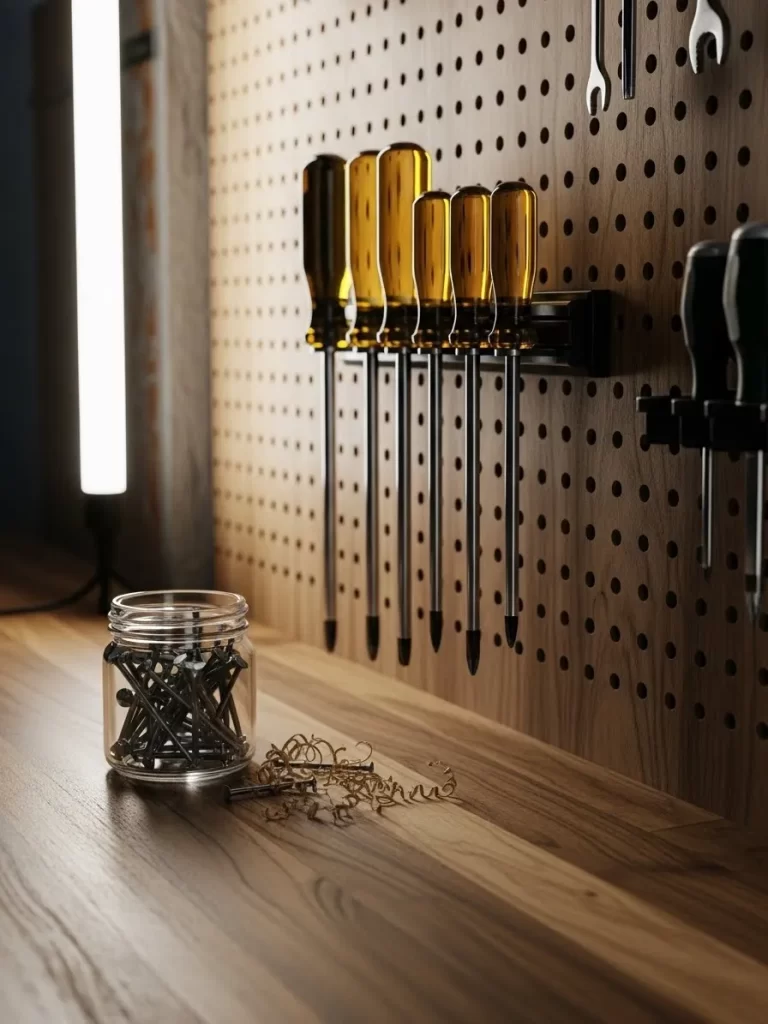
A messy workbench makes it impossible to find the right screwdriver when you need it. This project uses a classic wooden pegboard to hang your most used tools at eye level. It clears your workspace of clutter while keeping everything within easy reach.
Adding a dedicated jar for nails and screws prevents small parts from rolling away. The vertical storage allows you to see your entire collection at a single glance. You will find your DIY projects go much faster with an organized wall.
Material Required List
- Wooden pegboard panel
- Assorted peg hooks
- Small glass jar for nails
Equipment Required List
- Drill
- Level
- Pencil
DIY Instructions
- Measure the wall space above your workbench to decide on the board size.
- Mark the mounting holes on the wall using a level and pencil.
- Drill the holes and secure the pegboard firmly to the wall studs.
- Arrange your tools on the floor first to plan the best layout.
- Insert the peg hooks into the board according to your planned design.
- Hang your screwdrivers and wrenches from the hooks by their handles.
- Fill a small glass jar with nails and set it on the bench.
32 Deep Drawer Divider System

Deep kitchen drawers often turn into a jumble of large utensils and cooking tools. This project uses adjustable wooden dividers to create long channels for specific items like whisks. It prevents tools from jamming the drawer when you try to open it.
A grey felt liner at the bottom protects your drawer and prevents items from sliding. You can separate your silicone spatulas from your metal tongs for better organization. This simple upgrade makes your kitchen feel custom built and highly efficient.
Material Required List
- Adjustable wooden drawer dividers
- Grey felt drawer liner
- Double sided tape
Equipment Required List
- Measuring tape
- Scissors
DIY Instructions
- Empty the drawer completely and wipe out any dust or crumbs.
- Measure the internal dimensions of the drawer with your tape.
- Cut the felt liner to size and secure it with double sided tape.
- Group your large utensils by material or by their specific use.
- Place the main dividers into the drawer to create long rows.
- Adjust the tension of the dividers so they stay firmly in place.
- Arrange your whisks, spatulas, and knives into their new sections.
33 Baking Ingredient Tower

Baking supplies like flour and sugar can create a dusty mess in their original bags. This project uses tall glass flip top jars to keep your dry ingredients airtight and visible. It turns a messy cupboard into a beautiful display that is ready for baking.
Adding small containers for colorful sprinkles and food dyes keeps tiny items organized. A metal measuring cup kept nearby makes it easy to portion out what you need. You will love how clean your counters stay during your next project.
Material Required List
- Tall glass flip top jars
- Small stackable containers
- Flour and sugar labels
Equipment Required List
- Funnel
- Damp cloth
DIY Instructions
- Wipe down your pantry shelf to remove any spilled flour or dust.
- Wash and dry your glass jars thoroughly before filling them.
- Use a funnel to pour your flour and sugar into the tall jars.
- Place your sprinkles and food dyes into the small stackable bins.
- Apply clear labels to the front of the jars for quick identification.
- Set the jars on the shelf, keeping the heaviest ones in the back.
- Keep a metal measuring cup on the shelf for easy scooping.
34 Toaster Crumb Management
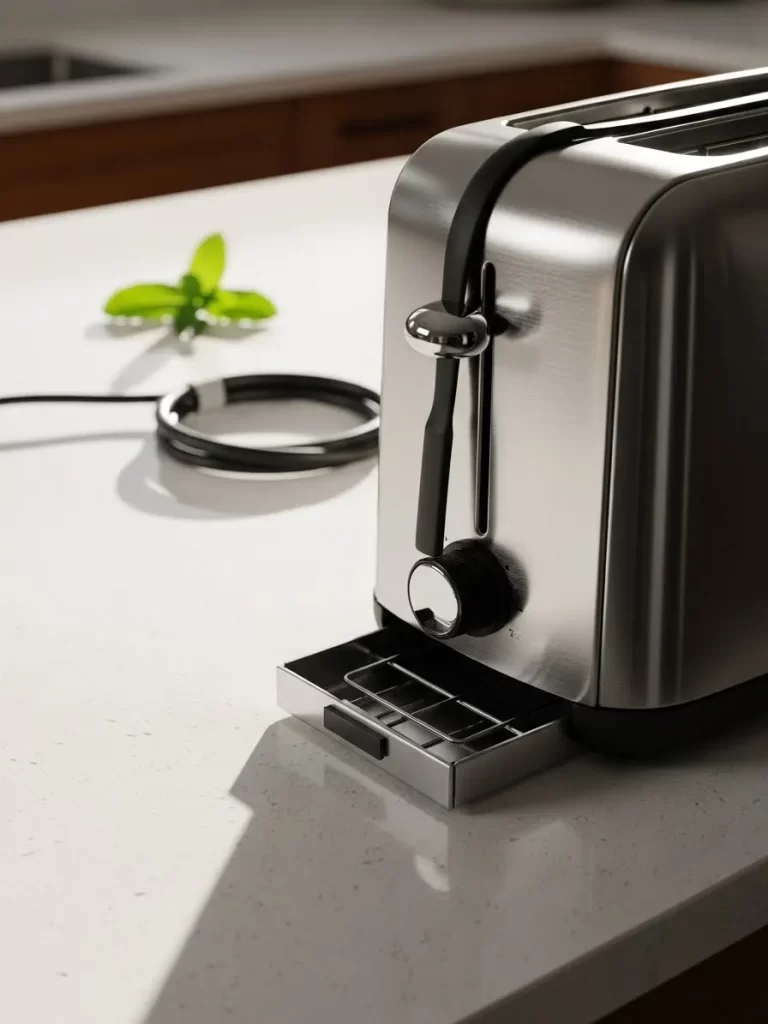
Toasters are notorious for hidden crumbs that can create a mess on your countertop. This project focuses on a deep clean of the crumb tray and organizing the power cord. Keeping the appliance spotless makes your morning routine feel much cleaner and more intentional.
Coiling the power cord with a velcro cable tie keeps the counter looking sleek and modern. A quick wipe of the stainless steel exterior removes fingerprints and grease spots instantly. This small habit prevents buildup and keeps your kitchen smelling fresh every morning.
Material Required List
- Mild dish soap
- Microfiber cloth
- Velcro cable tie
Equipment Required List
- Small brush
- Stainless steel polish
DIY Instructions
- Unplug the toaster and move it to a clear area of the counter.
- Slide out the crumb tray and empty it into the trash bin.
- Wash the tray with warm soapy water and dry it completely.
- Turn the toaster upside down over the sink and shake gently.
- Use a small brush to reach any crumbs stuck in the corners.
- Wipe the exterior with a cloth and a bit of stainless polish.
- Coil the power cord neatly and secure it with a velcro tie.
35 Gift Wrap Organization Station

Wrapping paper rolls are difficult to store and often end up crushed in a closet corner. This project involves grouping your rolls by color and storing them vertically in a tall bin. It keeps your paper crisp and prevents the edges from fraying before use.
A dedicated tray for scissors and tape ensures you never have to search for tools. Using green ribbons and white tissue paper creates a classic, organized look for any gift. You will find it much easier to prepare for holidays with everything in one spot.
Material Required List
- Tall cylindrical bin
- Green satin ribbon
- White tissue paper
Equipment Required List
- Sharp scissors
- Clear tape
DIY Instructions
- Gather all your wrapping paper rolls from around the house.
- Discard any rolls that are too small to wrap a standard box.
- Secure the ends of each roll with a small piece of tape.
- Place the rolls vertically into the tall bin, sorted by color.
- Set your scissors and tape on a small tray next to the bin.
- Stack your tissue paper flat in a drawer or a shallow box.
- Keep your ribbons on their original spools to prevent tangling.
36 Tech Accessory Cable Ties
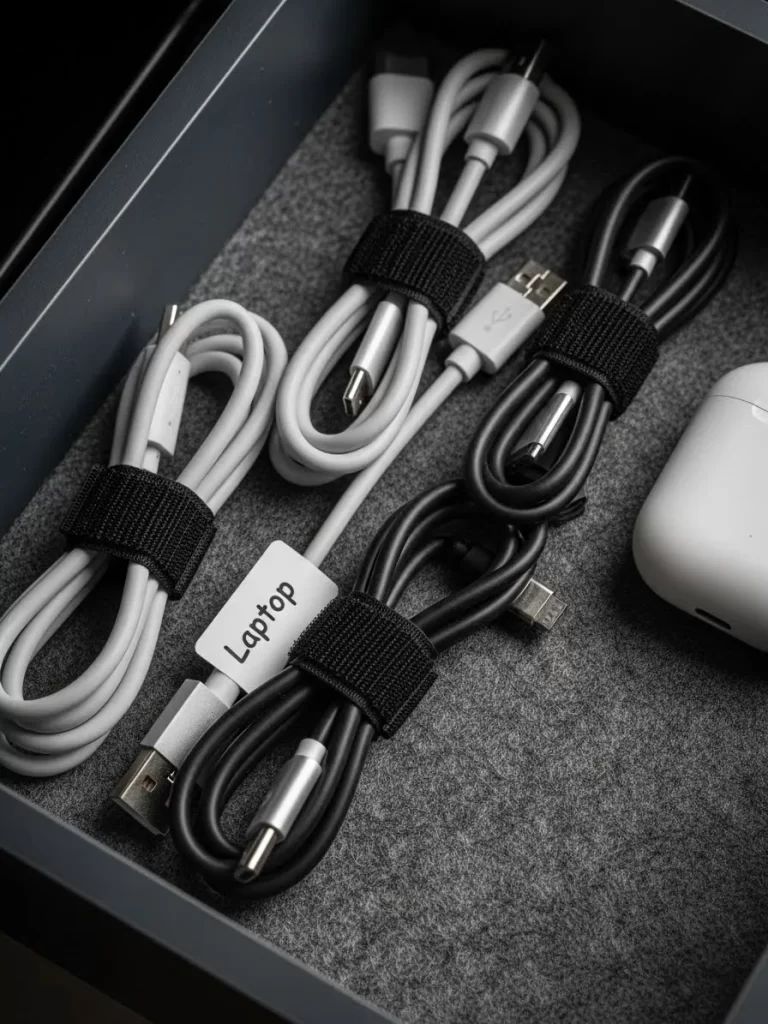
Loose charging cables in a desk drawer can quickly turn into a frustrating, tangled nest. This project uses black velcro ties to keep every laptop and phone cord neatly coiled. Labeling the cables prevents you from grabbing the wrong one when you are in a rush.
Storing your coiled cables on a felt lined tray provides a soft surface that prevents scratches. It keeps your tech accessories organized and ready for travel at a moment’s notice. You will enjoy the tidy look of your drawer every time you open it.
Material Required List
- Black velcro cable ties
- Adhesive cable labels
- Felt drawer liner
Equipment Required List
- Scissors
- Permanent marker
DIY Instructions
- Empty your tech drawer and untangle all the loose charging cords.
- Group the cables by the device they belong to, like “Laptop” or “Phone.”
- Coil each cable into a neat circle that fits comfortably in your hand.
- Secure the coil with a black velcro tie in the center.
- Write the name of the device on a label and attach it to the cord.
- Lay the felt liner in the bottom of your drawer or tray.
- Arrange the coiled cables side by side for easy identification.
37 Living Room Magazine Basket

Magazines and catalogs often pile up on coffee tables and create a cluttered appearance. This project uses a large woven basket to keep your reading material contained and tidy. It provides a specific home for your subscriptions while adding a warm texture to the room.
Keeping only the most recent issues prevents the basket from becoming overfilled and heavy. Placing the basket near a chair makes it easy to grab a magazine when you relax. This simple change keeps your table surfaces clear for drinks and snacks.
Material Required List
- Large woven seagrass basket
- Scented room spray
Equipment Required List
- Dusting cloth
- Recycling bin
DIY Instructions
- Gather all the magazines and catalogs from your living room surfaces.
- Sort through the pile and move old issues to the recycling bin.
- Wipe down the coffee table to remove any dust or paper fibers.
- Place the woven basket on the floor next to your favorite chair.
- Stack your magazines vertically in the basket so the covers are visible.
- Mist the area with a light room spray for a fresh atmosphere.
- Limit yourself to only keeping what fits comfortably inside the basket.
38 Entryway Key Drop Tray

Searching for your keys when you are already late is a stressful way to start the day. This project uses a small gold tray on an entryway console to act as a dedicated drop zone. It creates a simple habit of putting your essentials in the same spot every time.
A small white bin nearby can hold outgoing mail or receipts that need to be filed. Keeping the area minimal prevents it from becoming a landing spot for junk mail. You will appreciate the organized exit and entry every time you leave the house.
Material Required List
- Small gold metal tray
- White ceramic bin
- Console table
Equipment Required List
- Wood polish
- Microfiber cloth
DIY Instructions
- Clear the surface of your entryway table and wipe it with polish.
- Place the gold tray on the right side of the table for keys.
- Set the white ceramic bin on the left side for incoming mail.
- Remove any loose change or trash from the table surface.
- Train yourself to place your keys in the tray as soon as you walk in.
- Check the mail bin daily to ensure it does not overflow with paper.
- Keep a small wallet or card holder in the tray for quick errands.
39 Game Night Board Storage
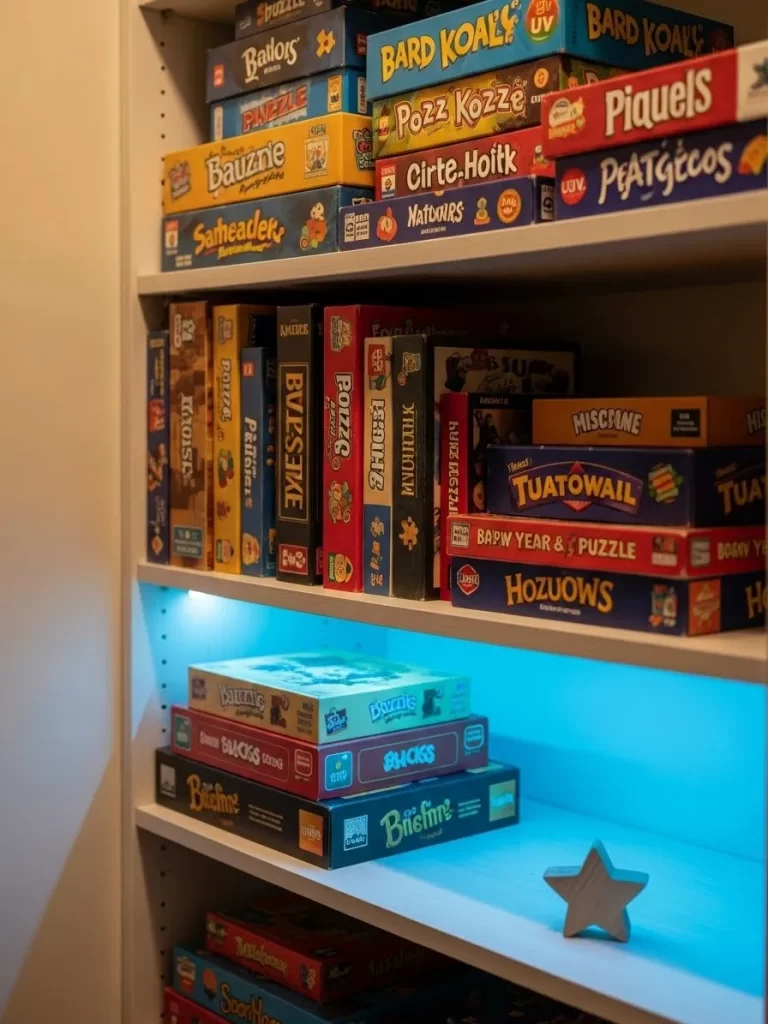
Board games often end up in messy stacks that make it hard to pull out the one on the bottom. This project involves organizing your games on a shelf by size and adding a motion sensor light. It makes your collection look like a curated shop and simplifies setup for game night.
Storing games horizontally prevents the internal pieces from shifting and getting mixed up. A small wooden star or decorative object adds a playful touch to the shelving unit. You will find it much easier to choose a game when they are all visible.
Material Required List
- Adjustable shelving unit
- Adhesive LED light strip
- Small wooden decorative star
Equipment Required List
- Level
- Tape measure
DIY Instructions
- Remove all your board games from their current storage area.
- Wipe down the shelves to remove any dust or cardboard fibers.
- Group your games by the size of the box and by their theme.
- Place the largest boxes on the bottom shelf for a stable base.
- Stack smaller games on the upper shelves, making sure they are centered.
- Mount the LED light strip along the underside of the shelf for visibility.
- Place a small wooden star on the shelf as a finishing touch.
40 Pet Supply Comfort Bin
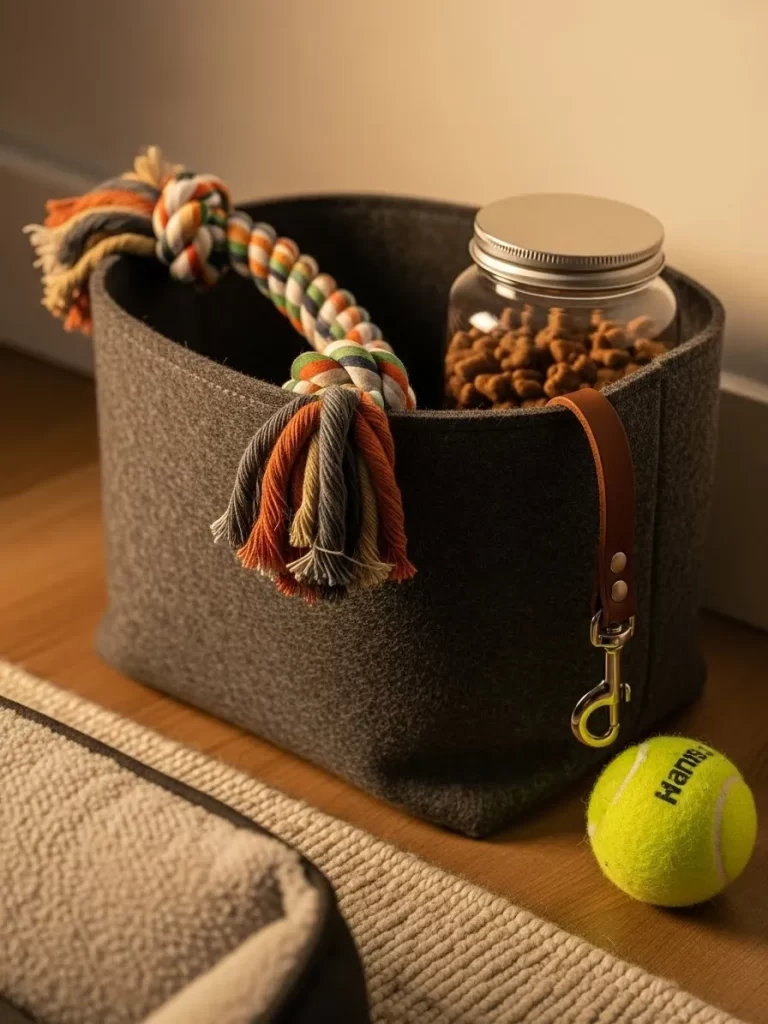
Pet toys and leashes can easily get scattered across the living room floor. This project uses a soft felt bin to keep your dog’s favorite ropes and tennis balls in one spot. A glass jar with a metal lid keeps treats fresh and prevents them from spilling.
Keeping the bin near your pet’s bed makes it easy for them to find their toys. A leather strap with a clip on the side of the bin provides a home for the leash. This setup keeps your home looking tidy while keeping your pet happy and entertained.
Material Required List
- Large charcoal felt bin
- Glass jar with metal lid
- Leather leash strap
Equipment Required List
- Lint roller
- Handheld vacuum
DIY Instructions
- Vacuum the area where your pet’s bed is located to remove hair.
- Use a lint roller to clean the inside and outside of the felt bin.
- Fill the glass jar with your pet’s favorite dry treats and close the lid.
- Place the treat jar and the tennis balls into the felt bin.
- Coil the rope toys and set them on top of the tennis balls.
- Clip the leather leash strap to the handle of the bin for access.
- Set the bin on the floor next to your pet’s sleeping area.
41 Stationery and Letter Drawer
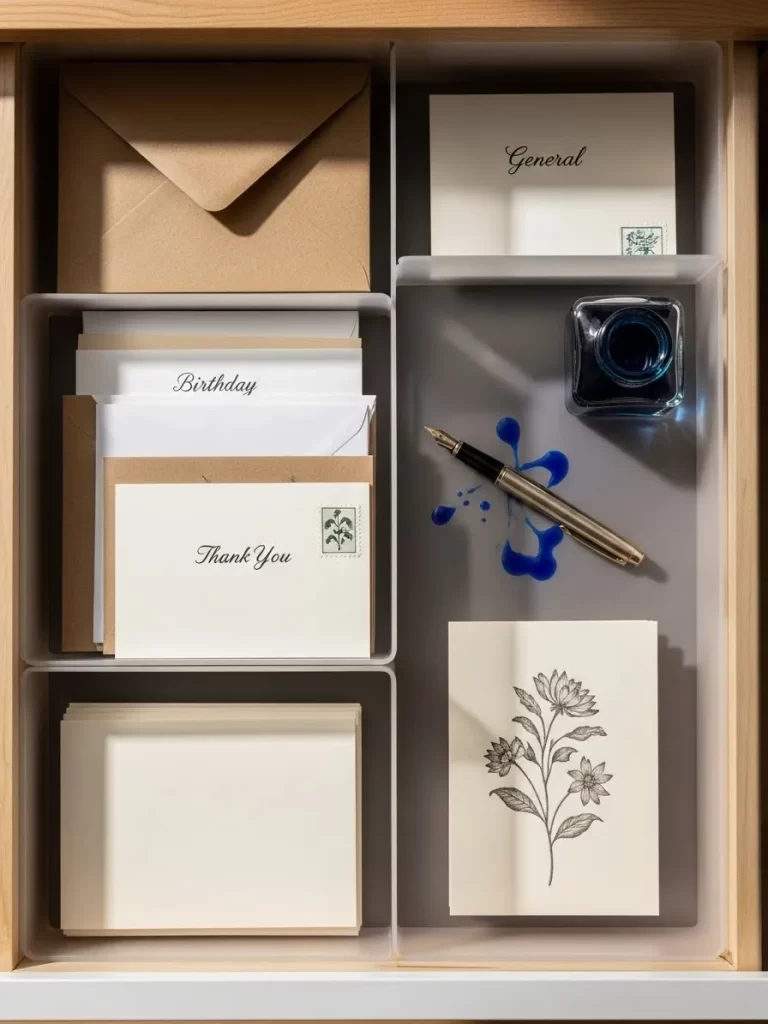
Writing a heartfelt note becomes a joy when your supplies stay perfectly arranged. This project uses shallow plastic trays to separate birthday cards, thank you notes, and general stationery. A dedicated spot for your fountain pen and ink prevents messy leaks in your desk.
Grouping envelopes by size makes it easy to find the right match for your paper. A small floral print or drawing in the corner adds a personal touch to your workspace. You will love the elegant look of your organized writing station every time you sit down.
Material Required List
- Shallow clear plastic organizer trays
- Assorted greeting cards and envelopes
- High quality fountain pen and blue ink
Equipment Required List
- Microfiber cloth
- Ruler (to measure tray fit)
DIY Instructions
- Empty your desk drawer and wipe it clean with a microfiber cloth.
- Sort through your paper supplies and group them by occasion or size.
- Place the clear plastic trays into the drawer to create a custom layout.
- Set your birthday cards in one tray and thank you notes in another.
- Stack your blank envelopes vertically so you can see the edges easily.
- Place your fountain pen and ink bottle in a separate, secure tray.
- Keep a few decorative stamps or stickers nearby for a finishing touch.
42 Repurposed Muffin Tin Organizer

Small hardware like nails, screws, and batteries always seem to get lost in deep drawers. This project repurposes an old metal muffin tin to create a series of small, shallow bins. It turns a chaotic junk drawer into a highly organized and industrial chic storage space.
Using the circular cups prevents small items from rolling around when you pull the handle. Grouping items by type, such as wood screws in one cup and AA batteries in another, saves time. This simple kitchen hack is an effective way to keep your home maintenance tools ready.
Material Required List
- Old 6 cup or 12 cup metal muffin tin
- Assorted rubber bands
- Small nails, screws, and batteries
Equipment Required List
- All purpose metal cleaner
- Steel wool (if the tin is rusty)
DIY Instructions
- Clean the muffin tin thoroughly with a metal cleaner to remove grease or rust.
- Measure your drawer to ensure the tin fits comfortably without hitting the top.
- Gather all the loose small parts from the bottom of your drawer or workbench.
- Group similar items like small nails, brass screws, and different battery sizes.
- Place each group into a separate cup of the muffin tin.
- Use a side area of the drawer to coil your rubber bands for easy grabbing.
- Slide the tin into the drawer and enjoy the instant visual order.
43 Over the Door Pocket Storage
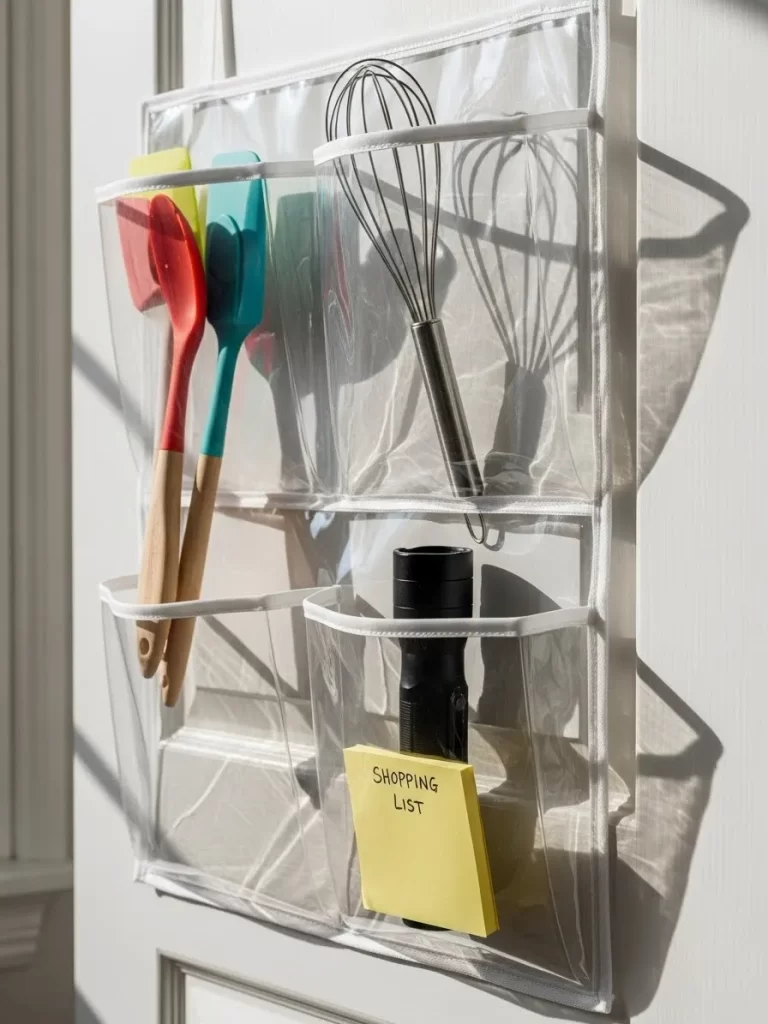
Vertical space on the back of a door is often overlooked but provides excellent storage potential. This project uses a clear plastic pocket organizer to house kitchen tools, flashlights, and shopping lists. It keeps your counters completely clear while keeping essentials at eye level.
Transparent pockets allow you to see exactly what is inside without digging. You can dedicate one row to colorful spatulas and another to emergency tools like a flashlight. This setup is a great way to maximize space in a small pantry or utility closet.
Material Required List
- Clear plastic over the door pocket organizer
- Colorful kitchen spatulas and whisks
- Sticky notes for shopping lists
Equipment Required List
- Door hooks (usually included with the organizer)
- Permanent marker (for optional labeling)
DIY Instructions
- Hang the organizer over your kitchen or pantry door using the provided hooks.
- Wipe the inside of each plastic pocket with a damp cloth to remove dust.
- Sort your kitchen utensils by color or by how often you use them.
- Place your whisks and spatulas into the top rows for easy reaching.
- Set your flashlight and a pen in a middle pocket for quick access during power outages.
- Stick a pad of notes to the outside of a pocket to act as a shopping list.
- Keep your oven mitts or dish towels in the bottom rows.
44 River Rock Boot Drying Tray

Wet boots can leave muddy puddles on your floor that are difficult to clean. This project uses a shallow black tray filled with smooth river rocks to act as a natural drainage system. The stones allow air to circulate under your boots, helping them dry faster after a rainy day.
The natural look of the stones adds a spa like and organic touch to your entryway. It creates a specific landing spot for wet footwear, keeping the rest of your home clean and dry. You will appreciate the functional beauty of this simple mudroom upgrade.
Material Required List
- Shallow black plastic or metal tray
- Bag of smooth, dark river rocks
- Pair of tall rubber rain boots
Equipment Required List
- Garden hose (to wash the rocks)
- Floor protector pads (for the tray bottom)
DIY Instructions
- Wash the river rocks in a bucket or with a hose to remove any dust or dirt.
- Dry the rocks completely by spreading them out on a towel in the sun.
- Apply floor protector pads to the bottom of your tray to prevent scratches.
- Place the tray in your entryway near the door or under a coat rack.
- Fill the tray with a single, even layer of the clean river rocks.
- Set your wet rubber boots on top of the stones after coming inside.
- Occasionally rinse the tray and rocks to keep the area looking fresh and clean.
45 Large Scale Donation Sort
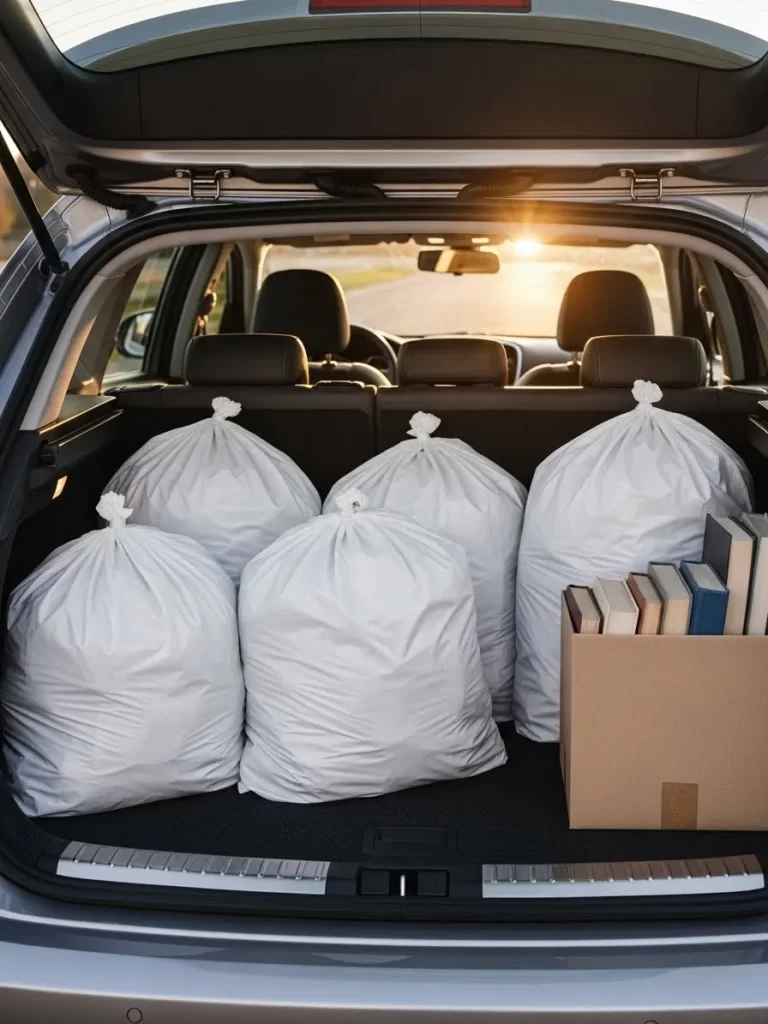
The final step in a successful decluttering weekend is removing the items you no longer need. This project involves filling large white bags with clothes and books and loading them into your car. Clearing these items out of your home provides a final sense of accomplishment.
Group your donations by type, such as books in a sturdy box and clothes in tied bags. Delivering them to a local charity ensures your old items go to a new home where they are needed. You will love the feeling of space and clarity in your home once the car pulls away.
Material Required List
- Heavy duty white drawstring trash bags
- Sturdy cardboard box for books
- Packing tape
Equipment Required List
- SUV or car with a large trunk
- Permanent marker (for labeling bags)
DIY Instructions
- Gather all the items you set aside during your weekend decluttering projects.
- Sort the items into piles for “Clothing,” “Books,” and “Household Goods.”
- Fold the clothes neatly and place them into the large white bags.
- Tie the drawstrings tightly and label each bag with your permanent marker.
- Stack your unwanted books into the cardboard box and tape the bottom for strength.
- Load the bags and boxes into the back of your car, placing the heaviest items first.
- Drive to your local donation center or charity shop to drop off the items.
- Park your car back at home and enjoy the incredible results of your hard work.
Reclaiming your home is a journey that starts with one small step. You have now seen how simple changes lead to a more organized and peaceful life. Each finished task builds momentum for the next project on your list.
Enjoy the clarity that comes with a tidy and intentional environment. Your daily routines will feel lighter and much more efficient than before. Maintaining this order remains easy once you have the right systems in place.
Celebrate the hard work you put in over the weekend. A clear home truly leads to a clear mind for everyone in the house. Take a deep breath and appreciate the beautiful space you finally created.
Key Takeaways
Focus on one area at a time to avoid feeling overwhelmed by the mess. Completing small zones gives you the energy to keep going until the job is done.
Uniform containers and clear labels create a sense of visual harmony in any room. Matching items help your brain process the space as being clean and organized.
Letting go of things you no longer use is essential for personal growth. Donations help others while freeing up valuable room in your own daily life.
Consistency is the secret to a clutter free home forever. Putting items back in their designated homes saves you hours of cleaning time later in the week.