Winter is beautiful outside, but nobody enjoys a home that feels permanently chilled, no matter how high the thermostat is set. That persistent draft or icy floor is a common frustration that costs homeowners money and comfort every year. The cold feeling often comes from heat escaping through uninsulated surfaces like floors, walls, and cold furniture.

The good news is you do not need to rely solely on expensive heating systems to solve this problem. The simplest and most stylish solution lies in the strategic use of textiles. Layering rugs and throws introduces insulating barriers that trap heat where you need it most.
This comprehensive guide gives you forty brilliant ideas for using fabrics to create instant warmth and comfort throughout your home. From blocking door drafts to turning a cold reading chair into a cozy haven, these DIY tricks use texture, density, and placement to fight the cold effectively.
1 High Texture Geometric Shag Rug
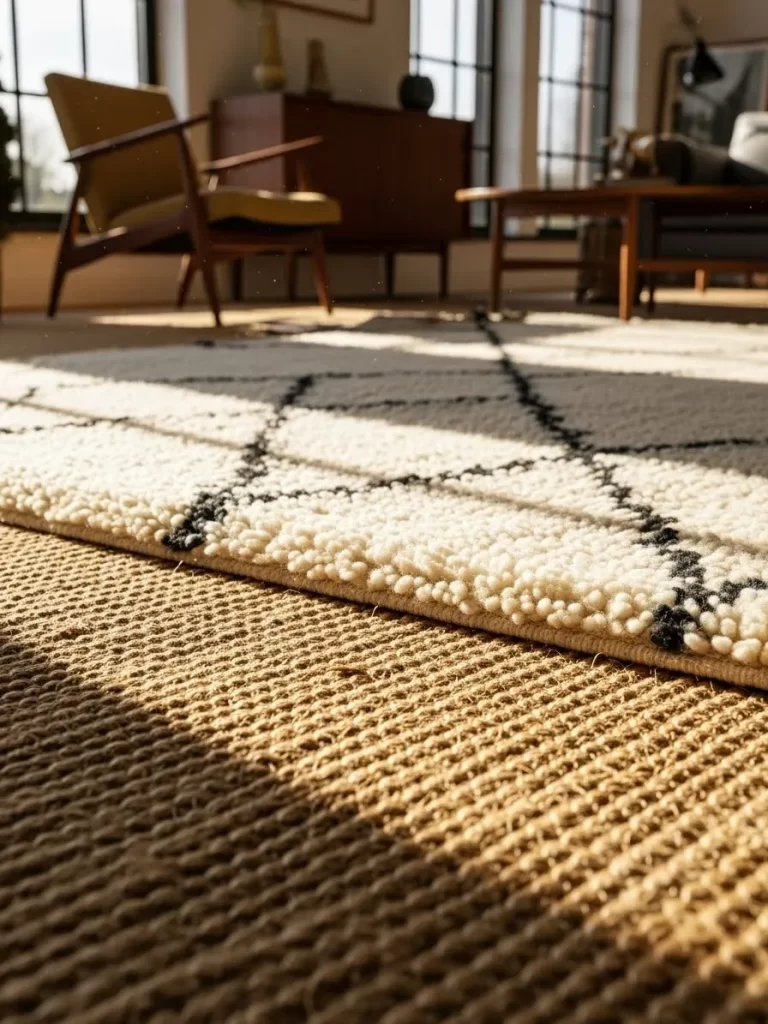
This technique addresses why your home feels cold by stopping heat loss through the floor. Placing a plush, high pile rug over a flat weave base creates a thick barrier against chilly drafts. The natural fibers in the bottom layer act as a foundation for the soft wool or synthetic fibers on top.
This combination traps warm air near your feet and adds a beautiful visual depth to any living room. The cream and black geometric pattern provides a modern touch that brightens a space during gray winter months. It feels soft to the touch and provides a cozy spot for children or pets to relax away from the hard flooring.
Using multiple layers is a smart way to update your decor without buying a single massive carpet. You can easily swap the top layer when seasons change or when you want a fresh look.
Material Required List
- One large natural fiber base rug like jute or sisal
- One medium geometric shag or plush rug
- Non slip rug padding
- Double sided rug tape
Equipment Required List
- Measuring tape
- Heavy duty scissors
- Vacuum cleaner
DIY Instruction Step by Step
- Clear the floor area entirely and run a vacuum to remove all dust and debris from the surface.
- Measure the floor space to ensure your base rug leaves at least twelve inches of bare floor around the edges of the room.
- Lay down the non slip rug padding and trim it with scissors so it is two inches shorter than your base rug on all sides.
- Unroll the large jute or sisal rug directly over the padding and smooth out any bumps or wrinkles with your hands.
- Position the smaller geometric shag rug in the center of the base rug or slightly offset for a more casual appearance.
- Apply strips of double sided rug tape to the underside corners of the top rug to prevent it from sliding or tripping guests.
- Press down firmly on the edges where the tape is applied to create a secure bond between the two textile layers.
- Walk over the entire surface to settle the fibers and ensure the arrangement stays flat and secure.
2 Chunky Knit Weighted Sofa Throw
Cold air often circulates around leather furniture, making your seating area feel uninviting. This heavy, chunky knit throw serves as a thick insulator that traps body heat effectively. The oversized loops create air pockets that hold warmth while providing a reassuring weight that helps you relax.
Draping this neutral-toned textile over a sofa adds immediate texture and a sense of coziness. It covers the cold surface of the leather, ensuring your skin never touches a chilly seat. The soft fibers are gentle and provide a substantial layer of protection against evening drafts in large, open rooms.
This specific style works well because it combines function with a bold aesthetic. You can move it from the living room to the bedroom whenever you need an extra boost of heat. It is a simple yet powerful tool for staying warm without cranking up the thermostat.
Material Required List
- 5 to 8 lbs of giant chenille or unspun wool roving yarn
- Large decorative buttons (optional for closure)
- Matching thread
Equipment Required List
- Your own arms (for arm knitting) or giant US 50 knitting needles
- Measuring tape
- Large eye tapestry needle
- Scissors
DIY Instruction Step by Step
- Spread your yarn out on a flat surface to ensure you have enough length for a full sofa-sized throw.
- Create a slip knot at the end of the yarn and slide it onto your right arm or the giant needle.
- Cast on about 20 to 25 stitches to achieve a width of roughly 50 inches across the couch.
- Pull the working yarn through each loop to create a new row of stitches, keeping the tension loose so the blanket remains flexible.
- Continue knitting row by row until the blanket reaches your desired length, typically around 60 inches.
- Bind off the final row by pulling the yarn through two loops at a time to create a finished edge.
- Cut the remaining yarn, leaving a ten-inch tail, and weave it back into the chunky loops using your fingers or a tapestry needle.
- Drape the finished piece over the back of your sofa, allowing the heavy folds to settle naturally for a stylish and warm look.
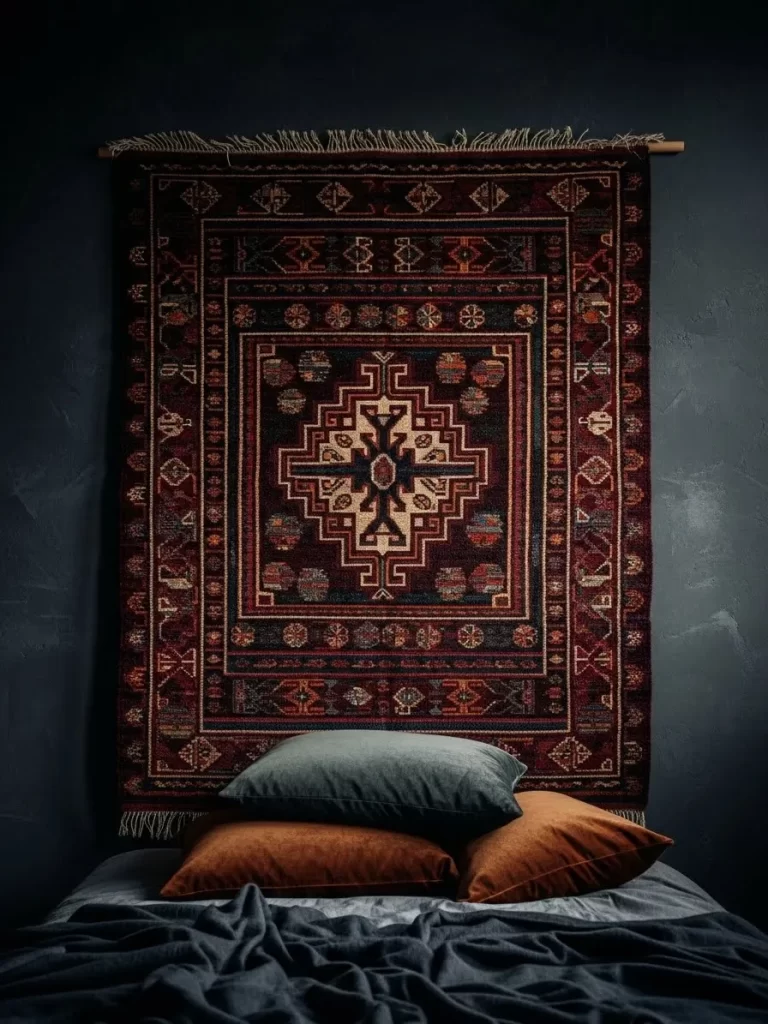
3 Bohemian Tribal Wall Tapestry

Walls can be a major source of heat loss, especially if they lack proper insulation. Hanging a thick, woven rug or tapestry acts as a beautiful thermal barrier. This tribal-patterned textile adds a layer of “soft wall” insulation that prevents radiant heat from escaping through the cold plaster or drywall.
The rich deep reds and intricate patterns bring a sense of visual warmth to a dark room. Placing this above a bed or behind a seating area makes the corner feel much more enclosed and shielded from outside temperatures. It dampens echoes and makes the acoustics of the room feel softer and more intimate.
Choosing a piece with a dense weave provides the best results for temperature control. This method is an excellent way to use a favorite rug that might be too delicate for high-traffic floor use.
Material Required List
- One woven tribal rug or thick fabric tapestry
- Sturdy wooden dowel or decorative curtain rod
- Wall mounting brackets or heavy-duty hooks
- Strong upholstery thread or “carpet clips”
Equipment Required List
- Power drill
- Wall anchors and screws
- Level tool
- Measuring tape
DIY Instruction Step by Step
- Measure the width of your rug to find a wooden dowel that is at least two inches wider on each side.
- Check the weight of the textile to ensure your wall anchors can support the load without pulling out of the drywall.
- Sew a sturdy fabric sleeve onto the back of the rug top if it does not already have a hanging mechanism.
- Slide the wooden dowel through the sleeve or attach carpet clips evenly across the top edge of the rug.
- Hold the dowel against the wall and use a level to mark the exact spots for your mounting brackets.
- Drill holes into the marks, insert the wall anchors, and screw the brackets firmly into place.
- Place the dowel onto the brackets and adjust the rug so it hangs straight and centered.
- Vacuum the rug gently once it is hung to fluff the fibers and help it settle into its new vertical position.
4 Sheepskin Accent Layering
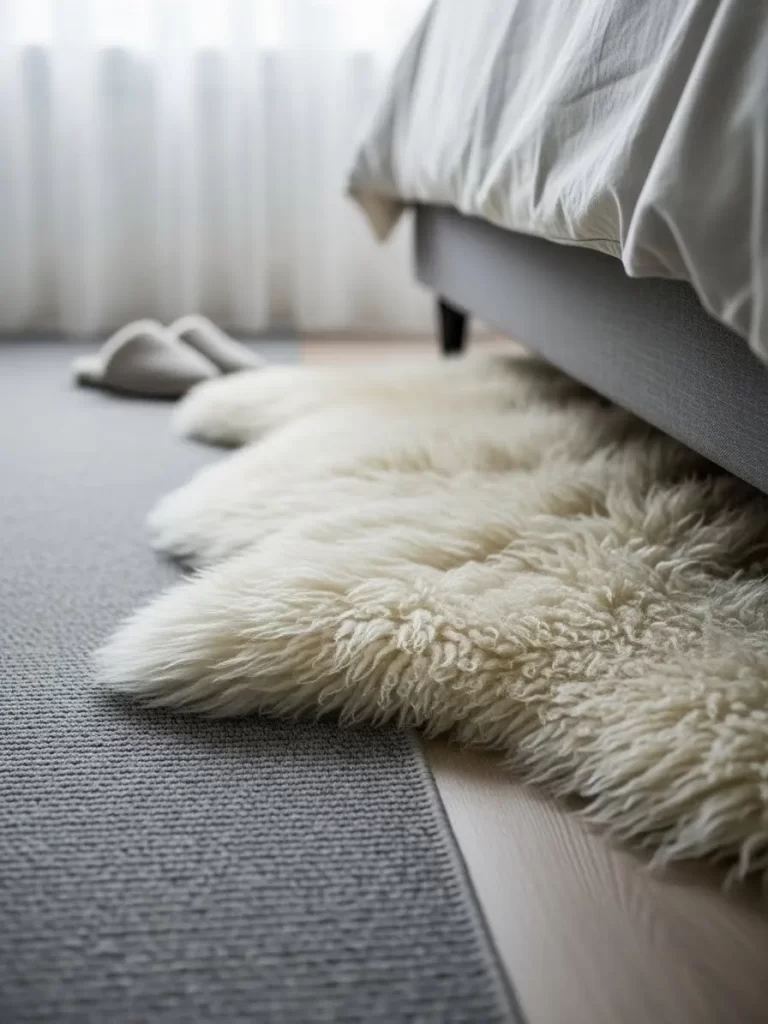
Cold bedroom floors are a harsh way to start your morning. Tucking a plush sheepskin rug partially under the bed frame provides a soft, warm landing for your feet. The long, natural wool fibers are famous for their ability to regulate temperature and stay warm even in freezing conditions.
Layering this over a standard low-pile carpet or a hard floor adds a luxury feel to the room. The cream color contrasts beautifully with darker flooring, creating a focal point that looks as warm as it feels. This small addition makes a significant difference in the perceived temperature of the sleeping area.
The organic shape of the hide breaks up the straight lines of the furniture. It creates a nested look that invites you to stay cozy just a little bit longer.
Material Required List
- One genuine or high-quality faux sheepskin rug
- Adhesive rug grippers (for hard floors)
- Fabric freshener spray
Equipment Required List
- Sheepskin brush or wide-tooth comb
- Vacuum with a hose attachment
DIY Instruction Step by Step
- Shake out the sheepskin rug outdoors to remove any loose dust or packaging debris.
- Locate the spot where your feet naturally hit the floor when you swing your legs out of bed.
- Slide about one-third of the rug under the bed frame to anchor it in place visually.
- Apply rug grippers to the bottom if you are placing the sheepskin on a wood or tile floor to prevent sliding.
- Smooth the long fibers outward from the center to create a full, fluffy appearance.
- Use a sheepskin brush to gently comb the wool if any areas appear matted or flat.
- Mist the rug lightly with a textile freshener to keep it smelling clean in the enclosed bedroom space.
- Position your slippers right next to the rug edge to complete the ultimate morning warmth station.
5 Pattern-Linked Hallway Runners
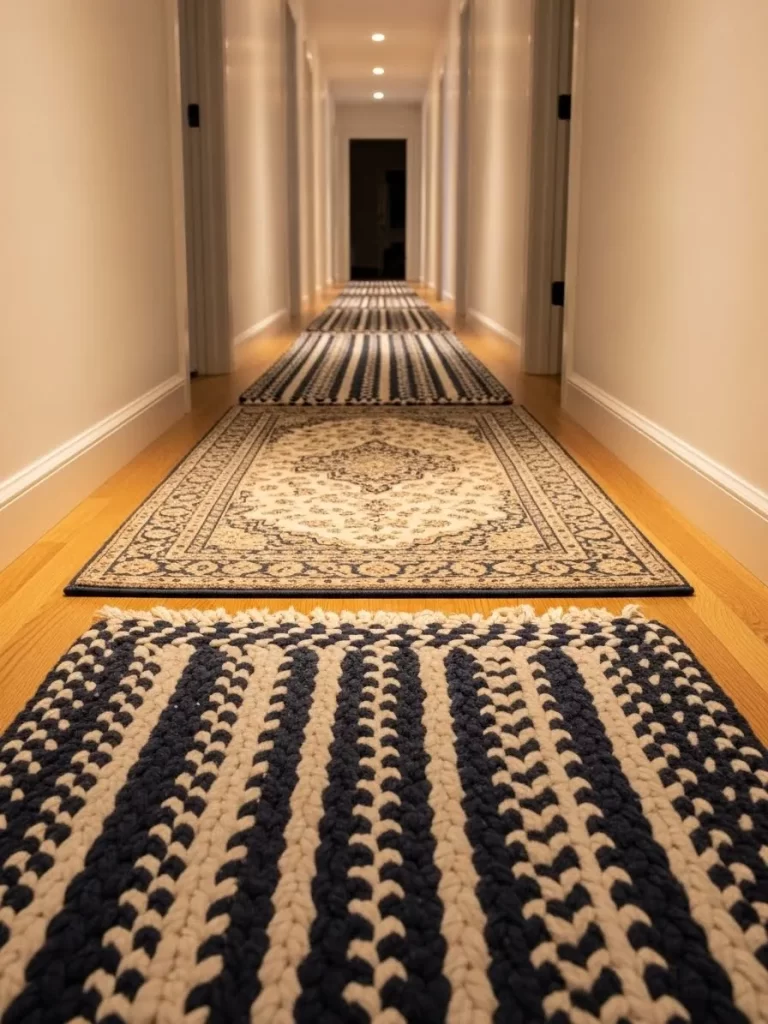
Long hallways often act as wind tunnels that move cold air between rooms. Placing a series of runners down the corridor breaks up the airflow and warms the floor surface. This setup uses a mix of textures and patterns to keep the long space interesting and thermally protected.
The repetition of textiles creates a path of warmth that makes walking through the home more comfortable. Using varied patterns like stripes and traditional motifs adds a curated, designer feel. Each rug serves as a small island of insulation against the cold floorboards underneath.
This approach is more flexible than one long custom runner. You can easily clean one section at a time or rearrange them to refresh the look of your hallway.
Material Required List
- Three to four small runner rugs (2×6 or 2×8 feet)
- Custom-cut rug pads for each runner
- Double-sided carpet tape
Equipment Required List
- Measuring tape
- Scissors
- Vacuum
DIY Instruction Step by Step
- Measure the total length of your hallway and divide the space to determine how many rugs you need.
- Leave a gap of about four to six inches between each rug to create a rhythmic, intentional look.
- Lay out the rugs without any adhesive first to find the best order for the different patterns.
- Cut individual rug pads for each section, making sure they do not stick out from under the edges.
- Place the pads on the floor and secure them with small pieces of carpet tape if they tend to shift.
- Lay the runners over the pads, starting from the center of the hallway and working your way out to the ends.
- Align the rugs perfectly with the baseboards so the “path” looks straight and professional.
- Press down on all edges to ensure a flat transition between the rugs and the bare floor to avoid tripping.
6 Ultra Dense Foam Insulation Pad

Standard rugs often fail to block the true chill coming from concrete or crawl space floors. This extra thick, gray foam pad serves as a massive thermal break underneath your decorative carpet. It acts like a coat for your floor, adding a significant layer of air and density that prevents cold from seeping upward.
The gray material is engineered to resist compression, meaning it keeps its insulating loft even under heavy furniture. It creates a soft, bouncy feel that makes any cheap rug feel like an expensive luxury piece. This hidden layer is the secret to why some rooms feel instantly warmer after a simple upgrade.
You can see how the green rug sits securely on top of the crisp, squared edges of the pad. This setup prevents the textile from shifting while providing a sturdy base for your feet. It is a practical solution for basement rooms or drafty first-floor apartments.
Material Required List
- One high-density felt or memory foam rug pad (1/2 inch thickness)
- Your favorite decorative area rug
- Rug tape for edges
Equipment Required List
- Box cutter or heavy-duty craft shears
- Straight edge or carpenter square
- Measuring tape
DIY Instruction Step by Step
- Move all furniture out of the way and clean the floor surface to ensure a smooth application.
- Unroll the thick foam pad and let it sit for two hours to lose any curls from the packaging.
- Measure your decorative rug and subtract one inch from all sides to find the cutting dimensions for the pad.
- Mark the foam with a pen using your straight edge to ensure the lines are perfectly vertical and horizontal.
- Cut along the marks using a sharp box cutter, applying firm pressure to get through the dense material in one pass.
- Center the pad on the floor in the desired location and ensure it does not wiggle when you step on it.
- Lay your decorative rug over the top, aligning the edges so the foam pad remains completely hidden from view.
- Press the rug down firmly to engage the grip of the foam and replace your furniture to help the layers settle.
7 Velvet Quilted Sofa Nesting
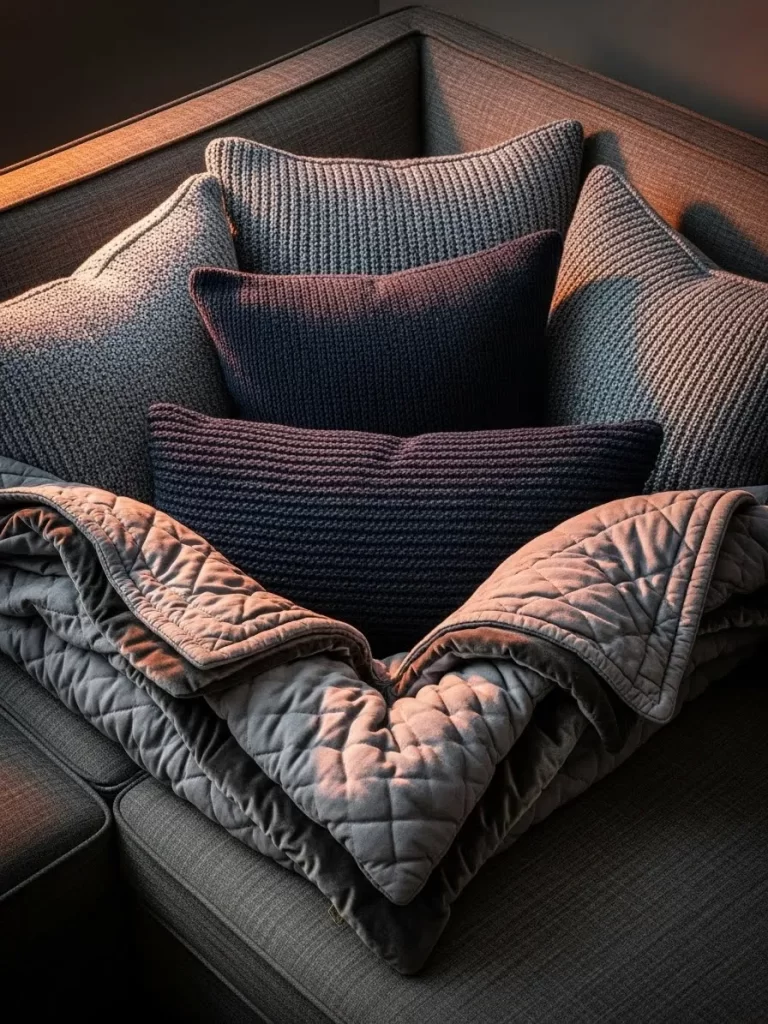
Corner seating often feels colder because air gets trapped behind the cushions. This arrangement uses deep navy knit pillows and a heavy velvet quilted throw to create a “nest” effect. The quilted texture of the blanket provides individual pockets of warmth that trap heat much better than a thin sheet.
The soft sheen of the velvet adds a touch of elegance while serving a very functional purpose. These materials are heavy enough to stay in place even when you move around while watching a movie. Mixing the smooth velvet with the ribbed texture of the knit pillows creates a sensory experience that feels incredibly cozy.
This technique is excellent for “zoning” a large sectional sofa. It tells your body that this specific corner is the warmest place to be. It blocks drafts coming from the back of the sofa and keeps your legs fully covered.
Material Required List
- One oversized velvet quilted coverlet or throw
- Two to three large knit decorative pillows
- Smaller lumbar support pillow in a matching tone
Equipment Required List
- Lint roller
- Fabric steamer (to remove fold lines)
DIY Instruction Step by Step
- Fluff your sofa cushions and ensure the back of the couch is pushed firmly against the wall to minimize drafts.
- Fold the velvet quilt in half lengthwise and drape it over the corner section of the sofa.
- Push the middle of the blanket deep into the crevices between the seat and back cushions to lock it in.
- Arrange the largest knit pillows in the very back of the corner to create a soft, insulated wall.
- Layer the smaller pillows in front of the larger ones, overlapping them slightly to prevent any gaps.
- Tuck the excess blanket fabric around the bottom of the seat cushions for a tailored and tidy look.
- Smooth out the top of the quilt to ensure the diamond-stitched pattern is clearly visible and inviting.
- Sit in the corner and pull the loose edges of the quilt over your lap to test the comfort and warmth.
8 Thermal Kitchen Fatigue Mat
Tiled kitchen floors are notoriously freezing during the winter months. Placing a tribal-patterned rug over a black anti-fatigue mat solves two problems at once. The rubberized base blocks the cold tile surface while the woven top adds a layer of textile warmth for your toes.
This combination is perfect for the space in front of a sink or stove where you stand for long periods. The black mat provides the cushion your joints need, and the colorful rug brings life to white cabinetry. It creates a small zone of comfort in an otherwise hard and cold room.
The fringe on the rug adds a bit of flair that makes the kitchen feel more like a living space. It is a quick way to upgrade your morning coffee routine without installing heated floors.
Material Required List
- One black rubber anti-fatigue kitchen mat
- One small woven accent rug (slightly larger than the mat)
- Silicone rug adhesive
Equipment Required List
- Damp cloth for cleaning
- Scissors
DIY Instruction Step by Step
- Wipe down the kitchen floor with a damp cloth to remove any grease or spills that might cause sliding.
- Place the black rubber mat in front of your most-used workstation, like the sink or prep area.
- Center your woven accent rug over the rubber mat to see how much of the black edge shows.
- Apply a small amount of silicone adhesive or rug tape to the four corners of the rubber mat.
- Lower the rug onto the mat, ensuring the pattern is straight and the fringe hangs naturally off the sides.
- Step on the rug repeatedly to bond the adhesive and make sure there are no air bubbles trapped between layers.
- Check that the height of the new “double layer” does not interfere with any low-swinging cabinet doors.
- Enjoy the soft support and heat retention the next time you spend a long afternoon baking or cooking.
9 Wool Bed Foot Runner
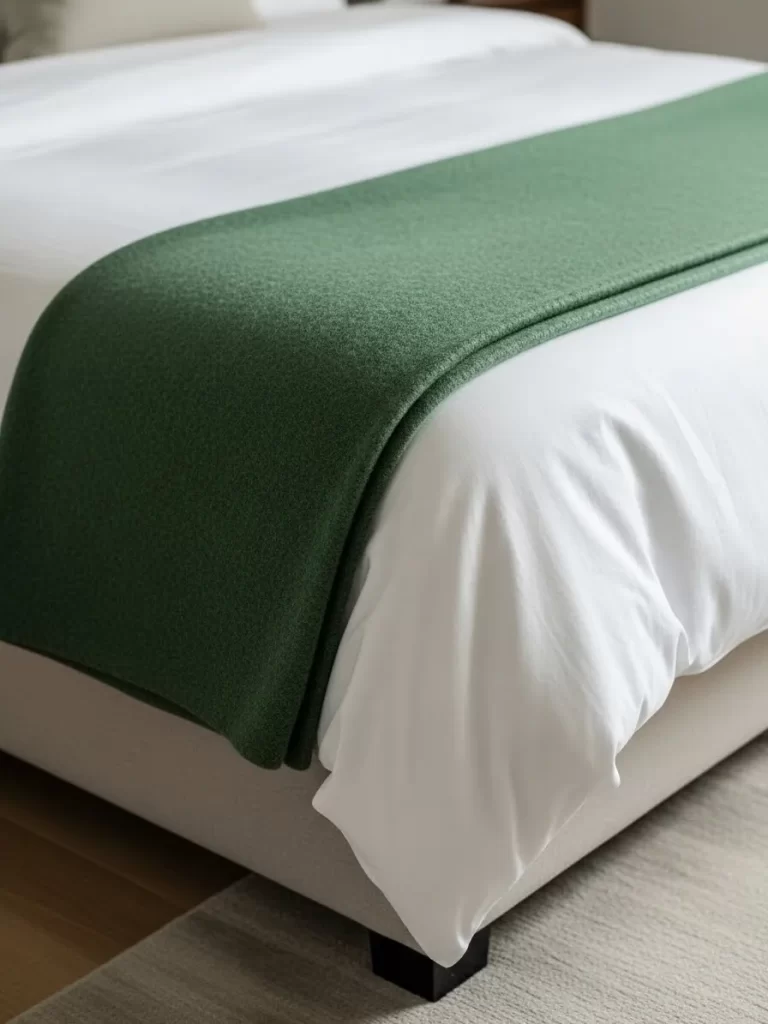
Warmth often escapes from the foot of the bed where blankets can become loose. Adding a thick, forest green wool runner across the bottom third of the mattress provides an extra layer of weight. This keeps your feet warm and prevents your main duvet from shifting during the night.
The deep green color looks sophisticated against crisp white linens. Wool is a superior insulator that remains breathable, so you stay warm without feeling sweaty. It acts as a final “seal” for the bed, trapping the heat generated by your body underneath the covers.
This simple addition transforms a basic bed into a hotel-style retreat. You can easily pull it up higher if the night gets particularly frosty. It is a versatile piece that works as well for style as it does for temperature control.
Material Required List
- One heavy wool or pashmina blend throw (rectangular shape)
- Standard bed linens
- Lavender pillow mist (optional)
Equipment Required List
- Iron or steamer
- Measuring tape (to ensure even overhang)
DIY Instruction Step by Step
- Make your bed completely, pulling the duvet or comforter tight and smoothing out any wrinkles.
- Fold your wool runner into a long, narrow rectangle that is approximately 18 to 24 inches wide.
- Lay the runner across the bed about 12 inches from the foot of the mattress.
- Adjust the runner so that the amount of fabric hanging off each side of the bed is exactly equal.
- Tuck the very edges of the runner under the mattress if you prefer a very secure and modern look.
- Smooth the surface of the wool to remove any lumps or shifted filling from the duvet below.
- Mist the fabric lightly with lavender to create a relaxing scent as the wool warms up.
- Fold the top of the runner back slightly to create a layered “cuff” look that adds visual thickness.
10 Double Entryway Draft Stopper

The area near your front door is usually the coldest spot in the house. Layering a dense, blue looped rug inside the door over a coir mat creates a double barrier against snowy or icy air. The bottom mat catches moisture, while the top rug provides a warm transition for your feet as you enter.
The blue rug features a thick, nubby texture that holds onto warm air coming from the hallway. This setup prevents the “cold floor” feeling that usually greets you when you take off your shoes. It also helps to muffle the sound of the door closing and footsteps in the entry.
Using two different textures creates a professional, layered look. It shows that the entryway is a planned part of your home’s decor rather than just a utility space.
Material Required List
- One heavy-duty coir (fiber) doormat for the base
- One cotton or wool looped rug for the top layer
- Outdoor-rated rug tape
Equipment Required List
- Broom or vacuum
- Tape measure
DIY Instruction Step by Step
- Sweep the entryway floor thoroughly to ensure no grit is trapped under the mats which could scratch the finish.
- Place the coir mat down first, as this rough material is best at scraping dirt and providing a stable base.
- Position the softer, blue looped rug on top of the coir mat, leaving a few inches of the base mat visible.
- Check the swing of your door to make sure it clears the thickness of both rugs without catching.
- Secure the corners of the top rug to the bottom mat using small strips of rug tape.
- Shift the entire assembly so it is perfectly centered with the door frame for a balanced look.
- Walk on the mats with your shoes on to settle the fibers into one another.
- Vacuum the top layer once a week to keep the loops open and effective at trapping air.
11 Oversized Chenille Arm-Knit Throw

Heavy leather armchairs often feel chilly against the skin during winter months. Draping a massive, cream-colored arm-knit throw over the back and seat provides a thick layer of insulation. This specific chunky knit style creates deep air pockets that trap warmth more effectively than a standard woven blanket.
The weight of the chenille yarn offers a comforting pressure that encourages relaxation while you read or rest. It covers the cold surface of the leather entirely, ensuring your legs and back stay cozy. The neutral ivory tone adds a bright, soft texture that contrasts beautifully with dark wood or leather furniture.
Using such a substantial textile is a quick way to winterize a drafty library or living room corner. It serves as a visual invitation to stay warm without turning up the heat. This piece is as much a design statement as it is a functional tool for home warmth.
Material Required List
- 6 to 10 lbs of super chunky chenille yarn
- Large crochet hook (optional for finishing)
- Matching sewing thread
Equipment Required List
- A large, clean table or floor space
- Measuring tape
- Sharp scissors
- Your own arms (no needles required)
DIY Instruction Step by Step
- Clear a large floor area and lay out your yarn to prevent any tangles during the process.
- Make a slip knot and slide it onto your right arm to begin the casting on process.
- Cast on 18 to 22 stitches using your arm as a needle to set the width of the throw.
- Reach through the loops with your left hand to pull the working yarn through, creating a new row of stitches.
- Transfer the loops back and forth between your arms, keeping the tension loose and consistent.
- Continue this rhythm until you reach the desired length or run out of yarn.
- Bind off the final row by pulling the yarn through two loops at a time to create a braided edge.
- Cut the yarn and weave the loose tail back into the thick stitches using your fingers until it is hidden.
12 Emerald Velvet and Faux Fur Duo
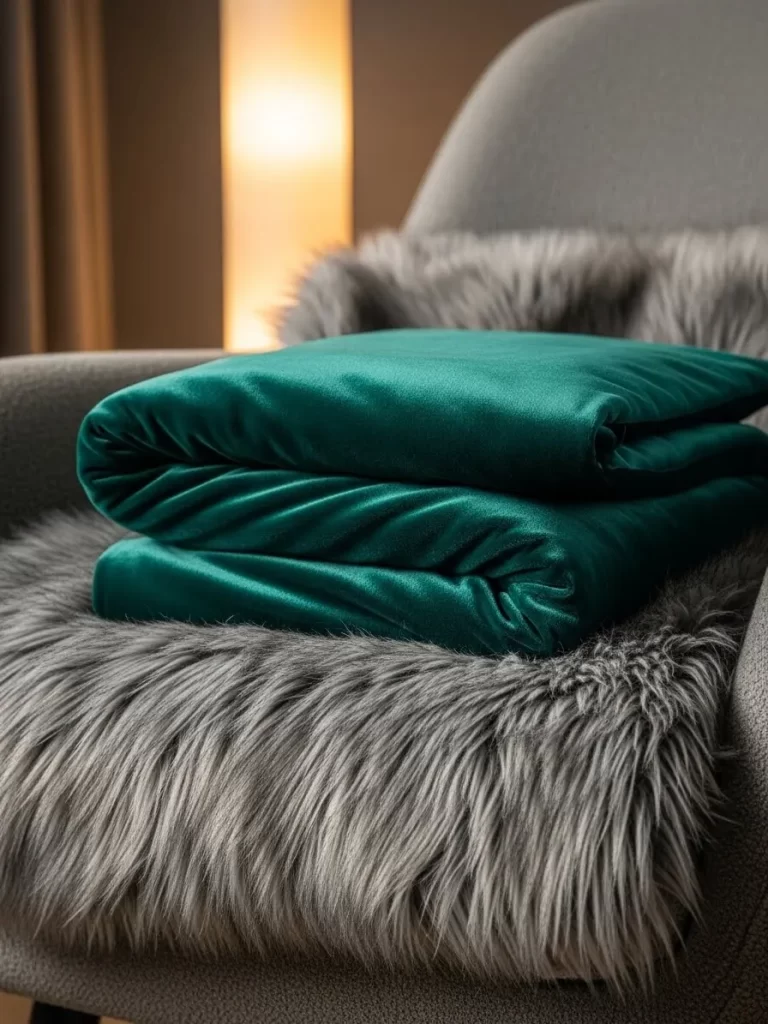
Cold evenings require a more sophisticated approach to layering on a reading chair. This combination features a smooth, emerald green velvet throw folded neatly over a long-pile gray faux fur rug. The density of the velvet blocks drafts, while the fur provides a high-loft cushion that keeps heat from escaping through the chair back.
The rich jewel tone brings a sense of luxury and visual warmth to a neutral room. Layering different textures like this creates a micro-climate of heat specifically for the person sitting there. It feels incredibly soft to the touch and provides immediate relief from a drafty window nearby.
This setup is easy to move between rooms if you decide to change your favorite lounging spot. It turns a simple chair into a dedicated warm zone that looks elegant even when not in use.
Material Required List
- One heavy emerald velvet throw blanket
- One small gray faux fur rug or chair pad
- Fabric-safe adhesive strips (optional)
Equipment Required List
- Handheld fabric steamer
- Soft-bristle brush (for the fur)
DIY Instruction Step by Step
- Lay the faux fur rug over the seat and back of the chair, ensuring it is centered.
- Press the fur firmly into the crease where the seat meets the back to keep it from sliding down.
- Use a steamer to remove any packaging folds from the velvet throw so it drapes perfectly.
- Fold the velvet throw into thirds lengthwise to create a clean, heavy band of color.
- Drape the folded velvet over the middle of the fur rug, allowing the edges to hang over the front.
- Brush the faux fur fibers around the velvet to blend the two textures together naturally.
- Place a small pillow behind the layers if the chair is deep to push the warmth closer to your body.
- Smooth the velvet top once more to ensure the light catches the fabric sheen for a polished look.
13 Highland Plaid Wingback Drape
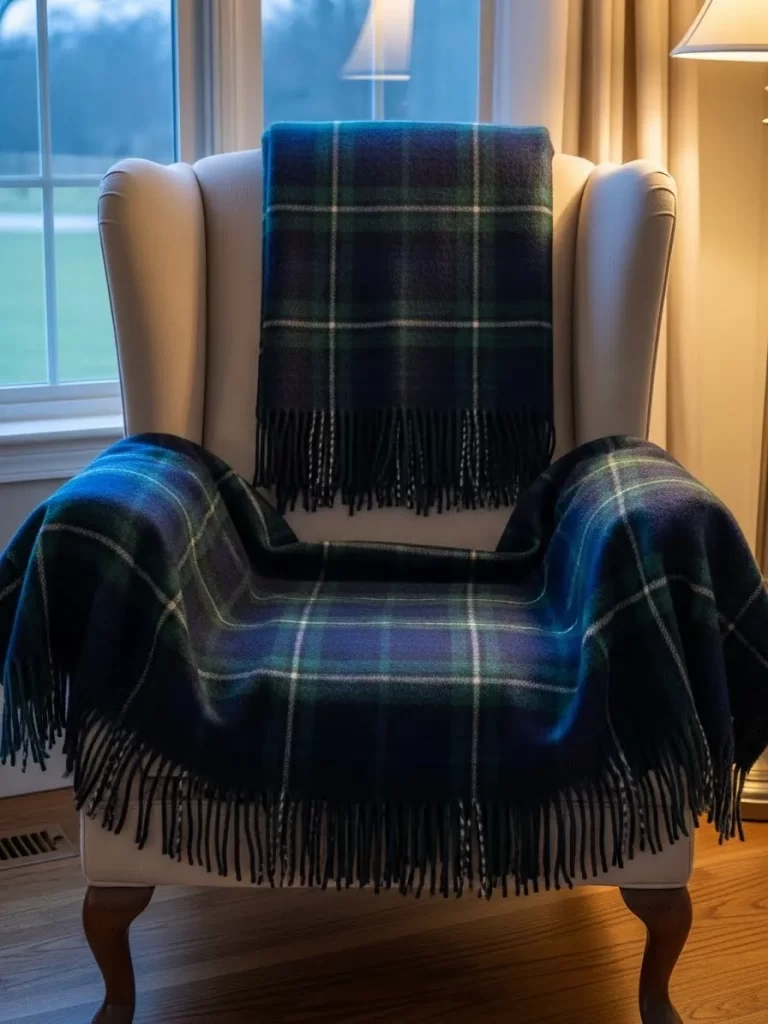
Drafts often sneak into a room through floor vents or gaps under the baseboards. This navy and green Highland plaid throw is draped purposefully over a wingback chair to act as a thermal shield. The traditional wool blend is naturally flame retardant and excellent at holding onto heat throughout the night.
The fringe detail adds a cozy, rustic charm that feels right at home during the holiday season. Draping the blanket over the armrests ensures that your hands and arms stay protected from the cooler air of the room. This classic pattern evokes a feeling of a cozy cabin, even if you live in a modern city apartment.
Wool textiles are breathable yet incredibly warm, making them the superior choice for layering. This setup ensures that your favorite chair remains a sanctuary of heat regardless of the temperature outside.
Material Required List
- One large wool-blend plaid throw with fringe
- Matching plaid pillow (optional)
- Scented cedar blocks (to protect the wool)
Equipment Required List
- Lint brush
- Hangers for seasonal storage
DIY Instruction Step by Step
- Center the plaid throw over the back of the wingback chair so the fringe hangs evenly at the bottom.
- Pull the sides of the blanket forward to cover the interior of the chair arms completely.
- Tuck the middle section into the seat cushion gap to provide a secure and tidy appearance.
- Allow the excess fabric to drape over the front of the seat to protect your legs from rising floor drafts.
- Arrange the fringe so it is straight and not tangled for the best visual appeal.
- Place a matching or contrasting pillow on the seat to add another layer of insulation for your lower back.
- Shake the blanket out once a week to prevent the wool fibers from matting down over time.
- Store with cedar blocks when the weather warms up to keep the natural fibers fresh and safe.
14 Triple Sheepskin Sofa Shield
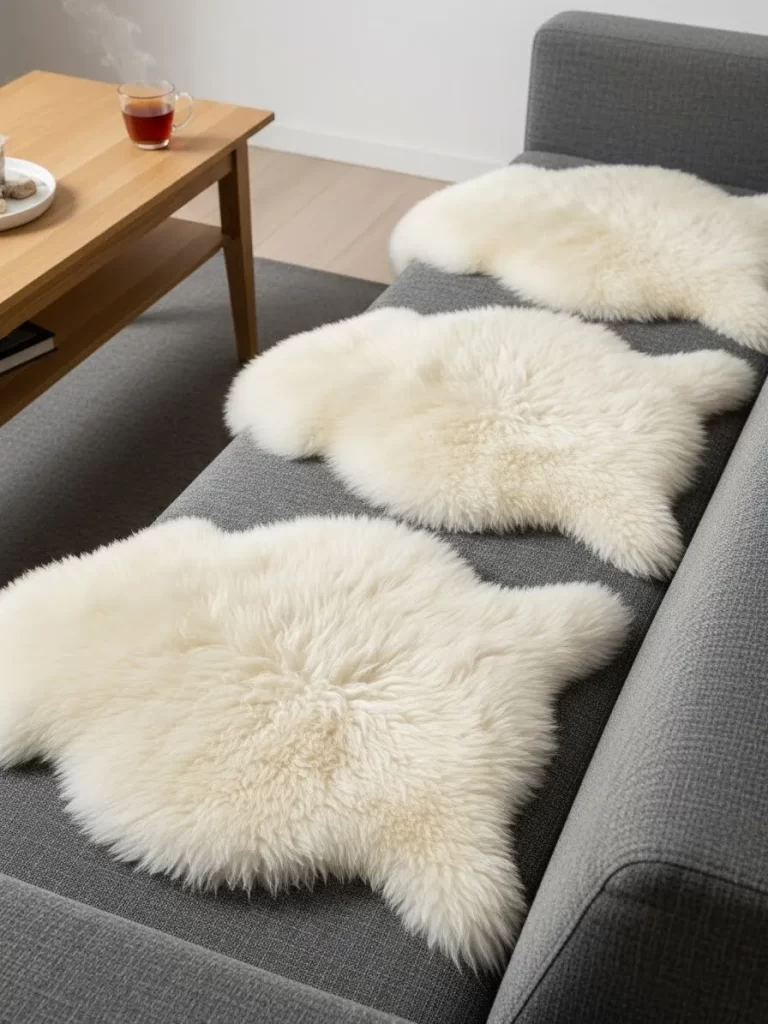
Standard sofa upholstery can feel surprisingly cold in the dead of winter. Laying three matching sheepskin pelts across the length of a gray sectional creates an instant heat barrier. The natural hollow fibers of the wool are the best insulators found in nature for keeping bodies warm.
This modular approach allows you to cover the exact spots where people sit most often. The creamy white color brightens up a dark sofa and adds a luxurious, cloud-like texture to the room. It prevents the cold fabric of the couch from zapping your body heat the moment you sit down.
Sheepskins are durable and resist dirt, making them a practical choice for busy households. They provide a soft, organic look that softens the sharp lines of modern furniture.
Material Required List
- Three medium-sized genuine or faux sheepskin rugs
- Non-slip fabric liners
- Wool-safe detergent
Equipment Required List
- Pet brush or wide-tooth comb
- Vacuum with a brush attachment
DIY Instruction Step by Step
- Measure the length of your sofa to determine how much space each sheepskin pelt will cover.
- Place small pieces of non-slip liner on the sofa cushions to prevent the pelts from sliding when you sit.
- Lay the first sheepskin at the end of the sofa, letting the organic edges hang naturally.
- Overlap the second and third pelts slightly to ensure there are no cold gaps between them.
- Push the top edges of the pelts into the back cushions to anchor them firmly in place.
- Use a wide-tooth comb to fluff the wool fibers if they appear matted or flat from shipping or storage.
- Align the “neck” portions of the hides in the same direction for a more uniform and intentional look.
- Vacuum the pelts on a low setting once a week to keep the wool airy and effective at trapping heat.
15 Mustard Waffle-Knit Bed Layer
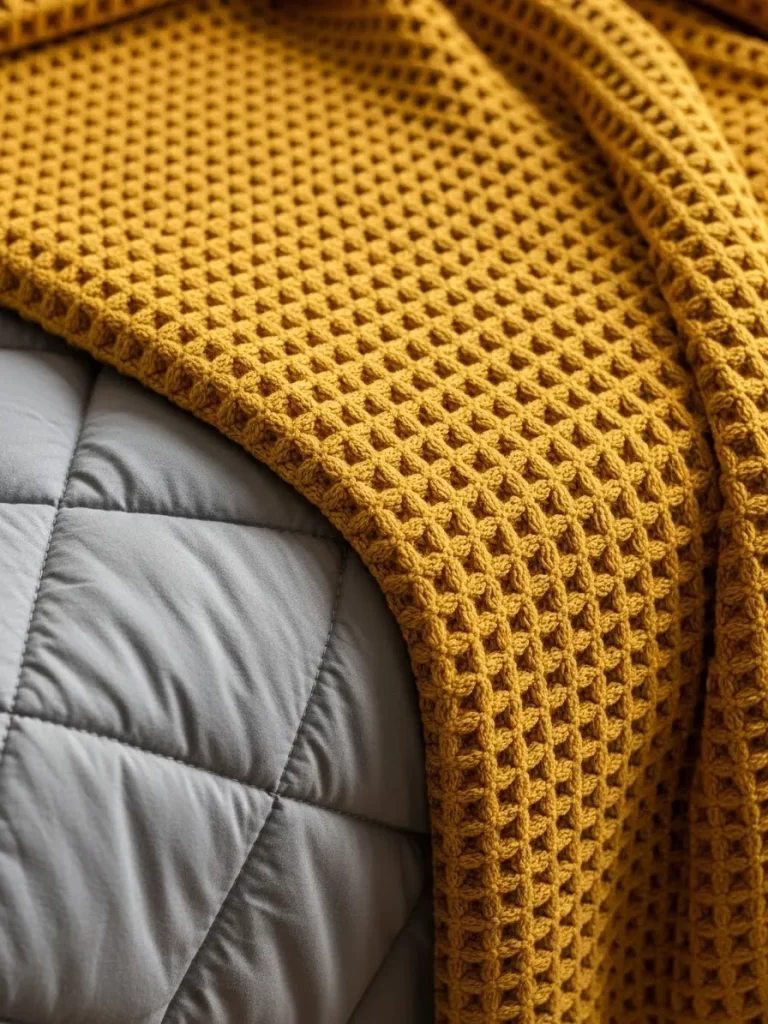
Duvets alone sometimes lack the weight needed to keep a bed truly warm. This mustard yellow waffle-knit blanket adds significant texture and extra air pockets to your bedding. The honeycomb weave is designed specifically to trap warm air close to the duvet surface, acting like a thermal blanket.
The bold color adds a pop of sunshine to a gray or white bedroom, which can improve your mood on dark winter mornings. This blanket is lightweight enough to stay comfortable but thick enough to make a noticeable difference in temperature. It stays in place better than smooth fabrics, preventing your covers from sliding off in the night.
Waffle-knit cotton is easy to wash and maintains its shape well over time. It is the perfect middle layer for someone who wants extra heat without the itchiness of heavy wool.
Material Required List
- One king or queen-sized waffle-knit cotton blanket
- Quilted mattress protector
- Flannel sheets
Equipment Required List
- Washing machine
- Dryer (to fluff the weave)
DIY Instruction Step by Step
- Strip the bed and start with a quilted mattress protector to block cold from the mattress itself.
- Lay down your flannel sheets and pull them tight to create a smooth base layer.
- Place your heavy duvet on top of the sheets as the primary source of insulation.
- Spread the mustard waffle-knit blanket over the foot of the bed, reaching halfway up to the pillows.
- Fold the top edge of the waffle blanket down about six inches to show off the deep texture.
- Tuck the sides of the blanket firmly under the mattress to seal in the warmth at the edges.
- Smooth any lumps to ensure the air pockets in the weave are distributed evenly across the bed.
- Wash the blanket on a gentle cycle and tumble dry on low to keep the “waffles” plump and effective.
16 Electric Heated Under-Blanket
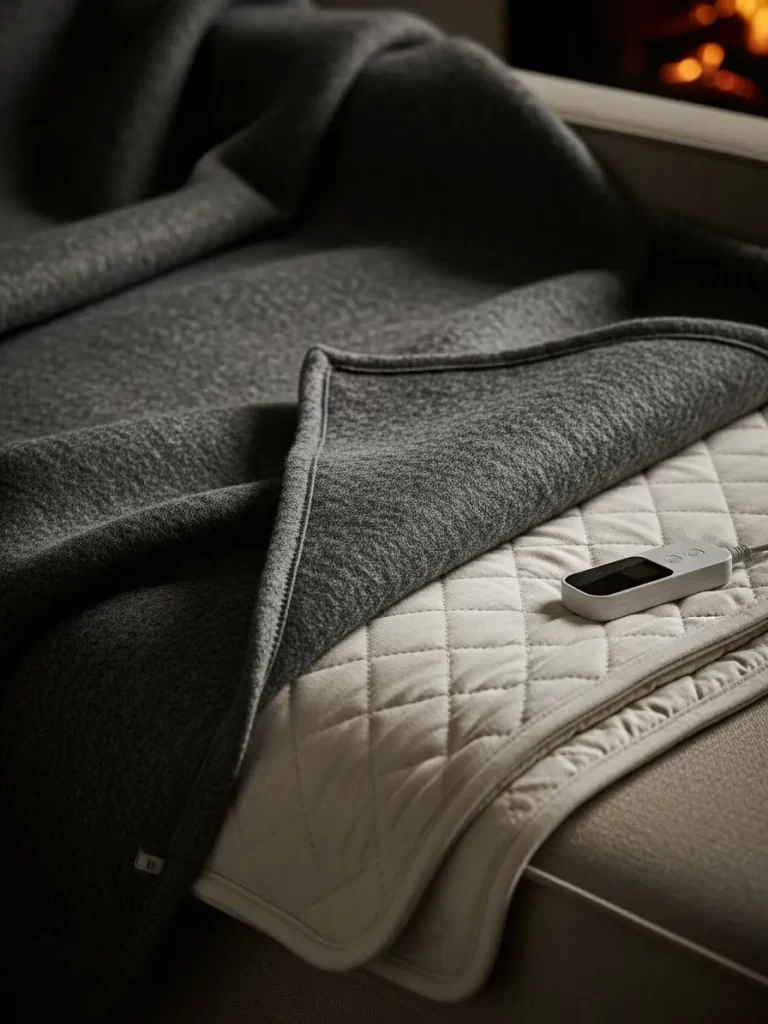
Sometimes the air is so cold that you need an active heat source to stay comfortable. This setup features a quilted electric under-blanket tucked beneath a heavy charcoal wool top layer. The electric element provides a consistent base of warmth while the wool prevents that heat from escaping into the room.
This is the most efficient way to warm a seating area without heating the entire house. You can see the controller resting on the quilted surface, allowing for easy temperature adjustments. The gray wool cover is stylish enough to hide the technical nature of the heating element beneath it.
Using an electric layer is a game-changer for people with poor circulation or very drafty homes. It creates a heated sanctuary that is ready in just a few minutes.
Material Required List
- One UL-certified electric heated mattress pad or throw
- One thick charcoal gray wool or fleece blanket
- Extension cord (if needed)
Equipment Required List
- Nearby power outlet
- Safety timer (optional)
DIY Instruction Step by Step
- Read the safety instructions for your electric blanket to ensure it is used correctly and safely.
- Lay the quilted electric pad directly onto the seat or bed surface where you want the heat.
- Secure any elastic straps around the furniture cushions to prevent the heating wires from bunching up.
- Place the heavy charcoal wool blanket over the top of the electric pad to serve as an insulator.
- Plug the controller into a wall outlet and route the cord behind the furniture to keep it hidden.
- Turn the heat to a medium setting fifteen minutes before you plan to sit down to pre-warm the space.
- Always keep the controller on top of the blankets so it does not overheat under the fabric.
- Switch the unit off whenever you leave the room to save energy and ensure home safety.
17 Mediterranean Tile Print Stack
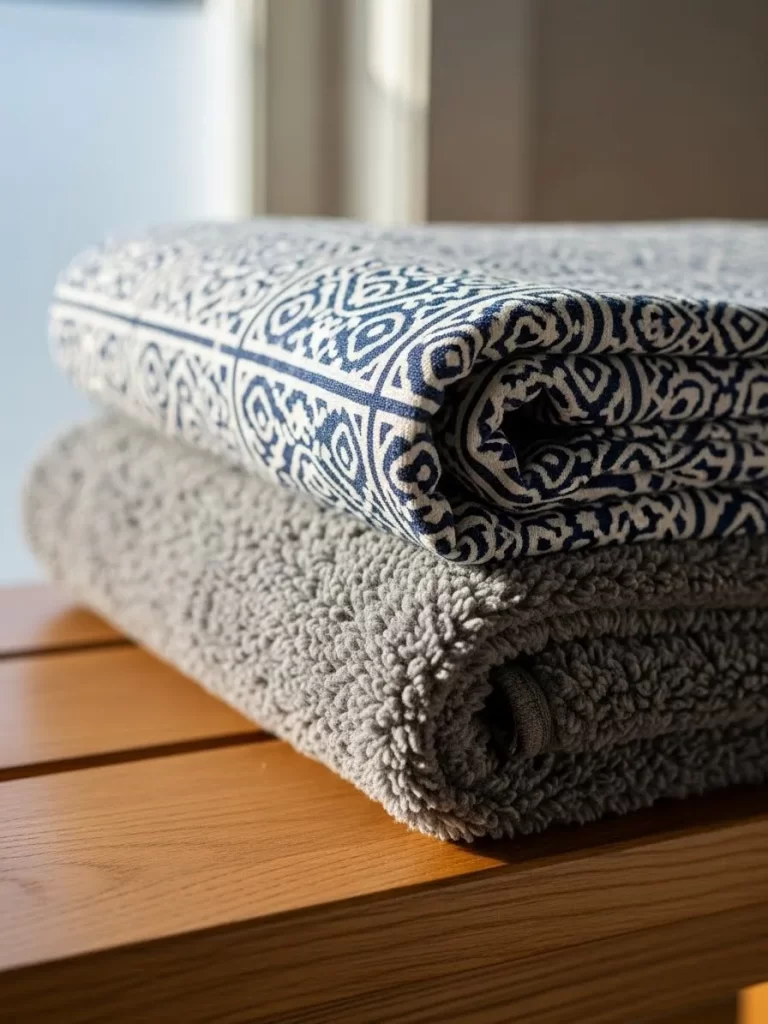
Bathrooms and entryways often feel cold because of the hard, reflective surfaces like tile or stone. This stack shows a blue and white tile-patterned cotton rug layered over a thick, gray looped wool mat. The cotton top provides a soft feel for bare feet, while the wool base acts as a heavy-duty insulator.
The geometric pattern brings a fresh, coastal vibe that makes a cold room feel more inviting and bright. This “rug on rug” technique is excellent for high-moisture areas where you need both warmth and quick-drying capabilities. The gray base is neutral enough to hide foot traffic marks in a busy hallway.
Stacking rugs like this allows you to wash the top layer more frequently while the heavy base stays in place. It adds a sophisticated designer touch to often-overlooked utility spaces.
Material Required List
- One patterned cotton flat-weave rug
- One thick looped wool or microfiber bath mat
- Non-slip rug tape
Equipment Required List
- Measuring tape
- Scissors
DIY Instruction Step by Step
- Clean the floor thoroughly and ensure it is completely dry before placing any textiles.
- Lay the thick gray wool mat down first to establish the insulating foundation.
- Center the blue patterned cotton rug over the gray mat, ensuring the edges are even.
- Apply strips of rug tape to the underside corners of the cotton rug to bond it to the wool layer.
- Press down hard on the corners to ensure the two rugs move as one single piece.
- Check that the combined height of the rugs still allows your door to open and close freely.
- Place the stack in front of the vanity or shower where the floor feels the coldest.
- Peel off the top rug for easy machine washing whenever it becomes damp or dirty.
18 Library Recliner Plaid Wrap

A leather recliner in a dark library is a classic cold spot that benefits from targeted layering. This arrangement uses a large black and white buffalo check wool throw and a sleek brown velvet lumbar pillow. The wool provides the heavy warmth needed for long nights, while the velvet pillow blocks air from moving behind your back.
The plaid pattern is timeless and fits perfectly with a collection of old books and warm lamplight. Draping the blanket over the footrest ensures your ankles and feet are shielded from floor-level drafts. This setup creates a dedicated “reading zone” that remains warm even if the rest of the room is cool.
Wool is excellent for this purpose because it doesn’t hold onto static like synthetic fibers can. It provides a natural, comforting heat that feels consistent and deep.
Material Required List
- One oversized buffalo check wool throw
- One brown velvet lumbar pillow
- Leather conditioner (to protect the chair under the wool)
Equipment Required List
- Soft lint roller
- Fabric spray
DIY Instruction Step by Step
- Apply a light coat of leather conditioner to your chair to prevent the wool from drying out the leather.
- Drape the plaid wool throw over the back of the recliner so it hangs halfway down the rear.
- Pull the blanket forward and tuck it into the sides of the seat to prevent shifting during movement.
- Smooth the lower half of the blanket over the footrest, leaving enough slack for the chair to recline.
- Place the brown velvet pillow at the base of the backrest to provide support and trap heat.
- Adjust the blanket folds so the pattern is straight and the fringe is visible at the edges.
- Test the recliner function to ensure the fabric does not get caught in the mechanical parts.
- Add a small side table for your tea to complete the ultimate warm winter reading nook.
19 Ottoman Tea Station Layer
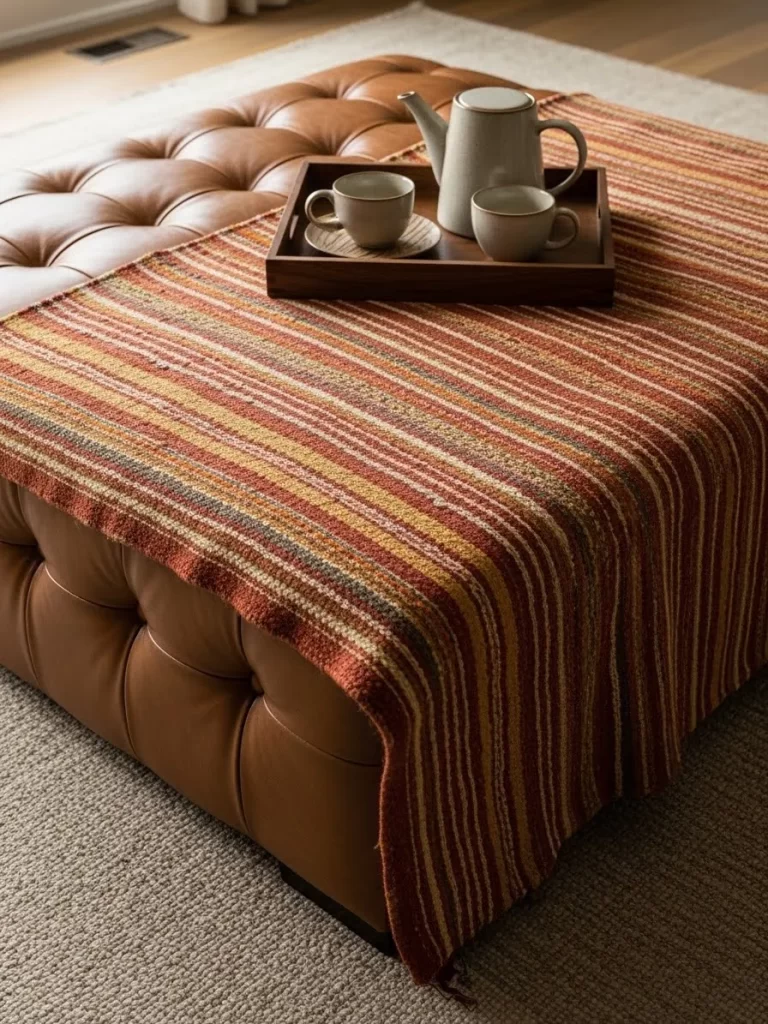
Large leather ottomans can feel like a giant block of ice in the middle of a room. Covering the top with a vibrant, striped woven runner creates a warm surface for resting your feet or a tea tray. The earthy tones of orange, red, and yellow provide a visual “heat” that makes the whole room feel sunnier.
This textile acts as a protective barrier that keeps your body heat from being absorbed by the cold leather. It also prevents the leather from being damaged by hot mugs or wooden trays. The long, narrow shape of the runner allows the beautiful leather of the ottoman to still show on the sides.
This is a low-effort way to add color and function to your living room. It makes the ottoman feel more like a cozy piece of furniture and less like a cold utility item.
Material Required List
- One woven textile runner with horizontal stripes
- One wooden serving tray
- Ceramic tea set
Equipment Required List
- Measuring tape
- Fabric protector spray
DIY Instruction Step by Step
- Clear the ottoman and wipe the leather surface with a dry cloth to remove any dust.
- Measure the length and width of the ottoman top to ensure your runner fits perfectly across the center.
- Lay the striped runner over the middle, letting the ends hang down the sides of the ottoman.
- Check that the stripes are perfectly horizontal and centered with the tufting of the leather.
- Place a heavy wooden tray in the center of the runner to act as a stable base and anchor for the fabric.
- Set your tea cups and teapot on the tray to test the stability of the arrangement.
- Mist the runner with a fabric protector to prevent stains from any accidental tea spills.
- Fold the ends of the runner inward if you prefer a cleaner look that doesn’t touch the floor.
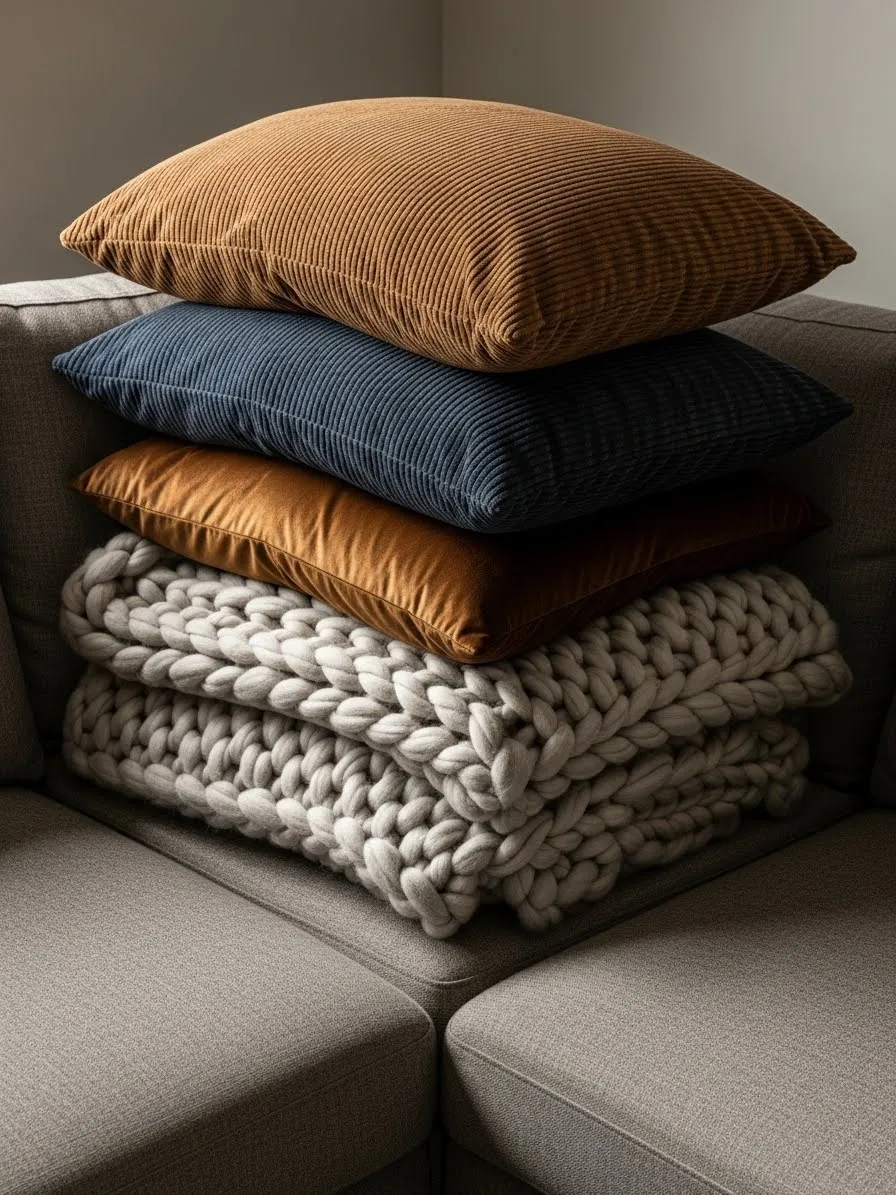
20 Corduroy and Knit Pillow Pyramid

Cold sofas often feel that way because of the empty space between the cushions and the wall. Building a pyramid of textured pillows against the backrest creates a thick wall of insulation. This stack uses ribbed corduroy and chunky knit textures in earthy blues and browns to block cold air.
The variety of heights and fabrics ensures that every part of your back and neck is protected from drafts. Corduroy is a fantastic winter fabric because the “wales” or ridges trap tiny pockets of air for extra warmth. The heavy knit blanket at the bottom provides a soft, warm base for your legs.
This arrangement is very inviting and makes the sofa the focal point of a cozy room. It is an easy way to refresh your decor while significantly increasing the comfort level of your seating.
Material Required List
- Two large square corduroy pillows (brown and blue)
- Two medium velvet pillows
- One chunky knit throw blanket
Equipment Required List
- Pillow inserts (one size larger than the covers for extra firmness)
- Fabric freshener
DIY Instruction Step by Step
- Use pillow inserts that are two inches larger than your covers to ensure the pillows are plump and warm.
- Fold your chunky knit blanket and place it on the sofa seat as the base for your pillow stack.
- Place the largest brown corduroy pillow in the back corner to serve as the foundation.
- Lean the blue corduroy pillow against it at a slight angle to create visual interest.
- Layer the smaller velvet pillows in front, overlapping them to close any air gaps.
- Plump each pillow by hitting the sides to move the filling into the corners for maximum loft.
- Arrange the stack so it follows the curve of the sofa corner for the best draft protection.
- Spray a light textile mist over the stack to keep the dense fabrics smelling fresh all winter.
21 Looped Wool Texture Layering
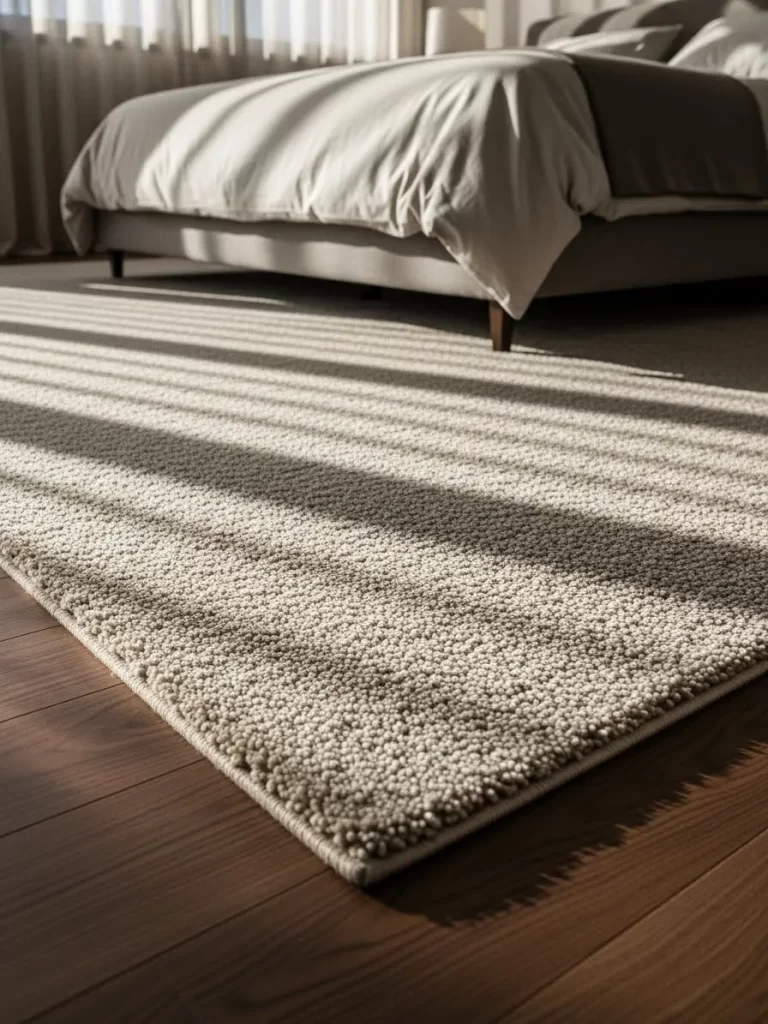
Bare wood floors look beautiful but often feel icy during the early morning hours. This cream-colored, looped wool rug creates a substantial buffer between your feet and the cold subfloor. The dense, pebbled texture acts as a series of tiny insulators that trap warm air and provide a soft landing for your toes.
Placing this rug partially under the bed frame anchors the room and ensures you never step onto a freezing surface. The neutral off-white tone reflects natural light, making the bedroom feel airy despite the heavy winter textiles. It offers a clean, modern aesthetic that balances the warmth of the wood with the comfort of a high-quality carpet.
Layering a rug of this density is a smart way to stop radiant heat from escaping through the floorboards. It provides an immediate sense of coziness that transforms the atmosphere of the entire sleeping area.
Material Required List
- One large looped wool area rug (8×10 or 9×12)
- High-quality felt rug pad
- Corner rug grippers
Equipment Required List
- Measuring tape
- Heavy-duty vacuum
- Scissors
DIY Instruction Step by Step
- Measure your bedroom floor to ensure the rug will sit at least halfway under the bed and extend past the sides.
- Clean the hardwood surface thoroughly to remove any grit that could cause the rug to slide or scratch the finish.
- Lay down the felt rug pad first to provide an extra layer of thermal insulation and cushioning.
- Trim the pad so it is one inch smaller than the rug on all sides to keep it completely hidden.
- Position the cream wool rug over the pad, aligning it with the legs of the bed frame.
- Lift the corners of the rug and apply adhesive grippers to prevent the edges from curling or shifting.
- Smooth out the surface of the rug by walking over it to settle the loops and remove any packaging waves.
- Vacuum the rug on a high-pile setting to fluff the fibers and maximize the air-trapping potential of the wool.
22 Indigo Indigo Kantha Quilt

Standard white linens can feel visually cold when the wind is howling outside. This deep indigo Kantha quilt features thousands of small running stitches that add incredible weight and density to your bed. The layered cotton fabric provides a breathable but sturdy shield that keeps your body heat exactly where you want it.
The rich blue pattern adds a layer of global charm and deep color to a minimalist bedroom. Using this as a top layer over a duvet provides the extra pressure needed for a deep, warm sleep. The hand-stitched texture creates a slightly uneven surface that traps more air than a machine-made, smooth blanket.
You can easily fold this quilt at the foot of the bed during the day and pull it up to your chin at night. It is a versatile piece that adds both a cultural story and practical warmth to your home.
Material Required List
- One hand-stitched indigo Kantha quilt
- Set of crisp white cotton sheets
- Down or down-alternative duvet
Equipment Required List
- Fabric steamer
- Mild textile detergent
DIY Instruction Step by Step
- Dress your bed with clean cotton sheets and a heavy duvet to establish the primary warmth layer.
- Unfold the indigo Kantha quilt and spread it evenly across the top of the duvet.
- Align the top edge of the quilt about six inches below the pillows to show a clean layer of white bedding.
- Tuck the quilt and duvet together at the foot of the bed for a secure, draft-free seal.
- Smooth the fabric toward the edges of the mattress to ensure the heavy stitching lies flat.
- Use a handheld steamer to remove any deep creases from the quilt to help it drape naturally.
- Fold the very top edge of the quilt back to create a decorative “cuff” that showcases the hand-stitching.
- Add a few accent pillows in similar blue tones to complete the layered and protected look of the bed.
23 Classic Cream and Black Plaid Throw

A folded plaid throw is the ultimate symbol of a winter-ready home. This heavy wool-blend blanket features a classic cream and black check pattern that fits any decor style from farmhouse to modern. The thick weave provides a robust barrier against the cold when you are lounging on top of your bed or sofa.
Keeping a blanket like this folded at the foot of the bed adds a layer of visual thickness that makes the room feel warmer. It is the perfect piece to grab for a quick nap or to wrap around your shoulders while reading. The fringe detail adds a touch of movement and soft texture to the straight lines of the mattress.
This specific pattern remains a favorite because it brings a sense of tradition and stability. It is an easy way to update your space for the season without a major investment.
Material Required List
- One large plaid wool-blend throw with fringe
- Neutral-colored duvet cover
- Decorative shams
Equipment Required List
- Lint roller
- Fabric-safe storage bag (for summer)
DIY Instruction Step by Step
- Make the bed fully, ensuring the duvet is centered and the pillows are propped up.
- Fold the plaid throw in half lengthwise to create a long, thick rectangle.
- Lay the folded blanket across the bottom third of the bed, allowing the fringe to hang off the sides.
- Check that the plaid lines are perfectly horizontal and aligned with the foot of the mattress.
- Smooth the blanket with your hands to remove any air pockets and create a flat, heavy layer.
- Tuck the edges of the throw under the mattress if you prefer a more tailored, contemporary appearance.
- Shake the blanket out once a week to prevent the wool fibers from matting down over time.
- Keep a lint roller nearby to remove any stray fibers and keep the black and white contrast looking sharp.
24 Midnight Blue Velvet Pillows
Walls and headboards can feel cold to the touch during a winter freeze. These oversized, midnight blue velvet pillows provide a plush and insulating barrier between you and the wall. Velvet is a dense fabric that holds heat exceptionally well, making these the best choice for propping yourself up in bed.
The deep blue color and shimmering texture bring a sense of luxury and quiet calm to the room. They act as “soft insulation” that absorbs sound and prevents cold drafts from moving around the head of the bed. Their large size ensures that your shoulders and head are always cushioned by a warm, soft surface.
Pairing these with warm-toned lighting creates a glowing effect that makes the bedroom look like a cozy cave. It is a simple swap that makes a massive impact on your comfort level.
Material Required List
- Two large square velvet pillow covers (24×24 inches)
- Two high-loft down or feather inserts
- Fabric protector spray
Equipment Required List
- None listed
DIY Instruction Step by Step
- Select pillow inserts that are one size larger than your covers to ensure a firm and warm fill.
- Stuff the velvet covers carefully, making sure the corners of the inserts reach the very corners of the fabric.
- Zip the covers closed and “chop” the top center of the pillow to create a stylish, professional look.
- Place the pillows vertically against the headboard or the wall at the top of the bed.
- Ensure they are touching each other in the middle to prevent any cold air from slipping through the gap.
- Lightly mist the velvet with a fabric protector to keep the nap of the fabric looking rich and clean.
- Brush the velvet in one direction with your hand to create a uniform, shimmering surface.
- Lean back against them while reading to experience the immediate heat retention of the dense velvet pile.
25 Quilted Bed Skirt Insulation
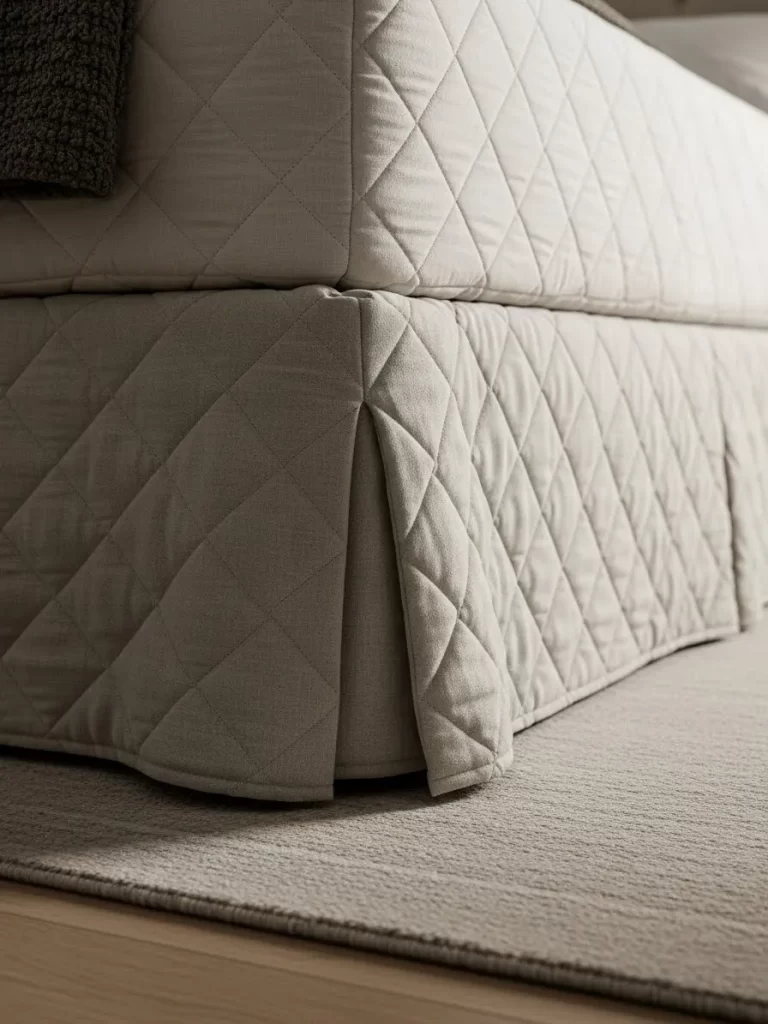
The space under your bed is often a reservoir for cold air. A thick, quilted bed skirt acts as a heavy curtain that prevents these chilly drafts from circulating under your mattress. This neutral, diamond-stitched fabric adds a layer of protection that also hides storage and gives the bed a finished look.
By sealing off the perimeter of the bed frame, you create a pocket of still air that helps maintain the mattress temperature. The quilted texture provides more weight than a standard thin fabric skirt, so it stays in place and doesn’t flap in a breeze. It is a functional detail that many people overlook when winterizing their homes.
The soft beige tone blends seamlessly with any flooring or carpet. It adds a subtle touch of elegance while performing a very practical task for your home’s thermal efficiency.
Material Required List
- One heavy-duty quilted bed skirt
- Bed skirt pins or “twisty pins”
- Measuring tape
Equipment Required List
- Iron or steamer
- Mattress lifter tool (optional)
DIY Instruction Step by Step
- Measure the “drop” from the top of your box spring to the floor to ensure you buy the correct length skirt.
- Remove the mattress and iron the quilted skirt to remove any wrinkles from the packaging.
- Spread the skirt over the box spring, aligning the corners of the fabric with the corners of the frame.
- Check that the hem of the skirt just barely touches the floor on all three sides.
- Use twisty pins to secure the fabric to the box spring so it doesn’t shift when you put the mattress back.
- Gently lower the mattress onto the box spring, being careful not to snag or pull the pinned skirt.
- Straighten the pleats at the corners of the bed to ensure a crisp and professional appearance.
- Vacuum the bottom edge of the skirt regularly to keep it free of dust and looking fresh throughout the winter.
26 Lavender Mohair Cloud Throw

Lightweight layering is just as important as heavy textiles for staying warm without feeling weighed down. This lavender-toned mohair throw is incredibly soft and features long, wispy fibers that trap heat with very little bulk. Draping this over your white bed linens adds a soft touch of color and a huge boost in insulation.
Mohair is known for its luster and its ability to keep you warm even when the material is thin. This blanket feels like a warm cloud and is perfect for those who find heavy wool too itchy or oppressive. The pale purple hue adds a soothing, feminine touch to a neutral bedroom palette.
It drapes beautifully, creating soft folds that catch the light and add visual depth to the bed. This is the piece you reach for when you want a little extra coziness on a chilly afternoon.
Material Required List
- One high-quality mohair or alpaca throw blanket
- White cotton bedding
- Satin pillowcases
Equipment Required List
- Soft-bristle garment brush
- Gentle fabric spray
DIY Instruction Step by Step
- Lay your white duvet and pillows as you normally would to create a clean foundation.
- Unfold the mohair throw and drape it diagonally across the center of the bed for a casual look.
- Allow the fabric to bunch slightly in the middle to create more air-trapping “loft” in the fibers.
- Ensure the edges of the throw are spread out enough to cover the main area where you rest.
- Gently brush the fibers upward with a garment brush to keep the mohair fluffy and insulating.
- Spritz the blanket with a light fabric spray to create a calm and productive atmosphere in your office.
- Tuck a small portion of the blanket under the duvet if you want to keep it from sliding off in the night.
- Enjoy the immediate, lightweight warmth the next time you curl up for a quick break.
27 Canopy Thermal Shielding
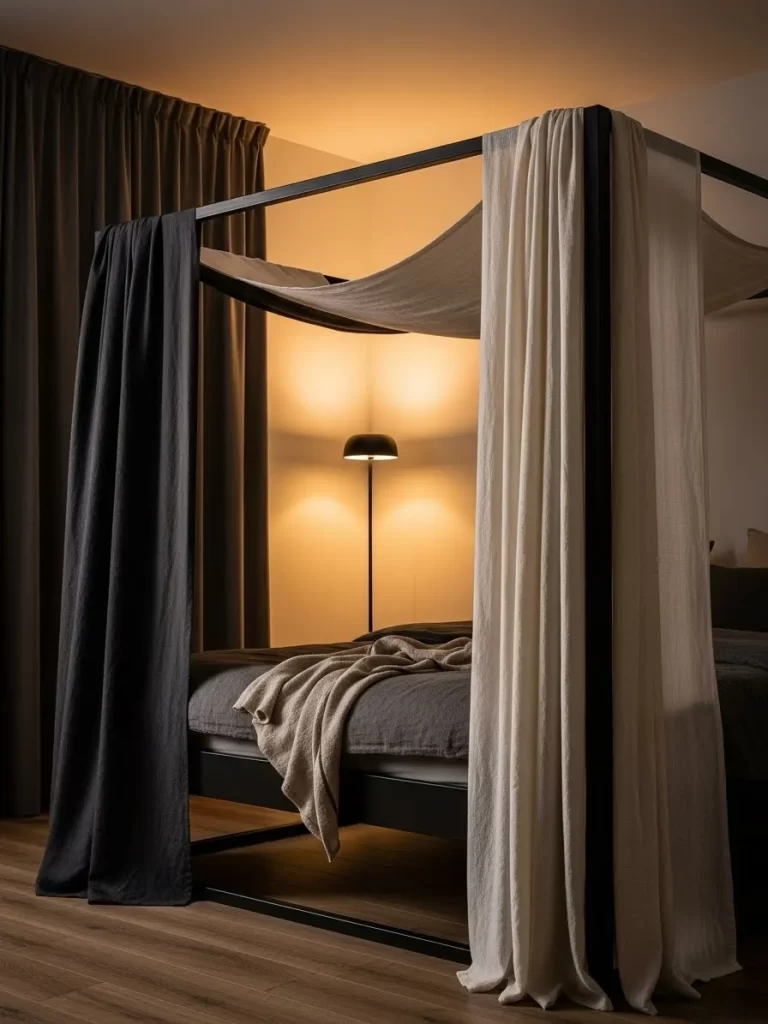
A four-poster bed offers a unique opportunity to create a room-within-a-room. Hanging long, heavy drapes from the top rails creates a thermal shield that traps your body heat inside the sleeping area. This setup uses a mix of dark and light curtains to block light and drafts, making the bed feel like a warm sanctuary.
The vertical fabric adds a massive amount of surface area to the room, which helps to muffle sound and soften the overall feel. It prevents cold air from the windows from reaching you directly while you sleep. The contrast between the black and white curtains adds a dramatic, architectural element to the bedroom.
Closing the curtains at night can significantly raise the temperature inside the canopy. It is a historic method of staying warm that still works perfectly in modern, drafty homes.
Material Required List
- Four to eight floor-length curtain panels (velvet or heavy linen)
- Curtain rings or ties
- One lightweight throw for the bed surface
Equipment Required List
- Step ladder
- Measuring tape
- Level
DIY Instruction Step by Step
- Measure the height of your four-poster frame to ensure your curtain panels reach the floor.
- Slide curtain rings onto the top horizontal rails of the bed frame.
- Attach the heavy panels to the rings, placing two panels at the head and two at the foot of the bed.
- Hang the darker panels on the outside and the lighter panels on the inside for a layered look.
- Use fabric ties to pull the curtains back against the posts during the day to allow for airflow.
- Release the curtains at night so they fully enclose the bed and touch the floor on all sides.
- Check that the fabric doesn’t interfere with any bedside lamps or electronics for safety.
- Steam the long panels while they are hanging to remove wrinkles and help the fabric hang straight.
28 Multi-Layer Mattress Topper Stack
Maximum warmth starts from the bottom up with a strategically stacked mattress topper system. This cross-section shows a base mattress covered by a thick quilted protector, followed by a waffle-knit thermal layer, and topped with a plush down duvet. Each layer adds a new level of insulation and softness to your sleeping surface.
This stack prevents the “cold mattress” feeling by creating multiple barriers between your body and the bed. The waffle-knit middle layer is the secret weapon, as its texture creates thousands of tiny pockets for warm air to settle. Finishing with a thick down layer provides the ultimate “sink-in” comfort that stays warm all night.
Using white and sage green tones keeps the stack looking clean and organized. It is a professional-grade way to upgrade any bed for the coldest months of the year.
Material Required List
- One thick quilted mattress protector
- One waffle-knit cotton thermal blanket
- One down or down-alternative mattress topper
- Fitted sheet with deep pockets
Equipment Required List
- Mattress vacuum
- Measuring tape (to check depth)
DIY Instruction Step by Step
- Vacuum your mattress surface to ensure it is clean and free of allergens before layering.
- Fit the quilted mattress protector over the bed, pulling it tight at the corners.
- Lay the sage green waffle-knit blanket flat over the protector to act as your primary thermal break.
- Place the thick down mattress topper on top of the waffle blanket for maximum loft and warmth.
- Cover the entire stack with a deep-pocket fitted sheet to hold all the layers securely in place.
- Smooth the sheet to ensure there are no lumps or bunches that could cause discomfort.
- Add your top duvet and pillows to complete the high-performance winter bedding system.
- Rotate the mattress topper every few weeks to prevent it from compressing and losing its heat-trapping ability.
29 Herringbone and Cotton Duo

Mixing textures is the key to a bed that looks and feels warm. This close-up shows a gray herringbone wool blanket layered directly under a crisp white duvet. The wool provides a heavy, scratch-free warmth, while the cotton duvet offers a clean and smooth finish for your skin.
The herringbone pattern adds a classic, tailored look that makes the bedding feel more expensive and deliberate. This combination works well because the wool stays warm even if the room gets damp or particularly cold. The overlap of the two fabrics creates a thick edge that is perfect for tucking under your chin.
It is a simple way to use a favorite throw blanket as a functional part of your nightly bedding. This setup ensures that you have multiple levels of heat control that you can adjust easily.
Material Required List
- One gray herringbone wool blanket
- One white cotton duvet cover and insert
- Herringbone accent pillows
Equipment Required List
- Fabric shaver (to remove wool pills)
- Iron
DIY Instruction Step by Step
- Lay the gray herringbone blanket flat across the entire surface of the bed sheets.
- Place the white duvet on top of the wool blanket, aligning the top edges perfectly.
- Fold the top of the duvet back about twelve inches to reveal the herringbone pattern underneath.
- Tuck both the blanket and the duvet into the sides of the mattress for a clean and warm seal.
- Smooth the fabric toward the foot of the bed to ensure there are no cold air gaps.
- Add matching herringbone pillows at the top of the bed to pull the look together visually.
- Use a fabric shaver on the wool blanket occasionally to keep the texture smooth and soft.
- Wash the cotton duvet frequently to maintain a fresh scent and clean feel against your skin.
30 Rust Cable-Knit and Sheepskin Chair

A simple wooden chair can become a warm reading nook with the right accessories. This arrangement features a thick, rust-colored cable-knit throw and a plush white sheepskin rug. The sheepskin provides a soft, insulating base for the seat, while the cable-knit blanket offers a heavy layer of warmth for your lap.
The earthy orange tone of the blanket brings a sense of firelight and autumn warmth to the corner. Cable-knit is a traditional winter texture that is excellent at holding heat due to the density of the overlapping yarn. This setup turns an unused corner into a destination for relaxation during the long winter evenings.
An open book resting on the sheepskin invites you to slow down and enjoy the warmth. It is a low-cost way to add personality and comfort to any small space in your home.
Material Required List
- One large cable-knit throw blanket in rust or orange
- One genuine or faux sheepskin pelt
- Comfortable wooden or upholstered chair
Equipment Required List
- Wide-tooth comb (for the sheepskin)
- Fabric freshener
DIY Instruction Step by Step
- Place the sheepskin rug over the seat and back of the chair, centering it carefully.
- Tuck the middle of the pelt into the seat crease to keep it from sliding when you sit.
- Drape the rust cable-knit throw over one arm of the chair, letting it hang toward the floor.
- Spread the other half of the blanket over the back of the chair to add extra padding for your shoulders.
- Arrange the folds of the blanket to show off the intricate cable-knit pattern and texture.
- Comb the sheepskin fibers with a wide-tooth comb to keep them fluffy and soft.
- Position the chair near a window or a reading lamp to create a dedicated cozy zone.
- Keep your favorite book nearby to encourage you to take a warm break in your new favorite spot.
31 Sunset Stripe Wall Insulation
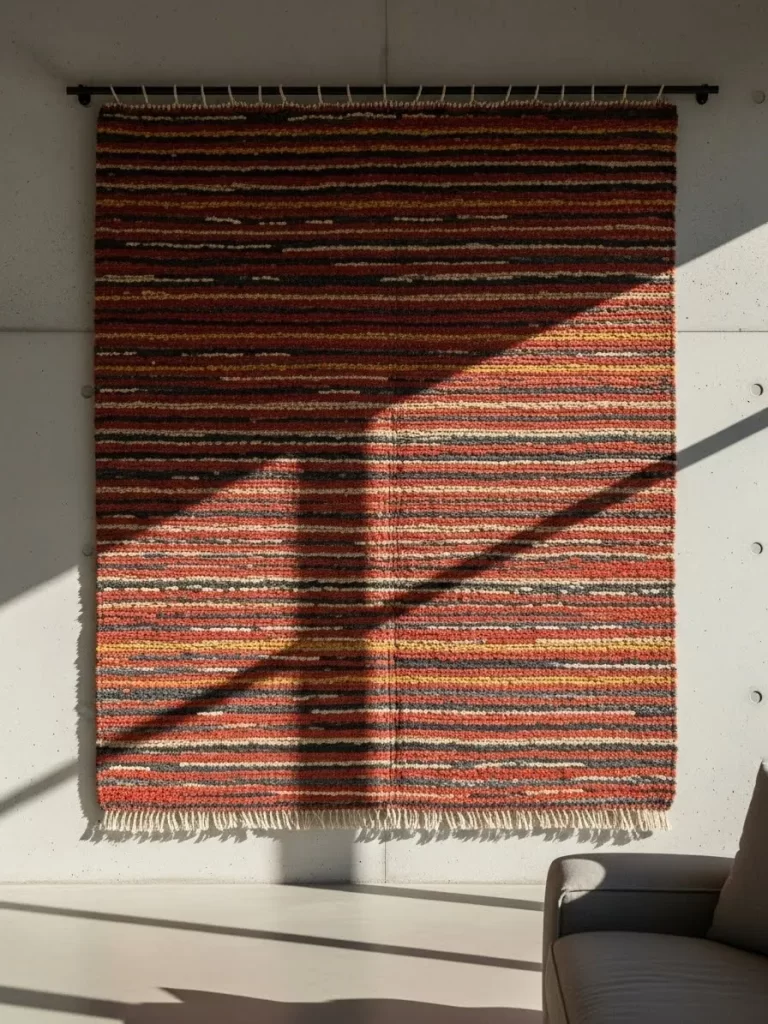
Vast concrete or stone walls often radiate a deep chill that makes a room feel like a freezer. Hanging a large, horizontal striped rug in warm sunset tones provides a massive thermal barrier for your living space. The dense weave absorbs the cold and prevents it from circulating through the air in your home.
This vibrant textile features shades of rust, orange, and gray that bring a visual heat to a minimalist interior. It acts as a functional piece of art that also dampens sound and softens the room’s acoustics. The fringe along the bottom edge adds a handmade touch that feels inviting and cozy.
Using a wall-mounted rug is a smart alternative to traditional insulation in modern buildings. It allows you to protect your space from temperature drops while adding a bold designer element to your walls.
Material Required List
- One large woven rug with horizontal stripes
- Heavy-duty wooden or metal curtain rod
- Wall mounting brackets
- Rug clips or upholstery thread
Equipment Required List
- Power drill
- Spirit level
- Measuring tape
- Wall anchors and screws
DIY Instruction Step by Step
- Measure the total width of the rug and select a rod that extends two inches past each side.
- Hold the rod against your wall and use a spirit level to ensure the mounting brackets are perfectly even.
- Drill pilot holes into the wall, insert the anchors, and screw the brackets into place securely.
- Attach rug clips evenly every six inches along the top edge of the textile.
- Slide the rod through the clips or sew a fabric channel onto the back of the rug if you prefer a hidden mount.
- Lift the rug and place the rod onto the brackets, checking that the weight is distributed evenly.
- Smooth the fabric downward with your hands to remove any bunches or folds.
- Gently vacuum the surface once it is hung to remove dust and help the fibers settle into position.
32 Camel Looped Door Draft Stopper
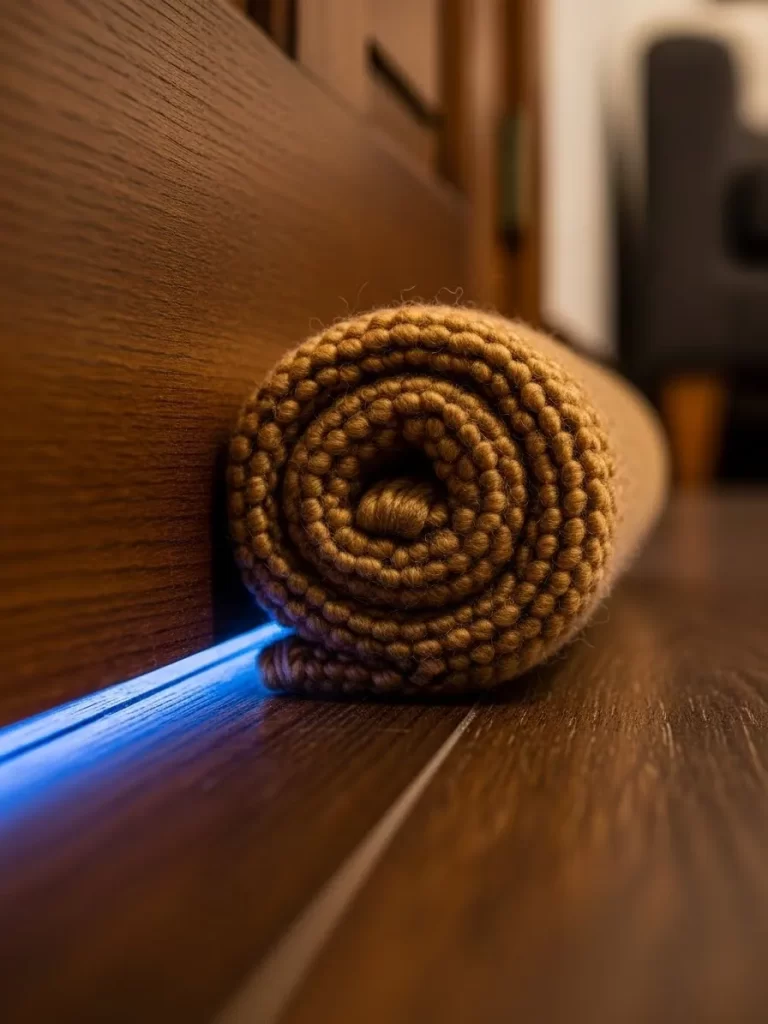
Drafts under doors are the most common reason why a home stays cold despite the heating being on. This thick, camel-colored looped rug is rolled tightly to create a dense physical barrier against incoming air. It sits flush against the bottom of the door, sealing the gap where heat escapes and cold air enters.
The textured loops provide extra surface area to catch and hold warm air near the floor. This simple addition can drastically improve the comfort of a bedroom or home office. The neutral tone blends perfectly with dark wood floors, making it a subtle and stylish functional accessory.
You can easily move this stopper between rooms depending on where you are spending your time. It is a low-cost solution that provides immediate results for your home’s energy efficiency.
Material Required List
- One small rectangular looped wool rug (approx. 2×3 feet)
- Strong rubber bands or twine
- Fragrant dried herbs like lavender (optional)
Equipment Required List
- Measuring tape
- Scissors
DIY Instruction Step by Step
- Measure the width of your door frame to ensure your rug is wide enough to cover the entire gap.
- Lay the rug flat on the floor with the textured side facing downward.
- Sprinkle a few dried herbs along the edge if you want a pleasant scent every time the door moves.
- Begin rolling the rug as tightly as possible from one long edge to the other to create a firm cylinder.
- Secure the ends and the middle of the roll with rubber bands or twine to keep it from unrolling.
- Place the rolled rug firmly against the base of the closed door, ensuring there are no visible light gaps.
- Check that the door can still open and close without snagging the fabric too much.
- Beat the dust out of the stopper once a week to keep it clean and effective at blocking air.
33 Olive Waffle-Knit Window Shield

Windows are notorious for losing heat, even with double glazing installed. Draping an olive green waffle-knit throw over a curtain rod creates an extra layer of “soft” insulation. The deep honeycomb texture of the blanket is designed to trap air, providing a thermal cushion between the glass and the room.
The rich green color brings a sense of the outdoors inside, making a room feel more grounded during the winter. This layering technique adds a heavy, luxurious look to your window treatments without the cost of custom thermal drapes. It is an excellent way to use extra blankets that might otherwise be hidden in a closet.
The fringe on the bottom of the blanket adds a decorative detail that catches the light beautifully. This method allows you to easily adjust your insulation levels as the outside temperature changes.
Material Required List
- One waffle-knit cotton or wool throw blanket with fringe
- Sturdy curtain rod with rings
- Large decorative clips
Equipment Required List
- Step ladder
- Measuring tape
DIY Instruction Step by Step
- Measure the width of your window to ensure the blanket provides full coverage when draped.
- Slide your curtain rings onto the rod and ensure they move smoothly from side to side.
- Fold the top edge of the blanket over by four inches to create a reinforced header for the clips.
- Attach the clips to the blanket every five inches, making sure the fringe hangs evenly at the bottom.
- Hook the clips onto the rings while standing on a steady step ladder.
- Spread the blanket across the window and check that it overlaps the edges of the frame to block drafts.
- Adjust the folds so the waffle texture is clearly visible and the fabric hangs straight.
- Close the blanket fully at sunset to maximize heat retention throughout the cold night.
34 Tribal Tapestry Door Insulation
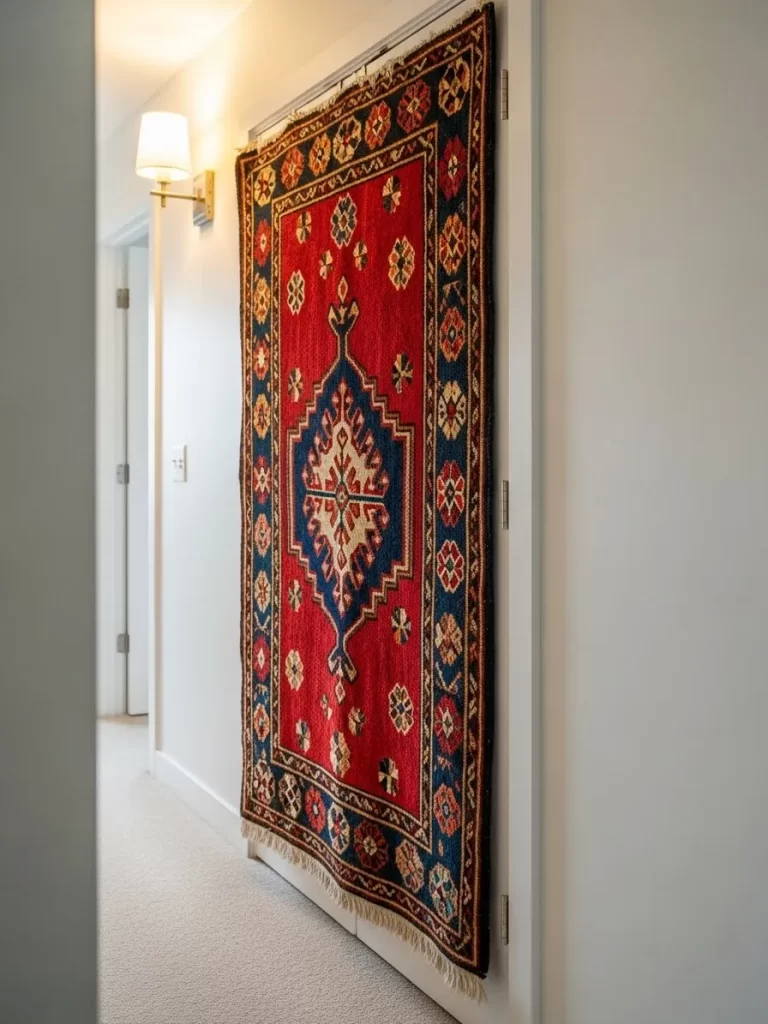
An uninsulated door can be a major source of heat loss in a hallway. Hanging a thick, vibrant tribal rug directly onto the door acts as a thermal jacket for the entryway. This red and blue patterned textile provides a dense barrier that keeps the interior of the door surface warm to the touch.
The intricate geometric designs add a touch of personality to a plain white door. This technique is especially effective for apartment dwellers who cannot replace their front doors. It creates a much quieter and warmer entrance for your home.
This method also helps to block light and sound from communal hallways. It is a versatile decoration that serves a very practical purpose during the coldest months of the year.
Material Required List
- One medium-sized tribal or Persian-style rug
- Over-the-door hooks or heavy-duty adhesive strips
- Small nails or upholstery tacks
Equipment Required List
- Hammer
- Measuring tape
- Level
DIY Instruction Step by Step
- Measure the height and width of your door to find a rug that covers at least 80 percent of the surface.
- Clean the door surface thoroughly to ensure any adhesive strips can bond correctly.
- Mark the top corners of the rug location on the door using a pencil and a level.
- Attach over-the-door hooks or press the adhesive strips firmly onto the marked spots.
- Mount the top of the rug onto the hooks or strips, ensuring it is centered and straight.
- Add a few small upholstery tacks to the corners if the rug is heavy and needs extra support.
- Check that the rug does not interfere with the door handle or the locking mechanism.
- Smooth the fabric flat against the door to eliminate any air pockets that could hold moisture.
35 Sheepskin Desk Foot Warmer
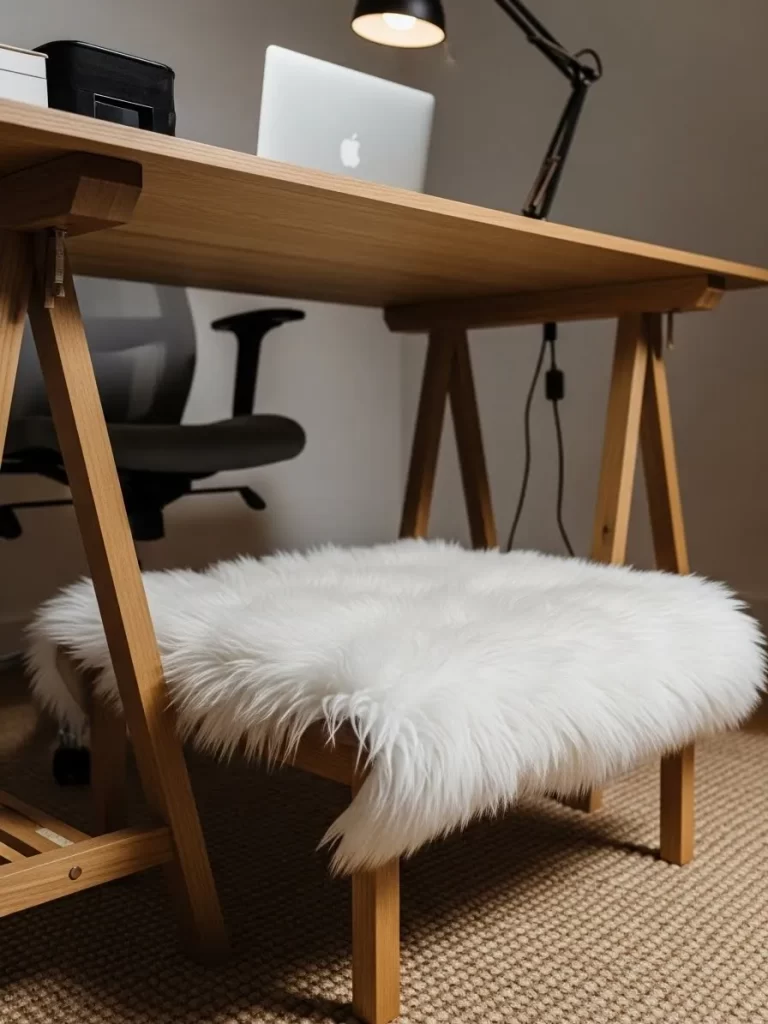
Sitting at a desk for long hours can lead to freezing feet, especially on tiled or hardwood floors. Tucking a plush, white sheepskin rug underneath your workspace provides a warm and soft sanctuary for your legs. The natural hollow fibers of the sheepskin are world-class insulators that reflect your own body heat back at you.
This small addition makes a dramatic difference in how long you can comfortably stay at your desk. The bright white wool adds a clean and cozy aesthetic to a modern office setup. It creates a soft contrast against the hard lines of a wooden desk and an ergonomic chair.
Sheepskins are also very durable and can handle the daily pressure of your feet. It is a simple luxury that makes the workday feel much more comfortable.
Material Required List
- One genuine or high-quality faux sheepskin rug
- Non-slip rug pad (if on a hard floor)
- Lavender fabric mist
Equipment Required List
- Sheepskin brush or wide-tooth comb
- Vacuum
DIY Instruction Step by Step
- Clear the area under your desk and vacuum the floor to remove any dust.
- Place a small non-slip pad on the floor if your rug tends to slide during movement.
- Lay the sheepskin rug directly on top of the pad, centering it where your feet naturally rest.
- Tuck the edges of the rug around the desk legs to give it a neat and intentional appearance.
- Use a sheepskin brush to fluff the fibers every few days to maintain the air-trapping loft.
- Mist the rug lightly with lavender to create a calm and productive atmosphere in your office.
- Shake the rug out once a week to remove any crumbs or debris that fall from the desk.
- Position your chair so the wheels do not catch on the long fibers of the wool.
36 Multi-Tone Wool Bench Wrap
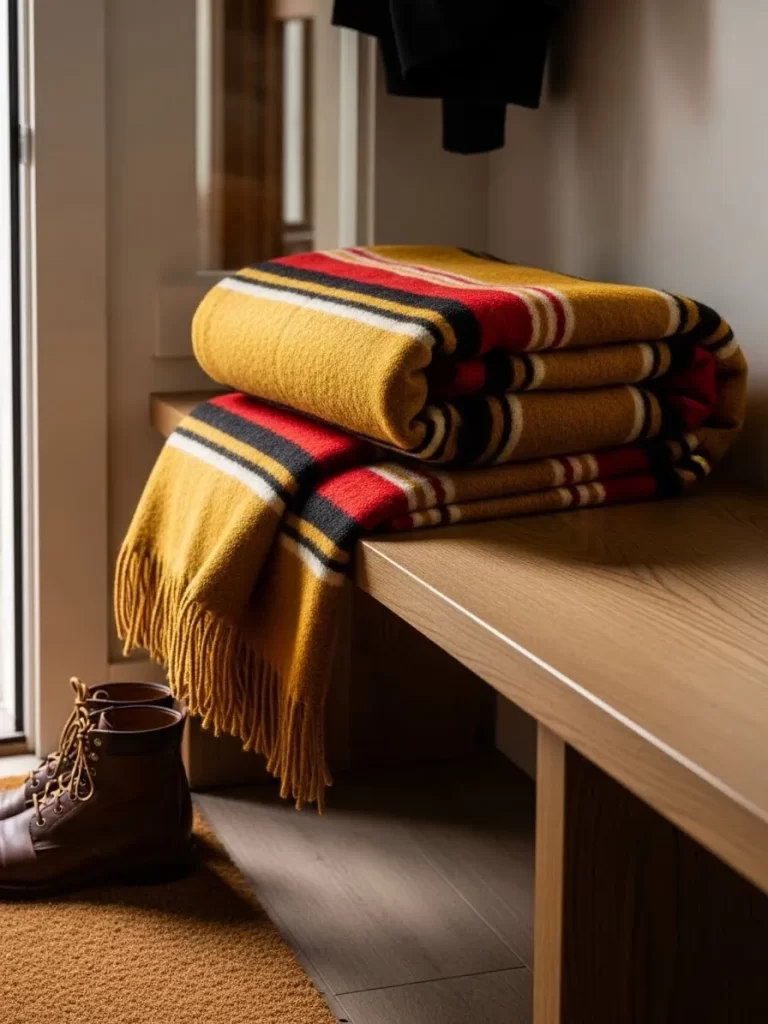
Entryway benches can be cold and uninviting when you are trying to take off snowy boots. Layering a thick, multi-toned wool blanket over the seating surface provides immediate warmth and comfort. This blanket features bold yellow, red, and black stripes that add a cheerful pop of color to a functional mudroom.
The heavy wool fabric is excellent for absorbing the chill from the wooden bench. It provides a soft place to sit while you transition from the cold outdoors to the warmth of your home. The fringe detail adds a rustic, cozy feel that welcomes guests the moment they walk in.
This setup is easy to clean and can be folded away when not in use. It is a practical way to add a layer of insulation to a high-traffic area.
Material Required List
- One heavy-duty striped wool blanket with fringe
- Wooden entryway bench
- Decorative storage baskets
Equipment Required List
- Lint roller
- Fabric spray
DIY Instruction Step by Step
- Clean the surface of the wooden bench to remove any dirt or moisture from outdoor gear.
- Fold the wool blanket in half lengthwise to create a thick and durable cushion.
- Drape the blanket over the length of the bench, allowing the fringe to hang off one end.
- Tuck the excess fabric behind the bench or under the seat to keep it secure.
- Smooth the top of the blanket to ensure the stripes are straight and the surface is flat.
- Place a decorative basket at the end of the bench to help anchor the blanket in place.
- Mist the wool with a fabric freshener to keep the entryway smelling clean and inviting.
- Roll the blanket up and store it in a basket if the bench is needed for heavy gear or drying boots.
37 Radiator Chair Thermal Shield
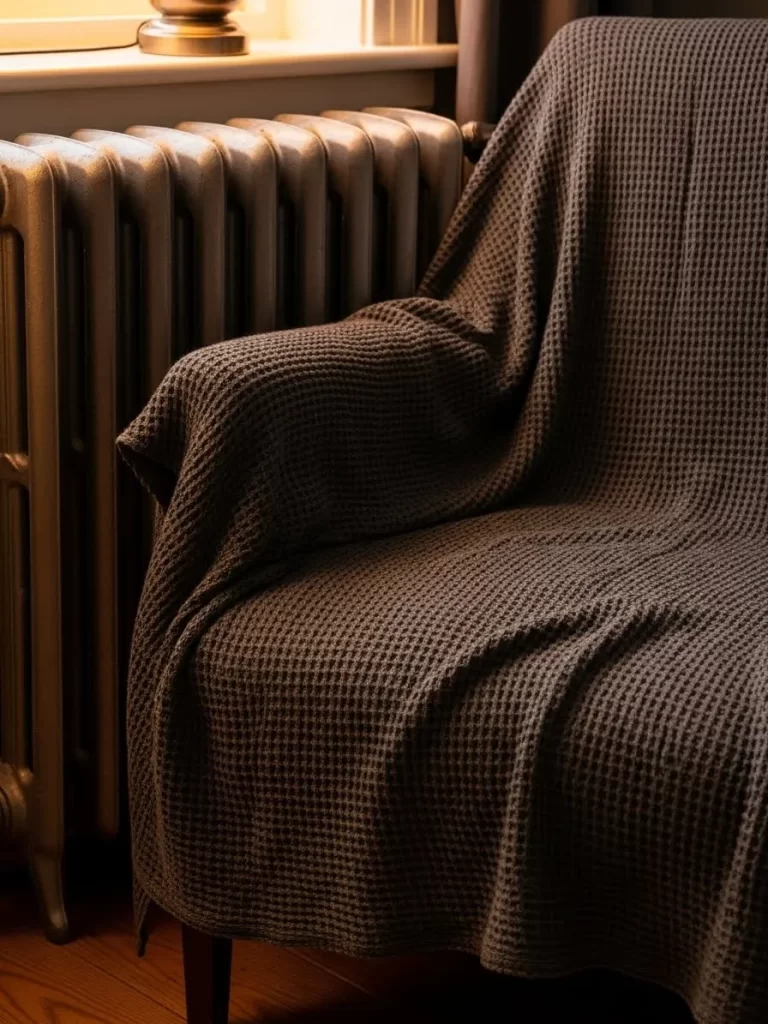
Sitting near an old radiator can be tricky; the air is warm, but the metal is often too hot or the seat nearby is too cold. This waffle-knit chocolate brown throw is draped over an armchair to act as a heat-collecting shield. The texture of the blanket absorbs the radiant heat from the radiator and holds it close to your body while you sit.
The deep brown color complements the industrial look of a vintage radiator. This layering technique prevents the back of the chair from losing heat to the wall behind it. It creates a cozy micro-climate that is perfect for reading on a rainy afternoon.
The heavy fabric drapes naturally over the arms and back of the chair. This simple addition turns a standard seat into the warmest spot in the entire house.
Material Required List
- One oversized waffle-knit throw in a dark earth tone
- Armchair with high back
- Nearby radiator
Equipment Required List
- Fabric steamer
- Soft lint brush
DIY Instruction Step by Step
- Position your armchair about six inches away from the radiator to allow for safe airflow.
- Drape the waffle-knit throw over the back of the chair so it hangs down toward the radiator.
- Pull the sides of the blanket forward to cover the armrests and protect them from the cold.
- Tuck the fabric into the seat cushion to prevent the blanket from sliding off when you stand up.
- Ensure the blanket is not touching the radiator directly to maintain home safety.
- Smooth the waffle texture with your hands to ensure the air pockets are open and effective.
- Steam the fabric to remove any fold lines and help it settle into the shape of the chair.
- Add a small side table and a lamp to complete your dedicated warm-zone reading nook.
38 Multi-Rug Stairway Path
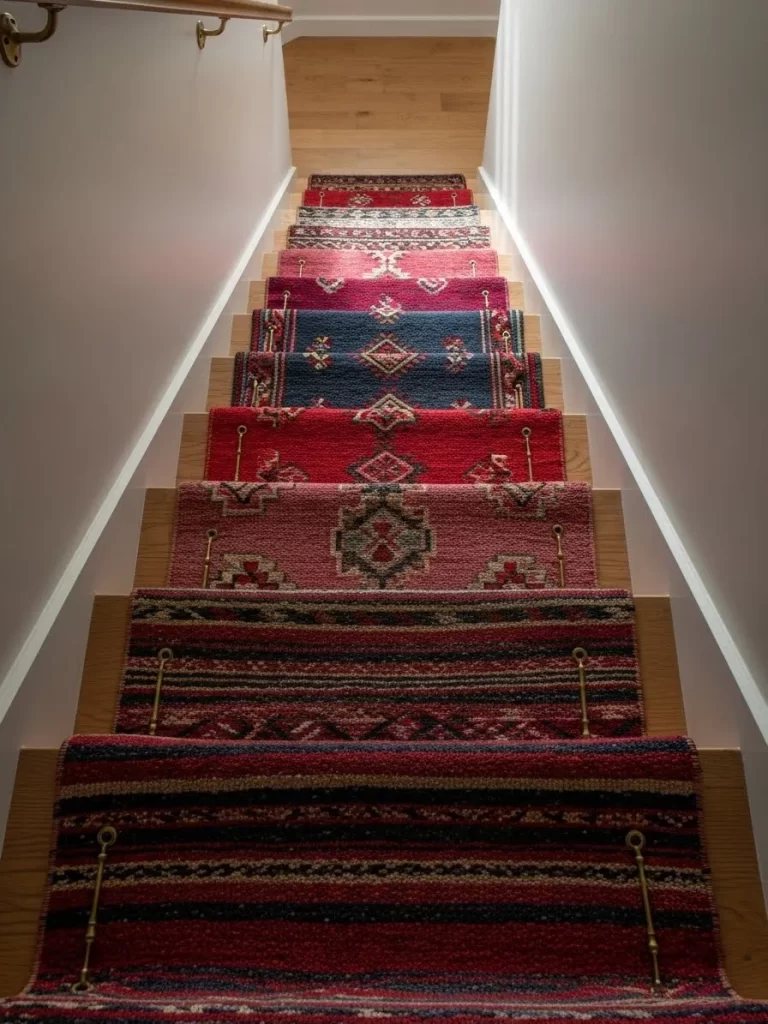
Wooden stairs can be incredibly cold on bare feet and often carry drafts between floors. Layering a series of small, colorful rugs down the staircase creates a beautiful and warm path for your home. These rugs act as individual thermal pads that stop the cold from rising through the wooden treads.
The variety of patterns and colors brings a sense of energy and warmth to a narrow space. Using stair rods to secure the rugs adds a classic, high-end feel while ensuring safety for your family. Each rug provides a soft, quiet landing that makes the house feel much more insulated.
This approach is easier to install than a single long runner and allows you to replace individual sections if they wear out. It is a creative way to use vintage rugs to solve a modern heating problem.
Material Required List
- Multiple small woven rugs (one for each step)
- Decorative metal stair rods
- Non-slip rug padding for each tread
Equipment Required List
- Power drill
- Measuring tape
- Level
DIY Instruction Step by Step
- Measure each stair tread and purchase rugs that are slightly narrower than the width of the stairs.
- Cut individual pieces of non-slip padding for every step to prevent the rugs from shifting.
- Place the padding on the center of each tread and lay a rug over the top.
- Align the rug so it wraps over the front edge of the stair and tucks into the back corner.
- Position the stair rods in the crease where the tread meets the riser and mark the screw holes.
- Drill pilot holes into the wood and screw the rod brackets firmly into place.
- Slide the decorative rods through the brackets to lock the rugs securely against the stairs.
- Check each step to ensure there are no loose edges that could cause a trip hazard.
39 Sunroom Sheepskin Sanctuary
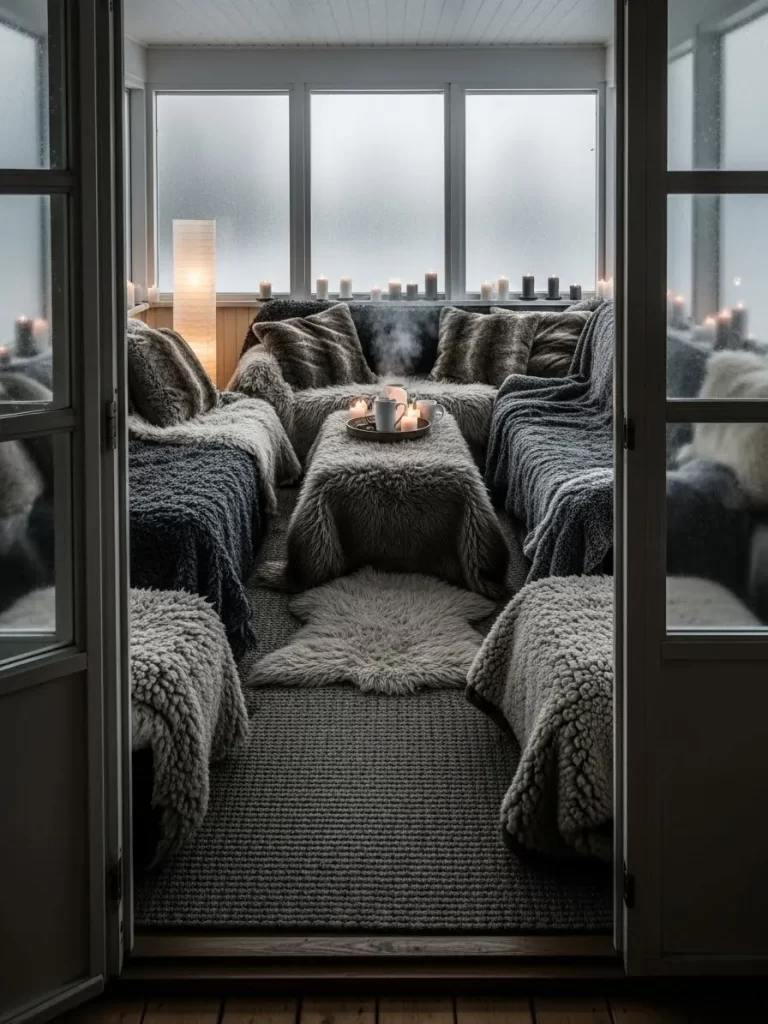
Sunrooms are beautiful but can become incredibly cold once the sun goes down. Filling the space with multiple sheepskin rugs and thick, textured throws creates a warm sanctuary that is usable even in winter. The layering of these natural materials on the benches and floor traps every bit of heat from the daytime sun.
The mix of gray, white, and charcoal textures provides a sophisticated and cozy look. Using candles on the central table adds a visual warmth that makes the frosted windows look less intimidating. It is a perfect way to maintain a connection to the outdoors without feeling the bite of the winter air.
The soft, organic shapes of the sheepskins break up the geometric lines of the room. This setup invites you to linger over a hot drink while watching the snow fall outside.
Material Required List
- Three to five large sheepskin rugs
- Two heavy textured knit throws
- Collection of pillar candles and a tray
Equipment Required List
- Wide-tooth comb (for sheepskins)
- Vacuum with upholstery tool
DIY Instruction Step by Step
- Clean the sunroom furniture and floor to ensure a dust-free environment for the textiles.
- Lay the largest sheepskin rugs across the seating benches to provide a warm base.
- Place a smaller sheepskin on the floor in the center of the room to act as a thermal rug.
- Drape the heavy knit throws over the backs of the chairs for extra shoulder insulation.
- Arrange the candles on a central tray to provide a focal point of light and heat.
- Comb the sheepskin fibers regularly to keep them airy and effective at trapping warmth.
- Keep the door to the sunroom closed when not in use to prevent heat loss from the rest of the house.
- Fluff the pillows and throws every morning to prepare the space for a cozy winter afternoon.
40 Woven Basket Textile Station
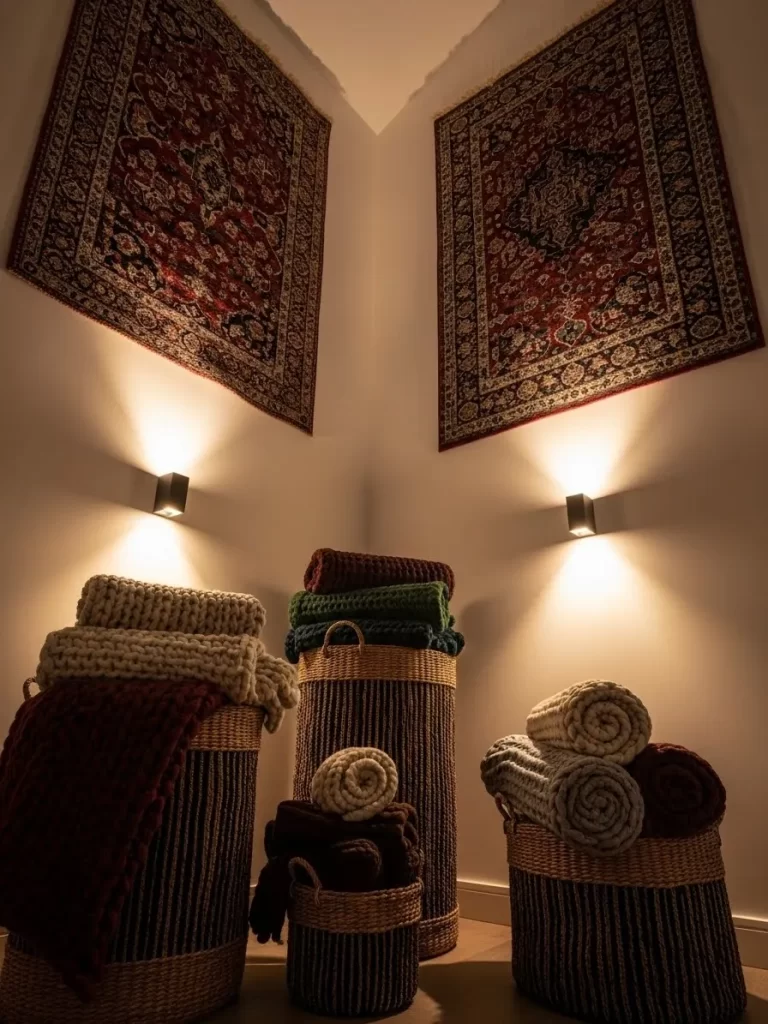
Keeping your layering tools organized is the final step in maintaining a warm home. Storing rolled-up wool and knit blankets in tall, woven baskets creates a decorative “warmth station” in any room. Hanging vintage rugs on the walls above these baskets adds another layer of insulation to the corners of your house.
The natural fibers of the baskets and the wool blankets work together to create a cozy, textured corner. This setup ensures that a warm layer is always within reach whenever you feel a draft. The glowing lights above the rugs highlight the intricate weaves and provide a soft, warm ambiance.
This is a stylish way to keep your home winter-ready without creating clutter. It turns your functional insulation into a beautiful part of your home’s interior design.
Material Required List
- Two or three tall, woven seagrass or wicker baskets
- Collection of wool, knit, and velvet blankets
- Two small woven wall-hanging rugs
Equipment Required List
- Wall mounting hooks
- Measuring tape
DIY Instruction Step by Step
- Select a corner of your room that feels particularly drafty or cold to the touch.
- Mount two small rugs on the walls in the corner to act as a double-sided thermal barrier.
- Place your tall woven baskets on the floor directly underneath the wall-mounted rugs.
- Roll your blankets tightly to keep them organized and to show off their different textures.
- Place the heaviest wool blankets at the bottom of the baskets and lighter knits on top.
- Arrange a few blankets so they drape over the edge of the basket for a casual, inviting look.
- Use wall-mounted lights to highlight the corner and add a sense of warmth to the textiles.
- Keep the station stocked with clean blankets so you are always ready for a sudden drop in temperature.
Fighting cold spots in your home is not about cranking up the heat; it is about creating smart, insulating barriers. By applying these forty layering tricks, you can tackle the issue of escaping heat at its source, turning drafty rooms into warm, inviting sanctuaries. Each throw, pillow, and layered rug adds a vital buffer against the chill.
Remember that density and texture are your two best friends in this battle against winter drafts. Wool, chenille, and high-pile rugs are vastly superior to thin decorative fabrics. Use these tips to add depth, color, and undeniable coziness to every cold surface in your house.
Your home should be a place of warmth and comfort during the cold season. Embrace the power of textiles to achieve maximum warmth and transform your living space into a truly snug environment for the winter ahead.
Key Takeaways
- Layer the Floors: Always place a dense pad beneath your rug to stop cold air from rising through wood or tile surfaces.
- Insulate the Walls: Use thick tapestries or heavy textile hangings on exterior walls to prevent radiant heat loss.
- Seal the Gaps: Roll up small, heavy rugs to create draft stoppers at the base of doors and windows.
- Warm Your Seating: Drape thick, high-loft throws, like chunky knits or velvet quilts, over cold leather or fabric furniture.
- Focus on Density: Wool, cable-knit, and plush sheepskin offer superior heat retention compared to thin cotton or linen.
- Anchor the Bed: Add a wool runner across the foot of the bed or stack multiple mattress toppers for an ultimate sleeping shield.