Living in a rental often feels like living in someone else’s shadow. You look at those beige walls and wonder if you can ever make them yours. Landlords usually have strict rules about nails and paint. This makes decorating feel like a lost cause for many tenants.

Your apartment should be a place where you feel relaxed and inspired. You do not need a mortgage to create a space that looks high end. Small changes can hide the flaws of an old building without breaking any lease rules. Creativity is your best tool when you cannot use a hammer.
This list offers thirty eight smart ways to change your home. These hacks focus on temporary fixes that stay secure until you move. You can finally say goodbye to ugly counters and boring light fixtures. Let us look at how you can claim your space today.
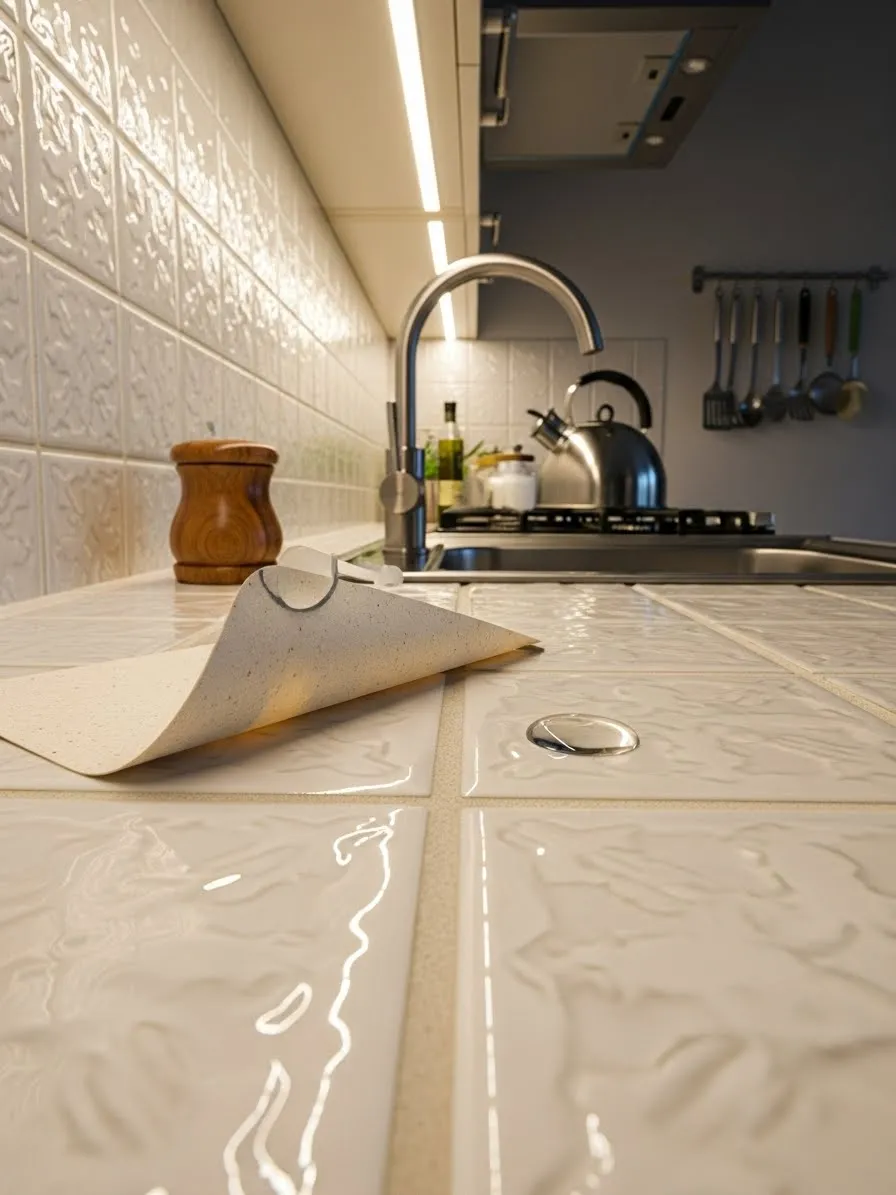
1 Damage Free Peel and Stick Countertop Tiles

Renting an apartment often means living with outdated kitchen surfaces. These old tiles might look worn or simply clash with your personal style. Changing the entire look of your kitchen is possible without losing your security deposit. Peel and stick tiles offer a brilliant solution for any renter facing this common dilemma.
Applying these adhesive sheets is simple and requires very little time. Modern options allow you to press the material directly over an existing countertop. They create a fresh surface that mimics high quality stone or marble. Adhesive covers stay firmly in place until you decide to move out.
Removing the material happens quickly when your lease ends. Most versions pull away cleanly without leaving sticky residue behind. Your landlord will never know you modified the space. Choosing this temporary upgrade is a smart way to feel at home.
Material required list
- Peel and stick tile sheets
- Microfiber cloth
- Isopropyl alcohol
- Painter tape
Equipment required list
- Utility knife
- Steel ruler
- Cutting mat
- Smoothing tool or squeegee
DIY instruction step by step
- Clean the entire surface thoroughly using a mix of warm water and dish soap to remove grease.
- Dry the area completely with a lint free towel to ensure the adhesive sticks properly.
- Wipe the tiles again with rubbing alcohol to eliminate any remaining oils or dust.
- Measure the length and width of your countertop carefully with your ruler.
- Cut the adhesive sheets to fit your specific dimensions on a cutting mat using a sharp blade.
- Peel a small section of the backing paper away from the top edge of the first sheet.
- Align the edge of the sheet carefully with the back corner of your counter.
- Press down firmly while slowly pulling the rest of the backing off with your other hand.
- Use a flat plastic smoothing tool to push out any air bubbles toward the outer edges.
- Repeat this process for each section until the entire surface is covered.
2 Woven Basket Cord Cover
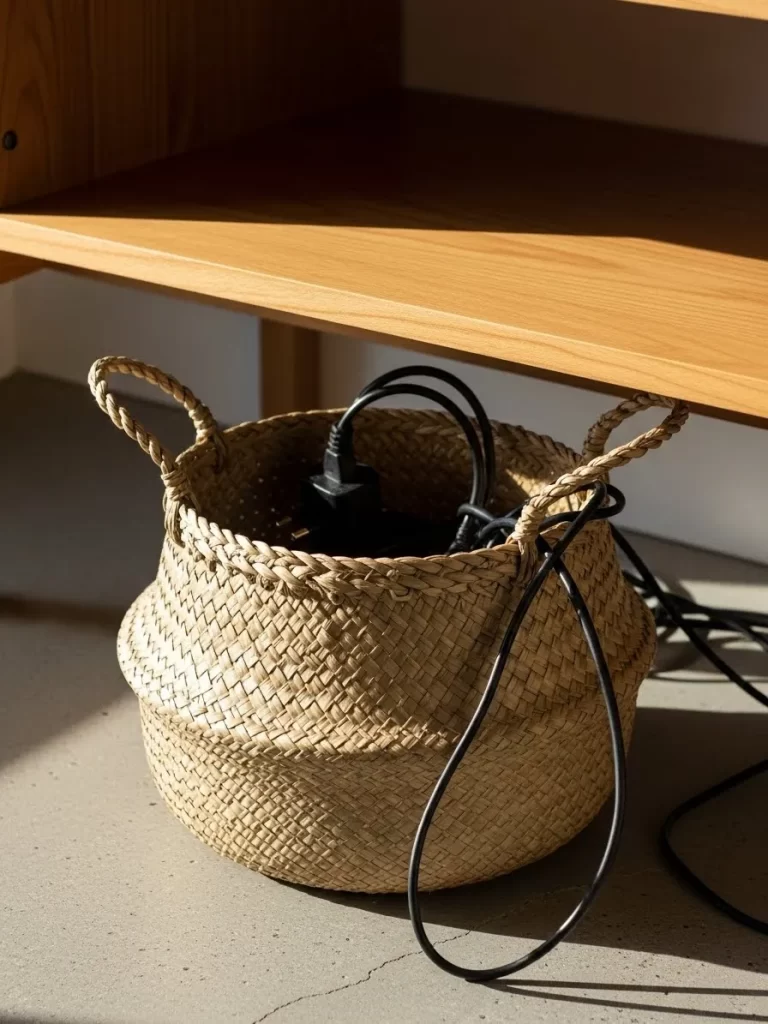
Electronics often clutter a room with messy wires. This simple fix uses a natural basket to hide power strips. You keep your home looking neat without spending much money.
Seagrass materials bring a cozy feeling to any space. Cords stay out of sight while remaining easy to reach. Visitors will only see your beautiful decor.
Material required list
- Large woven basket with handles
- Plastic cable ties
- Power strip
Equipment required list
- Sharp scissors
- Measuring tape
DIY instruction step by step
- Choose a basket that fits under your desk or side table.
- Measure the size of your largest plug to ensure it fits through the weave.
- Use your scissors to carefully widen a small gap in the back of the basket.
- Push the main power cord through this hole from the inside.
- Place the power strip flat on the bottom of the container.
- Plug all your devices into the strip while they sit inside the basket.
- Wrap extra wire length into loops and secure them with cable ties.
- Set the basket on the floor and tuck the remaining wires behind it.
3 Stainless Steel Appliance Film
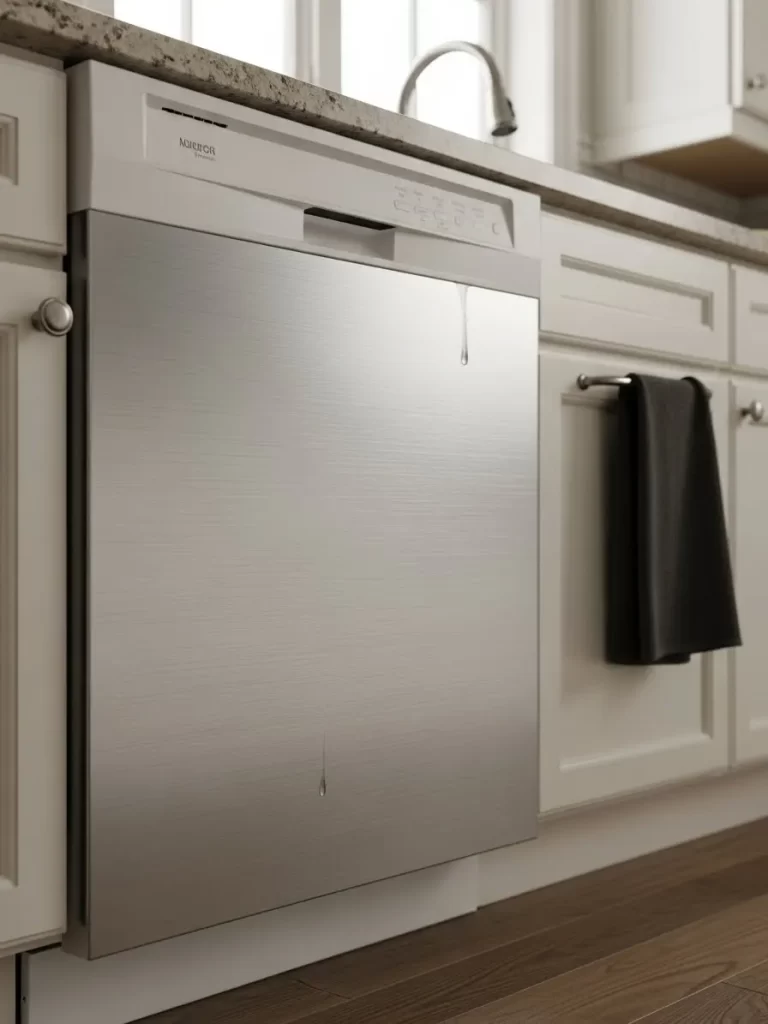
Old kitchen machines often look gray or worn out. Applying a metallic film gives your dishwasher a modern shine. It makes the entire kitchen feel updated and clean.
Removal is easy when you decide to leave your rental. The adhesive leaves zero marks on the original metal surface. You get a high end look for a very low price.
Material required list
- Stainless steel vinyl film roll
- Soapy water solution
- Cleaning cloth
Equipment required list
- Utility knife
- Squeegee tool
- Ruler
DIY instruction step by step
- Spray the dishwasher front with soapy water to remove any grease.
- Wipe the surface until it is completely dry and free of lint.
- Measure the height and width of the appliance door carefully.
- Cut a piece of film that is two inches wider than your measurements.
- Peel the top edge of the backing paper away from the vinyl.
- Align the film with the top edge of the dishwasher door.
- Smooth the film downward using your squeegee to push out air.
- Work from the center toward the sides to prevent any wrinkles.
- Use the utility knife to trim the extra vinyl along the edges.
4 Crystal Cabinet Knobs
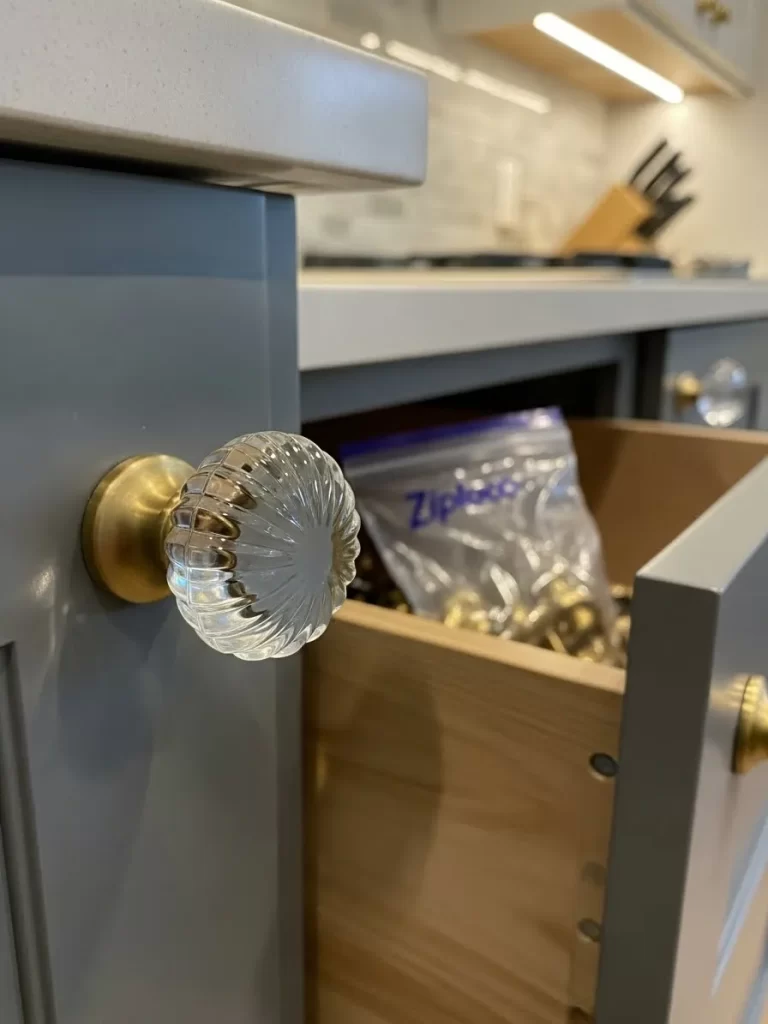
Basic handles look boring in most rental apartments. Swapping them for crystal knobs adds a touch of class. Your cabinets will feel like custom furniture in minutes.
Save the original hardware in a small bag for later. Putting the old ones back takes no effort during move out. This tiny change makes a huge difference in style.
Material required list
- Crystal cabinet knobs with screws
- Storage bag for old hardware
Equipment required list
- Phillips head screwdriver
DIY instruction step by step
- Open the cabinet door to access the screw on the inside.
- Turn the screw counterclockwise using your screwdriver until it is loose.
- Pull the old knob off the front of the door.
- Place the old knob and its screw into your storage bag.
- Insert the new screw through the hole from the inside of the door.
- Hold the crystal knob against the front of the door.
- Twist the knob onto the screw by hand to start the threads.
- Tighten the screw with your tool until the knob feels secure.
5 Large Fabric Wall Covering
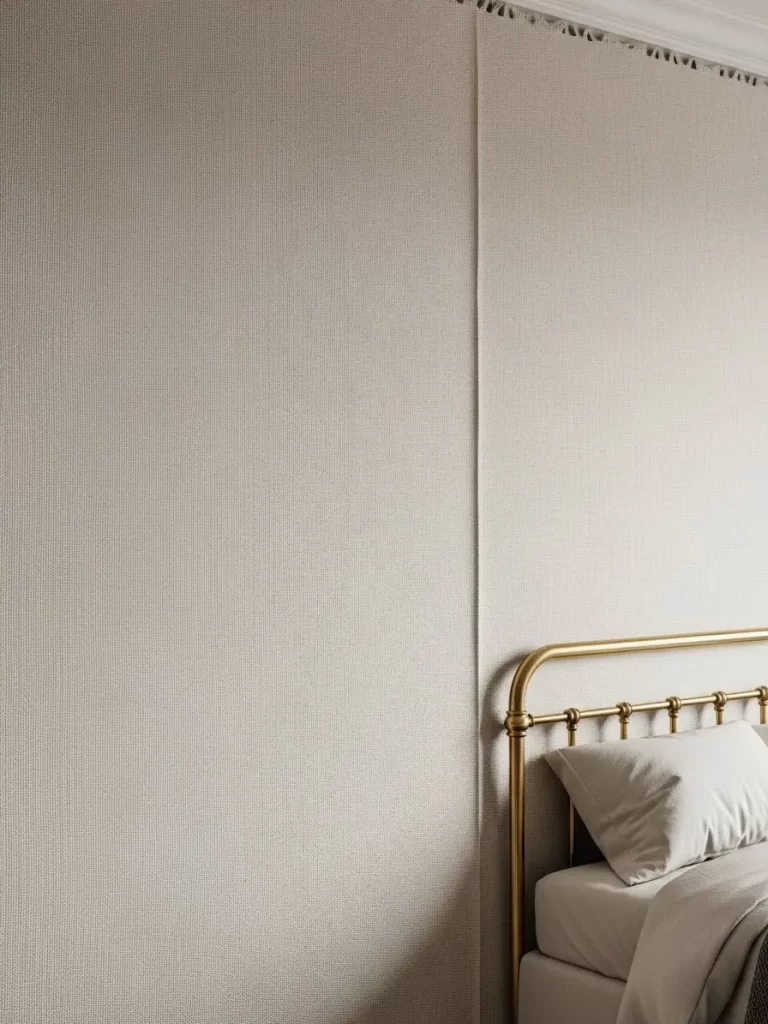
Rental walls usually stay a dull shade of white. Hanging a large fabric panel adds color without any paint. It covers up marks and creates a soft atmosphere.
Lightweight materials stay up with simple pins or adhesive. Removing the cloth takes seconds when your lease ends. You can take your favorite patterns to your next home.
Material required list
- Large fabric panel or tapestry
- Clear wall pins
Equipment required list
- Hand steamer
- Step ladder
- Spirit level
DIY instruction step by step
- Steam the fabric to remove any fold lines or deep wrinkles.
- Hold the top corner of the fabric against the wall near the ceiling.
- Use your level to ensure the top edge stays straight.
- Push a clear pin through the corner of the cloth and into the wall.
- Pull the fabric tight toward the opposite corner and pin it down.
- Place more pins every twelve inches along the top edge for support.
- Let the rest of the fabric hang down naturally toward the floor.
- Check that the display looks balanced from the center of the room.
6 Wood Over the Sink Shelf

Tiny kitchens rarely provide enough space for your soap. A sturdy wood board adds a useful surface over the basin. It keeps your most used items within easy reach.
Natural wood brings warmth to a sterile cooking area. The shelf prevents water from pooling on your counters. This hack adds both beauty and function to small units.
Material required list
- Precut wood board
- Waterproof wood sealant
- Non slip rubber feet
Equipment required list
- Sanding block
- Paint brush
- Measuring tape
DIY instruction step by step
- Measure the width of your sink from the left edge to the right.
- Find a board that is at least four inches longer than the sink opening.
- Rub the edges with a sanding block until the wood feels smooth.
- Apply a layer of sealant to protect the wood from kitchen moisture.
- Wait for the board to dry completely before touching it.
- Stick rubber feet to the four corners on the bottom of the board.
- Place the shelf across the back portion of your kitchen sink.
- Arrange your dish soap and small plants on the new surface.
7 Gold Decorative Tray
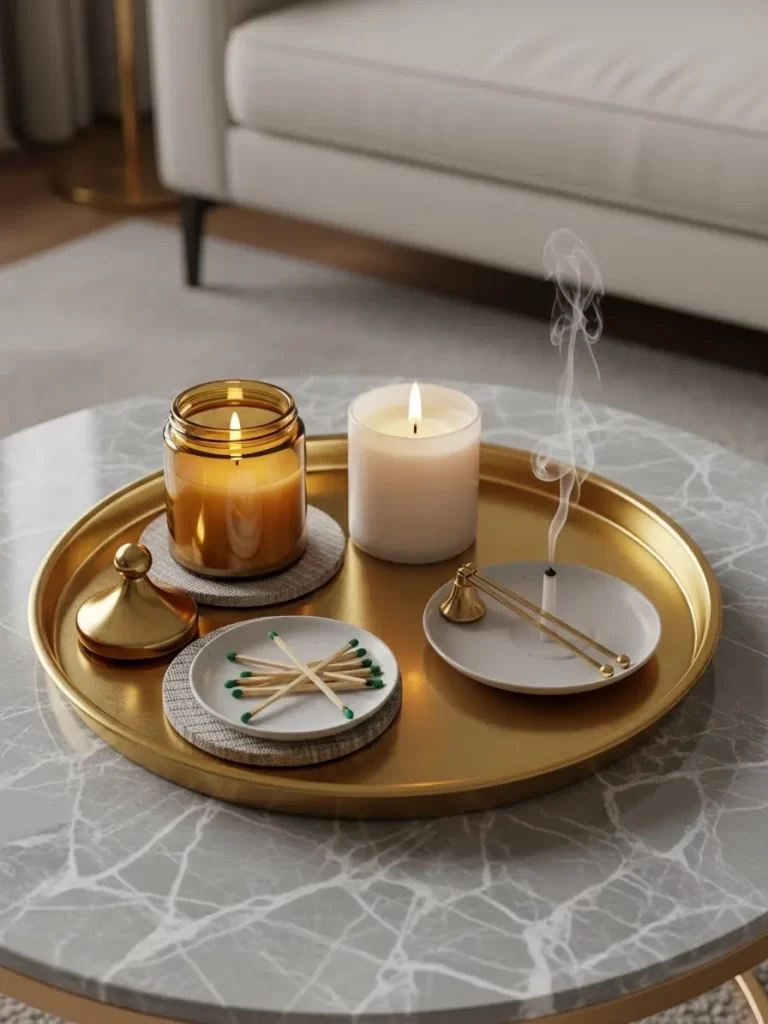
Small items like candles and matches often look scattered. Placing them on a gold tray creates a tidy group. Your coffee table will instantly look more organized.
Metallic finishes reflect light and add a rich feeling. Grouping items together makes cleaning much faster than before. Guests will notice your attention to small details.
Material required list
- Round gold tray
- Scented candle
- Glass jar of matches
Equipment required list
- Microfiber dusting cloth
DIY instruction step by step
- Wipe your table surface to remove any dust or fingerprints.
- Set the gold tray in the middle of your coffee table.
- Place your largest candle on one side of the tray.
- Put the match jar next to the candle for easy access.
- Add a small decorative object like a stone or a ring dish.
- Move the items around until the layout looks visually pleasing.
- Keep your remote controls inside the tray to prevent clutter.
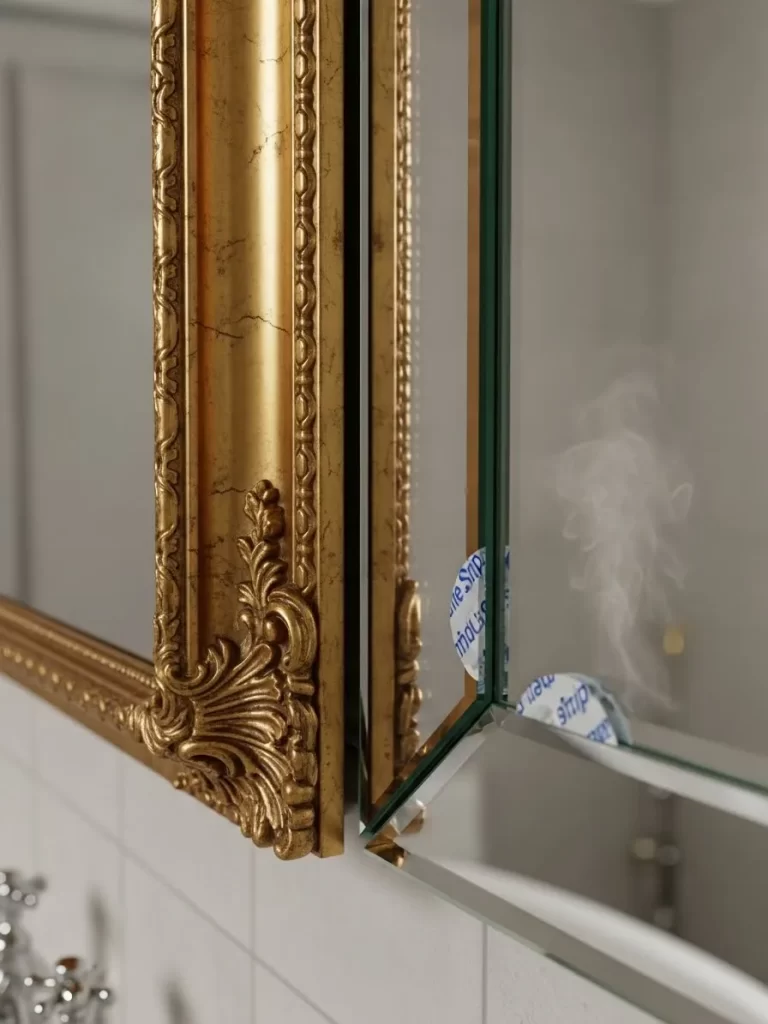
8 Mirror Adhesive Molding
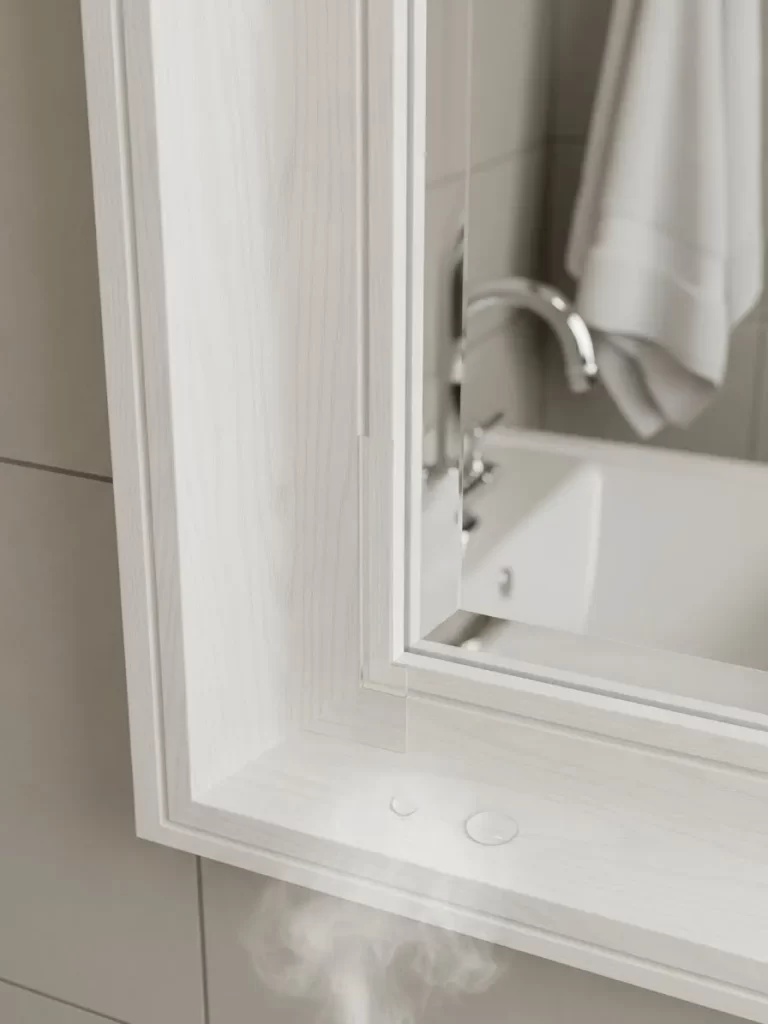
Plain bathroom mirrors often lack style or a frame. Applying white molding creates a custom look for very little cost. It transforms the room into a spa like space.
Moisture resistant materials work best in a bathroom setting. These strips stick directly to the glass without any damage. You can peel them away cleanly when you move.
Material required list
- Adhesive mirror trim strips
- Glass cleaner
Equipment required list
- Measuring tape
- Miter box
- Small saw
- Pencil
DIY instruction step by step
- Clean the outer edges of the mirror glass with a fresh cloth.
- Measure the exact length and height of the mirror surface.
- Mark these measurements onto the back of your molding strips.
- Use the miter box to cut the corners at a forty five degree angle.
- Hold the pieces up to the mirror to check for a tight fit.
- Peel the plastic film off the back of the top molding strip.
- Press the strip firmly against the top edge of the glass.
- Repeat this for the sides and bottom until the frame is complete.
9 Wood Look Vinyl Plank Flooring

Cold tile floors can make a bathroom feel uninviting. Laying down vinyl planks provides a warm and modern surface. The wood grain looks realistic and resists water spills.
Installation requires no glue or permanent fasteners at all. Each piece snaps into the next for a tight fit. Your landlord will never know what lies underneath.
Material required list
- Click lock vinyl floor planks
- Plastic spacers
Equipment required list
- Utility knife
- Rubber mallet
- Tape measure
DIY instruction step by step
- Mop the existing floor to remove any dirt or loose debris.
- Measure the width of the room to plan your first row.
- Place a plank in the corner with a small spacer against the wall.
- Align the next plank at an angle and click it into the first one.
- Use the rubber mallet to tap the seams until they are invisible.
- Cut the last plank in the row to fit the remaining gap.
- Start the next row using the leftover piece from the previous cut.
- Continue this pattern until the entire floor is covered.
10 Washi Tape Gallery Wall
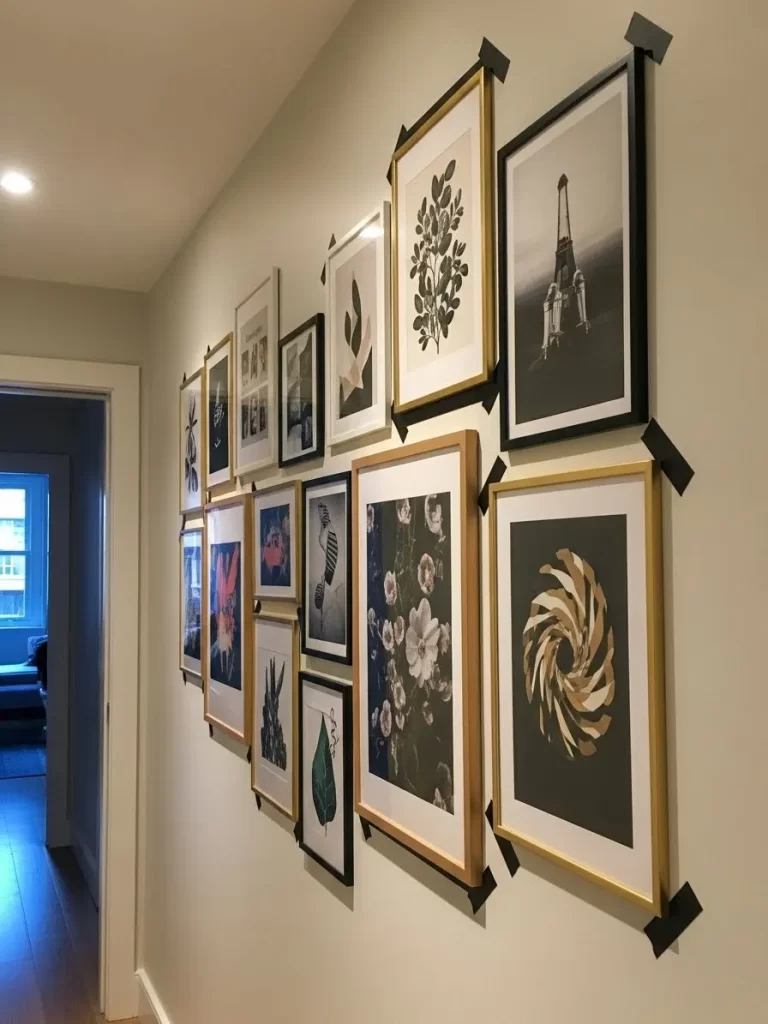
Heavy frames often require large nails that damage walls. Using black tape creates faux borders for your art prints. You get a bold look without any permanent holes.
Experimenting with different shapes is easy with this tape. Peeling it off takes no effort and leaves zero sticky residue. This project allows you to express your creative side.
Material required list
- Printed art or photos
- Black washi tape
- Removable poster putty
Equipment required list
- Spirit level
- Scissors
- Measuring tape
DIY instruction step by step
- Decide where you want each picture to go on the wall.
- Use a tiny bit of putty to stick the art to the wall.
- Check the alignment with your level to make sure it is straight.
- Cut a strip of washi tape slightly longer than the top of the photo.
- Press the tape onto the wall so it overlaps the edge of the paper.
- Repeat this for the bottom and sides to create a frame.
- Trim the corners of the tape with scissors for a clean look.
- Build out the rest of your gallery using the same method.
11 Marble Look Countertop Film
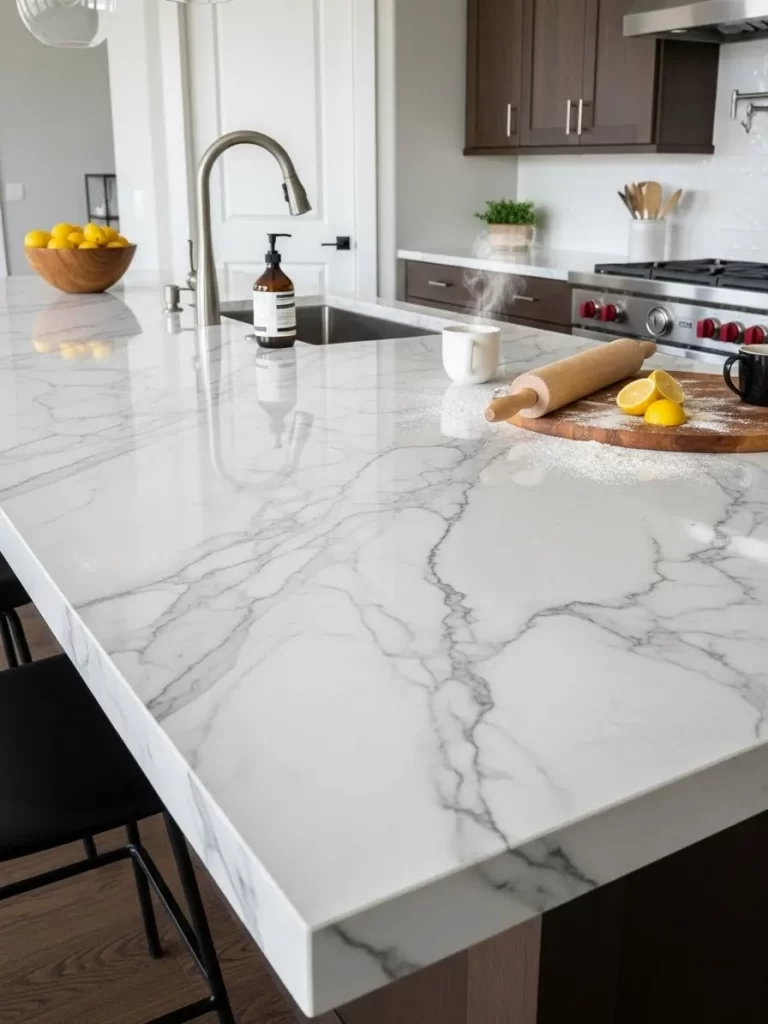
Scratched counters can make a kitchen feel very old. Rolling out a marble film creates a bright new surface. It protects the original counters from stains and daily wear.
Modern vinyl looks just like expensive natural stone slabs. Bubbles disappear easily with a small plastic smoothing tool. Your kitchen will feel expensive for a small price.
Material required list
- Marble pattern contact paper
- Degreasing cleaner
Equipment required list
- Squeegee
- Utility knife
- Blow dryer
DIY instruction step by step
- Scrub the countertop with a degreaser to remove all oils.
- Measure the surface and cut the film with three extra inches.
- Peel back a small section of the backing at one end.
- Stick the edge of the film to the back of the counter.
- Pull the backing away slowly while smoothing the top with a squeegee.
- Push all air bubbles toward the edges as you move forward.
- Use a blow dryer on low heat to stretch the vinyl around corners.
- Trim the excess material with a sharp blade for a professional finish.
12 Velvet Closet Curtains
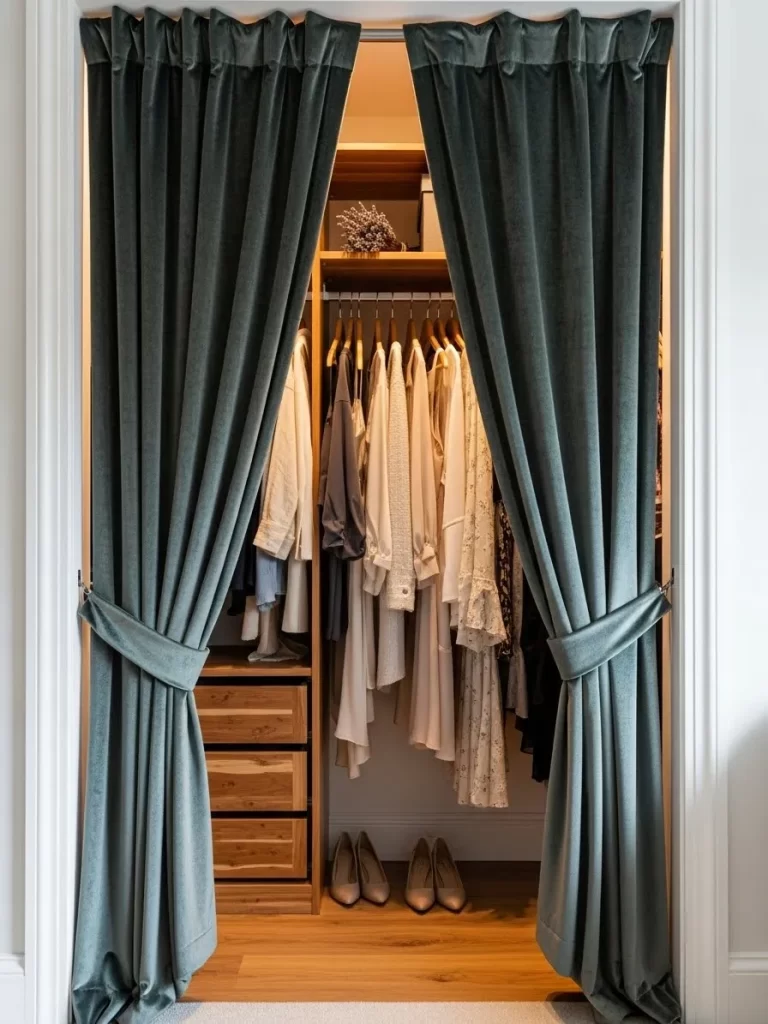
Metal closet doors often look harsh or function poorly. Replacing them with soft velvet curtains adds a luxury feel. The fabric blocks out views of your stored clothes.
Tension rods hold the curtains up without any drilling. Choosing a rich color makes the bedroom feel more cozy. You save space by removing sliding doors that get stuck.
Material required list
- Pair of velvet curtain panels
- Heavy duty tension rod
Equipment required list
- Measuring tape
- Step stool
DIY instruction step by step
- Measure the width inside your closet door frame.
- Slide the curtain panels onto the tension rod.
- Hold the rod inside the top of the closet opening.
- Twist the rod to extend it until both ends touch the walls.
- Continue twisting until the rod feels very tight and secure.
- Spread the curtain fabric evenly across the width of the rod.
- Use fabric tie backs if you want to keep the closet open.
- Store the old closet doors under your bed or in a closet.
13 Over the Door Mirror
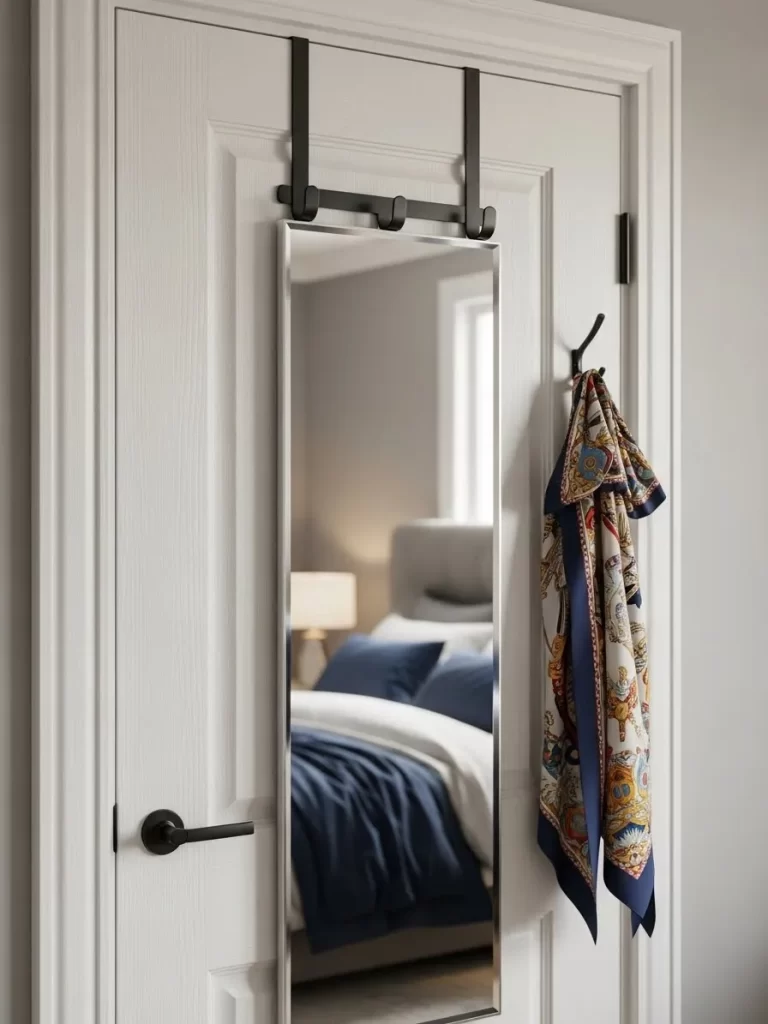
Floor space is often limited in small rental bedrooms. Hanging a mirror on the door solves this problem easily. It provides a full view of your outfit every morning.
Metal hooks slip over the top of any standard door. This hack adds light and depth to a dark hallway. You can move the mirror to any room you wish.
Material required list
- Full length mirror with door hooks
- Adhesive foam pads
Equipment required list
- Screwdriver
DIY instruction step by step
- Attach the metal hooks to the back of the mirror frame.
- Tighten the screws provided with the mirror kit.
- Stick foam pads to the bottom corners of the mirror back.
- Lift the mirror and slide the hooks over the top of the door.
- Center the mirror so it does not hit the frame when closing.
- Check that the door opens and shuts without any trouble.
- Clean the glass with a soft cloth to remove any smudges.
14 Patterned Stair Riser Decals
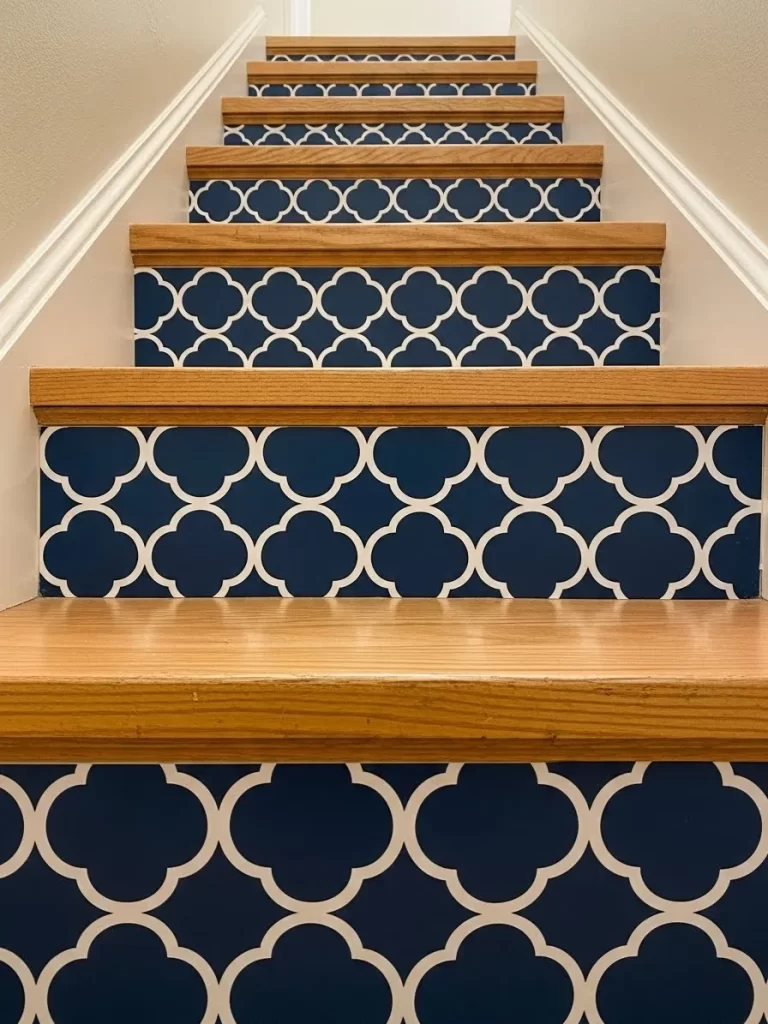
Plain wooden stairs often look boring in a home entryway. Adding blue and white decals brings a custom pattern. The design makes every step look like a work of art.
Adhesive sheets protect the wood from scuffs and dirt marks. Removal is simple and will not peel the floor finish. Your guests will be impressed by this bold change.
Material required list
- Peel and stick stair decals
- Rubbing alcohol
Equipment required list
- Ruler
- Utility knife
- Plastic card for smoothing
DIY instruction step by step
- Wipe the vertical part of each step with alcohol to clean it.
- Measure the height and width of the stair riser.
- Trim the decal to match these dimensions using your knife.
- Peel the top corner of the backing off the sticker.
- Align the decal with the top edge of the wooden riser.
- Press down and smooth out bubbles with your plastic card.
- Peel the rest of the backing away while sticking the decal down.
- Repeat these steps for every stair in your home.
15 Entryway Pegboard
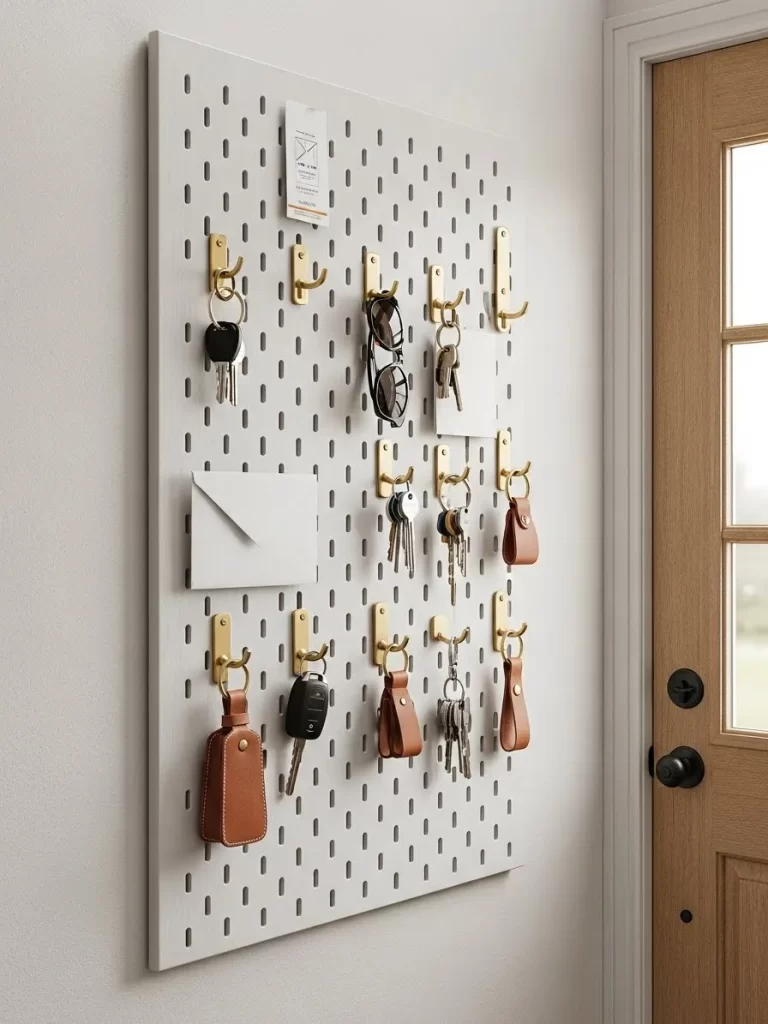
Keys and mail often get lost in a messy pile. Mounting a white pegboard keeps everything in one neat spot. You will always know where your sunglasses are hiding.
Brass hooks add a stylish touch to the utility board. Organizing your daily items saves a lot of time and stress. This board works in any room for extra storage.
Material required list
- Large white pegboard
- Assorted brass hooks
- Heavy duty adhesive wall strips
Equipment required list
- Spirit level
- Pencil
DIY instruction step by step
- Hold the pegboard against the wall at chest height.
- Use your level to make sure the board is not tilted.
- Mark the four corners on the wall using a pencil.
- Apply adhesive strips to the back corners of the pegboard.
- Press the board firmly against the wall for thirty seconds.
- Wait one hour for the adhesive to bond completely.
- Insert the brass hooks into the holes wherever you like.
- Hang your keys and bags on the hooks to stay organized.
16 Drum Shade Light Cover
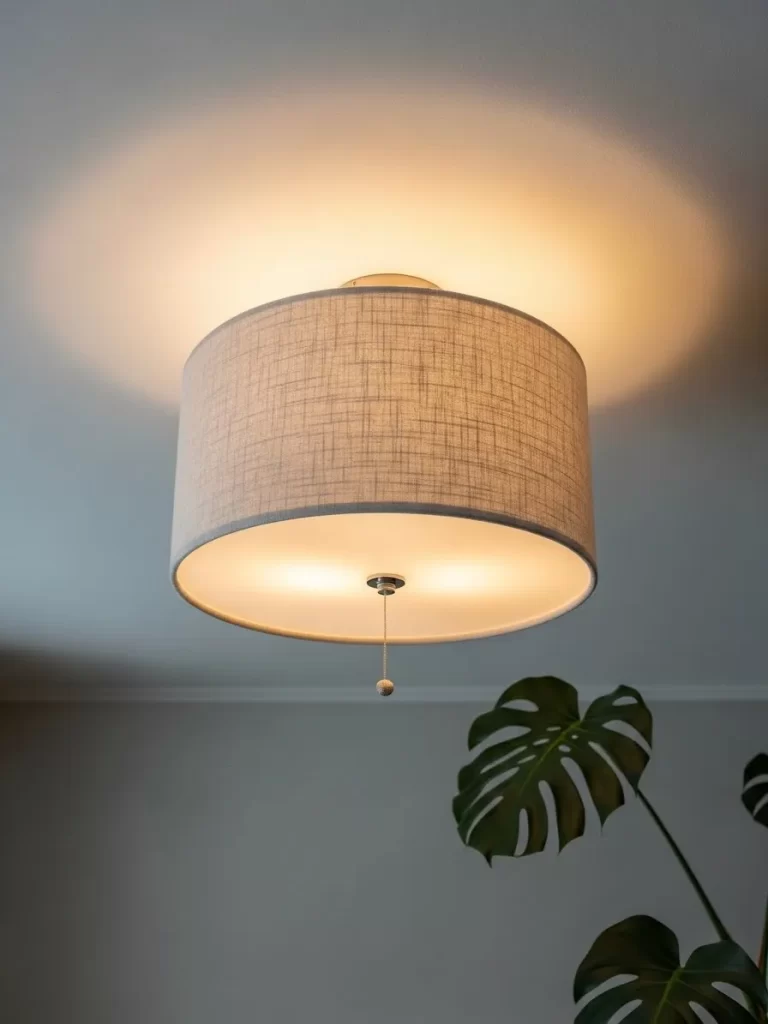
Bare light bulbs look ugly and create a harsh glare. Adding a fabric drum shade softens the glow in minutes. It hides the basic fixture that came with the rental.
Simple magnetic clips or hooks hold the shade in place. Light spreads evenly across the room for a cozy mood. You can take this fixture with you when you move.
Material required list
- Fabric drum shade
- Conversion kit or magnetic clips
Equipment required list
- Step ladder
DIY instruction step by step
- Turn off the light switch and let the bulbs cool down.
- Remove the small nut or glass cover from the current fixture.
- Attach the conversion kit to the base of the light socket.
- Lift the drum shade up to the ceiling.
- Hook the shade onto the clips or screw the center nut back on.
- Make sure the shade is level and not touching the bulbs.
- Turn the light back on to check the new glow.
- Enjoy the high end look of your updated ceiling light.
17 Layered Accent Rugs
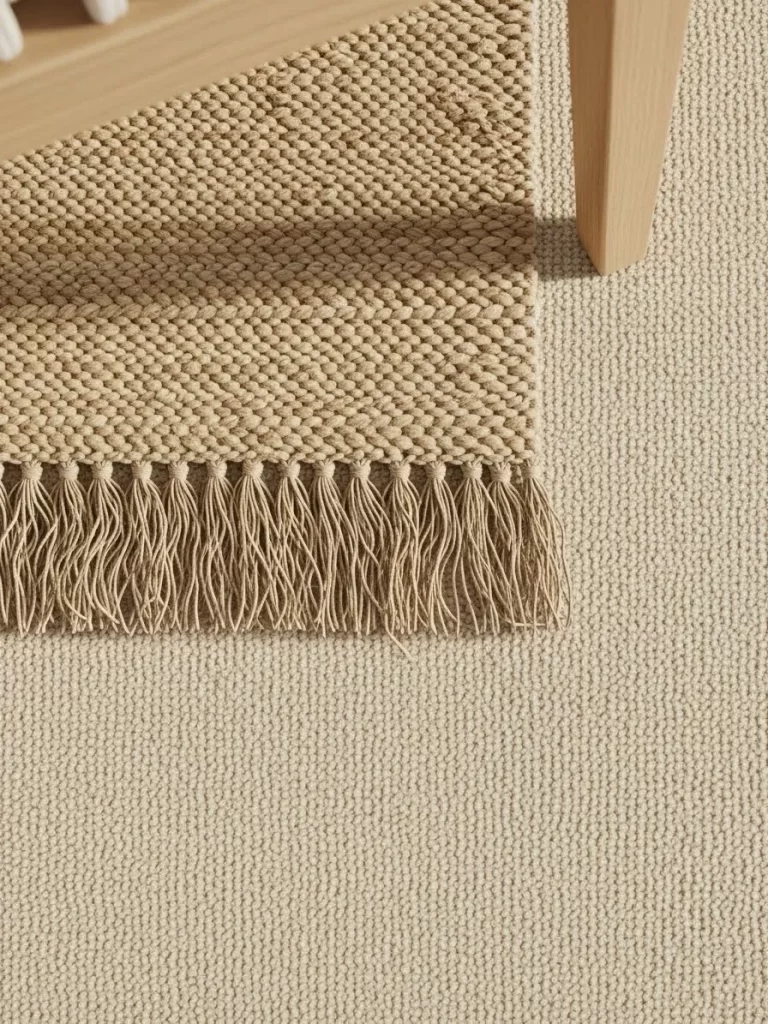
Standard carpets in rentals often look stained or very bland to the eye. Placing a textured rug over a plain one adds depth and style. This technique makes the living room feel much warmer and more comfortable.
Mixing different materials creates a unique look for less money. Fringe edges add a boho style to your main seating area. Your floors will feel soft and luxurious to walk on every day. It also helps protect the original carpet from new stains.
Material required list
- Large base rug
- Smaller textured accent rug
- Rug pad
Equipment required list
- Measuring tape
DIY instruction step by step
- Vacuum the floor thoroughly before you begin the work.
- Lay down your large base rug in the room center.
- Place a non slip pad on top of the base rug.
- Center the smaller accent rug over the pad carefully.
- Turn the top rug at an angle for a casual look.
- Smooth out any bumps or folds in both fabrics.
- Use small pieces of tape to keep corners flat.
- Move your furniture back into place to anchor rugs.
18 No Drill Curtain Rods
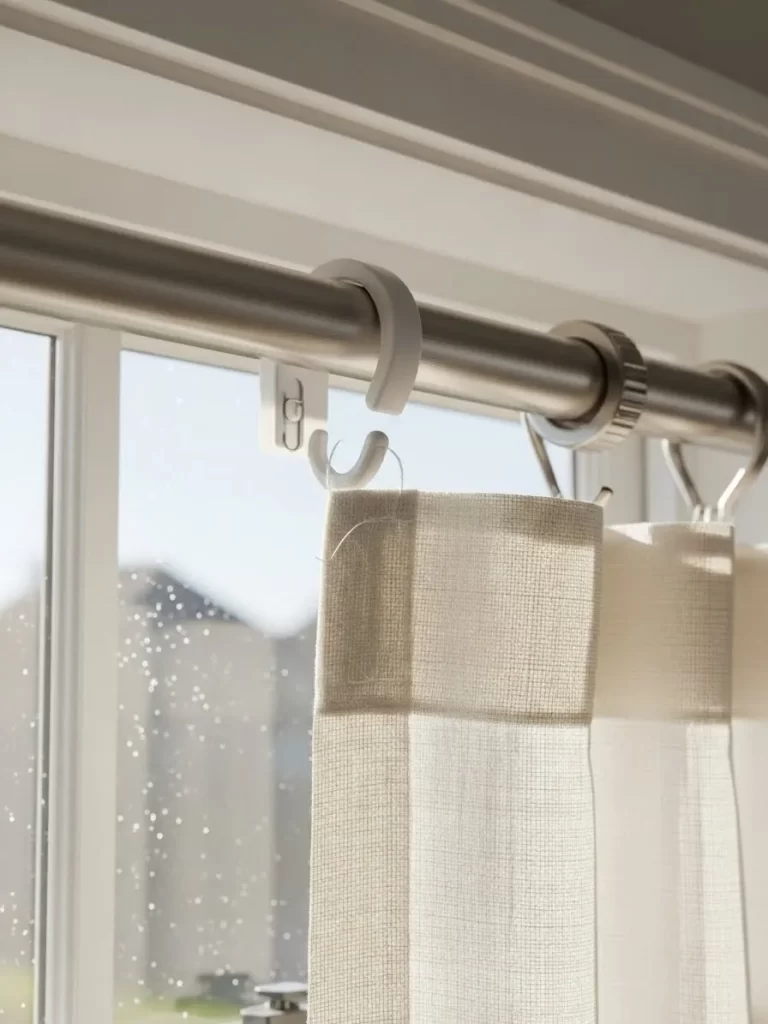
Landlords often forbid drilling holes for heavy curtain hardware on walls. Adhesive hooks allow you to hang rods without any damage at all. Your windows will look finished and private in just a few seconds.
Strong mounting tape holds plenty of weight for most light curtains. Taking them down leaves the walls smooth and completely clean later. This solution is great for renters who want a custom look. You will enjoy the extra privacy and shade.
Material required list
- Adhesive curtain rod brackets
- Lightweight curtain rod
- Sheer curtains
Equipment required list
- Measuring tape
- Pencil
DIY instruction step by step
- Clean the wall area above your window with a cloth.
- Measure three inches out from each side of the frame.
- Mark these spots with your pencil at the same height.
- Remove the backing from the adhesive bracket slowly.
- Press the bracket onto your mark for thirty seconds.
- Let the adhesive sit for one day before adding weight.
- Slide your curtains onto the rod now.
- Place the rod into the brackets and check stability.
19 Matte Black Door Handles
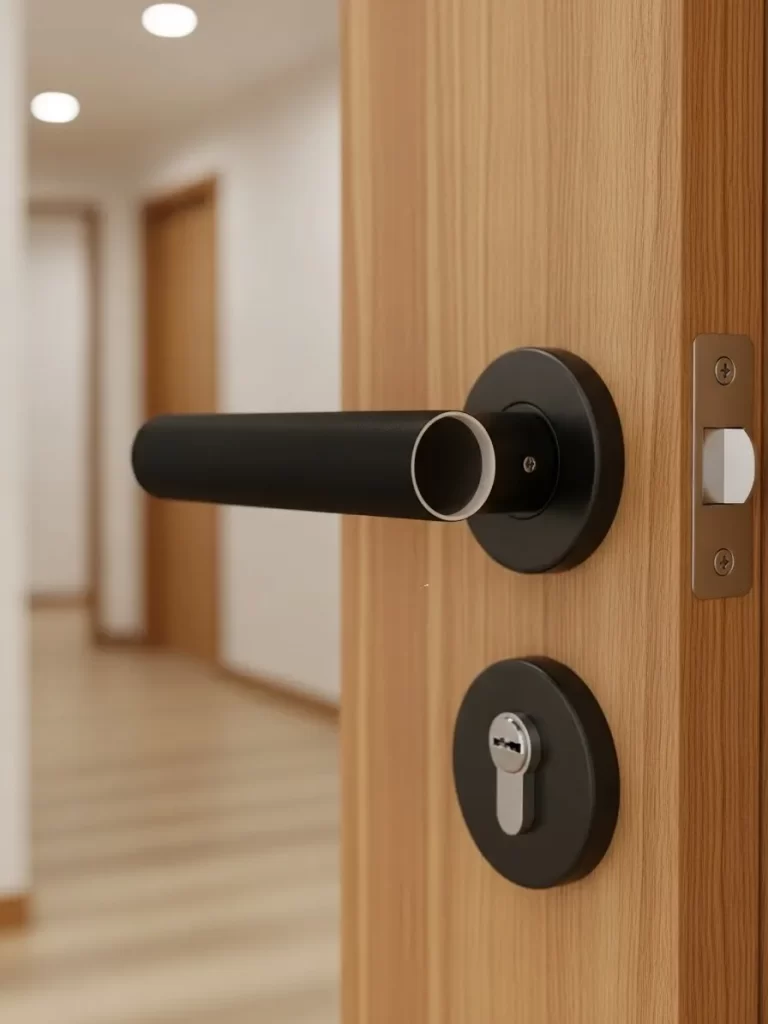
Shiny brass handles often look dated in a modern rental apartment. Swapping them for matte black hardware adds a cool and sleek edge. Each door will feel updated with this quick and easy change.
Standard screwdrivers are the only tool needed for this project. Save the old hardware in a box to put back when you leave. You get a custom look with very little effort or cost. Your home will feel much more modern and cohesive.
Material required list
- Matte black lever handles
- Small bag for storage
Equipment required list
- Screwdriver
DIY instruction step by step
- Remove the two screws holding the current handle.
- Pull the handles away from both sides of the door.
- Take out the metal latch piece from the door side.
- Slide the new black latch into the hole and screw it.
- Push the new handles onto each side of the door.
- Align the screw holes and insert the long screws.
- Tighten the screws until the handle is firm.
- Test the lock and handle to make sure it works.
20 Hexagon Wall Panels
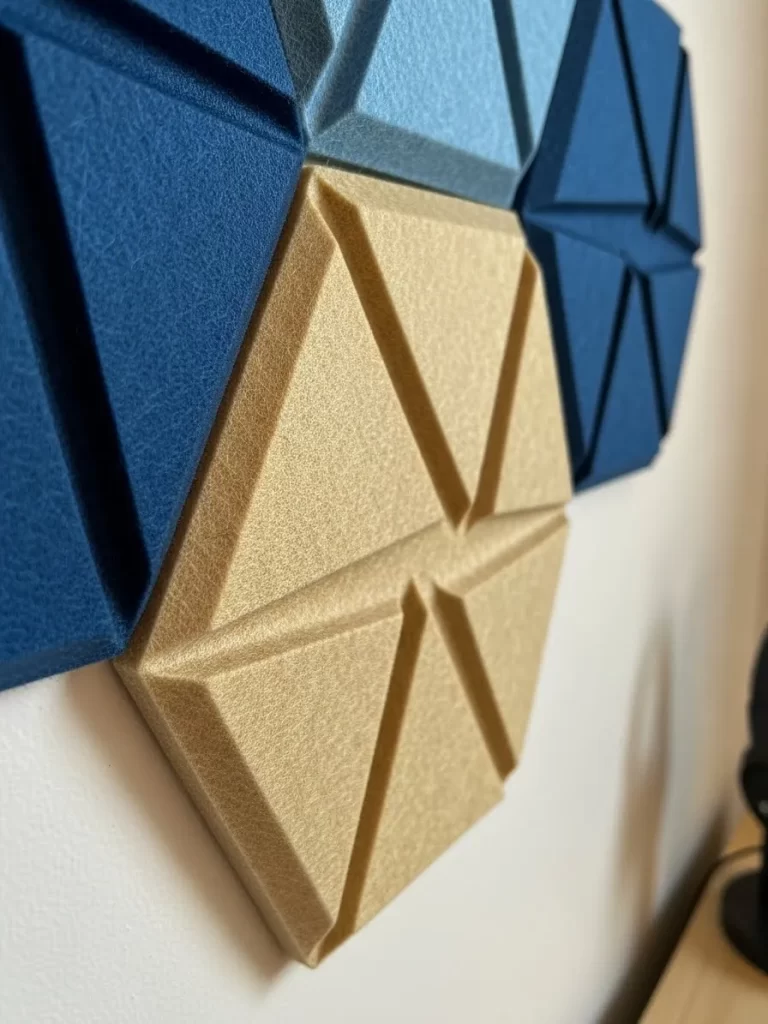
Large blank walls often feel empty and lack visual interest in a room. Sticking 3D hexagon panels creates a stunning and unique feature wall. They add texture and absorb sound in noisy apartment buildings.
Multiple colors allow you to create a beautiful geometric design easily. Adhesive backing makes installation fast and clean for any beginner. Your home will feel modern and very unique with this addition. It is a fun way to decorate without any tools.
Material required list
- Felt or foam hexagon panels
- Level
Equipment required list
- Pencil
- Measuring tape
DIY instruction step by step
- Find the center of the wall for your first panel.
- Draw a light vertical line using your level and pencil.
- Peel the paper off the back of the first hexagon.
- Press the panel onto the wall along your line.
- Place the next panel against the edge of the first.
- Continue adding panels to build your desired shape.
- Check frequently to make sure the rows stay straight.
- Step back often to see the design from a distance.
21 Frosted Window Film
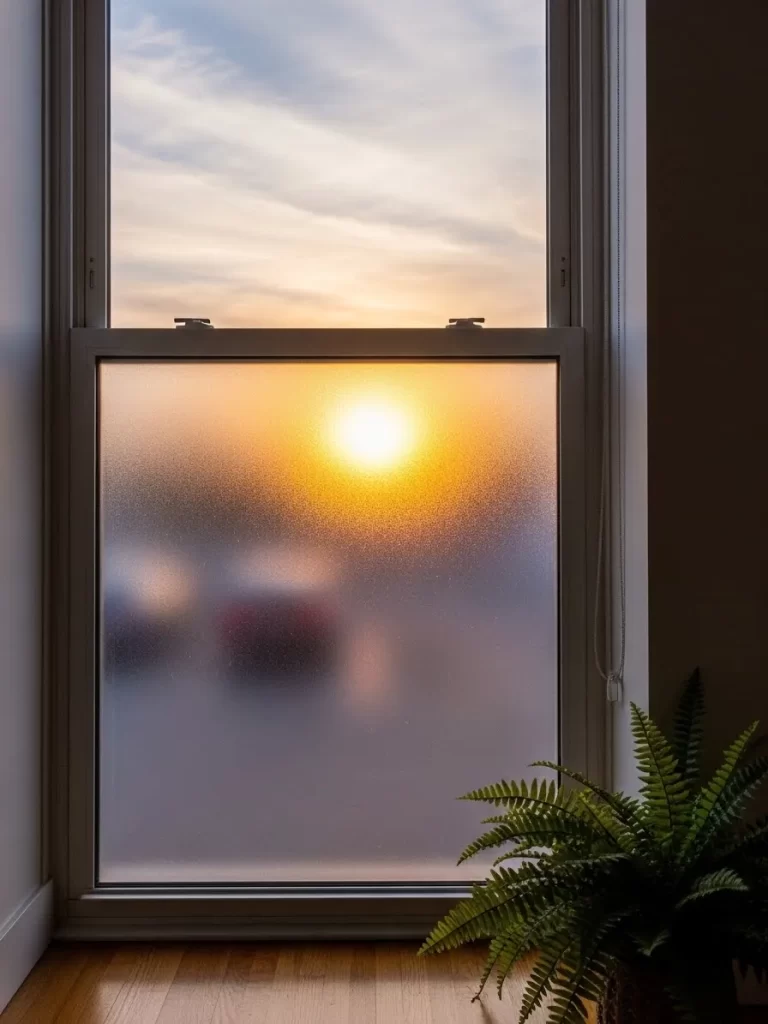
Privacy is often a concern in ground floor rental units with big windows. Applying a frosted film lets light in while blocking the view. It makes your bathroom or bedroom feel much more secure and private. The sun creates a beautiful soft glow through the glass.
Removal is easy since the film uses static cling rather than glue. You can take it down in seconds without leaving any sticky marks. This is a smart alternative to heavy blinds or dusty curtains. Your windows will look clean and modern all year long.
Material required list
- Frosted window film roll
- Water in a spray bottle
- Drop of dish soap
Equipment required list
- Utility knife
- Squeegee
- Measuring tape
DIY instruction step by step
- Clean the window glass thoroughly to remove all dust.
- Measure the height and width of the glass pane.
- Cut the film one inch larger than your measurements.
- Add a drop of soap to your water spray bottle.
- Spray the window glass until it is completely wet.
- Peel the backing off the frosted film slowly.
- Press the film onto the wet glass and align it.
- Use the squeegee to push water and bubbles out.
- Trim the extra film edges with your utility knife.
22 Built in Look Bookshelves
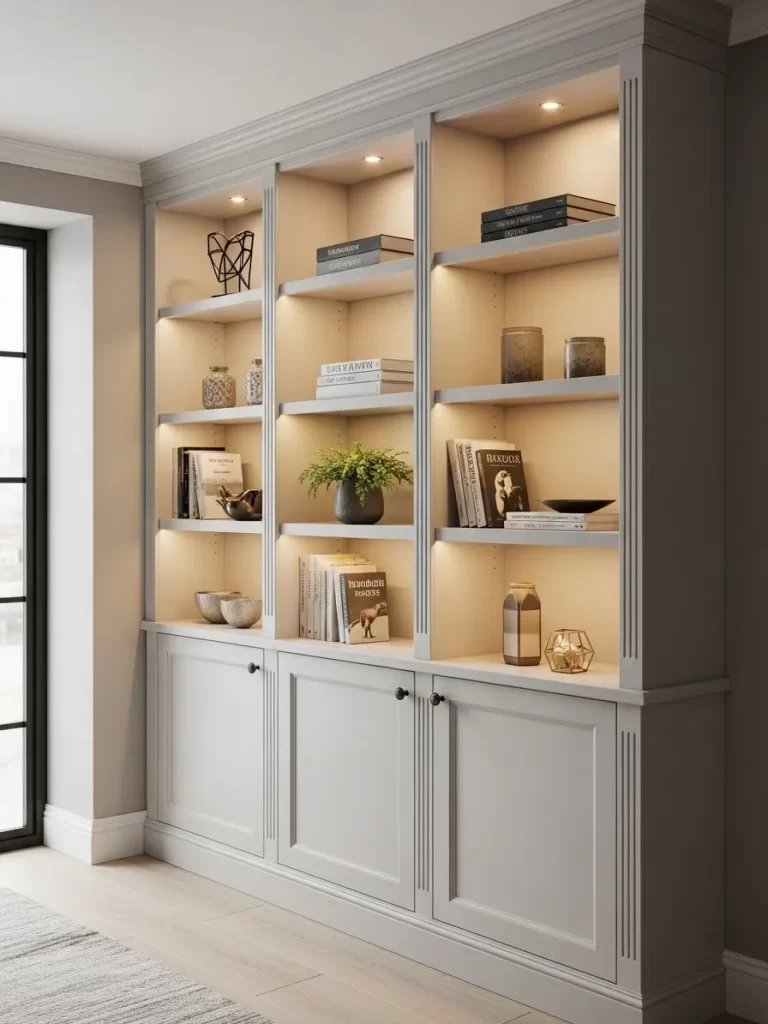
Plain bookcases can look cheap and cluttered in a small living room. Adding puck lights and trim creates the look of luxury built in shelves. It highlights your favorite books and decor items with a warm glow. This project makes your apartment feel like a custom home.
Battery powered lights stick on without any messy wiring or tools. You can change the batteries easily by twisting the light cover. This hack adds depth and a high quality finish to basic furniture. Your library will look like it cost much more than it did.
Material required list
- Battery powered LED puck lights
- Double sided mounting tape
- Thin wood trim strips
Equipment required list
- Measuring tape
- Level
- Pencil
DIY instruction step by step
- Empty the shelves so you have room to work.
- Clean the underside of each shelf with a dry cloth.
- Mark the center of each shelf section with a pencil.
- Peel the backing off the puck light adhesive strip.
- Press the light onto the center mark for thirty seconds.
- Use mounting tape to stick trim strips to shelf edges.
- Ensure the trim is level with the shelf for a clean look.
- Put your books back and turn on the new lights.
23 Large Room Divider Bookcase
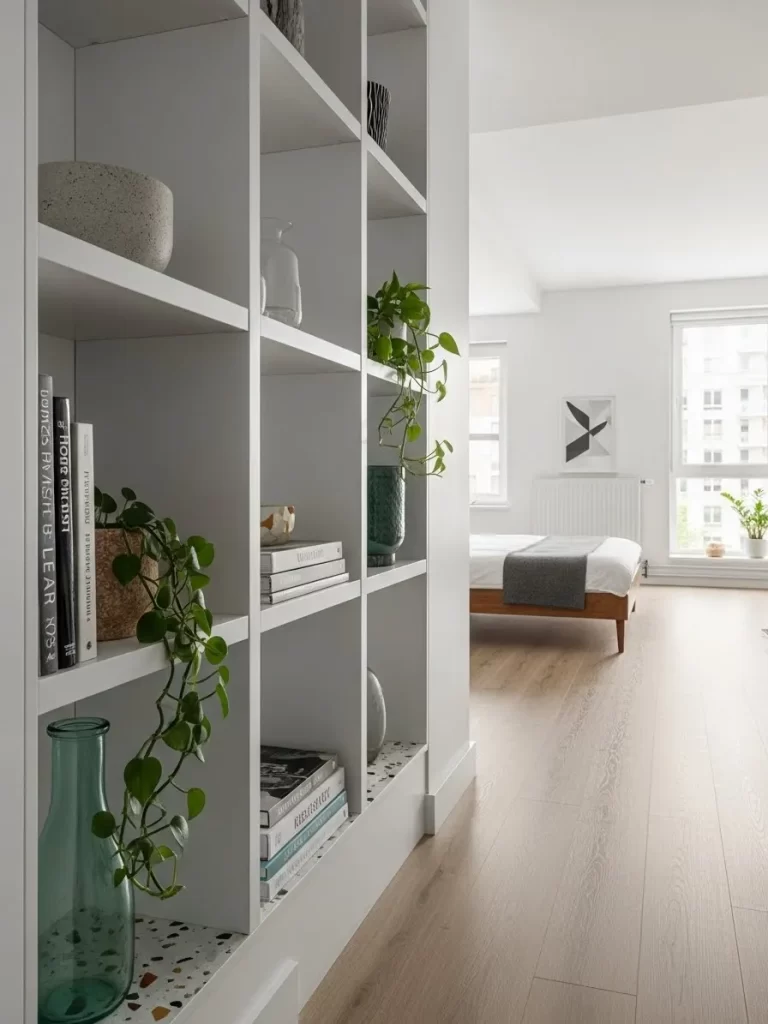
Open floor plans can feel cold and lack clear zones for living. Using a large open bookcase creates a wall without blocking any light. It provides extra storage for your plants and favorite books at once. This is a functional way to separate a bedroom from a lounge.
Choosing a white finish keeps the room feeling bright and airy. You can access your items from either side of the divider easily. This setup adds a lot of utility to a studio apartment. It feels like a permanent wall but moves when you do.
Material required list
- Large open back bookcase
- Anti tip furniture straps
- Decorative baskets
Equipment required list
- Screwdriver
- Level
DIY instruction step by step
- Assemble the bookcase following the manufacturer guide first.
- Move the unit to the spot where you want a wall.
- Check that the unit is level on your floor surface.
- Attach anti tip straps to the side wall for safety.
- Ensure the straps are tight so the unit cannot wobble.
- Fill the lower shelves with heavy books for extra weight.
- Place decorative baskets on middle shelves to hide items.
- Add small plants on top to soften the look of the unit.
24 Faux Wall Wainscoting
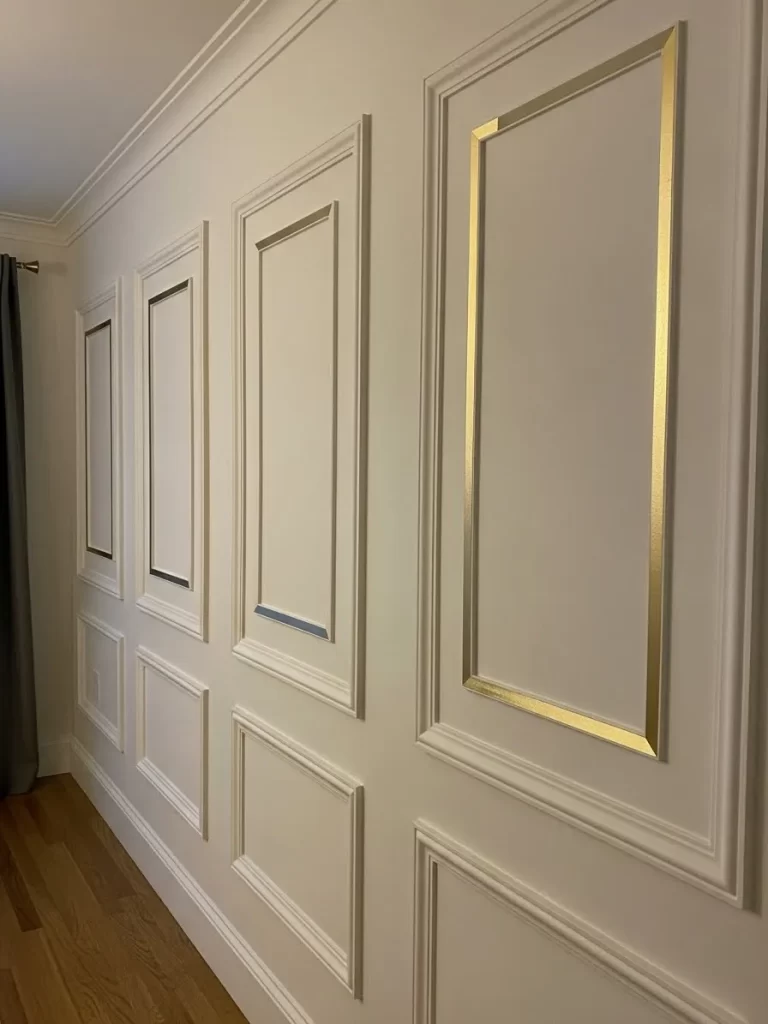
Plain rental walls often lack architectural detail and feel very flat. You can use painter tape or thin molding to create faux panels. This adds a classic look to a dining room or long hallway. It creates a sense of history in a modern apartment building.
Gold or white tape is a very low cost way to get this look. You can remove it in seconds without peeling any paint from walls. This project adds a lot of elegance to a room for very little effort. Your home will feel much more sophisticated and custom.
Material required list
- Metallic washi tape or thin wood molding
- Removable adhesive strips
- Pencil
Equipment required list
- Measuring tape
- Spirit level
- Scissors
DIY instruction step by step
- Measure the height of your wall from the floor up.
- Mark a point thirty six inches high with your pencil.
- Use the level to draw a straight line across the wall.
- Cut strips of tape to form a large rectangle shape.
- Stick the tape along your pencil lines to form panels.
- Ensure each panel is the same width for a clean look.
- Repeat the pattern across the entire length of the wall.
- Step back to check that the spacing looks even and straight.
25 Adhesive Floating Shelves
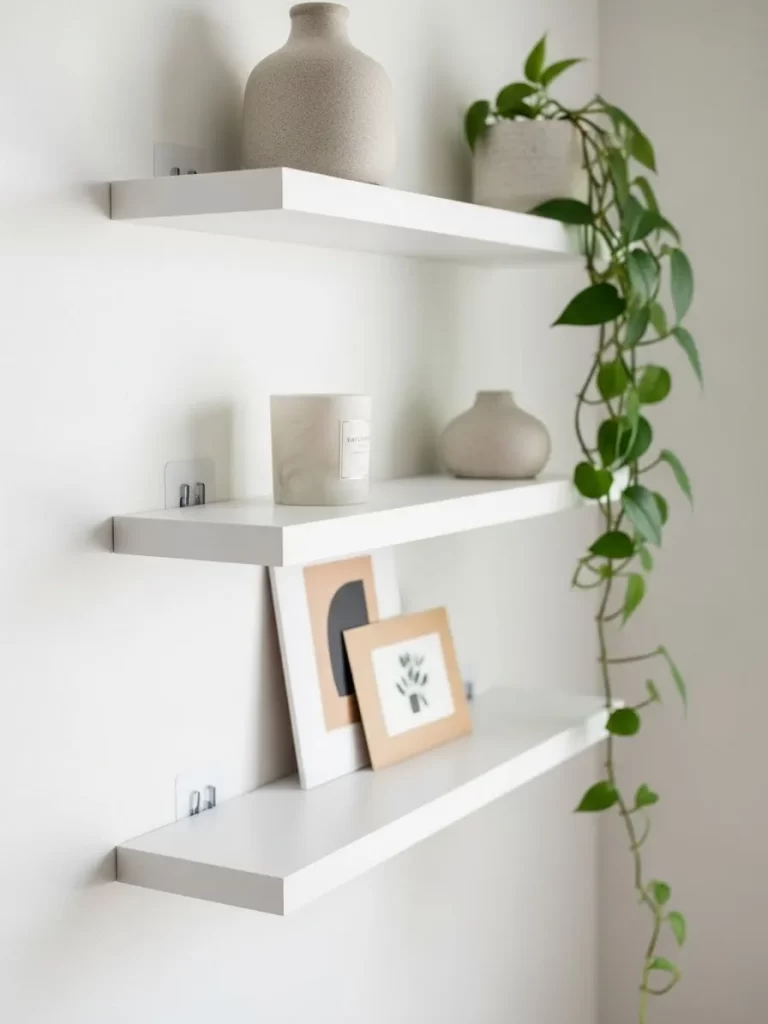
Wall space is valuable for storage but nails leave big holes. These floating shelves stick on with strong adhesive instead of screws. They hold your candles and small plants without damaging the drywall. You get a clean and modern look in any room.
Modern adhesive can hold several pounds of weight safely if applied well. Removal involves a slow peel that leaves the wall looking brand new. This is a brilliant solution for a small bathroom or kitchen area. You can display your favorite objects with total confidence.
Material required list
- Adhesive floating shelf kit
- Rubbing alcohol
Equipment required list
- Spirit level
- Pencil
- Measuring tape
DIY instruction step by step
- Wipe the wall area with alcohol to remove any oils.
- Let the wall dry completely for five minutes first.
- Mark the shelf height with a pencil and your level.
- Peel the backing off the large adhesive mounting strip.
- Press the strip onto the wall for one full minute.
- Wait twenty four hours for the glue to set properly.
- Slide the shelf onto the mounting bracket until it clicks.
- Place your light decor items on the new shelf surface.
26 Arched Wall Lighting
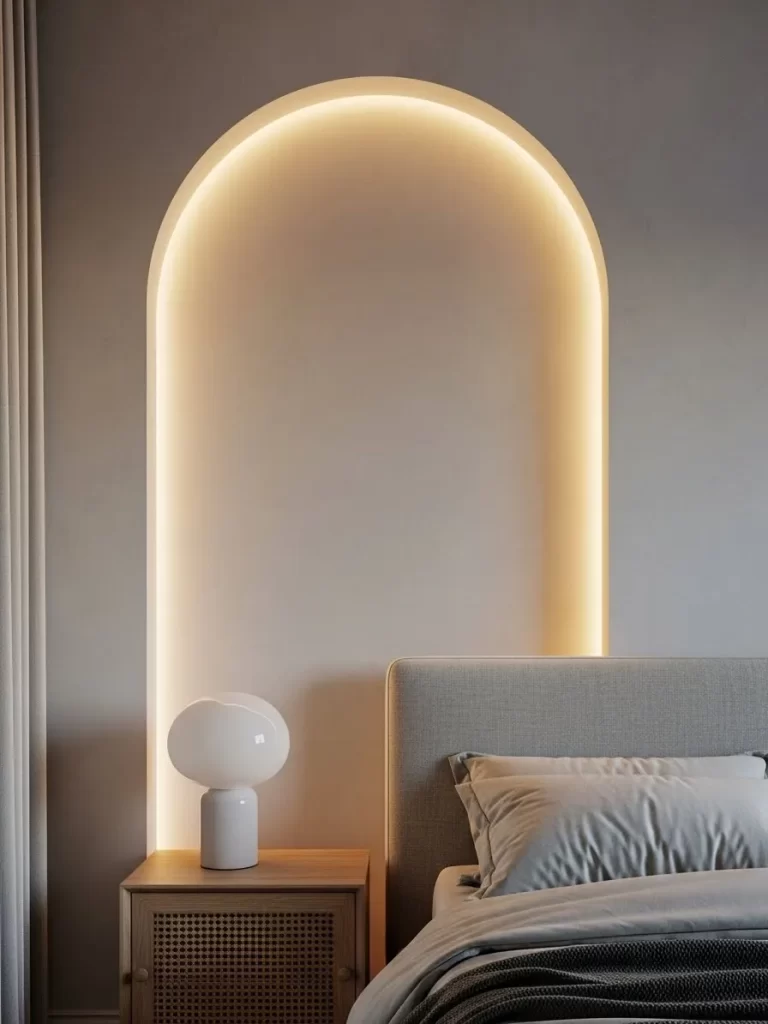
Dark corners can make a bedroom feel small and uninspiring at night. Installing a light inside an arched nook creates a cozy glow. It highlights the shape of your room and adds a luxury feel. This setup works great for a bedside reading nook or art.
LED strips hide behind the edge to create a soft halo of light. You can control the brightness with a remote from your bed. This is a modern way to add atmosphere without any hard wiring. Your bedroom will feel like a boutique hotel every single night.
Material required list
- Flexible LED light strip with remote
- Small cable clips
- Power extension cord
Equipment required list
- Step stool
- Measuring tape
- Pencil
DIY instruction step by step
- Clean the inner edge of the arch with a dry cloth.
- Measure the length of the arch from one side to the other.
- Peel the backing off the LED strip slowly as you go.
- Press the strip against the hidden edge of the arch.
- Use small clips to keep the cord flat against the wall.
- Run the power cord down the corner of the room.
- Plug the lights into the nearest wall outlet now.
- Use the remote to test the different colors and brightness.
27 Hanging Window Plant Rod
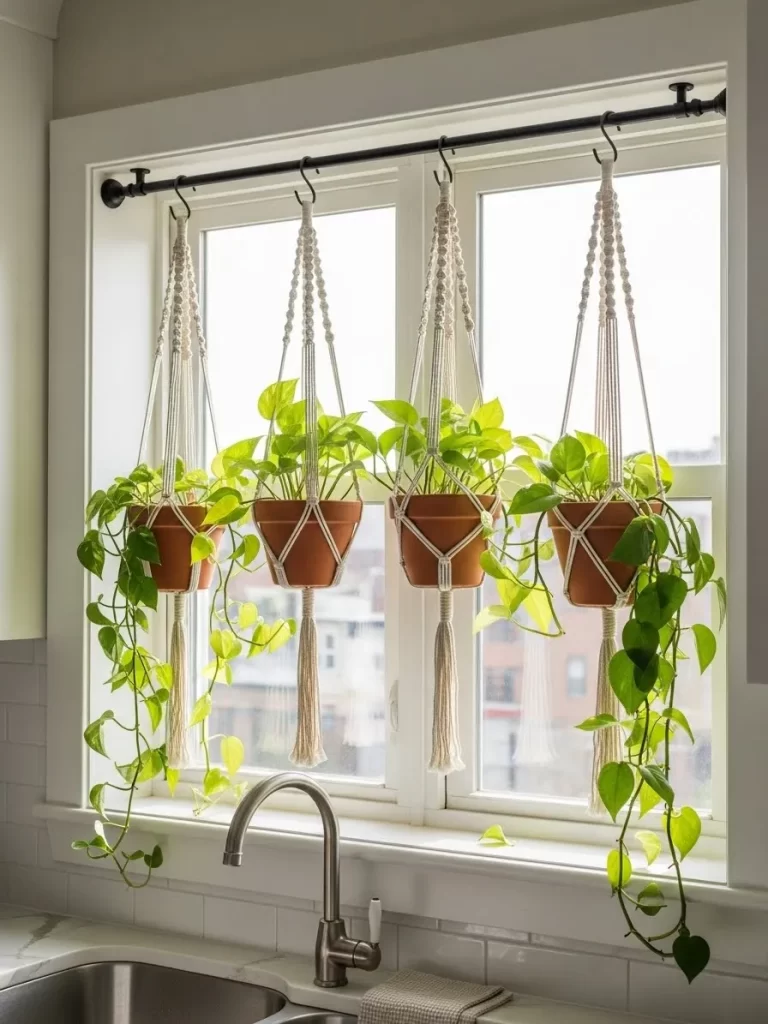
Windows are the best spot for plants but sills are often too narrow. Hanging a sturdy rod allows you to grow a lush vertical garden. This adds a natural green screen for privacy and fresh air. Your kitchen or living room will feel much more alive.
Tension rods fit inside the window frame with no drilling required. S hooks allow you to swap plants or move them for watering. This is a smart way to use light without losing any floor space. You will enjoy the view of hanging vines every day.
Material required list
- Heavy duty tension rod
- Assorted S hooks
- Potted plants in hanging baskets
Equipment required list
- Step ladder
- Measuring tape
DIY instruction step by step
- Measure the width inside your window frame at the top.
- Hold the tension rod up and twist it to expand.
- Tighten the rod until it is very firm against the sides.
- Pull down on the rod to test the weight limit first.
- Place an S hook over the rod for each plant you have.
- Hang your plant baskets onto the hooks carefully.
- Space the plants out so they each get enough sunlight.
- Check the rod tension once a month to keep it safe.
28 Plug in Wall Sconces
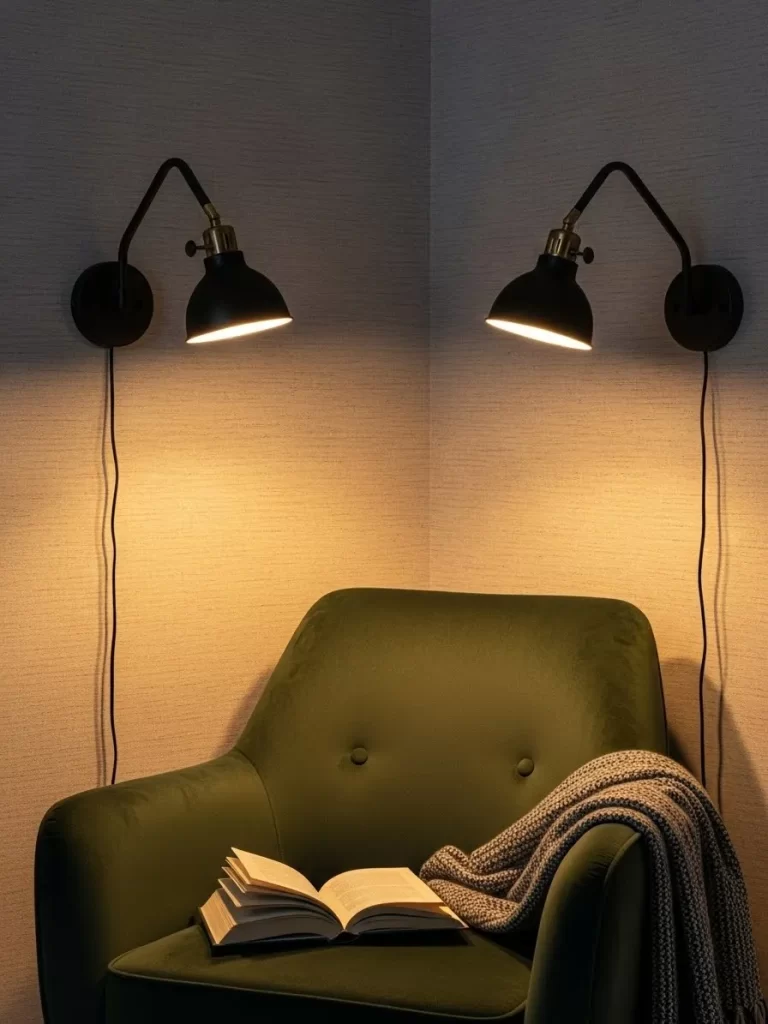
Good lighting is often missing from the walls of rental apartments. These sconces provide a warm glow without any electrical work or holes. They look just like high end permanent fixtures from a design store. You can add them above a bed or a reading chair.
Cords hang down the wall in a neat and stylish way. You can use decorative cord covers to match your paint color. This project adds a lot of character to a plain bedroom wall. You will love the cozy feeling of wall lighting at night.
Material required list
- Pair of plug in wall sconces
- Adhesive wall hooks
- Warm LED bulbs
Equipment required list
- Measuring tape
- Spirit level
- Pencil
DIY instruction step by step
- Decide on the height for your lights above the bed.
- Mark the spots with a pencil using your spirit level.
- Apply a heavy duty adhesive hook to the wall mark.
- Hang the base of the sconce onto the hook firmly.
- Let the cord hang straight down toward the floor outlet.
- Use small clips to keep the cord against the wall surface.
- Screw in the light bulbs and plug the sconce in.
- Toggle the switch to enjoy your new bedside lighting.
29 Under Cabinet LED Lighting
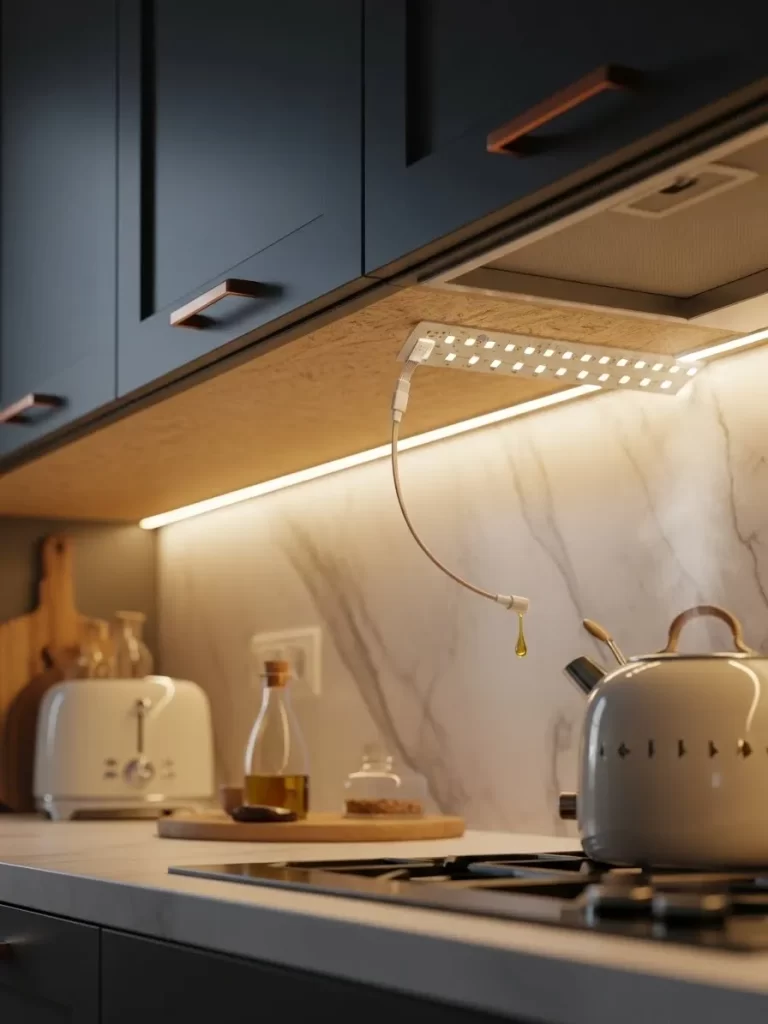
Kitchen counters are often dark and hard to use for chopping food. Sticking LED strips under the upper cabinets solves this problem fast. It provides a bright and even light for all your cooking tasks. This upgrade makes your kitchen feel modern and very professional.
These lights use a simple plug or batteries for power. You can hide the wires behind the cabinet lip very easily. This is a low cost way to improve the function of your kitchen. Your cooking space will look much more expensive and bright.
Material required list
- LED under cabinet light kit
- Small adhesive wire clips
- Double sided tape
Equipment required list
- Measuring tape
- Scissors
- Cleaning cloth
DIY instruction step by step
- Wipe the bottom of your cabinets to remove all grease.
- Measure the length of each cabinet section with your tape.
- Cut the LED strip at the marked spots if needed.
- Peel the backing off the light strip and press it on.
- Work from the power outlet toward the far end of the counter.
- Use small clips to keep the power cord tucked away.
- Plug the lights in and hide any extra cord length.
- Test the motion sensor or switch for the new lights.
30 Radiator Shelf
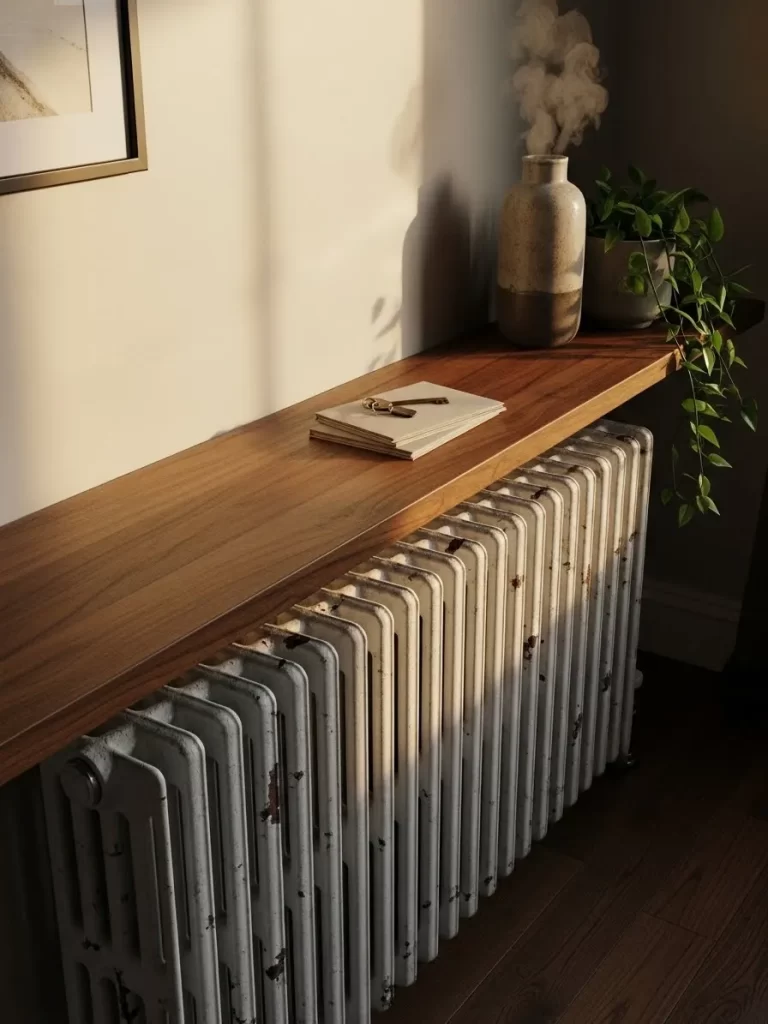
Old metal radiators are often ugly and waste a lot of space. Placing a wood shelf on top creates a useful spot for your keys. It turns a utility item into a beautiful piece of furniture. This hack works great in an entryway or a living room corner.
The wood blocks the view of rusty metal while staying safe. You get a new surface for plants or a decorative lamp. This is a clever way to add style to an older rental apartment. You will enjoy the extra storage in a small hallway.
Material required list
- Precut wood board
- High heat furniture wax
- Magnetic shelf brackets
Equipment required list
- Sanding block
- Tape measure
- Paint brush
DIY instruction step by step
- Measure the length and width of your radiator top.
- Buy a board that is two inches wider than the metal.
- Sand the wood until the surface is very smooth to touch.
- Apply a coat of wax to protect the wood from heat.
- Let the wax dry and buff it with a soft cloth.
- Place magnetic brackets onto the top of the radiator.
- Set the wood board onto the brackets carefully.
- Check that the shelf is stable and level for your items.
31 Gold Mirror Corner Accents
Plain mirrors look boring in many apartments. Adding gold corner pieces makes a simple mirror look expensive. You get a vintage vibe without spending much cash. This small detail transforms a basic bathroom into a space with character.
Applying these bits of decor takes only a moment. They stick on with light adhesive and stay secure for a long time. Your mirror will look like an antique find from a boutique shop. Removal is easy and leaves the glass clear of any marks.
Material required list
- Metallic gold corner appliques
- Clear adhesive dots
- Glass cleaning spray
Equipment required list
- Soft microfiber cloth
- Measuring tape
- Pencil
DIY instruction step by step
- Spray the corners of your mirror with glass cleaner to remove any dust.
- Wipe the area dry using a soft microfiber cloth.
- Measure two inches from each corner to ensure the accents sit evenly.
- Mark the spot lightly with a pencil on the mirror surface.
- Peel the backing off a clear adhesive dot.
- Press the sticky dot onto the back of the gold accent piece.
- Align the accent piece with the corner of the mirror glass.
- Push the piece firmly against the glass for ten seconds.
- Repeat this process for the remaining three corners of the mirror.
32 Vertical Wood Slat Wall
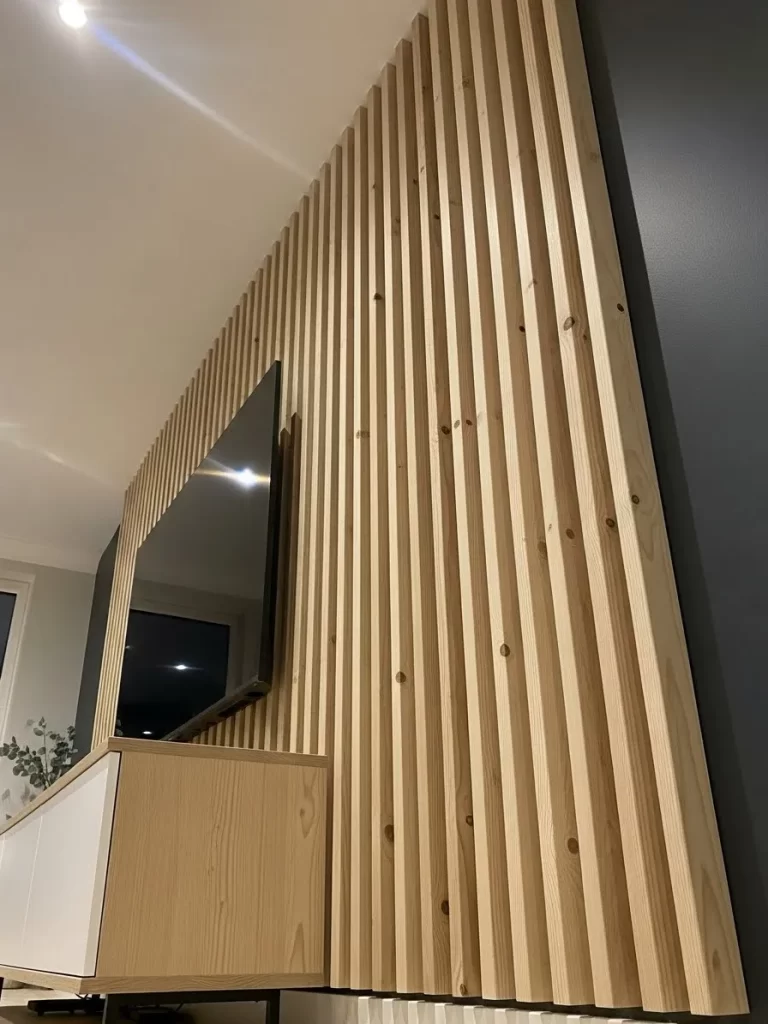
Flat walls often lack texture or warmth in modern units. Installing a wood slat section creates a beautiful focal point. These panels hide scuffs and add a natural element to your home. You can create a designer look without any permanent construction.
Most versions use simple mounting strips that leave no marks on the drywall. You can lean them against a wall for a temporary style update. Your living room will feel much more cozy and sophisticated. This project brings a bit of nature inside your apartment.
Material required list
- Wood slat wall panels
- Heavy duty adhesive wall strips
- Wood finishing oil
Equipment required list
- Spirit level
- Measuring tape
- Lint free rag
DIY instruction step by step
- Measure the height of the wall area you want to cover.
- Purchase panels that match your specific wall height.
- Rub a small amount of wood oil onto the slats with a rag.
- Let the oil dry for at least one hour before hanging.
- Apply four large adhesive strips to the back of the first panel.
- Hold the panel up against the wall where you want to start.
- Use the spirit level to make sure the panel is straight.
- Press the panel firmly against the wall for thirty seconds.
- Stick the next panel right against the edge of the first one.
33 Faux Fireplace Mantel
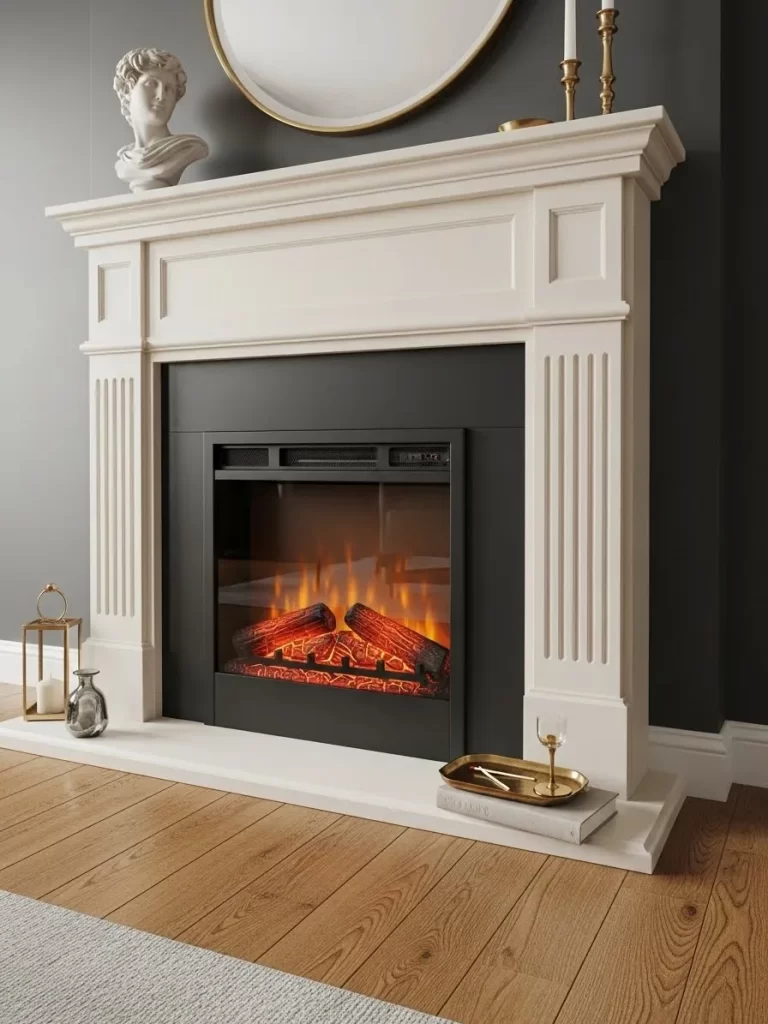
Many rentals do not have a built in fireplace for winter. A freestanding electric mantel provides warmth and a cozy glow. It acts as a beautiful shelf for your art or candles. You can create a cozy seating area in any room of the house.
This unit plugs into any standard wall outlet for easy power. You can take it with you whenever you move to a new home. It makes a room feel complete and very high end. Your living room will become the best spot for relaxing.
Material required list
- Electric fireplace mantel unit
- Power strip
- Wall safety anchor strap
Equipment required list
- Screwdriver
- Measuring tape
DIY instruction step by step
- Choose a flat wall section with a nearby power outlet.
- Unpack the fireplace unit from the box carefully.
- Move the mantel against the wall in your chosen spot.
- Plug the power cord into the wall outlet or a power strip.
- Check that the unit sits level on your floor surface.
- Attach a safety strap to the back of the mantel.
- Secure the other end of the strap to the wall with an adhesive hook.
- Turn on the flame effect to test the new atmosphere.
- Place a few books or a vase on top of the mantel shelf.
34 Starry Ceiling Decals
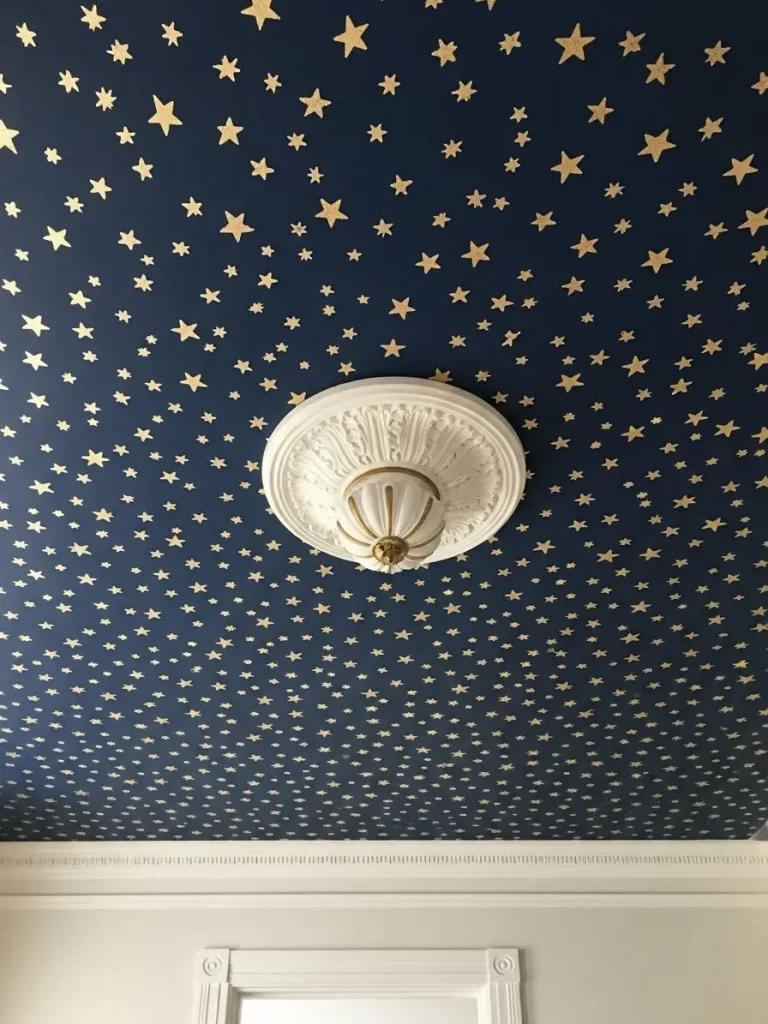
Ceilings are often the most ignored part of a rental room. Sticking gold stars on a dark surface creates a dream space. This works wonders for a child or a primary bedroom. You will enjoy looking up at the sky before you fall asleep.
Removal is simple and does not harm the original ceiling paint. These tiny stickers add a bit of magic to your night. You can arrange them in your favorite constellation patterns. It is a low cost way to add wonder to a plain room.
Material required list
- Gold foil star stickers in different sizes
- Clear adhesive putty
Equipment required list
- Step ladder
- Pencil
DIY instruction step by step
- Clean the ceiling with a dry cloth to remove any cobwebs.
- Use a ladder to reach the ceiling surface safely.
- Plan your pattern by marking small dots with a pencil.
- Peel a gold star sticker from the paper backing.
- Press the star onto a pencil mark on the ceiling.
- Rub your thumb over the star to make sure it sticks well.
- Repeat this until you have a full sky of gold stars.
- Use different sizes of stars to create a sense of depth.
- Step down from the ladder and check the pattern from below.
35 Art Rail Hanging System
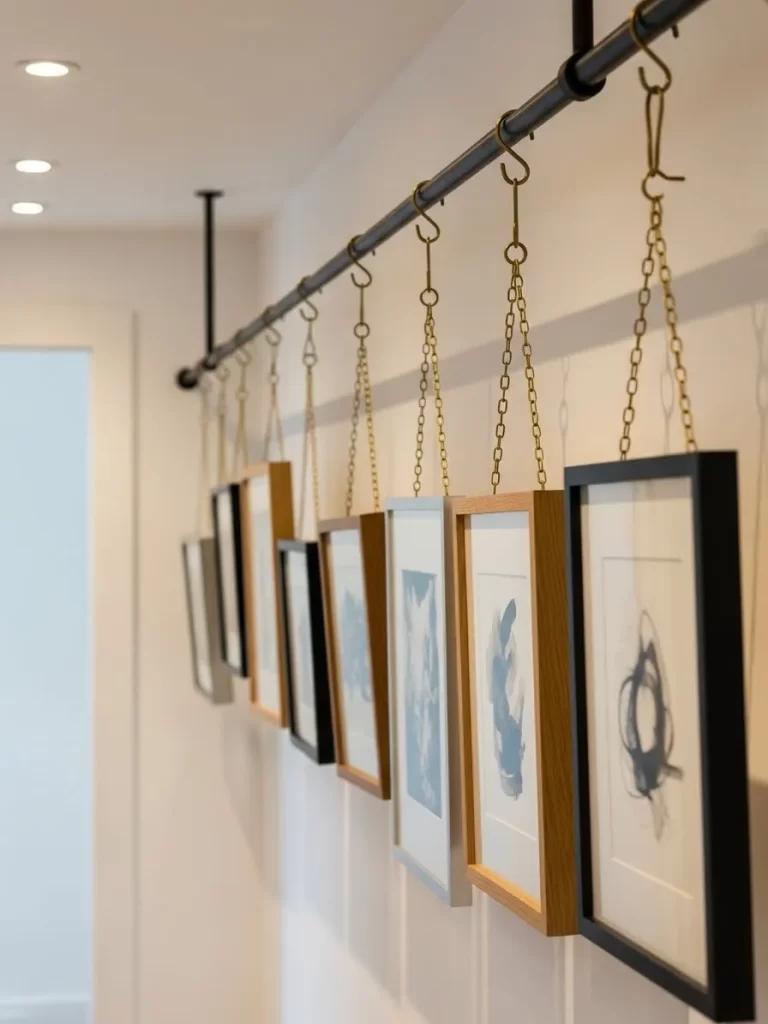
Poking holes for art prints is a common rental nightmare. A single rod with hooks allows you to swap art easily. Your walls stay smooth and completely free of any damage. This setup looks very professional and keeps your art organized.
Cables hang down to hold frames at any height you want. This gallery style setup looks professional and very clean. It is a smart way to show off your personal taste. You can move the pictures around without using any new nails.
Material required list
- Picture rail rod kit
- Clear hanging cables
- Adjustable frame hooks
Equipment required list
- Spirit level
- Measuring tape
- Pencil
DIY instruction step by step
- Measure the width of the wall where you want the rail.
- Mark the height for the rail near the ceiling line.
- Use the level to make sure your marks are straight.
- Press the adhesive mounting brackets onto your marks.
- Slide the metal rod into the brackets until it clicks.
- Hook the clear cables onto the top of the rod.
- Slide an adjustable hook onto each hanging cable.
- Attach your picture frame to the hook at your desired height.
- Slide the cables left or right to space out your art prints.
36 Rainfall Shower Head

Basic shower fixtures often provide poor water pressure in apartments. Replacing the head with a rainfall version adds instant luxury. Your morning routine will feel much more relaxing and pleasant. You get a spa experience every single day at home.
Unscrewing the old piece takes very little strength or time. Keep the original shower head in a box for your move out day. You deserve a better shower without hiring a plumber. This simple swap makes a huge difference in your comfort.
Material required list
- Large rainfall shower head
- Plumber tape
- Storage box for old fixture
Equipment required list
- Adjustable wrench
- Old rag
DIY instruction step by step
- Turn off the shower knobs to ensure the water is off.
- Wrap a rag around the old shower head base for grip.
- Turn the old head counterclockwise with a wrench to loosen it.
- Remove the old head and put it in your storage box.
- Clean the threads of the wall pipe with a dry cloth.
- Wrap three layers of plumber tape around the pipe threads.
- Screw the new rainfall head onto the pipe by hand.
- Use the wrench to give it one final quarter turn to tighten.
- Turn on the water to check for any small leaks.
37 Brass Tip Furniture Leg Caps
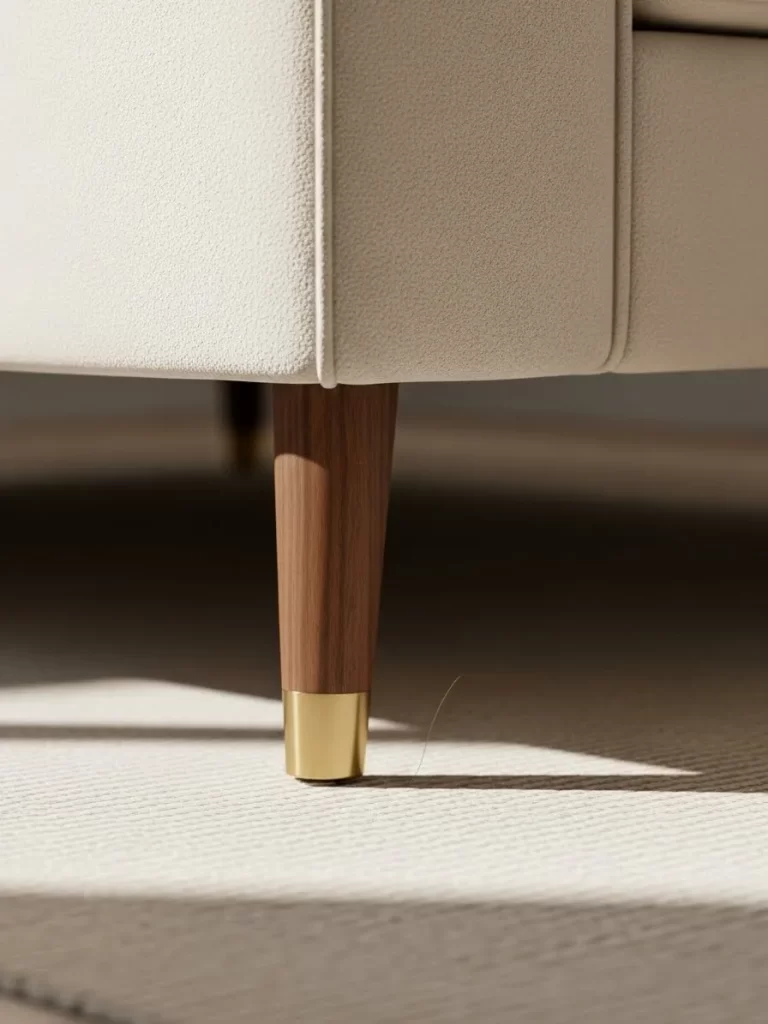
Dated furniture legs can make a nice sofa look cheap. Slipping on brass caps adds a mid century modern touch. This small detail elevates the whole piece of furniture quickly. Your guests will think you bought a brand new set of chairs.
These covers fit over most standard wooden or metal legs easily. They protect your floors from scratches while looking great. You can remove them in seconds if you change your decor style. It is a smart way to update old furniture on a budget.
Material required list
- Set of four brass furniture leg caps
- Adhesive felt pads
Equipment required list
- Measuring tape
DIY instruction step by step
- Measure the diameter of your furniture legs at the bottom.
- Purchase caps that match the width of your specific legs.
- Flip your chair or small table upside down on a rug.
- Clean the bottom of each leg to remove any dust or hair.
- Stick a small felt pad inside the bottom of the brass cap.
- Slide the brass cap over the end of the furniture leg.
- Push the cap up until it sits tight against the wood.
- Repeat this for all four legs of the furniture piece.
- Flip the furniture back over and check the new look.
38 Swag Pendant Hook
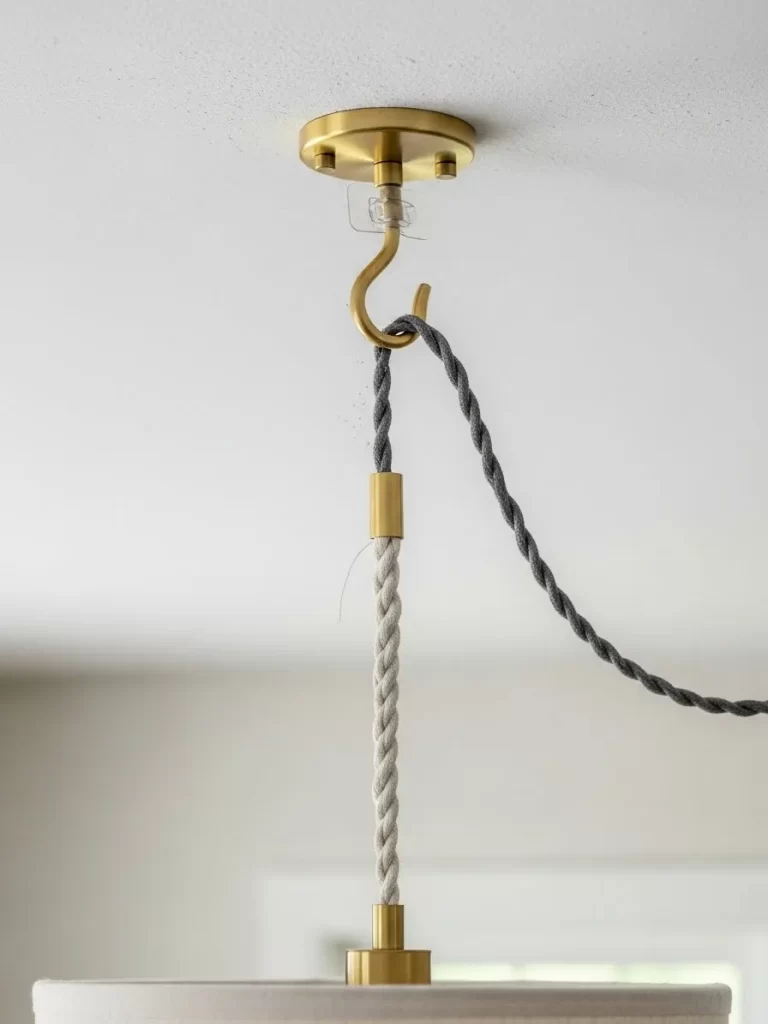
Lighting often sits in the wrong spot in a rental apartment. A swag hook allows you to move a lamp exactly where you need it. This hack fixes dark corners over a dining table. You get better light without calling an expensive electrician.
The cord drapes across the ceiling for a cool industrial look. Most hooks use strong adhesive to stay up without any drilling. You can position your favorite lamp right where the action is. This project adds both style and light to your room.
Material required list
- Adhesive ceiling hook
- Extension cord
- Pendant light with a long cord
Equipment required list
- Step ladder
- Measuring tape
- Pencil
DIY instruction step by step
- Find the spot on the ceiling where you want the light.
- Mark the spot lightly with your pencil while on the ladder.
- Clean the ceiling surface around the mark with a dry cloth.
- Remove the backing from the adhesive ceiling hook.
- Press the hook onto your mark for one full minute.
- Wait one hour for the adhesive to bond to the ceiling.
- Create a small loop with the light cord near the plug.
- Hang the cord loop over the hook so the lamp drapes down.
- Plug the light into the nearest outlet to finish the job.
Key Takeaways
Small upgrades create a massive visual impact in a cramped or dark apartment. You should focus on high traffic areas like the kitchen and bathroom first. These spots often have the most outdated features in a rental unit.
Temporary adhesives are a renter’s best friend for walls and floors. Products like washi tape and peel and stick vinyl leave zero residue behind. You get the look of a renovation without the permanent commitment or cost.
Always keep the original hardware and fixtures in a labeled box. You will need to put them back before your lease ends to get your deposit. Organization during the process makes moving out much faster and less stressful.
Lighting and texture can change the mood of a room instantly. Adding rugs and fabric panels hides ugly carpet or scuffed paint. You deserve a home that feels warm and personal every single day.
Transforming an ugly rental into a beautiful home is completely possible. These thirty eight hacks show that you have many options for a custom look. You do not have to wait until you buy a house to live in style.
Start with one small project this weekend to build your confidence. You will be surprised at how much better a room feels with a new rug or gold knobs. Every detail counts when you are creating a sanctuary for yourself.
Your apartment is a reflection of your personality and your journey. Take pride in your space by using these clever and safe decor methods. You can enjoy a luxury lifestyle while remaining a responsible and smart tenant.