The holidays were bright and full. Now, the last of the guests have gone. The quiet house is filled with the aftermath. Boxes, wrapping paper, and new items crowd your space. It is easy to feel overwhelmed.

You look at the clutter and do not know where to start. The joy of the season fades into a big task. Your home feels less like a sanctuary and more like a storage unit. You need a simple path back to order.
This guide provides that path. It is not about one giant, impossible job. It is about small, steady steps. You will find 45 clear strategies to tackle the mess, one bit at a time. Let’s begin the journey back to a calm, clean home.
1. Confront the Christmas Clutter

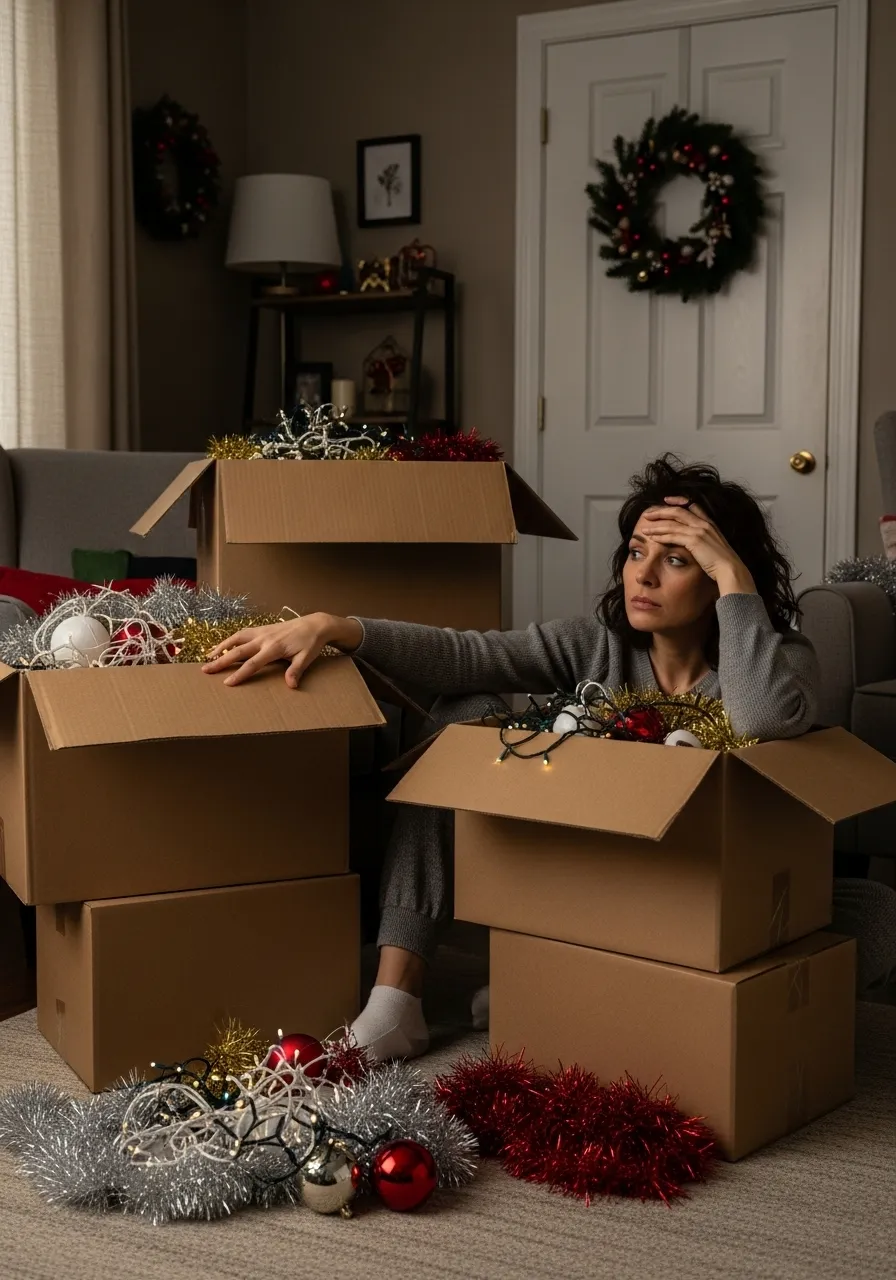
The festive season has ended. Now you sit among the boxes. Tinsel and lights spill over the sides, a reminder of the recent joy. That happy feeling can quickly turn to stress. The task of packing everything away seems enormous. It is easy to feel stuck when faced with so much to do.
This moment is familiar to many. The holiday magic fades into a sea of decorations that need a home for the next eleven months. Looking at the mess, you might not know where to begin. The key is to start with a single box. One small step is all it takes to begin clearing the chaos.
DIY: Holiday Memory Gift Tags
Don’t throw away those beautiful Christmas cards! Turn them into special gift tags for next year. It’s a simple way to recycle and save a happy memory.
What You Will Need:
- Old Christmas cards
- Scissors
- A hole punch
- Ribbon or string
Instructions:
- Choose Your Designs: Go through your stack of Christmas cards. Pick out the ones with your favorite pictures or patterns. Look for snowmen, reindeer, or pretty winter scenes.
- Cut Out Your Shapes: Carefully cut out the pictures you selected. You can make them into squares, circles, or any shape you like. You can even cut around the shape of the character on the card.
- Make a Hole: Take your hole punch and make one clean punch near the top of your new tag. Try to keep it in the center.
- Add the String: Cut a piece of ribbon or string that is about 6 inches long. Thread it through the hole you just made.
- Tie the Loop: Bring the two ends of the string together and tie them in a simple knot. This creates a loop, making it easy to attach to a gift.
- Store for Next Year: You’ve just made some wonderful new gift tags. Put them in a small bag or box with your wrapping paper so they are ready for next Christmas.
2. Tackle the Paper Mountain

Wrapping paper scraps, gift receipts, and holiday cards create a blizzard of paper. Your living room can disappear under all of it. A simple timer can turn this big job into a small one. Set it for 10 minutes. You will be surprised how much you can clear in a short time.
This quick burst of activity stops the task from feeling too big. Focus only on the paper. Sort it into piles: one for keepsakes, one for receipts you need, and one for the recycling bin. This small effort makes a huge difference. It clears a surface, and that clear surface gives you the energy to keep going.
DIY: Simple Receipt Keeper
Create a special envelope to hold all your holiday gift receipts. This way, you will know exactly where they are if you need to return something.
What You Will Need:
- A plain envelope (a legal or A4 size works well)
- Markers or crayons
- Stickers (optional)
Instructions:
- Label Your Envelope: Take a marker and write “Holiday Receipts” in big, clear letters on the front of the envelope.
- Decorate It: This is the fun part. Use your markers or crayons to draw festive pictures on the envelope. You could draw snowflakes, stars, or a simple Christmas tree. Add some stickers if you have them.
- Gather the Receipts: Find all the gift receipts from your holiday shopping. Make sure they are flat and not crumpled.
- Put Them Inside: Neatly place all the receipts inside your decorated envelope.
- Seal and Store: Close the envelope flap. You don’t have to seal it shut, just tuck it in. Put your receipt keeper in a safe place, like a desk drawer, where you will easily find it.
3. Repurpose Holiday Greetings

Your mantelpiece was likely covered in beautiful Christmas cards from friends and family. They are too lovely to just throw away. Yet, keeping them all can create clutter. Looking at them brings a smile, but soon they need a new purpose.
Instead of letting them pile up in a drawer, give them a new life. Transforming them into something else preserves the happy memory. It is a creative way to honor the person who sent it. This clears the clutter and gives you a head start on next year’s decorations.
DIY: Christmas Card Wreath
Turn your favorite cards into a beautiful wreath you can hang up next year. It’s a circle of happy memories.
What You Will Need:
- A paper plate
- Scissors
- About 10-15 old Christmas cards
- Glue or a stapler
- Ribbon
Instructions:
- Make the Wreath Base: Ask an adult to help you cut out the center circle of the paper plate. You should be left with a ring shape, like a doughnut. This is the base for your wreath.
- Prepare Your Cards: Cut the front off of each Christmas card. Try to keep the prettiest part of the picture.
- Arrange the Cards: Lay your paper plate ring on a table. Start placing the card fronts around the ring. Overlap them a little bit, like feathers on a bird. Move them around until you like how they look.
- Attach the Cards: One by one, glue or staple each card front onto the paper plate ring. Make sure they are secure. Keep going all the way around until the plate is completely covered.
- Add a Bow: Take a piece of ribbon and tie it into a bow. Glue the bow to the bottom or top of your wreath.
- Add a Hanger: Cut another piece of ribbon, about 8 inches long. Flip your wreath over to the back. Tape or staple the ends of the ribbon to the top of the wreath to make a loop for hanging. Let it dry, and it’s ready to be stored for next Christmas.
4. The One-In, One-Out Donation Rule

The holidays often bring new treasures into your home. New toys, new books, and new clothes all need a place to go. This is a great chance to teach the joy of giving. By donating items you no longer use, you make space for the new things.
Turn this into a family activity. Explain that giving away old toys or clothes helps other families who may not have as much. This simple act clears clutter from your home. It also fills it with a sense of kindness and community. A donation box can be a happy sight, not a sad one.
DIY: Family Donation Station
Make a designated spot in your home for items you plan to donate. This makes it easy to collect things all year round.
What You Will Need:
- A sturdy cardboard box
- Wrapping paper or plain paper
- Markers and crayons
- Tape
Instructions:
- Find a Good Box: Choose a box that is not too big and not too small. A copy paper box or a medium-sized moving box is a good choice.
- Cover the Box: Wrap the box with paper, just like you would wrap a present. This makes it look neat and special. You can use leftover wrapping paper or just plain white paper.
- Label Your Station: Use your markers to write “Donation Station” on the front of the box. You can also write what goes inside, like “Toys,” “Books,” and “Clothes.”
- Decorate It: Everyone in the family can help decorate the box. Draw pictures of people helping each other, or simply add colorful patterns and designs.
- Choose a Spot: Find a permanent home for your Donation Station. A corner in the laundry room, garage, or a closet works well.
- Start Filling It: Whenever you find something you don’t use anymore, put it in the box. When the box is full, your family can take a trip together to a local charity to drop it off.
5. Make Room in Your Wardrobe

A new sweater is a wonderful gift. But now you have to find a spot for it in an already full closet. This is the perfect reason to go through your clothes. You can finally make those tough decisions about what to keep and what to let go.
Looking at your closet can feel like a big job. Break it down into small sections. Start with just your shirts, or just your pants. The goal is to create breathing room for your clothes. A tidy closet makes getting dressed in the morning a much calmer experience.
DIY: Refreshing Cedar Sachets
Keep your closet smelling fresh and clean with these simple, homemade cedar sachets. They also help keep pesky moths away from your favorite sweaters.
What You Will Need:
- Cedar chips (you can find these at a pet store or hardware store)
- Small fabric bags with drawstrings (or small squares of fabric and ribbon)
- A spoon
Instructions:
- Get Your Bags Ready: If you have small drawstring bags, open one up and get ready to fill it. If you have fabric squares, lay one flat on the table.
- Fill with Cedar: Use a spoon to fill your bag with cedar chips. Fill it until it is about three-quarters full. You want it to be puffy but still able to close easily.
- Close the Bag: If you have a drawstring bag, just pull the strings tight and tie them in a bow. If you are using a fabric square, gather the four corners together. Cinch the fabric just above the cedar chips and tie it tightly with a piece of ribbon.
- Place in Your Closet: You have made a cedar sachet! Make a few more. You can hang them on hangers, or tuck them into your dresser drawers to keep your clothes smelling great.
6. Organize the Gift Basket Bounty

Gift baskets filled with lotions, soaps, and bath salts are a popular holiday present. They are thoughtful, but they can quickly fill up your bathroom cabinets. You might end up with more bubble bath than you can use in a year. It is time to sort through this fragrant collection.
Take everything out and see what you have. Decide what you will actually use. Items that are not your scent or style can be set aside. They can become great future gifts for someone else. This process clears your shelves. It also ensures the things you keep are things you truly enjoy.
DIY: Sweet Lemon Sugar Scrub
Use some of those extra toiletries to create a luxurious sugar scrub. It’s a great way to combine items and make something new for yourself or as a gift.
What You Will Need:
- A small jar with a lid
- 1 cup of white sugar
- 1/2 cup of coconut oil or olive oil (melted if solid)
- A few drops of lemon-scented lotion or body wash from a gift set
- A bowl and a spoon for mixing
Instructions:
- Combine Ingredients: In your bowl, pour in the 1 cup of sugar.
- Add the Oil: Slowly pour the 1/2 cup of oil over the sugar.
- Add a Scent: Squeeze a few drops of a scented lotion or body wash into the bowl. Lemon is a fresh, clean scent, but you can use lavender or vanilla too.
- Mix It Up: Use your spoon to mix everything together. Stir until it looks like wet sand. You want all the sugar to be coated in oil.
- Fill Your Jar: Carefully spoon the sugar scrub mixture into your clean jar. Pack it down a little bit.
- Decorate and Use: Close the lid tightly. You can tie a ribbon around the jar to make it look fancy. To use it, scoop a little out in the bath or shower and gently rub it on your skin to make it soft and smooth.
7. Clear Your Digital Space

Clutter is not just physical. After the holidays, your phone and computer are probably full too. You have dozens of new photos, promotional emails, and downloaded receipts. This digital mess can slow down your devices and your mind.
Set aside some time to sort through your digital life. Create folders for your holiday photos. Unsubscribe from the mailing lists you signed up for just to get a discount. Delete blurry pictures. A clean digital workspace feels just as good as a clean room. It helps you focus and start the new year fresh.
DIY: Digital Photo Organization System
Create a simple folder system on your computer to keep all your precious photos safe and easy to find.
What You Will Need:
- A computer
- Your digital photos (on your phone, camera, or computer)
Instructions:
- Create a Main Folder: On your computer’s desktop or in your “Pictures” folder, create a new folder. Name it “My Photos.”
- Create Year Folders: Inside the “My Photos” folder, create a new folder for each year you have pictures. For example, make a folder called “2023,” another called “2024,” and so on.
- Create Event Folders: Now, go inside a year folder, like “2024.” Inside this folder, create new folders for special events from that year. For Christmas, make a folder called “2024-12 Christmas.” For a birthday, you could make one called “2024-07 Sam’s Birthday.” Using the month number first helps keep them in order.
- Move Your Photos: Find your holiday pictures on your phone or camera. Connect it to the computer. Drag and drop all your Christmas photos into the “2024-12 Christmas” folder you just made.
- Delete from Your Device: Once you are sure the photos are safely on your computer, you can delete them from your phone or camera. This will free up a lot of space. Repeat this process for all your photos.
8. Tame the Holiday Pantry

Your pantry might look a little wild after weeks of holiday cooking. You have half-used bags of flour, extra cans of pumpkin, and tins of Christmas cookies. Finding anything can feel like a treasure hunt. It is time to bring some order back to your shelves.
Take everything out. Yes, everything. Wipe down the shelves to get rid of any crumbs. As you put things back, check the expiration dates. Group similar items together. All your baking supplies can go on one shelf, and all your canned goods on another. A tidy pantry makes cooking meals much more enjoyable.
DIY: “Everything” Holiday Spice Mix
Use up all the leftover bits from your holiday spices by creating your own unique baking spice blend.
What You Will Need:
- A small, clean jar with a lid
- Leftover ground spices like cinnamon, nutmeg, cloves, and ginger
- A small bowl and a spoon
Instructions:
- Gather Your Spices: Find all your containers of holiday spices that only have a little bit left in them.
- Measure and Mix: In your small bowl, combine the spices. A good starting mix is: 4 teaspoons of cinnamon, 2 teaspoons of ginger, 1 teaspoon of cloves, and 1/2 teaspoon of nutmeg. You can change this based on what you have.
- Stir Well: Use your spoon to mix all the spices together very well. You want the color to be even throughout the mix.
- Jar It Up: Carefully pour your new spice mix into the clean, dry jar.
- Label It: Make a small label for your jar. Write “Holiday Spice Mix” on it and tape it to the jar.
- Use It: You can use this mix in place of cinnamon in recipes. It’s delicious sprinkled on oatmeal, in apple pie, or mixed into pancake batter.
9. Smart Ornament Storage Solutions

Packing away the ornaments is the final step in saying goodbye to Christmas for the year. It can be tempting to just throw them all in a box. But this leads to broken treasures and tangled hooks next December. Taking a little extra time now saves you from future frustration.
Carefully wrapping each ornament shows that you value these memories. Proper storage protects them. When you open the box next year, you will be greeted with intact, beautiful decorations. It is a gift you give to your future self.
DIY: Cardboard Ornament Dividers
Protect your fragile ornaments by making your own simple dividers for your storage box.
What You Will Need:
- A storage box
- Thin cardboard (like from gift boxes or empty cereal boxes)
- A ruler
- A pencil
- Scissors
Instructions:
- Measure Your Box: Use your ruler to measure the length and the width of the inside of your box.
- Cut the Main Pieces: Cut two pieces of cardboard. They should be as long as the box’s length, and as tall as you want each section to be (usually 3-4 inches is good). Cut two more pieces that are the same height, but as long as the box’s width.
- Cut the Slits: Take your two long pieces. On both pieces, use your pencil to mark the center. Now cut a slit from the top edge down to that center mark. The slit should be just wide enough for the cardboard to slide through.
- Cut More Slits: Now take your two shorter pieces. Mark the center on these as well. This time, cut a slit from the bottom edge up to the center mark.
- Assemble the Grid: Slide the pieces together. The long pieces and short pieces should fit together at the slits, like puzzle pieces. They will form a cross (+) shape.
- Place in Box: Put your new divider grid inside the storage box. You now have four separate sections to safely place your ornaments. You can make more complex grids for more sections if you need them.
10. The Final Leftover Feast

The refrigerator is often the last frontier of holiday clutter. It is filled with containers of turkey, mashed potatoes, and cranberry sauce. Before you can clean and organize it, you need to deal with the food. Don’t let it go to waste.
Declare one night “Leftover Finale Night.” Make it a fun, buffet-style meal. Let everyone pick and choose their favorites. It is a low-effort dinner for you. More importantly, it clears out the fridge. This simple meal is the first step to getting your kitchen, and your life, back in order.
DIY: Leftover Remix Bowls
Turn your holiday leftovers into a fun, new meal by creating personalized bowls for everyone in the family.
What You Will Need:
- All your holiday leftovers (turkey, ham, mashed potatoes, stuffing, veggies, gravy, etc.)
- A bowl for each person
- Spoons for serving
Instructions:
- Heat Everything Up: Warm up all the different leftovers in the microwave or on the stovetop.
- Set Up a Buffet: Place all the containers of warm food on the counter or your kitchen table. This is your remix bar.
- Build Your Bowl: Give everyone in the family a bowl. Let them go down the line and build their own creation.
- Start with a Base: A good way to start is with a scoop of mashed potatoes or stuffing at the bottom of the bowl.
- Add the Toppings: Next, add the other items. A little bit of turkey, some green beans, a spoonful of corn. Be creative and mix things that you think will taste good together.
- Top it Off: Finish your bowl with a drizzle of warm gravy or a dollop of cranberry sauce on top. Everyone gets to eat their own unique creation. It is a delicious way to make sure no food goes to waste.
11. Conquer the Clothing Chaos

You open a drawer and it will not close. Piles of clothes sit on the floor, waiting to be put away. The closet is full. This is a common scene after Christmas, when new clothes arrive without a place to live. It can make you feel like you have nothing to wear, even with all the choices.
Take a deep breath and pull everything out. Make piles for keeping, donating, and storing. Be honest about what you will wear again. This process is about making your daily routine easier. An organized closet saves you time and stress every single morning.
DIY: No-Cost Drawer Dividers
Use empty shoeboxes or other small cardboard boxes to create simple, effective dividers for your drawers.
What You Will Need:
- Empty shoeboxes (lids too) or other small boxes
- Scissors or a box cutter (with adult help)
- A ruler and pencil
Instructions:
- Measure Your Drawer: First, measure the height of the inside of your drawer. You need to know how tall your dividers can be.
- Cut the Boxes: Using your ruler and pencil, mark a line on your shoebox that is the same height as your drawer. Ask an adult to carefully cut the box down to size. You can use both the bottom part and the lid.
- Create Your Layout: Place the cut boxes inside your drawer. Move them around to create different sized sections. You can have a long section for rolled-up shirts and a small square section for socks.
- Fill Them Up: Once you are happy with the layout, take the boxes out and fill them with your clothes.
- Put Them Back: Carefully place the filled dividers back into your drawer. Now everything has its own special spot.
12. Sort Out Holiday Spending

The fun of gift-giving can be followed by the stress of holiday bills. Credit card statements arrive. Bank accounts look a little lower than they did before. This financial clutter can be more stressful than a messy room. It is important to face it directly.
Sit down and review your spending. See where the money went. Make a simple plan to get back on track. This might mean spending less on extras for a few weeks. Organizing your finances brings a sense of control. It is a vital step in starting the new year on a solid foundation.
DIY: “My Savings Goal” Jar
Create a visual reminder of your savings goals. This makes saving money feel like a fun game instead of a chore.
What You Will Need:
- A clean, empty glass jar with a lid
- A piece of paper
- Tape
- Markers or crayons
Instructions:
- Decide on a Goal: First, think of something you want to save for. It could be a new toy, a book, or a special outing.
- Make a Label: Cut a piece of paper to be the label for your jar. Write what you are saving for on it, for example, “My New Bike Fund.”
- Decorate the Label: Use your markers and crayons to decorate the label. You could draw a picture of the item you want.
- Attach the Label: Tape the finished label onto the front of your glass jar.
- Start Saving: Put the jar somewhere you will see it every day. Every time you get some spare change or earn money, put some of it in the jar. Watching the money pile up will make you excited to reach your goal.
13. The Great Toy Takedown

The playroom floor has become a minefield of building blocks and dolls. New toys from Christmas have joined the old ones, creating an overwhelming amount of stuff. For a child, this can be too much. They might not be able to find the toy they actually want to play with.
Turn the cleanup into a game. Challenge your kids to see who can fill a bin the fastest. Work with them to decide which toys they have outgrown. This is a chance to teach them about organization and sharing. A tidy play space encourages more creative and focused play.
DIY: “Toy Jail” for Rotational Playing
Create a fun way to rotate toys so that old toys feel new again and your play area stays less cluttered.
What You Will Need:
- An empty laundry basket or a large storage bin
- A piece of paper
- Markers
Instructions:
- Make the “Jail” Sign: On the piece of paper, write “Toy Jail” in big, bold letters. You can draw some jail bars on it for fun. Tape this sign to the laundry basket or bin.
- Explain the Rules: Tell your kids that any toys left on the floor at the end of the day will go to “Toy Jail” for a little while. This isn’t a punishment, just a place for toys to rest.
- Round Up the Toys: At cleanup time, help your kids gather any toys that are not put away and place them in the Toy Jail bin.
- Bail Them Out: To get a toy out of jail, a child has to “bail it out” by doing a helpful chore, like setting the table or feeding a pet. Or, you can have a rule that they can get one toy out for every one they put away correctly.
- Rotate: This system helps you see which toys are not being played with. If a toy stays in jail for a month, it might be time to donate it.
14. Clear the Entryway Clutter

The front door is a magnet for clutter. After the holidays, it is even worse. Cardboard boxes from online shopping pile up. Bags of items that need to be returned sit waiting. Winter boots, scarves, and gloves get dropped in a heap. This mess is the first thing you see when you come home.
Spend just 15 minutes to reclaim this space. Break down all the cardboard boxes for recycling. Put the boots on a mat and the scarves in a basket. A clear entryway makes your whole home feel more peaceful. It is a small change that has a big impact on your daily mood.
DIY: Designated “Returns” Box
Never forget to return an item again by creating a special, decorated box to hold everything that needs to go back to the store.
What You Will Need:
- A medium-sized cardboard box with a lid or flaps
- Paper to cover the box (wrapping paper or craft paper)
- Tape and scissors
- A marker
Instructions:
- Wrap Your Box: Cover the box with paper to make it look nice. This makes it feel like an official part of your home instead of just a plain cardboard box.
- Label it Clearly: Use your marker to write “Store Returns” in large letters on at least two sides of the box.
- List the Stores: On the lid or top flaps, you can write the names of the stores you need to visit, like “Target,” “Walmart,” or “Kohl’s.”
- Add the Receipts: When you put an item in the box, tape the receipt right to it or place it in a ziplock bag inside the box.
- Find a Home: Place the box near your front door or in the trunk of your car. Now, whenever you are heading out, you can quickly grab the box and make your returns without having to hunt for everything.
15. Untangle and Test the Lights

One of the most frustrating holiday tasks is dealing with tangled strands of Christmas lights. Even worse is pulling them out next year only to find that half of them do not work. Taking a few minutes to check them now will prevent a major headache later.
As you take the lights off the tree, plug each strand in one last time. If a strand is broken, decide if it is worth fixing or if it is time to recycle it. For the ones that work, wrap them up neatly. This simple check is a gift of a stress-free decorating day to your future self.
DIY: Cardboard Light Organizer
Prevent your Christmas lights from turning into a tangled mess by using a simple piece of cardboard.
What You Will Need:
- A sturdy piece of cardboard (from a shipping box is great)
- Scissors
Instructions:
- Cut Your Cardboard: Cut the cardboard into a rectangle. A good size is about 12 inches long and 8 inches wide, but you can make it any size that fits your storage box.
- Cut a Slit: On one of the shorter ends of the rectangle, cut a small slit about one inch deep. This will be where you secure the start of your light strand.
- Start Wrapping: Find the end of your light strand (the plug). Tuck the wire into the slit you just cut to hold it in place.
- Wrap Neatly: Begin wrapping the lights around the cardboard, from one end to the other, like you are wrapping thread around a spool. Do not wrap them too tightly.
- Secure the End: When you get to the other end of the lights, you can either cut another slit to tuck the wire into, or just use a small piece of tape to hold it in place. Now your lights are ready to be stored neatly.
16. Reclaim the Linen Closet

Holiday guests often mean you use extra sheets, towels, and blankets. After everything is washed, it all gets shoved back into the linen closet. Soon, the shelves are overflowing. Towels are falling out, and you can’t find a matching pillowcase.
Empty each shelf one at a time. Refold everything into neat, tidy piles. Put matching sheet sets together, with the flat sheet, fitted sheet, and pillowcases all folded inside one of the set’s pillowcases. This keeps them together. A clean linen closet makes changing beds or grabbing a fresh towel a simple, calm task.
DIY: How to Fold a Fitted Sheet
Learn the simple trick to folding a fitted sheet so it becomes a neat, flat rectangle that is easy to store.
What You Will Need:
- One clean, fitted sheet
Instructions:
- The First Tuck: Stand up and hold the sheet in front of you. Put one hand in each of the two top corners of the sheet, with the elastic edge facing you.
- The Corner Flip: Bring your right hand over to your left hand. Flip the right corner over the left corner, so they are tucked inside each other. Now both corners are on your left hand.
- The Bottom Tuck: Run your right hand down the side of the sheet to find the next corner hanging in front. Pick it up and tuck it up into the first two corners that are already on your left hand.
- The Final Corner: Find the last corner hanging down. Pick it up with your right hand and flip it over your left hand, tucking all the other corners inside it.
- Make it Flat: All four corners should now be nested together on your left hand. Lay the sheet down on a flat surface, like a bed or a table. You can now fold it into a neat square or rectangle.
17. Give the Christmas Tree a New Purpose

The Christmas tree was the heart of your home for weeks. Now, its needles are starting to drop. Taking down the tree can feel a little sad, but it does not have to be wasteful. Many communities have tree recycling programs. They turn old trees into mulch for parks.
Giving your tree a second life is an eco-friendly way to end the holiday season. It teaches kids about recycling and caring for the environment. Check your local town or city’s website for information on their “tree-cycle” program. It is a simple act that benefits the whole community.
DIY: Pine Needle Potpourri
Keep the fresh scent of Christmas around a little longer by making simple potpourri sachets from your tree’s needles.
What You Will Need:
- A handful of pine needles from your tree (make sure they are dry)
- Other festive spices like a cinnamon stick or a few whole cloves (optional)
- A small fabric bag with a drawstring, or a coffee filter and a ribbon
Instructions:
- Gather Your Needles: Gently pull some of the needles off a branch of your Christmas tree. Put them in a small bowl.
- Add Some Spice: If you have them, break a cinnamon stick into small pieces and add it to the needles. You can also add a few whole cloves for an extra warm scent. Gently mix them together with your fingers.
- Fill Your Sachet: Spoon the pine needle mixture into your small fabric bag and pull the drawstring tight. If you are using a coffee filter, spoon the mix into the center, gather the edges up, and tie it tightly with a ribbon.
- Find a Spot: You have made a potpourri sachet! You can place it in a drawer to make your socks smell nice, or put it in a closet to keep it smelling fresh like a winter forest.
18. Complete the Thank-You Notes

In the excitement of opening presents, it is easy to forget the final step: saying thank you. A stack of unwritten thank-you cards can feel like homework. This small task can create mental clutter, nagging at you until it is done.
Set aside a quiet hour to write your notes. A heartfelt, simple message is all that is needed. Involving your children helps them learn about gratitude. Finishing this task feels good. It honors the generosity of your loved ones and clears your conscience so you can fully enjoy the new year.
DIY: Potato Stamp Thank-You Cards
Make your own unique thank-you cards using a potato to create fun, simple stamps.
What You Will Need:
- A potato
- A knife (for an adult to use)
- A pen or a small cookie cutter
- Washable paint and a paper plate
- Blank cards or folded construction paper
Instructions:
- Prepare the Potato: Ask an adult to cut a potato in half. The flat, cut side will be your stamp.
- Create Your Shape: Press a small cookie cutter (like a star or a heart) into the flat side of the potato. Ask an adult to carefully cut around the shape, leaving the star or heart sticking out. You can also have an adult carve a simple shape, like a triangle to make a tree.
- Get Your Paint Ready: Squeeze a little bit of paint onto a paper plate.
- Stamp Your Card: Dip the potato stamp into the paint, making sure the shape is evenly coated. Press it firmly onto the front of your blank card. Lift it straight up to see your design.
- Let it Dry: Make as many stamped cards as you need. Let them dry completely before you write your thank-you message inside.
19. Tackle a “Before and After” Zone

Every home has that one spot. It could be the garage, the basement, or a spare room. It is the place where things go when they do not have another home. After the holidays, this area is likely overflowing. Last year’s mess has been joined by this year’s boxes and clutter.
Choose one of these zones to completely transform. Take a “before” picture to motivate you. Put on some music and get to work. Sort, purge, and organize until the space is clear. The satisfaction of the “after” picture is a powerful reward. It proves you can make a big change.
DIY: Clear and Labeled Storage Bins
The secret to a truly organized space is a good system. Using clear bins with big labels lets you see what you have at a glance.
What You Will Need:
- Clear plastic storage bins with lids
- Large index cards or pieces of paper
- A thick, dark marker
- Clear packing tape
Instructions:
- Sort Your Items: First, sort all your stuff into categories. Put all the sports equipment in one pile, all the leftover holiday decorations in another, and all the tools in a third.
- Fill the Bins: Place each category of items into its own clear bin. Do not overfill the bins; you should be able to get the lid on easily.
- Create Big Labels: Take your marker and an index card. In very large, clear letters, write what is in the bin. For example: “Basketballs & Soccer,” “Extra Christmas Lights,” or “Painting Supplies.”
- Attach the Labels: Tape the label to the inside of the bin, facing out. This protects the label from getting dirty or falling off.
- Stack and Store: Now you can stack your bins. Because they are clear and have big labels, you will be able to find exactly what you need without having to open every single one.
20. Curate Your Ornament Collection

Every ornament on the tree tells a story. Some are from childhood. Some were gifts. Some mark a special year. As you pack them away, take the time to appreciate these memories. This is also a good moment to decide which stories have come to an end.
You do not have to keep every single ornament forever. If one is broken, or no longer has meaning for your family, it is okay to let it go. This makes room for new memories. It ensures your collection remains a treasured reflection of your family’s journey.
DIY: “Time Capsule” Ornament
Create a special new ornament that holds a memory from this past Christmas.
What You Will Need:
- A clear, plastic or glass fillable ornament (you can find these at a craft store)
- A small piece of paper and a pen
- Tiny items to put inside
Instructions:
- Write a Memory: On the small piece of paper, write down a favorite memory from this Christmas. Was it a funny joke someone told? A special gift you received? A delicious meal you ate? Roll the paper up very tightly, like a tiny scroll, and tie it with a piece of thread.
- Gather Your Trinkets: Find tiny things that represent the year. It could be a small seashell from a summer vacation, a tiny charm, some colorful confetti from a birthday party, or a few pretty beads.
- Fill Your Ornament: Carefully take the top off the ornament. Gently place your rolled-up memory and your tiny trinkets inside. Be careful not to crack the ornament.
- Close and Date It: Put the top back on the ornament securely. Using a permanent marker, you can write the year on the outside of the ornament. Now you have a tiny time capsule that you can look at every year when you decorate the tree.
21. Find a Home for Novelty Gifts

Some gifts are meant to make you laugh. That giant fish pillow or singing hamster brings a moment of pure joy. Then, the laughter fades, and you are left with the object. These novelty items are fun, but they can be awkward to store. You want to keep the happy memory, but you do not want it to become household clutter.
Instead of hiding these quirky treasures in a closet, give them a place of honor. Creating a specific spot for fun and unusual items turns them from clutter into a collection. It is a way to celebrate the fun-loving people in your life. This keeps the memory alive without letting it take over your living space.
DIY: The “Shelf of Fame”
Designate one shelf in your home as the “Shelf of Fame” where all your fun, quirky, and novelty gifts can be displayed with pride.
What You Will Need:
- An empty shelf (in a bookcase, on a wall, or in a cabinet)
- A piece of paper and a marker
- A fun frame (optional)
Instructions:
- Choose Your Shelf: Find a shelf that is a little out of the way, but still visible. A shelf in a study, a playroom, or a den is a great choice.
- Make it Official: Write “The Shelf of Fame” on a piece of paper. You can decorate it with stars or smiley faces. You can even put this sign in a fun picture frame and place it on the shelf.
- Arrange Your Treasures: Gather up all your novelty gifts. This could be funny mugs, silly trophies, or that giant fish pillow. Arrange them on the shelf in a way that makes you smile.
- Rotate the Display: Just like a real museum, you can change the display every few months. Put some items into storage and bring out others. This keeps the shelf interesting and prevents it from becoming too crowded.
22. Audit Your Kitchen Gadgets

The holidays often bring shiny new gadgets for the kitchen. An air fryer, a waffle maker, or a fancy new blender. Soon, your countertops are crowded. You might find you have three different tools that all do a similar job. It is time to decide which appliances have earned their spot.
Look at each gadget and ask yourself how often you really use it. Some single-purpose items might not be worth the space they take up. Keeping your most-used appliances easily accessible makes cooking more efficient. A clutter-free counter is also much easier to clean.
DIY: Appliance Garage
Create a designated home for your small kitchen appliances to keep your counters clear and your kitchen organized.
What You Will Need:
- An empty lower kitchen cabinet
- A small wire shelf or rack (optional)
Instructions:
- Pick Your Spot: Choose a cabinet that is easy to reach. A lower cabinet is often a good choice for heavier items like stand mixers.
- Clear it Out: Empty the cabinet completely and give it a good wipe down.
- Categorize Your Gadgets: Group your appliances by how often you use them. The coffee maker you use every day should be easy to grab. The ice cream maker you use twice a year can go in the back.
- Add a Shelf: If you have a lot of smaller items, a small wire rack can double your storage space. You can put the toaster on the bottom and the waffle iron on top.
- Load it Up: Place your appliances neatly inside their new “garage.” Now, when you need one, you know exactly where to find it. When you are done, it has a home to go back to.
23. Defeat the Dreaded Junk Drawer

Every home has one. That one drawer filled with a random collection of items. Rubber bands, old batteries, pens that may or may not work, and a single playing card. After the holidays, this drawer is usually worse than ever. It is the landing spot for all the little odds and ends.
Tackling this small space can have a big payoff. A clean junk drawer can feel like a major victory. It is about creating order in a small pocket of chaos. When you can actually find a rubber band when you need one, you will be glad you took on the challenge.
DIY: 5-Minute Drawer Dividers
Use small boxes you already have to create instant compartments and bring order to your junk drawer.
What You Will Need:
- Your messy junk drawer
- Several small, empty boxes (like tea boxes, checkbook boxes, or small gift boxes)
- Scissors
Instructions:
- Empty the Drawer: Take everything out of the junk drawer. Quickly sort items into piles: things to keep, and things to throw away (like those dried-up pens).
- Find Your Boxes: Gather some small, sturdy boxes. If they are too tall for the drawer, simply use scissors to cut them down to size.
- Arrange the Dividers: Place the empty boxes inside the drawer. Think of it like a puzzle. Arrange them to create different sized sections for your items.
- Fill it Back Up: Put your items back into the drawer, but this time, give everything a home. All the batteries go in one box, all the paper clips in another, and so on. Now your drawer is organized and easy to use.
24. Unpack and Reset the Guest Room

Whether you traveled for the holidays or had family come to stay, a bedroom can quickly turn into a disaster zone. Suitcases explode, piles of new gifts appear, and wrapping paper covers the floor. The once-calm space now feels chaotic. It is time to reclaim the room.
Focus on one task at a time. First, unpack all the suitcases. Then, find a home for all the new gifts. Finally, gather all the trash and recycling. Restoring order to the room helps you feel settled and ready to get back into your normal routine. A peaceful bedroom is a gift to yourself.
DIY: Gift Wrap Tube Corral
Keep your leftover rolls of wrapping paper from unspooling and getting crushed in the closet with this simple trick.
What You Will Need:
- An empty paper towel tube
- Scissors
- Your rolls of wrapping paper
Instructions:
- Prepare Your Tube: Take the empty paper towel tube.
- Cut the Tube: Carefully use scissors to cut the tube open, from one end to the other, in a straight line. You have now made a long cuff.
- Roll and Cinch: Roll up one of your leftover wrapping paper rolls as tightly as you can.
- Snap on the Corral: Take your cut paper towel tube and snap it around the center of the wrapping paper roll. The cardboard will act like a giant clip, holding the paper securely in place.
- Store Neatly: You can now stand all your wrapping paper rolls up in a tall basket or the corner of a closet without them unrolling and getting torn.
25. Purge the Receipt Avalanche

During the holiday season, your purse or wallet can quickly become a filing cabinet for receipts. Every shopping trip adds another slip of paper. Soon, you are digging through a crumpled mess just to find your debit card. Most of these receipts are no longer needed.
Take five minutes and dump them all out on a table. Quickly go through the pile. Keep only the receipts for big-ticket items that have a warranty, or for things you think you might need to return. The rest can go straight into the recycling bin. This simple purge feels surprisingly freeing.
DIY: The “Scan and Toss” Method
Keep important receipts without the physical clutter by saving a digital copy on your phone.
What You Will Need:
- A smartphone with a camera
- Your important receipts
Instructions:
- Find a Flat Surface: Lay the receipt you want to save on a flat, well-lit surface, like a kitchen counter.
- Take a Clear Picture: Open your phone’s camera app. Hold the phone directly above the receipt and take a clear, focused picture. Make sure you can read all the words.
- Create a Special Album: Go into your phone’s photo gallery. Create a new photo album and name it “Receipts” or “Warranties.”
- Move the Photo: Move the picture of the receipt you just took into your new “Receipts” album.
- Toss the Paper: Now that you have a safe digital copy, you can throw the paper receipt away. This keeps your records organized and your wallet clean.
26. Detox the Medicine Cabinet

The medicine cabinet is a place that is easy to ignore. It slowly fills up with things you rarely use. You might find expired cold medicine from three winters ago, or a bottle of sunscreen from a long-forgotten vacation. Now is a great time for a clean-out.
Take everything off the shelves. Check the expiration date on every single item. Be sure to dispose of old medications safely; many pharmacies have take-back programs. A clean and organized medicine cabinet means you can find the bandages quickly when you actually need them.
DIY: “Use First” Basket
Avoid having to throw away expired items by creating a simple system to use up products before they go bad.
What You Will Need:
- A small basket, box, or container that fits in your medicine cabinet
- A piece of paper and a pen
- Tape
Instructions:
- Make a Label: On the piece of paper, write “Use Me First!” Tape this label to your small basket or container.
- Check Your Dates: As you organize your medicine cabinet, look at the expiration dates on items like toothpaste, lotions, and ointments.
- Fill the Basket: Find the items that are going to expire the soonest. Place these products in your “Use Me First!” basket.
- Put it Front and Center: Place the basket in the very front of your medicine cabinet shelf. This way, every time you open the door, you will be reminded to use these items before you open a brand new one.
27. Excavate the Freezer

Your freezer works hard during the holidays, storing everything from the Thanksgiving turkey to Christmas cookie dough. Now, it is likely a frozen tundra. Layers of frost cover mystery containers. You are not sure what is in them or how long they have been there. It is time for a deep-sea dive into the deep freeze.
Pick a day to empty the freezer completely. Let it defrost and give the inside a good cleaning. As you put items back, label everything clearly with what it is and the date you froze it. An organized freezer saves you money because you will waste less food.
DIY: Freezer Inventory List
Keep track of what is in your freezer so you can find things easily and use them before they get too old.
What You Will Need:
- A magnetic whiteboard that can stick to your freezer door (or a piece of paper and a magnet)
- A dry-erase marker
Instructions:
- Stick it On: Place your magnetic whiteboard on the front of your freezer door.
- Take Stock: As you are putting your cleaned-out freezer back together, write down what you are putting inside on the whiteboard.
- Be Specific: Do not just write “chicken.” Write “Chicken Breasts (4)” or “Chicken Thighs (6).” This helps you know how much you have. You can also add the date it was frozen.
- Erase as You Go: When you take something out of the freezer to cook, erase it from the list. Now, with just a quick look, you will always know what you have for dinner.
28. Detail Your Car’s Interior

During the busy holiday season, your car can become a second home and a mobile trash can. It collects empty coffee cups, shopping bags, and crumbs from quick meals on the go. Pine needles from the Christmas tree might still be on the floor mats. A clean car can make your daily drive feel less stressful.
You do not need to pay for a professional detail. Just 20 minutes with a vacuum and a trash bag can make a world of difference. Clear out all the garbage, shake out the floor mats, and wipe down the dashboard. It is a simple reset that makes your car feel new again.
DIY: Car “Trash Can” Liner
Create a simple, reusable trash can for your car to keep it from getting cluttered.
What You Will Need:
- An empty plastic cereal container with a lid (the kind with a flip-top opening)
- A few plastic grocery bags
Instructions:
- Prepare Your Container: Make sure your empty cereal container is clean and dry.
- Line It Up: Open up one of the plastic grocery bags and use it to line the inside of the cereal container, just like a regular trash can. You can tuck the bag handles around the rim.
- Add More Liners: Place two or three more folded grocery bags in the bottom of the container, under the first bag.
- Place it in Your Car: Put the container on the floor of the passenger side or in the back seat. You can use the flip-top lid to easily toss in small pieces of trash.
- Easy Emptying: When the top bag is full, just pull it out, tie it up, and throw it away. A fresh liner will be waiting for you right underneath.
29. Pack a “Next Christmas” Starter Box

Imagine this: It is the first decorating day next winter. Instead of opening ten different boxes to find what you need, you open just one. This “starter box” has everything you need to get the holiday magic going. Preparing this box now is a wonderful gift to your future, less-stressed self.
This is not a storage box; it is a “getting started” kit. Think about the very first things you do when you decorate. By packing these items together, you create a calm and joyful start to the next holiday season. It turns a potentially chaotic day into a smooth and easy tradition.
DIY: Building Your “Open Me First” Box
Assemble a special box with all the essentials you will need to kick off next year’s holiday decorating.
What You Will Need:
- One empty, medium-sized box
- A thick marker
Instructions:
- Label it Big: On all four sides and the top of the box, use your marker to write “OPEN ME FIRST!” You could also write “Christmas Starter Kit.”
- Gather the Essentials: Think about the first hour of decorating. What do you need? Gather these items. Good things to include are:
- The Christmas tree stand and screws
- A pair of scissors or a box cutter
- A bag of ornament hooks
- The first strand of lights you put on the tree
- Your tree skirt
- Add Some Fun: Make it a real celebration in a box. Add a special holiday candle and a box of matches, your favorite Christmas CD or a note with the name of a holiday playlist, and maybe some candy canes.
- Seal and Store: Pack everything neatly inside, seal the box, and store it with your other decorations. Make sure it is easy to get to.
30. Launch an Email Unsubscribe Blitz

You signed up for the mailing list to get 15% off a gift. You did it again for free shipping. Now, your email inbox is buried in a daily avalanche of promotional emails. This digital clutter demands your attention and drains your energy. It is time to take back your inbox.
Set a timer for 15 minutes. Open your email and go on an “unsubscribe” mission. For every marketing email, scroll to the very bottom and click that tiny “unsubscribe” link. Do not just delete the email; stop it from ever coming back. You will be amazed at how much calmer your digital life becomes.
DIY: The “One-Click Rule”
Adopt a simple, new habit to keep your email inbox clean all year long.
What You Will Need:
- Your email inbox
Instructions:
- The New Habit: From now on, whenever a promotional email you do not want arrives in your inbox, you have to follow one simple rule. You are not allowed to just delete it.
- Scroll and Find: Before you hit delete, quickly scroll to the very bottom of the email.
- Find the Link: Look for the words “Unsubscribe” or “Manage Email Preferences.” It is usually very small.
- Click and Confirm: Click that link. You might be taken to a new page where you have to confirm. It only takes one extra click.
- Now You Can Delete: Once you have unsubscribed, you can delete the email with the satisfaction of knowing you will not get another one from that company again.
31. Tidy Up Crafting Supplies

After a flurry of holiday crafts, your art area might look like a glitter bomb exploded. Bits of paper, stray beads, and half-used glue bottles cover the table. While creativity is wonderful, the aftermath can be overwhelming. It is hard to feel inspired when your supplies are in disarray.
Take some time to gather all the scattered items. Put glitters back in their jars, pencils in their holder, and paper in a neat stack. This cleanup is not about stifling creativity. It is about making it easier to start your next project. An organized craft space makes future art sessions much more enjoyable.
DIY: Recycled Jar Organizer
Turn old jars and containers into a pretty and useful storage system for all your small craft supplies.
What You Will Need:
- Empty glass jars (like jam or pickle jars) with lids
- Empty plastic containers (like yogurt cups or butter tubs)
- Markers or paint
- Optional: ribbon, fabric scraps, or decorative paper
Instructions:
- Clean Your Jars: Wash and dry all your empty jars and containers very well. Make sure there is no food left inside.
- Decorate Them: This is the fun part! You can draw pretty designs on the jars with markers. You can also paint them. If you want, glue fabric scraps or decorative paper around the outside of the jars.
- Sort Your Supplies: Go through all your craft items. Put beads in one jar, buttons in another, and googly eyes in a third. Use the plastic containers for pencils, paintbrushes, or glue sticks.
- Label (Optional): If you want to be super organized, write a small label for each jar, like “Buttons” or “Glitter.”
- Place on Shelf: Arrange your new, pretty organizers on a shelf or in a cabinet. Now everything has a home, and you can easily find what you need for your next craft project.
32. Reconnect with Sentimental Items

Some items in your home hold deep meaning. A small bowl, a piece of jewelry, or a framed photo. These are not clutter; they are treasures. Yet, even treasures can get lost in the shuffle if you have too many. After the holiday buzz, take a moment to look at these special things.
Hold each sentimental item. Remember the story it tells. Ask yourself if it still brings you joy. If it does, find a special place to display it. If its meaning has faded, it is okay to let it go. This process honors your past. It also makes sure the items you keep truly resonate with your heart.
DIY: Memory Box for Keepsakes
Create a special box to hold your most cherished sentimental items, keeping them safe and organized.
What You Will Need:
- A sturdy box with a lid (a shoebox or a decorative storage box)
- Fabric scraps, decorative paper, or paint
- Glue or tape
- Pen and paper
Instructions:
- Decorate Your Box: Make your memory box look special. You can cover it with your favorite fabric or decorative paper, or paint it a pretty color.
- Label It: On the outside of the box, write “My Memory Box” or “Special Keepsakes.”
- Choose Your Treasures: Go through your sentimental items. Pick out the ones that are small enough to fit in the box and that mean the most to you. This could be old letters, small trinkets, or special photos.
- Add a Story Tag (Optional): For each item, you can write a tiny note about why it is special to you and the memory it holds. Tie the note with a string to the item.
- Place Inside: Carefully put your chosen keepsakes into the box. You can wrap very fragile items in soft tissue paper.
- Store It: Keep your memory box in a safe place, like on a shelf in your closet or under your bed. When you open it, you will find all your happy memories waiting for you.
33. Thoughtful Nativity Storage

Your nativity scene is more than just a decoration; it is a symbol of the holiday season’s true meaning. Each piece is often fragile and holds special memories. Packing it away incorrectly can lead to chipped figures or broken stable roofs. This is a task that deserves care and attention.
Dedicate time to wrap each figure separately. Place them gently in a sturdy box, ensuring they will be safe until next year. This respectful storage preserves their beauty. It means that next December, your family can unbox these cherished pieces and feel the spirit of Christmas all over again.
DIY: Egg Carton Nativity Protector
Use empty egg cartons to create custom, safe little homes for your smaller nativity figures.
What You Will Need:
- Empty cardboard egg cartons
- Scissors
- Tissue paper or soft cloth scraps
- Your nativity figures
Instructions:
- Get Your Egg Cartons: Collect a few empty cardboard egg cartons. Make sure they are clean and dry.
- Cut the Lids Off (Optional): You can cut the lid off the egg carton if it makes it easier to work with.
- Wrap Each Figure: Take a small nativity figure, like a sheep or a shepherd. Wrap it gently in a piece of soft tissue paper or a cloth scrap. This adds an extra layer of protection.
- Nestle Them In: Place one wrapped figure into each cup of the egg carton. If a figure is too big for one cup, you can use two cups and cut a divider.
- Stack or Store: Once all your figures are safely tucked into the egg cartons, you can place the cartons in a larger storage box. They will be protected from bumping into each other and stay safe until next year.
34. Donate Unused Decor

Sometimes, holiday decorations no longer fit your style. You might have received a new wreath, or perhaps your tastes have changed. These items are still in good condition. They just do not have a place in your home anymore. Instead of letting them gather dust, give them a new life.
Donating decorations allows another family to enjoy them. It is an act of generosity that benefits others. This clears your clutter. It also frees up space for the decorations you truly love and use. It is a win for your home and a win for your community.
DIY: “Give Away” Donation Box
Create a visible box specifically for items you want to donate, making the process easy and consistent.
What You Will Need:
- A sturdy cardboard box
- A marker
- Tape
Instructions:
- Label Your Box: On the outside of the box, use a marker to clearly write “Donation Box.” You can write it on all sides so you can always see it.
- Place It Prominently: Find a spot in your home where the box is easy to see and get to. This could be in a spare closet, the garage, or even a corner of a room.
- Start Filling It: Whenever you find a decoration (or any item) that you no longer need or love, put it straight into the Donation Box.
- Set a Schedule: Decide on a schedule for emptying the box. Maybe once a month, or whenever it gets full. Then, take the box to a local charity or donation center.
35. Rebox Seasonal Decor

Packing away holiday decorations can feel like a chore. It is tempting to just shove everything into any available box. However, this often leads to damage and disorganization. The goal is to make next year’s decorating a pleasant experience, not a frustrating hunt.
Invest in sturdy, labeled boxes specifically for seasonal items. Group similar decorations together. All the table runners in one box, all the garlands in another. Proper packing protects your items. It ensures they are ready to sparkle again next year, making the transition much smoother.
DIY: Tissue Paper Wrapped Ornaments
Protect your delicate ornaments by giving each one a soft, personalized wrap using tissue paper.
What You Will Need:
- Delicate ornaments
- Tissue paper (leftover from gifts is great!)
- A storage box
Instructions:
- Prepare Your Tissue: Tear or cut sheets of tissue paper into squares. Each square should be big enough to completely wrap one ornament.
- Wrap the Ornament: Take one ornament. Place it in the center of a tissue paper square. Gently crinkle the tissue paper around the ornament until it is fully covered.
- Secure the Wrap: You do not need tape. Just gently twist the ends of the tissue paper to keep it secure around the ornament.
- Place in Box: Carefully place the wrapped ornament into your storage box. Fill the box with as many wrapped ornaments as you can, making sure they are not squished. You can add more crumpled tissue paper to fill any empty spaces.
- Label: Label the outside of the box with “Fragile Ornaments” and the year.
36. Refresh Your Living Space

After weeks of festive clutter, your home might feel heavy. The decorations are gone, but a lingering sense of disarray might remain. The goal is to bring back a feeling of openness and calm. It is about clearing not just the physical space, but the mental space too.
Open the windows to let in fresh air. Wipe down surfaces. Bring in a simple vase of fresh flowers. These small actions create a huge shift in energy. They signal a new beginning. A refreshed living space helps you welcome the new year with a clear mind and a sense of tranquility.
DIY: Citrus Peel Air Freshener
Use leftover citrus peels to create a natural, fresh scent for your home that is much nicer than chemical sprays.
What You Will Need:
- Peels from oranges, lemons, or grapefruit
- A small pot
- Water
- Optional: A cinnamon stick or a few cloves
Instructions:
- Gather Your Peels: After you eat an orange or lemon, do not throw away the peel! Save it.
- Fill the Pot: Put the citrus peels into a small pot. Fill the pot with water until the peels are covered.
- Add Spices (Optional): For an extra cozy scent, you can add one cinnamon stick or a few whole cloves to the water.
- Simmer Gently: Ask an adult to help you place the pot on the stove over very low heat. Let the water gently simmer (just tiny bubbles). Do not let it boil dry.
- Enjoy the Scent: As it simmers, a lovely, natural smell will fill your home. Keep an eye on the water level and add more if needed. This is a great way to make your house smell clean and inviting.
37. Restore Sofa Serenity

Your sofa is the center of your living room. During the holidays, it becomes extra seating, a fort for kids, and a landing zone for blankets. After all that use, it might feel a little disheveled. Pillows are squished, and blankets are askew. It is time to bring back its calm and inviting look.
Fluff up all the cushions and pillows. Straighten any throw blankets and drape them neatly. If you have a basket for magazines or remotes, make sure it is tidy. A neat and inviting sofa is key to a comfortable and relaxing living room. It makes your space feel truly homey.
DIY: Fluffy Pillow Refresh
Bring your squished sofa pillows back to life with a quick and easy fluffing technique.
What You Will Need:
- Your sofa throw pillows
Instructions:
- The “Karate Chop” Method: Pick up one pillow. Hold it by two opposite corners and give it a few good shakes.
- Chop it: Now, give the middle of the pillow a gentle “karate chop” with the side of your hand.
- Fluff the Sides: Gently press in on the sides of the pillow, then release. Do this all around the pillow.
- Repeat: Do this for all your sofa pillows. You will notice they look much plumper and more inviting.
38. Back Up Your Digital Memories

You captured countless photos and videos over the holidays. These digital files are precious memories. However, if they only live on your phone or computer, you risk losing them. A device crash or accidental deletion can erase weeks of happy moments. Backing them up is a simple safeguard.
External hard drives or cloud storage services offer an easy way to protect your photos. Set aside time to transfer all your holiday media. This creates a duplicate copy, giving you peace of mind. Knowing your memories are safe lets you enjoy them without worry.
DIY: Simple Photo Backup System
Create an easy system to save your photos so you never lose your precious memories.
What You Will Need:
- A computer
- An external hard drive (a small box-like device that plugs into your computer)
- Your phone or camera with photos
Instructions:
- Connect Your Device: Plug your phone or camera into your computer using its USB cable.
- Plug in the Hard Drive: Plug your external hard drive into your computer. It should show up as a new drive (like “External Drive” or “Backup Drive”).
- Create a Folder: On your external hard drive, create a new folder. Name it “Family Photos” or “My Memories.”
- Create Year Folders: Inside “Family Photos,” make another folder for the current year, like “2024 Photos.”
- Copy Your Photos: Open the folder on your phone or camera that has your holiday pictures. Select all the pictures you want to save. Drag them and drop them into the “2024 Photos” folder on your external hard drive. This makes a copy.
- Check and Disconnect: Once all the photos are copied, make sure they are there. Then, safely disconnect your phone and your external hard drive. You now have a backup of your memories!
39. Declutter the Bookcase

Books often get shuffled around during the holidays. New gift books might have been added. Old favorites might have been pulled out and then left in a stack. An overflowing bookcase can make a room feel cramped and untidy. It is time to give your literary collection some order.
Take all the books off one shelf at a time. Dust the shelf. As you put the books back, arrange them in a way that makes sense to you. By genre, by author, or even by color. This makes your bookcase look appealing. It also makes it easier to find your next great read.
DIY: Book Nook Organizer
Create a special spot for your current reads, making it easy to find your book and keeping your table clear.
What You Will Need:
- A small, sturdy box (like a shoebox or a small wooden crate)
- Decorative paper or paint
- Glue or tape
- A pen and paper
Instructions:
- Decorate Your Box: Make your book nook box look attractive. You can cover it with decorative paper or paint it to match your room.
- Label It: Write “Currently Reading” or “My Book Nook” on the outside of the box.
- Choose a Spot: Find a cozy spot for your book nook. This could be on a bedside table, next to your favorite reading chair, or on a small shelf.
- Fill It Up: Put the book you are currently reading, any magazines you are enjoying, or a small journal into the box.
- Keep it Tidy: When you finish a book, take it out of the box and put it back on the shelf. Then, choose your next book to place in your book nook. This keeps your reading area neat and your current books easy to find.
40. Introduce the “Last Chance Basket”

After a thorough decluttering, you might still have a few items that you are unsure about. You do not want to throw them away, but they do not have a clear home. These lingering items can lead to future clutter. This is where the “Last Chance Basket” comes into play.
Place all your undecided items in this basket. Set a date for review, perhaps in a month or two. If, by that date, you have not used an item or given it a clear home, then it is time to let it go. This method helps you make those final tough decisions. It keeps your home truly free of unwanted items.
DIY: The “Last Chance” Basket Setup
Create a system for items you are unsure about, giving them one last chance before they leave your home.
What You Will Need:
- A medium-sized basket or bin
- A piece of paper and a marker
- Tape
- A timer
Instructions:
- Label Your Basket: On a piece of paper, write “Last Chance Basket” in big letters. You can also write the date you will review the items (e.g., “Review by February 15”). Tape this label to the front of your basket.
- Gather Undecided Items: When you are decluttering and come across something you are not sure about—you do not love it, but you do not want to throw it away yet—put it in this basket.
- Set a Reminder: Put a reminder on your phone or calendar for the review date you wrote on the basket.
- The Review Day: When the review day arrives, go through the basket. If you have not used an item or found a place for it, it is time for it to leave your home. This could mean donating it, selling it, or recycling it.
- Enjoy a Cleaner Home: This system helps you make decisions about those “maybe” items and keeps them from turning into permanent clutter.
41. Clean Up “Good Intentions”

Often, the holidays inspire us to try new things. You might have bought yarn to knit a scarf or beads for a special project. These “good intentions” can quickly become clutter if the project never gets finished. That half-knitted scarf or overflowing craft box can feel like a silent accusation.
Instead of letting these unfinished projects weigh on you, decide their fate. Will you truly finish it? If not, it is okay to let go of the guilt. Donate the supplies or repurpose them. This frees up your space. It also frees up your mind for new, achievable goals.
DIY: Repurpose Unfinished Projects Basket
Give a new life to your leftover craft supplies and materials from projects you will not finish.
What You Will Need:
- A basket or box
- Leftover yarn, fabric scraps, beads, or other craft supplies from an unfinished project
- A piece of paper and a marker
Instructions:
- Label Your Basket: Write “Repurpose & Share” on a piece of paper and tape it to the front of your basket.
- Gather Supplies: Collect all the materials from your unfinished projects. This could be yarn, fabric, beads, or even art supplies.
- Find a New Home: Instead of letting them sit in a corner, put these supplies into the “Repurpose & Share” basket.
- Offer to Others: Now, you can offer these supplies to someone else who might use them. You could give them to a friend who crafts, a school, or a local charity that runs art programs. This way, your “good intentions” get a second chance to become something wonderful, just not by you.
42. Embrace a Decluttering Challenge

Sometimes, a little friendly competition can be a great motivator. Instead of viewing decluttering as a chore, turn it into a fun challenge. This is especially true after the holidays when everyone in the family has acquired new items. A structured challenge makes the task feel lighter.
Involve your entire family in a “reverse hoarding” game. Each day, pledge to get rid of a certain number of items. This steady pace prevents overwhelm. It makes clearing out clutter a consistent habit. The shared goal creates a sense of accomplishment for everyone.
DIY: Family Decluttering Countdown Calendar
Create a visual calendar to track your family’s decluttering progress and celebrate each item that leaves your home.
What You Will Need:
- A large calendar (a blank wall calendar works well)
- Markers
- Sticky notes or small stickers
- A “Giveaway” box
Instructions:
- Draw Your Calendar: On a large piece of paper or a whiteboard, draw a calendar for the month. Make big squares for each day.
- Set the Daily Goal: Decide as a family how many items you want to declutter each day. It could be 1 item, 2 items, or even 5 items. Write “X ITEM(S)” in each daily square.
- Start Your Box: Label a box “Giveaway” and place it in a central spot.
- Track Your Progress: Each day, when someone declutters their items, they get to mark it off on the calendar with a sticky note or sticker. They can even write what they decluttered.
- Celebrate Milestones: When you reach a certain number of items, or at the end of the month, celebrate as a family. This could be with a special movie night or by taking the items to donation together.
43. Design an Upcycling Station

After Christmas, you often find yourself with items that are no longer needed but are too good to throw away. An old denim jacket, a chipped holiday plate, or leftover fabric scraps. These things have potential. They just need a new purpose.
Set up a dedicated space for “upcycling.” This is a place where you can transform old items into new treasures. It saves money. It also helps the environment by reducing waste. An upcycling station encourages creativity. It turns what could be clutter into unique, personal pieces for your home or as gifts.
DIY: Mosaic Coasters from Broken Plates
Turn a chipped or broken holiday plate into beautiful, unique coasters for your home. (Adult supervision needed for breaking plate!)
What You Will Need:
- An old, chipped ceramic plate (holiday themed or not)
- A hammer or heavy object (for an adult to use)
- An old towel or cloth
- Small cork or wood squares (about 4×4 inches)
- Strong craft glue
- Grout (available at hardware stores, with adult help)
- A sponge and a small bowl of water
Instructions:
- Break the Plate (Adult Job!): Ask an adult to wrap the old plate in an old towel. Carefully, the adult should tap it with a hammer to break it into small, uneven pieces.
- Sort the Pieces: Unwrap the towel and sort through the pieces. Choose the flat, smaller pieces that are not too sharp.
- Glue onto Coasters: Take a cork or wood square. Start gluing the plate pieces onto the square. Leave a tiny space between each piece, like a puzzle. Cover the whole square. Let the glue dry completely.
- Apply Grout (Adult Job!): Ask an adult to mix a small amount of grout with water until it is like thick toothpaste. Spread the grout over the mosaic pieces, pushing it into all the gaps. Wipe off any extra grout from the top of the pieces with a damp sponge.
- Clean and Cure: Let the grout dry for a few hours. Then, use a clean, damp cloth to wipe off any hazy residue from the mosaic pieces. Let your new coasters cure for 24 hours before using them.
44. Plan for Future Decluttering

Decluttering is not a one-time event. It is a continuous journey. You have made great progress after the holidays, but new items will always find their way into your home. The key to staying organized is to have a plan for the future.
Take a few minutes to schedule regular “mini-decluttering” sessions throughout the year. Put them on your calendar. It could be 15 minutes every Sunday or one hour every month. Consistent effort prevents clutter from building up again. This proactive approach keeps your home feeling light and organized all year round.
DIY: Monthly Decluttering Calendar
Create a simple calendar that reminds you to do a quick decluttering task each month.
What You Will Need:
- A blank calendar for the year
- A pen or marker
- Your favorite colored sticky notes or stickers
Instructions:
- Get Your Calendar: Find a blank calendar for the whole year.
- Assign a Task to Each Month: For each month, write down a specific decluttering task. For example:
- January: Holiday Decorations
- February: Winter Clothes
- March: Books
- April: Kitchen Pantry
- May: Craft Supplies
- June: Garage/Storage
- July: Digital Files
- August: Kids’ Toys
- September: Medicine Cabinet
- October: Linens & Towels
- November: Paperwork
- December: Gifts & Receipts
- Make it Visual: Use sticky notes or stickers to highlight these tasks on the calendar.
- Display it: Hang your decluttering calendar where you will see it regularly, like on the fridge or in your home office. This helps you remember to do your monthly tidy-up, keeping your home neat all year long.
45. Enjoy the Peaceful Aftermath

You have made it through the post-Christmas decluttering. The decorations are packed, the gifts have homes, and the clutter is gone. Your home now feels lighter, cleaner, and more spacious. This peaceful feeling is the true reward for all your hard work.
Take a moment to simply enjoy your tidy home. Light a candle. Sit on your clean sofa. Look around and appreciate the clear surfaces and open spaces. This feeling of calm and order is what all the decluttering was for. It is the perfect way to welcome a fresh start to the new year.
DIY: Simple “Thank You, Clean Home” Note
Write a small note of appreciation for your clean home and place it somewhere visible to remind you of your hard work.
What You Will Need:
- A small piece of paper
- A pen
- Optional: A small magnet or tape
Instructions:
- Write Your Note: On the small piece of paper, write a simple message like: “Thank you, clean home! You make me feel calm.” Or “My home is tidy, and so is my mind.”
- Decorate (Optional): You can draw a little smiley face or a heart on your note.
- Place it: Put your note on your fridge with a magnet, or tape it to a mirror in your bathroom. You can also place it on your freshly cleared kitchen counter.
- Read and Appreciate: Every time you see the note, take a moment to look around your tidy home and feel good about all the work you have done. This helps you remember how nice it feels to have an organized space.
The boxes are finally gone. Your floors are clear, and your surfaces are clean. The post-holiday chaos has been tamed. Your home is a peaceful space once again. This feeling of calm is the real reward.
Remember that organization is not a final destination. It is a daily practice. These strategies are tools you can use all year long. Small habits are what keep the clutter from returning.
You have reclaimed your space. You sorted, you cleaned, and you made thoughtful choices. Now you can move into the new year with a fresh, clear start. Enjoy the tranquility you have created.
Key Takeaways
- Start small to avoid feeling overwhelmed. A 10-minute timer or a single drawer is a great beginning.
- Give every item a clear home. Use the “one-in, one-out” rule for new gifts to maintain balance.
- Sort items into categories. Use boxes for donating, recycling, and returns to clear clutter quickly.
- Use simple DIY solutions. Cardboard dividers and labeled jars can create order without costing a lot.
- Decluttering is about more than just stuff. Clearing your digital space and your financial receipts brings mental peace.