Winter brings shorter days and longer nights. That lack of sunlight can leave our homes feeling dim and small. You might find yourself relying on electric lights long before sunset. This feeling of winter gloom is common, but it is not something you must accept.

You do not need massive renovations to change the mood. Maximizing the natural light you already have is the key. Simple adjustments to paint, decor, and window treatments make a significant difference.
We have gathered 38 powerful tricks and DIY projects here. These ideas range from exterior pruning to using reflective surfaces strategically. You are about to discover how to banish the shadows and fill your space with light, no matter how short the winter day.
1. High Gloss White Door Refresh

Dark doors often absorb the precious sunlight you want to keep. You should try to bounce that light around the room instead. A fresh coat of bright white paint does wonders for a dim space. It acts almost like a mirror for natural light.
Winter days are notoriously short. Every bit of brightness counts during these months. Using a high gloss finish amplifies this effect significantly. The sheen catches the sun and scatters it across the floor. This makes your space feel larger and more open immediately.
You do not need a massive renovation budget to see results. A simple paint job transforms the vibe instantly. This approach works in narrow hallways or cozy bedrooms alike. It is a classic choice for a reason. Clean lines and bright surfaces fight the winter gloom effectively.
Material Required List
- High gloss white interior paint
- Stain blocking primer
- Painter tape
- Sandpaper (120 grit and 220 grit)
- Wood filler
- Cleaning rags
- Degreaser or mild soap
Equipment Required List
- Screwdriver
- Angled sash paintbrush (2 inch)
- Small foam paint roller
- Paint tray
- Drop cloth or old newspapers
- Sanding block
DIY Instructions Step by Step
- Start by removing the door from its hinges if possible. Lay it flat on sawhorses or a covered floor. Remove the doorknob and latch plate using your screwdriver. This ensures you get a clean finish without getting paint on the hardware.
- Clean the door thoroughly. Use a degreaser or soapy water to remove fingerprints, dust, and grime. Paint will not stick well to dirty surfaces. Let the wood dry completely before moving on.
- Inspect the surface for any holes or deep scratches. Fill these imperfections with wood filler. smooth it out with a putty knife and let it dry according to the package instructions.
- Sand the entire door lightly with 120 grit sandpaper. You are not trying to remove all the old paint. The goal is to roughen the surface so the new primer adheres well. Wipe away all the dust with a damp rag.
- Apply a coat of primer. This is crucial if you are painting over a dark color or bare wood. It prevents the old color from bleeding through. Use your brush for the recessed corners and the roller for the flat areas. Allow this to dry fully.
- Sand the primed surface very lightly with 220 grit sandpaper. This step removes any brush marks or bumps. Wipe away the dust again to ensure a glass like finish.
- Paint the first coat of high gloss white. Start with the panels and detailed areas using the angled brush. Then use the foam roller for the vertical stiles and horizontal rails. Work with the grain of the wood.
- Let the first coat dry and then apply a second coat for full coverage. Once the paint is fully cured, reattach your hardware and hang the door back up.
2. The Strategic Leaning Mirror

You might feel your room is too small or dim. A large mirror is the oldest trick in the book for a reason. It acts like a second window. Placing a tall mirror opposite a window or near a light source bounces that light deep into the room.
This specific one leans casually but works hard. The frame you choose matters too. A thin metallic frame adds a modern touch without blocking the glass surface. It captures light from different heights.
You do not need to hang heavy glass on the wall. Leaning it is safer for renters and easier to move. This simple addition doubles the brightness instantly. It creates a sense of depth that paint alone cannot achieve.
Material Required List
- Full length mirror
- Furniture straps or anchors
- Wall screws
- Felt pads
- Glass cleaner
Equipment Required List
- Drill
- Screwdriver
- Measuring tape
- Stud finder
- Pencil
- Microfiber cloth
DIY Instructions Step by Step
- Choose the spot where the mirror will sit. Aim for a location directly across from a window for maximum light reflection. Ensure the floor is level.
- Clean the back of the mirror frame. Stick felt pads to the top corners where the frame touches the wall. This prevents scuffs and keeps the mirror stable.
- Lean the mirror against the wall. Adjust the angle until it captures the light nicely. Ensure the base is a few inches away from the wall for stability.
- Locate a wall stud behind the mirror using your stud finder. Mark this spot lightly with a pencil.
- Attach one end of the furniture strap to the back of the mirror frame. Use the screws provided with the strap kit.
- Attach the other end of the strap to the wall stud you marked. This is a critical safety step to prevent the mirror from tipping over.
- Clean the glass surface thoroughly with your microfiber cloth and cleaner. Enjoy the immediate boost in brightness.
3. Luminous Gloss Ceiling

We often forget about the ceiling when decorating. Designers call it the fifth wall. Painting it with a high gloss finish changes the game completely. A matte ceiling absorbs light, but a glossy one reflects it.
This technique helps distribute artificial light from your recessed fixtures. It also catches daylight from the windows. The effect is similar to a reflecting pool. It makes the room feel taller and much brighter.
You create a modern and sleek look with this finish. It pairs beautifully with cove lighting. The glow washes over the smooth surface and spreads evenly. This is a bold move that pays off during dark winter evenings.
Material Required List
- High gloss ceiling paint (White)
- Stain blocking primer
- Painter tape
- Plastic drop cloths
- Sanding pole
- 220 grit sandpaper
Equipment Required List
- Paint roller frame with extension pole
- Microfiber roller covers (low nap)
- Angled paintbrush
- Paint tray
- Safety goggles
- Hat or head covering
- Ladder
DIY Instructions Step by Step
- Clear the room completely. Move all furniture out or cover it entirely with plastic. Ceiling painting drips are inevitable.
- Tape off the top of the walls where they meet the ceiling. Press the tape down firmly to prevent bleed.
- Sand the ceiling lightly using the sanding pole. This smooths out bumps which show up more with glossy paint. Wipe away the dust with a damp cloth on a broom.
- Apply a coat of primer. This is essential for a uniform sheen later. Let the primer dry completely.
- Cut in the edges of the ceiling with your angled brush. Paint a strip about three inches wide along the perimeter.
- Roll on the high gloss paint. Work in small sections to keep a wet edge. Glossy paint dries fast and lap marks show easily.
- Roll in one direction for the first coat. Let it dry. Then roll the second coat perpendicular to the first. This crosshatch method ensures smooth coverage.
- Remove the tape while the paint is still slightly tacky to get a crisp line.
4. Daylight Bulb Upgrade

Lighting temperature changes everything. Many homes use warm white bulbs that look yellow. This mimics candlelight but can feel dim in the daytime. You need a cleaner light to fight winter gloom.
Switching to daylight bulbs makes a massive difference. These bulbs usually rate around 5000K on the Kelvin scale. They produce a crisp white light. This mimics the natural sun at noon.
Your colors will look truer under this light. It helps you feel more alert and energetic. You can mix these with warmer lamps for the evening. But for main overhead lighting, cool white is the best choice for brightness.
Material Required List
- LED bulbs (5000K Daylight temperature)
- Dimmer switch (optional compatibility)
Equipment Required List
- Step stool or ladder
- Clean dry cloth
- Gloves (optional)
DIY Instructions Step by Step
- Turn off the light switch and let the old bulbs cool down. Hot bulbs can burn your fingers.
- Set up your ladder safely under the fixture. Climb up and gently unscrew the old bulbs.
- Check the wattage rating on the fixture socket. Ensure your new LED bulbs do not exceed this limit. LEDs usually use far less power so this is rarely an issue.
- Screw in the new daylight bulbs. Do not overtighten them. Just turn until they stop.
- Wipe the bulb surface with a dry cloth. Oils from your hands can create hot spots on some bulbs.
- Turn the switch back on. Observe the difference in color temperature. The room should look instantly cooler and brighter.
5. Chrome Dome Table Lamp

Shiny surfaces multiply light. A lamp with a reflective base works double duty. It provides its own light source while reflecting others. This chrome mushroom lamp is a great example.
The curved metal surface catches rays from windows and other fixtures. It scatters specks of light around the room. This adds a sparkling effect that feels lively.
You get a functional sculpture with this piece. It looks good even when turned off. The metallic finish brightens a dull corner effortlessly. It is a small detail that adds layers of light to your space.
Material Required List
- Old lamp base (ceramic or metal)
- Chrome or metallic spray paint
- Painter tape
- Plastic bag
- Primer spray for plastic or metal
Equipment Required List
- Drop cloth
- Sandpaper (fine grit)
- Clean rag
- Face mask for fumes
DIY Instructions Step by Step
- Unplug your old lamp and remove the shade. Remove the light bulb.
- Clean the lamp base thoroughly. Remove any dust or grease. Dry it completely.
- Protect the socket and cord. Wrap the electrical cord in a plastic bag and tape it shut. Tape over the socket and switch carefully.
- Scuff the surface of the lamp base with sandpaper. This helps the paint stick better. Wipe away the dust.
- Take the lamp outside or to a well ventilated area. Place it on a drop cloth.
- Apply a thin coat of primer spray. Let it dry according to the can instructions.
- Shake the chrome spray paint can vigorously. Spray the lamp using light and even sweeping motions. Keep the can moving to avoid drips.
- Apply two or three thin coats rather than one thick one. Let it dry fully before removing the tape and adding the bulb back.
6. Invisible Glass Deep Clean

Dirty windows are silent light thieves. Dust and grime build up slowly over months. You might not even notice the haze until it is gone. A deep clean lets every possible photon of sunlight enter your home.
Winter sun is weak and sits low in the sky. You cannot afford to block it with a film of dirt. Cleaning the glass inside and out maximizes brightness.
The view outside becomes sharper too. It connects your interior to the outdoors. This makes the room feel less confined. A clean window is the cheapest way to brighten a room.
Material Required List
- White vinegar
- Distilled water
- Dish soap
- Paper towels (lint free)
Equipment Required List
- Squeegee
- Spray bottle
- Microfiber cloths
- Bucket
- Sponge
- Old toothbrush
DIY Instructions Step by Step
- Mix your solution in the spray bottle. Use one part vinegar to one part water. Add a tiny drop of dish soap.
- Place a towel on the window sill to catch drips.
- Spray the window generously. Let it sit for a minute to break down the grime.
- Use the sponge to scrub the glass. Use the old toothbrush to get into the corners and along the tracks.
- Use the squeegee to wipe the water down. Start at the top corner and pull straight down. Wipe the squeegee blade with a cloth after each stroke.
- Overlap your strokes slightly to avoid streaks.
- Use a dry microfiber cloth to wipe any remaining water from the edges and sill.
- Repeat on the exterior side of the window for the best results.
7. Fluted Glass Light Share

Dark hallways are a common problem. You can solve this by borrowing light from a brighter room. An interior transom window works wonders. It sits high on the wall above the door line.
Using fluted or ribbed glass gives you privacy. You cannot see shapes clearly through it. But the light passes through easily. It glows like a lantern when the adjacent room is bright.
This architectural detail looks high end. It breaks up large expanses of drywall. It connects the spaces visually while keeping them separate.
Material Required List
- Pre cut fluted glass pane
- Wood trim molding (1×2 inch)
- Wood glue
- Construction adhesive
- Finish nails
Equipment Required List
- Stud finder
- Reciprocating saw or drywall saw
- Level
- Hammer
- Miter saw
- Measuring tape
DIY Instructions Step by Step
- Check your wall for studs, wires, and pipes. This is crucial. Do not cut into a wall without knowing what is inside. Locate a clear space between two studs above a door.
- Mark the rectangle on the drywall for your opening. Use a level to ensure it is straight.
- Cut the drywall carefully along your lines. Remove the insulation if present.
- Build a simple wooden frame box that fits inside this hole. Use the 1×2 lumber. Secure it to the studs on either side.
- Install trim molding on one side of the frame opening. This creates a stop for the glass to rest against.
- Apply a bead of clear silicone adhesive to the trim stop.
- Place the fluted glass pane into the opening carefully. Press it against the adhesive.
- Install the second piece of trim molding on the other side. This sandwiches the glass in place.
- Fill the nail holes and paint the trim to match your door frame.
8. Semi Sheer Vertical Panels

Heavy drapes make a room feel like a cave. You want to see the outside without showing your whole life to the neighbors. These semi sheer panel blinds are the solution. They have a crisp and modern look.
The fabric filters the harsh glare but keeps the brightness. The vertical lines add height to the window. It creates a soft and diffused glow in the room.
Panel systems slide smoothly on a track. You can stack them neatly to the side when you want a full view. They are much sleeker than traditional vertical blinds.
Material Required List
- Panel track blind kit (rail and fabric)
- Wall anchors
- Screws
Equipment Required List
- Drill
- Pencil
- Measuring tape
- Level
- Step ladder
- Screwdriver
DIY Instructions Step by Step
- Measure the width of your window frame. Add four inches to each side if you want the panels to clear the glass completely when open.
- Hold the track bracket up to the wall above the window. Ensure it is high enough so the panels will not drag on the floor.
- Mark the screw holes with your pencil. Use the level to make sure the track will be straight.
- Drill pilot holes at your marks. Insert the wall anchors if you are not drilling into wood studs.
- Screw the brackets firmly into the wall.
- Snap the track rail into the brackets. Listen for the click to know it is secure.
- Attach the fabric panels to the sliding carriers. Most systems use velcro strips for this.
- Attach the weighted bars to the bottom of each fabric panel. This keeps them hanging straight and neat.
9. Light Flow Furniture Risers

Low furniture can block the flow of light. A heavy sofa sitting directly on the floor creates a visual blockade. Raising it up on legs changes the dynamic. It lets sunlight pass underneath the piece.
Seeing more floor space makes the room feel larger. The shadows cast are lighter and less dense. It gives the room a sense of airiness that is vital in winter.
You can modify existing furniture easily. Adding taller legs is a quick project. It updates the style and brightens the room layout simultaneously.
Material Required List
- Set of 4 furniture legs (6 inch or taller)
- Mounting plates (if not included)
- Wood screws
Equipment Required List
- Drill
- Screwdriver bit
- Measuring tape
- Helper to lift the sofa
DIY Instructions Step by Step
- Flip your sofa onto its back. Have a helper assist you as sofas are heavy.
- Inspect the current legs. If they screw in, simply unscrew them. If they are nailed on, you may need to pry them off.
- Position the new mounting plates at the four corners of the frame. Ensure they are attached to solid wood, not just the fabric bottom.
- Mark the screw holes with a pencil.
- Drill small pilot holes to prevent the wood from splitting.
- Screw the mounting plates securely to the frame.
- Screw the new taller legs into the mounting plates. Tighten them by hand.
- Flip the sofa back upright with your helper. Check that it sits level on the floor.
10. Boho Beaded Light Divider

Solid doors stop light from traveling through your home. Sometimes you need a separation without the darkness. A beaded curtain is a playful and functional alternative. It fits well in archways or hallway entrances.
The beads define the space clearly. Yet, light filters through the gaps effortlessly. It adds texture and movement to the room. This particular style uses wooden beads for a warm and natural look.
It keeps the sightlines open. This makes your home feel like one big bright space rather than a series of small dark boxes.
Material Required List
- Wooden beads (assorted sizes)
- Strong cotton or nylon string
- Wooden dowel or curtain rod
- Two ceiling hooks
Equipment Required List
- Scissors
- Measuring tape
- Drill
- Pliers (for knots)
DIY Instructions Step by Step
- Measure the width of your doorway. Cut the dowel to match this width exactly.
- Decide how long you want the curtain to be. Cut lengths of string that are six inches longer than your desired drop.
- Tie one end of a string securely to the dowel.
- Thread the beads onto the string. You can create a pattern or keep it random.
- Leave some gaps between beads if you want more transparency. Tie small knots to keep beads in place if spacing them out.
- Tie a secure knot at the bottom of the string after the last bead. Trim the excess string.
- Repeat this for as many strands as you need. Place them close together for privacy or further apart for more light.
- Install the two hooks at the top of your door frame or archway.
- Rest the dowel on the hooks. Adjust the strands to ensure they hang evenly.
11. Tilted White Venetians

You might think blinds are just for privacy. They are actually powerful light tools when used correctly. White horizontal blinds act like a series of small shelves for sunlight. When you tilt the slats upwards, they catch the incoming sun.
The white surface bounces this light up toward your ceiling. This diffuses the brightness throughout the entire room. You avoid the harsh glare that comes from direct sunbeams. It creates a soft and ambient glow that reaches deep into the space.
This setup gives you the best of both worlds. You block the view from the street while inviting the sky inside. It is a classic window treatment that is highly functional for winter brightness.
Material Required List
- White faux wood or vinyl blinds (measured to window size)
- Mounting brackets (usually included)
- Drywall anchors (if no studs)
- Pencil
Equipment Required List
- Power drill
- Drill bits
- Measuring tape
- Phillips head screwdriver
- Step ladder
- Level
DIY Instructions Step by Step
- Measure your window frame width at the top, middle, and bottom. Use the narrowest measurement for an inside mount.
- Hold the headrail of the blinds inside the window casing. Mark the position of the ends with your pencil.
- Position the mounting brackets at your pencil marks. The open side of the box bracket should face the room.
- Mark the screw holes through the bracket slots.
- Drill pilot holes at these marks. If you hit wood, great. If not, tap in your wall anchors gently with a hammer.
- Screw the brackets firmly into the wall.
- Slide the headrail of the blinds into the brackets. Close the hinged flap on the bracket until it snaps shut.
- Attach the tilt wand to the hook on the blinds. Twist it to test the slat movement.
12. Sky Blue Paint Refresh

Color psychology plays a huge role in how bright a room feels. Cool colors recede visually. This means they make walls feel further away than they really are. Painting a room in a soft sky blue mimics the atmosphere of a clear day.
White is the standard choice for brightness. However, a pale blue adds depth and dimension that white lacks. It pairs beautifully with natural light. The sun hits the blue and creates a crisp and airy feeling.
This works exceptionally well in small nooks or reading corners. It transforms a cramped space into a serene escape. You feel like you are sitting outside even when you are indoors.
Material Required List
- Interior latex paint (Sky Blue, Satin finish)
- White trim paint
- Painter tape
- Drop cloths
- Spackle
Equipment Required List
- Paint roller and tray
- Angled sash brush
- Sandpaper sponge
- Putty knife
- Extension pole for roller
DIY Instructions Step by Step
- Move furniture to the center of the room and cover it. Lay drop cloths on the floor.
- Inspect the walls for nail holes or dents. Fill them with spackle and let it dry. Sand these spots smooth.
- Apply painter tape along the baseboards and window trim. Press the edges down firmly to seal them.
- Cut in the edges of the wall with your angled brush. Paint a border about three inches wide around the ceiling, corners, and trim.
- Pour your blue paint into the tray. Load your roller evenly.
- Roll the paint onto the wall in a W pattern. Fill in the gaps without lifting the roller. Work in small sections to keep a wet edge.
- Let the first coat dry for at least four hours.
- Apply a second coat for a rich and true color. Remove the tape while the paint is still slightly damp for sharp lines.
13. Angled Mirror Mosaic

A single flat mirror reflects light in one direction. A surface made of many angled mirrors scatters it everywhere. This mosaic style wall feature is a powerhouse for brightness. Each small square is tilted slightly differently.
It catches the window light and throws it into unexpected corners. The effect is dynamic and sparkling. As the sun moves across the sky, the reflections in your room shift and change.
This piece acts as art and a light source. It breaks up dark wall space with texture. You get a modern industrial look that serves a very practical purpose during the grey winter months.
Material Required List
- Small square mirror tiles
- Plywood backing board (cut to size)
- Mirror mastic or heavy duty construction adhesive
- Small wood blocks (wedge shape)
- Black paint
Equipment Required List
- Caulk gun
- Notched trowel
- Protective gloves
- Measuring tape
- Saw (if cutting plywood)
DIY Instructions Step by Step
- Cut your plywood board to the desired size for your art piece. Paint the front surface black. This creates a shadow effect between the mirrors.
- Lay out your mirror tiles on the floor to plan the grid spacing. Leave a small gap between each tile.
- Glue small wooden wedges to the back of random tiles. This is what creates the angled effect. Leave some tiles flat.
- Apply a dab of construction adhesive to the back of a tile. Press it firmly onto the plywood board.
- Start from one corner and work your way across. Alternate between flat tiles and angled tiles.
- Ensure the gaps are even as you go. You do not need grout for this style.
- Let the adhesive cure for 24 hours.
- Mount the heavy plywood panel to the wall using a French cleat system for safety.
14. The Ceiling Skylight

Vertical windows can only do so much. The brightest light comes directly from above. A skylight captures the sun for more hours of the day than any wall window. It is the ultimate solution for a dark interior room.
The shaft leading up to the roof acts like a funnel. If you paint the inside of this well white, it amplifies the light even more. You get a massive flood of brightness that changes the entire mood of the home.
This is a bigger project than painting. But the payoff is unmatched. You stop relying on electric bulbs during the day completely. It connects you to the weather and the sky.
Material Required List
- Skylight unit (flashing kit included)
- 2×4 lumber for framing
- Drywall
- Roofing shingles (matching existing)
- Ice and water shield
- Insulation
Equipment Required List
- Circular saw
- Reciprocating saw
- Hammer
- Drill
- Pry bar
- Utility knife
- Chalk line
DIY Instructions Step by Step
- This is an advanced project. Consult a structural engineer if you are unsure about your roof trusses.
- Mark the opening on the ceiling inside the room. Drill locator holes at the corners through the roof.
- Go up to the roof. Remove the shingles around the area where the locator holes are.
- Cut the hole in the roof deck using your circular saw.
- Frame the opening inside the attic with double headers. This supports the cut rafters.
- Install the skylight curb and the unit itself. Follow the manufacturer instructions precisely to prevent leaks.
- Install the step flashing and weave it into the new shingles. This is the most critical step for waterproofing.
- Go back inside. Frame the light shaft connecting the ceiling hole to the roof hole.
- Install drywall on the inside of the shaft. Tape, mud, and paint it white.
15. Frosted Privacy Doors

Solid doors block the flow of light between rooms. You might want to close off a home office or den but hate the gloom. Wood framed doors with large frosted glass panels are the answer.
The frosted finish provides visual privacy. Shapes are blurred so you cannot see clutter or people clearly. However, the light passes through with almost no reduction. It shares the brightness from a south facing room with a darker hallway.
Using a pocket door style saves floor space. The door slides into the wall, leaving the opening completely clear when open. It is a sleek and functional architectural element.
Material Required List
- Pocket door frame kit
- Frosted glass door slab
- Drywall
- Door jamb kit
- Wood glue
Equipment Required List
- Reciprocating saw (Sawzall)
- Drill
- Level
- Hammer
- Drywall saw
- Pry bar
DIY Instructions Step by Step
- Determine if your wall is load bearing. If it is not, you can proceed. Remove the drywall on one side of the wall where the door will slide.
- Remove the existing studs in that section to make room for the pocket cage.
- Install the header track assembly according to the kit instructions. Ensure it is perfectly level or the door will slide open on its own.
- Install the steel wrapped studs that come with the kit. These replace the wood studs you removed.
- Attach the mounting hardware to the top of your door slab.
- Hang the door on the track. Test the sliding motion.
- Install new drywall over the pocket cage. Be careful not to use screws that are too long or they will scratch the door.
- Install the split jambs and casing trim around the opening.
16. Under Cabinet LEDs

Kitchens often have shadows right where you work. The overhead lights are blocked by your body and the upper cabinets. Installing light strips under the cabinets eliminates these dark spots.
The light bounces off the backsplash and the countertop. This creates a perimeter of brightness that opens up the kitchen. It makes the room feel wider and cleaner.
LED strips are thin and easy to hide. You do not see the fixture, just the light. This indirect glow is soft on the eyes. It is helpful for cooking and creates a nice ambiance at night.
Material Required List
- LED strip light kit (warm or cool white)
- Double sided foam tape (usually included)
- Wire clips
- Alcohol wipes
Equipment Required List
- Scissors (to cut strips at designated marks)
- Measuring tape
- Drill (if running wires through cabinets)
DIY Instructions Step by Step
- Measure the length of the bottom of your upper cabinets.
- Clean the underside of the cabinets thoroughly with alcohol wipes. Grease prevents the tape from sticking.
- Lay out your LED strips. Cut them to length if necessary. Only cut at the copper marks indicated on the strip.
- Peel the backing off the adhesive tape on the strip. Press it firmly against the bottom of the cabinet. Place it just behind the front lip of the cabinet frame to hide it from view.
- Connect the strips together using the connector cables provided. You may need to drill small holes to pass wires through cabinet dividers.
- Secure any loose wires with the wire clips. You want a clean look.
- Plug the power supply into the nearest outlet or wire it into a junction box if you are experienced.
17. Reflective Window Well

Basement windows are usually buried in deep holes. The dirt walls absorb almost all the light before it reaches the glass. The result is a dark and dungeon like basement. You can fix this by lining the well with reflective material.
This acts like a mirror tunnel. It directs the sunlight down into the hole and pushes it through the window. The difference is instant and dramatic.
You do not need to replace the window itself. Modifying the surroundings is cheaper and often more effective. It turns a useless dark slot into a genuine source of daylight.
Material Required List
- Reflective window well liner (or aluminum sheet)
- Construction adhesive suitable for masonry
- Weather resistant foil tape
- Gravel (for drainage)
Equipment Required List
- Utility knife or tin snips
- Stiff bristle brush
- Caulk gun
- Measuring tape
- Work gloves
DIY Instructions Step by Step
- Clear out any leaves, trash, or old gravel from the bottom of the window well.
- Scrub the walls of the well (whether metal, concrete, or plastic) to remove dirt. The adhesive needs a clean surface.
- Measure the height and perimeter of the well interior.
- Cut your reflective liner to size. It is easier to install in two or three vertical sections than one long piece.
- Apply a generous amount of construction adhesive to the back of the liner.
- Press the liner against the well wall. Smooth it out to remove bubbles.
- Seal the seams between sections with the foil tape. This prevents water from getting behind the liner.
- Add a fresh layer of clean gravel at the bottom to cover the lower edge of the liner.
18. Ghost Shelving Units

Heavy wooden bookcases absorb light and cast shadows. They visually shrink the room. If you need storage but want brightness, switch to clear acrylic shelves.
Light passes right through the material. The shelves appear to float on the wall. This preserves the open feeling of the room. The sunlight from your windows can travel all the way to the back wall.
These units look modern and clean. They hold your books and decor without adding visual weight. It is a trick designers use to make small apartments feel airy and bright.
Material Required List
- Acrylic wall shelves
- Wall anchors (heavy duty)
- Screws
- Masking tape
Equipment Required List
- Drill
- Level
- Pencil
- Screwdriver
- Stud finder
DIY Instructions Step by Step
- Decide on the layout for your shelves. Use masking tape to mark the positions on the wall. This lets you visualize the arrangement before drilling.
- Hold the first shelf up to the wall. Place your level on top to ensure it is straight.
- Mark the screw holes through the pre drilled openings in the acrylic.
- Remove the shelf and check for studs. If there is no stud, drill holes for your wall anchors.
- Insert the anchors flush with the wall surface.
- Position the shelf back over the holes. Drive the screws in by hand. Do not use a power drill for the final tightening. Acrylic can crack if you apply too much pressure.
- Peel off the protective blue or clear film from the acrylic surface.
- Repeat for the remaining shelves.
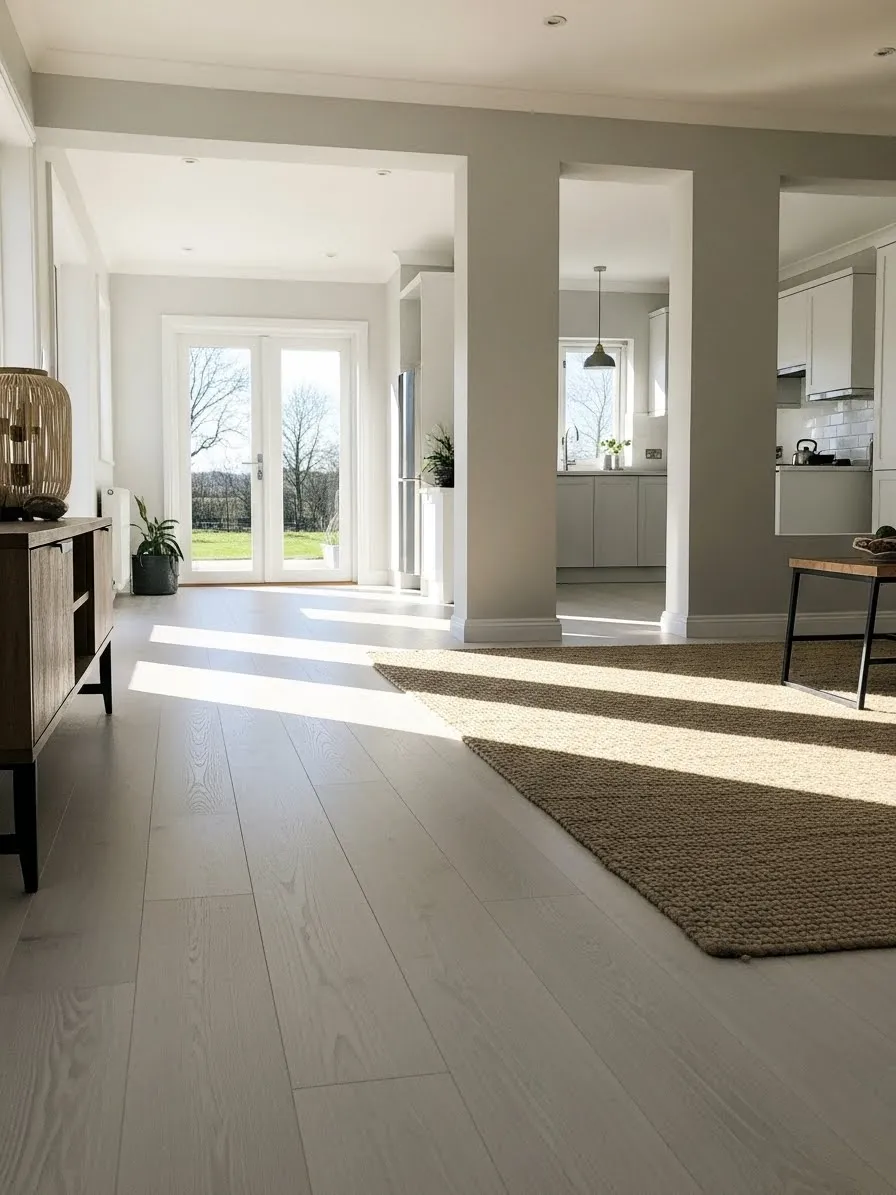
19. Pale Oak Flooring

The floor is the second largest surface in a room after the walls. If it is dark walnut or carpet, it sucks up light. Light colored wood flooring acts like a reflector.
Pale oak or maple tones bounce the sunlight back up. This fills the room with a warm and hazy brightness. It makes the ceiling feel higher and the room wider.
You do not always need to install new wood. Refinishing existing floors can achieve this. Removing the dark stain reveals the natural light tone of the wood grain underneath.
Material Required List
- Floor sander (rented)
- Edger sander
- Sandpaper belts (coarse, medium, fine)
- Water based polyurethane sealer (Matte or Satin)
- Wood filler
Equipment Required List
- Shop vacuum
- Respirator mask
- Ear protection
- Lambswool applicator or synthetic pad
- Paint tray
DIY Instructions Step by Step
- Remove all furniture, rugs, and base shoe molding from the room. Pound in any protruding nail heads.
- Start with the drum sander and coarse grit paper. Sand with the grain of the wood. Keep the machine moving constantly to avoid gouges.
- Use the edger sander to get close to the walls where the big machine cannot reach.
- Vacuum thoroughly. Then switch to medium grit paper and repeat the process. Finish with the fine grit paper for a smooth surface.
- Fill any cracks or gaps with wood filler that matches your species of wood. Let it dry and hand sand those spots.
- Clean the floor obsessively. Any dust left behind will be trapped in the finish.
- Apply the water based sealer. It stays clear and does not yellow like oil based products. Use the applicator to spread it evenly.
- Let the first coat dry. Lightly sand with a fine screen if recommended by the manufacturer. Apply two more coats for durability.
20. Filtering Roman Shades

Sometimes you have a window that faces the street. You need privacy but you hate blocking the sun. Light filtering Roman shades are the compromise you need. They are made of fabric that is woven loosely enough to let light in.
When the shade is down, the window glows. It becomes a soft panel of light rather than a black hole. You cannot see in from the outside, but the room stays bright.
The fabric adds texture and softness to the hard edges of the window. You can raise them fully on cloudy days to get every bit of light possible. They are cleaner and simpler than heavy drapes.
Material Required List
- Roman shade (inside mount preferred)
- Mounting brackets
- Screws
Equipment Required List
- Drill
- Measuring tape
- Pencil
- Screwdriver
DIY Instructions Step by Step
- Measure the depth of your window frame. Ensure you have enough space for the headrail mechanism.
- Hold the shade up in the window to check the fit. Center it perfectly.
- Mark the location for the brackets. Usually, they go two or three inches in from the ends of the headrail.
- Drill pilot holes for the screws. This is easier than trying to drive screws directly into the wood header.
- Screw the brackets firmly into the top of the window frame. Ensure they are aligned with each other.
- Fit the headrail onto the brackets. Usually, you hook the front edge first and then snap the back edge up.
- Pull the cord or handle to test the lifting mechanism. Ensure the shade falls straight and folds neatly when raised.
21. Exterior Shrub Clearing

We often focus on the inside of the house to fix lighting issues. However, the problem often starts outside. Overgrown bushes and trees blocking your windows are major light thieves.
Winter sun sits low on the horizon. Even a medium sized bush can cast a long shadow that covers your entire window. Trimming these back lets the sunlight hit the glass directly. You will be shocked at how much brighter the room feels immediately.
This maintenance prevents moisture buildup against your siding too. It creates a clean visual line from the indoors looking out. You connect your home back to the landscape while reclaiming that precious natural light.
Material Required List
- Heavy duty yard waste bags
- Twine or rope (for tying branches)
- Rubbing alcohol (to clean blades)
Equipment Required List
- Bypass pruners (for small stems)
- Lopping shears (for thick branches)
- Hedge trimmers (manual or electric)
- Gardening gloves
- Safety glasses
- Rake
DIY Instructions Step by Step
- Inspect the shrubbery from inside your house first. Identify exactly which branches are blocking the view and light.
- Go outside and clear the area around the base of the bush.
- Put on your gloves and safety glasses. Branches can snap back unpredictably.
- Start by removing any dead or diseased wood. Cut these branches back to the main stem.
- Use the loppers to remove the height. Aim to keep the top of the bush at least six inches below the window sill.
- Thin out the sides using your hedge trimmers. Angle the cut slightly so the bottom of the bush is wider than the top. This ensures sunlight reaches the lower leaves.
- Clean your cutting blades with alcohol if you move between different plants to prevent disease spread.
- Rake up all the clippings and bag them immediately.
22. Dual Direction Sconces

Overhead lights can sometimes feel harsh or clinical. They create strong shadows downwards. A wall sconce that shines both up and down solves this problem elegantly.
The upward beam washes the wall and hits the ceiling. This light bounces back down and softens the entire room. The downward beam provides practical task lighting for the floor or furniture below.
This creates a layer of light that makes the space feel taller. It highlights the texture of your walls. You get a warm and architectural look that feels intentional rather than just functional.
Material Required List
- Up down wall sconce fixture
- Wire nuts
- Electrical tape
- Light bulbs (matching base)
Equipment Required List
- Voltage tester
- Screwdriver set
- Wire strippers
- Ladder or step stool
- Drill (if new installation)
DIY Instructions Step by Step
- Turn off the power to the circuit at your breaker box. Test the existing switch to ensure the power is truly off.
- Unscrew the old fixture from the wall. Disconnect the wires by untwisting the wire nuts.
- Inspect the electrical box. Ensure it is securely mounted to the stud.
- Install the mounting bracket that came with your new sconce. Use a level to make sure it is straight.
- Connect the wires from the wall to the fixture. Match black to black (hot), white to white (neutral), and copper to bare (ground).
- Twist the wire nuts on tightly and wrap them with electrical tape for extra safety.
- Tuck the wires neatly into the electrical box.
- Mount the fixture base to the bracket using the provided decorative nuts.
- Install the bulbs and turn the power back on to test.
23. Woven White Storage

Clutter creates shadows. Dark storage bins make a closet or shelf look like a black hole. Swapping these for white or light wicker baskets keeps the visual weight low.
The texture of the wicker adds warmth without darkness. The white color reflects the ambient light in the closet. This makes it easier to find things and keeps the space feeling airy.
Organizing with these lighter containers tricks the eye. The shelves look less packed even if they hold the same amount of stuff. It is a simple swap that creates a sense of order and brightness.
Material Required List
- White wicker or plastic weave baskets
- Chalkboard labels (optional)
- Shelf liner (white)
Equipment Required List
- Measuring tape
- Cleaning cloth
- All purpose cleaner
- Scissors
DIY Instructions Step by Step
- Empty your shelves completely. Sort your items into keep, donate, and trash piles.
- Clean the shelves thoroughly. Dust loves to hide in corners.
- Measure the height, width, and depth of your shelf space.
- Purchase baskets that fit these dimensions. Leave at least an inch of space above the basket so you can slide it out easily.
- Cut the white shelf liner to size and lay it down. This brightens the horizontal surface.
- Group your items by category. Place them into the new baskets.
- Label the baskets if you like. This helps maintain the organization.
- Place the baskets back on the shelves. Align the front edges for a neat appearance.
24. Screenless Winter Windows

Window screens are great for keeping bugs out in summer. But in winter, they are essentially light filters. A standard screen blocks about thirty percent of the natural light hitting your glass.
Removing them for the season is a free way to boost brightness. The view outside becomes crisp and clear. Your windows will look cleaner and the glass will sparkle more.
You also prevent snow and ice from getting trapped between the screen and the sill. This protects your window frames from moisture damage. It is a win for both light and maintenance.
Material Required List
- Masking tape (for labeling screens)
- Marker
- Warm water
- Mild dish soap
Equipment Required List
- Flathead screwdriver (for prying tabs)
- Soft bristle brush
- Hose or bucket
- Dry towels
DIY Instructions Step by Step
- Open your window fully. Locate the tabs or pins holding the screen in place.
- Pull the tabs gently to release the tension. Push the screen frame outward slightly and tilt it to remove it.
- Bring the screens to a flat area like a driveway or bathtub.
- Label each screen with the tape. Write “Living Room Left” or “Kitchen Main” so you know where they go next spring.
- Mix the soap and warm water. Scrub the mesh gently with the soft brush to remove dust and pollen.
- Rinse the screens thoroughly with clean water.
- Let them dry completely in the sun or wipe them down.
- Store the screens in a dry place like a basement or garage. Stack them flat or stand them up where they will not be punctured.
25. Broadened Doorway Trim

Doors interrupt the flow of light between rooms. Even when open, the header and jambs block angles of sunlight. Widening the opening or removing the door slab entirely changes the home dynamic.
A wide cased opening allows light from a south facing room to spill into a darker hallway. It makes two small rooms feel like one large suite. The sightlines open up considerably.
This is a structural change that feels modern. It encourages social flow and brightness. You lose some sound privacy but gain a massive amount of visual space.
Material Required List
- Wood casing trim
- Drywall compound
- Drywall tape
- Paint
- Wood shims
Equipment Required List
- Pry bar
- Hammer
- Reciprocating saw
- Level
- Drill
- Utility knife
DIY Instructions Step by Step
- Remove the existing door from its hinges. Remove the hinge plates from the frame.
- Use the pry bar to carefully remove the casing trim around the door.
- If you are just removing the door, fill the hinge mortises with wood filler and paint.
- If you are widening the opening, you must check for load bearing studs. Consult a contractor for this part.
- Cut the drywall back to the new width. Frame the new opening with 2×4 lumber.
- Install new drywall to cover the exposed framing. Tape and mud the seams.
- Measure and cut your new casing trim. Miter the corners at forty five degrees.
- Nail the trim into place. Fill the nail holes and caulk the edges.
- Paint the new trim to match the rest of your woodwork.
26. Mirrored Subway Tile

Kitchens often have dark corners under the cabinets. A standard tile backsplash creates a flat surface. Using mirrored subway tiles turns that wall into a light reflector.
Every under cabinet light or window reflection is multiplied. The kitchen feels twice as big instantly. It adds a touch of glamour and polish to the room.
These tiles are easy to clean and very durable. They work with almost any cabinet color. You get a functional backsplash that actively works to brighten your workspace.
Material Required List
- Mirrored subway tiles
- Tile adhesive (mastic)
- Unsanded grout (gray or white)
- Tile spacers (1/8 inch)
Equipment Required List
- Tile cutter or glass scorer
- Notched trowel
- Grout float
- Sponge
- Bucket
- Level
DIY Instructions Step by Step
- Protect your countertops with cardboard or a drop cloth. Turn off the power to outlets on that wall.
- Remove outlet covers. Ensure the wall is clean and flat. Scuff glossy paint with sandpaper.
- Apply the mastic to a small section of the wall using the notched trowel. hold the trowel at a forty five degree angle.
- Press the first tile into place. Start from the center and work outwards. Use spacers to keep the gaps even.
- Cut tiles to fit around outlets and corners. Glass tiles require careful scoring and snapping.
- Let the adhesive cure for at least twenty four hours.
- Mix the unsanded grout. Sanded grout will scratch the mirror surface.
- Apply the grout with the rubber float. Push it diagonally into the joints.
- Wipe away the excess grout with a damp sponge. Rinse the sponge often. Buff with a dry cloth once a haze forms.
27. White Deck Stain

We usually think of decks as brown wood. But a dark deck outside a glass door absorbs sunlight. Painting or staining that deck white creates a giant reflector.
The sun hits the white floor boards and bounces upwards. It travels through the glass door and onto your interior ceiling. This indirect light is soft and covers a large area.
It also keeps the deck cooler in summer. The visual effect is crisp and nautical. It blurs the line between the indoor floor and the outdoor space.
Material Required List
- Solid body exterior deck stain (White)
- Deck cleaner solution
- Painter tape
- Plastic sheeting
Equipment Required List
- Pressure washer (optional)
- Stiff deck brush
- Paint roller with extension pole
- Large paint brush
- Sandpaper (coarse grit)
DIY Instructions Step by Step
- Sweep the deck clear of all furniture and debris.
- Scrub the wood with the deck cleaner and the stiff brush. This removes mildew and old dirt.
- Rinse the deck thoroughly. Let it dry for two full days. Moisture is the enemy of stain.
- Sand any rough spots or splinters. Replace any rotted boards.
- Tape off the siding of the house where it meets the deck. Cover nearby plants with plastic.
- Use the brush to apply stain between the boards and in the corners. This is tedious but necessary.
- Pour the stain into a tray. Use the roller to cover the main surface boards. Back brush if needed to work the stain into the grain.
- Apply two thin coats rather than one thick one. Let the first coat dry completely before adding the second.
28. Patterned Privacy Film

You may have a bathroom window or a street facing view that needs coverage. Curtains block the light. Adhesive window film gives you privacy while letting the sun shine through.
The pattern refracts the light, scattering it around the room. You get a glowing effect rather than a shadow. It mimics the look of expensive etched glass for a fraction of the cost.
This is a great rental friendly solution. It peels off without leaving residue. You can choose from many designs to match your style.
Material Required List
- Roll of window privacy film
- Application solution (water with a drop of baby shampoo)
- Lint free cloth
Equipment Required List
- Spray bottle
- Squeegee (usually comes with film)
- Utility knife with a fresh blade
- Metal ruler
- Measuring tape
DIY Instructions Step by Step
- Measure the glass pane exactly. Do not include the frame in your measurement.
- Cut the film on a flat surface. Add one inch to your measurements for a safety margin.
- Clean the window glass meticulously. Any speck of dust will create a bubble. Use a razor blade to scrape off stuck paint or grit.
- Spray the glass generously with the application solution.
- Peel the backing liner off the film. Spray the sticky side of the film with the solution as well.
- Place the film onto the glass. The water lets you slide it into position.
- Spray the front of the film. Use the squeegee to push the water and bubbles out. Work from the center to the edges.
- Use the metal ruler and knife to trim the excess film right at the edge of the frame.
- Wipe the edges dry with the cloth.
29. Acrylic Console Table

Furniture takes up visual space. A heavy wood table in a hallway stops the eye and casts a shadow. An acrylic or Lucite table is effectively invisible.
Light travels right through the legs and the top. It allows you to see the floor and the wall behind it. This maintains the open feeling of the room while still giving you a surface to use.
It looks sleek and modern. It creates a “floating” effect for whatever you place on top. This is perfect for narrow entryways where every inch of light counts.
Material Required List
- Acrylic cleaner (specialized for plastic)
- Microfiber cloths
- Felt pads for the feet
Equipment Required List
- None (furniture comes assembled usually)
DIY Instructions Step by Step
- Unpack the table carefully. Acrylic scratches easily so do not use a knife to open the box if possible.
- Peel off the protective film. Do this slowly to avoid building up static charge which attracts dust.
- Inspect the edges for any sharpness. You can lightly sand sharp edges with very fine grit sandpaper if needed.
- Stick small clear felt pads to the bottom of the legs. This prevents the hard plastic from scratching your wood floors.
- Position the table in your space. Ensure it is not in direct path of heavy traffic to avoid scuffs.
- Clean it only with the specialized cleaner and microfiber. Paper towels will leave scratches over time.
30. Tunable Smart Lighting

Natural light changes color throughout the day. It is cool and blue at noon, warm and orange at sunset. Static light bulbs cannot match this. Tunable smart bulbs can mimic the full spectrum of daylight.
In winter, we lack the blue enriched light that wakes us up. Setting these bulbs to “Daylight” or 5000K in the morning boosts your energy. Shifting them to “Warm White” or 2700K in the evening helps you relax.
This variability supports your circadian rhythm. You get the right kind of brightness exactly when your body needs it. It creates a home that feels responsive to the time of day.
Material Required List
- Smart LED bulbs (Tunable White or Color)
- Smartphone or tablet
Equipment Required List
- Ladder or step stool
- WiFi router (home network)
DIY Instructions Step by Step
- Download the app associated with your bulb brand. Create an account if required.
- Turn off the light switch. Remove your old bulbs.
- Screw in the new smart bulbs. Turn the switch back on. The bulbs will usually pulse or flash to indicate they are in pairing mode.
- Open the app and select “Add Device”. Follow the on screen prompts to connect the bulbs to your WiFi.
- Group the bulbs by room within the app.
- Set up a schedule. Program the lights to turn on cool white at 7:00 AM.
- Program a shift to warm white at 6:00 PM.
- Test the dimming functions to ensure you have full control.
31. Boho Beaded Archway

An open archway is a beautiful architectural feature that connects rooms. However, you might sometimes want a soft visual barrier without blocking the light. A beaded curtain, like this one, is a perfect solution.
The strands define the space clearly. Yet, the sunlight from the window beyond filters through the gaps effortlessly. It adds a bohemian touch and a sense of movement to the entryway. The beads catch and refract the light, adding a subtle sparkle.
This is a simple way to add character without sacrificing brightness. It keeps the sightlines open, making your home feel like one big, bright space.
Material Required List
- Beaded curtain (sized to your opening)
- Two heavy-duty cup hooks or a tension rod
Equipment Required List
- Drill
- Measuring tape
- Pencil
- Step stool
DIY Instructions Step by Step
- Decide if you want to mount the curtain inside the archway frame or on the wall above it. Inside mounting is sleeker.
- Measure the width of the archway at the top where you will hang the curtain.
- Mark the positions for the two cup hooks with your pencil. Ensure they are spaced evenly to support the curtain’s header bar.
- Drill small pilot holes at your marks to make screwing the hooks in easier.
- Screw the cup hooks firmly into the wood frame by hand.
- Lift the beaded curtain and place the eyelets of its header bar over the hooks. Adjust the strands so they hang straight.
- Alternatively, for a no-drill solution, simply twist a tension rod to fit snugly inside the archway and slide the curtain onto it before securing.
32. Modern Up/Down Sconce

Standard wall lights often cast a single, harsh shadow downwards. This can make a room feel smaller and gloomier. A dual-direction sconce, like this one, solves that problem elegantly.
It shines light both up towards the ceiling and down towards the floor. This creates a “wall wash” effect. The light bounces off the wall surface, brightening the entire area and making the room feel taller.
It provides both ambient light for the room and practical task lighting for the floor below. This modern look is far softer and more flattering than a single direct bulb.
Material Required List
- Up/down wall sconce fixture
- Wire nuts
- Electrical tape
- Two LED bulbs (GU10 base is common for this style)
Equipment Required List
- Screwdriver
- Wire strippers
- Voltage tester
- Ladder or step stool
DIY Instructions Step by Step
- Turn off the power to the light circuit at your main breaker box. Test the existing switch to ensure the power is truly off.
- Unscrew the old fixture from the wall. Disconnect the wires by untwisting the wire nuts.
- Use your voltage tester on the wires coming from the wall to double-check that they are not live.
- Install the mounting bracket that came with your new sconce onto the electrical box.
- Connect the wires from the wall to the fixture. Match black to black (hot), white to white (neutral), and bare/green to bare/green (ground).
- Wrap the wire nuts with electrical tape for extra security. Tuck the wires neatly back into the box.
- Mount the fixture base to the bracket using the provided decorative nuts.
- Install the bulbs and turn the power back on to test.
33. Patterned Privacy Film

You may have a bathroom or street facing window that needs privacy. But heavy curtains or blinds block the precious sun you want. Patterned window film is the perfect compromise.
It obscures the view from the outside, creating visual privacy. Yet, it lets natural light pour into the room. The etched pattern, like this elegant design, diffuses harsh sunlight and creates a soft, glowing effect.
It adds a decorative element that mimics expensive etched glass. It’s also a great temporary solution for renters as it peels off without leaving a sticky residue.
Material Required List
- Roll of patterned window film
- Spray bottle filled with water and a drop of baby shampoo
- Lint-free cloth or paper towels
Equipment Required List
- Squeegee (often included with the film)
- Utility knife with a fresh blade
- Metal ruler or straight edge
- Measuring tape
- Glass cleaner
DIY Instructions Step by Step
- Clean the window glass thoroughly with glass cleaner. Any speck of dust or dirt will create a permanent bubble under the film.
- Measure your window pane’s height and width accurately.
- Unroll the film on a clean, flat surface. Mark your measurements, adding an extra inch on all sides for trimming. Cut the film with scissors.
- Spray the window glass generously with the soapy water solution.
- Peel the clear backing liner off the film. Spray the exposed sticky side of the film with the solution as well.
- Carefully place the film onto the wet glass. The water allows you to slide it into the perfect position.
- Spray the front surface of the film. Use the squeegee to push the water and air bubbles out, working from the center towards the edges.
- Place your metal ruler against the edge of the window frame. Use the utility knife to trim the excess film for a perfect fit.
- Wipe the edges dry with your cloth. The film will adhere fully as it dries over the next few days.
34. Crisp White Window Trim

The color of your window trim has a surprising impact on how bright a room feels. Dark wood trim can absorb light and make a window seem smaller. Painting it a crisp white, as seen here, immediately brightens the space.
The white surface reflects the incoming sunlight, bouncing it further into the room. It also frames the view outside, creating a clean contrast that makes the window itself pop visually.
This simple change creates a modern, fresh look that feels airy and open. It’s one of the most effective paint projects for boosting light.
Material Required List
- White semi-gloss or satin interior trim paint
- Stain-blocking primer (essential if painting over dark wood)
- Painter’s tape
- Spackle or wood filler
Equipment Required List
- Angled sash paintbrush (1.5 to 2 inch)
- Fine-grit sandpaper or sanding sponge
- Putty knife
- Damp cleaning cloth
- Drop cloth
DIY Instructions Step by Step
- Lay down a drop cloth to protect your floor.
- Clean the trim thoroughly to remove dust and grease.
- Fill any nail holes or dents with spackle. Let it dry, then sand it smooth. Lightly sand the rest of the trim to de-gloss the old finish so the new paint sticks.
- Wipe away all the sanding dust with a damp cloth.
- Apply painter’s tape carefully to the wall and the window glass where it meets the trim. Press the edges down firmly.
- Apply a coat of primer to the trim. This is crucial for covering dark wood and ensuring a uniform final finish. Let it dry completely.
- Apply your first coat of white paint using long, smooth strokes. Watch for drips in the corners. Let it dry according to the can’s instructions.
- Apply a second coat for full, rich coverage.
- Remove the painter’s tape slowly while the final coat is still slightly damp to get a crisp, clean line.
35. Fluted Glass Sliding Divider

In a studio or open-plan space, you sometimes need to separate a sleeping area for privacy. A solid wall would make the space feel dark and claustrophobic. This sliding room divider uses fluted glass to solve that problem perfectly.
The textured “ribbed” glass provides visual privacy by blurring shapes and figures. You can’t see through it clearly. However, it allows light to pass through it almost unimpeded, keeping the entire space bright.
The light wood frame adds warmth and structure. The sliding mechanism means the divider can be opened completely when you want a single, large, sunlit room.
Material Required List
- Ceiling-mounted sliding track hardware kit (sized for your opening)
- Custom-sized fluted glass panels with wood frames
- Floor guides
Equipment Required List
- Drill
- Stud finder
- Level
- Measuring tape
- Ladder
- Screwdriver
DIY Instructions Step by Step
- This project requires precision. Use a stud finder to locate the ceiling joists where you want the divider to go. The track must be anchored into solid wood, not just drywall.
- Measure the exact height from floor to ceiling at several points to check for variations. Your panel height needs to account for the track and floor clearance.
- Mark the position of the top track on the ceiling. Use a level to ensure it’s perfectly straight.
- Drill pilot holes into the joists through the pre-drilled holes in the track. Screw the track securely to the ceiling.
- Install the roller hardware onto the top edge of your wood-framed glass panels according to the manufacturer’s instructions.
- Carefully lift a panel and tilt it to hook the rollers into the ceiling track. You will need a helper for this step.
- Install the small floor guides at the bottom. These keep the panels hanging straight and prevent them from swinging.
- Test the sliding motion to ensure it’s smooth and the panels align correctly when closed.
36. High Gloss Kitchen Cabinets

Kitchens can often feel dark, especially if they lack large windows. One effective way to combat this is by choosing reflective surfaces for your largest installations. These high-gloss grey cabinets act almost like mirrors.
They reflect the light from the overhead spots, the window, and the under-cabinet lighting. This bounces brightness around the room, making it feel significantly larger and lighter.
The sleek, polished finish is modern and stylish. It’s also incredibly easy to wipe clean, which is a practical bonus in a busy kitchen environment.
Material Required List
- High-gloss interior cabinet paint
- Bonding primer (for glossy surfaces)
- Liquid deglossing agent
- Painter’s tape
Equipment Required List
- Screwdriver or drill
- High-density foam paint rollers (4-inch)
- Small angled paintbrush
- Paint tray
- Tack cloth
- Cleaning rags
DIY Instructions Step by Step
- Set up a work area in a garage or well-ventilated room. Remove all cabinet doors and drawers. Remove all hardware (knobs, hinges) and label them so you know where they go back.
- Clean all cabinet surfaces thoroughly with a degreaser to remove kitchen grime. This is the most important step.
- Wipe all surfaces with a liquid deglosser. This dulls the old finish without dusty sanding and helps the new paint stick.
- Wipe everything down with a tack cloth just before painting to remove any final dust motes.
- Tape off the insides of the cabinet boxes and any walls.
- Apply a coat of bonding primer to the doors, drawers, and frames. Use the brush for corners and the foam roller for flat areas. Let it dry completely.
- Apply the first coat of high-gloss paint. Use a light touch with the foam roller to avoid creating bubbles or texture.
- Let it dry, then apply a second and possibly third thin coat. Multiple thin coats are better than one thick one for a smooth, glassy finish.
- Let the paint cure for several days before reattaching the hardware and reinstalling the doors.
37. Translucent Stone Veneer

We usually think of stone as a solid, opaque material. But some natural stones, like certain types of onyx or marble, are translucent when cut thinly. Using slim stone veneer panels creates a stunning and unique light feature.
When backlit, the stone glows from within. It highlights the incredible natural patterns and veins that are otherwise hidden. The light it emits is soft, warm, and diffused, perfect for creating a cozy atmosphere in a dark corner or hallway.
It turns a plain wall into a dramatic focal point that is also a source of light. It feels luxurious and organic.
Material Required List
- Translucent stone veneer sheets (often backed with fiberglass)
- Clear construction adhesive suitable for stone
- LED strip lighting (warm white)
- Plywood for building a light box frame
Equipment Required List
- Circular saw or table saw
- Caulk gun
- Drill
- Level
- Measuring tape
- Utility knife or tin snips (to cut veneer)
DIY Instructions Step by Step
- Build a shallow wooden frame box on your wall using plywood. This will house the LED lights and support the stone panels. The depth should be about 2-3 inches.
- Install the LED strip lighting inside the back of this box. Run the strips in rows, spacing them evenly to avoid hot spots. Connect them to a power source with a switch or dimmer.
- Test the lights to ensure they are working and cast an even glow.
- Measure your stone veneer panels. You can cut most thin stone veneers with tin snips or a utility knife.
- Apply a clear construction adhesive to the edges of your plywood frame box. Do not put adhesive in the middle where it would block the light.
- Carefully press the stone veneer panel onto the frame. If using multiple panels, butt them together tightly.
- Hold the panel in place with painter’s tape until the adhesive sets.
- Finish the edges with wood trim to hide the plywood frame and the edge of the stone sheet.
38. Wired Glass Balustrade

Staircases are often dark wells in the center of a house. A traditional staircase with solid wood banisters and spindles blocks a significant amount of light. Replacing this with a glass balustrade opens up the entire area.
The wired glass shown here is a great choice. The wire mesh inside gives it an industrial, almost vintage look while providing structural safety. Light passes right through the glass panels.
This lets light from upstairs windows travel down to the lower level, and vice-versa. It makes the staircase feel like a light shaft rather than a dark tunnel, brightening both floors it connects.
Material Required List
- Custom-cut wired glass panels
- Metal handrail and post system (steel or aluminum)
- Glass clamps or U-channel base shoe
- Heavy-duty anchors for concrete or wood
Equipment Required List
- Hammer drill (for concrete) or standard drill
- Wrenches and Allen keys appropriate for the hardware
- Level
- Measuring tape
- Chalk line
- Suction cups for handling glass
DIY Instructions Step by Step
- This is an advanced DIY project that requires careful planning and adherence to building codes. Remove the old banister and spindles. Patch and repair the stairs and floor.
- Lay out the position of your new posts. Use a chalk line to ensure they are in a perfect line.
- If installing into a wood floor, ensure you are anchoring into joists. If into concrete, drill holes for heavy-duty expansion anchors.
- Securely bolt down the metal posts. Use a level to ensure they are perfectly plumb (vertical) in all directions.
- Install the glass clamps onto the posts. Do not tighten them fully yet.
- With a helper and suction cups, carefully lift a glass panel and place it into the clamps between two posts.
- Adjust the panel so it is level and centered. Tighten the clamp screws securely according to the manufacturer’s torque specifications.
- Repeat for all panels.
- Install the metal handrail on top of the posts or directly onto the glass, depending on your system’s design.
You now have 38 clever strategies to transform your home into a bright, light filled haven. From high gloss paint on your doors to pruning the bushes outside, every small action contributes to a brighter interior. The goal is to maximize every single photon of winter sunlight.
By introducing reflective surfaces, widening sightlines, and using sheer fabrics, you shift the visual atmosphere. You stop fighting the darkness and start working with the light. Apply these tips to make your space feel larger, cleaner, and far more welcoming.
Say goodbye to the winter gloom. Your home can be a beacon of brightness and warmth throughout the coldest months. Embrace these simple tricks and enjoy the renewed energy that daylight brings.
Key Takeaways
- Maximize Reflection: Utilize mirrors, high gloss paint, and light colored flooring to bounce light deep into your rooms. Shiny surfaces work like secondary light sources.
- Clear the Path: Remove screens, prune exterior foliage, and use acrylic or clear furniture. Do not let anything absorb or block the limited winter sun.
- Prioritize Sheer Layers: Replace heavy drapes with sheer shades or patterned window film. This allows privacy while softening harsh sunlight into a uniform, ambient glow.
- Strategic Lighting: Swap warm, yellow bulbs for 5000K daylight LEDs in main living areas. This mimics natural noon sun and increases alertness and brightness.
- Open Sightlines: Replace solid doors with glass panels or remove them entirely to allow light to flow freely between rooms. This creates a larger, more unified sense of space.