The holiday season is a time for joy, connection, and celebration. But with a busy schedule, decorating for a party can feel like a daunting task. It doesn’t have to be. Forget spending weeks planning and crafting. You can transform your home into a festive wonderland in a single afternoon.

This guide is your secret weapon for last-minute holiday magic. We have gathered 38 incredible decor ideas that are as quick and simple as they are beautiful. Each one comes with easy-to-follow instructions, designed to help you create a warm, inviting, and memorable atmosphere for your guests without the stress. Let’s get crafting!
1. Whimsical Tulle Trees

Create a magical holiday scene with these delightful tulle trees. This decoration idea steps away from traditional colors, offering a soft and playful atmosphere for your party. The light and airy tulle, shaped into festive cones, brings a unique texture to your holiday display. These pieces look wonderful on a dessert table or as a whimsical centerpiece.
Surround the trees with classic nutcrackers and glass jars filled with shiny ornaments. This combination creates a beautiful scene reminiscent of a sugarplum fantasy. Your guests will appreciate the imaginative and charming setup. It’s a simple way to build a memorable holiday corner in your home in just a few hours.
How to Make It:
What You’ll Need:
- Poster board or thin cardboard
- Rolls of tulle fabric (in two colors, like pink and light green)
- Scissors
- Tape
- A hot glue gun (ask an adult for help with this part!)
- Ribbon for a bow
Step 1: Make a Cone Shape Take your large piece of poster board and roll it into a cone, just like an ice cream cone. Make sure the bottom is flat so it can stand up by itself. Use tape to secure the edge of the cone so it holds its shape.
Step 2: Start Wrapping the Tulle Pick one color of tulle to start with. Put a small dot of hot glue at the bottom of the cone and press the end of the tulle onto it. Carefully begin wrapping the tulle around the cone, making sure each new layer slightly overlaps the last one. Continue until you have a thick stripe of color. Cut the tulle and glue the end down.
Step 3: Add the Second Color Now, take your second color of tulle. Glue the end right above where your first color ended. Start wrapping it just like you did before to create a second, different colored stripe.
Step 4: Finish Wrapping to the Top Keep making stripes with your colors, alternating as you go up the cone. When you get to the very top, wrap the tulle a few extra times to make sure the pointy tip is covered. Cut the tulle and secure it with a final dot of glue.
Step 5: Add a Festive Bow Take your ribbon and tie it into a beautiful bow. Put a dot of glue on the back of the bow and press it firmly onto the top of your new tulle tree. Let it dry, and your charming decoration is ready to display!
2. Frosted Window Wonderland

Transform a quiet corner into a serene winter scene. This decoration captures the quiet beauty of a snowy day, using a simple palette of white and silver. Bare branches, dusted with glitter, reach up towards delicate paper snowflakes that seem to float in the air. The arrangement creates a peaceful and elegant atmosphere.
This look relies on texture and light to build its magic. Soft cotton batting mimics fresh snow on the windowsills, while reflective silver vases and ornaments catch the light. It’s a sophisticated way to bring the stillness of a winter forest indoors for your holiday gathering.
How to Make It:
What You’ll Need:
- A few bare branches from your yard
- White or silver spray paint
- Spray adhesive (like the kind for school projects)
- White or silver glitter
- A clear vase
- White paper
- Scissors
- Clear string or fishing line
- Cotton batting (the fluffy stuff inside pillows)
Step 1: Frost Your Branches Take your branches outside and lay them on some newspaper. Lightly spray them with the white or silver paint. You don’t have to cover them completely. Once the paint is dry, spray them with the spray adhesive and quickly sprinkle glitter all over them. They will sparkle like they are covered in ice!
Step 2: Create Paper Snowflakes Take a square piece of white paper and fold it in half to make a triangle. Fold it in half again two more times. Now, cut little shapes along all the folded edges. When you unfold the paper, you’ll have a beautiful, unique snowflake. Make several of these in different sizes.
Step 3: Assemble Your Wonderland Put your sparkly branches into a clear vase. Pull apart the cotton batting and lay it around the base of the vase and on the windowsill to look like snow. Use the clear string to hang your paper snowflakes from the ceiling or window frame so they dangle above the branches.
3. Timeless Tartan Tablescape

Set a classic and inviting holiday table with rich colors and traditional patterns. A bold red plaid runner grounds the entire setting, creating a warm foundation. Matching napkins tied with sprigs of green add a simple, festive touch to each plate. The entire table feels cozy and full of holiday spirit.
The centerpiece shines with a brilliant arrangement of red berries, drawing the eye and adding a pop of vibrant color. This is complemented by a large glass bowl filled with gleaming gold ornaments. Tall red and white candles cast a soft, welcoming glow, making the space ready for a memorable holiday meal.
How to Make It:
What You’ll Need:
- A large, clear glass bowl or vase
- Shiny ball ornaments (gold looks great!)
- A few small pinecones
- Faux or real evergreen sprigs
Step 1: Build Your Base First, place a few of the evergreen sprigs and pinecones at the very bottom of your glass bowl. This will create a nice, natural layer for your ornaments to sit on.
Step 2: Add the Ornaments Carefully begin placing the shiny gold ornaments inside the bowl. Use different sizes if you have them to make it look more interesting. Fill the bowl until it’s about three-quarters full.
Step 3: Finishing Touches For a little extra flair, you can tuck a few more small evergreen sprigs in between the ornaments near the top. Your beautiful centerpiece is now ready to be the star of the dinner table.
4. Emerald and Garnet Glow

Create a dramatic and luxurious atmosphere for your holiday dinner. This look uses deep, rich colors like dark green and burgundy, paired with the warm glow of gold accents. An abundance of candles at different heights provides most of the light, making the room feel intimate and special.
Lush evergreen garlands drape over the fireplace mantel and serve as a table runner, dotted with pinecones and dried fruits. The deep colors of the tablecloth and ribbons on the chairs tie everything together. This moody and elegant setting is a wonderful choice for a sophisticated evening party.
How to Make It:
What You’ll Need:
- A fresh orange
- A knife (ask an adult to help with this)
- A baking sheet
- An oven
- Twine or thin ribbon
- A sprig of fresh rosemary (optional)
Step 1: Slice Your Orange Ask an adult to help you carefully slice the orange into thin, round slices. Try to make them all about the same thickness, like a skinny cookie.
Step 2: Dry the Slices Place the orange slices in a single layer on a baking sheet. An adult will need to put them in the oven on its lowest temperature setting. Let them bake for 2-3 hours until they are dry to the touch. Let them cool completely.
Step 3: Create Your Place Setting Fold your dinner napkin nicely. Place a dried orange slice on top of it. If you have rosemary, you can add a small sprig. Wrap a piece of twine or ribbon around the napkin, orange slice, and rosemary, and tie it in a simple knot or bow on top.
5. Rustic Lantern Jars

Bring a cozy, rustic feeling to any space with these simple lighted jars. Grouped together, they create a warm and inviting atmosphere, like tiny, personal fireplaces. The soft glow of the fairy lights inside highlights the natural textures of the pinecones, birch logs, and plaid blankets nearby.
This decorating idea is wonderfully versatile. You can place a cluster on the floor to light up a corner, arrange a few on a side table, or use a single jar as a charming accent. They provide a gentle, ambient light that makes any room feel more comfortable and ready for holiday relaxation.
How to Make It:
What You’ll Need:
- A clean, empty glass mason jar
- A string of battery-powered fairy lights (the kind with a small battery pack)
- A few very small pinecones
Step 1: Prepare Your Lights Turn on your fairy lights to make sure they work. Untangle the thin wire so it’s easy to handle.
Step 2: Fill the Jar Carefully feed the string of lights into the jar, bit by bit. As you put the lights in, drop in a few of the small pinecones. Try to spread them out so they are mixed in with the lights.
Step 3: Hide the Pack and Light It Up Leave the small battery pack right at the top of the jar. You can tuck it just inside the rim so it’s easy to reach. Screw on the metal ring part of the jar lid (you don’t need the flat top part). Switch on the lights, and your cozy lantern is finished!
6. Confectionery Candy Lane

Design a sweet and playful centerpiece that looks good enough to eat. This table is a celebration of holiday treats, with a village of decorated gingerbread houses as the main attraction. The scene is cheerful and bright, promising fun for guests of all ages.
The theme extends upwards, with candy canes hanging merrily from the chandelier. Bowls of colorful candies are placed on the table, inviting guests to help themselves. This setup is not just a decoration but an interactive dessert display that adds a layer of delightful fun to your party.
How to Make It:
What You’ll Need:
- A box of candy canes
- Thin red or white ribbon
- Scissors
Step 1: Cut Your Ribbon For each candy cane you want to hang, cut a piece of ribbon that is about 6 inches long. This will give you enough length to make a loop.
Step 2: Tie the Ribbon Take one piece of ribbon and tie it securely around the curved part of a candy cane. Make a simple, tight knot.
Step 3: Hang on the Chandelier Take the two loose ends of the ribbon and tie them together in a knot, creating a loop. Now you can simply hang this loop over one of the arms of your chandelier. Repeat this with more candy canes until your chandelier is decorated all around.
7. Scandinavian Winter Simplicity

Embrace a clean and modern holiday look with minimalist decorations. This style focuses on natural elements and a calm, neutral color scheme. A simple glass vase holding a few sprigs of fresh evergreen and eucalyptus becomes a beautiful, understated centerpiece.
The table setting is uncluttered, using a light-colored linen runner and simple white and black accents. Small ceramic houses and trees add a touch of whimsy without overwhelming the space. This approach to decorating creates a serene and peaceful environment for your holiday meal.
How to Make It:
What You’ll Need:
- A clear glass vase or tall bottle
- A few branches from an evergreen tree in your yard (like a pine or fir)
- Water
Step 1: Gather Your Greenery Go outside and find a few small branches from an evergreen tree. Choose ones that have an interesting shape. You only need two or three.
Step 2: Trim the Branches Before you put the branches in the vase, pull off any needles from the bottom part of the stem. This will help keep the water in your vase cleaner. An adult can help you snip the bottom of the stem at an angle.
Step 3: Arrange in Water Fill your vase about halfway with fresh water. Place your evergreen branches inside. Arrange them so they look nice and natural. That’s it! You have a simple, beautiful, and modern centerpiece.
8. Ocean Jewel Centerpiece

Make a bold and modern statement with a burst of unexpected color. This striking centerpiece uses a single color family—in this case, vibrant blues and greens—to create a high-impact look. A tall glass vase overflows with shiny ornaments, looking like a cascade of jewels.
The theme is carried through with color-coordinated gift boxes and other decorative elements arranged artfully around the base. This is a fantastic way to decorate if you want to move beyond traditional holiday colors. It feels fresh, contemporary, and full of energy.
How to Make It:
What You’ll Need:
- A tall, clear cylinder vase
- Lots of shatterproof ball ornaments in different sizes (all in the same color family, like different shades of blue)
- A few interesting bare branches from the yard
- Spray paint that matches your ornaments (optional)
- A hot glue gun (ask an adult for help!)
Step 1: Prepare Your Branches (Optional) If you want your branches to match, take them outside and spray paint them with a color that goes with your ornaments. Let them dry completely.
Step 2: Fill the Vase Start by dropping a layer of ornaments into the bottom of the vase. Then, stand your branches up inside the vase. Carefully continue adding ornaments, filling the vase up and arranging them around the branches.
Step 3: Create the Burst To make it look like the ornaments are exploding out of the top, an adult can help you use a hot glue gun. Put a small dot of glue on an ornament and stick it to the end of one of the branches sticking out of the vase. Do this with a few more ornaments to complete the look.
9. Electric Holiday Glow

Light up your party with a fun, modern, and unexpected decoration. Bright neon signs spelling out festive words like “Joy” and “Noël” create an exciting party atmosphere. This style is great for a nighttime event, as the glowing colors become the main feature in a dimly lit room.
The vibrant lights are reflected in the glass vases and on the tabletop, doubling the effect. This is a very contemporary take on holiday cheer, swapping traditional candlelight for a high-energy, electric glow. It’s sure to be a conversation starter and a memorable backdrop for photos.
How to Make It:
What You’ll Need:
- A piece of black foam board or stiff cardboard
- A pencil
- Flexible, battery-powered EL wire (you can find this at a craft store)
- A thick needle or a skewer
- Clear tape
Step 1: Draw Your Word Using a pencil, lightly write a simple holiday word on your black foam board. “JOY” is a good one to start with because it has straight lines.
Step 2: Poke Holes for the Wire Use your skewer or thick needle to poke holes along the letters you drew. Make a hole at the start and end of each straight line in your letter.
Step 3: Thread the Wire Turn on your EL wire so you can see it glow. Starting from the back of the board, push the end of the wire through your first hole to the front. Guide the glowing wire along the line of your letter, then push it back through the hole at the end of that line. Keep doing this to “draw” your word with the light-up wire.
Step 4: Secure and Display On the back of the board, use small pieces of clear tape to hold the wire in place where it passes from one letter to the next. Tape the battery pack to the back. Prop your new faux-neon sign up against a wall and enjoy the glow!
10. Modern Metallic Constellation

Create a sophisticated and artistic wall display with geometric shapes. This decoration moves away from traditional wreaths and garlands, opting instead for a collection of modern, metallic objects. The mix of copper, gold, and silver adds a warm yet contemporary shine to the wall.
This arrangement plays with form and texture, from the airy wire shapes to the solid, folded paper ornaments. The pieces are hung like a constellation of stars, creating a focal point that is both festive and chic. It is a wonderful option for a holiday party with a modern, artistic theme.
How to Make It:
What You’ll Need:
- A square piece of stiff paper (metallic or colored paper looks great)
- Scissors
- A glue stick or clear tape
- A piece of string
Step 1: Make a Paper Square If your paper isn’t already a square, fold one corner over to meet the opposite edge, making a triangle. Cut off the extra rectangular piece. When you unfold the triangle, you’ll have a square.
Step 2: Fold Your Square Fold your square in half one way, then unfold it. Then fold it in half the other way and unfold it. You should have creases that look like a plus sign.
Step 3: Cut Your Folds Now, cut along each of the four fold lines, but STOP cutting when you get close to the center. Don’t cut all the way through! You should have four cuts that point toward the middle.
Step 4: Fold and Glue the Points You now have eight points (two for each of the four corners). Take one point from each corner and fold it over to the very center of the square. Glue or tape just the tip of that point down. Skip the next point, and grab the one after that. Fold it to the center and glue it down. Keep doing this until you have four points glued to the center, creating a pinwheel shape.
Step 5: Add a String and Hang Poke a small hole in one of the top points and loop your string through it to hang your new geometric ornament.
11. Icy River Table Setting

Create a cool and shimmering tablescape that feels like a magical winter palace. This design uses a palette of icy blue and sparkling silver to craft a breathtaking scene. Floating candles in blue-tinted water cast a serene glow, reminiscent of light on a frozen lake. The effect is enchanting and deeply calming.
Iridescent streamers hang from the ceiling, catching the light and mimicking a waterfall of icicles. Glittering silver placemats and runners add another layer of sparkle to the table. This is a truly unique and modern way to celebrate the season, leaving a lasting impression on your guests with its frosty elegance.
How to Make It:
What You’ll Need:
- A few clear glass cylinder vases of different heights
- Water
- Blue food coloring
- Small, white floating candles
Step 1: Prepare Your Vases Make sure your glass vases are clean and clear so they sparkle. Arrange them in a group in the center of your table. Using different heights will make it look more interesting.
Step 2: Add the Colored Water Fill each vase with water, leaving about two inches of space at the top. Now, add one single drop of blue food coloring to the water in each vase. You can stir it gently with a spoon. You only want a hint of color, not a dark blue.
Step 3: Float the Candles Carefully place one floating candle on the surface of the water in each vase. The candles should float right on top. Ask an adult to light the candles just before your guests arrive, and your beautiful, glowing centerpiece is complete.
12. Graphic Glam Holiday Table

For a chic and modern celebration, try a bold black and white theme. This striking look uses strong patterns and clean lines to create a sophisticated atmosphere. A custom table runner with bold typography sets the stage, making a very personal statement.
Striped black and white ornaments fill glass vases, continuing the graphic theme. Napkins are folded neatly and cinched with beautiful striped bows. The simplicity of the color scheme allows the fresh green foliage and the warm candlelight to stand out, creating a balanced and stylish setting.
How to Make It:
What You’ll Need:
- A wide, striped black and white ribbon
- A pair of scissors
- A hot glue gun (ask an adult for help!)
- A thin, plain ribbon or a twist tie
Step 1: Create the Bow Loops Cut a long piece of your striped ribbon, about 12 inches. Make a loop by bringing one end to the middle. Then make a second loop by bringing the other end to the middle. It should look like a flattened number 8.
Step 2: Pinch the Center Pinch the middle of your ribbon loops together. It will start to look like a bow.
Step 3: Secure the Middle While still pinching, wrap a small, thin ribbon or a twist tie tightly around the center to hold the bow shape. Now, cut another small piece of the main striped ribbon. Put a dot of hot glue on it and wrap it around the center to hide the thin ribbon. Glue it securely on the back. Your beautiful bow is ready to place on a napkin.
13. Gilded Bottle Centerpiece

Turn empty bottles into a stunning metallic centerpiece. This project gathers used wine bottles and transforms them with coats of gold, silver, and copper spray paint. Grouped together on a sequined runner, they create a skyline of shimmering color that looks expensive and chic.
This display is all about texture and reflection. The smooth, painted glass contrasts beautifully with the sparkling sequins of the tablecloths. Ornaments and walnuts, also painted in metallic tones, are scattered around the base, completing the look. It’s a brilliant way to upcycle common items into a glamorous holiday display.
How to Make It:
What You’ll Need:
- A clean, empty glass bottle (make sure the label is washed off)
- A can of metallic spray paint (gold or silver works well)
- Newspaper or a drop cloth
Step 1: Set Up Your Painting Area This part is very important and must be done outside. Lay down plenty of newspaper or a drop cloth in a well-ventilated area, like your driveway or backyard.
Step 2: Paint Your Bottle Place your clean bottle upside down in the center of the newspaper. Shake the can of spray paint very well. Holding the can about a foot away from the bottle, spray a light, even coat all over it. Don’t try to cover it all at once or the paint will drip.
Step 3: Let It Dry and Add a Second Coat Let the first coat of paint dry completely. This might take about an hour. Once it’s dry, you can spray a second coat on it to make sure it’s fully covered and looks smooth. Let it dry completely before bringing it inside to display.
14. Gatsby Glam Party Corner

Throw a party with all the glitz and glamour of the Roaring Twenties. This theme uses a classic black, gold, and white color palette to create a feeling of luxury and excitement. A backdrop of giant, golden paper fans makes a stunning statement for a photo wall or behind a bar cart.
White and black feather boas are draped playfully, while strings of pearls add a touch of elegance. Everything, from the glassware to the dessert trays, is chosen to fit the extravagant theme. It’s a fun and festive way to transport your guests to another era for a night of celebration.
How to Make It:
What You’ll Need:
- Several sheets of stiff, golden paper (about 3-4 sheets per fan)
- A ruler
- A pencil
- A glue stick or a hot glue gun (with an adult’s help)
Step 1: Fold the Paper Like an Accordion Take one sheet of paper and start folding it back and forth, like you’re making a paper fan you can cool yourself with. Each fold should be about one inch wide. Do this with all of your sheets of paper.
Step 2: Connect the Folded Sheets Take two of your folded paper strips and glue their ends together to make one very long strip. Keep doing this until all your strips are glued into one long accordion.
Step 3: Form the Circle Now, glue the two remaining ends together to form a circle. It will look like a paper tube.
Step 4: Flatten to Create the Fan Carefully push the top of the tube down and towards the center. The paper will flatten out into a beautiful round fan shape. You might need an adult to help you put a dot of hot glue right in the center to hold it all together.
15. Jewel-Tone Holiday Feast

Step away from red and green and embrace a rich, jewel-toned color palette. This opulent table setting uses deep emerald, sapphire blue, ruby red, and regal purple to create a luxurious and unforgettable scene. Colored glass bottles hold tall, flickering candles and magnificent peacock feathers.
The deep burgundy tablecloth provides a dramatic canvas for the vibrant colors. Velvet ribbons in matching jewel tones are tied around the chairs, adding a soft, textural element. This bold and beautiful approach to holiday decorating feels both festive and uniquely sophisticated.
How to Make It:
What You’ll Need:
- A clean, empty wine bottle (a colored one in green or blue is great)
- One or two long peacock feathers
- A tall, thin taper candle
Step 1: Prepare Your Bottle Make sure your bottle is clean and that the label has been removed. You can soak it in warm, soapy water to get the paper and glue off easily. Let it dry completely.
Step 2: Add the Feathers Take your peacock feathers and simply slide them into the bottle. The long stems will hold them upright. Arrange them so the beautiful “eye” of the feather is facing out.
Step 3: Add the Candle Take your taper candle and gently place it in the opening of the bottle. If it’s a little wobbly, you can ask an adult to help you carefully melt the bottom wax of the candle a little so it sticks securely in the opening.
16. Celestial Starry Night

Bring the beauty of a clear winter sky indoors with a celestial-themed party. A dark navy blue tablecloth serves as the night sky, creating a stunning backdrop for glittering gold and silver stars. Strings of fairy lights are mixed with hanging star garlands for a magical, twinkling effect.
The table is scattered with star-shaped confetti, and constellations can even be drawn on the tablecloth for an interactive touch. This theme is enchanting and full of wonder, making guests feel like they are celebrating under the stars. It is a brilliant idea for a New Year’s Eve party as well.
How to Make It:
What You’ll Need:
- Stiff craft paper in gold, silver, and glitter finishes
- A star-shaped cookie cutter or a printed star shape to trace
- A pencil
- Scissors
- A hole punch
- A long piece of string or clear fishing line
Step 1: Create Your Stars Trace your star shape onto the different kinds of paper. Make lots of stars in different sizes and colors to make your garland interesting. Carefully cut out all of the star shapes.
Step 2: Punch the Holes Take your hole punch and make one hole in the top point of each star. This is where the string will go through.
Step 3: String Your Garland Take your long piece of string and begin threading it through the holes in your stars. Leave a few inches of space between each star. You can mix up the colors and sizes as you go. Once you’ve added all your stars, your beautiful garland is ready to hang.
17. Sparkling Confetti Celebration

Fill your party with sparkle and cheer with a rose gold and confetti theme. This look is festive, glamorous, and full of fun. A sequined table runner immediately sets a celebratory tone, catching the light and adding a ton of shimmer.
The key features are the balloons filled with gold confetti, which look like bubbles of joy floating over the table. Metallic and white ornaments are scattered across the table, complementing the balloons and runner. This is a bright and happy theme that works wonderfully for Christmas or a New Year’s Eve bash.
How to Make It:
What You’ll Need:
- Clear, uninflated latex balloons
- Paper confetti (metallic gold looks great)
- A small funnel
Step 1: Fill the Balloon with Confetti Before you blow up the balloon, stretch the opening a little with your fingers. Place the small end of the funnel into the balloon’s opening. Now, pour a good amount of confetti through the funnel and into the balloon.
Step 2: Inflate the Balloon Carefully remove the funnel. Blow up the balloon with air or helium, just as you normally would, and tie the end in a knot.
Step 3: Create Static for a Fun Effect To make the confetti stick to the inside walls of the balloon, you need to create static electricity. Rub the inflated balloon on your hair or on a fuzzy blanket. You’ll see the little pieces of confetti magically cling to the sides of the balloon.
18. Disco Ball Winter Wonderland

Get your guests in the mood to dance with a retro disco-themed party corner. This fun setup uses a silver tinsel curtain as a shimmering backdrop, creating the perfect space for photos. A cluster of disco balls of various sizes hangs from the ceiling, reflecting light all around the room.
Colored party lights add to the festive, high-energy atmosphere. A single spotlight pointed at the disco balls will send dazzling spots of light dancing across the walls and ceiling. This is an incredibly fun and energetic theme for a holiday party that is all about celebration and good times.
How to Make It:
What You’ll Need:
- A silver foil fringe curtain (you can find these at a party store)
- Strong tape (like packing tape or painter’s tape)
- Scissors
Step 1: Measure Your Space Decide which wall you want to use for your backdrop. Use a measuring tape to see how wide the space is. The foil curtains usually come in long, rectangular sections.
Step 2: Hang the First Curtain The foil curtains have a solid strip at the top where all the fringe is attached. Apply a long piece of tape along this top strip. Carefully press the taped edge onto the wall where you want your backdrop to start. Make sure it’s straight.
Step 3: Overlap for a Fuller Look Take your next curtain section and hang it right next to the first one, letting the edges overlap by about an inch. This will make sure there are no gaps in your sparkly wall. Keep doing this until you’ve covered the whole area. If the curtains are too long, you can easily trim the bottom fringe with scissors.
19. Enchanted Forest Tablescape

Bring the natural beauty of the outdoors to your holiday table with a rustic woodland theme. This design uses elements straight from the forest to create a peaceful and organic centerpiece. A large, weathered tree branch runs down the center of the table, resting on a bed of fresh moss and pinecones.
Each place setting is adorned with a sprig of evergreen and a cinnamon stick, tied together with simple twine. Smooth river stones are used as place cards, with guests’ names written on them. This tablescape is wonderfully tactile and aromatic, creating a calm and grounded atmosphere for your meal.
How to Make It:
What You’ll Need:
- A smooth, flat river stone (light grey or tan works best)
- A white or silver permanent marker with a fine tip
Step 1: Clean Your Stone Find a nice stone from your yard or a craft store. Make sure it’s big enough to write a name on and has at least one flat side. Wash the stone with soap and water to get rid of any dirt and let it dry completely.
Step 2: Write the Name Take your permanent marker and carefully write one of your guest’s names on the flat surface of the stone. You can use your best cursive or print letters.
Step 3: Let It Dry Let the marker ink dry for a few minutes so it doesn’t smudge. Once it’s dry, you can place the stone on top of a folded napkin at each guest’s seat. It’s a simple, natural, and personal touch for your table.
20. Recycled Storybook Christmas

Craft a cozy and eco-friendly holiday scene using recycled paper. This charming setup features decorative trees and garlands made from old newspapers, book pages, and simple cardboard. The result is a decoration that is full of texture, character, and homemade charm.
The neutral tones of the paper create a warm and inviting atmosphere, especially when paired with the soft glow of a small candle. Glittery paper snowflakes add a touch of festive sparkle to the window. This is a wonderfully creative and sustainable way to decorate, proving that beautiful things can be made from the simplest materials.
How to Make It:
What You’ll Need:
- An old newspaper
- Scissors
- A ruler
- A pencil
- A hot glue gun (and an adult to help)
- A thin wooden skewer or dowel
Step 1: Cut Lots of Paper Squares Take several pages from your newspaper. Start by cutting out a large square, maybe 8 inches by 8 inches. Then cut another square that is a little smaller, and another that is smaller still. Keep cutting squares that get gradually smaller and smaller. You will need a lot of them.
Step 2: Fold Your Squares Take each square and fold it in half, then fold it in half again to make a smaller square.
Step 3: Start Building Your Tree An adult can help you put a dot of hot glue at the bottom of the skewer and press it into a small cardboard base to help it stand up. Now, take your largest folded square and poke the skewer through its center. Slide it all the way to the bottom.
Step 4: Stack the Layers Take your next-largest square and slide it onto the skewer. Turn this one so its corners are not lined up with the one below it. Keep adding your folded squares, going from biggest to smallest. Remember to rotate each new layer.
Step 5: Finish the Top When you get to the very top, you can add a small paper star or just fluff out the top layers. Your beautiful newspaper tree is now complete.
21. Aromatic Holiday Spice Display

Fill your home with the classic scents of the season. This decoration is as much about fragrance as it is about appearance. Clove-studded oranges, known as pomanders, release a warm and spicy aroma that instantly feels like the holidays. They look beautiful arranged with cinnamon sticks and fresh rosemary.
This collection of natural elements creates a rich, sensory experience. A floating candle in a bowl of cranberries and water adds a gentle light to the scene. You can group these items on a tray for a stunning centerpiece or place them around the room to spread the festive fragrance.
How to Make It:
What You’ll Need:
- A fresh, firm orange
- A generous amount of whole cloves (the little brown spice that looks like a nail)
- A toothpick or a small skewer
Step 1: Plan Your Design Decide what pattern you want to make on your orange. You can make stripes, swirls, or just cover the whole thing in cloves. It’s easier if you start with a simple design, like a line that goes all the way around.
Step 2: Poke the Holes Take your toothpick and poke a hole in the orange wherever you want to place a clove. This makes it much easier to push the cloves in without breaking them or hurting your fingers. Poke a row of holes for the pattern you planned.
Step 3: Insert the Cloves Gently push one whole clove into each hole you made. Push it in until the “head” of the clove is flat against the orange peel. Keep doing this until your design is complete. The orange will start to smell wonderful right away!
22. Living Winter Garden Centerpiece

Bring life and freshness to your holiday table with a centerpiece made of living plants. This beautiful arrangement gathers a variety of small potted plants to create a miniature indoor garden. The mix of deep red poinsettias, bright green cypress, and fragrant rosemary offers a variety of colors and textures.
Wrapping the simple nursery pots in burlap and twine gives the display a cohesive, rustic charm. This is a sustainable and long-lasting decoration that will continue to bring joy even after the party is over. It’s a wonderful way to incorporate the beauty of nature into your celebration.
How to Make It:
What You’ll Need:
- A small potted plant (like rosemary or a mini evergreen)
- A square piece of burlap fabric, large enough to wrap around the pot
- A piece of twine or natural string
- Scissors
Step 1: Prepare Your Burlap Place your square of burlap on a flat surface. Put your potted plant right in the center of the square.
Step 2: Wrap the Pot Bring one side of the burlap up and press it against the side of the pot. Then, bring up the opposite side. Continue bringing up the fabric all around the pot, gathering it together.
Step 3: Tie It with Twine While holding the burlap in place, take your piece of twine and wrap it around the pot a few times. Pull it snug and tie it in a simple bow or a knot. You can trim any extra long ends of the twine. Your plant now has a charming, rustic new look.
23. Golden Beeswax Glow

Create a warm and inviting atmosphere with the simple beauty of natural materials. This centerpiece features an assortment of beeswax candles, which cast a soft, honey-scented glow. The candles’ natural honeycomb texture adds a lovely detail that feels both rustic and elegant.
The candles are arranged on a simple wooden board over a burlap table runner. Small glass vases, wrapped in twine and holding dried wheat and lavender, complete the scene. This understated decoration is all about texture and warmth, creating a peaceful and welcoming space for your guests.
How to Make It:
What You’ll Need:
- A clean, empty glass jar or small bottle
- A roll of jute twine
- A hot glue gun (ask an adult for help!)
- Scissors
Step 1: Start the Wrap An adult can help you put a single, small dot of hot glue near the bottom of your glass jar. Press the end of the twine onto the glue dot to hold it in place.
Step 2: Wrap the Twine Begin tightly wrapping the twine around the jar. Make sure each new wrap is snug against the last one so there are no gaps. Keep wrapping your way up the jar.
Step 3: Secure the End Decide how far up the jar you want the twine to go. You can cover the whole thing or just a small section. When you’re finished wrapping, cut the twine from the roll. An adult can put another small dot of hot glue on the jar to secure the end of the twine.
24. Twinkling Bottle Lanterns

Upcycle empty glass bottles and jars into a magical display of light. This simple idea uses strings of battery-powered fairy lights to make it look like you’ve captured fireflies in a bottle. The light twinkles through the different colored glass, creating a beautiful and cozy ambiance.
Arrange the lighted bottles and jars in a group on a windowsill or as a centerpiece on a table. For an extra wintry touch, you can add a sprinkle of faux snow or Epsom salt to the bottom of the jars. This is an incredibly easy and effective way to add a warm, festive glow to any room.
How to Make It:
What You’ll Need:
- A clean, empty wine bottle
- A string of battery-powered fairy lights on a thin wire (the kind with a small “cork” battery pack works well)
Step 1: Untangle Your Lights First, unwrap your fairy lights and make sure they are not in a tangle. Turn them on to check that they are working.
Step 2: Feed the Lights into the Bottle Starting with the end of the light string (not the battery pack part), begin carefully feeding the wire into the mouth of the bottle.
Step 3: Fill the Bottle Continue pushing the light string into the bottle bit by bit. The flexible wire will coil up inside. Keep going until only the battery pack is left outside the bottle. If you have the “cork” style lights, the battery pack will fit right into the opening of the bottle, just like a real cork.
25. Peppermint Candy Stripe Party

Create a bright and cheerful party atmosphere with a classic red and white candy stripe theme. This look is full of energy and sweet, nostalgic charm. Bold striped bows adorn the chairs and serve as a focal point on the wall, instantly setting a festive mood.
The theme carries through to every detail, from the striped vases holding vibrant red and white carnations to the hanging peppermint candy ornaments. The clean white tablecloth makes the red stripes pop, creating a look that is crisp and incredibly festive. It’s a delightful theme that feels both traditional and fun.
How to Make It:
What You’ll Need:
- A styrofoam ball
- A round, red and white striped peppermint candy
- A hot glue gun (with an adult’s help!)
- A piece of string or ribbon for hanging
Step 1: Prepare Your String First, cut a piece of string or ribbon about 6 inches long. Fold it into a loop. Ask an adult to put a dot of hot glue on the styrofoam ball and press the ends of the loop into the glue to secure it. This will be your hanger.
Step 2: Start Gluing Candies An adult can put a small dot of hot glue on the back of one peppermint candy. Carefully press the candy onto the styrofoam ball, near the hanger.
Step 3: Cover the Ball Continue gluing peppermints onto the ball, one by one. Try to place them very close together so that none of the white styrofoam shows through. Keep going until the entire ball is covered in candy. Let it dry completely before you hang your sweet new ornament.
26. Santa’s Workshop Table

Spark the imagination of your guests with a playful elf workshop theme. This creative tablescape turns your dining area into a corner of the North Pole. A rustic wooden crate serves as the centerpiece, filled with spools of twine, wooden toy parts, and, of course, a few friendly elves overseeing the work.
The details make this theme special. Little metal buckets hold paintbrushes and hardware, while wood shavings are scattered across the table. Each place setting has a simple paper tag tied with baker’s twine. It’s a fun, interactive theme that is especially wonderful for a party with children.
How to Make It:
What You’ll Need:
- A rectangular piece of brown craft paper or cardstock
- A hole punch
- A piece of red and white baker’s twine
- A marker or pen
Step 1: Cut Your Tag Shape Take your piece of craft paper and cut it into a classic tag shape. You can do this by cutting off the two top corners at an angle.
Step 2: Punch a Hole Use your hole punch to make a single hole in the top center of the tag.
Step 3: Write Your Message Use a nice marker to write your guest’s name on the tag. You can also add a little holiday message like “Happy Holidays!”
Step 4: Add the Twine Cut a piece of baker’s twine about 8 inches long. Thread it through the hole in your tag and tie it in a simple knot or bow. You can use this tag to tie around a napkin, a small gift, or a cup at each person’s seat.
27. Pastel Winter Forest

Dream up a soft and magical holiday scene with a pastel color palette. This charming display uses a collection of bottle brush trees in gentle shades of mint green, pink, lavender, and cream. The trees are clustered together to create a whimsical miniature forest.
Nestled among the trees are iridescent and silver ball ornaments that shimmer in the light. The entire scene is set upon a fluffy white faux fur base, which looks like a blanket of fresh snow. This is a sweet and modern take on holiday decor that creates a light and airy feel.
How to Make It:
What You’ll Need:
- A collection of bottle brush trees in various pastel colors and sizes
- A white faux fur rug or piece of fabric
- A handful of shiny ornaments in coordinating pastel and silver colors
Step 1: Create Your Snowy Base Lay your piece of white faux fur on the table or surface you want to decorate. Fluff it up a bit with your hands to make it look like soft, deep snow.
Step 2: Plant Your Forest Arrange your bottle brush trees on the faux fur. Start with the tallest trees in the back and place the shorter ones in the front. Group them close together so it looks like a real forest. Don’t be afraid to mix the colors up.
Step 3: Add Some Sparkle Carefully place your shiny ornaments in the gaps between the trees. Tuck some in at the base and let others rest against the branches. The different shapes and textures will make your pastel forest look even more magical.
28. Tropical Holiday Getaway

Celebrate the holidays with a fun and sunny tropical twist. This theme swaps snow for sand and pine trees for palm leaves. A pineapple, outfitted with sunglasses and a Santa hat, becomes the hilarious and charming centerpiece of the party.
The decor is bursting with vibrant colors. Bright hibiscus flowers, shiny metallic ornaments, and large tropical leaves create a festive and exotic backdrop. This “Mele Kalikimaka” theme is a wonderful way to have a unique and memorable celebration that feels like a cheerful island escape.
How to Make It:
What You’ll Need:
- A whole pineapple
- A miniature Santa hat (from a craft store)
- A pair of kids’ sunglasses
- A little bit of tape or a dab from a hot glue gun (with an adult’s help)
Step 1: Position the Hat Take your mini Santa hat and place it on top of the pineapple, nestled right in the green leafy crown. You might need to tilt it to one side to make it look jaunty and fun. A small piece of double-sided tape inside the hat can help it stay in place.
Step 2: Add the Sunglasses Open the arms of the sunglasses. Rest the glasses on the front of the pineapple, using the bumpy texture of the pineapple’s skin to hold them up.
Step 3: Secure if Needed If the sunglasses won’t stay put, an adult can help by putting a tiny dab of hot glue on the inside of each arm of the sunglasses where it touches the pineapple. This will hold them securely. Your cool Santa-pple is now ready to be the life of the party!
29. Tacky & Terrific Ornament Station

Host a party that’s all about fun and creativity with an “ugly” ornament-making station. This theme celebrates the quirky and handmade with an explosion of color and texture. A backdrop of festive red fabric is covered in goofy, homemade felt creatures, pom-poms, and miniature knit sweaters.
The table is set up with all the supplies guests need to make their own wonderfully tacky creations: felt, yarn, glue, and googly eyes. This is more than just decoration; it’s an interactive activity that gets everyone laughing and crafting together, creating memories and wonderfully weird keepsakes.
How to Make It:
What You’ll Need:
- Different colors of craft felt
- Scissors
- Googly eyes
- A hot glue gun (with adult help) or craft glue
- A big, fluffy craft pom-pom
- A small piece of ribbon
Step 1: Make the Antlers Draw a simple antler shape on a piece of brown felt. It can look like a tiny hand with two or three fingers. Cut out two of these shapes.
Step 2: Build Your Reindeer Take your big pom-pom, which will be the reindeer’s head. An adult can help you use the hot glue gun to stick the two felt antlers to the top of the pom-pom.
Step 3: Give It a Face Glue two googly eyes onto the front of the pom-pom. Then, you can glue on a smaller red pom-pom or a small circle of red felt for the nose.
Step 4: Add a Hanger Fold your piece of ribbon in half to make a loop. Glue the two ends of the ribbon to the back of the pom-pom head. Let everything dry, and your silly reindeer ornament is ready to hang.
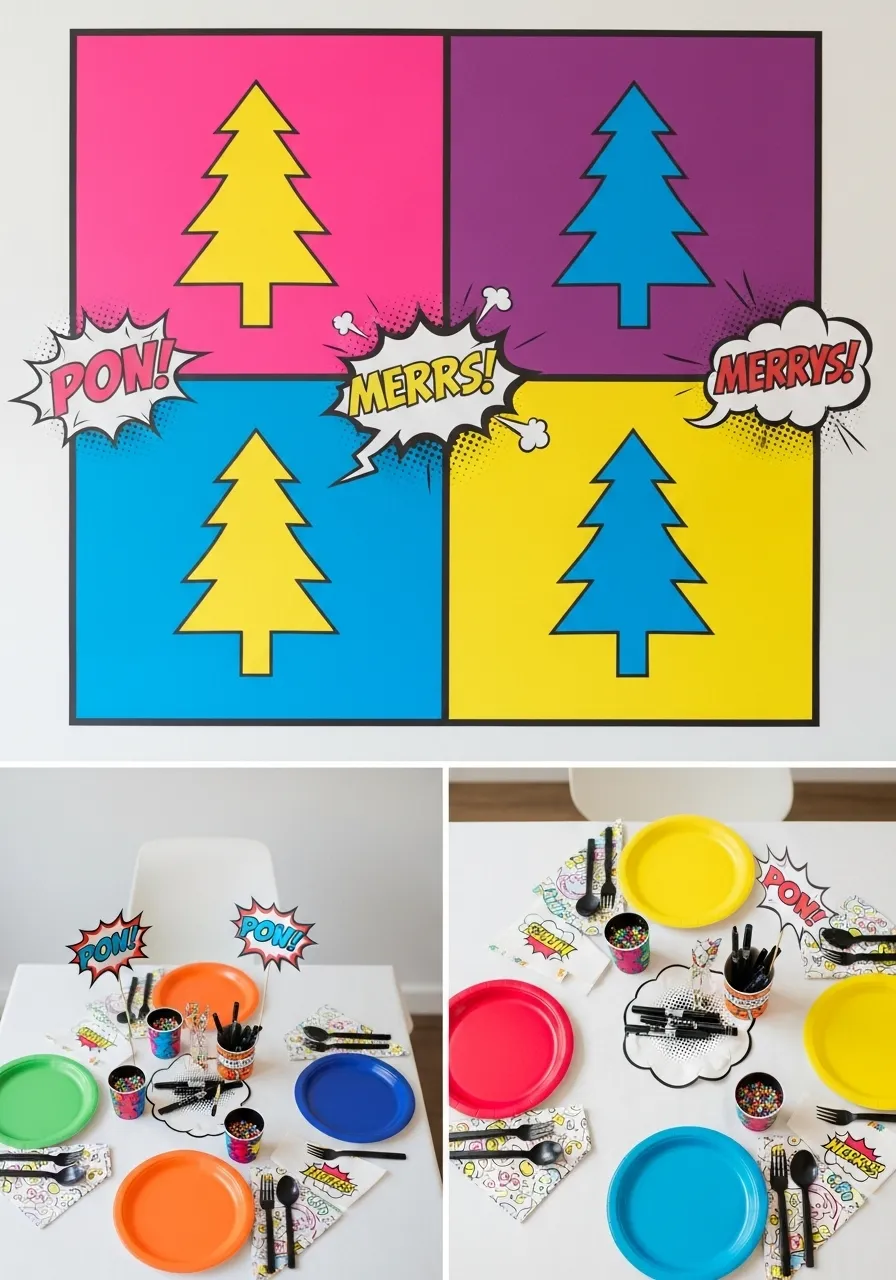
30. Superhero Holiday Pop Art

Celebrate the season with a pow! This pop art holiday theme is perfect for kids and the young at heart. It uses a bold, graphic style inspired by classic comic books. A large four-panel poster features a Christmas tree in bright, contrasting colors, setting the scene.
The party table is just as vibrant, with solid-colored plates that pop against the black and white place settings. Fun, comic-style word bubbles like “POW!” and “MERRYS!” are used as decorations. This is a highly creative and energetic theme that breaks from tradition in a very fun way.
How to Make It:
What You’ll Need:
- A piece of white poster board or thick paper
- A black marker
- A red marker and a yellow marker
- Scissors
- A wooden skewer or popsicle stick
- Tape
Step 1: Draw Your Action Bubble Using the black marker, draw a spiky cloud shape, like the kind you see in comic books when something explodes. This is your action bubble.
Step 2: Write Your Word Inside the bubble, write a fun, loud word in big, blocky letters. “POW!” is a classic choice. You can use your pencil first to make sure you like the way it looks.
Step 3: Add Color and Detail Trace your letters with the black marker. Color the letters in with your yellow marker. You can add some red lines around the outside of the bubble to make it look even more exciting.
Step 4: Cut It Out and Mount It Carefully cut out your action bubble. Turn it over and tape the wooden skewer to the back. Now you can stick your sign in a cup or a piece of styrofoam to have it stand up on your party table.
31. Hygge Haven of Candles

Create the ultimate cozy corner for your holiday gathering. This decor idea is all about creating a feeling of warmth, comfort, and togetherness, also known as “hygge.” The room is filled with an abundance of soft textures, from chunky knit blankets and faux fur throws to plush pillows in neutral tones.
The main source of light comes from clusters of simple white candles. Placed on trays and surfaces at different heights, their collective glow creates a serene and magical atmosphere. This setup turns any space into a peaceful retreat from the winter chill, inviting guests to relax and stay awhile.
How to Make It:
What You’ll Need:
- A round wooden or metal tray
- A collection of 3-5 white pillar candles of slightly different heights
- A few small, decorative items like pinecones or faux cranberries (optional)
Step 1: Arrange Your Candles Place your tallest candle in the center of the tray. Then, arrange the shorter candles around it. Don’t worry about making it look too perfect; a little bit of randomness looks more natural and cozy.
Step 2: Add Natural Touches (Optional) If you want to add a little more decoration, you can place a few small pinecones or a sprinkle of faux cranberries on the tray in the gaps between the candles. Make sure these items are not too close to the wicks where the flame will be.
Step 3: Find the Right Spot Place your finished candle tray on a coffee table, a sturdy stool, or the floor. Ask an adult to light the candles, and your room will instantly feel warmer and more inviting.
32. Bohemian Holiday Nook

Embrace a warm, free-spirited vibe for your holiday decor. This bohemian-inspired corner combines natural textures with earthy colors for a relaxed and inviting atmosphere. A large macrame wall hanging serves as the focal point, with its intricate knots and soft tassels creating a beautiful backdrop.
Lush green houseplants in terracotta pots bring life and freshness to the space, a welcome sight in winter. Mini wreaths made with dried flowers and eucalyptus add a subtle holiday touch. Cozy floor cushions and the warm glow of salt lamps complete this peaceful and unconventional holiday scene.
How to Make It:
What You’ll Need:
- A small metal or wooden hoop (about 6-8 inches across)
- A hot glue gun (ask an adult for help!)
- A few sprigs of faux eucalyptus or other greenery
- A few small, faux flowers in holiday colors (like deep red or white)
- A small pinecone or other festive accent
Step 1: Start with Greenery Take one of your sprigs of eucalyptus and lay it against the hoop. An adult can help you put a few small dots of hot glue on the hoop to attach the stem of the greenery.
Step 2: Create a Cluster Continue gluing on more greenery, layering the pieces on top of each other. Have all the stems point in the same direction and arrange them to cover about one-third of the hoop.
Step 3: Add Your Flowers Now, add your flowers. Put a dot of glue on the back of each flower and place them in a nice little group on top of the greenery. This will be the focal point of your wreath.
Step 4: Add a Final Touch For a final festive touch, glue a small pinecone or a couple of faux berries next to your flowers. Your beautiful mini boho wreath is now ready to hang.
33. Mid-Century Merry Modern

Travel back in time with a fun and festive mid-century modern theme. This look is characterized by clean lines, bold colors, and geometric shapes. Brightly colored paper starbursts pop against the white wall, creating a simple yet high-impact holiday display.
A whimsical tinsel tree in stripes of red, green, and gold serves as the cheerful centerpiece. The vintage-style glass ornaments and classic cocktail glasses on the wooden credenza complete the retro vibe. This is a nostalgic and stylish way to celebrate, full of vibrant energy and charm.
How to Make It:
What You’ll Need:
- 2 identical square pieces of colored paper
- Scissors
- A glue stick
- A piece of string
Step 1: Fold the First Square Take one square and fold it in half to make a triangle. Unfold it. Then fold it in half the other way to make another triangle and unfold. Your square should have an “X” shape in creases.
Step 2: Cut and Glue the Points Cut along each of the four corner creases, stopping about half an inch from the center. Now, take one side of each cut corner and fold it in to meet the center crease line. Glue it down. It will create a 3D point. Do this for all four corners.
Step 3: Make the Second Half Repeat steps 1 and 2 with your second piece of paper so you have two identical star halves.
Step 4: Assemble Your Star Glue the flat back of one star half to the flat back of the other, making sure to rotate it so the points are offset. Before you press them together, sandwich your loop of string between the two halves for a hanger.
34. A Book Lover’s Holiday

For those who love stories, this literary theme is a dream come true. This cozy and clever decor uses old books as its primary material. A garland made from the folded pages of a book is draped gracefully in front of a bookshelf, adding texture and charm.
The centerpiece is a delightful tree made from a stack of vintage books, with the pages of the top book folded to create the tree’s shape. Handwritten place cards and warm candlelight create an intimate and inviting atmosphere for a quiet holiday dinner. It’s a thoughtful and sustainable way to share your love of reading.
How to Make It:
What You’ll Need:
- An old paperback book you don’t mind reusing
- A long piece of twine or string
- A hot glue gun (with an adult’s help)
Step 1: Prepare Your Pages Carefully tear about 20-30 pages out of the old book.
Step 2: Fold the Pages Take one page. Fold the top right corner down to meet the left edge, making a point at the top. It will look like the beginning of a paper airplane.
Step 3: Attach to the String Lay your long piece of twine on a table. An adult can help you put a thin line of hot glue along the folded edge of your paper. Press the twine into the glue at the top of the page.
Step 4: Build Your Garland Take another folded page and glue it onto the twine right next to the first one, facing the same way. Keep adding folded pages, pressing them snugly against each other. Once you have a long section of pages, your beautiful book garland is ready to hang.
35. Midnight Celestial Celebration

Host an elegant and mystical party under the stars. This celestial theme uses a deep navy blue and shimmering gold color palette to create a magical night-sky effect. A beautiful mobile made of golden moons and stars hangs above the table, turning the dining area into a galaxy.
The table itself is set with navy blue linens, gold-rimmed chargers, and napkins embroidered with constellations. A tangle of fairy lights woven through the place settings adds a soft, twinkling glow. This is a sophisticated and enchanting theme for a memorable winter solstice or New Year’s Eve party.
How to Make It:
What You’ll Need:
- A small, sturdy branch from the yard
- Gold spray paint
- Gold and navy blue craft paper
- A pencil
- Scissors
- Clear fishing line or thin string
- A hole punch
Step 1: Prepare Your Branch Take your branch outside and spray paint it gold. Let it dry completely.
Step 2: Cut Out Your Shapes While the branch is drying, draw and cut out lots of stars and crescent moon shapes from your gold and navy paper. Make them in different sizes.
Step 3: Create the Hanging Strands Cut several pieces of fishing line in different lengths. Use your hole punch to make a hole at the top of each paper shape. Tie one end of a piece of fishing line to a shape. On the same line, you can tie on a few more shapes, leaving space between them.
Step 4: Assemble Your Mobile Once your branch is dry, tie the other end of each of your finished strands to the branch. Space them out nicely. Finally, tie one long piece of fishing line to both ends of the branch to create a hanger for your beautiful celestial mobile.
36. Rustic Italian Holiday Feast

Celebrate with the warmth and abundance of a rustic Italian countryside. This tablescape is a feast for the eyes, using fresh ingredients as the main decoration. A stunning centerpiece is created by piling vibrant pomegranates and fresh artichokes on a bed of nuts, all arranged on a simple platter.
Each place setting features a miniature wreath made of fresh, fragrant rosemary. Uncooked pasta shapes are scattered playfully down the table runner, adding a fun and unexpected touch. This theme feels generous and welcoming, focusing on the simple beauty of good food and good company.
How to Make It:
What You’ll Need:
- A few long, flexible sprigs of fresh rosemary
- A piece of thin, flexible floral wire
- A small piece of twine
- Scissors
Step 1: Form the Wreath Shape Take one long sprig of rosemary and gently bend it into a circle, about the size of the center of a dinner plate.
Step 2: Secure the Shape Overlap the two ends of the rosemary sprig. Take your floral wire and wrap it tightly around the overlapping ends to hold the circle shape. You can add another sprig of rosemary and wrap it around the first one to make the wreath look fuller.
Step 3: Add a Twine Bow Take your small piece of twine and tie it into a simple bow. You can attach the bow to the wreath by tucking it into the wire, or by using a tiny dab of glue. Place your finished rosemary wreath on a folded napkin for a fragrant and beautiful place setting.
37. Winterberry Floating Candles

Capture the crisp beauty of a winter morning with this simple and elegant centerpiece. This decoration relies on the striking color combination of crimson red and snowy white. A clear glass vase is filled with bright red cranberries and water, creating a vibrant base.
A single white floating candle sits on top, casting a soft glow. The display is completed with frosted evergreen branches and icy-looking red berry sprigs. This look is clean, fresh, and incredibly festive. It is an easy and quick way to add a beautiful pop of color to your holiday table.
How to Make It:
What You’ll Need:
- A clear glass vase or bowl
- Fresh cranberries
- Water
- One white floating candle
Step 1: Fill Your Vase with Cranberries Pour your fresh cranberries into the vase. You can fill it about halfway, or a little more, depending on the look you want.
Step 2: Add Water Slowly pour cool water into the vase over the cranberries. The cranberries will bob around and settle. Fill the vase with water until it is about two inches from the top rim.
Step 3: Add the Candle Gently place your floating candle on the surface of the water. It should float right on top of the cranberries. Ask an adult to light the candle just before your party starts. The flame will reflect beautifully in the water and on the bright red berries.
38. Floating Origami Peace Cranes

Create a serene and breathtaking installation with a flight of paper cranes. In Japanese culture, the crane is a symbol of hope and peace, making this a beautiful sentiment for a holiday gathering. Hundreds of origami cranes, folded from white, silver, and gold paper, are strung together and hung from the ceiling.
The cranes float gracefully in the air, seeming to fly through the room. A simple tree branch can be used to create a mobile-like structure. This is a delicate and meaningful decoration that creates a quiet, contemplative, and utterly magical atmosphere for your guests.
How to Make It:
What You’ll Need:
- A perfect square of paper (origami paper is best)
Step 1: Initial Folds Fold the square in half to make a triangle, then unfold. Fold it in half the other way to make another triangle, then unfold. You should have an ‘X’ of creases. Flip the paper over. Fold it in half to make a rectangle, unfold, then fold it in half the other way and unfold.
Step 2: Make a Square Base Push the sides of the square inwards along the creases. The top will come down, and you will be left with a smaller, two-layered square. This is called a square base.
Step 3: Form the Neck and Tail With the open end of the square pointing down, fold the two top-layer side corners in to meet the center line. Unfold them. Now, take the bottom point and fold it up to the top, then unfold. Using these new creases, lift the bottom point all the way up, folding the sides inward. This is tricky! Flip it over and do the same thing on the back. You’ll have a diamond shape with two “legs.”
Step 4: Finish the Crane Fold the skinny legs up and inward to become the neck and tail. Make a head by making a small fold at the tip of one of the points. Finally, gently pull the wings apart to give your crane a 3D body.
There you have it, 38 ways to bring festive cheer into your home, all achievable in just a few hours. Decorating for your holiday party doesn’t need to be a grand, time-consuming production. The most memorable spaces are often born from simple, heartfelt touches and a little bit of creative fun.
Whether you chose a cozy, traditional look or a bright, modern theme, the goal is the same: to create a welcoming space for making memories. We hope these ideas have inspired you to craft a celebration that is uniquely yours. Now, all that’s left to do is welcome your guests and enjoy the wonderful atmosphere you’ve created.
Key Takeaways
- Embrace Simplicity: Many high-impact decorations, like twinkling bottle lanterns or aromatic orange pomanders, require only a few simple materials and steps.
- Use Natural Elements: Fresh greenery, pinecones, cranberries, and even bare branches can bring an authentic and beautiful holiday feeling into your home for little to no cost.
- Upcycle and Reuse: Empty wine bottles, old books, and glass jars can be easily transformed into stunning, personalized decorations.
- Focus on a Theme: Choosing a simple theme—whether it’s a color scheme like black and white or a concept like a “Woodland Feast”—helps your decor look cohesive and intentional.
- Create an Atmosphere: Don’t just decorate, create a mood. The warm glow of candles, the scent of cinnamon, and soft textures can make your space feel extra special and inviting.