Feeling busy but not productive? Your home office might be the problem. A cluttered desk or a chaotic digital workspace can drain your energy before the day even starts. It is easy to get stuck in a rut of distraction.

The start of 2026 is a great time for a reset. You do not need a massive overhaul. You just need a new set of habits and a smarter space. Lasting change comes from small, consistent actions.
This guide gives you 40 actionable hacks. Each one is a simple step you can take to reclaim your focus. Let’s build an office that helps you get real work done.
1. Create a Desktop “Intake Zone”
Item Name: Desktop Intake Tray

Desk clutter happens quickly. Mail, keys, and your phone can create small piles of distraction. A dedicated tray solves this problem. Think of it as a landing pad for everything that enters your office.
All incoming items go directly into this one spot. The rest of your desk remains open and ready for work. This single habit creates a boundary against clutter. Later, you can sort the mail and put things where they belong. Your focus improves when your space is clear.
DIY Instructions: The 5-Minute Shoebox Lid Organizer
You can make a simple version of this with stuff you already have.
What You Need:
- A lid from any shoebox
- A piece of strong cardboard (like from a cereal box or shipping box)
- Scissors or a box cutter (ask a grown-up for help!)
- Glue (white school glue or a hot glue gun)
- (Optional) Paint or wrapping paper to decorate
Step-by-Step:
- Get Your Base: Find a shoebox lid. A lid from a pair of adult shoes works well because it’s wide and shallow.
- Make it Yours (Optional): If you want, paint the lid your favorite color or cover it with nice wrapping paper. Let it dry completely.
- Measure Your Divider: Take your piece of cardboard. You need to cut a rectangle. It should be the same width as the inside of your shoebox lid. Make it about 3 or 4 inches tall.
- Cut the Divider: Ask a grown-up to carefully cut out the cardboard rectangle you just measured.
- Glue it in Place: Stand your cardboard divider up inside the lid. Place it about one-third of the way from the end. This creates a small section for mail and a large section for keys and your phone.
- Secure it: Run a line of glue along the bottom edge and the two side edges of your divider (where it touches the lid). Press it firmly into place and hold it for one minute.
- Let it Dry: Let the glue dry for at least an hour.
- Set Up Your Zone: Place your new organizer on your desk. You’re ready to catch clutter!
2. Go Vertical with Your Notebooks
Item Name: Vertical Desk Sorter

Notebooks and planners often stack up. These flat piles eat up valuable desk space. A vertical sorter flips the script. It holds all your important books upright, like files in a cabinet.
You can see every notebook at a glance. Grabbing what you need is fast. This simple change keeps your primary workspace open. It turns a cluttered pile into a tidy library.
DIY Instructions: The 5-Minute Cereal Box File
You can make a great sorter from a large cereal box.
What You Need:
- An empty, large cereal box
- Scissors (ask a grown-up for help)
- A ruler and a pencil
- (Optional) Wrapping paper, paint, or colorful tape
Step-by-Step:
- Get Your Box: Find a large, empty cereal box. Make sure it’s clean inside.
- Mark Your Lines: Stand the box up. On one of the narrow sides, use your ruler to draw a diagonal line. Start about 4 inches up from the bottom on one edge and draw to the top corner of the other edge.
- Copy the Line: Turn the box to the other narrow side and draw the exact same diagonal line.
- Connect the Front: On the wide front of the box, draw a straight line that connects the two low points of your diagonal lines.
- Cut (With Help): Ask a grown-up to carefully cut along the three lines you drew (the two diagonal lines and the one straight line across the front). The tall back of the box stays.
- Decorate: You now have a file holder! You can cover it with wrapping paper, paint it, or use colorful duct tape to make it look great.
- Load It Up: Let it dry. Then, slide your notebooks, folders, and even your tablet inside.
3. Block Digital Distractions
Item Name: Focus and Site-Blocking App

Your biggest productivity drain might be digital. Pings, notifications, and “quick checks” break your concentration. A focus app acts as a shield. It temporarily blocks distracting websites and apps you choose.
This is not about weak willpower. It is about creating an environment where deep work is possible. You set a timer, and the app protects your time. This helps you stay on a single task.
DIY Instructions: The “Phone Jail” Box
You can’t DIY a phone app, but you can make a physical tool that does the same thing.
What You Need:
- A small cardboard box with a lid (a shoebox or an old tea box)
- Markers or paint
- (Optional) A small lock or a rubber band
Step-by-Step:
- Find Your Box: Get a small box that your phone can fit inside.
- Decorate It: Use your markers to write “Phone Jail” or “Focus Box” on the lid. You can draw “stay out” signs or just make it your favorite colors.
- Find Its Spot: Place this box across the room from your desk. It should not be easy to reach.
- The Rule: When you need to work, put your phone on silent. Walk over to the “Phone Jail” and put your phone inside.
- Lock It Up: Put the lid on. If you want, you can wrap a rubber band around it or use a small travel lock to “lock” it.
- Work: Go back to your desk. The simple act of having to stand, walk, and unlock the box makes you stop and think before you check your phone.
4. Conquer “Tab Chaos”
Item Name: Tab Management Browser Extension

Each open browser tab is an “open loop” in your brain. It’s an unfinished task or a piece of information you’re afraid to lose. Having 40 tabs open creates mental static.
Your computer’s memory slows down. Your mind does, too. A tab manager extension is the answer. It lets you group tabs, save them as a session, or suspend them. You can close everything down with confidence. Your mind and your machine will feel lighter.
DIY Instructions: The “Analog Tab” Notepad
This is a paper-based system to stop you from opening new tabs.
What You Need:
- A small notepad (like a sticky note pad or a small spiral notebook)
- A pen
Step-by-Step:
- The Rule: Your browser is for one task at a time.
- The Urge: You are working on a report. Suddenly, you think, “I should check the weather” or “What was that actor’s name?” You have the urge to open a new tab.
- Stop: Do not open the tab. Instead, grab your “Analog Tab” notepad and pen.
- Write It Down: Write down “check weather” or “actor name” on the notepad.
- Go Back to Work: Go back to your main task. The idea is captured. You won’t forget it.
- Review Later: When you take a break, look at your notepad. You can “open” these “tabs” now. You’ll find half of them were not important anyway.
5. Match Your Light to Your Task
Item Name: Adjustable Color Temperature Lamp

Light sends a powerful signal to your brain. The wrong light can make you sleepy or strained. An adjustable lamp changes this. Use a cool, bright-blue light in the morning. This mimics daylight and tells your brain it’s time to be alert.
As you end your day, switch to a warm, orange light. This helps you wind down. It signals that work is over. You control your work environment’s mood, not the other way around.
DIY Instructions: The “Focus” vs. “Calm” Light Station
You can create this effect with two different lightbulbs.
What You Need:
- Your main desk lamp
- A second, smaller lamp (like a small table lamp)
- One “Daylight” or “Cool White” lightbulb (it has a blue-ish glow)
- One “Soft White” or “Warm” lightbulb (it has an orange-ish glow)
Step-by-Step:
- The “Focus” Lamp: Put the “Daylight” (cool/blue) bulb into your main desk lamp. This is your “Focus” lamp. Turn this on when you are doing your hardest work.
- The “Calm” Lamp: Put the “Soft White” (warm/orange) bulb into your second, smaller lamp. Place this lamp in a corner of your office.
- The Switch: About one hour before you plan to finish work, turn off your bright “Focus” lamp.
- Wind Down: Turn on your “Calm” lamp.
- The Effect: The whole room will feel cozier. This warm light helps your brain stop thinking about work. It makes it easier to close your computer and relax.
6. Build a Sensory “Reset Kit”
Item Name: Desktop Sensory Kit

Work can be stressful. Staring at a screen for hours is draining. A small “reset kit” on your desk gives you a physical, screen-free break. A bundle of dried lavender offers a calming scent. Smooth stones give your hands something to hold.
This is not just decoration. It is a set of tools to ground you when you feel anxious. Taking 60 seconds to use them can reset your entire nervous system.
DIY Instructions: Create Your Own “Reset Kit”
You can build this kit in 10 minutes from things in your home or yard.
What You Need:
- A small bowl, box, or cloth bag
- Something that smells good (a tea bag, a candle, dried herbs)
- Something that feels interesting (smooth stones, a stress ball, a piece of soft fabric)
Step-by-Step:
- Find a Container: Get a small bowl, a nice box, or a cloth bag. This will hold your kit.
- Find Your Scent: Find something that smells calming. This could be a small candle, a bar of nice soap, a peppermint tea bag, or a bundle of herbs from the garden (like rosemary or lavender).
- Find Your Touch: Find something interesting to hold. Go outside and find a few smooth, flat stones. A polished rock, a soft piece of velvet, or even a small, squishy stress ball works.
- Assemble: Put your scent item and your touch item into your bowl or box.
- Place it: Keep this kit on your desk.
- Use it: When you feel stressed, close your eyes. Pick up the rock and feel how smooth it is. Smell the lavender or tea. Take five deep breaths.
7. Automate Your Digital Inbox
Item Name: Email Filters and Rules

An overflowing inbox is a list of tasks other people gave you. It is a huge source of unproductivity. Stop sorting it by hand. Use the tools you already have.
Set up filters and rules. Automatically send newsletters to a “Read Later” folder. Tag emails from key clients. Auto-archive receipts. You can sort 80% of your email before you even see it. Your main inbox should only be for messages that need your direct reply.
DIY Instructions: Your First “Newsletter” Filter
This guide works for most email programs like Gmail or Outlook.
What You Need:
- Your email account
Step-by-Step:
- Find a Newsletter: Open your email. Find any newsletter you get, like from a store or a website.
- Find the ‘Filter’ Button: Open that email. At the top, find the three little dots (the “More” menu). Click it.
- Click ‘Filter’: Choose the option “Filter messages like these.”
- The ‘From’ Box: A box will pop up. The email address of the sender is already in the “From” line. Click “Create filter.”
- Choose Your Action: Now you tell the email what to do.
- Check the box that says “Skip the Inbox (Archive it).”
- Check the box that says “Apply the label.”
- Make a ‘Label’: Click “Choose a label…” and select “New label.” Name this new label “Newsletters” or “Read Later.” Click “Create.”
- Finish: Click the final “Create filter” button.
- Done! Now, all emails from that sender will go straight to your “Newsletters” folder. They will not bother you. You can read them all at once on Friday.
8. Automate One Repetitive Task
Item Name: Task Automation (e.g., Templates or Scripts)

How much time do you waste on setup? Copying files, creating project folders, or sending the same follow-up email is “dumb work.” Automation tools can do this for you.
You can set up a rule that creates a new project folder when a client is added to a spreadsheet. You can auto-generate a task from a starred email. Saving 15 minutes per project adds up. It frees your brain to work on the hard problems, not the setup.
DIY Instructions: The “Canned Response” Template
This is the easiest automation, and it saves a lot of time.
What You Need:
- Your email program (like Gmail/Outlook) or a simple text file
Step-by-Step:
- Find the Task: Think of an email you write over and over. Maybe it’s “Thanks, I received your file” or “Here is the agenda for our meeting.”
- Write it Once: Open a blank document or email draft. Write the best version of that email.
- Use Placeholders: Where the person’s name or project name goes, put a clear placeholder. Like
[CLIENT NAME]or[PROJECT DATE]. - Save it:
- In Gmail/Outlook: Look for the “Templates” feature (in the “More” menu) and save this draft as a template.
- Simple Version: Save this text in a file on your desktop. Name it “Email Templates.”
- Use it: Next time you need to send that email, do not write it.
- In Gmail/Outlook: Start a new email, click the “Templates” button, and pick the one you saved.
- Simple Version: Open your “Email Templates” file. Copy the text. Paste it.
- Fill in Blanks: Just fill in the
[CLIENT NAME]and hit send. You just saved five minutes.
9. Schedule a “Digital Declutter”
Item Name: Digital Maintenance Day

Your office is not just your physical desk. It is also your computer’s desktop, your cloud storage, and your download folder. This digital space gets cluttered, too.
All those old files and unused apps create drag. You cannot find what you need. Start 2026 fresh by scheduling a “Digital Declutter.” It is like spring cleaning for your hard drive. Delete old projects. Organize files into clear folders. Uninstall apps you never use. A clean digital home makes for a clear, focused mind.
DIY Instructions: The 5-Minute “Desktop Sweep”
This is a fast and easy way to clean your computer’s main screen.
What You Need:
- Your computer
Step-by-Step:
- The ‘Junk Drawer’ Folder: On your computer’s Desktop, create one new folder. Call it “TO SORT.”
- The Sweep: Look at your Desktop. It is probably full of random files, old downloads, and pictures.
- Drag and Drop: Select everything on your Desktop (except the new “TO SORT” folder).
- Move It: Drag all of it into that one “TO SORT” folder.
- Breathe: Your desktop is now clean. It feels much better.
- The 10-Minute Sort: Now, open the “TO SORT” folder. Set a timer for 10 minutes.
- Sort or Delete: Go through the files one by one. Ask one question: “Do I need this?”
- If “No,” delete it.
- If “Yes,” move it to the right place (like your “Documents” or “Pictures” folder).
- If “Maybe,” just leave it in the “TO SORT” folder for next time.
- Repeat: Do this for just 10 minutes every Friday. Soon, your “TO SORT” folder will be empty.
10. Write a “Productivity Manual”
Item Name: Personal Productivity Manual

You are most productive when you have clear rules. Do not keep them in your head. Write them down. Create a simple, one-page “Productivity Manual” for your wall.
List your big goals for the year. Define your boundaries, like “No email after 6 PM.” Then, write your “Break-in-Case-of-Emergency” rules for when you feel unfocused. This could be “Take a 15-minute walk.” This manual is your map. It keeps you on track when you feel lost.
DIY Instructions: Your One-Page Manual
This is a 10-minute project that guides you for the whole year.
What You Need:
- One blank piece of paper
- A marker or a pen
Step-by-Step:
- Title: At the top of the paper, write “MY 2026 FOCUS PLAN.”
- Goals: Write a heading: “GOALS.” Under it, list your 3 most important goals. (e.g., “Read 10 books,” “Finish my project,” “Learn one new skill”).
- Boundaries: Write a new heading: “BOUNDARIES.” These are your rules. List 3 simple rules for your work.
- Example 1: “Phone in the ‘Phone Jail’ box.”
- Example 2: “Work stops at 5 PM.”
- Example 3: “No social media during work time.”
- Emergency Plan: Write a final heading: “EMERGENCY FOCUS RULES.” List 3 things you must do when you feel lazy or distracted.
- Example 1: “Stand up and stretch for 1 minute.”
- Example 2: “Drink one full glass of water.”
- Example 3: “Look at my ‘GOALS’ list.”
- Post it: Tape this one piece of paper to the wall right in front of your desk. When you feel lost, just read your plan.
11. Reach “Inbox Zero” Daily
Item Name: Inbox Zero Strategy

An empty inbox is a clean workspace. A full one is a to-do list that anyone can add to. The goal of “Inbox Zero” is not about having zero emails. It is about processing every email.
Each message is handled: reply, delete, archive, or defer. This method stops your inbox from becoming a high-stress pile. You regain control. Your email becomes a tool, not a boss. A clear inbox equals a clear mind.
DIY Instructions: The “Touch-It-Once” Email Game
You can learn this process in one afternoon.
What You Need:
- Your email inbox
- A timer (on your phone or computer)
Step-by-Step:
- Set Your Timer: Set a timer for 25 minutes. This is your email “game time.”
- Start at the Top: Open the oldest unread email first.
- The “Touch-It-Once” Rule: You must do something with it right now. You have four choices.
- Choice 1: DELETE (or Archive): Is it junk? Do you not need it? Delete it. Get it out.
- Choice 2: REPLY (The 2-Minute Rule): Can you reply in less than 2 minutes? If yes, do it right now. Then archive or delete it.
- Choice 3: DEFER (The ‘To-Do’ Folder): Does it need a long reply or a lot of work? Drag it to a new folder called “To-Do” or “Needs Reply.”
- Choice 4: DELEGATE: Do you need to forward it to someone else? Forward it, then archive or delete it.
- Keep Going: Move to the next email. Do this fast. When the timer rings, stop.
- Schedule It: Play this “game” twice a day. Once in the morning, once in the afternoon.
12. Turn Your Phone into a “Utility Tool”
Item Name: Minimalist Phone Homescreen

Your phone can be your worst enemy. A screen full of red notification bubbles and social media apps begs for your attention. It’s a “Distraction Machine.”
Tame it. Move every distracting app off your main screen. Put them all in one folder on the second page. Your home screen should only have “tools,” not “traps.” Think maps, camera, calendar, and messages. This small change removes the constant urge to check. It puts you back in charge.
DIY Instructions: The 5-Minute Home Screen Detox
This is a simple change you can make right now.
What You Need:
- Your smartphone
Step-by-Step:
- Unlock Your Phone: Go to your main home screen.
- Find a “Distraction”: Find one app that distracts you (like a game or social media).
- Press and Hold: Press your finger on the app icon and hold it down until it starts to wiggle (or a menu pops up).
- The “Folder” Trick: Drag this app on top of another distracting app. Your phone will automatically make a new folder.
- Name the Folder: Name this folder something boring, like “Extras” or “Later.”
- Move It Away: Now, press and hold the folder itself. Drag it all the way to the right edge of your screen. Keep holding it. Your phone will swipe to the second page. Drop the folder there.
- Repeat: Go back to your home screen. Do this for all distracting apps. Move them into that one folder on your second page.
- Clean Up: Your home screen should now be almost empty. Only leave the “tool” apps: Phone, Messages, Camera, Maps.
13. Set a Social Media “Curfew”
Item Name: Social Media App Log-Out

That endless scroll feels like a small break. It is
actually a major productivity drain. You open your phone for one thing and get lost for 20 minutes.
The fix is simple. Log out of your social media apps. If you cannot delete them, just log out. This forces you to enter your password every time. That small bit of friction is often enough to make you stop. You can still check on your computer. It just stops being a constant pocket-sized temptation.
DIY Instructions: The “Log-Out” Barrier
This trick uses laziness to your advantage.
What You Need:
- Your smartphone
- Your most distracting social media app
Step-by-Step:
- Open the App: Find your most distracting app (like Instagram, TikTok, or X) and open it.
- Find Your Profile: Go to your profile page. This is usually the little person icon in the bottom corner.
- Find Settings: Look for the “Settings” menu. It is usually three lines or a gear icon in the top corner.
- Find “Log Out”: Scroll all the way down to the bottom of the Settings menu.
- Click “Log Out”: The app will ask, “Are you sure?” Click “Log Out.”
- Important Step: The app might ask, “Save your login info?” Click “Not Now” or “No.”
- Test It: Close the app and open it again. It will now ask for your username and password. Most of the time, you will not bother to type it in.
14. “KonMari” Your Cloud Storage
Item Name: Digital File “Joy” Check

Your Google Drive and Dropbox are digital attics. They get filled with junk. You have “Untitled (1).doc,” old projects, and files you do not recognize. This digital clutter costs you time.
Take a page from Marie Kondo. Schedule an hour to clean your cloud. Open each folder. Ask, “Does this file serve a purpose?” or “Is this required for my records?” If not, delete it. A clean digital drive is as calming as a clean desk.
DIY Instructions: Your First “Spark Joy” Folder Clean-Up
Do not try to clean everything at once. Just start with one folder.
What You Need:
- Your computer
- Your cloud drive (like Google Drive or OneDrive)
Step-by-Step:
- Log In: Open your cloud drive.
- Find One Folder: Pick one folder that bothers you. Maybe it’s your “Downloads” folder.
- Make Three Folders: Inside this folder, create three new folders.
- Name one:
1. KEEP - Name one:
2. ARCHIVE(for old things you must save, like taxes) - Name one:
3. DELETE
- Name one:
- Sort the Files: Go through the files one by one. Drag each file into one of your three new folders.
- Ask the Question: For each file, ask, “Do I need this for my work right now?”
- If “Yes,” drag it to
1. KEEP. - If “It’s old, but I must save it,” drag it to
2. ARCHIVE. - If “No,” drag it to
3. DELETE.
- If “Yes,” drag it to
- Empty the Trash: Open the
3. DELETEfolder. Look inside one last time. Select all the files and delete them for good.
15. Untangle Your Passwords
Item Name: Password Manager

“Password reset” is a thief of time. You have dozens of accounts. You either use the same three weak passwords or you forget them constantly. This creates a tangled mess of mental clutter.
A password manager solves this. You only have to remember one strong master password. The app creates, saves, and auto-fills every other complex password for you. It is a secure vault that clears your mind. You no longer waste energy trying to remember how to log in.
DIY Instructions: Use Your Browser’s “Password Safe”
You can start this in 60 seconds.
What You Need:
- Your web browser (like Google Chrome)
Step-by-Step:
- Find Your Settings: Open your Chrome browser. In the top-right corner, click the three little dots. Go to “Settings.”
- Find Passwords: On the left side, click “Autofill and passwords.” Then click “Google Password Manager.”
- Turn it On: Make sure the toggle switch that says “Offer to save passwords” is turned ON.
- Turn on Auto-fill: Make sure “Auto sign-in” is also turned ON.
- How it Works: The next time you log in to a new website, Chrome will show a pop-up. It will ask, “Save password?” Click “Save.”
- The Magic: The next time you go to that website, Chrome will fill in the password for you. You just built a simple password manager.
16. Put Your To-Do List on Your Calendar
Item Name: Time-Blocking Calendar

A to-do list shows you what you need to do. A calendar shows you when you will do it. Stop living off a list. Start living off a schedule. This is “time-blocking.”
If you need to write a report, do not just add it to a list. Find a 90-minute empty slot on your calendar and schedule it. Label it “Write Report.” This habit stops procrastination. You are no longer “hoping” to find time. You are making time.
DIY Instructions: Block Your First Task
Treat your tasks like real appointments.
What YouNeed:
- Your calendar (Google Calendar, Outlook, or a paper planner)
- Your to-do list
Step-by-Step:
- Find a Task: Look at your to-do list. Find one important task. (Example: “Finish my report”).
- Estimate the Time: How long will it take? Be honest. (Example: “1 hour”).
- Open Your Calendar: Look at your calendar for tomorrow.
- Find an Empty Spot: Find an empty 1-hour block. (Example: “Tomorrow at 10:00 AM”).
- Create an “Event”: Click on that empty spot and create a new event, just like you would for a meeting.
- Name the Event: Do not name it “Busy.” Name it the task. (Example: “WORK ON REPORT”).
- Save It: Save the event.
- The New Rule: When 10:00 AM comes tomorrow, your calendar will tell you it’s time to work. You must treat this “appointment” just like a real one.
17. Set “Work” and “Wind-Down” Lighting
Item Name: Task and Ambient Lighting

Your brain follows light cues. Bright, cool-toned light signals energy and focus. Dim, warm-toned light signals relaxation. Your home office should use both.
During work hours, use a bright desk lamp to light your task. This keeps you alert. When your workday ends, turn off that bright lamp. Switch to a small, warm lamp in the corner. This physical act of “changing the light” tells your brain that the workday is over. It helps you disconnect.
DIY Instructions: The “Spotlight” and “Glow” Method
This uses two different lamps to change the feel of your room.
What You Need:
- Your main desk lamp
- A second, smaller lamp (or string lights)
Step-by-Step:
- The “Spotlight”: This is your main desk lamp. It should have a bright bulb. Point it directly at your keyboard and notebook. This is your “Work Spotlight.”
- The Rule: The “Spotlight” is only on when you are actively working.
- The “Glow”: This is your second lamp. It can be a small table lamp or even a string of holiday lights. It should have a dim, warm bulb. Place it on a bookshelf or in a corner.
- The “Work” Setup: When you work, your “Spotlight” is ON.
- The “End of Day” Setup: When you are done working, click your “Spotlight” OFF. This is a very important signal.
- The “Relax” Setup: Turn your “Glow” lamp ON. The room is now soft and cozy. It is no longer a “work” space.
18. Create a “Start Work” Ritual
Item Name: Flow State Ritual Kit

You cannot just sit down and demand “focus.” You must ease into it. A “start work” ritual is a simple routine that tells your brain it is time for deep work.
It can be small. Maybe you light a specific candle. Maybe you set a 5-minute timer and write in a journal. Or you ring a small bell and take three deep breaths. The act itself does not matter. The consistency does. This simple 2-minute habit builds a powerful trigger for your brain.
DIY Instructions: Your 3-Minute “Focus” Ritual
This helps you warm up your brain for work.
What You Need:
- A timer
- A notebook and pen
- (Optional) A nice-smelling candle or a cup of tea
Step-by-Step:
- Set the Scene (Optional): Light a candle or make your tea. The smell will become part of your signal.
- Set Your Timer: Set a timer for 3 minutes.
- Clear Your Space: For 1 minute, quickly tidy your desk. Put away your coffee cup. Close your email.
- Write Your Goal: For the last 2 minutes, open your notebook. Write down one sentence. Answer this question: “What is the one thing I must finish right now?”
- Example: You might write, “I will write 500 words for the report.”
- Start Work: When the timer rings, your ritual is over. Your brain is warmed up. Start working only on that one thing you wrote down.
19. Build a “Living” Room Divider
Item Name: Plant Shelf Divider

When your office is in your living room, it is hard to disconnect. You need a clear boundary. A large, open bookshelf can create this separation.
Do not fill it with books. Fill it with plants. This “living wall” creates a physical and mental barrier. It blocks the view of your sofa or bed. It also cleans the air and can boost your mood. It feels less like a harsh wall and more like a small indoor garden.
DIY Instructions: The “Plant Wall” Illusion
You can create a wall of plants without a big shelf.
What You Need:
- A few small tables, stools, or sturdy boxes
- 3-5 plants of different sizes
Step-by-Step:
- Find the Line: Stand at your desk. Look toward the rest of the room (like your sofa). Imagine a line on the floor where you want a “wall.”
- Create Levels: Get a few small tables or sturdy boxes. Place them along this line. Make them different heights.
- The “Anchor”: Place your tallest plant on the floor on one end of the line.
- The “Middle”: Place a medium-sized plant on one of the tables or boxes.
- The “Small” ones: Place your smaller plants on the other tables.
- Stagger Them: Do not put them in a perfectly straight line. Put one a little forward, one a little back. This makes it look fuller.
- Check Your View: Sit at your desk. The plants should now help block your view of the “home” part of your room.
20. Control the “Bounce” (Sound, Not Light)
Item Name: Acoustic Wall Panels

Home offices often have hard floors and bare walls. This makes every sound bounce. The echo from your own voice on a video call is distracting. Outside noises feel louder.
Sound-absorbing panels fix this. They are made of soft material that ” catches” sound. This stops the echo and makes your room feel quieter. It is a simple fix for a more professional-sounding and feeling workspace.
DIY Instructions: The “No-Echo” Canvas Hack
You can make a simple sound panel.
What You Need:
- A blank art canvas (from a craft store)
- An old, fluffy towel
- (Optional) A staple gun (ask a grown-up for help)
Step-by-Step:
- Get Your Canvas: Find a cheap, blank art canvas. A 12-inch by 12-inch square is a good start. It’s just a wooden frame with cloth stretched over it.
- Fold Your Towel: Get an old, fluffy towel you don’t need anymore. Fold it so it’s the same size as the inside of the canvas frame.
- Stuff the Canvas: Lay the canvas on its face (cloth side down). Place your folded towel into the hollow space in the back. It should be snug.
- Secure It (Optional): If you have a staple gun, you can staple a piece of scrap cloth over the back to hold the towel in neatly.
- Hang it Up: Hang this canvas on the wall behind your computer, just like a picture.
- How it Works: The sound from your voice will go through the thin canvas cloth and get trapped in the fluffy towel. It cannot bounce back at you.
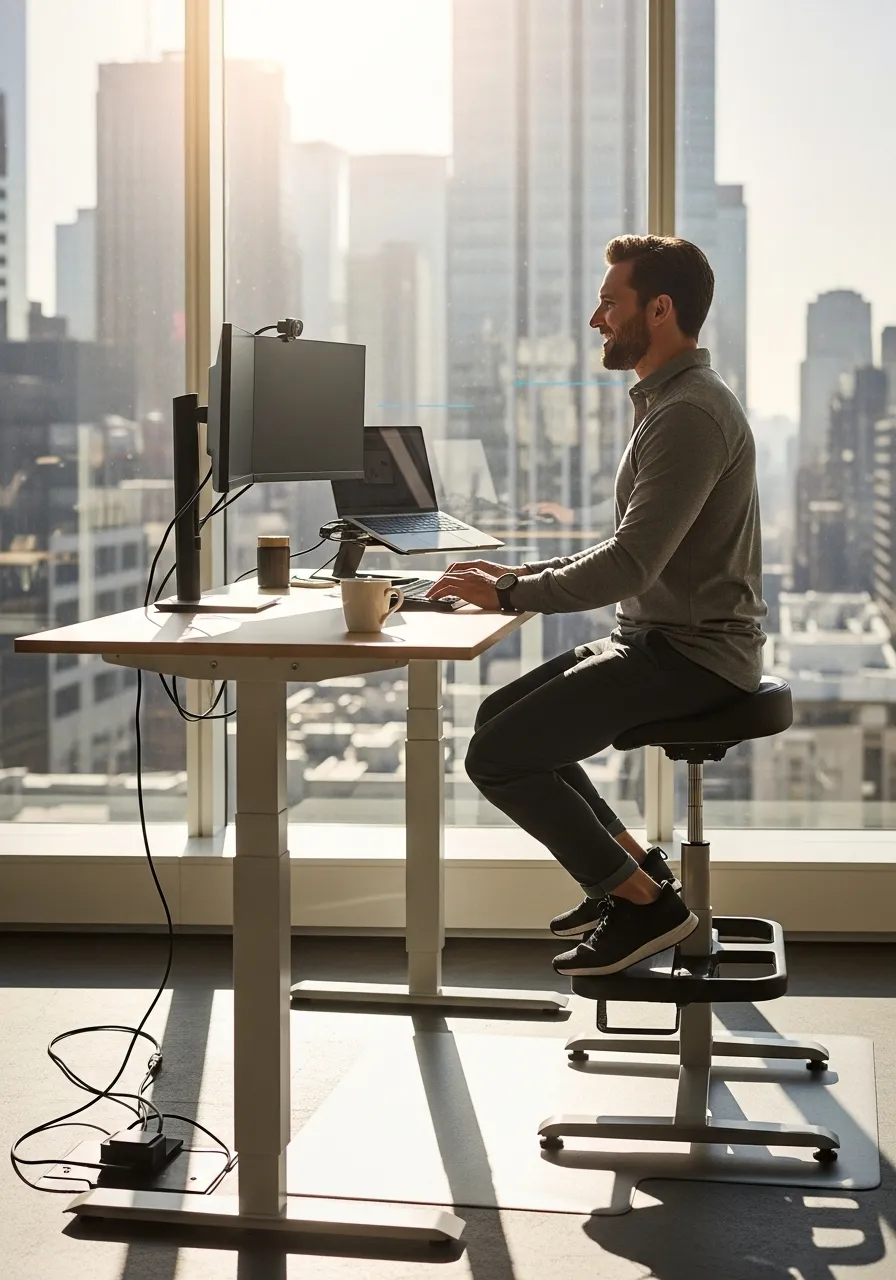
21. Stop Just Sitting, Start “Active Sitting”
Item Name: Ergonomic Stool or Standing Desk

Sitting still in a comfy chair for eight hours is a recipe for low energy. Your body is not meant to be rigid. An active setup, like a standing desk or an ergonomic stool, encourages small movements.
This keeps your blood flowing and your core engaged. You will feel more alert and less stiff at the end of the day. It turns your workstation into a tool for energy, not a drain.
DIY Instructions: The “Better Chair” Hack
You can improve the chair you already have.
What You Need:
- Your current desk chair
- A firm pillow or a rolled-up bath towel
Step-by-Step:
- Check Your Height: Sit in your chair. Your feet should be flat on the floor. Your knees should be at a 90-degree angle. If they are not, adjust your chair height.
- Fix Your Slouch: Most chairs do not support your lower back. This makes you slouch.
- Get Your Support: Take a firm pillow (like a couch throw pillow) or roll up a bath towel tightly.
- Place it: Wedge this pillow or towel right in the curve of your lower back.
- Sit Up: This support will push your lower back in. It forces you to sit up straight.
- The Timer: Set a timer on your phone to “Stand Up” once every 30 minutes. Just stand up, stretch your arms, and sit back down.
22. Use “Mode” Lighting for Your Brain
Item Name: Task-Based Light Boxes

Color has a strong effect on your mood. You can use this to your advantage. Set up different light “modes” for your different work tasks.
A cool blue light signals to your brain that it is time for “Focus.” A warm orange light can be for “Creative” thinking. A soft green light can mean it is time for a “Meditation/Break.” It is a simple, visual cue to help you switch gears quickly.
DIY Instructions: The “Smart Bulb” Mode Switch
You can do this easily with one smart bulb.
What You Need:
- A desk lamp
- One color-changing smart bulb (you can find these at most stores)
- A smartphone
Step-by-Step:
- Set Up Your Bulb: Screw the smart bulb into your lamp. Download the app for that bulb on your phone.
- Create Your “Modes”: In the app, create 3 “Scenes” or “Favorites.”
- Mode 1: “Focus”: Create a scene named “Focus.” Set the color to a bright, cool white or a light blue.
- Mode 2: “Creative”: Create a scene named “Creative.” Set the color to a warm, orange-ish light.
- Mode 3: “Break”: Create a scene named “Break.” Set the color to a dim, soft green or red.
- Use It: Before you start a task, open your phone and tap the “Focus” scene. When you are brainstorming, tap “Creative.” It is a 2-second way to tell your brain what to do.
23. Create a “Decompression Zone”
Item Name: “Off-Clock” Corner

When your office is also your home, it is hard to “clock out.” Your brain stays in work mode. A “Decompression Zone” is a physical spot that signals your workday is over.
It should not be your desk. It is a comfy chair in another corner. The rule is simple: when you sit here, you are “off the clock.” No work email, no calls. This physical boundary creates a mental one.
DIY Instructions: The 5-Minute “Break Space”
You can create this zone with things you already own.
What You Need:
- Any chair (that is not your desk chair)
- A small table or a stack of books
- A plant or a lamp
Step-by-Step:
- Find a Corner: Find any empty corner in your room, even if it is just a few feet from your desk.
- Place Your Chair: Put the comfy chair in that corner. It should not face your desk. Make it face a window or a wall.
- Make a “Table”: Place a small side table next to it. If you do not have one, a stack of large books or a small box works fine.
- Make it Nice: Put a small lamp or a plant on the “table.”
- The Rule: This is now your “Break Space.” You are only allowed to sit here when you are on a break or done for the day. Never bring your laptop here.
24. Position Your Desk for Light, Not Distraction
Item Name: Window-View Desk Setup

Natural light is a huge productivity booster. It helps your mood and energy. Many people think facing a window is the best setup.
But a busy street can be very distracting. You get light, but you lose focus. The solution is to place your desk parallel to the window. Your desk faces a wall, but the light floods in from your side. You get all the benefits of the sun without watching every car that drives by.
DIY Instructions: The “Side-Light” Setup
This is a simple room re-arrangement.
What You Need:
- Your desk and chair
Step-by-Step:
- Find Your Window: Look at the main window in your office.
- Face the Wall: Move your desk so it is against a wall that is next to the window.
- Test Your View: Sit at your desk. You should be facing a blank wall (which is good for focus).
- Check Your Side: Look to your left or right. You should see the window.
- The Benefit: The natural light will light up your desk from the side. You will feel the energy from the light, but your eyes will be focused on your work.
25. Let AI Pre-Sort Your Priorities
Item Name: AI-Powered Email Sorter

A simple spam filter is not enough. Your inbox is still full of newsletters, random receipts, and messages that are not urgent. An AI sorter acts like a personal assistant.
It learns who you talk to and what is important. It automatically sorts your email into “Priority Replies” and “Everything Else.” This means you only spend your brainpower on the messages that truly matter.
DIY Instructions: The “VIP Filter”
You can set this up in 2 minutes in any email program.
What You Need:
- Your email account
Step-by-Step:
- Identify Your VIPs: Think of the 3-5 people whose emails you must see (like your boss or a major client).
- Find Their Email: Open an email from your boss.
- Find “Filter”: Click the three dots (the “More” menu) and choose “Filter messages like these.”
- Create the Filter: A box will pop up with their email address. Click “Create filter.”
- Choose Your Action: Now you tell the email what to do.
- Check the box “Apply the label.” Create a new label called
_IMPORTANT. (The underscore_keeps it at the top of your list). - Check the box “Star it.”
- Check the box “Never send it to Spam.”
- Check the box “Apply the label.” Create a new label called
- Finish: Click “Create filter.” Repeat this for your other 4 VIPs. Now, all important messages will automatically get a star.
26. Automate Your Project “Setup Tax”
Item Name: Project Kickoff Automation

Think about starting a new project. You have to create a new folder. Then you make sub-folders for “Admin,” “Drafts,” and “Final.” Then you send the same kickoff email. This is a “setup tax” you pay every time.
Automation tools can bundle these steps. You just hit one button. It builds the folders and opens a draft email for you. This saves 15-30 minutes and lets you get straight to the real work.
DIY Instructions: The “Master Template Folder”
This is a low-tech way to do the same thing.
What You Need:
- Your computer’s file system
Step-by-Step:
- Go to “Documents”: Open your main “Documents” folder.
- Create Your Template: Create one new folder. Name it
_PROJECT TEMPLATE. (The underscore keeps it at the top). - Build Your Folders: Open that new folder. Inside it, create the sub-folders you always use.
01_Admin02_Assets03_Drafts04_Final_Versions
- The “Kickoff” File: Inside the
01_Adminfolder, create a blank text file. Name itkickoff_email_template.txt. Open it and paste in the email you always send. - The Workflow: Next time you have a new project, do not make a new folder.
- Copy, Paste, Rename: Just copy the
_PROJECT TEMPLATEfolder, paste it, and rename the copy to your new project’s name. All your folders are ready to go.
27. Stop Typing, Start “Expanding”
Item Name: Text Expander / Snippet Tool

How many times a day do you type your email address? Your phone number? The link to your website? Or the same “Thanks, I’ve received this!” email?
A text expander is a small tool that saves you hours. You create a short snippet, like ;addr. When you type that snippet, it instantly expands into your full address. You can do this for common phrases, code blocks, and entire emails.
DIY Instructions: The “Autocorrect” Snippet Hack
You can use your phone’s keyboard shortcuts for this.
What You Need:
- Your smartphone
Step-by-Step:
- Find Your Keyboard Settings:
- On iPhone: Go to
Settings>General>Keyboard>Text Replacement. - On Android: Go to
Settings>System>Languages & input>On-screen keyboard>[Your Keyboard]>Dictionary>Personal dictionary.
- On iPhone: Go to
- Click the “+” Sign: Tap the plus sign (+) to add a new shortcut.
- The “Phrase”: In the “Phrase” box, type the full thing you want to expand.
- Example:
123 Main Street, Anytown, USA 12345
- Example:
- The “Shortcut”: In the “Shortcut” box, type your short snippet. Make it something you will not type by accident.
- Example:
zaddr(The “z” makes it unique).
- Example:
- Save It: Save the shortcut.
- Test It: Open a new text message. Type
zaddrand press space. It will expand. This syncs across your devices.
28. Use AI to “Attend” Meetings for You
Item Name: AI Meeting Transcription Tool

Meetings are productivity killers. The worst part is trying to participate while also taking notes. You end up doing neither very well.
An AI tool can “join” your video call. It listens and writes down everything that is said (a transcript). After the meeting, it emails you a summary. It identifies the “Key Points” and “Action Items.” This frees you to actually listen and talk.
DIY Instructions: The “Action Item” Focus
You cannot DIY an AI, but you can change how you take notes.
What You Need:
- A notebook and pen (or a blank text file)
Step-by-Step:
- The “Old Way”: Most people try to write down everything that is said. This is bad.
- The “New Way”: Before your meeting, open your notebook.
- Draw Two Columns: Draw a big “T” on the page to make two columns.
- Label Column 1:
KEY DECISIONS - Label Column 2:
ACTION ITEMS (Who/What/When) - Take “Action” Notes: During the meeting, do not write anything else. Only listen. When you hear an action item (like “Bob will send the report by Friday”), write it in column 2.
- The Wrap-Up: At the end of the meeting, read your “Action Items” list out loud. “Okay, so Bob is sending the report by Friday, and I am drafting the intro.”
29. Create Voice-Activated “Work Modes”
Item Name: Smart Speaker Routines

You can use a smart speaker to build powerful start and end-of-day rituals. It is about creating a “scene.”
Set up a “Start Work” routine. When you say the command, your speaker can turn on your desk lights, turn on your fan, and start your “Focus” playlist. In the evening, an “End Work” command can turn off your office lights and announce, “Work is over. Time to disconnect.”
DIY Instructions: The “Alarm” Routine
You can do this with the alarm clock on your phone.
What You Need:
- Your smartphone
Step-by-Step:
- Open Your Clock App: Go to the “Alarm” section.
- The “Start” Alarm: Create a new alarm for the time you start work (e.g., 9:00 AM).
- Label It: This is the most important part. Name the alarm “START WORK.”
- The “End” Alarm: Create a second alarm for the time you finish work (e.g., 5:00 PM).
- Label It: Name this alarm “WORK IS OVER. GO HOME.”
- Set the Sound: Make the 9:00 AM alarm an energetic sound. Make the 5:00 PM alarm a calm or fun sound.
- The Effect: When the 5:00 PM alarm rings and you see “WORK IS OVER. GO HOME” on your screen, it is a very powerful signal. It is much harder to ignore than just “watching the clock.”
30. Reduce Your “App-Switching Tax”
Item Name: Context Switching Awareness

Every time you switch apps—from your email to your chat, to your document, to your calendar—your brain pays a “tax.” It takes time to re-focus. This is “context switching.”
All these apps are supposed to help, but they often just scatter your attention. Try to reduce this. Find tools that combine your work. Or, be disciplined: close your chat and email when you are writing. Your brain will thank you.
DIY Instructions: The “One Hour, One App” Challenge
This is a mental exercise to train your focus.
What You Need:
- A timer
- One task to do (like writing a report)
Step-by-Step:
- Choose Your Task: Decide on one important task (e.g., “Write the report draft”).
- Choose Your One App: You will do this task in one app (e.g., Google Docs or Word).
- The “Shutdown”: Close all other apps. Close your email. Close your chat. Quit them completely so you get no notifications.
- Set the Timer: Set a timer for 60 minutes.
- Work: For one hour, you are not allowed to open any other app.
- The Result: You will likely get more done in that 60 minutes than you do in a normal 3-hour afternoon. This teaches you the cost of switching apps.
31. Back Up Your Brain, Not Just Files
Item Name: Digital Brain Backup

The fear of losing work creates mental anxiety. Your computer could crash. Your cloud could fail. This fear sits in the back of your mind.
A regular, automated backup removes this anxiety. It is not just about files. It is about backing up your mental energy. You know your work is safe. This frees your brain to focus on creation, not on the “what if.”
DIY Instructions: The “Emergency Thumb Drive”
This is a simple backup for your most important files.
What You Need:
- A small USB thumb drive
- Your computer
Step-by-Step:
- Get a Thumb Drive: Buy a small USB thumb drive (8GB or 16GB is usually enough).
- Create a Folder: On the thumb drive, create a folder called
_EMERGENCY BACKUP. - Identify Crucial Files: Think about the 3-5 files you absolutely cannot lose (e.g., your tax documents, your main project file, your resume).
- Copy Them Over: Drag copies of those files into the
_EMERGENCY BACKUPfolder. - Store It Safely: Take the thumb drive out. Keep it in a safe place, away from your computer. Maybe in a desk drawer, or even in your wallet.
- Update Weekly: Once a week (e.g., every Friday morning), plug it in and update those files.
32. Filter the Digital Noise
Item Name: Ad Blocker / Tracker Blocker

The internet is a busy place. Ads flash. Pop-ups appear. Websites try to track your every move. This “digital noise” is a constant drain on your attention.
An ad blocker or tracker blocker cleans up the web. Websites load faster. The visual clutter disappears. This creates a calmer, more focused browsing experience. It is like putting on noise-canceling headphones for your web browser.
DIY Instructions: Install Your First Ad Blocker
This is a free tool you can install in 1 minute.
What You Need:
- Your web browser (like Google Chrome or Firefox)
Step-by-Step:
- Open Your Browser: Open Chrome or Firefox.
- Go to the Store:
- Chrome: Go to the Chrome Web Store (search for it).
- Firefox: Go to Firefox Browser ADD-ONS (search for it).
- Search for “uBlock Origin”: This is a free, powerful ad blocker.
- Install It: Click “Add to Chrome” or “Add to Firefox.”
- Confirm: Click “Add extension” when it asks.
- The Shield: A small red shield icon will appear in the top-right corner of your browser.
- Enjoy: Go to a website you know has lots of ads. They should now be gone.
33. Clean Your Digital Desktop Daily
Item Name: Desktop Declutter Ritual

Your physical desk gets messy. So does your digital one. Downloads, screenshots, and random files build up. This creates mental clutter every time you see it.
A daily “digital declutter” keeps your computer feeling fresh. At the end of the day, spend 5 minutes sorting or deleting desktop files. It is like wiping your slate clean for tomorrow. A clean digital space reduces visual distraction.
DIY Instructions: The “Desktop Sweeper” Method
This is a super-fast way to clear your screen.
What You Need:
- Your computer
- A few minutes at the end of your workday
Step-by-Step:
- Create a Folder: On your Desktop, create one new folder. Name it “Desktop Sweep.”
- Select All: Click on your desktop. Press
Ctrl + A(Windows) orCommand + A(Mac) to select everything on your desktop (except the new folder). - Drag It In: Drag all the selected items into the “Desktop Sweep” folder.
- The Fresh Start: Your desktop is now clean.
- The “Review”: The next morning (or whenever you have 5 minutes), open the “Desktop Sweep” folder.
- Delete or File: Go through the files. Delete what you do not need. Move anything important to its correct folder (Documents, Pictures, etc.).
34. Design Your “Ideal Workday” Blueprint
Item Name: Visual Workday Blueprint

Do you start your day feeling lost? Do you bounce between tasks? Without a plan, you react. With a plan, you act. A visual “workday blueprint” is your map.
On one page, write your top 3 goals. Then, block out your morning deep work, your lunch break, and your afternoon tasks. Stick it on the wall. This visual guide stops you from getting sidetracked. It is your daily reminder of what truly matters.
DIY Instructions: Your “Dream Day” Paper Plan
You can make this in 10 minutes.
What You Need:
- A piece of paper
- A pen or marker
- (Optional) A ruler
Step-by-Step:
- Draw Your Boxes: Draw 3 big boxes on the paper.
- Box 1: “Top 3 Goals”: In the first box, write “My Top 3 Goals Today.” List the three most important things you need to achieve.
- Box 2: “Deep Work Block”: In the second box, write “Morning Focus (9 AM – 12 PM).” This is when you do your hardest work.
- Box 3: “Afternoon Flow”: In the third box, write “Afternoon Tasks (1 PM – 4 PM).” List smaller tasks or meetings here.
- Add Breaks: In between the boxes, write down “Lunch” and a “Short Break.”
- Hang It Up: Stick this paper next to your computer. Every morning, look at it. It tells your brain, “This is the plan.”
35. Master Your “Shutdown Ritual”
Item Name: 120-Second Shutdown Checklist

The workday ends, but your brain keeps churning. You go from work straight to dinner, still thinking about emails. This creates mental fatigue.
A “shutdown ritual” creates a clean break. It is a quick 2-minute checklist. You close all tabs, organize your physical space, and write down your top task for tomorrow. This signals to your brain that work is truly done. You leave the office, mentally refreshed, ready for your evening.
DIY Instructions: Your “End-of-Day” Checklist
This can be a sticky note next to your computer.
What You Need:
- A sticky note or small piece of paper
- A pen
Step-by-Step:
- Write “Shutdown Ritual”: At the top of the sticky note, write “My 2-Minute Shutdown.”
- Add 3 Steps:
- Step 1: Clear the Desk: “Put away physical clutter.”
- Step 2: Digital Close: “Close all tabs/programs.”
- Step 3: Tomorrow’s Top Task: “Write 1 MIT for tomorrow.” (MIT means Most Important Task).
- Stick It Up: Stick this note right on your monitor or next to your keyboard.
- The Ritual: Every day, before you leave your desk, do these three things. It only takes 2 minutes. This tells your brain, “Work is officially over.”
36. Embrace the “Analog First” Rule
Item Name: Paper Planner / Notebook

Our digital tools are amazing, but they are also full of distractions. Every app asks for your attention. An “analog first” approach changes this.
Start your planning on paper. Your calendar, your to-do list, your brainstorming. A notebook does not have notifications. There are no distracting ads. This forces you into a calmer, more focused planning process. Once the plan is solid, you can transfer it to digital if needed.
DIY Instructions: The “Planner Page” Layout
You can make a simple planner on any piece of paper.
What You Need:
- A blank notebook or piece of paper
- A pen
Step-by-Step:
- Draw a Box: Draw a large box in the middle of the page. This is your “Main Work Area.”
- Add Your List: On the left side of the box, write “Today’s Tasks.” List your top 3 tasks for the day.
- Add Your Calendar: On the right side, write “Schedule.” Draw a few lines to represent your morning, afternoon, and evening. Write down any fixed appointments.
- The “No Tech” Rule: When you are planning or brainstorming, do it in this notebook. Keep your phone and computer closed.
- Focus: When you are working on a task, keep the relevant page of your notebook open. It reminds you what you are doing without any digital pings.
37. Create a “Mental Walk-Out”
Item Name: Physical Boundary Ritual

Working from home blurs the lines. You just “stop” working. You need a clear separation. A “mental walk-out” creates this boundary.
At the end of your workday, physically leave your office (even if it is just one room). Shut the door. If you do not have a door, walk around the block. This physical movement signals to your brain that your work identity is “off.” When you come back, you are “home.”
DIY Instructions: The “Virtual Commute”
You can create this with a short walk.
What YouNeed:
- Your front door
- Your walking shoes
Step-by-Step:
- The End of Day: You have completed your shutdown ritual.
- Get Your Shoes: Put on your shoes.
- Go Outside: Walk out your front door.
- Walk for 5 Minutes: Walk for 5-10 minutes. Do not bring your phone unless it is for emergencies. Just walk and look around.
- The Return: When you come back into your home, you are no longer in “work mode.” You are “home.” This small walk creates a powerful mental shift.
38. Celebrate Small Wins, Often
Item Name: Daily Achievement Tracker

Big goals are great, but they can feel far away. This leads to burnout. The solution is to celebrate small wins every day.
At the end of your day, list 3 things you accomplished. Did you send that tough email? Check. Did you organize your desktop? Check. A simple checklist can boost your morale. It shows you that you are making progress, even when it feels slow. This positive feedback fuels motivation.
DIY Instructions: Your “Daily Wins” Whiteboard
You can use a whiteboard or a large piece of paper.
What You Need:
- A whiteboard or large paper
- A marker
- Sticky notes (optional)
Step-by-Step:
- Divide Your Space: Draw two columns on your whiteboard.
- Column 1: “MY GOALS”
- Column 2: “TODAY’S WINS!”
- List Goals: In the “MY GOALS” column, write your 3 biggest goals for the week or month.
- Daily Check-In: At the end of each day, look at “TODAY’S WINS!”
- Write 3 Wins: Write down 3 things you finished or made progress on, no matter how small. (Example: “Sent the difficult email,” “Organized my download folder,” “Finished one page of report”).
- Reward Yourself: Give yourself a small reward for completing your wins. It can be a sticker, a checkmark, or a quick break.
- Motivation: This simple act helps you see that you are getting things done, which boosts your energy for tomorrow.
39. Gamify Your Progress
Item Name: Progress Tracking Calendar

Motivation can be fleeting. It is hard to keep going when you do not see progress. “Gamifying” your goals turns work into a game.
Use a visual tracker. A wall calendar with stickers for each day you hit your goals. Or a progress bar on a whiteboard. This visual feedback makes it fun to keep going. You literally see yourself winning, which encourages you to keep the streak alive.
DIY Instructions: Your “Awesome Year” Tracker
You can make this in 10 minutes.
What You Need:
- A large wall calendar (or a blank piece of paper)
- Stickers or colorful markers
Step-by-Step:
- Get a Calendar: Find a large wall calendar for the entire year.
- Choose Your Goal: Pick one good habit you want to stick with (e.g., “Work out,” “Read a book,” “Meditate”).
- Make it Visual: Every day you complete that habit, put a sticker on that day on the calendar. Or draw a big, happy star.
- The “Streak”: Try to get a “streak” of stickers. When you see 3 days in a row, you will want to get 4, then 5.
- Motivation: This visual record shows you your progress. It makes it fun to stick to your goals.
40. Turn Off Your “Work Identity”
Item Name: Digital Work Identity Switch

Your brain associates certain actions with “work.” Checking email, opening specific files, even sitting at your desk. You need a clear “off switch” to disconnect.
This is more than just closing your laptop. It is a series of small actions that tell your brain, “The work version of me is signing off.” It includes closing all work-related apps, putting away work items, and physically leaving your workspace. This creates a clean mental break.
DIY Instructions: The “Work Brain” Shutdown Sequence
This is a mental checklist that becomes a habit.
What You Need:
- Your computer
- Your physical workspace
Step-by-Step:
- The “Big Red Button” Mental Image: Imagine a big red “OFF” button for your work brain.
- Step 1: Email/Chat OFF: Close your email program and all chat apps. (Mentally push the “Email” button off).
- Step 2: Browser Tabs OFF: Close all work-related browser tabs. (Mentally push the “Browser Tabs” button off).
- Step 3: Files OFF: Save and close all your work documents and programs. (Mentally push the “Project Files” button off).
- Step 4: To-Do List OFF: Write tomorrow’s most important task on your physical list. Clear your mental to-do list. (Mentally push the “Mental To-Do List” button off).
- Step 5: Physical Space OFF: Tidy your desk and chair. Make it ready for tomorrow. (Mentally push the “Physical Workspace” button off).
- Final Push: Take a deep breath. Stand up. Say to yourself, “Work identity shutdown complete.”
Key Takeaways
- Organize Your Physical Space: Your desk is your command center. Use vertical sorters, intake trays, and clear zones to keep surfaces open and ready for work.
- Conquer Digital Clutter: Your computer is just as important as your desk. Manage your browser tabs, set up email filters, and use a password manager to reduce mental drag.
- Create Firm Boundaries: Productivity depends on clear “on” and “off” switches. Use lighting, “start work” rituals, and a “shutdown sequence” to tell your brain when it’s time to focus and when it’s time to rest.
- Automate the Small Stuff: Stop wasting energy on repetitive tasks. Use text expanders, project templates, and AI tools to handle the setup so you can focus on the real work.
You do not have to be a victim of unproductivity. The feeling of “spinning your wheels” is solvable. It often starts with the space right in front of you. A disorganized office creates a disorganized mind.
Do not try to do all 40 of these hacks at once. Pick one. Just one. Maybe it’s clearing your physical desktop. Or setting up one email filter.
These small changes build on each other. They create a foundation for focus. A more organized office for 2026 will lead to a clearer mind, better work, and more time for the things you enjoy.