The holiday season brings a special kind of magic, but often our bedrooms get left behind in the decorating frenzy. While the living room may sparkle, your personal space can start to feel a little plain or even uncozy in comparison.

Your bedroom should be a sanctuary, a place to unwind from the holiday rush. If it’s not feeling like a restful retreat, a few simple festive touches can make all the difference. It’s not about grand gestures, but small, personal details that create a serene and joyful atmosphere.
We’ve gathered 35 unique ideas to transform your bedroom into a festive escape. From simple DIY garlands to glamorous themes, you’ll find plenty of inspiration to make your space feel warm, inviting, and full of holiday spirit.
1. Twinkling Star & Light Garland

A simple string of lights can transform a room. This garland adds a gentle, warm glow to the headboard, creating a peaceful mood. The wooden stars bring a touch of nature indoors. This decoration feels calm and uncluttered, making your bedroom a true retreat.
The soft light is enough to feel festive without being too bright. It pairs well with other simple decorations like a fresh wreath or a cozy knit blanket. You can create a holiday space that feels both special and serene. It’s a small touch that makes a big difference.
DIY Instructions: Make Your Own Star Garland
Making this is super easy and fun! Here’s how you can do it.
What You’ll Need:
- A long piece of twine or thick string
- A set of battery-powered fairy lights (the kind with thin wire)
- Small wooden stars (you can find these at a craft store)
- A hot glue gun (ask a grown-up for help with this part!) or strong craft glue
- A measuring tape
- Scissors
Step-by-Step Guide:
- Measure Your Space: First, use the measuring tape to see how long your headboard is. You want the garland to drape nicely across it. Add a little extra length to your measurement and then cut your piece of twine.
- Place Your Stars: Lay the twine flat on a table or the floor. Place your wooden stars along the twine, leaving even spaces between them. Think about how far apart you want them to be.
- Glue the Stars: Time for the glue! One by one, put a small dot of hot glue on the back of a wooden star and press the twine onto it. If you’re using craft glue, you’ll need to let it dry completely. Remember, hot glue is very hot, so let an adult handle that part.
- Wrap the Lights: Once the stars are secure, take your fairy lights. Starting at one end, carefully wrap the light wire around the twine. Weave it in and out between the stars until you reach the other end.
- Hang It Up: Now your beautiful garland is ready! You can hang it on your headboard using small, clear hooks or even just some tape on the back. Tuck the small battery pack behind your bed, turn it on, and enjoy the cozy glow!
2. Spiced Orange & Pinecone Garland

Bring the warm scents of the season into your room. This rustic garland uses dried orange slices and pinecones for a natural touch. The rich colors and textures create a cozy, cabin-like feeling. It’s a decoration that smells as good as it looks.
This style is all about comfort and nature. Imagine the subtle scent of citrus and pine as you relax. The warm tones of the wood and the soft candlelight make the space feel incredibly inviting. This is a wonderful way to add a layer of warmth to your bedroom retreat.
DIY Instructions: Make Your Own Scented Garland
This project will make your whole room smell like the holidays!
What You’ll Need:
- A few oranges
- An oven (and a grown-up to help)
- Small pinecones
- Cinnamon sticks
- A long piece of twine
- A needle with a big eye, or something sharp to poke holes
Step-by-Step Guide:
- Dry the Oranges: Ask a grown-up to slice the oranges (not too thick, not too thin). They can place the slices on a baking sheet and bake them in the oven on a very low heat for a few hours until they are dry.
- Plan Your Pattern: While the oranges cool, lay out your twine. Arrange your dried orange slices, pinecones, and cinnamon sticks along the twine to decide what pattern you like best.
- String It All Together: Thread the twine through your needle. Carefully poke the needle through the center of an orange slice and pull it onto the twine.
- Add Pinecones and Cinnamon: To add a pinecone, wrap the twine tightly around its base. For cinnamon sticks, you can wrap the twine around them a few times or ask a grown-up to help you drill a small hole through them.
- Hang and Enjoy: Continue your pattern until the garland is full. Find a spot for it on your headboard or wall, hang it up, and breathe in that amazing holiday scent!
3. Winter Wonderland Canopy

Create a magical, frosty escape right in your bedroom. This look uses shimmering silver and crisp white to build a dreamy winter scene. Hanging icicle lights and delicate snowflakes over the bed makes it feel like you are sleeping under a starry, winter sky.
The soft, sheer fabric of the canopy adds to the elegance. Everything sparkles, from the mirrored furniture to the silver ornaments. It’s a very glamorous and enchanting way to decorate for the holidays, turning your room into a peaceful, snowy sanctuary.
DIY Instructions: Create a Snowy Canopy
Let’s make a magical snowy wonderland above your bed.
What You’ll Need:
- A long piece of white, sparkly, or sheer fabric (like tulle)
- A string of cool white icicle lights
- Paper or plastic snowflakes of different sizes
- Clear string (like fishing line)
- Scissors
- Clear hooks that stick to the ceiling
Step-by-Step Guide:
- Hang the Fabric: Ask a grown-up to help you stick a few hooks to the ceiling above your bed. Drape the sheer fabric over the hooks so it hangs down like a soft canopy.
- Add the Lights: Carefully drape the icicle lights over the fabric. Let the “icicles” hang down to create a sparkly, dripping effect.
- Make it Snow: Cut different lengths of clear string. Tie a snowflake to the end of each piece of string.
- Hang the Snowflakes: Tie the other end of the strings to the hooks and the fabric canopy. Hang them at different heights so it looks like snow is gently falling.
- Light It Up: Plug in your lights, and watch your room transform into a magical, frosty wonderland!
4. Evergreen Wreath Headboard

Sometimes, one bold piece is all you need. A large evergreen wreath hanging above the bed makes a stunning statement. The deep green brings the feeling of a quiet winter forest indoors. It’s a simple decoration that is full of natural beauty.
This minimalist approach feels both festive and sophisticated. The dark green walls and bedding create a calming, cozy mood. The simple string lights add just enough of a holiday twinkle. This look shows that you don’t need a lot of decorations to make a big impact.
DIY Instructions: Craft a Classic Evergreen Wreath
Making a wreath is a classic holiday activity. Here’s a simple way to do it.
What You’ll Need:
- A wire wreath frame (from a craft store)
- Green floral wire
- Lots of fresh or fake evergreen branches (like pine or fir)
- A few pinecones or berries for decoration
- Gloves (to protect your hands from sticky sap)
Step-by-Step Guide:
- Make Little Bundles: Take a few small branches and group them together into a little bundle.
- Attach the First Bundle: Place your first bundle onto the wire frame. Use a piece of floral wire to wrap it tightly to the frame. Don’t cut the wire yet!
- Layer the Next Bundle: Make another bundle. Place it so it overlaps the stems of the first one. Use the same long piece of wire to wrap this bundle onto the frame.
- Keep Going: Continue making bundles and attaching them, always overlapping the last one, until you have gone all the way around the frame.
- Add Decorations: Tuck your pinecones and berries into the wreath. You can use floral wire or a grown-up with a hot glue gun to make sure they stay in place. Find a good spot above your bed and hang up your beautiful, fresh wreath!
5. Regal Garland & Gilded Mirror

For a truly grand holiday feeling, embrace rich colors and elegant details. A lush garland with deep red velvet bows draped over a gold mirror creates a classic and luxurious look. This style is all about warmth and opulence, making the room feel extra special.
The deep teal walls, velvet bedding, and glowing candlelight add to the drama. It’s a sophisticated style that feels like a room in a beautiful, old mansion. The faux fireplace at the foot of the bed completes the cozy and grand atmosphere.
DIY Instructions: Design a Regal Garland
Let’s make a fancy garland that looks like it’s from a castle.
What You’ll Need:
- A basic fake evergreen garland
- A roll of wide, velvet ribbon in a rich color like red or green
- Floral wire or pipe cleaners
- A few festive items like fake berry sprigs or small, non-breakable ornaments
- Scissors
Step-by-Step Guide:
- Make Big Bows: Ask a grown-up to help you make two large, beautiful bows from the velvet ribbon. Leave the ribbon “tails” long so they can hang down.
- Attach the Bows: Use floral wire or a pipe cleaner to attach one bow to each end of the garland.
- Add Some Bling: Weave the berry sprigs into the garland. If you have small ornaments, attach them throughout the garland using pieces of wire. Spread them out evenly.
- Fluff it Up: Gently bend the branches of the garland to make it look full and lush.
- Drape it: Carefully hang your finished garland over a mirror or your headboard. Let the long velvet ribbon tails hang down for a truly regal look.
6. Coastal Holiday Driftwood Wreath

Holiday decor can be light and breezy, too. A driftwood wreath brings a touch of the seaside to your winter celebration. The natural, weathered wood paired with soft whites and blues creates a calm and peaceful feeling. It’s a refreshing take on festive decorating.
This room uses textures to feel cozy. The chunky knit blanket, jute rug, and smooth sea glass all work together. The globe lights add a soft glow, like lights from a ship on the water. It’s a serene coastal escape, even in the middle of winter.
DIY Instructions: Build a Beachy Driftwood Wreath
Bring the beach to your bedroom with this cool wreath.
What You’ll Need:
- A wreath frame (a simple circle made of wire or vines)
- A collection of small driftwood pieces
- A hot glue gun (and a grown-up to use it!)
- A few beachy treasures, like seashells or starfish (optional)
- A piece of simple ribbon for hanging
Step-by-Step Guide:
- Plan Your Design: Lay your wreath frame on a flat surface. Arrange the pieces of driftwood on top of it. Try to fit them together like a puzzle to cover the frame.
- Start Gluing: Ask your grown-up helper to pick up one piece of driftwood at a time, put a good amount of hot glue on the back, and press it firmly onto the frame.
- Keep Building: Continue gluing the pieces on, layering them to create a cool, textured look.
- Add Treasures: If you have seashells or starfish, find the great spots for them and have your grown-up glue them on.
- Add a Hanger: Once all the glue is dry and cool, tie a simple ribbon to the top of the wreath. Now you can hang your piece of the beach on your wall.
7. Sugar Plum Fairy Canopy

Enter a world of sweet dreams and magical wishes. This bedroom is pure enchantment, with soft pastel colors and sparkling lights. A delicate canopy floats over the bed, decorated with shimmering stars and pretty bows. It’s a whimsical style that feels straight out of a fairy tale.
The room is filled with soft textures, like fluffy rugs and plush pillows. Mirrored furniture adds to the glamour, reflecting the twinkling lights all around. This is a delightful and playful way to bring holiday magic into your personal space.
DIY Instructions: Dream Up a Fairy Canopy
This is like building a magical fort over your bed!
What You’ll Need:
- A large embroidery hoop
- Several long pieces of sheer, glittery, or pastel-colored fabric (tulle works well)
- A string of battery-powered fairy lights
- Ribbon in pretty colors
- Glittery star ornaments
- A hook for the ceiling
Step-by-Step Guide:
- Make a Hanger: Tie four long, equal pieces of ribbon to the embroidery hoop. Gather them at the top and tie a strong knot. This is how you’ll hang it.
- Add the Fabric: Take a long piece of fabric, fold it in half, and loop it over the hoop. Pull the ends through the loop to secure it. Do this all the way around the hoop until it’s covered in flowing fabric.
- Weave in Lights: Carefully wrap your fairy lights around the hoop and weave them through the hanging fabric.
- Hang the Stars: Cut different lengths of ribbon. Tie a star ornament to one end and tie the other end to the hoop so the stars hang down.
- Hang Your Canopy: Ask a grown-up to put a hook in the ceiling above your bed. Hang your beautiful canopy and let the fabric drape around your bed.
8. Midnight Celestial Wall Hanging

Look up at the night sky from the comfort of your bed. This modern holiday look uses a deep navy blue to create a backdrop for shimmering celestial shapes. A simple wall hanging with moons and stars, paired with a glowing headboard, gives the room a cool, cosmic vibe.
This style is sleek and mysterious. The silver branches in the corner look like frosted winter trees under a starry sky. The gentle twinkle of fairy lights adds to the peaceful, nighttime mood. It’s a unique and stylish way to celebrate the season.
DIY Instructions: Make a Moon & Stars Wall Hanging
Let’s make some art that looks like the night sky.
What You’ll Need:
- A nice, straight stick from outside, or a wooden dowel
- Air-dry clay
- Moon and star cookie cutters (or you can shape them by hand)
- A pencil or straw
- String or twine
- Silver craft paint and a paintbrush
Step-by-Step Guide:
- Prepare the Clay Shapes: Roll out your air-dry clay. Use the cookie cutters to make a few moon and star shapes.
- Make a Hole: Before the clay dries, use a pencil or a straw to poke a hole at the top of each shape. This is where the string will go. Let the shapes dry completely (it might take a day).
- Paint Everything: Once the clay is dry, paint your stick and all your clay shapes silver. Let them dry.
- Assemble Your Art: Cut different lengths of string. Tie one end of a string through the hole in a clay shape. Tie the other end to your painted stick.
- Hang it Up: Add all your shapes to the stick. Tie one long piece of string to both ends of the stick to create a hanger. Find a spot on your wall and show off your cosmic creation!
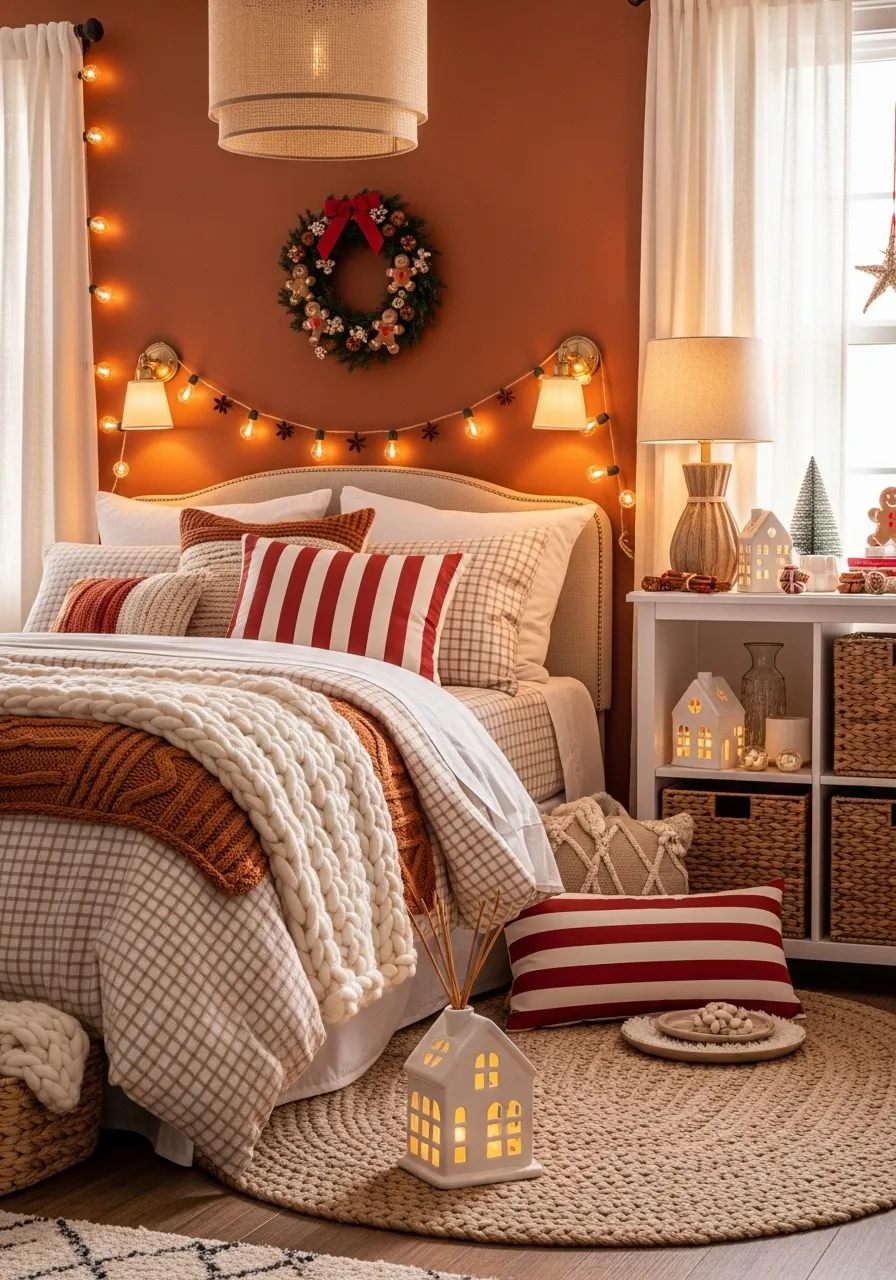
9. Cozy Farmhouse Light Garland

Warmth and comfort are at the heart of this inviting bedroom. A simple string of globe lights draped over the headboard gives off a soft, welcoming glow. The terracotta-colored wall and cozy textures like a chunky knit blanket make the space feel like a big hug.
This modern farmhouse style is all about being relaxed and happy. The mix of patterns, from the striped pillows to the checkered duvet, adds a playful touch. Little details like the ceramic houses and miniature trees make the room feel personal and full of holiday cheer.
DIY Instructions: Hang a Simple Globe Light Garland
This is one of the easiest and coziest decorations you can make.
What You’ll Need:
- A string of globe lights (the ones with the round bulbs)
- Small, clear wall hooks that are easy to remove
- A small, simple wreath (optional)
Step-by-Step Guide:
- Plan the Drape: Stand back and look at your headboard. Decide how you want the lights to hang. A gentle curve or a little swag looks nice.
- Place the Hooks: Following the path you planned, stick the clear hooks to the wall. Press them firmly so they stay put.
- Hang the Lights: Carefully rest the wire of the light string onto the hooks. Make sure it’s secure.
- Add a Wreath (Optional): If you want, you can hang a small, lightweight wreath in the very middle, right above the lights, for an extra festive touch.
- Plug and Glow: Plug in your lights, snuggle into bed, and enjoy the warm and happy glow.
10. Bohemian Holiday Wreath

Celebrate the holidays with a free-spirited and earthy style. A unique wreath made of dried grasses and eucalyptus adds a touch of nature to this bohemian room. The decor is all about texture, with macrame wall hangings and layers of patterned textiles.
This look is warm, personal, and relaxed. The mix of handmade items and natural elements creates a space that feels calm and creative. The soft lighting from the lanterns and salt lamp makes everything glow. It’s a wonderful way to have a festive room that is also uniquely you.
DIY Instructions: Weave a Bohemian Wreath
Let’s make a cool, natural wreath that’s a little different from the traditional kind.
What You’ll Need:
- A metal or wood hoop (from a craft store)
- Green floral wire
- A mix of dried things, like eucalyptus, pampas grass, or dried flowers
- Twine and a few wooden beads (optional)
- Scissors
Step-by-Step Guide:
- Create Small Bundles: Take a few pieces of your dried eucalyptus and grasses and make a small bundle.
- Attach to the Hoop: Place the bundle against the hoop. Use floral wire to wrap the stems tightly to the hoop.
- Layer and Build: Make another bundle and place it so it overlaps the stems of the first one. Keep attaching bundles until about half of the hoop is covered. The bohemian style often leaves part of the hoop showing.
- Add Details (Optional): You can tie a few pieces of twine with wooden beads onto the empty part of the hoop for extra detail.
- Fluff and Hang: Gently fluff out your dried grasses to make them look nice and full. Hang your beautiful, one-of-a-kind wreath on the wall.
11. Minimalist Berry Branch Display

A touch of nature can be powerful. This room uses a simple branch with red berries to bring in the holiday spirit. Placed against a dark wall, the red pops, creating a striking focal point. This approach is clean, modern, and very calming.
The beauty of this style is its simplicity. The natural wood tones and soft lighting from the paper lantern create a peaceful space. It shows that holiday decor doesn’t need to be loud or complicated to be beautiful and festive. It’s an understated way to celebrate.
DIY Instructions: Create a Winter Berry Branch Vase
This is a very simple and beautiful decoration you can make in minutes.
What You’ll Need:
- A simple vase (a glass jar works too!)
- A few branches from your yard
- Some sprigs of fake red berries (from a craft store)
- A small piece of twine or ribbon (optional)
Step-by-Step Guide:
- Gather Your Branches: Go outside and find a few nice-looking bare branches.
- Arrange the Branches: Place your branches in the vase. Move them around until you like how they look.
- Add the Berries: Tuck the fake berry sprigs in among the branches. The red color will look really nice against the wood.
- Add a Final Touch (Optional): You can tie a small piece of twine or a simple ribbon around the top of the vase for a little extra detail.
- Find a Spot: Place your beautiful, simple arrangement on your nightstand or dresser.
12. Vintage Toyland Display

Step back in time with a room full of holiday nostalgia. This space is filled with classic Christmas toys and decorations, like nutcrackers and bottle brush trees. The bright, cheerful colors and gingham patterns create a joyful and playful atmosphere, like a scene from a storybook.
This look is all about the magic of childhood Christmases. The colorful lights, handmade garlands, and collection of festive figures on the dresser make the room feel full of wonder. It’s a warm and happy way to decorate, sure to bring a smile to your face.
DIY Instructions: Make a Bottle Brush Tree Forest
Let’s create a tiny winter forest for your dresser or shelf.
What You’ll Need:
- A collection of bottle brush trees in different sizes and colors
- A few small, festive toys (like little red trucks or reindeer)
- Fake snow or cotton balls
- A tray or a flat board to build your scene on
Step-by-Step Guide:
- Create a Snowy Base: Spread the fake snow or pull apart cotton balls to make a fluffy white layer on your tray. This will be your snowy ground.
- Plant Your Trees: Arrange your bottle brush trees on the snow. Put taller ones in the back and shorter ones in the front to make it look like a real forest.
- Add Your Toys: Place your little toys among the trees. Maybe a truck is delivering a tiny tree, or a reindeer is peeking out from behind one.
- Tell a Story: Move things around until you’ve created a little scene that tells a story.
- Display Your Forest: Put your finished winter scene on your dresser and enjoy your mini magical world.
13. Natural Yuletide Wall Decor

Create a cozy, earthy retreat with elements from nature. A large wreath made with fresh greens and dried oranges makes a beautiful centerpiece. Hanging bundles of dried herbs next to it adds to the natural, fragrant atmosphere. This style feels warm and a little bit magical.
The soft glow of beeswax candles and a salt lamp makes the space feel safe and comforting. The mix of textures, from soft pillows to rough wooden stars, is interesting and inviting. This is a great way to celebrate the winter season by bringing the outdoors in.
DIY Instructions: Make Dried Herb Bundles
These look and smell wonderful, and they are so easy to make.
What You’ll Need:
- Fresh herbs with long stems (like rosemary, sage, or lavender)
- Twine or string
- Scissors
Step-by-Step Guide:
- Gather Your Herbs: Take a small handful of your fresh herbs.
- Make a Bundle: Arrange them so the stems are all together at one end.
- Tie Them Up: Cut a long piece of twine. Tightly wrap it around the stems of your herb bundle. Leave a long tail of twine for hanging.
- Make a Loop: Tie the ends of the twine together to make a loop.
- Hang to Dry: Find a cool, dry place to hang your herb bundle upside down. In a week or two, they will be dry and will make your room smell amazing. You can then hang them on your wall as a decoration.
14. Art Deco Holiday Glamour

Celebrate the season with style and sophistication. This bedroom uses a bold black, white, and gold color scheme to create a glamorous, Art Deco feel. The striking sunburst mirror and geometric patterns give the room a feeling of luxury and celebration, like a fancy New Year’s Eve party.
This is a very grown-up and elegant way to decorate. The plush faux fur throw, sparkling chandelier, and metallic details all add to the opulent atmosphere. It’s a stunning look that proves holiday decor can be both festive and incredibly chic.
DIY Instructions: Craft a Golden Garland
Let’s make a glamorous garland that shines and sparkles.
What You’ll Need:
- Black and gold craft paper (some glittery gold paper would be great!)
- A circle paper punch or a cup to trace circles and scissors
- A sewing machine and thread, or a needle and thread
- A ruler
Step-by-Step Guide:
- Cut Your Circles: Use your paper punch or trace and cut out lots of circles from your black and gold paper.
- Start Sewing: If you have a sewing machine, feed your first circle through. Sew right down the middle of it.
- Add More Circles: Without cutting the thread, feed your next circle through, leaving a small space between it and the first one. Keep doing this, alternating black and gold circles.
- No Sewing Machine? No Problem: If you’re using a needle and thread, poke the needle through the center of a circle, pull it through, and tie a knot. Then, poke it through your next circle, and so on.
- Hang Your Glam: Once your garland is as long as you want it, cut the thread and hang your chic and shiny creation over your mirror or headboard.
15. Desert Holiday Charm

Who says a cactus can’t be a Christmas tree? This room combines warm, earthy tones with festive touches for a unique desert holiday style. A wreath made of pampas grass and a simple star garland bring a soft, celebratory feel to the space without feeling out of place.
This look is all about embracing your own personal style. The terracotta pots, leather accents, and patterned rug create a warm and inviting base. Adding simple fairy lights to a cactus is a fun and playful way to show holiday spirit in a non-traditional way.
DIY Instructions: Assemble a Wooden Bead Star Garland
This is a simple garland that adds a natural, rustic touch.
What You’ll Need:
- A long piece of twine
- Wooden beads of various sizes
- Flat, wooden star shapes (from a craft store)
- A hot glue gun (and a grown-up)
Step-by-Step Guide:
- Plan the Pattern: Lay out your twine and decide on a pattern. Maybe you want three beads, then a star, then three more beads.
- String the Beads: Tie a big knot at one end of the twine so the beads don’t fall off. Start threading your wooden beads onto the twine according to your pattern.
- Glue the Stars: When you get to a spot where you want a star, ask a grown-up to put a line of hot glue on the back of the star and press the twine into it.
- Keep Going: Continue your pattern of beads and stars until your garland is the right length.
- Finish it Off: Tie another big knot at the other end. Now you can hang your charming, rustic garland on the wall.
16. Rustic Apple & Wheat Garland

Create a cozy, harvest-inspired holiday space. This room uses natural elements like a wheat wreath and a garland of apples and dried fruit to create a warm and inviting atmosphere. The soft lighting and plaid patterns make it feel like a comfortable farmhouse on a crisp autumn evening.
This style is all about simple abundance and country charm. The braided rug and chunky knit blanket add layers of texture and warmth. It’s a wholesome and comforting way to decorate, celebrating the bounty of the season.
DIY Instructions: Make a Faux Apple Garland
This sweet garland will add a touch of country charm to your bed.
What You’ll Need:
- A long string of fake autumn leaves garland
- A string of fairy lights
- Small fake apples (from a craft store)
- Floral wire
- Dried orange slices (you can buy these or make them)
Step-by-Step Guide:
- Combine Garland and Lights: Lay your leaf garland flat. Carefully wrap the string of fairy lights around it, from one end to the other.
- Prepare the Apples: Cut small pieces of floral wire. Poke one end of a wire into the bottom of a fake apple.
- Attach the Apples: Use the other end of the wire to attach the apple to the leaf garland. Twist the wire tightly so it’s secure. Add apples all along the garland.
- Add the Oranges: Use small pieces of wire to attach the dried orange slices, filling in the spaces between the apples.
- Drape and Glow: Hang your finished garland over your headboard or on a wall, plug in the lights, and enjoy the cozy, rustic feel.
17. Cozy Cabin Retreat

Escape to a rustic mountain lodge without leaving your room. This decor uses classic cabin elements like plaid textiles and a stag’s head to create a cozy and rugged holiday feel. The dark wood paneling and warm lighting make the space feel like a snug hideaway from a winter storm.
This look is masculine and comfortable. Layers of tweed and flannel on the bed invite you to curl up and get warm. The small fireplace in the nightstand adds to the incredible coziness. It’s a timeless holiday style that is both handsome and inviting.
DIY Instructions: Tie a Simple Plaid Bow
A good bow can make anything look festive. Here’s an easy way to do it.
What You’ll Need:
- A roll of wide, wire-edged plaid ribbon
- A pipe cleaner or a piece of floral wire
- Scissors
Step-by-Step Guide:
- Make a Loop: Take the end of the ribbon and make a loop. This will be the center of your bow.
- Make Bigger Loops: Twist the ribbon and make a bigger loop on one side. Then twist it again and make another big loop on the other side.
- Keep Going: Keep making loops, alternating sides, until your bow is as big and full as you want it.
- Cinch the Middle: Pinch the very center of all your loops together. Use your pipe cleaner or wire to wrap around the middle very tightly. Twist it in the back to secure it.
- Fluff and Shape: Now, use the wire in the ribbon’s edges to fluff and shape your loops. Pull them apart to make your bow look big and beautiful. You can use this bow on a wreath, a present, or a garland.
18. Plum & Silver Elegance

Wrap your room in rich, jewel-toned luxury. This bedroom uses a stunning combination of deep plum velvet and sparkling silver. A frosted wreath and shimmering ornaments add a touch of icy glamour to the soft, plush textures. This look is incredibly elegant and sophisticated.
The room feels both cozy and grand. The deep colors create a comforting mood, while the reflective surfaces and crystal lamps add a celebratory sparkle. It’s a beautiful way to create a holiday space that feels both restful and special.
DIY Instructions: Create Frosted Pinecones
Turn regular pinecones into beautiful, snowy decorations.
What You’ll Need:
- A few pinecones
- White craft paint
- A small paintbrush
- Silver glitter (optional)
- A paper plate
Step-by-Step Guide:
- Prepare Your Paint: Squeeze some white paint onto a paper plate.
- Paint the Tips: Hold a pinecone and use your paintbrush to dab white paint onto the tips of its scales. You don’t need to paint the whole thing, just the edges.
- Add Sparkle (Optional): While the paint is still wet, sprinkle some silver glitter over the pinecone. The glitter will stick to the wet paint.
- Let Them Dry: Set your pinecones on the plate to dry completely.
- Display Them: Once they are dry, you can place your beautiful frosted pinecones in a bowl, on a tray, or tuck them into a wreath.
19. Modern Monochrome Mobile

Holiday decor can be cool and artistic. This room features a striking black and white design with a modern, minimalist feel. Instead of a traditional garland, a sleek mobile with hanging ornaments acts as a piece of sculptural art above the bed.
This style is for someone who loves clean lines and uncluttered spaces. The glowing headboard and simple reindeer figures add a festive touch without breaking the minimalist mood. It proves that holiday decorations can be both subtle and incredibly stylish.
DIY Instructions: Construct a Modern Ornament Mobile
Let’s make a cool, hanging piece of art for your room.
What You’ll Need:
- A metal hoop (an embroidery hoop works well)
- Black spray paint (ask a grown-up for help)
- Clear string (like fishing line)
- A few simple, modern ornaments in black, white, and silver
- Scissors
Step-by-Step Guide:
- Paint the Hoop: In a well-ventilated area (like outside), ask a grown-up to spray paint your hoop black. Let it dry completely.
- Prepare the Hanger: Cut three or four long, equal pieces of clear string. Tie them evenly spaced around your hoop. Gather the ends at the top and tie a strong knot. This is how you’ll hang your mobile.
- Hang the Ornaments: Cut different lengths of clear string. Tie one end of a string to an ornament. Tie the other end to the hoop.
- Create Balance: Hang ornaments all around the hoop at different heights. Try to balance the weight so your mobile hangs straight.
- Hang Your Art: Find a spot above your bed or in a corner and hang your cool, modern mobile.
20. Literary Book Page Garland

For the book lover, what could be cozier than being surrounded by stories? This unique garland is made from the folded pages of an old book. It adds a personal, creative touch to the room and celebrates a love of reading. It’s a smart and charming decoration.
The room has the feel of a classic library, with rich leather furniture and shelves full of books. The warm lighting and plaid textiles make it the wonderful place to curl up with a good book on a cold winter day. This is a very personal and meaningful way to decorate for the holidays.
DIY Instructions: Fashion a Book Page Garland
Turn an old story into a new decoration.
What You’ll Need:
- An old book that you don’t mind cutting up (maybe one that’s already falling apart)
- A long piece of twine or string
- A hot glue gun (and a grown-up)
- Scissors or a craft knife
Step-by-Step Guide:
- Prepare the Pages: Ask a grown-up to carefully remove some pages from the book.
- Fold the Pages: Take one page and fold it like a fan or an accordion, with each fold being about one inch wide.
- Create the Fan Shape: Once the whole page is folded, fold it in half the other way. Glue the two inside edges together to create a little fan or semi-circle shape. Make lots of these.
- Attach to the String: Lay out your long piece of twine. One by one, have a grown-up put a line of hot glue along the straight edge of a folded page fan and press the twine into it.
- Complete Your Garland: Keep adding page fans, leaving a little space between each one, until your garland is the right length. Hang it on your bookshelf or wall for a cozy, literary look.
21. Aurora Borealis Night Sky

Why decorate your walls when you can decorate your ceiling? This room uses a light projector to cast a stunning aurora borealis effect overhead. It creates a magical, ever-changing display that feels like sleeping under the northern lights.
This is a modern and dynamic way to bring wonder into your room. Paired with a simple star mobile and glowing geode accents, the space becomes a celestial escape. It’s a truly immersive experience that is both calming and awe-inspiring.
DIY Instructions: Make a Hanging Constellation Mobile
Let’s make a simple mobile that looks like a starry constellation.
What You’ll Need:
- A few thin wooden dowels or straight sticks
- Clear string (fishing line)
- Small, shiny silver and clear ornaments or beads
- A small hook to screw into the ceiling
Step-by-Step Guide:
- Build the Frame: Take two sticks and cross them in the middle to make an “X” shape. Use a long piece of clear string to wrap around the center, tying them tightly together.
- Create a Hanger: Tie another long piece of string to the center knot you just made. This will be what you hang your mobile from.
- Hang the Stars: Cut different lengths of clear string. Tie one end to an ornament or bead.
- Attach to the Frame: Tie the other end of the strings to the arms of your “X” frame. Space them out and hang them at different heights.
- Find a Spot: Ask a grown-up to put a small hook in the ceiling. Hang your constellation mobile and watch it gently spin.
22. Peppermint Candy Cane Lane

Bring the sweet fun of candy canes into your bedroom. This look is bright, cheerful, and full of energy, using a crisp red and white color palette. A fluffy pom-pom wreath and striped bedding create a playful, peppermint-striped wonderland.
This style is all about happiness and classic holiday treats. The simple, bold colors make a big statement. Little details, like a vase full of candy canes and a bright red lamp, complete the fun and festive atmosphere.
DIY Instructions: Craft a Fluffy Pom-Pom Wreath
This wreath is so soft and fun to make!
What You’ll Need:
- A foam wreath form (from a craft store)
- Lots of red and white yarn
- A pom-pom maker (or you can use your fingers or a fork)
- A hot glue gun (and a grown-up helper)
- Scissors
Step-by-Step Guide:
- Make Lots of Pom-Poms: Using your pom-pom maker, make a big pile of fluffy pom-poms. Make some all white, some all red, and some mixed. You will need a lot!
- Start Gluing: Ask your grown-up helper to put a dot of hot glue on the foam wreath form and press a pom-pom onto it.
- Cover the Wreath: Keep gluing on pom-poms, snuggling them close together so you can’t see the foam form underneath. Mix up the colors to create a fun pattern.
- Check for Gaps: Once you think you’re done, hold the wreath up and look for any empty spots. Fill them in with more pom-poms.
- Add a Hanger: Tie a piece of yarn or ribbon to the back so you can hang your super soft and cheerful wreath on the wall.
23. Gilded Palace Dreams

Sleep like royalty in a room dripping with gold and glamour. This opulent style uses rich cream and shimmering gold to create a space that feels like a room in a fairytale palace. The grand bed canopy and sparkling chandelier make it a truly luxurious holiday escape.
Every detail in this room is about elegance and grandeur. From the ornate mirrors to the overflowing garlands, the look is one of pure indulgence. The soft glow of many candles adds to the romantic and lavish atmosphere.
DIY Instructions: Create a Grand Canopy Topper
Make your bed feel extra fancy with this elegant decoration.
What You’ll Need:
- A block of floral foam
- A collection of fake flowers in gold and cream
- Fake greenery or berry sprigs in gold
- A few non-breakable gold ornaments
- Floral wire
- A wide, sheer gold ribbon
Step-by-Step Guide:
- Prepare the Topper: Ask a grown-up to help you securely attach the floral foam to the top of your canopy or to the wall above your bed.
- Add Greenery: Start by sticking the stems of your fake greenery into the foam to create a full base.
- Add Flowers: Next, add your gold and cream flowers. Place the bigger ones first, then fill in with smaller ones.
- Add Ornaments: Cut small pieces of floral wire. Poke a wire through the top of an ornament and twist it to make a stem. Stick the ornament “stems” into the foam.
- Drape the Ribbon: Let a long piece of sheer gold ribbon hang down from the sides for a final touch of elegance.
24. Modern Farmhouse Charm

This look is clean, crisp, and wonderfully cozy. A classic farmhouse style is created with a white shiplap wall and a bold buffalo check pattern. A simple green wreath with a gingham bow adds the perfect holiday touch without cluttering the space.
This style feels calm and organized. The mix of wood tones and simple black accents keeps it modern and fresh. Potted miniature trees on the nightstands bring a bit of the outdoors in, completing this serene and welcoming holiday bedroom.
DIY Instructions: String a Wooden Bead Garland
This is a very popular farmhouse decoration, and it’s so easy to make.
What You’ll Need:
- A long piece of jute twine
- A bag of round, unfinished wooden beads
- Scissors
- A needle with a large eye (optional, but helpful)
Step-by-Step Guide:
- Cut Your Twine: Decide how long you want your garland to be and cut a piece of twine. Make it a little longer than you need.
- Make the Tassels (Optional): To make a tassel for the ends, wrap twine around your hand about 20 times. Slide it off, and tie a small piece of twine tightly around the top of the loops. Cut the bottom loops to create the fringe. Make two of these.
- Start Stringing: Tie one tassel to the end of your long piece of twine. Start threading the wooden beads onto the twine. A needle can make this go faster.
- Fill it Up: Keep adding beads until your garland is almost full.
- Finish it Off: Tie your second tassel onto the other end. Your simple and stylish garland is ready to be draped over a bench, a headboard, or a dresser.
25. The Ultimate Hygge Glow

Embrace the feeling of “hygge” with a room filled with warmth and soft light. This style is all about creating a cozy, contented atmosphere. A collection of candles, a glowing salt lamp, and warm-toned string lights fill the space with a gentle, flickering radiance.
Natural textures are key to this look. The chunky knit blanket, woven baskets, and wooden furniture all add to the comfortable and serene feeling. This is a room designed for quiet evenings, relaxation, and peaceful holiday moments.
DIY Instructions: Assemble a Cozy Candle Cluster
Create a beautiful, glowing centerpiece for your floor or a low table.
What You’ll Need:
- A round, flat basket tray or a placemat
- A collection of battery-operated pillar candles in different heights and sizes (using flameless candles is safer for a bedroom!)
- A few pinecones or other natural elements like cinnamon sticks or dried leaves
Step-by-Step Guide:
- Place Your Tray: Put your basket tray or placemat on the floor where you want your decoration to be.
- Arrange the Candles: Place your tallest candle in the middle. Arrange the other candles around it. Don’t be afraid to let them be close together.
- Add Nature: Tuck your pinecones and other natural items into the gaps between the candles.
- Turn Them On: Switch on your battery-operated candles.
- Get Cozy: Dim the overhead lights and enjoy the warm, peaceful glow of your candle cluster.
26. Gothic Romance Holiday

For those who love mystery and drama, this is a unique way to celebrate. This style blends gothic and Victorian elements for a holiday look that is dark, moody, and romantic. A wreath of deep red roses and a collection of vintage portraits create a scene from another time.
The atmosphere is created with lots of candlelight and dark, heavy fabrics. Details like a black crow figure and antique silver add to the beautiful and slightly spooky feeling. It’s a holiday style that is full of history and personality.
DIY Instructions: Create “Aged” Vintage Frames
Turn new or boring picture frames into mysterious, old-looking ones.
What You’ll Need:
- A few simple picture frames
- Black craft paint
- Gold or silver metallic craft paint
- A paintbrush
- A paper towel or an old rag
Step-by-Step Guide:
- Paint it Black: Paint your entire picture frame with the black paint. Let it dry completely.
- Add the Metallic Paint: Squeeze a small amount of metallic paint onto a paper plate. Dab your paper towel or rag into it, then dab most of it off. You want very little paint on your rag.
- Dry Brush the Frame: Lightly rub the rag over the raised parts and edges of your black frame. The metallic paint will catch on the details, making it look like an old, worn frame.
- Let it Dry: Let the metallic paint dry.
- Add a Picture: Find some old-looking pictures online to print out, or use black and white photos of your family for a personal touch. Place them in your newly “aged” frames.
27. Frosted Ice Palace

Step into a world of pure winter magic. This room is a breathtaking ice palace, decorated entirely in shades of shimmering white and frosty silver. Frosted branches, sparkling sequins, and a crystal chandelier create a space that is glamorous and ethereal.
The key to this look is layering different textures of white. A fluffy shag rug, a soft faux fur throw, and sparkly sequin curtains all work together to build a rich, multi-dimensional winter wonderland. It feels like waking up inside a beautiful, glittering snow globe.
DIY Instructions: Make Frosted Winter Branches
Bring the beauty of a frosty morning indoors with these sparkling branches.
What You’ll Need:
- Several bare branches from your yard
- A can of white spray paint (and a grown-up’s help)
- A can of spray adhesive
- White or iridescent glitter
- An old box or newspaper to protect your work area
Step-by-Step Guide:
- Work Outside: This is a messy job, so do it outside on a calm day. Lay your branches on the newspaper inside a large box.
- Paint them White: Ask your grown-up to spray paint the branches white. Make sure to get all the sides. Let them dry completely.
- Make them Sticky: Once the paint is dry, have your grown-up spray the branches with the spray adhesive.
- Add the Sparkle: Before the adhesive dries, sprinkle the glitter all over the sticky branches. Turn them to make sure you cover them evenly.
- Let them Dry Again: Let the branches dry completely. Once they are dry, you can arrange your beautiful, frosty branches in a tall vase.
28. Tropical “Mele Kalikimaka”

Celebrate a sunny Christmas with this bright and cheerful tropical theme. This room is a vacation from the cold, filled with vibrant colors like turquoise, coral, and yellow. A festive pineapple, flamingo decorations, and a hibiscus wreath bring the warm spirit of the islands home for the holidays.
This style is all about fun and being unconventional. Instead of a pine tree, a palm tree gets the holiday treatment. Instead of snowflakes, there are seashells and starfish. It’s a joyful and laid-back way to celebrate the season.
DIY Instructions: Craft a Tropical Holiday Wreath
Say “Mele Kalikimaka” (Merry Christmas) with this bright and sunny wreath.
What You’ll Need:
- A grapevine wreath form
- Fake tropical leaves (like palm or monstera leaves)
- Brightly colored fake flowers (like hibiscus)
- A hot glue gun (and a grown-up)
Step-by-Step Guide:
- Create a Leafy Base: Have your grown-up helper glue the fake tropical leaves onto the grapevine wreath. Overlap them to make it look lush and full.
- Add the Flowers: Decide where you want your big, bright flowers to go. Put a generous amount of hot glue on the back of a flower and press it firmly onto the leaves.
- Fill it In: Add flowers all around the wreath. You can cluster them in one spot or spread them out evenly.
- Check Your Work: Hold up the wreath to make sure you like the arrangement and that everything is secure.
- Hang it Up: Add a ribbon to the back for hanging, and bring a little bit of sunshine to your holiday decor.
29. Moody Winter Cabin

This look is for those who love a cozy, dramatic, and minimalist style. A simple evergreen wreath pops against a dark, moody wall, creating a sophisticated and calming focal point. The room feels like a modern, secluded cabin deep in a silent winter forest.
The beauty is in the textures. A faux fur throw, a knitted blanket, dark wood, and a stack of firewood all work together to create a space that feels warm and protective. This is a very grown-up and serene take on holiday coziness.
DIY Instructions: Build a Stylish Firewood Holder
Even if you don’t have a fireplace, stacked wood looks incredibly cozy.
What You’ll Need:
- A simple, sturdy metal or wooden box or crate
- A small pile of firewood logs (you can buy these at many stores)
- Sandpaper (if your box is wood)
Step-by-Step Guide:
- Prepare Your Box: If you are using a wooden crate, you might want to sand any rough edges to make it smooth.
- Start Stacking: Take your firewood logs and begin stacking them inside the box.
- Be Neat: Try to make the stack look neat and tidy. You can place the logs all in the same direction, or mix them up for a more rustic look.
- Fill it Up: Keep stacking until the box is full.
- Place it: Put your stylish firewood holder next to your bed or at the foot of it. It adds a wonderful, rustic, and cozy texture to the room.
30. Pastel Winter Wonderland

Dream in a world of candy colors and soft textures. This sweet holiday theme uses a palette of mint green, soft pink, and creamy white to create a room that is gentle and cheerful. A fluffy pastel wreath and a forest of matching bottle brush trees make the space feel magical.
This look is light, airy, and full of youthful charm. Playful pillows shaped like clouds and stars add to the dreamy atmosphere. It’s a wonderful way to decorate for someone who loves soft colors and whimsical designs.
DIY Instructions: Dye Your Own Pastel Bottle Brush Trees
You can turn plain bottle brush trees into any color you like!
What You’ll Need:
- White or cream-colored bottle brush trees
- Fabric dye in pastel colors (like pink and mint green)
- A few bowls or jars that you don’t mind getting stained
- Bleach (and a grown-up to handle this part!)
- Warm water
- Paper towels
Step-by-Step Guide:
- Bleach the Trees (If Needed): If your trees are a dark green, ask a grown-up to help you. They will need to dip the trees in a mixture of bleach and water for a few minutes until they turn a light cream color, then rinse them very well.
- Mix Your Dyes: In your bowls, mix a small amount of fabric dye with warm water. Remember, you want pastel colors, so don’t make the dye too dark.
- Dip and Dye: Dip a light-colored tree into one of your dye bowls. Hold it there for about 30 seconds.
- Check the Color: Pull the tree out and see if you like the color. If you want it darker, dip it again.
- Let Them Dry: Once you are happy with the colors of your trees, stand them up on some paper towels to dry completely. Arrange your new pastel forest on your dresser!
31. Steampunk Holiday Workshop

Celebrate the holidays with a creative, industrial flair. This steampunk-themed room is full of fascinating details like copper pipes, vintage gauges, and glowing Edison bulbs. A wreath made of gears and wire becomes a unique piece of art, turning the space into an inventor’s holiday workshop.
The warm glow of the custom lighting and the rich textures of metal and wood make the room feel cozy and imaginative. It’s a style that celebrates invention and history, proving that holiday decor can be wonderfully unconventional and deeply personal.
DIY Instructions: Engineer a Steampunk Gear Wreath
Let’s build a cool wreath that looks like it came from an inventor’s workshop.
What You’ll Need:
- A grapevine or wire wreath form
- A bag of plastic toy gears in various sizes (from a toy or craft store)
- Metallic spray paint in copper, gold, and bronze colors (and a grown-up’s help)
- A hot glue gun (and a grown-up)
- A string of copper-wire fairy lights
Step-by-Step Guide:
- Paint the Gears: Outside or in a well-ventilated space, ask a grown-up to spray paint your gears. Paint some copper, some gold, and some bronze. Let them dry completely.
- Arrange the Gears: Lay your wreath form flat. Plan out where you want to put your gears. Layer bigger ones on the bottom and smaller ones on top.
- Glue Everything On: Have your grown-up helper glue the painted gears onto the wreath form.
- Add the Lights: Once the gears are secure, wrap the copper-wire fairy lights around the wreath, weaving them in and out of the gears.
- Hang Your Invention: Find a spot for your amazing steampunk wreath and turn on the lights.
32. Enchanted Forest Floor

Bring the quiet magic of the deep woods into your home. This unique concept turns the bedroom into an enchanted forest floor, complete with soft moss, birch branches, and smooth river stones. The look is incredibly peaceful and connects you directly with nature.
This style is about creating a serene, immersive experience. The mossy art on the wall and the simple ivy-wrapped wreath continue the theme. It’s a celebration of the earth’s natural beauty, creating a space for calm reflection during the busy holiday season.
DIY Instructions: Create Your Own Moss Wall Art
This is like making a painting, but with moss!
What You’ll Need:
- An empty picture frame with the glass removed
- A piece of cork board or sturdy cardboard cut to fit the frame
- A bag of preserved moss (from a craft store)
- A hot glue gun (and a grown-up)
- A few small, interesting twigs or a fake mushroom (optional)
Step-by-Step Guide:
- Prepare Your Canvas: Place your cork board or cardboard securely inside the frame.
- Plan Your Forest Scene: Open your bag of moss. Tear off pieces and arrange them on the board. You can make little hills and valleys.
- Start Gluing: Ask your grown-up to help you. One section at a time, they can put hot glue on the board and you can press the moss down firmly.
- Cover the Board: Keep adding moss until the entire board is covered and looks like a lush, green landscape.
- Add Details (Optional): If you have twigs or a mushroom, find a good spot for them and have your grown-up glue them in place. Hang your living art on the wall.
33. Moroccan Holiday Oasis

Travel to a vibrant, festive marketplace without leaving your room. This style is an explosion of rich colors, intricate patterns, and warm light. Layered rugs, plush floor cushions, and glowing Moroccan lanterns create a cozy and inviting holiday oasis.
This look celebrates global traditions and craftsmanship. The warm reds, oranges, and blues are naturally festive. A simple pom-pom garland adds a playful holiday touch to the intricate tapestries and carved wood. It’s a wonderful way to have a holiday that feels both exotic and deeply comforting.
DIY Instructions: Make a Festive Pom-Pom Garland
This colorful garland will add a touch of fun to any space.
What You’ll Need:
- Yarn in several bright colors (like red, orange, and yellow)
- A pom-pom maker or a piece of cardboard
- A long piece of twine
- Scissors
- A needle with a big eye
Step-by-Step Guide:
- Make Pom-Poms: Make lots of fluffy pom-poms using your different colored yarns. You can make them all one color, or mix the yarns to make multi-colored ones.
- Trim Them: Use your scissors to give your pom-poms a little haircut, trimming them so they are nice and round.
- Thread Your Needle: Thread your long piece of twine through the eye of your needle.
- String the Pom-Poms: Push the needle right through the center of a pom-pom and pull it onto the twine.
- Create Your Garland: Keep adding pom-poms, leaving a little bit of space between each one, until your garland is the length you want. Tie a loop at each end for easy hanging.
34. Russian Folk Tale Holiday

Step into a classic Russian fairy tale with this rich and dramatic holiday decor. Deep reds and royal blues, intricate folk art patterns, and luxurious fabrics create a room that feels both grand and cozy. Details like Matryoshka dolls and ornate samovars add an authentic, storybook touch.
This style is about celebrating tradition and artistry. The beautiful patterns on the pillows and canopy feel special and timeless. A soft faux fur throw and the warm glow of candlelight make this a truly enchanting place to spend a cold winter’s night.
DIY Instructions: Paint Your Own Matryoshka Doll
Decorate a classic nesting doll with your own designs.
What You’ll Need:
- A set of blank wooden nesting dolls (available at craft stores)
- Craft paints in bright colors like red, blue, yellow, and white
- Fine-tipped paintbrushes
- A pencil
- Clear sealant spray (and a grown-up’s help)
Step-by-Step Guide:
- Plan Your Design: Use a pencil to lightly sketch a simple design on your wooden dolls. Think of a simple face, some hair, and a dress with a flower pattern.
- Start Painting: Use your smallest paintbrush to paint your design. Start with the larger areas of color, like the dress and hair.
- Add the Details: Once the first layer is dry, add the smaller details, like the eyes, rosy cheeks, and the pattern on the dress. Don’t forget to paint all the dolls in the set!
- Let Them Dry: Let your painted dolls dry completely.
- Seal Your Art: Ask a grown-up to spray the dolls with a clear sealant. This will protect your painting and make them look shiny and finished.
35. Old Hollywood Holiday Glam

Lights, camera, Christmas! This room captures the glamour of old Hollywood with a dramatic black, white, and silver color scheme. A makeup vanity with bright lights, fluffy feather wreaths, and sparkling accents make the space feel ready for a movie star.
This look is all about drama and elegance. The textures of faux fur, sequins, and feathers create a luxurious and tactile experience. It’s a celebration of vintage style and cinematic magic, making for a truly show-stopping holiday bedroom.
DIY Instructions: Make a Glamorous Feather Wreath
This fluffy wreath is pure Hollywood glamour and is so easy to create.
What You’ll Need:
- A white foam wreath form
- One or two white feather boas (you can find these at a party or craft store)
- A hot glue gun (and a grown-up)
- A piece of shimmery ribbon for hanging
Step-by-Step Guide:
- Secure the End: Ask your grown-up helper to put a dot of hot glue on the wreath form and press the very end of a feather boa onto it.
- Start Wrapping: Begin wrapping the feather boa around the foam wreath form. Keep your wraps close together so that none of the white foam shows through.
- Keep Going: Continue wrapping until the entire wreath is covered in fluffy feathers. If you run out of boa, glue the end down and start a new one right next to it.
- Secure the Other End: When the wreath is fully covered, have your grown-up glue the other end of the boa securely to the back of the wreath.
- Add a Hanger: Tie your shimmery ribbon into a loop around the top of the wreath. Now you can hang your glamorous creation on your wall or door.
Creating a festive bedroom doesn’t require a complete overhaul. As we’ve seen, a simple wreath, a string of lights, or a cozy new texture can completely transform the feeling of your space. The goal is to craft a personal retreat that brings you comfort and joy throughout the busy season.
By choosing a style that speaks to you and trying a fun DIY project, you can make your bedroom the coziest room in the house. We hope these 35 ideas have inspired you to bring a little extra holiday magic into your personal sanctuary this year.
Key Takeaways
- Personalize Your Theme: Your bedroom is your space. Choose a holiday theme that feels calming and joyful to you, whether it’s minimalist, rustic, or full-on glamour.
- Focus on Lighting: Soft, warm lighting from fairy lights, globe lights, or flameless candles is one of the easiest ways to create an instantly cozy atmosphere.
- Embrace DIY: A handmade decoration adds a unique and personal touch. Simple projects like garlands, wreaths, and painted ornaments make your decor more meaningful.
- Layer Textures: Add warmth with festive textures like faux fur, chunky knit blankets, velvet, and flannel to make your room feel extra snug.