Do you open your garage door only to be greeted by a chaotic jumble of tools, sports gear, and half finished projects? You are certainly not alone. For many homeowners, the garage quickly devolves into the default dumping ground, sacrificing vehicle space for mountains of clutter. It often feels like an overwhelming problem, too big to tackle in a few hours.

The good news is that transforming your messy garage into a highly functional, tidy space doesn’t require a costly renovation. With a strategic plan and the right hacks, you can conquer the chaos in a single weekend. The secret lies in thinking vertically and installing smart, specialized storage solutions.
We have compiled a massive list of 38 genius storage hacks that are easy to implement, budget friendly, and designed to maximize every square inch of your garage. Get ready to swap the clutter for control. Start today and finally reclaim your garage space once and for all.
1. Wall Mounted Pegboard Tool Organizer
Item Name: Ultimate Tool Wall Storage System

This incredible organization system keeps every tool exactly where you need it, maximizing efficiency in your workspace. Notice how the pegboard turns unused wall space into a vibrant and highly functional display for all your hand tools. Everything from screwdrivers and pliers to hammers and wrenches hangs neatly in view. When you can quickly see and grab the specific tool you require, jobs become much simpler and less frustrating.
A utility shelf sits right above the pegboard, adding extra storage for larger items or project materials. This overhead shelf is supported by sturdy wooden brackets, ensuring stability and a clean, integrated appearance. Maintaining a well organized garage is truly achievable when you incorporate smart vertical solutions like this one. You’ll spend less time searching for misplaced items and more time completing tasks.
Required Material List
- Large sheet of pegboard (usually 1/8 inch or 1/4 inch thickness)
- Two 1×2 or 1×4 lumber pieces for the frame/spacers (enough to frame the perimeter of the pegboard)
- One sheet of plywood (or a sturdy shelf board) for the overhead shelf
- Two wooden shelf brackets (or lumber to cut your own supports)
- Wood screws (various lengths)
- Wall anchors (if mounting to drywall)
- Pegboard hooks and accessories (assorted sizes for different tools)
DIY Instruction Steps
- Prepare the Pegboard Spacers: Pegboard must sit away from the wall so hooks can fit into the holes. Cut your 1×2 or 1×4 lumber into four pieces to create a frame slightly smaller than your pegboard sheet. This frame will act as the spacer.
- Attach Spacers to Pegboard: Lay the pegboard face down on a flat surface. Position the cut lumber pieces around the perimeter, creating a gap between the pegboard and the wall. Secure the lumber frame to the back of the pegboard using short wood screws, making sure the screws do not poke through the front.
- Locate Wall Studs: Use a stud finder to mark the locations of the vertical wall studs where you plan to hang the system. Attaching the system directly to studs is the strongest option.
- Mount the Pegboard: Lift the assembled unit into place. Drill pilot holes through the wooden frame (the spacers) and into the wall studs. Drive long, sturdy screws through the frame and deep into the studs. If studs are unavailable, use heavy duty wall anchors for a secure installation.
- Install the Shelf Brackets: Hold the wooden shelf brackets against the wall directly above the mounted pegboard. Align them with the studs if possible. Mark and drill pilot holes, then secure the brackets firmly to the wall with appropriate screws.
- Place the Shelf: Lay the plywood or shelf board across the top of the installed brackets. If you want a permanent fixture, use short screws to secure the shelf to the top of the brackets from underneath.
- Organize Your Tools: Begin inserting the various pegboard hooks and specialized tool holders into the holes. Arrange your tools logically, grouping like items together, such as all screwdrivers in one section and all wrenches in another. Always place the most frequently used items in the easiest reach.
2. Custom Wooden Chisel and Screwdriver Rack
Item Name: Tiered Woodworking Tool Holder

Anyone serious about woodworking knows that keeping sharp tools safe and accessible is a major challenge. This clever DIY storage solution provides individual, designated slots for chisels, screwdrivers, and carving tools. Building a custom holder like this ensures that delicate edges are protected from damage and that everything remains razor sharp. The tiered design maximizes vertical space, presenting a neat, uniform look against the wall.
This approach uses simple plywood construction, proving that effective organization doesn’t require complex materials. The different groupings help maintain visual order, separating long tools from short ones. Creating homes for smaller, frequently used items is key to preventing workshop chaos. Taking a weekend to build something this functional will make all your future projects much more streamlined.
Required Material List
- Plywood sheets (1/2 inch or 3/4 inch thickness is recommended)
- Wood glue
- Brad nails or small wood screws
- Miter saw or hand saw for precise angle cuts
- Drill and assorted drill bits
- Measuring tape and pencil
- Mounting screws (long enough to go through the rack and into wall studs)
DIY Instruction Steps
- Measure and Design: Start by gathering all the tools you want to store in this rack. Measure the width of the handles and the length of the shafts to determine the required spacing and depth for the holding slots. Sketch out a basic plan for your modules.
- Cut the Components: Using your plywood, cut the pieces needed for the horizontal backs, the side supports, and the slotted top and bottom pieces for each tool holder module. Remember to cut multiples of the side supports for each holding section.
- Cut the Tool Slots: On the top and bottom pieces that will hold the tools, mark where each tool handle and blade will sit. Use a drill press or hand drill to create the initial holes, then use a jig saw or hand saw to cut a slot from the front edge to the hole, allowing the tool to slide in easily.
- Assemble the Modules: Apply wood glue to the edges of the bottom and side supports, then attach them to the back piece and the slotted top piece using brad nails or small screws for reinforcement. Wipe away any excess glue. Repeat this process until all modules are built.
- Create the Mounting Rails: Cut a long, flat piece of plywood to serve as a secure rail. Predrill holes along this rail, spacing them to align with the wall studs. This rail provides a strong anchor point for the lighter modules.
- Mount the Rail: Secure the mounting rail to the wall studs using long wood screws. Make sure the rail is level before driving in the final screws.
- Attach the Modules: Place the finished tool modules onto the mounting rail. Use wood screws from the back of the rail into the module’s back piece to firmly attach them. Organize your tools into the new slots and enjoy the immediate difference.
3. Comprehensive Overhead and Vertical Storage System
Item Name: Multilayered Heavy Duty Garage Shelving

Taking advantage of every square foot is the key to conquering a cluttered garage, and this robust system truly delivers on that promise. A heavy duty, industrial grade shelving unit occupies the floor space, providing numerous deep shelves for large bins and smaller parts storage. The thoughtful addition of smaller, easily accessible tilt bins means quick access to hardware like nails, screws, and washers. Organized items are clearly labeled or grouped into consistent containers, preventing that inevitable mess.
Even better, the ceiling mounted rack provides valuable out of the way storage for items used only seasonally or infrequently. Lifting those holiday decorations and camping supplies off the ground immediately frees up floor space for vehicles or workshop activities. Utilizing all three dimensions—floor, wall, and ceiling—allows you to reclaim your space fully. This smart approach creates a clean, factory like efficiency that makes finding anything a breeze.
Required Material List
- Freestanding metal shelving unit (adjustable height is a bonus)
- Sturdy storage totes and bins (consistent size for stacking)
- Small parts organizer bins (stackable or tilt out style)
- Ceiling storage rack kit (heavy duty metal frame with wire decking)
- Lag bolts and washers (specifically designed for ceiling mounting)
- Stud finder and measuring tape
- Step ladder or scaffolding
DIY Instruction Steps
- Assemble the Floor Shelving: Start by unpacking the freestanding metal shelving unit. Follow the manufacturer’s directions carefully to assemble the vertical uprights and crossbeams. Many units use a simple lock and slot system.
- Level and Secure the Unit: Once assembled, place the unit in its final location against a wall. Use a level to check for plumb and adjust the feet if needed. For safety, secure the top of the shelving unit to the wall studs using brackets and screws to prevent tipping.
- Organize Shelf Contents: Place the large storage totes and small parts organizers onto the shelves. Dedicate specific shelves for different categories (e.g., car supplies, sports equipment, overflow household items). Label every container clearly.
- Locate Ceiling Joists: Use a stud finder to locate the ceiling joists. Mark the locations with a pencil, as the overhead rack must be secured only into the joists for maximum safety and weight bearing capacity. Do not rely on drywall or anchors alone.
- Assemble and Mount the Rack: Assemble the ceiling rack frame and extension posts according to the kit instructions. Lift the assembled unit and align the mounting brackets with the marked joists. Drill pilot holes and secure the rack firmly to the joists using large lag bolts and heavy duty washers. Double check all connections before adding weight.
- Load the Storage: Place lighter, seasonal, or bulky items like sleeping bags and holiday lights onto the ceiling rack. Store heavier items on the lower shelves of the floor unit for easier access and better stability.
4. Vertical Slatwall Organization System
Item Name: Heavy Duty Wall Panel Storage System

This sophisticated slatwall panel system represents a truly modular and flexible approach to garage organization. The continuous horizontal grooves allow you to arrange, move, and customize hooks, shelves, and baskets quickly and without tools. This adaptability is key for garages where storage needs constantly evolve, such as when you buy a new tool or finish a project. The smooth, clean panels instantly elevate the garage’s appearance, turning a boring wall into a functional display.
Various accessories are shown hanging here, including tool hooks for wrenches and clamps, specialized clips for levels, and flat shelves for paint cans and cleaning supplies. You can also see an area dedicated to storing long handled equipment, like a bicycle leaning against the wall. The flexibility of this system makes it easy to keep frequently used tools within easy reach and clearly visible, preventing clutter from accumulating on the workbench or floor.
Required Material List
- Slatwall panels (vinyl, PVC, or composite)
- Wall mounting screws (often specialized screws that fit into the panel channels)
- Slatwall accessories (hooks, baskets, shelves, tool holders)
- Level and measuring tape
- Drill and appropriate driver bits
DIY Instruction Steps
- Measure the Installation Area: Determine the height and width of the area you want to cover with the slatwall. Calculate how many panels you will need.
- Locate Wall Studs: Use a stud finder to identify and mark the vertical wall studs. This system needs to be secured directly into the studs to safely bear weight.
- Install the First Panel: Starting at the bottom of the wall, hold the first slatwall panel in place. Use a level to ensure the panel is perfectly horizontal. Drill pilot holes through the panel material and into the wall studs, typically along the top and bottom edge channels. Secure the panel with the designated mounting screws.
- Interlock Subsequent Panels: The next panel usually locks or interlocks with the one below it. Place the second panel directly above the first, making sure the edges connect tightly. Use the level again to verify it is straight. Secure this panel into the wall studs using screws in the appropriate channels.
- Continue Installation: Repeat step 4 until all panels are installed, covering the desired area. Many systems are designed so the screw heads are hidden by the next overlapping panel, creating a clean, seamless look.
- Add Accessories: Once the wall is secure, simply slide the desired hooks, baskets, and shelves into the slat channels. Adjust their position as needed until you achieve the functional layout you want for your tools and supplies.
5. Ceiling Mounted Garage Shelf Racks
Item Name: Overhead Garage Bin Storage

Maximizing vertical space is perhaps the single best strategy for reclaiming a crowded garage floor. These sturdy wooden shelves are built high above the garage door track, taking advantage of the usually wasted space near the ceiling. This area is truly excellent for storing bulky items that you only access a few times per year. You can see large plastic totes, likely holding seasonal decorations and camping gear, tucked safely out of the way.
The design utilizes simple dimensional lumber, creating a highly stable structure that screws directly into the ceiling and wall studs. This DIY approach allows homeowners to customize the height and depth of the shelves to fit their specific storage bins. By moving large, rarely used items overhead, you create valuable square footage below. Achieving a tidy garage often requires looking up and realizing the tremendous storage potential above your head.
Required Material List
- 2×4 dimensional lumber (for the frame and supports)
- Plywood or 1x material (for the shelf decking/floor)
- Long structural screws or lag bolts (for attaching to ceiling joists and wall studs)
- Wood screws (for assembling the frame)
- Stud finder
- Level and measuring tape
- Safety glasses and ladder
DIY Instruction Steps
- Locate Framing and Plan Placement: Use a stud finder to locate and mark the ceiling joists and the wall studs where the shelf will be attached. Measure the distance between the joists to plan the shelf’s depth and placement. Ensure the shelf will not interfere with the garage door’s operation.
- Build the Ledger Boards: Cut two long 2×4 pieces. These will be the ledger boards attached to the back wall and the front vertical face. Predrill holes every 16 to 24 inches to align with the marked wall studs.
- Secure Ledger Boards: Attach one ledger board flat against the wall studs using long structural screws or lag bolts. This forms the back support.
- Create the Joist Hangers: Cut 2x4s to the depth you want the shelf to be (e.g., 24 inches). These will be the horizontal joists. Use metal hangers or simply screw these joists directly into the side of the installed ledger board.
- Attach Ceiling Supports: Lift the front ledger board (the one that runs parallel to the wall, forming the front of the shelf) and attach the other end of the horizontal joists to it. Then, secure the top of this front ledger board to the ceiling joists above using long structural screws or lag bolts. You can also add vertical 2×4 supports from the ceiling to the front ledger board for added stability.
- Install the Decking: Cut the plywood or 1x material to fit the top of the shelf frame. Screw the decking securely into the horizontal joists using wood screws.
- Final Touches: Test the shelf’s stability and load your large, bulky, or seasonal bins onto the new overhead storage area. Remember to keep the heaviest items closest to the wall and ceiling anchors.
6. Stackable Gravity Feed Hardware Organizers
Item Name: Transparent Small Parts Storage Bins

Nothing causes immediate frustration like searching for a specific nail or screw amidst a messy jumble of hardware. These clear, stackable storage cubes provide a brilliant solution for organizing small components like nuts, bolts, and assorted fasteners. Since the containers are transparent, identifying the contents becomes incredibly easy and quick, saving you precious time during projects. Each unit is clearly labeled, further ensuring that every tiny piece has its own designated home.
A unique design feature is the small dispensing spout near the base. You can pour out just a few pieces without removing the entire lid, which is helpful when your hands are full. The sturdy, interlocking design allows you to build a tower of hardware, keeping the footprint small while maximizing vertical storage capacity. Adopting this system transforms a chaotic hardware collection into a neat and highly efficient resource.
Required Material List
- Stackable, clear plastic storage bins with dispensing spouts (these are usually purchased)
- Preprinted or blank adhesive labels
- Permanent marker
- Funnel (optional, for easy filling)
- Assorted small hardware (screws, nails, washers, etc.)
DIY Instruction Steps
- Empty and Sort Hardware: Gather all your existing small hardware from jars, cans, and random boxes. Sort everything into distinct categories (e.g., drywall screws, wood screws, hex nuts).
- Clean and Prepare Bins: Make sure all the stackable plastic bins are clean and dry. Remove any old labels or residue.
- Label Each Bin: Decide which hardware type will go into each container. Write a clear, descriptive label for the contents, including size or material if applicable (e.g., “Wood Screws #8” or “Hex Nuts 1/4in”). Apply the label to the front of the bin.
- Fill the Bins: Using a funnel makes this step much easier, especially for very small items. Carefully pour or scoop the sorted hardware into the matching labeled bins. Avoid overfilling; leave a little room at the top for shaking and stacking.
- Stack and Store: Secure the lids tightly on all containers. Stack the bins neatly on a workbench, shelf, or in a cabinet. Place the hardware you use most frequently on top for the quickest access.
7. Custom Wall Mounted Cordless Tool Charging Station
Item Name: Plywood Power Tool and Battery Organizer

Clutter often happens when power tools and their numerous chargers sprawl across a workbench. This smart wooden organizer solves the problem by providing a centralized home for cordless drills, drivers, batteries, and chargers. The custom built shelf holds the battery chargers neatly on top, keeping them off the work surface and safely plugged in. By mounting it on the wall, you immediately free up valuable countertop space.
The clever slotted rack underneath provides a hanging dock for drills, using gravity to secure them when not in use. Furthermore, the side racks keep specialized drill bits and drivers readily available right next to the tools they belong with. This unified charging station not only looks tidy but also ensures your batteries are always fully charged and ready for your next project. It is a fundamental piece for any serious home workshop.
Required Material List
- Plywood sheets (1/2 inch thickness is sufficient)
- Wood glue
- Wood screws (various lengths)
- Jigsaw or table saw
- Drill and wood drill bits
- Measuring tape and pencil
- Mounting screws (long enough to reach wall studs)
DIY Instruction Steps
- Measure Your Tools: Measure the length of your drills and the width of their handles to determine the required size and slot spacing for the organizer. Measure the footprint of your battery chargers for the top shelf.
- Cut the Plywood Pieces: Cut the main pieces: a large back panel, a bottom shelf, side panels, and the top shelf. Also, cut two pieces for the drill hanging slots.
- Create the Hanging Slots: On the two pieces designated for the slots, measure and mark the placement of each drill handle. Use a jigsaw to cut U or V shaped slots large enough for the drill handle neck to slide into.
- Assemble the Main Box: Apply wood glue and use screws to join the bottom shelf, side panels, and top shelf to the back panel, forming a sturdy rectangular box structure. Wipe away any excess glue.
- Install the Drill Rack: Position the slotted hanging pieces inside the main box structure. Attach the rear slotted piece to the back wall and the front slotted piece to the front inner edge of the side panels, ensuring the slots line up perfectly. This creates the secure hanging dock.
- Build Bit Holders (Optional): Cut and attach small, layered wood pieces to the side of the organizer. Drill small, evenly spaced holes into these layers to create storage for drill bits and drivers.
- Mount to Wall: Locate the wall studs and drill pilot holes through the organizer’s back panel and into the studs. Secure the entire unit firmly to the wall using long wood screws. Place your chargers on top and plug them in.
8. Magnetic Wall Tool Strips and Drawer Organization
Item Name: Multistrip Magnetic Tool Rack

Eliminating clutter from work surfaces often requires adopting magnetic storage solutions that leverage wall space. These simple yet effective magnetic strips keep frequently used hand tools organized and entirely accessible. Tools stick firmly to the powerful magnets, making it incredibly fast to grab a screwdriver or wrench and equally quick to put it back immediately after use. Grouping similar tools together, like screwdrivers, wrenches, and pliers, creates visual order.
The benefit extends below the wall display as well. The open drawer reveals highly organized tray inserts, proving that storage extends even to the inside of cabinets. Using divider trays for small hardware, sockets, and specialty bits prevents items from rolling around and becoming a tangled mess. Combining magnetic wall storage for tools with modular drawer organization for parts is a surefire strategy for maintaining a productive workshop.
Required Material List
- Magnetic tool bars (long strips with strong magnets)
- Wall mounting screws (appropriate for the tool bar type)
- Drawer organizing trays or adjustable dividers
- Level and drill
DIY Instruction Steps
- Determine Tool Placement: Decide where you want your different tool groups (wrenches, screwdrivers, pliers) to hang. Consider the height and spacing needed above your workbench.
- Mark and Level the First Strip: Hold the lowest magnetic strip against the wall. Use a level to ensure it is perfectly straight. Mark the locations where the mounting screws will go, ideally aligning them with wall studs.
- Mount the Strips: Drill pilot holes and securely attach the magnetic strips to the wall using the supplied mounting screws. Repeat this process for all remaining strips, ensuring consistent, neat spacing between them.
- Organize Wall Tools: Begin placing your metal hand tools onto the magnetic bars. Arrange them logically, keeping all similar tools together. Place the heavier items closer to the mounting screws for stability.
- Organize the Drawer: Measure the inside dimensions of your workbench drawer. Purchase or cut drawer organizing trays or dividers that fit snugly inside.
- Sort Drawer Contents: Transfer all loose hardware, socket sets, and small components into the newly installed trays. Dedicate one section for each type of item, instantly tidying the drawer.
9. Space Saving Overhead Bike Hoist System
Item Name: Ceiling Mounted Bicycle Storage Lift

Bicycles consume a surprisingly large amount of floor space, quickly contributing to garage chaos. This simple rope and pulley system offers an elegant solution by lifting bikes to the ceiling, completely clearing the floor below. The hoist uses a mechanism that securely cradles the bike and allows one person to effortlessly raise or lower even a heavy bicycle. Utilizing this high vertical space is an effective way to store seasonal items like sports gear.
Safety is paramount, so the system includes a locking cleat attached to the wall. This device firmly holds the rope in place, preventing any accidental drops. Storing bikes overhead prevents damage from bumps and clutter while maximizing the functional area of your garage. It proves that even large, awkward items can be managed effectively with a smart mechanical solution.
Required Material List
- Bicycle hoist kit (includes pulleys, ropes, hooks, and mounting hardware)
- Stud finder
- Lag bolts (if not included with the kit, ensure they are appropriate for ceiling mounting)
- Drill and appropriate bit
- Wrench
- Ladder
DIY Instruction Steps
- Locate Ceiling Joists: Use a stud finder to locate the ceiling joists. Mark the locations with a pencil, as the overhead rack must be secured only into the joists for maximum safety and weight bearing capacity. Do not rely on drywall or anchors alone.
- Assemble and Mount the Rack: Assemble the ceiling rack frame and extension posts according to the kit instructions. Lift the assembled unit and align the mounting brackets with the marked joists. Drill pilot holes and secure the rack firmly to the joists using large lag bolts and heavy duty washers. Double check all connections before adding weight.
- Thread the Rope: Following the manufacturer’s instructions, thread the rope through the pulley system. Attach the lifting hooks to the ends of the rope, ensuring they are properly secured.
- Install the Tie Off Cleat: Choose a convenient wall location where you can easily reach the rope to lock and unlock the system. Use screws to firmly mount the rope cleat or wall bracket to a wall stud.
- Test the System: Attach the hooks to the bicycle handlebars and seat. Slowly pull the rope to raise the bike, ensuring the mechanism moves smoothly. Secure the rope to the wall cleat when the bike is fully raised.
10. Recessed Wall Mounted Cabinet
Item Name: Flush Mount Storage for Cans and Bottles

A messy collection of spray paints, lubricants, and small specialty bottles quickly leads to confusion. This neatly built wooden cabinet offers dedicated, organized shelving for all those small cans and liquid containers. The brilliant design utilizes space between the wall studs, creating recessed storage that is flush with the wall surface. This technique saves significant floor space and prevents things from being knocked over.
The simple, sturdy wood construction creates multiple levels, allowing you to separate different categories of items, such as oil treatments, spray paint colors, and adhesives. Everything is visible at a glance, eliminating the need to search through crowded drawers. Building storage into the wall cavity like this provides a custom, professional look while keeping hazardous chemicals safely contained and out of the way.
Required Material List
- 1×4 dimensional lumber (or wider, depending on stud depth)
- Plywood or thin MDF (for the backing panel)
- Wood glue
- Brad nails or small wood screws
- Drywall saw or utility knife
- Stud finder and measuring tape
DIY Instruction Steps
- Locate Wall Studs: Use the stud finder to locate two adjacent wall studs. This space will become the width of your cabinet. Ensure no electrical wires or plumbing run through the intended area.
- Measure and Cut the Opening: Measure the distance between the two studs and the desired height for the cabinet. Use a level and pencil to draw a neat rectangle on the drywall between the studs. Carefully cut out the opening using a drywall saw.
- Build the Cabinet Frame: Cut the 1×4 lumber to create the top, bottom, and side pieces of the cabinet frame. The side pieces will fit between the studs. Use wood glue and small screws or brad nails to assemble the basic rectangular box.
- Install the Shelves: Cut pieces of 1×4 to serve as shelves. Measure the height needed for your tallest cans. Place the shelves inside the frame and secure them through the side pieces using glue and brad nails.
- Attach the Backing: Cut the thin plywood or MDF to fit the back of the assembled shelf box. Attach it using wood glue and small brad nails.
- Install the Cabinet: Apply construction adhesive to the back edges of the cabinet frame. Carefully slide the finished cabinet into the opening until the front edges are flush with the wall. Use long finishing nails or screws driven through the cabinet sides into the wall studs for a secure, permanent hold.
- Caulk and Paint (Optional): Apply a small bead of caulk around the perimeter where the wood meets the drywall for a clean finish. Paint the cabinet to match the wall color.
11. Corner Mounted Vertical Ball Caddy
Item Name: DIY Corner Rope Sports Ball Storage

Dealing with rolling sports balls is a constant struggle in any family garage. This ingenious rope and wood system transforms a neglected corner into highly efficient storage for basketballs and soccer balls. By utilizing the vertical space between the wall and the corner, the system keeps balls contained and off the floor where they constantly become tripping hazards. The balls stack vertically, maximizing storage capacity while taking up a minimal footprint.
The design is incredibly simple, relying on sturdy wooden brackets mounted high on the wall and elastic cord or bungee rope. This easy setup allows children to retrieve and replace balls without difficulty, promoting tidiness. Building this quick project is a straightforward, budget conscious way to bring immediate order to the most chaotic elements of your family’s sports equipment collection. It is a smart way to stop balls from rolling under cars or workbenches.
Required Material List
- 2×4 dimensional lumber (or similar width wood)
- Wood screws
- Drill and wood drill bits
- Elastic cord or bungee rope (several yards)
- Mounting screws (long enough to reach wall studs)
- Measuring tape and pencil
DIY Instruction Steps
- Cut and Prep the Brackets: Cut four pieces of 2×4 lumber into approximately 6 to 8 inch lengths. These will be the top wall brackets.
- Drill Rope Holes: Drill several holes (about three or four) evenly spaced along the bottom edge of each wooden bracket. These holes should be just large enough for the elastic cord to pass through and tie.
- Locate and Mount Brackets: Use a stud finder to locate the wall studs near the corner. Hold two brackets against each wall forming the corner. Ensure the brackets are level and at a height that allows the lowest ball to sit just above the floor trim. Secure the brackets firmly into the wall studs using long mounting screws.
- Thread the Rope: Cut three or four long pieces of elastic cord. Tie a large knot at one end of a cord and thread it down through a hole on one bracket. Run the cord across the corner space, pull it up through a corresponding hole on the adjacent bracket, and tie another knot to secure it tightly.
- Create the Ball Cages: Repeat step 4 with the remaining cords, creating an open net pattern. The distance between the rope lines determines how snug the balls fit. You want the ropes to be slightly closer together than the diameter of your balls so they compress slightly, holding the balls securely in place.
12. Horizontal Wall Mounted Bike Rack
Item Name: Wooden Peg and Hook Bike Hanger

Keeping a bicycle safely stored and off the garage floor is essential for maintaining a clean space and preventing damage. This minimalist wall mounted hanger uses a simple wooden block and a specialized hook to support the bike horizontally by its frame. Mounting the bike flat against the wall frees up significant floor space and is especially useful in narrower garages. The setup keeps the bike visually tidy, transforming it almost into a piece of decorative wall art.
Choosing a simple, effective storage solution like this is always better than leaning the bike against a car or workbench where it might fall over. The wooden backplate provides a strong anchor point while adding a touch of natural aesthetic to the workspace. This is a highly cost effective solution for anyone needing to maximize their square footage without complex pulley systems or bulky racks. A well placed bike hanger makes all the difference.
Required Material List
- Dimensional lumber (e.g., a short 1×4 or 2×4 piece for the wall mount)
- Specialized bike wall hook (often vinyl coated metal)
- Wood screws
- Drill
- Long mounting screws (to secure the wood block to a wall stud)
DIY Instruction Steps
- Determine Hanging Height: Determine where on the wall you want the bicycle to hang. The height should allow the bike to clear the floor easily and be comfortable for you to lift. Mark the spot where the center of the wooden mount will go.
- Locate Wall Stud: Use a stud finder to locate the nearest vertical wall stud. The entire weight of the bike must be supported by this stud, not just drywall.
- Prep the Wood Mount: Cut your lumber piece to the desired size. You might sand or finish the wood for a cleaner look.
- Attach Mount to Wall: Hold the wood block against the wall, ensuring it is vertically aligned with the stud. Drill pilot holes through the wood and into the wall stud. Secure the wood mount firmly to the wall using long mounting screws.
- Install the Bike Hook: Position the specialized bike hook onto the mounted wooden block. Drill pilot holes for the hook screws and secure the hook firmly to the wood block. Ensure it is aligned to cradle the bike frame levelly.
- Hang the Bike: Lift the bicycle and place the frame tube securely over the installed wall hook. Step back and appreciate the amount of floor space you just reclaimed.
13. Overhead Fishing Rod Storage
Item Name: Ceiling Suspended Angling Rod Rack

Fishing rods are notoriously difficult to store, often ending up tangled in a corner or scattered across a ceiling. This clever overhead system uses simple, wide hooks to suspend multiple rods horizontally from the ceiling joists. This keeps the delicate rods safely out of the way, preventing tips from breaking and lines from tangling. Placing them above the garage door track or another unused ceiling area is an incredibly efficient use of space.
The strong metal J hooks are screwed directly into the wooden ceiling beams or joists, creating a robust support system. Storing rods this way also allows air to circulate around them, helping any moisture evaporate after a day on the water. This smart method preserves your fishing investment while immediately tidying one of the most awkward categories of sports equipment. It keeps your rods ready for action but out of sight when you don’t need them.
Required Material List
- Large, vinyl coated utility hooks or J hooks (wide enough for multiple rods)
- Drill and screw bits
- Measuring tape and pencil
- Stud finder (to locate ceiling joists)
- Ladder
DIY Instruction Steps
- Locate Ceiling Joists: Use a stud finder to locate the ceiling joists. Mark the locations with a pencil, as you must anchor the hooks directly into this wood for adequate weight support.
- Determine Hook Placement: Decide how many rods you need to store and how far apart you want the hooks. Plan to install two hooks for every three or four rods you plan to store. For each set of rods, one set of hooks will support the rod tips and the other will support the rod butts.
- Install the First Row of Hooks: Starting with the row that will hold the rod tips, drill pilot holes into the marked joist locations. Screw the large J hooks firmly into the joists. Ensure the hooks are all aligned and face the same direction.
- Install the Second Row of Hooks: Measure the length of your longest fishing rod. Install the second row of hooks at that corresponding distance away from the first row. These hooks will support the thick ends (the butts) of the rods. Again, drill pilot holes and screw the hooks in firmly.
- Store the Rods: Carefully place your fishing rods onto the hooks, organizing them by size or type. Ensure the delicate tips are safely cradled and the reels are resting securely.
14. Adjustable Long Handled Tool Organizer
Item Name: Wall Mounted Modular Rake and Shovel Rack

Long handled tools like brooms, rakes, and shovels take up significant floor space and often clutter corners. This sturdy, modular wall rack provides a neat, upright home for all those gardening and cleaning implements. The system uses a specialized gripping mechanism that securely holds the tool handles in place, keeping them flush against the wall. Because the rack is mounted to a segment of pegboard or directly to the wall, it frees up critical square footage.
Organizing these tools vertically prevents them from falling over, which happens frequently when they are simply propped up. The adjustable nature of this system means you can customize the spacing to fit different handle thicknesses, from thin brooms to chunky shovel handles. Utilizing a smart system like this instantly transforms a cluttered mess into an orderly display, making it easy to find the specific tool you require for yard work.
Required Material List
- Modular long handled tool organizer rack (purchased plastic or metal unit)
- Mounting screws (usually included with the kit)
- Drill
- Level and measuring tape
- Wall anchors (if mounting to drywall only) or stud finder
DIY Instruction Steps
- Mark Rack Position: Decide on the best height for the rack. It should be high enough so the tools clear the floor but low enough for easy access. Use a pencil and level to draw a straight line where the rack will sit.
- Find Studs or Use Anchors: If possible, locate and mark the wall studs and align the rack mounting holes with them for the strongest hold. If studs are unavailable, you must use heavy duty wall anchors appropriate for the weight of the tools.
- Drill Pilot Holes: Drill pilot holes through the wall at the marked locations.
- Mount the Rack: Hold the tool rack in place. Drive the mounting screws firmly through the rack and into the wall studs or anchors. Ensure the rack is tightly secured to the wall and does not wiggle.
- Insert Tools: Begin placing the rakes, shovels, brooms, and other long handled tools into the gripping slots. Ensure each tool is held securely upright. Grouping similar tools together often works best.
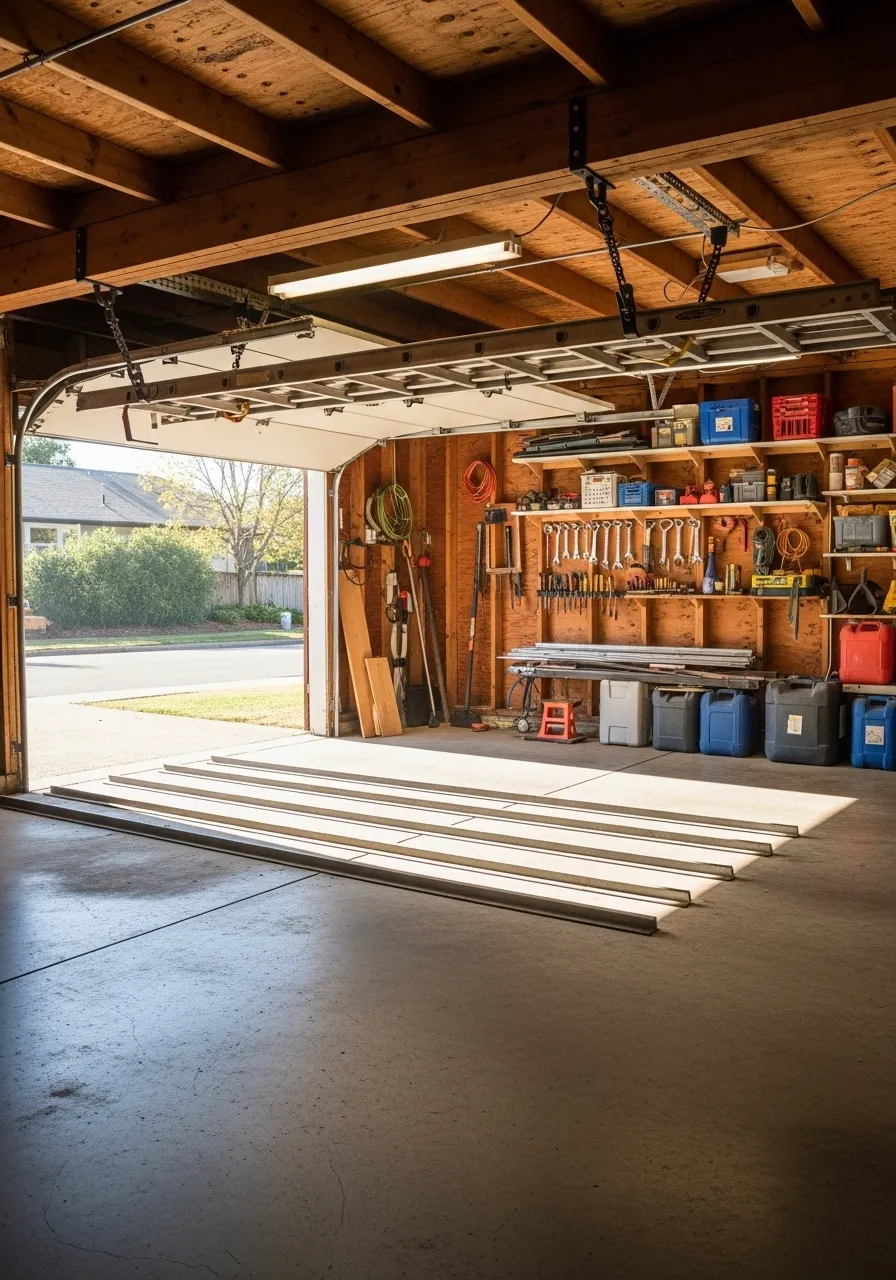
15. Wide View of Organized Garage Space
Item Name: Comprehensive Workshop and Storage Integration

This full garage view clearly demonstrates the power of integrating different storage methods to achieve a completely organized space. High wall shelving holds various bins and small containers, keeping paint cans and cleaning supplies off the floor. There is a specific workbench area with a tool wall, indicating a dedicated zone for project work. Even garden tools are neatly hung on the side wall, maximizing the available vertical area.
The floor is largely clear, allowing vehicles or large items to be moved easily, which is the ultimate goal of garage organization. The entrance is welcoming and bright, thanks to both natural light and good overhead lighting. Utilizing a mixture of open shelving for quick access and clearly defined zones for tools and supplies creates a functional, attractive workspace. This overall approach shows how dedication to organized storage can truly transform your entire garage experience.
Required Material List
- No DIY materials are required for this step as it represents the culmination of organizational techniques rather than a single project.
DIY Instruction Steps
- No DIY steps are required for this step. The focus is on the integrated planning and execution of multiple organization hacks, such as those described in the preceding sections (e.g., shelving, tool walls, vertical racks).
- Assess and Declutter: Start by removing everything from the garage that does not belong or hasn’t been used in over a year. Create three piles: Keep, Donate/Sell, and Trash.
- Zone the Space: Divide your garage into distinct functional areas: Parking, Workshop/Bench, Long Term Storage (ceiling), and Immediate Access/Tools (wall).
- Implement Storage Solutions: Install the appropriate hacks for each zone. Use shelving for bins, pegboards or slatwalls for tools, and overhead racks for seasonal items.
- Maintain Organization: Label all containers clearly and consistently. Commit to a “place for everything and everything in its place” rule to prevent clutter creep. Perform a small tidy up at the end of every project.
16. Wall Mounted Collapsible Tire Rack
Item Name: Heavy Duty Seasonal Tire Storage

Tires take up a tremendous amount of garage floor space, especially for those who swap between winter and summer sets. This heavy duty metal rack provides an exceptional solution by suspending four tires securely on the wall, completely clearing the floor below. The rack’s structure bolts directly into the wall studs, ensuring that it can safely support the significant weight of the rubber. When not in use, the rack cleverly folds up flat against the wall, making it incredibly space efficient.
Storing tires properly, off the cold concrete floor, also helps prolong their lifespan. This system keeps them organized, accessible, and contained, preventing them from rolling around. Utilizing strong wall mounted solutions for bulky items like tires is a smart organizational move that instantly frees up valuable real estate in your garage. It proves that even the biggest items can be managed efficiently with the right gear.
Required Material List
- Collapsible wall mounted tire rack kit (heavy duty metal)
- Lag bolts or heavy duty mounting hardware (usually included)
- Stud finder
- Drill and appropriate driver bits
- Level and measuring tape
DIY Instruction Steps
- Locate Wall Studs: Use a stud finder to locate the vertical wall studs in the desired installation area. Mark the center lines of the studs, as this rack must be secured directly into the wood framing.
- Determine Height: Decide on the mounting height. The rack should be high enough to clear your work area but low enough for safe loading and unloading of the tires.
- Mark Mounting Holes: Hold the rack’s vertical mounting brackets against the wall, aligning them with the marked studs. Use a level to ensure they are straight. Mark the precise locations for the lag bolts.
- Drill Pilot Holes: Drill pilot holes through the wall and deep into the center of the wall studs. This prevents the wood from splitting when the large bolts are driven in.
- Secure the Brackets: Securely attach the vertical mounting brackets to the wall using the heavy duty lag bolts. Use a wrench or impact driver to ensure they are completely tight.
- Assemble and Load: Following the kit instructions, assemble the horizontal bars and ensure the folding mechanism works smoothly. Lift the tires and load them onto the rack, placing the heaviest tires near the secured ends.
17. Simple Wall Mounted Cord and Hose Hooks
Item Name: Heavy Duty Utility Hanger for Cords and Hoses

Untamed electrical cords and garden hoses quickly become an unsightly mess on the garage floor, leading to tangles and safety hazards. This simple, effective utility track system provides two heavy duty metal hooks for neat vertical storage. The wide, sturdy hooks are capable of holding coiled garden hoses, thick extension cords, and appliance cables without bending. Keeping these items coiled and elevated prevents damage and makes them easily accessible when needed.
This type of organization utilizes minimal hardware—just two screws—to deliver maximum impact on cleanliness. The black metal track gives the system a clean, industrial appearance that works well in any workspace. Utilizing these types of quick, inexpensive solutions is fundamental to achieving an organized space. Organizing these simple items clears the clutter that is often the root cause of a messy garage.
Required Material List
- Small metal utility track or two large, single screw in utility hooks
- Heavy duty mounting screws
- Drill and appropriate bit
- Stud finder (optional, but recommended)
DIY Instruction Steps
- Locate Mounting Spot: Choose a convenient wall location near where you use your hose or cords. Use a stud finder to locate a wall stud for the most secure attachment.
- Mark and Level: Hold the utility track or the first hook in place. Use a level to ensure it is perfectly straight. Mark the precise spot for the mounting holes.
- Drill and Secure: Drill pilot holes through the wall and into the wall stud. Drive the heavy duty screws through the mounting points and firmly into the stud. Ensure the track or hook cannot wiggle.
- Install Second Hook (if applicable): If you are using single hooks, measure the desired distance for the second hook to allow both the hose and cord to hang without touching. Repeat the drilling and securing process.
- Coil and Hang: Neatly coil the garden hose and extension cords. Hang them securely on the mounted hooks, keeping the connections elevated off the floor.
18. Rolling Vertical Sheet Material Cart
Item Name: Mobile Plywood and Scrap Wood Organizer

Woodworkers often struggle with storing large, awkward pieces of sheet material like plywood, MDF, or leftover scraps. This clever vertical cart on casters solves the problem by allowing the material to be stored upright in individual slots. Storing sheets vertically prevents warping and makes it incredibly easy to see and retrieve the piece you need without shuffling a heavy stack. Building this unit from simple plywood means it is sturdy and cost effective.
The addition of heavy duty casters means this entire lumber library can be rolled out of the way when not in use, instantly reclaiming valuable floor space. The vertical partitions create individual slots, ensuring the scrap pieces don’t fall over or lean against the wall. This type of customized, specialized storage is a game changer for anyone dealing with a constant accumulation of workshop materials.
Required Material List
- Plywood sheets (3/4 inch thickness for strength)
- Wood glue
- Wood screws
- Four heavy duty swivel caster wheels
- Drill and various drill bits
- Jigsaw or table saw
DIY Instruction Steps
- Cut the Base and Frame: Cut a large rectangular base piece from your plywood. Cut two long side panels and two shorter end pieces. The height of the side panels determines the maximum size of wood sheet the cart can hold.
- Assemble the Outer Box: Use wood glue and wood screws to assemble the base, sides, and ends into a strong, simple box structure. Ensure all connections are square.
- Install the Casters: Flip the box upside down. Position the four swivel caster wheels near the corners of the base. Mark and predrill holes, then securely attach the casters with screws or bolts.
- Cut the Dividers: Cut multiple vertical divider pieces from the remaining plywood. The number of dividers determines the number of storage slots.
- Install the Dividers: Mark the spacing for each slot on the base and the top edge of the side panels. Apply wood glue to the bottom edge of a divider and slide it into position. Secure the divider by driving screws through the base into the bottom edge and through the side panels into the edges of the divider. Repeat for all remaining dividers.
- Load the Cart: Stand the cart upright and load your sheet goods and scrap lumber into the individual vertical slots. Roll the cart to an out of the way corner.
19. Magnetic Key Lock Storage Cabinet
Item Name: Secure Chemical and Liquid Storage Locker

Storing automotive chemicals, cleaning liquids, and paints requires a safe and secure location, especially in homes with children or pets. This wall mounted metal cabinet offers a robust and responsible storage solution. Its simple, lockable design provides a secure enclosure, preventing accidental spills or access to potentially hazardous substances. The clean shelving inside allows for neat organization of bottles and cans by category.
The compact design of the locker means it can be mounted directly above the floor, keeping the chemicals off the ground where a spill might spread. Even in the event of a leaky bottle, the cabinet contains the mess, as evidenced by the liquid dripping underneath the unit. Investing in a secure cabinet like this is not just an organizational hack; it is a critical safety measure for any garage that doubles as a storage area for household chemicals.
Required Material List
- Wall mounted metal storage cabinet with lock and key (purchased unit)
- Mounting hardware (screws or lag bolts, usually included)
- Drill and appropriate bit
- Stud finder and level
DIY Instruction Steps
- Choose a Safe Location: Select a location on the wall that is easily accessible but out of the immediate traffic path, preferably mounted into wall studs. Ensure the location is not directly above a heat source or anything that could be damaged by a small leak.
- Locate Wall Studs: Use a stud finder to locate the wall studs where the cabinet will be mounted.
- Mark and Level: Hold the cabinet against the wall. Use a level to ensure it is straight. Mark the locations for the mounting holes, aligning them with the wall studs.
- Drill Pilot Holes: Drill pilot holes through the wall and into the center of the wall studs.
- Secure the Cabinet: Securely mount the cabinet to the wall using the supplied heavy duty screws or lag bolts. Ensure all mounting points are used and the cabinet is held firmly against the wall.
- Load and Lock: Place your automotive liquids, waxes, and cleaning supplies neatly onto the shelves. Lock the door and keep the key in a safe, designated spot, especially if the contents are hazardous.
20. Simple Tennis Ball Parking Aid
Item Name: Hanging Tennis Ball Garage Parking Guide

One of the greatest frustrations in a messy garage is trying to park a vehicle without bumping into tools, shelves, or the back wall. This exceptionally simple tennis ball guide is a timeless hack that solves the problem instantly. By suspending a tennis ball from the ceiling with string, you create a visual marker that perfectly aligns with your dashboard or windshield. The driver simply pulls in until the ball gently taps the predetermined spot, indicating exactly when to stop.
This zero cost, no fuss solution requires only a ball and a piece of string. When the ball hits the sweet spot, the car is parked safely, maximizing the remaining space in front and behind the vehicle. Using this guide eliminates guesswork and reduces the chance of expensive damage to your car or your stored belongings. It is a fantastic reminder that the best organization hacks are often the simplest ones.
Required Material List
- One tennis ball
- Durable string or twine
- Small eye hook or cup hook
- Drill (to predrill the ceiling joist)
- Step stool or ladder
DIY Instruction Steps
- Determine Parking Spot: Drive the vehicle into the garage and park it in the perfect stopping spot, maximizing space in front and behind.
- Mark the Ceiling: Sit in the driver’s seat. Locate the precise spot on the windshield or dashboard that you want the tennis ball to hit (e.g., the center of the windshield). Mark the exact location on the ceiling directly above this spot.
- Install the Hook: Use a stud finder to confirm the marked spot is located in a ceiling joist for a secure hold. Drill a small pilot hole into the ceiling joist. Screw the eye hook or cup hook firmly into the pilot hole.
- Prepare the Ball: Make a small hole through the center of the tennis ball using a drill or a sharp object. Thread one end of the string through the ball and tie a sturdy knot inside to prevent it from slipping out.
- Attach and Adjust: Tie the other end of the string securely to the hook installed in the ceiling. Adjust the length of the string so the tennis ball hangs at the exact height needed to gently tap your windshield or dashboard when the car is parked safely.
21. Collapsible Wall Mounted Workbench
Item Name: Fold Down Space Saving Work Table

In smaller garages where space is genuinely limited, a fold down workbench is the ultimate organizational lifesaver. This sturdy plywood shelf uses heavy duty hinges and brackets to transform from a flat wall panel into a functional workspace in seconds. When you are finished working, the bench folds back up against the wall, allowing the car to park comfortably right beside it. This hack shows how to create a highly functional workshop without sacrificing space for your vehicle.
Above the workbench, a compact pegboard keeps essential hand tools within easy reach while you are working. The genius of this setup lies in its temporary nature; you gain a workspace when you need it and reclaim the open floor when you don’t. This design requires careful mounting directly into wall studs to ensure maximum stability and safety while handling tools and materials.
Required Material List
- Plywood sheet (3/4 inch thickness recommended for the tabletop)
- Dimensional lumber (2×4 or 1×4 for wall mounting ledger)
- Heavy duty folding shelf brackets with locking mechanism
- Continuous hinge (piano hinge) or multiple gate hinges
- Wood screws and lag bolts (for mounting ledger to wall studs)
- Drill and measuring tape
DIY Instruction Steps
- Cut the Tabletop: Cut the plywood to the desired dimensions for the workbench top. Sand the edges smooth.
- Mount the Wall Ledger: Cut a piece of dimensional lumber to span the desired width of the workbench. Locate wall studs and secure this ledger board horizontally and levelly to the wall using long lag bolts. This piece provides a strong anchor point for the hinges.
- Attach Hinges to Tabletop: Lay the tabletop flat. Attach one half of the continuous hinge (or multiple gate hinges) along the back edge of the tabletop using wood screws.
- Attach Tabletop to Ledger: Stand the tabletop up vertically. Align the other half of the hinge with the ledger board already mounted on the wall. Secure the hinge to the ledger board using wood screws. The bench should now swing down.
- Install Folding Brackets: Attach the folding shelf brackets underneath the tabletop, near the wall edge. When the bench is down, the bracket arms should extend to provide full support. Secure the bottom end of the brackets to the wall, making sure they line up horizontally and engage the locking mechanism when the bench is open.
- Test Stability: Press down firmly on the open bench to ensure it is rock solid before placing any tools or materials on it. Practice folding it up and down.
22. Wall Mounted Corner Protection Pads
Item Name: DIY Foam Garage Wall Bumpers

Accidentally scraping a vehicle door against a concrete post or rough wall is an instant annoyance that leads to frustrating cosmetic damage. This clever vertical bumper pad is a simple, customizable solution that protects your car in tight parking spots. The blue foam material provides a soft cushion, while the yellow casters (wheels) mounted around it create a visible guide. If the door accidentally swings wide, it gently contacts the soft pad instead of the abrasive wall.
This hack is especially valuable in single car garages or bays where parking clearance is minimal. The brightly colored material draws the eye, making it easier to gauge distance in dim lighting. Creating your own protective buffer zones is a highly effective way to prevent needless dents and paint damage, ensuring your vehicle stays looking its best.
Required Material List
- Dense foam padding or thick pool noodle (in a bright color)
- Plywood or wood backing strip (optional, for mounting stability)
- Small rubber or plastic casters/wheels (optional, for visual guide)
- Construction adhesive or strong double sided tape
- Mounting screws (if using a wood backing)
DIY Instruction Steps
- Measure and Cut Foam: Measure the vertical area of the wall where the car door is most likely to swing open. Cut the dense foam or pool noodle to this length.
- Prepare Mounting Surface: If using a wood backing strip, secure the wood strip vertically to the wall, aligning it with a wall stud near the collision point. If mounting foam directly to drywall, ensure the wall surface is clean and dry.
- Attach Foam: Apply strong construction adhesive or heavy duty double sided tape to the back of the foam strip. Press the foam firmly against the wall or the mounted wood strip. Hold it in place for the required bonding time.
- Install Guide Wheels (Optional): If using the guide wheels, attach them with short screws or adhesive to the foam strip at various points (top, middle, and bottom) to provide visual markers and prevent the door from catching the foam edge.
- Test Clearance: Park your car and slowly open the driver’s door to ensure it gently contacts the foam bumper, giving you a clear margin of safety.
23. Stackable Home Recycling Bins
Item Name: Tiered Household Waste Separation Containers

Garages often become the dumping ground for unsorted recycling, creating messy piles of cardboard and plastic. These brightly colored, stackable containers provide a simple, attractive, and highly functional way to separate household waste. Each container is clearly labeled for materials like paper, plastic, and glass, ensuring easy sorting for everyone in the family. The vertical stacking design minimizes the floor space required for your recycling collection.
A clever feature of these bins is the lift up or open front access panel. This allows you to drop items in without having to unstack the units every time. Placing the recycling station near a doorway or mudroom helps encourage proper sorting immediately. Maintaining a tidy, structured system for discards prevents the unsightly build up of boxes and bags.
Required Material List
- Stackable recycling containers (purchased units with lids/openings)
- Labels or decals (for clear waste identification)
DIY Instruction Steps
- Purchase and Assemble: Acquire three or more stackable bins designed for recycling. Ensure they fit together securely and have access points for easy use.
- Label the Bins: Assign a material category to each bin (e.g., Paper, Plastic, Glass, Aluminum). Apply clear, highly visible labels to the front of each container.
- Determine Stack Order: Place the heaviest or largest volume bin (like cardboard) at the bottom for stability, or place the bins that require the most frequent access at the top.
- Position the Station: Place the stacked bins in a convenient, well lit area of the garage, preferably close to the entry door or vehicle access point.
- Educate the Household: Instruct family members on the new sorting system, emphasizing the importance of dropping items into the correct, clearly marked container.
24. Mobile Hardware Parts Organizer Tower
Item Name: Rolling Multi Bin Parts Cart

For those who frequently tackle different projects around the workshop, having hardware mobile is a huge advantage. This four sided rotating tower uses gravity feed rail systems to hold multiple small parts bins. The sheer amount of storage packed into this vertical footprint is impressive, keeping dozens of varieties of fasteners and tiny components organized. Using bright, color coded bins (like red and blue) makes visual identification even quicker.
Because the unit is mounted on sturdy caster wheels, you can effortlessly roll your entire hardware collection right next to your current project. The tall design maximizes cubic space, and the rail system allows you to adjust the bin placement instantly. This mobile organizer is truly a highly versatile hack for any active crafter or DIY enthusiast who needs their supplies to travel with them.
Required Material List
- Plywood or MDF sheets (for the tower structure)
- Four heavy duty swivel caster wheels
- Parts bin rails (metal or plastic track systems)
- Assorted plastic hanging bins (various sizes)
- Wood screws, bolts, and nuts (for assembly and casters)
DIY Instruction Steps
- Cut Tower Panels: Cut four equal sized rectangular panels from the plywood for the sides of the tower. Cut a top and bottom panel as well.
- Assemble the Tower: Assemble the six pieces into a vertical box shape using wood glue and screws, ensuring the structure is square and solid.
- Install Casters: Attach the four swivel caster wheels to the bottom panel of the tower using appropriate bolts and nuts.
- Install Bin Rails: Decide on the vertical spacing needed for your bins. Secure the horizontal parts bin rails onto the exterior of the tower panels using screws. Repeat this on all four sides of the tower.
- Add Handle (Optional): Attach a sturdy handle to the top panel for easier maneuvering around the shop floor.
- Load the Bins: Fill the various sized bins with your small parts, nuts, bolts, and washers. Hang the bins onto the installed rails, organizing them by size or type for easy access while working.
25. Wall Mounted Tilt Out Small Parts Bins
Item Name: Modular Multi Color Hardware Rail System

Another effective way to manage vast quantities of small hardware is using a modular rail system with tilt out bins. The use of multiple colors—red, blue, and yellow—provides an excellent visual organization cue, allowing you to instantly associate a color with a specific category of item. These sturdy plastic bins hang securely on metal tracks mounted horizontally on the wall. This setup keeps the tiny, loose hardware safely contained and highly visible.
Since the bins are mounted directly on the wall, they keep the workbench clear for assembly and other tasks. The open top of the bins provides quick access, which is crucial when you are installing screws or grabbing a handful of washers. This modular design means you can expand the system easily as your hardware collection grows. Utilizing a dedicated wall area for these small but necessary components is a major step toward a truly organized shop.
Required Material List
- Horizontal metal mounting rails (purchased)
- Assorted colored plastic tilt out bins (purchased, designed to fit the rails)
- Mounting screws (appropriate for the rails)
- Drill and level
DIY Instruction Steps
- Mark Rail Placement: Determine the desired height and spacing for your rows of bins. Use a pencil and level to draw straight lines for the mounting tracks, making sure to leave enough vertical space between rows to easily access the bins.
- Locate Wall Studs: Use a stud finder to locate wall studs along the marked lines for the most secure installation.
- Mount the Rails: Hold the first metal rail against the wall. Drill pilot holes and secure the rail firmly to the wall studs using mounting screws. Repeat this process for all subsequent rails, maintaining consistent horizontal alignment.
- Load the Bins: Fill the various colored plastic bins with different types of hardware (e.g., all screws in red, all bolts in blue).
- Attach Bins to Rails: Simply slide or clip the loaded bins onto the installed mounting rails. Arrange them logically, keeping the most frequently used bins at chest level.
26. Floating Corner Shelves with Ambient Lighting
Item Name: Decorative Corner Display and Storage

While sometimes used in kitchens, floating corner shelves offer a unique and attractive storage solution for the garage or mudroom entry. This design utilizes the often awkward corner space, transforming it into a display area for decorative items or functional storage for smaller, neat items. The thick wood shelves appear to float, creating a modern, clean aesthetic. The under shelf lighting adds brightness and highlights the contents, making the space feel more welcoming.
This system is particularly useful for storing items like frequently used cookbooks, small gardening tools, or even small bins of household essentials. By taking advantage of the corner, you gain valuable storage without intruding far into the room. This approach shows that garage organization does not have to be purely utilitarian; it can also be stylish.
Required Material List
- Thick plywood or lumber (for the floating shelves)
- Floating shelf brackets or rods (heavy duty, concealed mounting system)
- LED strip lighting (optional)
- Drill, level, and mounting hardware
DIY Instruction Steps
- Determine Shelf Placement: Locate the wall studs and measure the height needed for the shelves. Ensure the placement leaves adequate space for items above and below.
- Install Mounting Brackets: Depending on your floating shelf system, you will either attach a metal bracket or drill holes and secure supporting rods into the wall studs. Use a level to ensure the brackets are perfectly horizontal.
- Prep the Shelves: Cut the shelf wood to the required length and depth to fit the corner. If using rods, drill corresponding holes into the back and sides of the shelves so they slide onto the rods.
- Install Lighting (Optional): Before securing the shelves, run LED strip lighting along the bottom edge of the shelf piece, adhering to the manufacturer’s instructions for power source and wiring.
- Secure the Shelves: Slide or secure the wooden shelves onto the installed brackets or rods. For a truly secure fit, some systems require final screws driven into the shelf from below.
- Style the Shelves: Place your desired items on the new shelves, using the vertical space in the corner efficiently.
27. Simple Wall Mounted Utility Shelving
Item Name: Basic Utility Shelf Brackets and Boards

Sometimes, the most effective organizational hack is simply utilizing basic, open wall shelving. This system uses simple metal wall brackets secured to wall studs, supporting long, continuous wood shelves. This approach provides huge amounts of visible storage space for everything from cleaning fluids and automotive liquids to smaller items placed in bins. Keeping all these essential garage supplies elevated and visible prevents them from ending up scattered on the floor or workbench.
Because the shelving is completely open, it is easy to see everything you own, making it simple to grab what you need. This method is incredibly versatile and cost effective, allowing you to customize the shelf depth and height to fit your specific storage needs. Utilizing the area high above a workbench or tool cabinet immediately doubles your available storage capacity.
Required Material List
- Adjustable metal wall brackets and standards (or fixed heavy duty brackets)
- Lumber boards (1×10 or 1×12 thickness, for the shelves)
- Long mounting screws (to attach standards/brackets to studs)
- Wood screws (to secure shelves to brackets)
- Stud finder, level, and drill
DIY Instruction Steps
- Locate Wall Studs: Use a stud finder to locate and mark the wall studs along the desired shelf run.
- Install Standards/Brackets: Decide on the height of your shelves. Mount the metal standards (vertical tracks) or fixed brackets to the wall, aligning the screw holes with the marked wall studs. Use a level to ensure the tracks are perfectly vertical and all brackets are aligned horizontally.
- Cut and Place Shelves: Cut the lumber boards to the required length. Place the shelf boards onto the mounted brackets.
- Secure Shelves: For stability, use short wood screws to attach the shelf boards directly to the tops of the metal brackets from underneath. This prevents the shelves from being easily knocked off the supports.
- Load and Organize: Place your supplies onto the shelves, grouping like items together. Use consistent, small bins or containers to maintain tidiness on the open shelves.
28. Wall Mounted Step Ladder Hanger
Item Name: Heavy Duty Utility Hook for Folding Ladder

Step ladders are a household necessity, yet they always seem to be in the way, leaning against a wall or taking up floor space. This simple, heavy duty wall hook provides a dedicated, out of the way home for a folding step stool or small ladder. The bracket is secured directly to the wall, holding the folded ladder flat against the surface. This hack utilizes vertical space to manage a bulky, awkward item that would otherwise consume valuable floor area.
Hanging the ladder makes it easy to grab when needed and keeps the folding mechanism protected from damage. This organizational solution is straightforward, requiring minimal installation time but delivering a major improvement in clear space. When every square foot counts, even something as simple as a designated ladder hook makes a significant difference in garage functionality.
Required Material List
- Heavy duty utility hook or ladder hanger bracket (purchased unit)
- Mounting screws or lag bolts
- Drill and appropriate bit
- Stud finder
DIY Instruction Steps
- Locate Wall Stud: Find a clear section of the wall and use a stud finder to locate the wall stud where you will hang the ladder.
- Determine Hanging Height: Fold your step ladder and measure its length. Determine a mounting height that allows the ladder to hang safely without touching the floor or ceiling.
- Mark and Level: Hold the ladder hanger bracket in place. Use a level to ensure it is straight. Mark the precise locations for the mounting screws.
- Drill and Secure: Drill pilot holes into the wall stud. Secure the heavy duty hanger bracket firmly to the wall stud using the supplied lag bolts or mounting screws.
- Hang the Ladder: Fold the ladder completely. Lift it and hang it securely onto the new wall hook.
29. Wall Mounted Command Center
Item Name: Centralized Message Board and Key Organizer

Garages often serve as the main family entry point, making them an excellent spot for a centralized command center. This attractive wall mounted unit combines a large dry erase or chalk calendar with essential organizational features. Having a calendar visible here keeps everyone aligned on the family schedule. The lower section includes hooks for keys, ensuring they are always returned to the same spot, eliminating frantic morning searches.
Small shelves and metal containers below the board provide storage for mail, pens, and quick access notes. This hack is about organizing life as much as organizing tools. By controlling the flow of paper, keys, and schedules right at the entry point, you prevent that clutter from entering the main house. It is a highly functional piece that brings order to daily chaos.
Required Material List
- Wall mounted command center unit (purchased, with calendar, hooks, and shelves)
- Mounting screws
- Drill and level
- Dry erase markers, magnets, or chalk
- Small containers (for pens/mail)
DIY Instruction Steps
- Choose Mounting Location: Select a clear wall space near the garage entry door that is easily visible and accessible to everyone.
- Locate Wall Studs: Use a stud finder to locate the wall studs where the unit will be mounted. Since the unit can be heavy when loaded, secure attachment is crucial.
- Mark and Level: Hold the command center unit against the wall. Use a level to ensure it is perfectly straight. Mark the precise locations for the mounting screws.
- Drill and Secure: Drill pilot holes through the wall and into the wall studs. Secure the command center unit firmly to the wall using the appropriate mounting screws.
- Set Up: Write out the weekly calendar, place keys on the hooks, and fill the small containers with pens and notepads. Immediately start using the center to manage incoming mail and notes.
30. Stacked Uniform Storage Totes
Item Name: Heavy Duty Labeled Container Stacks

The most basic, yet most important, rule of long term storage is consistent labeling and stacking. This image shows a system relying on uniform, heavy duty gray storage totes that stack securely on top of one another. The key feature is the large, clear label applied to the front of every single bin, identifying contents like “Old Photos,” “Christmas Decs,” or “Camping Gear.” When you know exactly what is inside, retrieval becomes immediate.
Using uniform bins not only looks incredibly neat but also maximizes vertical stacking capability, which is critical for maximizing garage storage. The durable plastic protects contents from dust and moisture, making this the best choice for storing sentimental items or seasonal clothing. Standardizing your storage containers is a nonnegotiable step in achieving a truly organized and functional garage.
Required Material List
- Uniform heavy duty plastic storage totes with secure lids
- Label maker or clear, adhesive labels and permanent marker
- Contents (seasonal gear, photos, tools, etc.)
DIY Instruction Steps
- Standardize Containers: Purchase a large number of storage totes that are all the same brand and size, ensuring they stack securely.
- Sort and Categorize: Go through your loose items and sort them into broad categories (e.g., Holiday, Documents, Tools). Only store items that fit neatly into a category.
- Fill and Stack: Fill the totes by category. Do not overstuff them to the point where the lids won’t seal properly. Place the heaviest totes on the bottom for stability.
- Label Meticulously: Using a label maker or neat handwriting on clear labels, create a precise label for the contents of each box (e.g., not “Stuff,” but “Winter Clothes 2024”). Affix the label prominently on the front of the bin.
- Create an Inventory (Optional): For very deep storage, consider keeping a simple digital list of the contents of each labeled bin so you never need to search blindly.
31. Professionally Finished Garage Floor
Item Name: Epoxy Coated Garage Floor

A genuinely organized garage often starts from the ground up, and a professionally finished epoxy floor is a prime example of this. The seamless, light gray surface instantly brightens the entire space, making it feel cleaner and more expansive. Beyond aesthetics, an epoxy coating provides a durable, easy to clean surface that resists oil stains, chemicals, and tire marks. This makes sweeping and tidying a much quicker and more enjoyable task.
The reflective quality of the floor also enhances the existing lighting, which helps with visibility while working on projects. Combined with the various wall mounted tools and storage cabinets seen in the background, a high quality floor sets the foundation for lasting organization. Investing in a durable floor surface transforms the garage from a dreary dumping ground into a truly functional extension of your home.
Required Material List
- Epoxy garage floor coating kit (two part or three part system)
- Concrete cleaner/degreaser
- Concrete etching solution (often included in kits)
- Pressure washer or stiff bristle brush
- Squeegee or roller with extension pole
- Paint tray and stir sticks
- Safety gear (gloves, safety glasses, respirator)
- Non-slip additives (optional)
DIY Instruction Steps
- Clear the Garage: Remove absolutely everything from the garage, including vehicles, tools, storage items, and anything else on the floor.
- Clean the Floor Thoroughly: Use a heavy duty concrete cleaner and degreaser to remove all oil, grease, and dirt. A pressure washer is highly effective here. Rinse the floor completely and let it dry for at least 24 hours.
- Etch the Concrete: Apply the concrete etching solution according to the manufacturer’s directions. This creates a porous surface for the epoxy to bond to. Rinse thoroughly and allow to dry completely for another 24-48 hours. Ensure the floor is bone dry.
- Repair Cracks and Chips: Fill any cracks or divots in the concrete with a concrete patch compound. Allow it to cure fully and then sand smooth.
- Mix the Epoxy: Follow the specific instructions for your epoxy kit precisely. This typically involves mixing two or more components together. Work quickly, as epoxy has a limited pot life.
- Apply the Epoxy: Start by “cutting in” the edges and corners with a brush. Then, use a squeegee or roller to apply a thin, even coat of epoxy over the entire floor. Work in small sections to maintain a wet edge. If using non-slip additives, sprinkle them into the wet epoxy.
- Cure Time: Allow the epoxy to cure for the recommended time (typically 24-72 hours) before walking on it or driving a vehicle onto it. Ventilation is crucial during this process.
32. High Lumen Adjustable LED Garage Light
Item Name: Multi Directional Ceiling Workshop Light

Proper lighting is a truly underestimated aspect of garage organization and functionality. This innovative LED fixture transforms a standard light socket into a high lumen workshop light with adjustable panels. The four broad, flat light panels can be angled to direct powerful illumination exactly where it is needed most, such as over a workbench or a vehicle. This superior brightness makes it easier to find items, work on projects, and navigate the space safely.
Unlike traditional single bulb fixtures, this design spreads light evenly, eliminating dark shadows and improving overall visibility. The simple screw in installation makes it an incredibly easy upgrade for any garage. Investing in quality lighting creates a brighter, more inviting workspace, encouraging you to keep it organized and functional.
Required Material List
- Multi directional LED garage light fixture (screws into standard E26/E27 base)
- Sturdy step ladder
DIY Instruction Steps
- Turn Off Power: Locate the circuit breaker that controls the garage lighting and turn off the power completely to prevent any electrical accidents.
- Remove Old Bulb: Carefully unscrew and remove any existing light bulb from the ceiling fixture. Allow the old bulb to cool if it has been on recently.
- Screw in New Fixture: Gently screw the base of the new multi directional LED light fixture into the existing light socket. Turn it clockwise until it is snug, but do not overtighten.
- Restore Power: Return to the circuit breaker and restore power to the garage lighting.
- Adjust Panels: Once the light turns on, adjust the individual LED panels by hand, angling them to direct light to your work areas, shelves, or any dark corners of the garage.
33. Wall Mounted Garage Safety Station
Item Name: Centralized First Aid and Fire Safety Board

Safety should always be a top concern in any workspace, and a dedicated safety station provides immediate access to critical emergency supplies. This vibrant red board prominently displays a fire extinguisher, protective gloves, safety goggles, and a well stocked first aid kit. Mounting these items in a single, highly visible location ensures that in an emergency, there is no frantic search for crucial gear.
Having a fire extinguisher readily available is an absolute must for any garage, given the presence of flammable liquids and power tools. The organized hanging of safety glasses and gloves encourages their regular use for various tasks. This station not only contributes to a tidy garage but, more importantly, enhances the overall safety and preparedness of your home.
Required Material List
- Plywood or sturdy plastic board (for the back panel, preferably red)
- Fire extinguisher
- First aid kit
- Safety goggles
- Work gloves
- Various hooks and clips (to hang items securely)
- Mounting screws (for the board)
- Drill and level
- Label maker or stencils for “Safety Station” text
DIY Instruction Steps
- Prepare the Back Panel: Cut the plywood or plastic board to the desired size. Paint it a bright, highly visible color like red. Stencil or label “Safety Station” at the top.
- Layout Components: Arrange the fire extinguisher, first aid kit, goggles, and gloves on the board to determine the best placement for each item. Ensure everything is easily accessible.
- Attach Hangers: Secure specialized hooks or mounting brackets for the fire extinguisher and first aid kit to the board. Use smaller hooks or clips for the goggles and gloves.
- Mount the Safety Station: Choose a prominent, easily accessible wall location in the garage, away from potential fire hazards. Locate wall studs and mount the entire safety station board securely to the wall using screws and a level.
- Stock and Maintain: Place the fire extinguisher, first aid kit, and protective gear onto their designated hooks. Periodically check the first aid kit for expired items and the fire extinguisher’s gauge for pressure.
34. Under Cabinet Paper Towel Dispenser
Item Name: Convenient Under Shelf Shop Towel Holder

Spills and messes are an inevitable part of garage work, making quick access to cleaning supplies essential. This simple under cabinet paper towel dispenser keeps a roll of shop towels conveniently within reach, yet off the workbench surface. Mounting it to the underside of a shelf or cabinet frees up valuable countertop space, ensuring your cleaning wipes are always available when a mishap occurs.
The durable plastic or metal holder is designed for robust blue shop towels, which are much more absorbent and tear resistant than regular paper towels. This small but mighty organization hack prevents rolls from getting dirty, lost, or wet. Having this staple item instantly accessible makes cleaning up faster and helps maintain a tidier workspace overall.
Required Material List
- Under cabinet paper towel dispenser (plastic or metal)
- Mounting screws (usually included)
- Drill and appropriate bit
- Blue shop towel roll
DIY Instruction Steps
- Choose Mounting Spot: Select a spot on the underside of an existing garage cabinet or shelf. Ensure the spot is convenient for access but out of the way of your main work area.
- Mark and Drill: Hold the dispenser in place. Use a pencil to mark the locations for the mounting screws. Drill pilot holes slightly smaller than the screws.
- Mount the Dispenser: Securely attach the paper towel dispenser to the underside of the cabinet or shelf using the mounting screws. Ensure it is firmly attached and cannot wobble.
- Load the Roll: Slide a fresh roll of blue shop towels onto the dispenser rod. Tear off a test sheet to ensure smooth operation.
35. Interlocking Garage Floor Tiles
Item Name: Durable Modular Garage Flooring

For those looking to truly elevate their garage’s appearance and functionality, interlocking floor tiles offer a fantastic solution. These durable, often perforated tiles snap together easily, creating a resilient and visually appealing surface that is far superior to bare concrete. The checkerboard pattern shown here adds a stylish, custom look, making the garage feel more like an extension of the home rather than a simple storage area.
Beyond aesthetics, these tiles provide a comfortable cushion underfoot, reduce dust, and protect the concrete slab from stains and damage. Their modular nature means you can replace individual tiles if they become damaged. Investing in a quality floor covering like this completely transforms the garage, encouraging better organization and making it a more inviting space for hobbies and projects.
Required Material List
- Interlocking garage floor tiles (sufficient quantity to cover your garage floor area)
- Rubber mallet
- Utility knife or jigsaw (for cutting tiles to fit edges)
- Measuring tape and straightedge
DIY Instruction Steps
- Clear and Clean Floor: Remove all items from the garage floor. Sweep and clean the concrete thoroughly. Ensure the floor is dry and free of debris.
- Plan the Layout: Determine a starting point, usually from the back wall or a prominent doorway. Consider how the pattern will lay out across the floor.
- Start Laying Tiles: Begin laying the first row of tiles, snapping them together along the connecting edges. Use a rubber mallet to gently tap the tiles into place, ensuring a secure fit.
- Cut to Fit: As you approach walls or obstacles, use a utility knife (score and snap) or a jigsaw to cut the tiles to the required size and shape. Wear appropriate safety glasses during cutting.
- Complete Installation: Continue laying and cutting tiles until the entire garage floor is covered. Ensure all edges are neatly trimmed and all tiles are securely interlocked.
- Add Edging (Optional): Many tile systems offer ramped edge pieces for a clean transition from the garage door. Install these if desired.
36. Hallway Wall Mounted Organizer
Item Name: Entryway Key and Accessory Rack

While not strictly a garage item, an entryway wall organizer can significantly reduce the clutter that migrates into the garage. This sleek, modern unit provides a dedicated spot for keys, mail, hats, scarves, and other daily essentials right inside the door. By giving these items a proper home before they reach the garage or kitchen counter, you prevent immediate disorganization in other areas. The clean white board with metal hooks and a small shelf offers both practicality and a touch of style.
This hack emphasizes the importance of having a functional drop zone. When you can immediately hang up your keys, set down your mail, or store a tablet, you are less likely to leave items in random places. It is a subtle but highly effective way to manage the everyday items that often contribute to overall household mess.
Required Material List
- Wall mounted entryway organizer unit (purchased, with hooks and shelves)
- Mounting screws
- Drill and level
- Pencil
DIY Instruction Steps
- Select Location: Choose a prominent wall in a hallway or entryway, preferably near the door you use most frequently.
- Mark and Level: Hold the organizer unit against the wall at the desired height. Use a level to ensure it is perfectly straight. Mark the precise locations for the mounting screws.
- Drill Pilot Holes: Drill pilot holes through the wall at the marked locations. If mounting into drywall without a stud, use appropriate wall anchors.
- Secure the Organizer: Attach the organizer unit firmly to the wall using the mounting screws. Double check that it is stable.
- Organize Essentials: Hang keys, hats, and scarves on the hooks. Place mail, notepads, or small decorative items on the shelves.
37. A-Frame Paint Can Storage Shelf
Item Name: DIY Wooden Paint Storage Rack

Paint cans are bulky and always seem to be scattered, making it hard to find the right color. This clever A-frame shelf unit provides a unique and highly organized way to store dozens of paint cans, both large and small. The tiered design keeps every can visible and easily accessible, preventing you from buying duplicate colors. Built from simple wood, this rack provides both strong support and a charming, rustic aesthetic.
The angled shelves ensure the cans sit securely without rolling off, maximizing the storage capacity in a compact footprint. Placing it against a wall in a dedicated workshop area makes all your painting supplies readily available. This DIY project is a functional and visually appealing solution for anyone who keeps a varied collection of paints and finishes.
Required Material List
- Dimensional lumber (2×4 or 1×4 for the A-frame legs and shelf supports)
- Plywood or 1x material (for the shelves)
- Wood glue
- Wood screws
- Miter saw or hand saw (for angled cuts)
- Drill and measuring tape
DIY Instruction Steps
- Cut A-Frame Legs: Cut four long pieces of dimensional lumber for the main A-frame legs. Decide on the angle you want the “A” to sit at (usually around 15-20 degrees from vertical at the top). Use a miter saw to cut corresponding angles on the ends that will meet at the top.
- Assemble the A-Frames: Join two leg pieces at the top using wood glue and screws, forming one “A.” Repeat for the second “A.”
- Add Cross Braces: Cut smaller pieces of lumber to act as horizontal cross braces, connecting the two A-frames at various points to create shelf supports. These braces also ensure the structure is stable. Secure them with wood glue and screws.
- Cut and Install Shelves: Measure the length and depth for your shelves to fit between the A-frames. Cut plywood or 1x material to these dimensions. Space the shelves vertically to accommodate different can heights. Secure the shelves to the cross braces using wood glue and screws.
- Load Paint Cans: Place your paint cans onto the new shelves, organizing them by color, type, or project. Enjoy the instant visibility and order.
38. Wall Mounted Trash Bag Dispenser
Item Name: Convenient Roll Dispenser for Garbage Bags

No organized garage is complete without a tidy solution for waste management, and this wall mounted trash bag dispenser is a simple yet effective hack. Instead of fumbling with rolls of bags, this unit keeps them neatly contained and allows you to pull one out effortlessly, just like paper towels. Mounting it near your main trash bin or workbench ensures that new bags are always within immediate reach when the old one is full.
The dispenser keeps the rolls protected from dirt, dust, and moisture, ensuring they are clean and ready for use. This small organizational detail contributes significantly to overall tidiness and workflow efficiency. It is a quick, inexpensive upgrade that eliminates a minor but frequent point of frustration in any busy garage.
Required Material List
- Wall mounted trash bag dispenser (purchased unit)
- Mounting screws (usually included)
- Drill and appropriate bit
- Roll of trash bags
DIY Instruction Steps
- Choose Location: Select a convenient wall location, ideally close to your main garage trash can or a frequently used workspace.
- Mark and Drill: Hold the dispenser in place. Use a pencil to mark the locations for the mounting screws. Drill pilot holes slightly smaller than the screws.
- Mount the Dispenser: Securely attach the trash bag dispenser to the wall using the mounting screws. Ensure it is firmly attached and cannot wobble.
- Load the Roll: Slide a fresh roll of trash bags onto the dispenser rod or insert it into the designated slot. Pull out the first bag to ensure smooth dispensing.
You have just unlocked the blueprint for transforming your chaotic garage into a model of efficiency and organization. Implementing these 38 genius storage hacks is far more than just tidying up. It is about creating a safer, more productive, and genuinely pleasant workspace.
Remember that lasting organization relies on dedicating a specific home for every single item. Focus on maximizing vertical space with shelving, pegboards, and overhead racks. Adopt a system of clear, labeled containers and commit to the “put it away right now” rule.
By taking on just a few of these projects this weekend, you can say goodbye to the embarrassment of a cluttered space. Start small with simple solutions like cord hangers or a ball caddy, then build up to larger projects like a mobile workbench or custom shelving. Get out there and create the organized garage you deserve!
???? Key Takeaways
- Go Vertical: Always look up! The most valuable, often overlooked space in your garage is on the walls and ceiling. Utilize racks, hoists, and tall shelving to clear the floor.
- Embrace Specialization: Generic bins lead to generic messes. Implement specialized solutions for awkward items like fishing rods, bicycles, long handled tools, and power tools.
- Label Everything: Uniform storage containers only work when they are clearly and accurately labeled. Use a label maker to immediately identify contents, saving time and preventing confusion.
- Manage the Hardware: Small parts like screws, nuts, and bolts are the biggest culprits of clutter. Use dedicated, modular wall bins or stackable transparent containers to keep every tiny piece organized.
- Protect Your Vehicle: Simple hacks like the tennis ball parking guide and foam wall bumpers prevent unnecessary damage, ensuring your garage functions safely as a parking spot first.