A modern glam living room is a testament to style and personality. It’s a space that combines sophisticated design with luxurious comfort, creating an atmosphere that is both inviting and impressive. This style is all about pairing sleek, contemporary lines with plush textures and shimmering metallic accents.

Transforming your living room into a glamorous haven doesn’t require a complete overhaul. Often, the magic lies in the details—the unique decorative pieces that catch the eye and tell a story. It’s about curating a space that reflects your own unique flair and creativity.
This collection of stunning ideas is designed to spark your imagination. Each concept is paired with a simple, step-by-step DIY project, empowering you to craft a living room that not only radiates elegance but is also deeply personal and uniquely yours. Get ready to explore a world of creative possibilities.
1. Embrace Whimsical Iridescence

Capture a touch of magic in your living room. This design draws inspiration from the shimmering, multi-tonal nature of fantasy. An accent wall with iridescent wallpaper can become a stunning focal point, changing its hue as the light shifts throughout the day. This creates a dynamic and captivating atmosphere in the space.
Introduce metallic elements to ground the look. Polished chrome legs on a coffee table or silver-threaded throw pillows add a sleek, contemporary edge. These reflective surfaces complement the iridescence, enhancing the room’s brightness. The result is a space that feels both enchanting and sophisticated, a true modern glam statement.
DIY “Trickster Fae” Decorative Accent Bottle
Materials You’ll Need:
- An empty, clear glass bottle with an interesting shape.
- A bottle stopper or decorative cap (crystal-style works well).
- Clear school glue or glycerin.
- Warm water.
- Various types of cosmetic-grade glitter: holographic, iridescent, and fine silver.
- A funnel.
- Strong adhesive or a hot glue gun.
Instructions:
- Prepare the Bottle: Start by cleaning your glass bottle thoroughly. Make sure it is completely dry inside and out before you begin.
- Create the Glitter Base: Fill the bottle about halfway with warm water using the funnel. Add clear glue or glycerin to the water. A good ratio is about one part glue/glycerin to three parts water. The more you add, the slower the glitter will fall.
- Add the Sparkle: Pour your different types of glitter into the bottle. Be generous to achieve a dense, shimmering effect. A mix of glitter sizes and shapes will add depth and visual interest.
- Seal and Shake: Secure the cap or stopper onto the bottle. If it’s not a tight fit, use a strong adhesive to seal it permanently. Shake the bottle well to mix the glitter with the liquid.
- Display Your Creation: Place your new decorative bottle on a bookshelf, side table, or mantelpiece. It will catch the light beautifully and serve as a unique piece of glam decor.
2. Weave in Natural Textures

Bring the outside in with a design that celebrates earthy elements. A living room can feel both glamorous and grounded by mixing natural textures with polished finishes. Consider a rich, velvet sofa in an emerald green, set against a backdrop of exposed brick or a subtle wood-paneled wall. This contrast is key.
Accessorize with pieces that have an organic feel. A live-edge wood coffee table or stone coasters can add a rustic touch. Then, introduce gold or brass accents through lighting fixtures and decorative objects. This blend of raw nature and refined metal creates a sophisticated yet comfortable living space.
DIY “Druid’s Earth Jug”
Materials You’ll Need:
- A ceramic or stoneware jug.
- Preserved moss and lichen.
- Small twigs, acorns, and dried leaves.
- Hot glue gun.
- Twine.
- Optional: Wood stain or paint for accents.
Instructions:
- Plan Your Design: Decide where you want to place the natural elements on your jug. Creating clusters of moss and twigs around the base and shoulder often looks appealing.
- Apply the Moss: Use the hot glue gun to carefully attach patches of preserved moss and lichen to the jug. Work in small sections, pressing the moss firmly onto the glue.
- Add Details: Glue the twigs, acorns, and dried leaves onto and around the moss patches. This adds dimension and a more authentic woodland look.
- Finishing Touches: Tie a piece of twine around the neck of the jug for a rustic detail. If you wish, you can use a small brush to add runes or symbols with wood stain or paint.
- Display: Place your jug on a mantelpiece or bookshelf as a unique, nature-inspired accent.
3. Decorate with Celestial Blues

Create a serene and dreamy living area using a celestial-inspired color palette. Soft blues, shimmering silvers, and gentle whites form the foundation of this look. Imagine a comfortable sofa in a light gray fabric, adorned with silver-threaded cushions. An area rug with a subtle starburst pattern can tie the room together.
The magic is in the details. Use accessories that sparkle and shine, like crystal candle holders or a mercury glass vase. A large, frameless mirror can amplify the light and add to the ethereal quality of the room. This approach results in a space that feels calm, enchanting, and incredibly chic.
DIY “Starlight Wish Bottle”
Materials You’ll Need:
- A clear glass bottle with a stopper.
- Light corn syrup or clear hair gel.
- Water.
- Fine silver glitter, iridescent glitter, and small star-shaped confetti.
- A silver moon charm and silver thread.
- A small paper tag and a pen.
Instructions:
- Create the Suspension Liquid: Fill the bottle about two-thirds full with a mixture of corn syrup (or hair gel) and water. A 50/50 ratio works well. The syrup helps the glitter and stars float slowly.
- Add the Celestial Elements: Add a generous amount of your glitters and star confetti to the bottle.
- Secure and Mix: Place the stopper on the bottle, ensuring it’s secure. Gently tilt and turn the bottle to mix the contents until the glitter swirls beautifully.
- Add the Charm: Write a small wish or quote on the paper tag. Tie the tag and the moon charm around the neck of the bottle using the silver thread.
- Display: Your celestial wish bottle is ready to add a touch of magic to your decor.
4. Incorporate Timeless Wood Tones

Achieve a look of refined elegance by grounding your living room with rich, dark wood. A classic wooden bookshelf or a statement media console in a deep walnut finish can serve as an anchor for the space. These timeless pieces provide a sense of history and stability, forming a sophisticated base.
Contrast the dark wood with soft, light-colored upholstery. A sofa in cream or beige creates a beautiful balance and prevents the room from feeling too heavy. Introduce warmth and glamour with brushed gold or brass accents. Picture frames, lamps, and small decorative objects in these metals will catch the light and add a luxurious finish.
DIY “Celestial Timekeeper Hourglass”
Materials You’ll Need:
- A simple, inexpensive hourglass.
- Dark wood stain.
- Metallic gold paint and a fine-tipped brush.
- A small, engravable brass plate (optional).
- Fine-grit sandpaper.
Instructions:
- Prepare the Wood: If your hourglass has a wooden frame, lightly sand it to prepare the surface. Wipe away any dust.
- Stain the Frame: Apply the dark wood stain to the frame according to the product’s instructions. Let it dry completely. This will give it a richer, more classic appearance.
- Add Celestial Accents: Use the fine-tipped brush and metallic gold paint to carefully paint small moon phases or star symbols onto the wooden frame.
- Personalize (Optional): If you have a brass plate, you can have it engraved with a meaningful word or date and then affix it to the base of the hourglass.
- Display: Your upgraded hourglass now serves as a stylish and symbolic piece of decor.
5. Play with Poetic Duality

Design a living room that thrives on compelling contrast. The duality of light and dark, or warm and cool, can create a visually dynamic and balanced space. Consider painting one accent wall in a deep navy blue and keeping the others a crisp white. This provides a dramatic backdrop for your decor.
Choose furniture and accessories that continue this theme. A light-colored sofa can be accented with dark blue throw pillows. A gold-framed mirror against the navy wall will pop beautifully. This interplay of opposites creates a sophisticated and harmonious environment that feels both bold and intentional.
DIY “Sun and Moon Elixir Bottles”
Materials You’ll Need:
- Two clear glass bottles (crescent moon shape if possible, otherwise any unique shape).
- Yellow and blue food coloring.
- Baby oil or mineral oil.
- Gold and silver glitter.
- Gold and silver metallic paint pens or vinyl decals for the sun and moon designs.
- Corks, twine, and small sun and moon charms.
Instructions:
- Design the Bottles: Using paint pens or vinyl decals, draw a sun design on one bottle and a moon on the other. Let it dry completely.
- Create the “Sol” Elixir: Fill the sun bottle with oil. Add a few drops of yellow food coloring and some gold glitter. Stir gently until you achieve the desired color.
- Create the “Luna” Elixir: Fill the moon bottle with oil. Add a few drops of blue food coloring and a generous amount of silver glitter.
- Seal and Decorate: Place the corks in the bottles. Tie the corresponding sun and moon charms around the necks of the bottles with twine.
- Display Together: Arrange the two bottles together on a shelf to showcase their beautiful contrast.
6. Curate a Gothic Glam Vibe

Embrace drama with a living room that blends moody gothic influences with sleek modern glamour. Start with a statement piece, like a black velvet sofa with elegant, clean lines. This sets a luxurious and daring tone for the entire space.
Use metallics to cut through the darkness and add light. Polished chrome or silver are excellent choices for this style. Think of a geometric chrome coffee table or a large, ornate silver mirror. Introduce texture with a faux fur rug or damask-print cushions to add depth and prevent the space from feeling flat.
DIY “Arachne’s Silk” Perfume Atomizer
Materials You’ll Need:
- An old or inexpensive perfume bottle, preferably with an interesting shape.
- Stretchy fake spider web material.
- A small, silver spider charm.
- A small silver chain.
- Hot glue or strong craft adhesive.
Instructions:
- Clean the Bottle: Make sure the exterior of the perfume bottle is clean and dry.
- Apply the Webbing: Carefully stretch the fake spider web material over the bottle. You don’t need much; a little goes a long way. Pull it thin in some areas and let it bunch in others for a natural look.
- Secure the Web: Use tiny dabs of hot glue in inconspicuous places (like the bottom or back) to secure the webbing so it doesn’t shift.
- Add the Charm: Attach the spider charm to the small silver chain. Drape the chain around the neck of the bottle, securing it with a dot of glue if necessary. Position the spider so it appears to be crawling on the web.
- Display: This gothic-chic accent piece is now ready to add a touch of mystery to your decor.
7. Cultivate a Mystical Ambiance

Create a cozy and enchanting living room with a focus on soft, layered lighting. A moody wall color like charcoal or deep indigo provides the good canvas. The key is to avoid harsh overhead lights and instead use multiple, smaller light sources to build a warm atmosphere.
Place fairy lights inside large glass jars or lanterns. Use dimmable floor lamps to cast a soft glow in the corners of the room. Plush textures are also important. A chunky knit blanket draped over the sofa and soft, velvet cushions invite you to relax. This combination of dim light and soft textiles makes for a truly magical retreat.
DIY “Misty Hollow Lantern”
Materials You’ll Need:
- A large, clear glass jug or jar.
- Polyester fiber fill (pillow stuffing).
- A string of battery-powered warm white or amber fairy lights.
- A stick or dowel to help position the filling.
- Optional: A decorative, vintage-style label.
Instructions:
- Start the Layers: Begin by gently pulling apart the polyester fiber fill to make it look light and cloud-like. Place a small layer at the bottom of the jar.
- Add Lights: Unwind your fairy light string and place a portion of it on top of the first layer of filling. Keep the battery pack outside the jar.
- Build Up: Continue adding alternating layers of fiber fill and lights. Use the stick to push the filling and lights into place, creating the look of glowing clouds.
- Finishing Touches: Arrange the top layer so it looks fluffy. If you’re using a label, apply it to the front of the jar. Conceal the battery pack behind the jar or under a decorative cloth.
- Light it Up: Turn on the lights to create a warm, mystical glow.
8. Design with Cosmic Elegance

Transform your living room into a celestial sanctuary. A dark and dramatic accent wall, painted in a deep midnight blue or black, mimics the vastness of the night sky. This provides a stunning backdrop for metallic decor that will shine like distant stars.
Choose a sofa in a rich jewel tone—sapphire blue, amethyst purple, or emerald green—to add a layer of luxury. Accessorize with celestial-themed items. Pillows with constellation embroidery, a starburst mirror, or a rug with a subtle galaxy print all contribute to the theme. Keep the lighting soft and ambient to enhance the cosmic, otherworldly feel.
DIY “Eternal Night” Constellation Lamp
Materials You’ll Need:
- A dark-colored glass bottle (wine bottles work well).
- A battery-operated “cork” fairy light string.
- Silver or white permanent paint pens (fine and medium tip).
- Optional: Stencils for constellations.
Instructions:
- Clean the Bottle: Ensure the bottle is clean and completely dry.
- Draw the Stars: Use the fine-tipped paint pen to dot small stars all over the bottle. Vary their size and spacing to look like a natural night sky.
- Create Constellations: Either freehand or using a stencil, draw a few prominent constellations on the bottle. Use the medium-tip pen to connect the dots and make the main stars of the constellation slightly larger.
- Let it Dry: Allow the paint to dry completely according to the pen’s instructions.
- Insert the Light: Feed the fairy light string into the bottle and push the cork part into the opening. The battery and switch will be housed in the cork.
- Illuminate: Turn on the light to see your constellation lamp glow from within.
9. Mix in Sophisticated Whimsy

Create a living room that feels both classic and playfully intriguing. Start with a timeless furniture piece, like a traditional tufted sofa, as your anchor. The “whimsy” comes from the unique and unexpected accessories you choose to display.
Curate a collection of curiosities on floating shelves or in a display cabinet. Think vintage-style apothecary bottles, stacks of old hardcover books, and other interesting objects. A classic color scheme of black, cream, and rich browns allows these quirky items to stand out. Brass or antique gold accents will add a final touch of polished charm.
DIY “Veritaserum” Replica Bottle
Materials You’ll Need:
- A clear glass apothecary bottle with a stopper.
- Water.
- A printable vintage-style warning label (you can design one or find templates online).
- A printer and paper.
- A tea bag and a lighter or matches.
- Mod Podge or craft glue.
Instructions:
- Age the Label: Print your designed label. Brew a strong cup of tea and let it cool slightly. Dab the tea bag all over the paper to stain it, giving it an aged look. Let it dry.
- Distress the Edges: Carefully and safely singe the edges of the dried label with a lighter or match for a more authentic, distressed appearance. Do this over a sink for safety.
- Apply the Label: Coat the back of the label with Mod Podge or glue and carefully affix it to the front of your bottle, smoothing out any air bubbles.
- Fill the Bottle: Fill the bottle with plain water. The clear liquid adds to the “truth serum” effect. Place the stopper on top.
- Display: Your bottle is now a clever and whimsical accessory for a bookshelf or side table.
10. Go for Galactic Glam

Make a bold statement with a living room inspired by the vibrant colors of a cosmic nebula. This design is all about rich hues and dramatic flair. Use a color palette of deep purples, inky blues, and black, accented with bright pinks and shimmering silver.
Choose furniture with modern, sculptural shapes. A curved sofa in a luxurious purple velvet, for instance, can become the room’s centerpiece. Lighting is essential for this look; consider a modern sputnik chandelier or hidden LED strips to cast an otherworldly glow. A large piece of abstract art that resembles a galaxy will complete this dramatic and glamorous space.
DIY “Cosmic Drip” Orb
Materials You’ll Need:
- A clear, spherical glass vase or bottle.
- Purple, blue, and black acrylic paint.
- Clear glitter paint or fine iridescent glitter.
- A battery-powered LED light base or puck light.
- An ornate stand or base.
Instructions:
- Paint the Galaxy: Pour small amounts of the blue and purple paint inside the vase. Swirl the vase around to let the paints mix and coat the interior, creating a nebula effect. Don’t cover it completely; leave some clear spots.
- Add Stars: While the paint is still wet, add a coat of clear glitter paint or sprinkle in fine iridescent glitter. Swirl it again to distribute the “stars.” Let the inside dry.
- Create the Drip Effect: Turn the vase upside down. Squeeze a generous amount of black paint around the top (which is now the bottom). Allow it to drip down the sides naturally. Let this dry completely.
- Assemble: Place the finished orb on its ornate stand. Put the LED light inside or place the orb on top of an LED base.
- Light it Up: Turn on the light to illuminate your cosmic creation from within, revealing the galaxy inside.
11. Illuminate with Rustic Charm

Combine the raw appeal of industrial design with the soft warmth of rustic decor. A metal lantern can be a striking centerpiece in a living room, especially when filled with a gentle, modern light source. This look is about balancing hard and soft elements.
Pair the lantern with comfortable, plush furniture. A deep-seated linen sofa and a soft, high-pile rug can create an inviting atmosphere. Use natural wood tones in your coffee table and side tables to complement the rustic feel. The cool glow from the lantern against these warm textures results in a space that is both stylish and cozy.
DIY “Enchanted Swamp Lantern”
Materials You’ll Need:
- A vintage-style metal and glass lantern.
- A string of cool blue or green battery-powered fairy lights.
- Preserved moss and spanish moss.
- Hot glue gun.
Instructions:
- Prepare the Lantern: Clean the lantern, especially the inside of the glass.
- Create a Mossy Base: Place a layer of preserved moss at the bottom of the lantern, around the area where the light source will sit.
- Add the Lights: Bunch the fairy light string into a loose ball and place it in the center of the lantern, on top of the moss. Ensure the battery pack is accessible.
- Drape with Spanish Moss: Use a hot glue gun to attach wisps of spanish moss to the exterior of the lantern, letting it hang down for a swampy, aged effect.
- Display: Place your lantern on a side table or hearth to cast an enchanting, cool-toned glow.
12. Introduce Exotic Glamour

Inject a sense of daring and luxury into your living space with decor that hints at the mysterious. A color palette of emerald green, black, and gold sets a sophisticated and exotic tone. This combination feels both opulent and a little dangerous.
Incorporate animal-inspired motifs in a subtle, stylish way. A snakeskin-patterned tray on an ottoman or a pair of leopard-print cushions can add the right amount of wildness. Choose furniture with sleek, modern lines to keep the look contemporary. Gold accents in lighting and table legs will tie everything together, creating a chic and adventurous room.
DIY “Serpent’s Elixir” Bottle
Materials You’ll Need:
- A uniquely shaped glass bottle.
- Black, green, and gold polymer clay.
- A clay sculpting tool or craft knife.
- Bake-according-to-package-directions oven.
- Black and green acrylic paint and a fine brush.
- Glossy sealant.
Instructions:
- Sculpt the Snake: Condition the polymer clay by kneading it. Roll out a long rope of black clay for the snake’s body. Wrap it around the bottle in a realistic coil.
- Add Details: Use small pieces of green and gold clay to create a pattern on the snake’s back. Sculpt a head and add tiny red eyes if desired.
- Bake the Bottle: Place the bottle with the clay on it in the oven and bake according to the clay package’s instructions. Let it cool completely.
- Paint and Seal: Use acrylic paints to add extra detail and depth to the snake. Once dry, apply a coat of glossy sealant over the clay to give it a polished, wet look.
- Display: This dramatic art piece will be a commanding presence on any shelf.
13. Embrace Modern Vampire Chic

Design a living room that is both dark and romantic, blending classic gothic elements with a modern, minimalist edge. A deep crimson or burgundy accent wall creates a rich, dramatic backdrop. Pair this with sleek, black leather furniture for a sharp, contemporary feel.
Use silver and crystal to add a touch of glamour and light. A crystal decanter on a silver tray, or a modern silver-framed mirror, can reflect light and add sparkle to the moody space. The key is the contrast between the lush, velvety colors and the cool, hard shine of the metallic and glass accents.
DIY “Vampire’s Vintage” Decanter
Materials You’ll Need:
- A clear glass decanter, preferably with a cut-glass pattern.
- A silver-tone chain.
- An ornate silver-plated frame charm or pendant.
- Strong craft adhesive (like E6000).
- Red food coloring and water (optional).
Instructions:
- Prepare the Decanter: Make sure the decanter is clean and dry.
- Attach the Charm: Apply a thin layer of strong adhesive to the back of the silver frame charm. Press it firmly onto the front of the decanter.
- Drape the Chain: Measure the chain to fit around the neck of the decanter. Secure the ends of the chain at the back with a drop of adhesive.
- Optional Filling: For a dramatic effect, fill the decanter with water and add a few drops of red food coloring to mimic a dark beverage.
- Display: Place your elegant decanter on a bar cart or side table for a touch of gothic sophistication.
14. Decorate with a Haunting Touch

Create a space that feels artistic and slightly surreal with transparent and ethereal decor. This style works well in a minimalist living room with a neutral color palette of grays, whites, and soft blacks. The focus is on unique, statement pieces that spark conversation.
Incorporate glass and acrylic furniture, like a “ghost” chair or a waterfall coffee table, to maintain a light, airy feel. The true artistry comes from hand-painted accessories. A decorative bottle with ghostly figures or a custom piece of abstract art can add a personal and hauntingly beautiful touch to the room’s decor.
DIY “Captured Spirits” Bottle
Materials You’ll Need:
- An interesting clear glass bottle (a twisted shape is a great choice).
- White, gray, and black glass paint.
- A very fine-tipped paintbrush.
- Rubbing alcohol.
Instructions:
- Clean the Surface: Wipe the inside of the bottle with rubbing alcohol to ensure the paint adheres well. Let it dry.
- Paint the Ghosts: Working from the inside of the bottle, use the fine-tipped brush to paint simple, flowing ghost shapes with the white paint. Don’t worry about making them solid; a translucent look is better.
- Add Shadows and Faces: Once the white paint is dry, use the gray and black paint to add simple, expressive faces (like open mouths and eyes). Use the gray to add a little shading on one side of each ghost to give them depth.
- Let it Cure: Allow the paint to cure completely, following the paint manufacturer’s instructions. Some glass paints need to be baked to become permanent.
- Display: Place the bottle where light can shine through it, highlighting the trapped spirits inside.
15. Infuse with Romantic Hues

Craft a living room that feels soft, romantic, and utterly glamorous. A color scheme of blush pink, rose gold, and creamy whites creates a warm and inviting atmosphere. The key is to layer different textures within this soft palette to create visual interest.
Choose a comfortable sofa in a light-colored fabric and adorn it with plush pink velvet and faux fur cushions. A rose gold coffee table or floor lamp adds a modern, metallic touch. The finishing element is opalescent decor; vases, candle holders, or decorative objects with a pearly, iridescent finish will catch the light beautifully and add a touch of magic.
DIY “Love Potion” Bottle
Materials You’ll Need:
- A heart-shaped glass bottle.
- Pearlescent or color-shifting craft paint (in pink or white).
- A small sponge brush.
- A pink satin ribbon.
- A small, silk rose.
- A hot glue gun.
- A printable label with a fancy script font.
Instructions:
- Paint the Bottle: Pour a small amount of the pearlescent paint inside the bottle. Swirl it around to coat the entire interior. This gives it a magical, glowing look from the outside while keeping the surface smooth. Let it dry completely.
- Add the Label: Print and cut out your label. Use a thin layer of craft glue to apply it to the front of the bottle.
- Decorate the Neck: Tie the pink satin ribbon into a bow around the neck of the bottle.
- Add the Rose: Use a small dot of hot glue to attach the silk rose to the center of the bow.
- Display: This romantic bottle is a lovely accent for a vanity, bookshelf, or side table.
16. Unleash a Mythical Vibe

Design a living room that is bold, powerful, and full of mythical energy. A dark, moody color scheme of charcoal gray, black, and fiery red sets the stage. This creates a dramatic canvas for unique, textured decor pieces.
Introduce a tactile element with a “dragon scale” accent wall using 3D wall panels. Alternatively, bring in this texture through smaller items like throw pillows or a decorative box. Use warm, dimmable lighting to create a cave-like, intimate feel. A faux leather armchair and a dark wood coffee table complete this powerful and imaginative look.
DIY “Dragon’s Breath” Bottle
Materials You’ll Need:
- A glass bottle with a swing-top lid.
- A hot glue gun (with plenty of glue sticks).
- Black, gray, and red acrylic paint.
- Metallic wax paste (in silver or bronze).
- A small piece of leather or faux leather and twine.
Instructions:
- Create the Scales: Starting from the bottom of the bottle, use the hot glue gun to create overlapping, U-shaped “scales.” Work your way up, covering about half the bottle.
- Paint the Base: Once the glue is completely cool, paint the entire scaled section with black acrylic paint. Let it dry.
- Add Dimension: Dry-brush the gray paint over the scales to highlight their edges and create depth.
- Highlight with Wax: Rub a small amount of the metallic wax paste over the raised parts of the scales to give them a metallic sheen.
- Finishing Touches: Paint the top half of the bottle with swirling red and orange paints to look like fire. Create a small leather tag, burn a dragon symbol onto it if you can, and tie it to the bottle’s neck.
17. Dive into Nautical Wonders

Create a living room that captures the mystery and beauty of the deep sea. Use a color palette of deep ocean blues, sandy beiges, and hints of coral. An accent wall in a rich navy or teal can make the space feel like an underwater grotto.
Incorporate natural textures like rope, driftwood, and seashells in your decor. A large glass bottle filled with sand and shells, or a coffee table with a driftwood base, can serve as a focal point. Use soft, ambient lighting to mimic the filtered light of the ocean depths. A comfortable, light-colored sofa keeps the space from feeling too dark and heavy.
DIY “Message from the Deep” Ocean Bottle
Materials You’ll Need:
- A large, clear glass bottle.
- Craft sand.
- Tiny seashells and pebbles.
- Blue and clear epoxy resin.
- Miniature glow-in-the-dark sea creatures.
- Jute twine and a small anchor charm.
Instructions:
- Create the Seafloor: Pour a layer of craft sand into the bottom of the bottle. Arrange the tiny seashells, pebbles, and a few of the sea creatures on the sand.
- Pour the First Layer: Mix a small batch of clear epoxy resin according to the package directions. Pour it carefully over the sand to secure everything in place. Let it cure.
- Add the Ocean: Mix another batch of resin, this time adding a few drops of blue dye to create a translucent ocean color. Pour this into the bottle.
- Add More Creatures: While the blue resin is still liquid, drop in the rest of your glow-in-the-dark sea creatures so they appear to be floating. Let it fully cure.
- Decorate the Exterior: Wrap jute twine around the neck of the bottle and attach the anchor charm.
18. Build a Cabinet of Curiosities

Evoke the feeling of a well-traveled adventurer’s study in your living room. This look is about curated collections and rich, warm textures. Dark wood bookshelves and a comfortable leather armchair are foundational pieces for this style.
Fill the shelves with an eclectic mix of objects. Small, labeled apothecary jars, stacks of vintage books, interesting rocks or fossils, and old maps create a sense of history and intrigue. Use warm lighting from a classic table lamp to highlight your collections. This style tells a story and makes a space feel deeply personal and interesting.
DIY “Adventurer’s Apothecary” Jars
Materials You’ll Need:
- Several small glass jars and bottles with corks.
- Tea or coffee for staining.
- Printable label paper or parchment paper.
- Twine.
- Various “ingredients” (e.g., small pebbles for “dragon’s teeth,” herbs for “gillyweed,” glitter for “pixie dust”).
Instructions:
- Age the Labels: Design and print small, vintage-style labels for your ingredients. Stain the labels by dabbing them with a wet tea bag or coffee. Let them dry, and singe the edges for an older look.
- Fill the Jars: Fill each jar with a different “magical” ingredient.
- Apply Labels: Glue the aged labels onto the front of each jar.
- Finishing Touches: Wrap twine around the neck of the jars or use wax to seal the corks for a more authentic look.
- Group and Display: Arrange your collection of apothecary jars together on a shelf or in a small crate.
19. Capture a Woodland Miniature

Bring the charm of a forest floor into your home with tiny, detailed decor. This style works beautifully on a floating shelf or mantelpiece in a living room with a natural, organic theme. It’s about appreciating the small, beautiful details of nature.
Complement these miniature worlds with other natural elements. A potted fern, a stack of books on botany, or a framed print of a forest scene can enhance the theme. Keep the color palette earthy, with lots of greens, browns, and creams. This creates a calm, peaceful environment that celebrates the quiet beauty of the woods.
DIY “Fairy Terrarium” Acorn Jar
Materials You’ll Need:
- A small, round glass jar.
- A real acorn cap that fits the opening of the jar.
- Preserved moss.
- A tiny, artificial flower or mushroom.
- Clear epoxy resin.
- Glitter (optional).
- Hot glue gun.
Instructions:
- Create the Scene: Place a small piece of preserved moss at the bottom of the jar. Glue the tiny flower or mushroom onto the moss.
- Add Resin: Mix the clear epoxy resin according to the directions. If you like, stir in a tiny bit of glitter for a magical sparkle.
- Pour Carefully: Slowly pour the resin into the jar until it covers the moss and flower, creating the illusion that they are preserved in water. Let it cure completely.
- Make the Lid: Use hot glue to attach the acorn cap to the jar’s original lid or cork to create a natural-looking top.
- Display: This tiny piece of woodland magic is a charming addition to any small space.
20. Style with Alchemical Accents

Create a living room that feels both historic and mystical, inspired by the workshops of ancient alchemists. Use a mix of materials like dark wood, aged leather, and tarnished brass. A large, dark-wood bookshelf or cabinet is the good place to display your collection of unique objects.
Accessorize with an assortment of small, decorative bottles, brass scales, and old books. The key is to group these items together to create interesting vignettes. A comfortable, worn-leather armchair and a soft, patterned rug will make the space feel cozy and lived-in, like a true scholar’s retreat.
DIY “Traveling Alchemist’s” Potion Holder
Materials You’ll Need:
- A strip of brown faux leather.
- Three small glass vials with corks.
- A snap button kit.
- Strong craft glue or a leather punch and rivets.
- Scissors and a ruler.
Instructions:
- Cut the Leather: Cut a main vertical strip of leather for the holder’s spine. Then, cut three smaller strips that are long enough to wrap around the vials.
- Create the Loops: Form a loop with each of the smaller strips, making sure it holds a vial snugly. Glue or rivet the ends of the loops to the main leather spine, spacing them out.
- Add the Top Strap: Cut another small strip of leather. Attach one part of a snap button to the end of this strip. Glue or rivet the other end of the strip to the top of the main spine, creating a loop to hang the holder.
- Secure the Vials: Place your decorative vials into the loops.
- Display: Hang your completed potion holder from a hook on a bookshelf or as part of a larger display.
21. Channel an Antique Apothecary

Give your living room a touch of historical intrigue with decor inspired by old-world pharmacies. This style leans on dark woods, aged paper tones, and amber glass. A vintage-style wooden cabinet or a set of deep-set floating shelves can serve as the main display area for your collection.
The beauty is in the authentic details. Display amber bottles with distressed labels alongside old books and dried herbs. Use warm, low lighting from a banker’s lamp or an Edison bulb fixture to create a cozy, scholarly atmosphere. This look adds a layer of sophisticated, old-fashioned charm to any space.
DIY “Plague Doctor’s” Remedy Bottle
Materials You’ll Need:
- An amber or dark glass bottle.
- A cork.
- Black sealing wax.
- Dried herbs (like rosemary or thyme).
- Craft glue.
- A printable vintage apothecary label.
- A tea bag for aging the label.
Instructions:
- Age the Label: Print your label and stain it with a damp tea bag. Let it dry, then carefully singe the edges for an authentic look. Glue it to the bottle.
- Add Herbal Details: Apply a thick band of craft glue around the neck of the bottle, just below the rim. Press the dried herbs firmly into the glue.
- Seal the Bottle: Push the cork into the bottle. Melt the black sealing wax and carefully drip it over the cork and down onto the herbs, creating a secure, dripping seal.
- Display: Your historic-looking remedy bottle is ready to be added to your cabinet of curiosities.
22. Incorporate Playful Gothic Touches

For a modern glam look with a hint of fun, mix sleek black elements with a pop of vibrant color. A matte black accent wall or a black lacquered coffee table can provide a strong, contemporary base. This creates a dramatic backdrop that makes other colors stand out.
Don’t be afraid to add a whimsical, graphic element. A piece of pop art, a brightly colored velvet cushion, or a uniquely shaped decorative vase in a bold hue like emerald green can add personality. This blend of sophisticated black and playful color results in a living room that is both chic and full of character.
DIY “Cheshire Cat” Candy Jar
Materials You’ll Need:
- A round glass or ceramic jar, preferably black.
- Green and white acrylic paint suitable for glass.
- A fine-tipped paintbrush.
- Clear gloss sealant.
- Black twine and a small bell.
Instructions:
- Sketch the Design: Lightly sketch a mischievous, smiling cat face onto the jar with a pencil. Focus on large, expressive eyes and a wide grin.
- Paint the Details: Using the green paint, fill in the eyes and other features. Use white paint to add highlights and sharp details, like whiskers or the glint in the eyes.
- Seal Your Work: Once the paint is completely dry, spray the jar with a clear gloss sealant to protect the design.
- Add the Finishing Touch: Tie the black twine around the neck of the jar, attaching the small bell so it jingles. Fill with your favorite treats.
23. Create a Quirky “Specimen” Display

Add a touch of mad-scientist fun to your decor with a living room that celebrates the weird and wonderful. This style works well with an industrial or rustic base—think exposed brick walls and reclaimed wood furniture. The key is to display unique, eye-catching objects that tell a story.
Dedicate a shelf or a side table to your “specimen” collection. Fill jars with colorful liquids, plastic eyeballs, and other quirky items. Use rough, natural textures like burlap and twine to label your creations. This approach to decor is a conversation starter and adds a layer of humor and imagination to your living space.
DIY “Swamp Monster” Specimen Jar
Materials You’ll Need:
- A large mason jar with a lid.
- Green, yellow, and black acrylic paint.
- Water.
- Craft sand or dirt.
- Green yarn or string.
- Plastic eyeballs and spiders.
- Burlap fabric and a black marker.
Instructions:
- Create the Swamp Water: In a separate container, mix the acrylic paints with water to create a murky, swirled green liquid. Pour this into the mason jar.
- Build the Base: Add a layer of sand or dirt to the bottom. Push in the green yarn to look like seaweed, and drop in the plastic eyeballs and spiders.
- Make the Label: Cut a piece of burlap and write a spooky label on it with a black marker. Use hot glue to attach it to the jar.
- Finishing Touches: Secure the lid, and wrap the rim with twine or more burlap for a rustic finish.
24. Mix Rustic and Macabre Elements

For a look that is both earthy and edgy, combine rustic textures with macabre details. A neutral color palette of beige, gray, and black allows the textures to take center stage. Consider a distressed wood coffee table or a simple linen sofa as the foundation of the room.
The intrigue comes from the accessories. A skull-shaped candle, a framed print of a raven, or a decorative jar filled with “grave dust” can add a dark, poetic touch. The contrast between the simple, rustic furniture and these gothic accents creates a space that feels both grounded and mysterious.
DIY “Gothic Terrarium” Jar
Materials You’ll Need:
- A clear glass jar with a lid.
- Sand and small pebbles.
- A miniature plastic skull.
- Dried moss or small twigs.
- Twine and a paper tag.
- A tea bag for aging.
Instructions:
- Layer the Base: Create layers in the jar with sand and small pebbles to resemble earthy ground.
- Create the Scene: Place the miniature skull in the center of the jar. Arrange the dried moss and twigs around it to create a miniature gravesite scene.
- Age the Tag: Write a spooky label on the paper tag. Stain the tag by dabbing it with a wet tea bag to give it an aged look.
- Attach the Tag: Once the tag is dry, tie it around the rim of the jar with a piece of twine. Secure the lid on top.
25. Experiment with Scientific Glam

Merge the clean lines of a laboratory with the luxury of gold for a unique and sophisticated living room. A minimalist approach is key here. Choose furniture with simple, geometric shapes and a neutral color palette of black, white, and gray.
The “glam” comes from a single, powerful accent color: gold. Use it sparingly for maximum impact. A piece of wall art featuring gold leaf, a vase with a gold geometric pattern, or a decorative flask filled with a golden liquid can become a stunning focal point. This creates a space that feels intelligent, modern, and undeniably chic.
DIY “Potion of Midas” Flask
Materials You’ll Need:
- A scientific glass flask (like an Erlenmeyer flask).
- Gold leaf sheets.
- Water.
- Yellow food coloring.
- A black rubber stopper.
Instructions:
- Prepare the Gold Leaf: Carefully tear the gold leaf sheets into small, irregular flakes.
- Create the Potion: Fill the flask with water. Add a few drops of yellow food coloring until you achieve a rich, golden hue.
- Add the Gold: Gently drop the gold leaf flakes into the liquid. They will float and swirl, catching the light beautifully.
- Seal the Flask: Place the rubber stopper securely in the top of the flask.
- Display: Set your gleaming flask on a bookshelf or desk as a striking piece of scientific art.
26. Hang Delicate Glass Accents

Create an ethereal and light-filled living room by incorporating delicate, hanging glass elements. This style is about creating a sense of airiness and wonder. A soft, neutral color palette—think whites, soft grays, and pale blues—provides a serene backdrop.
Hang a cluster of small, teardrop-shaped glass vases or ornaments in front of a window. They will catch the sunlight and cast beautiful reflections around the room. Pair this with light, breezy curtains and furniture with slim legs to enhance the feeling of open space. The result is a room that feels tranquil, dreamy, and magically light.
DIY “Mermaid’s Tears” Ornaments
Materials You’ll Need:
- Small, teardrop-shaped glass craft bottles with corks.
- Clear epoxy resin.
- Pearlescent white or blue mica powder.
- A toothpick or small stick for stirring.
- Small silver eye-screws and silver chains.
Instructions:
- Mix the Resin: In a disposable cup, mix a small amount of clear epoxy resin according to the package directions.
- Add Shimmer: Add a tiny pinch of the pearlescent mica powder to the resin and stir with a toothpick until it creates a swirling, magical effect.
- Fill the Bottles: Carefully pour the resin mixture into the small glass bottles, filling them about halfway.
- Let it Cure: Place the corks in the bottles and let the resin cure completely. The swirl will be frozen in place.
- Add Hardware: Screw a small silver eye-screw into the top of each cork. Thread a silver chain through the eye-screw to create a hanging ornament or necklace.
27. Layer with Cosmic Sparkle

Design a living room that is bursting with playful, cosmic energy. Use a deep, rich color like indigo or purple as your base for an accent wall. This creates a backdrop that makes brighter, sparkling elements pop.
Layer on the glamour with accessories that glitter and shine. A sequined throw pillow, a vase filled with metallic confetti, or a piece of art made with glitter can add a fun and festive touch. Don’t be afraid to mix different colors and textures. This style is all about creating a vibrant, joyful space that feels like a celebration.
DIY “Nebula in a Bottle” Charm
Materials You’ll Need:
- A small glass vial with a cork.
- Fine glitter in various colors (purple, blue, silver).
- Small metallic star confetti and microbeads.
- A small paper tag and a metallic pen.
- Gold or silver thread.
Instructions:
- Layer the Stardust: Create distinct layers in the vial. Start with a layer of purple glitter, then add some gold microbeads, followed by a layer of star confetti, and so on.
- Fill to the Top: Continue layering your different sparkly materials until the vial is full.
- Add the Label: Write “Stardust” or another cosmic word on the small paper tag with a metallic pen.
- Secure and Decorate: Push the cork securely into the vial. Tie the tag around the neck of the vial with a piece of metallic thread, finishing with a small bow.
28. Design a Whimsical Wonderland

Create a living room that is delightfully eccentric and full of color, inspired by a fantasy tea party. This style is about breaking the rules and having fun with your decor. Use a pastel color palette—like mint green, baby pink, and soft blue—as your foundation.
Mix and match patterns with abandon. A floral armchair, a striped rug, and polka-dot cushions can all live happily in the same space. The key is to fill the room with quirky, charming accessories. A stack of mismatched teacups, a clock with wonky numbers, or a teapot turned into a vase will complete this playful and imaginative look.
DIY “Mad Hatter” Teapot Centerpiece
Materials You’ll Need:
- A vintage ceramic teapot (one from a thrift store is a great choice).
- Various charms, beads, and old costume jewelry.
- Different types of ribbon in various colors and patterns.
- A hot glue gun or strong craft adhesive.
- Optional: Glitter and decoupage glue.
Instructions:
- Plan Your Charms: Decide where you want to place your charms and jewelry. Draping them from the lid and handle often looks best.
- Attach the Decorations: Use hot glue to attach your chosen charms, beads, and jewelry pieces to the teapot. Create layers and let them dangle.
- Add Ribbons: Tie various ribbons in bows around the handle and the knob on the lid. Let the ends trail down.
- Add Sparkle (Optional): For extra magic, you can add a “window” of glitter on the side of the teapot using decoupage glue and your favorite glitter.
- Display: Use your wonderfully mad teapot as a vase for flowers or as a standalone centerpiece.
29. Use Raw, Industrial Textures

Embrace a strong, modern aesthetic by incorporating raw, industrial textures into your living room. A color palette of grays, black, and white creates a clean, minimalist backdrop. The focus here is on materials like concrete, stone, and unfinished metal.
Consider a polished concrete floor or a feature wall with stone-effect panels. Furniture should be simple and functional, with clean lines and metal frames. A touch of black leather on a sofa or armchair can add a layer of sophistication. This look is bold, confident, and unapologetically modern.
DIY “Faux Stone” Bottle
Materials You’ll Need:
- A glass bottle (a whiskey bottle shape works well).
- Textured spray paint (the kind that mimics stone or concrete).
- Gray and white acrylic paint.
- A small sponge.
- Air-dry clay.
- A silver paint pen.
Instructions:
- Sculpt the Stone Frame: Roll out thin pieces of air-dry clay. Drape and press them around the shoulders and edges of the bottle to look like a cracked stone frame. Let it dry completely.
- Apply Texture: Spray the entire bottle, including the clay parts, with the textured stone spray paint. Let it dry.
- Add Dimension: Use a sponge to lightly dab gray and white acrylic paint onto the “stone” parts to create highlights and shadows, making it look more realistic.
- Create a Label: Paint a rectangular label shape on the front with silver paint, or create a label from another piece of clay, paint it silver, and glue it on.
30. Fill Your Space with Sunlight

Create a bright, warm, and uplifting living room that feels like it’s bathed in perpetual sunlight. A color palette of golden yellows, warm oranges, and creamy whites is essential. Paint the walls in a soft, buttery yellow to maximize the feeling of light and space.
Choose furniture in light wood tones and comfortable, natural fabrics. The key accessories are those that reflect and enhance the light. A gold-framed mirror, brass candle holders, and decorative glass objects will catch the sunlight and fill the room with a warm, glamorous glow. This style is cheerful, inviting, and full of positive energy.
DIY “Essence of Sunshine” Potion
Materials You’ll Need:
- A uniquely shaped clear glass bottle with a cork.
- Yellow and orange mica powder.
- Baby oil or mineral oil.
- A gold-tone sun charm.
- A small gold chain.
Instructions:
- Fill the Bottle: Fill the glass bottle most of the way with baby oil.
- Add the Mica: Add a generous pinch of both the yellow and orange mica powders to the oil. Don’t stir it yet.
- Seal and Shake: Secure the cork in the bottle. Shake the bottle vigorously. The mica powder will swirl and suspend in the oil, creating a beautiful, shimmering liquid that looks like captured sunlight.
- Add the Charm: Drape the small gold chain around the neck of the bottle and attach the sun charm so it hangs in the front.
- Display: Place your bottle on a windowsill where it can catch the light and truly shine.
31. Add a Touch of Mythical Botany

Infuse your living room with a touch of the fantastical by focusing on mythical and unusual plant-themed decor. This style pairs well with an earthy color palette of greens and browns, grounded by sleek, modern furniture. The goal is to create a space that feels like a chic, magical greenhouse.
Accessorize with unique botanical prints, terrariums, and unusual potted plants. A statement piece, like a “mandrake” specimen jar, can add a witty and imaginative focal point to a bookshelf or side table. This approach to decor brings a sense of wonder and storytelling into your home.
DIY “Mythical Mandrake” Specimen Jar
Materials You’ll Need:
- A large glass and ceramic jar with a lid.
- Beige or tan polymer clay.
- Sculpting tools.
- A small artificial plant sprig.
- Water and a few drops of green or brown food coloring.
- Burlap, twine, and a printable vintage-style tag.
Instructions:
- Sculpt the Mandrake: Condition the polymer clay and sculpt it into a humanoid root shape. Use tools to create a face and add root-like details.
- Bake the Clay: Bake the polymer clay figure according to the package directions. Let it cool completely.
- Prepare the Jar: Fill the jar with water and add a few drops of food coloring to create a murky “preserving” liquid.
- Assemble the Specimen: Place the cooled mandrake figure and the artificial plant sprig inside the jar.
- Finishing Touches: Secure the lid, cover it with burlap, and tie it with twine. Attach your aged, handwritten tag for an authentic look.
32. Embrace Rustic Industrial Edge

Create a living room with a strong, grounded character by blending rustic and industrial styles. This look features raw materials like burlap, aged metal, and unfinished wood. A neutral color scheme with pops of rust and brown creates a warm, moody atmosphere.
Choose sturdy furniture with clean lines, like a leather sofa or a reclaimed wood coffee table. The personality comes from the handmade-style accessories. A decorative bottle with a rough burlap label or a lamp made from industrial pipes can add a unique, edgy touch. This aesthetic is all about celebrating imperfection and texture.
DIY “Bottled Fear” Curiosity Accent
Materials You’ll Need:
- An amber glass bottle.
- A piece of burlap.
- Red and black embroidery floss and a needle.
- A black permanent marker.
- Twine or straw for the inside.
- Hot glue.
- Optional: Rust-effect paint.
Instructions:
- Create the Label: Cut a rectangle of burlap. Use the black marker to write “FEAR” in bold letters. Stitch a rough border around the word with red embroidery floss.
- Attach the Label: Use hot glue to attach the burlap label to the front of the bottle.
- Add Texture: Fill the bottle with some loose twine or straw.
- Decorate the Top: Use another piece of burlap to create a rustic cap, tying it in place with a bow made from the same material.
- Age it (Optional): For an extra touch, use a sponge to dab rust-effect paint onto the bottle’s metal lid before covering it.
33. Decorate with Gothic Romance

Channel a darkly romantic and powerfully glamorous vibe in your living room. This style uses a dramatic color palette of deep red and black. The key is to introduce textures that feel both luxurious and slightly dangerous, like cracked leather or velvet.
Choose a statement piece of furniture, like a black chaise lounge, and accent it with deep red cushions. The accessories tell the story. A decorative heart-shaped bottle with a crackle finish or black roses in a vase can add a touch of beautiful melancholy. This look is bold, emotional, and unapologetically dramatic.
DIY “Broken Heart” Anti-Love Potion
Materials You’ll Need:
- A heart-shaped glass bottle.
- Red acrylic paint.
- A black crackle-effect paint or medium.
- Black sealing wax.
- A cork or bottle stopper.
- Decorative pins.
- A small, aged paper tag.
Instructions:
- Paint the Heart: Paint the exterior of the heart bottle with a solid coat of red acrylic paint. Let it dry.
- Create the Crackle Effect: Apply the crackle medium or paint over the red layer according to the product’s instructions. As it dries, it will crack to reveal the red underneath.
- Add the Drips: Melt the black sealing wax and carefully drip it around the neck of the bottle.
- Create the Label: Write a phrase on the aged paper tag. Pierce the tag and the bottle (if it’s soft enough, or glue them) with the decorative pins.
- Seal It: Place the cork in the opening and add more wax on top to seal it.
34. Style a Scholarly Corner

Create a sophisticated and moody living room corner that evokes the feel of a classic study. This look is defined by a dark, academic color palette—charcoal gray, deep navy, and black. It’s about creating an atmosphere of quiet intelligence and timeless elegance.
Choose a comfortable, classic armchair and pair it with a dark wood side table. The accessories are key to achieving the scholarly vibe. A vintage-style inkwell and quill, a stack of leather-bound books, and a classic desk lamp will complete the look. This creates a cozy and inspiring nook for reading or reflection.
DIY “Raven’s Quill” Inkwell Set
Materials You’ll Need:
- A clear glass inkwell-style bottle.
- Dark blue or black ink (or water with food coloring).
- A large, clean black feather (craft feathers work well).
- A printable vintage-style label.
- Mod Podge or glue.
Instructions:
- Prepare the Inkwell: Clean the glass bottle thoroughly. Fill it with the ink or colored water.
- Create the Label: Design and print a simple, elegant label with a vintage font. Carefully cut it out.
- Apply the Label: Use a thin coat of Mod Podge or glue to apply the label to the front of the inkwell.
- Add the Quill: Place the black feather into the inkwell as if it’s ready for writing.
- Display: Arrange your inkwell set on a desk or bookshelf as a sophisticated and literary accent piece.
35. Create a Frosted Winter Palace

Transform your living room into a glittering, icy wonderland. This design uses a cool, monochromatic color palette of icy blue, silver, and brilliant white. The focus is on textures that mimic snow and ice, creating a space that feels both magical and serene.
Incorporate faux fur rugs and chunky white knit blankets to add warmth and softness. Furniture should be sleek and modern, with mirrored or acrylic surfaces that enhance the frosty feel. Accessories like crystal candle holders and a decorative bottle covered in faux snow will complete this enchanting, winter-inspired look.
DIY “Frost Rune” Elixir Bottle
Materials You’ll Need:
- A clear glass bottle.
- Coarse craft salt or faux snow.
- Spray adhesive.
- White candle wax or hot glue for drips.
- A small piece of clear resin or plastic for the charm.
- A black permanent marker.
- Faux ice cubes.
Instructions:
- Create the Frosted Texture: Spray the exterior of the bottle with adhesive, then roll it in the coarse salt or faux snow until it’s fully coated. Let it dry.
- Add Icy Drips: Melt white candle wax (or use a hot glue gun) and carefully drip it around the rim of the bottle to look like melting icicles.
- Make the Rune Charm: Draw a rune symbol on the small piece of resin or plastic with a permanent marker. Drill a small hole and attach it to a chain around the bottle’s neck.
- Fill the Bottle: Fill the bottle with light blue-tinted water and a few faux ice cubes.
36. Incorporate Coastal Treasures

Evoke the feeling of a windswept coastline with a living room design that is both rustic and refined. This is a more sophisticated take on nautical decor, using a muted color palette of sea glass green, sandy beige, and ocean blue. It’s about capturing the essence of the sea’s natural treasures.
Use natural textures like jute and rope. A large area rug made of jute or a coffee table with rope-wrapped legs can anchor the space. The decor should feel found and collected. A decorative bottle wrapped in netting and filled with sea glass and colored salts makes for a beautiful and authentic coastal accent.
DIY “Siren’s Call” Sea Glass Bottle
Materials You’ll Need:
- A sea-green tinted glass bottle.
- Colored bath salts or sand in shades of blue and green.
- Small pieces of craft sea glass.
- Decorative craft netting.
- Sealing wax and a stamp with a nautical theme (like an anchor).
- A cork.
Instructions:
- Layer the Contents: Carefully pour layers of the different colored salts and sand into the bottle. Drop in small pieces of sea glass as you go.
- Wrap in Netting: Drape and wrap the decorative netting around the outside of the bottle, securing it with a knot.
- Seal the Bottle: Place the cork in the opening. Melt the sealing wax and pour it over the cork. While the wax is still soft, press your nautical stamp firmly into it.
- Display: Your bottle of coastal treasures is ready to be displayed on a shelf or mantel.
37. Curate a Poison Garden Aesthetic

Create a living room that is sleek, minimalist, and beautifully dangerous. This style draws inspiration from the elegant but deadly plants of a poison garden. The color palette is clean and simple—mostly black and white, with a sharp accent of pale green.
Choose modern furniture with clean lines and sharp angles. The decor should be sparse but impactful. A single, striking piece of botanical art or a simple dropper bottle containing a sprig of (artificial) “hemlock” can become a powerful focal point. This look is about sophisticated minimalism with a dark, intriguing twist.
DIY “Hemlock Specimen” Dropper Bottle
Materials You’ll Need:
- A clear glass Boston round bottle with a dropper top.
- Water.
- A sprig of a safe, artificial flower that resembles hemlock (like Queen Anne’s Lace).
- A printable vintage-style poison label.
- Mod Podge or glue.
- A tea bag for aging.
Instructions:
- Create the Label: Design and print a label featuring a skull and crossbones. Age it with a damp tea bag and let it dry.
- Apply the Label: Attach the aged label to the front of the bottle using a thin coat of Mod Podge.
- Prepare the Specimen: Fill the bottle with water. Carefully insert the sprig of the artificial flower, using the dropper to help position it.
- Seal It: Screw the dropper top on tightly.
- Display: This elegant and slightly sinister bottle is a great addition to a curated shelf display.
38. Capture Ethereal and Smoky Elements

Design a living room that feels mysterious and otherworldly. This aesthetic is built on a dark color palette and the illusion of captured smoke or wandering spirits. It’s a minimalist look that creates a powerful, ethereal mood.
Keep furniture and other decor simple and understated. A black leather sofa, a dark wood coffee table, and soft gray walls create the good canvas. The real magic comes from a single, dramatic accent piece, like a large apothecary jar filled with swirling smoke. This creates a hauntingly beautiful focal point that is sure to captivate.
DIY “Wandering Spirit” Apothecary Jar
Materials You’ll Need:
- A large, clear glass apothecary jar with a lid.
- A small, battery-operated personal humidifier or water mist maker.
- A small decorative chain.
- An aged paper label.
- Safety Note: Dry ice can also be used for a temporary, dramatic effect, but handle it with protective gloves and ensure proper ventilation.
Instructions:
- Prepare the Jar: Clean the jar and apply your aged, handwritten label to the front.
- Add the Mist Maker: Place the small mist maker at the bottom of the jar. Add water according to its instructions.
- Create the Effect: Turn on the mist maker. It will begin to fill the jar with a dense, swirling fog that looks like captured smoke.
- Finishing Touches: Place the lid on top (you may need to leave a small gap for a cord, depending on your device). Drape the decorative chain around the base of the jar.
- Display: Turn it on to create a mysterious, smoky effect on your bookshelf.
39. Introduce a Pop of Carnival Chaos

Inject your living room with a dose of vibrant, chaotic fun. This style is inspired by the wild energy of a carnival or a court jester. It’s all about bold, clashing colors—purple, green, orange—and playful, over-the-top accessories.
Don’t be afraid of maximalism. Mix patterns like harlequin and stripes. Choose furniture with unusual, curved shapes. The decor should be equally flamboyant. A multi-colored potion bottle with a jester cap is the good centerpiece for a coffee table or bar cart in a room that celebrates fun and fantasy.
DIY “Jester’s Juice” Potion Bottle
Materials You’ll Need:
- An interesting, curved glass bottle.
- Water or clear oil.
- Alcohol inks in various bright colors (purple, green, orange).
- A jester-head bottle stopper (either purchased or sculpted from polymer clay).
- Colorful ribbon and small jingle bells.
Instructions:
- Create the Swirls: Fill the bottle with water or oil. Drip the different colors of alcohol ink into the liquid. They will create beautiful, swirling patterns as they sink and mix.
- Add the Stopper: Place your jester-head stopper in the top of the bottle.
- Decorate: Create a bow with the colorful ribbon and tie it around the neck of the bottle. Use thread to attach the jingle bells to the ends of the ribbon.
- Add a Label: Write a quirky description of the potion’s effects on a small tag and tie it to the ribbon.
40. Glow with a Friendly Haunting

Add a touch of gentle, spooky fun to your living room with decor that literally glows. This style is perfect for a space that doesn’t take itself too seriously. It combines a playful ghost motif with the cool, ethereal light of glow-in-the-dark elements.
This works best in a room with a dark accent wall to make the glowing effect truly stand out. Keep the rest of the decor relatively simple to let your glowing creations be the star. A “ghost lantern” on a side table can provide a soft, ambient light source and a dose of charming, supernatural character.
DIY “Glow-in-the-Dark” Ghost Lantern
Materials You’ll Need:
- A clear glass jar with a lid.
- Glow-in-the-dark beads or marbles.
- Clear hair gel or slime.
- A waterproof, cartoonish ghost sticker.
- Black permanent marker.
- A colorful ribbon.
Instructions:
- Prepare the Ghosts: If your beads are plain, use a black permanent marker to draw simple ghost faces on them.
- Fill the Jar: Fill the jar about halfway with the clear hair gel or slime. This will help the “ghosts” float.
- Add the Ghosts: Drop your glow-in-the-dark ghost beads into the gel.
- Decorate the Exterior: Apply the large ghost sticker to the front of the jar. Decorate the lid with paint or washi tape, and tie a colorful ribbon around the rim.
- Charge and Display: “Charge” the lantern by holding it under a bright light for a few minutes, then turn off the lights to watch your friendly ghosts glow.
41. Channel the Phoenix’s Fire

Bring the legendary power and warmth of a phoenix into your living room. This design is built around a fiery color palette of deep reds, vibrant oranges, and shimmering gold. It creates a space that feels energetic, luxurious, and full of life. A statement piece like a rich, red velvet sofa can serve as the room’s anchor.
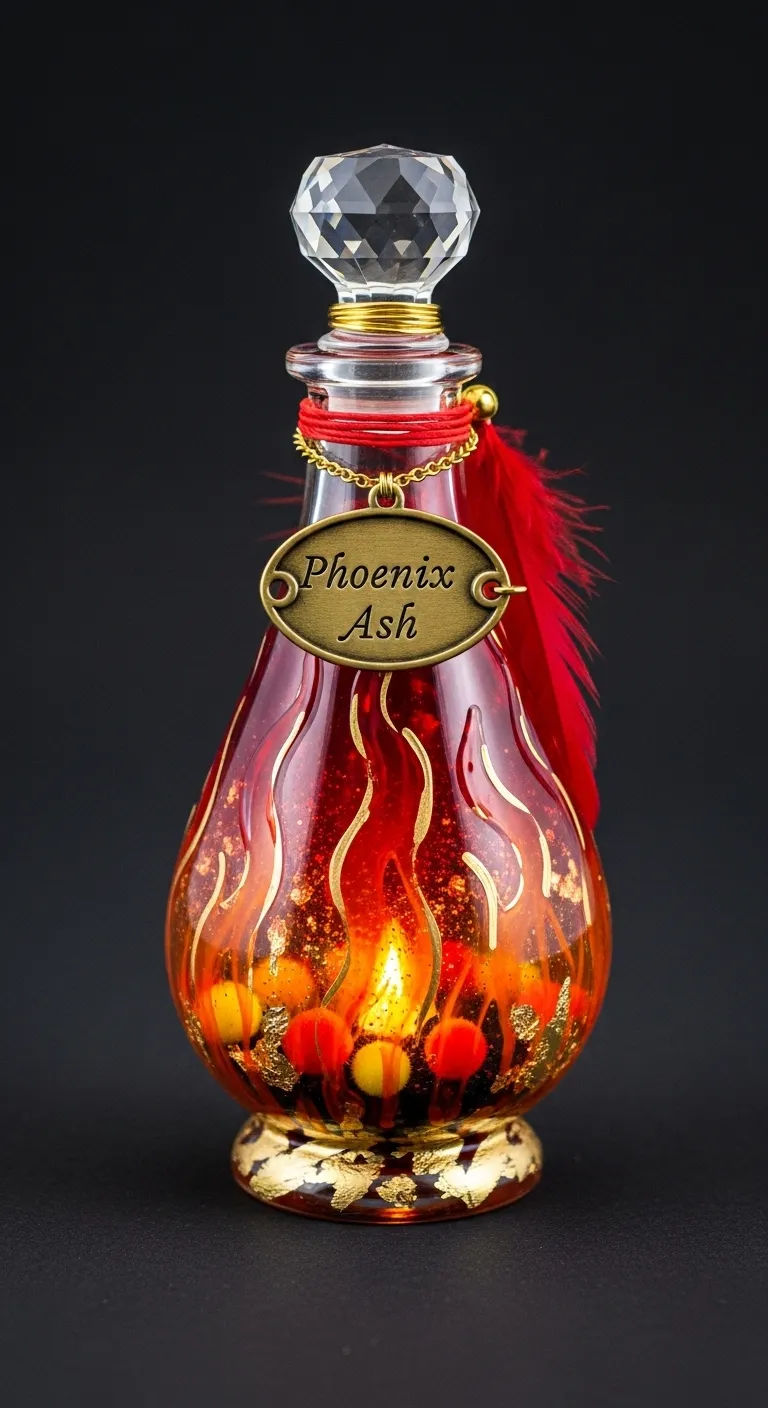
Accessorize with gold elements to represent the magical nature of the phoenix. Think gold-framed mirrors, brass side tables, and lamps that cast a warm, inviting glow. A decorative bottle with flame-like patterns and a touch of red and gold can be a stunning focal point, embodying the spirit of rebirth and eternal fire.
DIY “Phoenix Ash” Potion Bottle
Materials You’ll Need:
- A clear glass bottle with a crystal stopper.
- Red and orange alcohol inks.
- Fine gold glitter.
- A small, battery-powered LED light.
- A gold chain and a blank metal tag.
- A small red feather.
- A gold paint pen.
Instructions:
- Create the Flames: Drip red and orange alcohol inks inside the clean, dry bottle. Swirl them to create a fiery, translucent effect. Let it dry.
- Add the Embers: Sprinkle in fine gold glitter. Drop the small LED light into the bottom of the bottle to create a glowing ember effect from within.
- Design the Tag: Use a gold paint pen to write “Phoenix Ash” on the blank metal tag.
- Assemble: Drape the gold chain around the neck of the bottle, attaching the tag and the red feather.
- Display: Place the bottle on a mantelpiece or a dark shelf where its inner glow can truly shine.
42. Cultivate an Earthy Minimalist Vibe

Embrace a sense of calm and simplicity with an earthy, minimalist living room. This style focuses on a muted color palette of soft blues, sandy beiges, and stone grays. The goal is to create a serene, uncluttered space where natural textures are the main feature.
Choose furniture with clean lines, crafted from light-colored wood and upholstered in natural linen or cotton. Keep accessories to a minimum, focusing on pieces with texture and a handmade feel. A simple, two-toned ceramic jar can serve as a beautiful, grounding element, celebrating the beauty of raw materials and understated design.
DIY “Essence of Calm” Stoneware Jar
Materials You’ll Need:
- A two-toned ceramic or stoneware jar with a lid.
- Coarse and fine craft sand.
- Twine.
- A paper tag.
- A tea bag for aging.
Instructions:
- Fill with Texture: Fill the jar with layers of coarse and fine sand.
- Create the Label: Write a simple, cautionary phrase like “Apply Sparingly” on the paper tag. Age the tag by dabbing it with a wet tea bag. Let it dry completely.
- Attach the Tag: Tie the aged tag around the neck of the jar using a piece of twine.
- Final Touches: Arrange some of the coarse sand around the lid and on top to make it look as though the contents are naturally overflowing.
- Display: Place your minimalist jar on a clean, uncluttered surface, like a floating shelf or a simple wooden side table.
Creating a modern glam living room is an exercise in balance and personal expression. It’s about confidently mixing sleek modernity with touches of luxury, and knowing that elegance doesn’t have to be cold or unapproachable. The true beauty of this style lies in its versatility, allowing for everything from dark, gothic romance to bright, sunlit warmth.
Ultimately, the most stunning living room is one that tells your story. By incorporating handmade, DIY elements, you infuse your space with a unique character that can’t be bought. Whether you choose one theme or mix and match elements from several, the goal is to create a haven that is not only beautiful to look at but also a deep and authentic reflection of you.
Key Takeaways
- Balance is Essential: Modern glam thrives on the interplay between contrasting elements—sleek and plush, dark and light, rustic and refined.
- Metallics Are Your Friend: Gold, silver, brass, and chrome are crucial for adding that signature touch of glamour, reflecting light and creating a sense of luxury.
- Texture Adds Depth: From velvet and faux fur to raw wood and stone, layering different textures prevents a glam space from feeling one-dimensional.
- Personalize with DIY: The most memorable spaces feature unique, personal touches. The included DIY projects are a great starting point for making the style your own.