Does your bedroom feel more chaotic than calm? You close the door to hide the mess, but you know the clutter is still there. Piles of clothes have found a permanent home on a chair, your nightstand is overflowing, and the closet is a challenge to open.

An unorganized bedroom can affect your entire day. It’s the first space you see when you wake up and the last one you see at night. This room should be a peaceful retreat, not another source of stress. A tidy space can lead to a clearer mind.
The good news is that you don’t need a massive, expensive overhaul to reclaim your room. Lasting change comes from implementing small, smart solutions consistently. We have gathered 38 genius ideas, from simple habits to clever storage hacks, to help you transform your space into a sanctuary you will love.
1. Upgrade to Uniform Hangers
Item: Matching Velvet Hangers

A closet full of mismatched hangers—wire from the cleaners, chunky plastic ones, and a few wooden ones—can make your wardrobe look chaotic, even when the clothes are neat. The simplest way to create a clean, streamlined look is to switch to uniform hangers. It is a small change with a huge visual impact.
Slim velvet hangers are a great choice. They save space, and their texture prevents clothes from slipping off. When every item hangs at the same height and in the same way, your closet instantly appears more organized and less cluttered. It’s like giving your clothes a tidy, new home.
DIY Instructions: The Hanger Swap-Out
Step 1: Get Your New Hangers
- First, you need to buy a big box of matching hangers. Make sure you get enough for all the clothes you have hanging up.
Step 2: Take Everything Out
- Take a section of clothes out of your closet. Don’t try to do it all at once. Maybe start with just your shirts.
Step 3: One-by-One Transfer
- Pick up one piece of clothing. Take it off the old, mismatched hanger. Put that old hanger in a pile or a box to get rid of. Now, put the clothing onto one of your new, matching hangers.
Step 4: Put It Back Neatly
- Hang the clothing on its new hanger back in the closet. Make sure all the hangers are facing the same direction to make it look extra neat.
Step 5: Repeat Until Done
- Keep doing this, one section at a time, until all of your clothes are on the new, matching hangers.
2. Create a “Get Ready” Station
Item: Outfit Staging Area

The bedroom chair that becomes a mountain of clothes is a common problem. We toss outfits we tried on, robes, and tomorrow’s clothes on it. To stop this, create a specific “get ready” station. This is a designated spot, away from your bed and that chair, for planning your outfits.
Using a simple wall hook rack and a decorative ladder provides a home for these “in-between” clothes. The hooks are for shirts and jackets, while the ladder can hold scarves, pants, or towels. This keeps your clothes off the furniture, reduces wrinkles, and makes your morning routine much smoother.
DIY Instructions: Make a Simple Wall Hook Rack
Step 1: Find a Nice Piece of Wood
- You will need a flat piece of wood. It can be a new piece from a hardware store, or you can use a cool-looking piece of reclaimed wood. Make sure it’s smooth and has no splinters.
Step 2: Get Your Hooks
- Buy a few cool hooks from a hardware or home decor store. You can get simple ones or fancy ones that you like.
Step 3: Plan Where the Hooks Go
- Lay your piece of wood on a flat surface. Place the hooks on the wood and move them around until you like how they are spaced out. Use a pencil to make a little mark where each hook’s screw will go.
Step 4: Attach the Hooks
- With a grown-up’s help, use a screwdriver to attach each hook to the wood using the pencil marks as a guide.
Step 5: Hang Your Rack
- Ask a grown-up to help you hang your new rack securely on the wall. They will have the right tools to make sure it’s strong enough to hold your clothes.
3. Maximize Vertical Space for Shoes
Item: Floating Shelves and Over-the-Door Organizer

Shoes often end up in a messy pile on the closet floor. This makes it hard to find a matching pair and can damage the shoes. A much better way is to use your vertical space. Floating shelves installed on an open wall turn your shoe collection into a neat, visible display.
For even more storage, use the back of a door. An over-the-door shoe organizer with clear pockets is a good way to store flats, sandals, and sneakers. It keeps them off the floor and easy to find. Using these two methods together can solve your shoe clutter problem.
DIY Instructions: Set Up an Over-the-Door Shoe Holder
Step 1: Get the Right Organizer
- First, you need to buy an over-the-door shoe organizer. They sell these at most big department stores. Get one that has hooks at the top.
Step 2: Unpack and Unfold It
- Take the organizer out of its package and unfold it so it’s long and flat.
Step 3: Put the Hooks On
- Look at the top of the organizer. You should see a few holes or loops. Slide the metal hooks that came with it into these holes. Make sure the curved part of the hook is pointing away from the pockets.
Step 4: Hang it On the Door
- Open the door where you want to hang it. Lift the organizer up and hook the metal hooks over the top edge of the door.
Step 5: Fill It Up
- Close the door to make sure it still shuts properly. Now you can start putting your shoes into the pockets. One shoe per pocket works best to keep it neat.
4. Put Jewelry and Accessories on Display
Item: Framed Corkboard and Accessory Organizers

Jewelry tangled in a box and sunglasses lost in a drawer are common frustrations. An organized display not only solves this but also doubles as room decor. A beautiful, ornate frame turned into a corkboard is a clever way to hang necklaces and earrings. You can see everything you own, making it easier to choose what to wear.
For other items, like sunglasses and watches, a clear acrylic organizer keeps them visible and dust-free. Belts and scarves can be hung from simple hooks on a door or wall. This system turns your accessories into a tidy, accessible collection.
DIY Instructions: Make a Framed Jewelry Holder
Step 1: Find an Old Picture Frame
- Look for a picture frame that you like but aren’t using anymore. The bigger the frame, the more jewelry it can hold. Take out the glass and the backing.
Step 2: Get a Cork Sheet
- You can buy a thin sheet of cork from a craft store. It often comes in a roll.
Step 3: Cut the Cork to Fit
- Lay the frame’s backing on top of the cork sheet. Use a pencil to trace around it. With a grown-up’s help, use a craft knife or strong scissors to cut the cork to the right size.
Step 4: Put it All Together
- Place your newly cut cork sheet inside the frame, where the picture would normally go. Put the frame’s backing on behind it to hold it in place.
Step 5: Add Your Pushpins
- Hang your new corkboard on the wall. You can now use decorative pushpins to hang your necklaces and bracelets directly from the board.
5. Keep Your Nightstand Clear
Item: Organized Nightstand with Drawer Storage

The nightstand is often a hotspot for clutter. It accumulates books, glasses, charging cables, and water glasses until there is no space left. A tidy nightstand is key to a peaceful bedroom. The goal is to keep the surface as clear as possible, holding only a few essential items like a lamp and a small tray.
The drawer is where the real organization happens. Use it to hide away less attractive items like charging cords, hand cream, and extra books. A small tray on top can be a designated spot for your ring or watch. This keeps the surface functional and serene.
DIY Instructions: Tame Your Nightstand Drawer
Step 1: Empty the Drawer
- Take every single thing out of your nightstand drawer and wipe it clean.
Step 2: Find Small Boxes
- Look around your house for small, shallow boxes. The boxes that new phones or jewelry come in are great for this. Empty checkbook boxes also work well.
Step 3: Arrange the Boxes Inside
- Play around with the small boxes like a puzzle, fitting them into your empty drawer. This will create little compartments.
Step 4: Sort Your Items
- Group all the items you took out of the drawer into categories. For example, all your charging cables together, all your lip balms together, and so on.
Step 5: Put Everything in its New Home
- Place each group of items into one of the small boxes inside your drawer. Now everything has its own little spot, and things won’t get jumbled up.
6. Create a Paperwork Command Center
Item: Wall-Mounted and Desktop File Sorters

Even in a digital world, papers like mail, bills, and receipts can quickly pile up on any flat surface in the bedroom. This creates a stressful mess. The best way to handle this is to create a single, dedicated spot for all incoming paperwork—a command center.
Use a wall-mounted file sorter for items that need immediate attention. On your desk, a simple tiered tray can hold documents you need for ongoing projects. A small set of labeled drawers for “To Do,” “To File,” and “To Shred” creates a simple, actionable system that stops paper from ever taking over your room again.
DIY Instructions: Make a “To-Do” Box System
Step 1: Find Three Matching Boxes
- Get three boxes that are the same size. Shoeboxes work well, or you can find some simple wooden or cardboard boxes at a craft store.
Step 2: Decorate Your Boxes
- If you want, you can make your boxes look nice by painting them or covering them with decorative paper.
Step 3: Make Your Labels
- On three separate pieces of paper or cardstock, write one of these labels on each: “TO DO,” “TO FILE,” and “TO SHRED.”
Step 4: Attach the Labels
- Glue or tape one label to the front of each box.
Step 5: Line Them Up and Use Them
- Place your three boxes in a row on your desk or a shelf. The moment a piece of paper comes into your room, decide what needs to happen to it and put it in the correct box right away.
7. Digitize Your Sentimental Clutter
Item: Memory Box and Digital Photo System

Old ticket stubs, greeting cards, and children’s drawings are precious, but they can create a lot of physical clutter. It is hard to part with these memories, so they end up stuffed in drawers and boxes. A two-part system is a great way to manage this sentimental clutter.
First, take a high-quality photo of each item. You can save these digital copies in a special folder on your computer or phone. Second, get one beautiful, designated “memory box.” After you digitize an item, you can decide if the physical copy is special enough to earn a spot in this exclusive box. This honors your memories without letting them take over your space.
DIY Instructions: Start Your Digital Memory Album
Step 1: Gather Your Sentimental Items
- Collect all your special papers, like old movie tickets, birthday cards, and drawings, from wherever they are hiding.
Step 2: Find a Good Spot for Photos
- Find a spot in your house with lots of natural light, like near a big window. A plain, flat background like a white poster board or a clean table is best.
Step 3: Take Clear Pictures
- Using a phone, lay one of your items flat on the background. Hold your phone directly above it, making sure there are no shadows. Take a clear, bright photo. Do this for every item.
Step 4: Create a Special Folder
- On your phone or computer, create a new photo album or folder. Name it something like “My Memories.”
Step 5: Move the Photos
- Move all the pictures you just took into your new “My Memories” folder. Now you can look at them any time you want without having to dig through a messy box.
8. Follow the 90/90 Possibility Rule
Item: Neatly Organized Cable Drawer

We often hold onto things “just in case.” That tangled drawer of mystery cables is a classic example. We think we might need one of them someday. The 90/90 Possibility Rule helps you break this habit. The rule is simple: if you haven’t used an item in the last 90 days, and you don’t have a definite plan to use it in the next 90 days, you can probably let it go.
This rule is very effective for things like old electronics, clothes that don’t fit, and hobby supplies for a hobby you no longer do. Applying this rule helps you clear out the “maybe someday” clutter and keep only what is truly useful and relevant to your life right now.
DIY Instructions: The “Just in Case” Box
Step 1: Find an Empty Box
- Get a cardboard box that is not too big. Write today’s date on the outside of the box with a big marker.
Step 2: Fill the Box
- Go around your room and find all the things you are keeping “just in case.” This could be old cables, chargers for phones you don’t have, or clothes you might fit into someday. Put them all in this box.
Step 3: Write the “Goodbye” Date
- On the box, under today’s date, write a date that is three months from now (that’s about 90 days).
Step 4: Hide the Box
- Put the box away somewhere you won’t see it every day, like in a closet or under the bed.
Step 5: The Final Decision
- If you ever need something from that box in the next three months, you can go get it. But, when the “goodbye” date arrives, you must donate or throw away everything that is still left in the box without looking inside.
9. Use Vacuum Seal Bags for Bulky Bedding
Item: Labeled Vacuum Storage Bags

Big, fluffy comforters and extra sets of sheets can take up an entire shelf in a closet. These bulky items are mostly air. Vacuum seal bags are a game-changing solution. By sucking all the air out, these bags shrink bulky bedding and clothing down to a fraction of their original size.
This allows you to store a winter duvet, guest pillows, and flannel sheets in a small, compact package. It also protects them from dust, moisture, and pests while in storage. Using these bags can free up a huge amount of space in your closet for things you use more often.
DIY Instructions: Use a Vacuum Seal Bag
Step 1: Get Your Supplies
- You will need a vacuum storage bag and a vacuum cleaner that has a hose attachment.
Step 2: Neatly Fold Your Items
- Take your big, bulky comforter or your extra sheets and fold them as neatly and flatly as you can.
Step 3: Put Them in the Bag
- Open the vacuum bag. It will have a large opening at one end. Carefully place your folded bedding inside. Don’t overfill it; there is usually a “fill line” marked on the bag.
Step 4: Seal the Bag
- Close the top of the bag. Most bags have a special zipper closure. You usually have to slide a little plastic clip across it a few times to make sure it’s completely sealed.
Step 5: Vacuum Out the Air
- Find the little valve on the side of the bag. Unscrew the cap. Press the end of your vacuum cleaner hose firmly over the valve and turn the vacuum on. Watch as the bag shrinks and all the air gets sucked out. When it’s flat, turn off the vacuum, remove the hose, and quickly screw the cap back on.
10. Build a Complete Closet System
Item: Organized Closet with Baskets and Bins

A closet with just a single rod and a high shelf is often not enough. This leads to a messy pile of shoes on the floor and teetering stacks of sweaters on the shelf. Installing a full closet system is the best way to maximize every inch of space.
A good system will include double-hung rods to fit more shirts and pants, cubbies or shelves for folded clothes and shoes, and drawers for smaller items. Using matching baskets and bins within the system creates a tidy, cohesive look. It turns a basic closet into a highly functional and organized wardrobe.
DIY Instructions: The “One-a-Week” Closet Clean-Out
Step 1: Pick One Small Section
- Look at your messy closet and choose just one small part to focus on. For example, you could choose to organize just your shoes, or just your sweaters.
Step 2: Take Everything Out of That Section
- Take all the items out of just that one section. If you are doing shoes, take every single shoe out of the closet.
Step 3: Sort and Decide
- Go through the pile and make decisions. Put the items into three new piles: “Keep,” “Donate,” and “Throw Away.” Be honest with yourself.
Step 4: Put the “Keep” Pile Back Neatly
- Take the items you are keeping and put them back in their spot in the closet in an organized way. For example, line up your shoes neatly.
Step 5: Do It Again Next Week
- That’s it for this week. Next week, choose a new small section, like your shirts, and do the same exact thing. Over time, your whole closet will be organized without it feeling like a huge, overwhelming job.
11. Master Your Dresser with Drawer Dividers
Item: Drawer Divider Inserts

A messy dresser drawer is a common problem. It’s hard to find what you need when socks, shirts, and underwear are all jumbled together. Drawer dividers are a simple fix that creates order. They create individual compartments for each type of clothing.
By filing your rolled or folded clothes vertically, you can see everything at once. No more digging to the bottom of a pile to find your favorite shirt. This system not only keeps things tidy but also maximizes the space within each drawer, allowing you to fit more in.
DIY Instructions: Make Your Own Cardboard Dividers
Step 1: Gather Your Materials
- You will need some sturdy cardboard, a ruler, a pencil, and a pair of scissors or a craft knife (and a grown-up to help if you use a knife).
Step 2: Measure the Inside of Your Drawer
- Empty the drawer completely. Use your ruler to measure the length (from front to back) and the width (from side to side). Also, measure how deep the drawer is.
Step 3: Cut the Cardboard Pieces
- Cut your cardboard into long strips. Make them the same height as the drawer’s depth. You will need a few strips that match the length of the drawer and a few that match the width.
Step 4: Cut Notches to Connect Them
- Take one of the long strips. Decide where you want a cross-piece to go and cut a slit from the top edge down to the middle. Now take a shorter strip and cut a slit from the bottom edge up to the middle.
Step 5: Fit Them Together
- Slide the two pieces together where you cut the slits. The notches should interlock to form a cross. Continue doing this to create a grid pattern that fits snugly inside your drawer. Now you have custom compartments to organize your clothes.
12. Corral Clutter with Decorative Trays
Item: Dresser Top Trays

Flat surfaces like the top of a dresser are magnets for clutter. Keys, loose change, perfume bottles, and jewelry can quickly create a messy look. A decorative tray is a stylish way to contain the chaos. It groups items together, making the surface look intentional and styled.
Using a tray creates a visual boundary. It tells you where things belong. This simple trick prevents clutter from spreading across the entire surface. You can use different trays for different categories, like one for daily makeup and another for candles and decor. It brings instant elegance and order.
DIY Instructions: Revamp an Old Tray
Step 1: Find a Tray to Refresh
- Look for an old tray you don’t use anymore. You could also use the lid from a sturdy box, a simple serving platter, or a shallow wooden crate.
Step 2: Clean and Prepare It
- Make sure your tray is clean and dry. If it’s made of wood, you might want to lightly sand it to make the surface smooth.
Step 3: Give It a New Look
- Paint the tray a new color that matches your room. You can use acrylic craft paint or spray paint (do this outside with a grown-up’s help). Another option is to line the inside bottom of the tray with pretty wrapping paper or contact paper.
Step 4: Let It Dry and Seal It
- Make sure the paint is completely dry. If you want to protect the finish, you can ask a grown-up to help you spray it with a clear sealant.
Step 5: Put It to Use
- Place your newly designed tray on your dresser. Use it to hold your perfume bottles, a small dish for rings, and other pretty items.
13. Adopt a “Floor-Clear” Policy
Item: A Clutter-Free Floor

One of the fastest ways to make a bedroom feel messy is leaving things on the floor. A clear floor instantly makes a room look larger, cleaner, and more peaceful. Piles of clothes, stacks of books, or stray shoes create visual stress and are actual tripping hazards.
Making a rule to keep the floor clear is a powerful habit. The only things that should touch the floor are pieces of furniture and rugs. This forces you to put things away in their proper homes instead of dropping them where you stand. It is a simple principle with a huge impact on your room’s tidiness.
DIY Instructions: The 5-Minute Nightly Floor Sweep
Step 1: Set a Timer
- Every evening before you get ready for bed, set a timer on a phone or clock for just five minutes.
Step 2: Grab a Basket
- Get an empty laundry basket or a bin. This will be your “clutter catcher.”
Step 3: Walk and Pick Up
- Start the timer and walk around your room. Your only job is to pick up anything off the floor that doesn’t belong there. Toss everything into your clutter catcher basket.
Step 4: Put Everything Away
- When the timer goes off, or when you’ve picked everything up, take the basket and quickly put each item in its real home. Dirty clothes go in the hamper, books go on the shelf, and trash goes in the bin.
Step 5: Make It a Habit
- Do this every single night. Because it only takes five minutes, it’s an easy habit to stick with. You’ll wake up to a clean floor every morning.
14. Use Labeled Bins for Everything
Item: Cube Storage with Labeled Bins

Cube storage units are incredibly versatile for bedroom organization. But when the bins are not labeled, they become mystery boxes. You waste time pulling each one out to find what you need. Adding a label to each bin is the key to an effective system.
Labels tell you exactly what’s inside at a glance. This makes it fast to find things and even faster to put them away. Use bins and labels to sort miscellaneous items that don’t have a clear home, like extra cords, seasonal accessories, or craft supplies. It creates a clean, uniform look.
DIY Instructions: Create Stylish Bin Labels
Step 1: Get Your Label Material
- You can use cardstock, small pieces of thin wood, or even stiff cardboard cut from a box.
Step 2: Cut Them to Size
- Cut your material into rectangles or tag shapes. Make them all the same size so they look uniform and neat.
Step 3: Write Your Categories
- Using a nice marker, clearly write the name of what’s inside the bin on each tag. For example, “Socks,” “Winter Hats,” or “Art Supplies.”
Step 4: Punch a Hole
- Use a hole punch to make a hole at the top of each label.
Step 5: Attach to Your Bins
- Cut a piece of string or twine. Thread it through the hole in your label and tie it securely to the handle of the correct bin. If your bin doesn’t have a handle, you can use a safety pin or a small clip to attach the label to the fabric.
15. Create a Mobile Hobby Station
Item: Rolling Craft Cart

Hobbies like painting, knitting, or crafting can create a lot of clutter. Supplies often end up scattered across desks and floors. A rolling cart is a brilliant way to contain the mess. It acts as a mobile hobby station that holds everything you need in one organized place.
When you’re ready to get creative, you can wheel the cart to your workspace. It keeps all your tools and materials within arm’s reach. When you are finished, you can simply roll it away into a closet or corner. This keeps your bedroom a relaxing space, free from half-finished projects.
DIY Instructions: Set Up Your Own Hobby Cart
Step 1: Get a Cart and Containers
- Start with a basic three-tiered rolling cart. Also, gather some small containers like glass jars, small plastic cups, or little boxes.
Step 2: Sort All Your Supplies
- Gather everything you use for one specific hobby. Put all the similar items together. For example, all your paintbrushes in one pile, all your paints in another, and all your yarn in a third.
Step 3: Organize the Tiers
- Assign a purpose for each level of the cart. Use the top tier for the tools you use most often, like scissors and brushes. The middle tier can hold your main materials, like paint or yarn. The bottom tier is good for sketchbooks, canvas, or ongoing projects.
Step 4: Use Your Small Containers
- Place your smaller items into the jars and cups. This stops them from rolling around. Put your pens in one cup, and small beads in a jar.
Step 5: Load Up Your Cart
- Arrange everything neatly on your cart. Now your hobby has its own organized home that you can move anywhere.
16. Tame the Tech Octopus
Item: Cable Management Box & Charging Station

In our modern world, a tangle of charging cables is a common source of mess. This “tech octopus” sprawls across nightstands and desks, looking chaotic. A cable management system is the solution. It hides the messy power strip and all the extra cord length.
A charging station provides a neat dock for your phones and tablets to rest while they power up. Labeling each cord with a small piece of tape saves you from the daily frustration of tracing a wire to see which device it belongs to. This system clears the visual clutter and simplifies your daily routine.
DIY Instructions: Make a Shoebox Charging Station
Step 1: Find a Sturdy Shoebox
- You’ll need a shoebox with a lid that is in good condition. You can decorate it with wrapping paper or paint to make it look nice.
Step 2: Get a Grown-Up’s Help
- For this next part, ask an adult to help you. You will need a craft knife or a box cutter, which is very sharp.
Step 3: Cut the Holes
- On one of the short ends of the box, have the adult cut a hole big enough for the plug of a power strip to fit through. On one of the long sides, have them cut several smaller slots or holes, one for each device you want to charge.
Step 4: Install the Power Strip
- Place a power strip inside the shoebox. Feed the main plug through the large hole you cut and plug it into the wall.
Step 5: Plug In and Organize
- Plug your device chargers into the power strip inside the box. Poke the end of each charging cable out through one of the smaller slots. Put the lid on the box. You can now rest your devices on top of the box while they charge.
17. Put Your Makeup on Display
Item: Magnetic Makeup Board

Makeup bags and drawers can quickly become a jumbled mess. It’s hard to find that one specific eyeshadow you’re looking for. A magnetic makeup board is a creative solution that gets your products out where you can see them. It is both a storage system and a piece of wall art.
By displaying your most-used items, you free up valuable drawer and counter space. This makes your getting-ready routine much faster and more enjoyable. You can customize the board to fit your collection, adding small magnetic cups to hold brushes and pencils.
DIY Instructions: Create a Magnetic Makeup Board
Step 1: Gather Your Supplies
- You will need a picture frame, a piece of sheet metal that fits inside the frame, a hot glue gun, and some small, strong craft magnets.
Step 2: Assemble the Board
- Take the glass out of the picture frame. Place the sheet metal inside the frame where the glass was. Use the hot glue gun to put a bit of glue in the corners on the back to hold the metal sheet securely in place.
Step 3: Make Your Makeup Magnetic
- Take your makeup items, like eyeshadow palettes and blushes. Be careful with them! Use the hot glue gun to attach one or two small magnets to the back of each item. Let the glue cool down completely.
Step 4: Arrange Your Board
- Once the glue is dry, you can stick your makeup products right onto the front of your metal board. They will hold in place because of the magnets.
Step 5: Hang It Up
- Hang your new magnetic makeup board on the wall near your vanity or dresser. Now all your favorite makeup is organized and easy to grab.
18. Build Up with Bookshelves
Item: Wall-to-Wall Shelving

For book lovers, a single small bookcase is often not enough. This leads to books being stacked on the floor, on nightstands, and in any available corner. To solve this, think vertically. Using your wall space to install tall shelving is an efficient way to store a large collection.
Framing a window or a doorway with bookshelves utilizes a part of the wall that is often ignored. This method provides a huge amount of storage without taking up much floor space. It turns your book collection into a beautiful and impressive feature of the room.
DIY Instructions: Plan Your “Book Nook” Wall
Step 1: Choose and Measure Your Wall
- Pick the wall where you want to add shelves. With a grown-up’s help, use a measuring tape to find out how tall and how wide the wall is. Write down the numbers.
Step 2: Draw a Picture of Your Plan
- On a piece of paper, draw a simple rectangle to represent your wall. Sketch where you would like the shelves to go. Do you want them on either side of a window? Do you want them to go all the way to the ceiling?
Step 3: Look for the Right Shelves
- The easiest way to do this is with an adjustable track shelving system from a hardware store. These have metal strips that you screw to the wall and brackets that you can move up and down.
Step 4: Make a Shopping List
- Based on your drawing, count how many metal tracks you need and how many brackets and shelves you want. Write it all down on a list.
Step 5: Build with Help
- This is a big project, so you will need a grown-up to help you buy everything and install it. They will have the right tools to make sure the shelves are strong and safely attached to the wall.
19. Hide Clutter with a Bed Skirt
Item: A Stylish Bed Skirt

The area under the bed is a fantastic spot for storage, but it can look messy if it’s exposed. Boxes, shoes, and storage bins create visual clutter that can make a room feel less restful. The simple solution is a bed skirt, also known as a dust ruffle.
A bed skirt is a piece of fabric that hangs down from the box spring to the floor. It neatly conceals everything hidden underneath your bed. This one addition instantly makes your bed look more complete and the entire room feel cleaner and more polished. It is an easy way to hide a messy area in style.
DIY Instructions: Make a No-Sew “Faux” Bed Skirt
Step 1: Pick Your Fabric
- You will need one flat bed sheet that is one size larger than your bed. For example, if you have a twin bed, use a full-sized flat sheet. Choose a color or pattern you like.
Step 2: Get the Bed Ready
- With a grown-up’s help, slide your mattress off the box spring and set it aside. You should see the bare box spring.
Step 3: Drape the Sheet
- Lay your flat sheet over the top of the box spring. Let the extra fabric hang down evenly over the two long sides and the foot of the bed. The side at the head of the bed doesn’t need to be covered.
Step 4: Pin It in Place
- To keep the sheet from moving, use some upholstery pins or large safety pins. These look like corkscrew-shaped pins. Push and twist the pins through the sheet and into the top of the box spring every foot or so.
Step 5: Put the Mattress Back
- Carefully slide your mattress back on top of the box spring and the pinned sheet. Adjust the hanging fabric so it looks neat. You just made a bed skirt without any sewing.
20. Use That Wasted Under-Bed Space
Item: Rolling Under-Bed Storage

The space under your bed should not be wasted or left to collect dust. It is a large, hidden area that is great for storage. It is the place to keep items you don’t need every day, like seasonal clothing, extra blankets, or shoes.
To make this space easy to use, choose storage containers designed to fit under a bed. Bins with wheels are especially good because they can be rolled out smoothly when you need to get something. This keeps your items organized, dust-free, and completely out of sight.
DIY Instructions: Upgrade a Box with Wheels
Step 1: Find a Low-Profile Box
- You will need a storage box that is shallow enough to fit under your bed. A long, flat plastic bin or a simple wooden crate can work. Measure the height under your bed first to make sure it will fit.
Step 2: Get Your Wheels
- Go to a hardware store and buy four small wheels, called “caster wheels.” Make sure to get the kind that can be screwed into the bottom of your box.
Step 3: Ask a Grown-Up for Help
- This part requires tools, so it’s a job for an adult. Turn the box upside down. Have them help you attach one wheel to each of the four corners on the bottom of the box using a drill and screws.
Step 4: Check Your Work
- Flip the box back over and give it a little push. It should roll smoothly across the floor.
Step 5: Fill It and Roll It Away
- Fill your new rolling bin with folded sweaters, extra shoes, or whatever you need to store. Then, simply roll it into place under your bed.
21. Store Off-Season Items Like Nesting Dolls
Item: Nesting Storage Cases

Empty luggage and storage boxes can be bulky, taking up precious closet space when not in use. A set of nesting cases solves this problem. Just like Russian nesting dolls, these containers are designed to fit one inside the other. This means a whole set can be stored in the footprint of the largest one.
This is an efficient way to store seasonal decor, travel supplies, or anything you don’t need year-round. You can use the smallest case as a “go-bag” for toiletries or electronics, keeping it packed and ready. When it’s time to store everything, it all condenses back into one neat package.
DIY Instructions: The Box-in-a-Box System
Step 1: Gather All Your Empty Boxes
- Go on a hunt around your house for all the empty boxes you have. Look for shoeboxes, gift boxes, and old shipping boxes of different sizes.
Step 2: Find the Biggest Box
- Find the largest box you have. This will be the “mother” box that holds everything else.
Step 3: Start Nesting
- Take your next-largest box and see if it fits inside the biggest one. Then, find the next-largest and see if that fits inside the second one. Keep doing this, putting smaller boxes inside bigger boxes.
Step 4: Use Them for Storage
- Before you nest the boxes, you can fill them. Put your winter scarves in a small box, and then place that box inside a larger one holding your winter hats.
Step 5: Store the Final Package
- Once you have filled and nested as many boxes as you can, put the lid on the largest box. You’ve now stored many things in the space of just one container.
22. Finally Conquer the “Junk Drawer”
Item: Modular Drawer Inserts

Every bedroom seems to have one: the dreaded “junk drawer.” It’s a chaotic mix of pens, batteries, spare keys, and random odds and ends. This mess is a source of daily frustration. The solution is to give every single item a specific home using modular tray organizers.
Unlike a single organizer, these individual trays can be mixed and matched like puzzle pieces to perfectly fit your drawer and your stuff. Use small trays for paperclips and long ones for pens. By creating a custom layout, you ensure that nothing is left to roll around aimlessly.
DIY Instructions: Build a “Junk Drawer” Map
Step 1: Empty and Trace Your Drawer
- Take everything out of your junk drawer. Place a large piece of paper on the bottom and trace the inside shape of the drawer onto it.
Step 2: Arrange Your “Junk” on the Map
- Take all the items you just removed and start arranging them on your paper map. Group similar things together. Put all the pens in one spot, all the rubber bands in another.
Step 3: Draw the Compartments
- Once you are happy with the arrangement, use a ruler and a marker to draw boxes around each group of items on your paper map. This shows you what size and shape of compartments you need.
Step 4: Find or Make Your Dividers
- You can now take your map to the store to find organizer trays that match the boxes you drew. Or, you can use your map as a guide to build your own cardboard dividers that fit your items.
Step 5: Assemble Your Organized Drawer
- Put your new organizers or dividers in the drawer and place your items into their designated spots according to your map.
23. Use Soft Lighting to Create Calm
Item: Layered Accent Lighting

A single, harsh overhead light can make a room feel like an interrogation room. It highlights every bit of dust and clutter. To create a calmer, tidier feeling, use layered lighting instead. This means using several sources of soft, warm light around the room.
Place lamps on your nightstand, a floor lamp in a corner, and maybe a small lamp on your dresser. This creates pools of gentle light, making the room feel cozy and inviting. The soft shadows can hide minor imperfections and draw attention to the tidier parts of your space, giving the illusion of a more organized room.
DIY Instructions: Create a Triangle of Light
Step 1: Find Your Three Lights
- You will need three different lamps or light sources. For example, you can use the lamp on your bedside table, a floor lamp, and a desk lamp.
Step 2: Imagine a Triangle
- Look at your room from the doorway. Imagine a big triangle drawn on the floor of your room.
Step 3: Place Your Lights at the Points
- Place one of your three lamps at each point of the imaginary triangle. For instance, the bedside lamp is point one. The floor lamp across the room is point two. The desk lamp in another corner is point three.
Step 4: Use Warm Bulbs
- Make sure your lamps have light bulbs that give off a soft, warm light, not a bright, white light. The package will often say “soft white” or “warm white.”
Step 5: Turn Them On
- Turn on your three lamps and turn off the main overhead light. Your room will feel much cozier and the light will be balanced and pleasant.
24. Establish an Entry “Drop Zone”
Item: Wall-Mounted Entryway Organizer

Clutter often begins the moment you walk into your room. Tossing your keys on the dresser, your bag on the floor, and your mail on the bed creates an instant mess. A designated “drop zone” right by the door stops this habit. It is a specific place to unload your daily essentials.
All you need is a small shelf and a hook. The shelf becomes home for your keys, wallet, and phone. The hook is for your bag or jacket. This simple system takes up almost no space. It ensures the things you carry every day have a home that isn’t a clean surface somewhere else in your room.
DIY Instructions: The No-Drill Drop Zone
Step 1: Get Your Supplies
- You will need one or two strong, self-adhesive wall hooks and a small, lightweight floating shelf that is designed to be hung with adhesive strips. You can find these at most big-box stores.
Step 2: Clean the Wall
- Pick a spot on the wall near your bedroom door. Use a cleaning wipe or some rubbing alcohol on a cloth to clean that spot really well. This helps the adhesive stick properly. Let it dry completely.
Step 3: Follow the Instructions
- Your hooks and shelf will come with instructions on the package. Read them carefully. They usually tell you to press the sticky strip onto the back of the hook or shelf first.
Step 4: Press it to the Wall
- Peel the paper backing off the adhesive strip. Press the hook or shelf firmly against the wall where you cleaned it. The instructions will tell you to hold it in place for about 30 seconds.
Step 5: Let It Set
- This is the most important step! The package will tell you to wait for at least one hour before you hang anything. This lets the adhesive form a strong bond with the wall. After you wait, your drop zone is ready to use.
25. Elevate Your Under-Bed Storage
Item: Rolling Under-Bed Shelf System

Storage bins are a common solution for the space under the bed, but a rolling shelf unit can be even more effective. It allows you to use the vertical height in that hidden space, essentially letting you stack items without crushing them. This is especially useful for shoes or craft supplies.
Because the unit rolls out, you can easily see and access everything at once without having to drag out a heavy, dusty bin. It turns the dark space under your bed into a highly functional and accessible storage area, almost like a mini rolling closet.
DIY Instructions: Hack a Bookshelf into a Rolling Cart
Step 1: Find a Short Bookshelf
- Look for a very short, small bookshelf. A single cube from a modular storage unit or a small shoe rack would work well. Measure the height under your bed to make sure the shelf is short enough to fit.
Step 2: Get Four Wheels
- At a hardware store, buy four small caster wheels. These are the little wheels you see on the bottom of office chairs.
Step 3: Get a Grown-Up to Help
- You’ll need an adult for this part because it requires a drill. Turn the bookshelf upside down so the bottom is facing up.
Step 4: Attach the Wheels
- Have the adult help you screw one caster wheel onto each of the four corners on the bottom of the bookshelf.
Step 5: Fill and Roll
- Turn your new cart right-side up. You can now fill the shelves with shoes, boxes of supplies, or folded clothes. When you’re done, it will roll easily right under your bed.
26. Hide Laundry Baskets in a Cabinet
Item: Laundry Sorter Hamper Cabinet

A pile of dirty laundry in an open basket can make even the cleanest room feel messy. A laundry sorter cabinet is a clever piece of furniture that hides this necessary mess. It looks like a regular cabinet or dresser, but inside it contains removable hampers.
This keeps your dirty clothes completely out of sight. Many of these units have multiple bags, allowing you to pre-sort your laundry into whites, darks, and colors as you go. This saves you time on laundry day. It’s a functional piece of furniture that conceals clutter and adds a clean surface to your room.
DIY Instructions: The Side Table Hamper Hideaway
Step 1: Find the Right Table and Basket
- You will need a small end table or nightstand that is open in the front, without a door or drawers. You will also need a laundry basket that is small enough to fit inside the opening.
Step 2: Get a Tension Rod
- Buy a small, spring-loaded tension rod. Get one that is just a little wider than the opening of your side table.
Step 3: Make or Find a Small Curtain
- You need a small piece of fabric to be your curtain. You can hem a rectangle of fabric, or you can even use a nice cloth napkin or placemat. Make sure it has a pocket at the top for the rod to go through.
Step 4: Assemble Your Hideaway
- Slide the tension rod through the pocket at the top of your curtain.
Step 5: Install the Curtain
- Squeeze the tension rod to make it shorter and fit it into the opening of the side table, near the top. When you let go, it will expand and hold itself in place. Slide your laundry basket into the table, behind the new curtain.
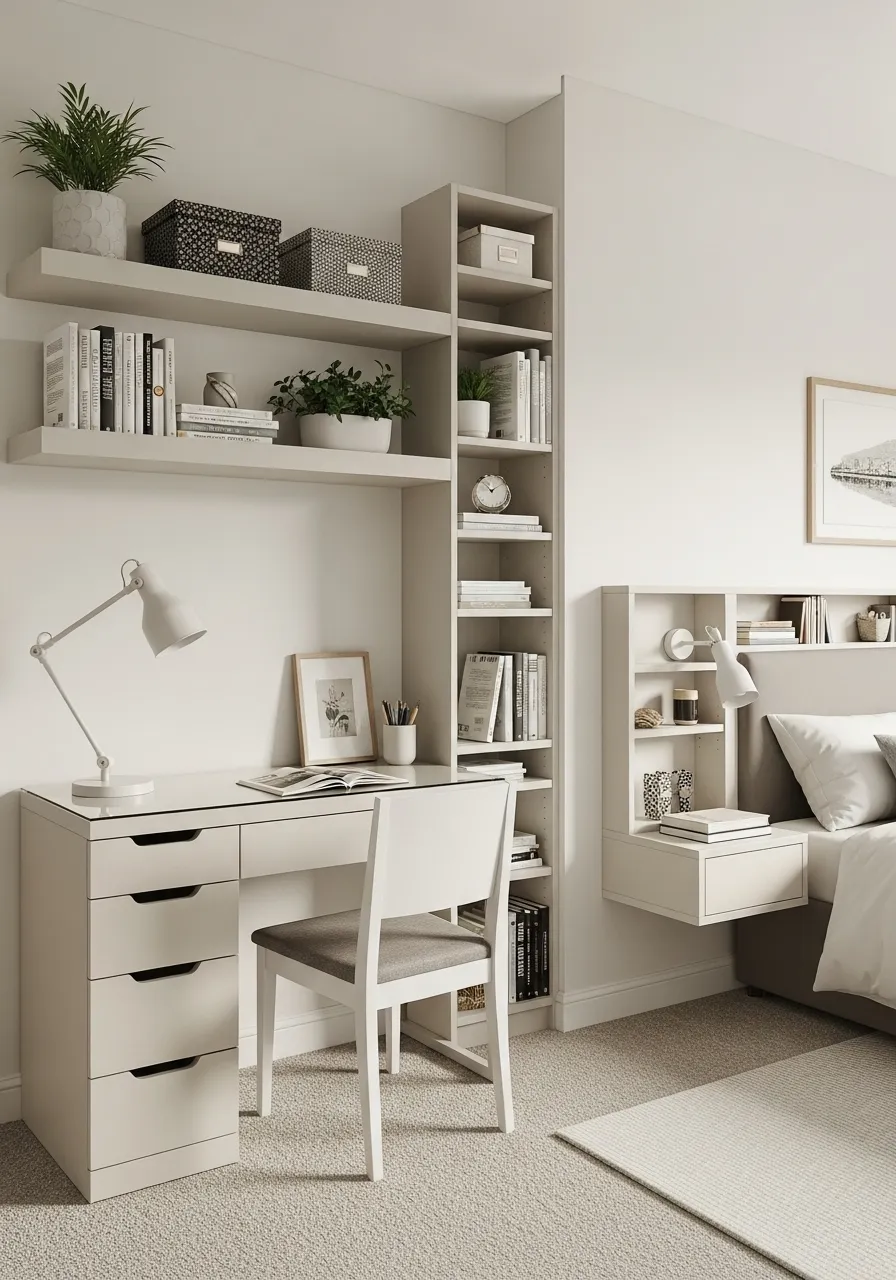
27. Go for Integrated, Built-in Furniture
Item: Cohesive Wall Unit Furniture

Using many separate, mismatched pieces of furniture can make a room feel cluttered and disjointed. A more streamlined approach is to use furniture that looks like it’s built-in. This creates a clean, cohesive look and maximizes storage by using vertical space effectively.
A system that combines a desk, bookshelves, and a bedside table into one unit feels less chaotic than three separate pieces. This approach makes the room feel larger and more thoughtfully designed. It also means fewer furniture legs on the floor, which makes cleaning easier and adds to the tidy appearance.
DIY Instructions: The “Faux Built-In” Look
Step 1: Gather Your Furniture
- Collect a few separate pieces of furniture that you want to group together, like a tall bookshelf, a desk, and a shorter bookshelf.
Step 2: Arrange Them Against a Wall
- Push all the pieces of furniture snugly together against one wall. Play with the arrangement until it looks like one long, interesting shape.
Step 3: Paint Everything the Same Color
- This is the most important step. With a grown-up’s help, paint all the separate furniture pieces the exact same color. For the best effect, paint them the same color as the wall they are pushed against.
Step 4: Let It Dry
- Give the paint plenty of time to dry completely.
Step 5: Admire Your Work
- Once dry, the matching colors will trick your eye into seeing the separate pieces as one single, custom-built unit. It will make your room look very organized and stylish.
28. Use Mirrors to Enlarge Your Space
Item: Mirrored Wardrobe and Door Mirror

Mirrors are a classic tool for making a room feel bigger, brighter, and less cluttered. They reflect light and create an illusion of depth, which can be especially helpful in smaller bedrooms. A wardrobe with mirrored doors is a fantastic two-for-one solution.
This type of furniture provides essential storage while also serving as a full-length mirror, saving you from needing a separate one. Another space-saving trick is to hang a mirror on the back of your bedroom or closet door. It uses an otherwise empty surface to add function and expand the feel of your room.
DIY Instructions: Hang a Damage-Free Door Mirror
Step 1: Get a Lightweight Mirror
- Find a long, lightweight mirror that doesn’t have a heavy frame. Many stores sell mirrors specifically for this purpose.
Step 2: Buy Strong Adhesive Strips
- At the hardware store, look for picture-hanging adhesive strips. Get the kind that can hold a few pounds of weight and are designed to be removed without damaging the wall or door.
Step 3: Clean Both Surfaces
- Clean the back of the mirror and the spot on your door where you want to hang it. Use a cleaning wipe or rubbing alcohol and let both surfaces dry completely.
Step 4: Attach the Strips
- Following the package directions, stick one part of each adhesive pair to the back of the mirror (usually one strip in each corner). Then stick the matching parts to the first strips.
Step 5: Mount the Mirror
- Peel the paper backing off the strips that will touch the door. Carefully press the mirror onto the door, making sure it is straight. Press firmly all over for about 30 seconds. Wait at least one hour before using the door normally.
29. Lay Out Tomorrow’s Outfit Tonight
Item: A Valet Stand or Clothing Staging Area

A major cause of bedroom mess is the pile of clothes on “that chair.” To fight this, create a specific spot to lay out your outfit for the next day. A classic valet stand is designed for exactly this. It has a place for a jacket, a shirt, and pants, keeping them neat and ready to wear.
If you don’t have a valet stand, you can create a similar “staging area” with a few wall hooks and a chair. The act of choosing your outfit the night before saves you time and stress in the morning. It also gives your clothes a proper home, preventing them from ending up in a heap.
DIY Instructions: The Chair Valet System
Step 1: Pick a Chair
- Designate one chair in your room to be your official “valet chair.” It should be kept empty and ready for this one special job.
Step 2: Prepare Your Outfit
- Before you go to bed, choose everything you want to wear the next day, including socks and accessories.
Step 3: Hang the Shirt
- Put your shirt on a hanger. Hook the hanger over the top of the chair’s backrest.
Step 4: Drape the Pants
- Neatly fold your pants in half and drape them over the back of the chair, either in front of or behind the shirt.
Step 5: Place the Rest
- Place your shoes neatly on the floor right under the chair. You can place your folded socks and any accessories on the seat of the chair. In the morning, your entire outfit will be in one organized spot.
30. Make Use of Awkward Corners
Item: Corner Floating Shelves

The corners of a room are often empty, awkward, and unused spaces that just collect dust. You can turn these forgotten nooks into a beautiful and functional storage area by installing corner shelves. They are designed to fit perfectly into a 90-degree corner.
This is a wonderful spot for things that can make a room feel cluttered, like stacks of books, small plants, or picture frames. By using the corners, you are adding storage without taking up any valuable floor space. It draws the eye upward and makes the entire room feel more complete and intentionally designed.
DIY Instructions: Set Up a Simple Corner Shelf
Step 1: Get a Corner Shelf Kit
- At a home improvement store, you can buy a simple corner shelf kit. It will come with the shelf and all the screws and brackets you need to hang it.
Step 2: Get a Grown-Up to Help
- Hanging shelves requires tools and making sure they are level, so this is a job for an adult.
Step 3: Pick Your Corner and Height
- Decide which corner you want the shelf in and how high up you want it to be. Use a pencil to make a small mark on the wall.
Step 4: Use a Level
- The adult helping you will place the shelf in the corner and use a tool called a level to make sure it’s perfectly flat and not crooked. They will then mark where the screws need to go.
Step 5: Attach the Shelf
- The adult will use a drill to attach the brackets to the wall and then secure the shelf to the brackets. Once it’s tight and secure, it’s ready for you to decorate with your books or plants.
31. Curate Surfaces with the Rule of Three
Item: Curated Decorative Tray

A dresser top can easily become a messy landing pad for random items. To create a look that is styled instead of cluttered, use the “rule of three.” This is a simple design trick that says items grouped in odd numbers, especially threes, are more appealing to the eye. It stops a surface from looking like a storage shelf.
Gather three decorative items of varying heights and arrange them in a loose triangle on a tray. This simple act of grouping transforms clutter into a deliberate arrangement. It gives your eyes a calm place to rest and makes the whole room feel more put-together.
DIY Instructions: Style a Surface Using the Rule of Three
Step 1: Start with a Clean Slate
- Take everything off the surface you want to decorate, like the top of your dresser. Give it a good wipe down.
Step 2: Choose Your “Anchor”
- Find a tray or a flat, decorative placemat. This will be the base that holds your little group together. Place it on your clean surface.
Step 3: Pick Your Three Items
- Find three decorative objects that you like. The trick is to pick items with different heights: one tall, one medium, and one short. For example, a tall vase, a medium picture frame, and a short candle.
Step 4: Arrange Them in a Triangle
- Place your three items on the tray. Don’t line them up in a row. Instead, arrange them so they form a loose triangle shape.
Step 5: Step Back and Adjust
- Take a few steps back and look at your arrangement. You can nudge the items closer together or farther apart until it looks balanced and nice to you.
32. Choose a Hamper with a Lid
Item: Lidded Laundry Hamper

An open basket overflowing with dirty laundry can make an entire room feel untidy. It is a visual reminder of a chore that needs to be done. The simplest upgrade is to choose a hamper that has a lid. This one small change instantly hides the messy pile of clothes from view.
A lidded hamper contains the clutter and helps keep any odors from escaping. When you choose one made from a nice material like wicker or seagrass, the hamper stops looking like clutter itself. It becomes a stylish piece of furniture that adds to your room’s decor instead of taking away from it.
DIY Instructions: Give Your Old Hamper a Lid
Step 1: Find a Hamper and Some Cardboard
- You will need your current laundry hamper and a large, flat piece of very sturdy cardboard.
Step 2: Trace the Top
- Turn your hamper upside down and place the opening onto the cardboard. Use a pencil to trace around the rim of the hamper.
Step 3: Cut Out the Lid
- Using strong scissors or a box cutter (with a grown-up’s help), carefully cut out the shape you traced. Make the lid about an inch wider than the line all the way around so it has a little lip to rest on.
Step 4: Decorate Your New Lid
- You can make your cardboard lid look nice by covering it with fabric, contact paper, or even by painting it.
Step 5: Add a Handle
- To make the lid easy to lift, you can add a handle. Glue a loop of thick rope or a cabinet knob to the center of the top of the lid. Let it dry completely before using it.
33. Create a Designated Pet Zone
Item: Organized Pet Corner

Our furry friends are family, but their belongings can quickly spread throughout a room, making it look messy. Leashes on the floor, toys under the bed, and food bowls in a walkway all add to the clutter. The solution is to create a dedicated “pet zone” where all their things belong.
Choose a low-traffic corner of the room for this station. Use a stylish basket to hold all their toys. A hook on the wall or the back of the door is for their leash. Placing their food and water bowls on a silicone mat keeps the floor clean and defines their dining area.
DIY Instructions: Set Up a Tidy Pet Station
Step 1: Pick a Corner
- Find a small, out-of-the-way corner in your room where your pet likes to hang out. This will be their new spot.
Step 2: Get a Toy Bin
- Find a basket or a sturdy, open-top box. This will be the official toy bin. Go around the house and gather up all of your pet’s toys and put them inside.
Step 3: Install a Leash Hook
- Get a single wall hook (a stick-on one is easy to use). Attach it to the wall near the pet corner at a height that is easy for you to reach. Hang your pet’s leash and collar on it every time you come inside.
Step 4: Set Up the Dining Area
- Get a small, rubber-backed mat or a placemat. Place your pet’s food and water bowls on top of it. The mat will catch any spills and keep the bowls from sliding around.
Step 5: Teach Your Pet
- When it’s time to play, get the toys from the bin. When you are done, show your pet that you are putting them back. Soon they will know where their things belong.
34. Find a Home for Your Fitness Gear
Item: Hidden Fitness Storage

Having fitness equipment in your bedroom makes it easy to work out, but it can also make your relaxing space look like a cluttered gym. Dumbbells on the floor and yoga mats in the corner add to the visual noise. Find clever storage solutions to tuck this gear away when you’re done.
A storage ottoman at the foot of the bed is a great place to hide weights, resistance bands, and other small items. A tall, decorative basket can neatly hold a rolled-up yoga mat and a foam roller. By giving your equipment a home, you can easily switch your room from a gym back to a peaceful sanctuary.
DIY Instructions: The Storage Ottoman Switch
Step 1: Find a Bench or Ottoman
- You will need a storage ottoman or a bench with a lid that lifts up. You can often find these at furniture stores.
Step 2: Measure Your Gear
- Before you buy one, look at your biggest piece of workout gear that you want to hide (like a foam roller or a set of weights). Measure it to make sure it will fit inside the ottoman you choose.
Step 3: Designate Its Purpose
- Once you have your storage ottoman, make a rule: this is only for workout gear. Don’t let it become a new junk drawer.
Step 4: Load It Up
- Neatly place your equipment inside. You can use small bags or boxes inside the ottoman to organize smaller things like resistance bands or jump ropes.
Step 5: Put It to Use
- Place the ottoman at the foot of your bed or against a wall. It serves as extra seating and a secret storage spot. After every workout, put your gear right back inside.
35. Use a “Put-Away” Basket
Item: A “Go-Backs” Basket

One reason rooms get messy is because we leave things lying around. A book left on the nightstand, a pair of glasses on the dresser, or mail on the bed—it all adds up. A “put-away” basket is a simple habit that stops this from happening. It’s one central spot for everything that is out of place.
Instead of leaving something on a surface, toss it into this basket. Then, just once a day, take five minutes to walk around and put everything from the basket back in its proper home. This simple routine prevents small messes from turning into big ones and keeps your surfaces clear.
DIY Instructions: Start the Put-Away Basket Habit
Step 1: Find a Basket
- Choose any empty basket, bin, or even a sturdy shopping bag. It doesn’t have to be fancy. This will be your official “put-away” basket.
Step 2: Place It in a Hot Spot
- Put your basket in the area of your room where clutter seems to pile up the most. For many people, this is near the door or next to the bed.
Step 3: Make a New Rule
- The new rule is simple: if you see something that is out of place, but you don’t have time to put it away right then, you must put it in the basket. Don’t just set it down on a table.
Step 4: Schedule Your Tidy-Up Time
- Set an alarm on your phone for the same time every day. Label it “Put-Away Time.” Five minutes is all you need.
Step 5: Empty the Basket
- When the alarm goes off, grab your basket and walk around your home putting every single item back where it truly belongs. When the basket is empty, you’re done for the day.
36. Swap to See-Through Storage
Item: Clear Labeled Storage Bins

Solid-colored bins are great for hiding clutter, but they have a big downside: you can’t see what’s inside. This means you have to pull down every single box from a high shelf just to find your winter scarves. This process is frustrating and often creates a bigger mess than the one you started with.
The solution is to swap to clear storage containers. Being able to see the contents at a glance saves you a huge amount of time and energy. You can quickly identify what you need and grab the correct box on the first try. Add a simple label to the front for even faster recognition.
DIY Instructions: Add a “Window” to Your Old Bins
Step 1: Gather Your Supplies
- You will need a solid-colored storage bin (fabric or plastic), a marker, a craft knife (and a grown-up to help you use it), and a piece of clear vinyl or a sturdy plastic bag.
Step 2: Draw Your Window
- On the front of your bin, use a marker to draw a rectangle or a square. This will be the outline for your new window.
Step 3: Cut the Opening
- This is a job for an adult. Have them use the craft knife to carefully cut along the lines you drew, removing the piece of plastic or fabric to create a hole.
Step 4: Cut the “Glass”
- Take your piece of clear vinyl or a heavy-duty clear plastic bag. Cut a square that is about one inch bigger on all sides than the hole you just cut in your bin.
Step 5: Install the Window
- From the inside of the bin, place your clear plastic square over the hole. Use strong tape or a hot glue gun to secure all four edges of the plastic to the inside of the bin. Now your bin has a see-through window.
37. Get Laundry Baskets Off the Floor
Item: Hanging Closet Hampers

In many bedrooms, the biggest piece of clutter is the laundry basket itself. It takes up a significant amount of floor space and is often overflowing. To reclaim that space and hide the mess, take your laundry storage vertical. Hanging hampers are a genius space-saving solution.
These lightweight, collapsible bags can be hung on a sturdy hook on the back of a door or from the rod inside your closet. This gets the laundry completely off the floor, which instantly makes your room feel larger and cleaner. Many are designed to be easily taken down and carried to the laundry room.
DIY Instructions: Make a Simple Hanging Hamper
Step 1: Find a Pillowcase and a Hanger
- You will need an old pillowcase you no longer use and a sturdy clothes hanger. A plastic or wood hanger is better than a thin wire one.
Step 2: Get Your Needle and Thread
- Ask a grown-up if you can use a needle and some thread. You can also use safety pins for a no-sew version.
Step 3: Create the Opening
- Lay the pillowcase flat. Near the top seam (the end that is sewn shut), carefully cut a slit in the middle that is wide enough to push clothes through. About 8 inches should be good.
Step 4: Attach it to the Hanger
- Put the hanger inside the pillowcase through the normal open end. Push the hook of the hanger out through the slit you just cut.
Step 5: Secure It
- Fold the open end of the pillowcase over the bottom bar of the hanger. Use your needle and thread or your safety pins to secure the fabric so the hanger can’t fall out. Now you can hang your new hamper in the closet.
38. Isolate Your “To Wear” Pile
Item: Minimalist Garment Rack

The chair piled with clothes you plan to wear again is a classic sign of a disorganized room. A better system is to isolate these items on a small, separate clothing rack. This keeps your “in-between” clothes neat, unwrinkled, and ready to wear. It is also a great way to plan your outfits for the week ahead.
A simple, minimalist garment rack takes up very little space. By moving these clothes off the chair and out of your main closet, you create clear boundaries. Your main closet stays tidier, and your planned outfits look like a curated collection instead of a pile of clutter.
DIY Instructions: The Ladder Wardrobe
Step 1: Find a Decorative Ladder
- You will need a simple wooden or bamboo ladder. These are often sold as decorations for holding blankets. Make sure it’s tall enough for your clothes.
Step 2: Lean it Against the Wall
- Find an empty spot on a wall and lean the ladder against it. Make sure it’s steady.
Step 3: Get Some “S” Hooks
- At a hardware store, buy a few “S” shaped hooks. These are hooks that are shaped like the letter S.
Step 4: Put Your Hangers to Use
- Put the clothes you want to hang on regular clothes hangers.
Step 5: Hang Them Up
- Hook the top part of an S-hook over one of the ladder rungs. Then, hang your clothes hanger from the bottom part of the S-hook. You can also drape your pants or scarves directly over the rungs of the ladder.
Creating an organized bedroom is a journey, not a one-time fix. You do not need to tackle all 38 of these solutions at once. Instead, start with the one idea that addresses your biggest frustration. Small, consistent efforts are what build a tidy and peaceful space.
The real goal is to create simple systems that work for your life. A clear floor, a neat closet, and a clean nightstand are small victories that bring a large sense of calm to your daily routine. They make your room a place you can truly relax in.
Your bedroom has the potential to be the sanctuary you deserve. Take one of these ideas and put it into action today. You are just one small step away from a more peaceful, organized home.
Key Takeaways
- Give Everything a Home: The foundation of an organized room is assigning a specific spot for every single item. This prevents clutter from accumulating on surfaces.
- Use Vertical & Hidden Space: Don’t forget to look up, behind, and under. Walls, doors, and the area under your bed offer a huge amount of untapped storage potential.
- Contain Your Clutter: Use trays, baskets, bins, and dividers to group similar items together. This creates visual order and makes things easy to find.
- Build Small Daily Habits: Lasting tidiness comes from routine. A 5-minute floor sweep or laying out your clothes the night before can make a massive difference.
- Hide It in Plain Sight: Choose furniture with hidden functions. A storage ottoman, a lidded hamper, or a cabinet for laundry can conceal messes while adding style.