Does your bedroom feel a little uninspired lately? It happens to the best of us. This is the one room that should be your personal sanctuary, a place to unwind and recharge. Yet, it’s often the last space we think to update.

Over time, your personal retreat can start to feel stale. The same layout, the same colors, the same bedding. It becomes just a room you sleep in, not a space that truly feels like your own. You might think you need a huge budget or a complete overhaul to make a change.
But that simply isn’t true.
A fresh, vibrant bedroom is closer than you think. All it takes is a few simple swaps. This guide is filled with 43 easy and budget-friendly ideas to breathe new life into your space. From adding new textures to playing with light, each tip comes with a simple DIY project to help you get started right away.
1. Introduce Earthy Textures with a Chunky Knit Blanket
Cozy Chunky Knit Throw

A thick, woven blanket brings instant comfort to any bedroom. Its rich texture creates a feeling of warmth and relaxation. You can instantly change the mood of your space by simply draping one over your bed. The soft, oversized loops add a layer of visual interest that smooth cotton or silk can’t match.
This simple addition works well with other natural materials. Think about linen bedding, a jute rug, or a wicker basket placed in the corner. Together, these elements create a calm and grounded atmosphere. Your bedroom transforms into a personal retreat, a place that feels both stylish and deeply restful. It is an easy swap for a big impact.
DIY Your Own Cozy Chunkey Throw (Arm Knitting)
This is a fun way to make a blanket without any needles!
Step 1: Get Your Yarn First, you’ll need some special yarn. Go to a craft store and ask for “chunky” or “jumbo” yarn. It looks like a big, fluffy rope. You will probably need about 4 or 5 big bundles (called skeins) to make a good-sized throw blanket.
Step 2: Make the First Loop Take the end of your yarn and make a loop, like the first step of tying your shoes. This is called a slip knot. Put your hand through the loop, grab the long piece of yarn (the one attached to the ball), and pull it through to make a new loop. Make this first loop big enough to slide onto your arm.
Step 3: Put Stitches On Your Arm Slide that first loop onto your right wrist. Now, with the yarn in your left hand, wrap it over your right thumb and hold it in your fist. Use your left hand to pull the yarn from your right fist up and over your right hand, creating a new loop. Slide that new loop onto your right arm. Repeat this until you have about 20 loops on your arm. These are your first stitches!
Step 4: Start Knitting! Now, hold the long piece of yarn in your right hand. Take the very first loop on your right wrist (the one closest to your elbow) and pull it up and completely off your hand. You just made a new stitch! Grab that new stitch with your left hand and put it on your left wrist. Do this for all 20 stitches, moving them from your right arm to your left arm.
Step 5: Keep Going Back and Forth Great job! Now all the stitches are on your left arm. Just do the same thing again but in the opposite direction. Hold the yarn in your left hand and move all the stitches from your left arm back over to your right arm. Keep doing this—moving the stitches from arm to arm—until your blanket is as long as you want it to be.
Step 6: Finish the Blanket When you are ready to finish, knit two stitches onto your right arm. Then, take the first stitch (closest to your elbow) and pull it up and over the second stitch, then off your hand. You will have one stitch left. Knit one more stitch over from your left arm, so you have two again. Repeat this process until you only have one single loop left on your right arm.
Step 7: Tie the Final Knot Cut the yarn, leaving a tail about six inches long. Take that tail and pull it all the way through your last loop. Pull it tight to make a knot. You did it! You have a brand new, super cozy blanket.
2. Add Industrial-Style Wall Sconces
Modern Industrial Sconce

Wall-mounted lights free up space on your nightstand. They create a clean, minimalist look. These fixtures act as both a light source and a piece of wall art. The mix of metal and an exposed bulb adds a raw, urban feel to the room, especially against a dark, moody wall color.
This kind of lighting is very useful for reading in bed. It directs a focused glow right where you need it. Swapping a bulky table lamp for a sleek sconce is a functional upgrade. It makes the whole area around your bed feel more open and intentional. It is a smart change for smaller bedrooms.
DIY Your Own Plug-in Wall Sconce
Let’s make a cool lamp that hangs on the wall, no electrician needed!
Step 1: Gather Your Supplies Go to a hardware store with a grown-up. You will need a small wooden circle or square (this will be the base), a “plug-in lamp kit” (it’s a cord with a socket for the lightbulb and a plug for the wall), a drill, some sandpaper, and a cool-looking lightbulb (like an Edison bulb). You can also get some paint or wood stain if you want to color the wood.
Step 2: Prepare the Wood Base If your wood base has any rough spots, use the sandpaper to make it smooth. After that, you can paint it a fun color or use the stain to make it look like dark wood. Let it dry completely.
Step 3: Drill a Hole Ask a grown-up to help you with this part. You need to drill a hole in the center of your wooden base. The hole should be just big enough for the cord from your lamp kit to pass through.
Step 4: Put it All Together Take the end of the cord with the lightbulb socket. Push the cord through the hole in your wood base from the front, so the socket is sitting nicely on the front of the wood. Some lamp kits have a nut you can screw on the back to hold it in place.
Step 5: Hang it Up Decide where you want your lamp on the wall next to your bed. Ask a grown-up to help you nail or screw the wood base to the wall. Make sure it’s secure.
Step 6: Finish Up Screw in your cool lightbulb. Plug the cord into the wall outlet. You can let the cord hang straight down or use small clips to arrange it in a cool pattern on the wall. Now you have a new reading light!
3. Hang Bohemian Macrame Curtains
Textured Macrame Wall Hanging

Macrame brings a soft, crafty feeling to a room. This knotted wall art adds a layer of texture that is gentle and interesting. It can hang on the wall or be used as a light-filtering curtain. The intricate patterns create a focal point without overwhelming the space.
This style works well with other natural elements like wood and plants. It helps create a calm and relaxing environment. A touch of macrame can make a room feel more personal and handmade. It is a simple way to introduce a bit of bohemian spirit into your bedroom.
DIY a Simple Macrame Wall Hanging
Let’s make a cool knotted decoration for your wall!
Step 1: Get Your Stuff You will need macrame cord (it’s like thick cotton string), a stick or a wooden dowel (you can find one in your yard or buy one at a craft store), and scissors.
Step 2: Cut Your Cords Cut ten pieces of macrame cord. Each piece should be really long, about as long as you are tall.
Step 3: Attach Cords to the Stick Take one piece of cord and fold it in half so you have a loop at one end. Place the loop over the top of your stick. Then, pull the two loose ends of the cord through the loop and pull tight. This is called a “Lark’s Head” knot. Do this with all ten of your cords.
Step 4: Make Your First Row of Knots Now you will make square knots. Take the first four cords on the left. Let the two middle cords hang straight. Take the left cord and make a “4” shape over the two middle cords. Then, take the right cord, pass it over the tail of the “4”, then go under the two middle cords and up through the loop of the “4”. Pull both ends tight. That’s half a knot!
Step 5: Finish the Square Knot Now do the same thing, but start from the right side. Take the right cord and make a backward “4” over the middle cords. Take the left cord, pass it over the tail of the backward “4”, then under the middle cords and up through the loop. Pull tight. You just made one full square knot! Make square knots all the way across your row of cords.
Step 6: Make More Rows To make the next row, leave the first two cords on the left alone. Start your next square knot with the third, fourth, fifth, and sixth cords. This will make your knots look like a triangle pattern. Keep making rows of knots.
Step 7: Finish with a Fringe Once your knotted part is long enough, you can leave the rest of the cords hanging down. Use your scissors to trim the bottom ends. You can cut them straight across, in a “V” shape, or at an angle. Your macrame is ready to hang!
4. Use Statement Wall Mirrors
Glamorous Statement Mirrors

A large mirror can completely change a room. It makes the space feel bigger and brighter by bouncing light around. A mirror with a unique frame, like a golden sunburst or a tall arch, also acts as a piece of art. It creates a beautiful focal point on any wall.
Placing a mirror across from a window is a great way to bring more natural light into your room. It adds a touch of glamour and sophistication. This is a practical and beautiful swap. It can make a small or dark bedroom feel more open and alive.
DIY Your Own Sunburst Mirror
Let’s make a mirror that looks like a shining sun!
Step 1: Your Sun-Making Kit You’ll need a small, round mirror from a craft store. You’ll also need something for the sun’s rays. Wooden skewers (the kind for making shish kebabs) or thin wooden dowels work great. You will also need a hot glue gun (ask a grown-up for help), a piece of cardboard, and gold spray paint.
Step 2: Prepare Your Base Trace your round mirror onto the piece of cardboard and cut the circle out. This cardboard circle will be the back of your mirror.
Step 3: Glue on the Rays Now it’s time to make the sun’s rays. Ask a grown-up to help you with the hot glue gun. Glue your wooden skewers or dowels all around the edge of the cardboard circle. You can make some rays long and some a little shorter to make it look more interesting.
Step 4: Paint it Gold Take your creation outside or to a well-ventilated area. Place it on some old newspaper. Use the gold spray paint to cover all the wooden rays and the cardboard. Make sure to get the front and the sides. Let it dry completely. You might need to add a second coat of paint.
Step 5: Attach the Mirror Once the paint is totally dry, put a good amount of hot glue in the center of your sunburst, on the cardboard. Carefully press your round mirror onto the glue. Hold it in place for a minute until the glue sets.
Step 6: Hang Your Sun You can glue a loop of ribbon or string to the back of the cardboard to hang it on a nail. Find a nice spot on your wall and show off your shiny new sunburst mirror!
5. Lay Down a Bold Geometric Area Rug
High-Contrast Graphic Rug

A rug anchors the furniture in your bedroom. It defines the space and adds a soft layer under your feet. Choosing a rug with a bold, graphic pattern adds energy and a modern touch. The clean lines and repeating shapes draw the eye and make the floor a feature of the room.
This is a great way to introduce a pattern into your design without making it too busy. A neutral color palette with a strong pattern, like the black and cream one here, feels both exciting and sophisticated. It can tie the whole room together. Swapping a plain rug for a patterned one is a quick, high-impact change.
DIY a Painted Geometric Rug
Let’s turn a plain rug into a cool, modern masterpiece!
Step 1: Get Your Rug and Tools You will need a plain, flat-weave rug. A simple, cheap one made of jute or cotton is good for this. You will also need painter’s tape (the blue kind), a ruler or measuring tape, a pencil, and fabric paint or regular acrylic paint mixed with something called “fabric medium.” You’ll also need a paintbrush.
Step 2: Plan Your Design Decide what kind of pattern you want. You can do stripes, triangles, zig-zags, or squares. Use your ruler and a pencil to lightly draw your design on the rug.
Step 3: Tape Your Pattern This is the most important step! Carefully place the painter’s tape along the lines you drew. Press the edges of the tape down very firmly. This will keep your paint from bleeding underneath and will give you nice, sharp lines.
Step 4: Time to Paint Now for the fun part! Start painting inside the taped-off areas. Use your paintbrush to apply a nice, even coat of paint. Don’t use too much paint at once, or it might sneak under the tape. Let the first coat dry.
Step 5: The Big Reveal Once the paint is completely dry, it’s time to peel off the tape. Do it slowly and carefully. You should have clean, sharp lines and a very cool pattern.
Step 6: Let it Cure Let your rug sit for a day or two to make sure the paint is totally hardened before you walk on it or put furniture on it. Now you have a custom rug that you designed yourself!
6. Create a Rustic Reclaimed Door Headboard
Farmhouse-Style Repurposed Headboard

A headboard can be the main focus of a bedroom. Using something unexpected, like an old wooden door, creates a unique and personal touch. The weathered wood brings in natural texture and a sense of history. It tells a story and adds character that you can’t buy in a store.
This kind of headboard provides a strong, rustic backdrop for soft pillows and bedding. The contrast between the rough wood and the smooth fabric is visually interesting. It’s a creative way to recycle materials and give your bedroom a warm, farmhouse feel.
DIY a Faux Reclaimed Wood Headboard
You don’t need a real old door to get this look. We can make one with new wood!
Step 1: Gather Your Wood Go to a home improvement store and get three or four new wooden planks. Have them cut to be just a little wider than your bed. You will also need two smaller pieces of wood to attach them together on the back. You’ll need screws, a screwdriver or drill, sandpaper, and some wood stain in a color you like (like gray or brown).
Step 2: Build Your Headboard Lay your long planks on the floor, side by side, with the best-looking side facing down. Place your two smaller pieces of wood across the planks, one near the top and one near the bottom. Use a drill or screwdriver to screw the small pieces to the long planks. This will hold your headboard together.
Step 3: Make it Look Old Now, let’s make the new wood look old and rustic! Use sandpaper to round off the sharp edges and corners. You can even hit it gently with a hammer or some chains to make little dents and marks. This will make it look like it’s been around for a long time.
Step 4: Stain the Wood Wipe all the dust off your headboard. Use a rag or a brush to apply the wood stain. The stain will make the wood look weathered. Let it soak in for a few minutes, then wipe off the extra with a clean rag. Let it dry completely.
Step 5: Hang it on the Wall This is a job for a grown-up. The easiest way to hang your new headboard is to screw it directly into the wall behind your bed. Make sure it’s attached securely to the wall studs so it won’t fall. Now push your bed up against it!
7. Curate a Moody Vintage Gallery Wall
Eclectic Gallery Wall

A blank wall is an opportunity. Creating a gallery wall turns that space into a reflection of your personality. This collection of vintage portraits and landscapes adds a classic, sophisticated mood. The mix of ornate gold frames and simple black ones creates a rich, collected look.
Arranging the art close together against a dark wall makes the entire display feel like a single, large piece of art. It draws you in and makes the room feel more intimate and interesting. This is a way to show what you love. It transforms a simple bedroom into a personal museum.
DIY Your Own Gallery Wall
Let’s make a wall full of your favorite pictures and art!
Step 1: Collect Your Art First, you need things to frame! You can use photos of your family and friends, drawings you’ve made, pictures from old magazines or books, or even cool-looking postcards. Gather a bunch of things in different sizes.
Step 2: Find Some Frames You can find frames at thrift stores, dollar stores, or craft stores. It looks really cool if you mix and match different styles and colors. Some can be fancy and gold, and others can be simple and black or white.
Step 3: Plan Your Layout This is a super important step! Before you start making holes in the wall, lay all your framed pictures on the floor. Move them around until you find an arrangement that you like. Try to keep the spacing between the frames about the same.
Step 4: Make Paper Templates For each frame, trace its shape onto a piece of paper (like newspaper or wrapping paper) and cut it out. On each paper cutout, mark the spot where the nail should go.
Step 5: Tape Them to the Wall Using painter’s tape, stick your paper templates on the wall in the exact same arrangement you made on the floor. You can easily move them around until it looks just right.
Step 6: Hammer Time! Ask a grown-up to help you. Hammer a nail right through the spot you marked on each piece of paper. Then, tear the paper off the wall. The nail will be in the exact right place.
Step 7: Hang Your Art Now you can hang your real pictures on the nails. Step back and admire your awesome new gallery wall!
8. Pile on Vibrant Mix-and-Match Throw Pillows
Colorful Textured Pillows

One of the fastest ways to give a bedroom a new look is to change the throw pillows. A big pile of colorful, textured pillows makes a bed look exciting and comfortable. Don’t worry about making them all match. Mixing different colors, patterns, and fabrics is what makes it fun.
Look for pillows with interesting textures, like chunky knits, soft chenille, or raised embroidery. This variety adds depth and makes the bed feel extra cozy and inviting. This simple swap can instantly brighten up a neutral room. It adds a dose of personality and playfulness.
DIY a Simple No-Sew Pillow Cover
Let’s make a new cover for a pillow without any sewing!
Step 1: What You’ll Need You will need a square pillow you already have (or a pillow insert), a piece of fabric that is about twice as wide as your pillow, and either fabric glue or special iron-on hemming tape. You will also need scissors and an iron if you use the tape.
Step 2: Cut Your Fabric Lay your fabric on the floor with the pretty side facing down. Place your pillow in the middle of it. You want the fabric to be long enough to fold over the pillow like you are wrapping a birthday present. Trim the fabric so you have about six inches of extra fabric on the top and bottom.
Step 3: Fold it Like a Burrito First, fold the top edge of the fabric down toward the middle of the pillow. Then fold the bottom edge up to overlap it. It should look like your pillow is tucked inside a fabric tube.
Step 4: Secure the Middle If you are using fabric glue, run a line of glue along the edge of the top flap and press it down onto the bottom flap. If you are using hemming tape, place the tape between the two flaps and have a grown-up help you press it with a hot iron.
Step 5: Close the Sides Now you have two open ends on the left and right. Fold the corners in, like you are wrapping a present. Fold the top flap down and the bottom flap up.
Step 6: Glue or Iron the Sides Shut Use your fabric glue or hemming tape to secure these side flaps. Do this for both the left and right sides.
Step 7: Flip it Over Let the glue or tape cool and dry completely. That’s it! You have a new pillow cover. Since one side will have the folded ends, you just keep that side facing the back.
9. Add a Lush Indoor Plant Collection
Living Greenery Wall

Plants bring life and energy into a room. Adding a few green friends can make a stale space feel fresh and vibrant. They clean the air and add a of nature, which can be very calming. You can arrange them on shelves, hang them in baskets, or place larger ones on the floor.
Mixing different types of plants creates a beautiful variety of leaf shapes and shades of green. Placing them near a window will help them thrive and will also make your room feel more connected to the outdoors. Taking care of plants can be a relaxing hobby, too.
DIY a Painted Terracotta Pot
Let’s give a plain plant pot a fun makeover!
Step 1: Your Pot Painting Station You will need a plain terracotta pot (the orange-y clay kind), some acrylic craft paints in your favorite colors, paintbrushes, a cup of water for rinsing brushes, and some paper towels. It’s a good idea to put down some newspaper to protect your table.
Step 2: Clean Your Pot Wipe your pot with a damp paper towel to get any dust or dirt off. Let it dry before you start painting.
Step 3: Paint a Base Coat (Optional) If you want, you can paint the whole pot one solid color first. White is a great choice because it will make the other colors you paint on top look really bright. Let this base coat dry completely.
Step 4: Decorate! This is where you get to be creative. You can paint stripes, polka dots, zig-zags, flowers, or even a funny face on your pot. Use different brushes to make thin lines and thick lines. Have fun with it!
Step 5: Let It Dry When you are happy with your design, let the paint dry all the way. This might take an hour or two.
Step 6: Plant Your New Friend Once your pot is dry, it’s ready for a plant. Go with a grown-up to a nursery or garden store and pick out a small indoor plant. They can help you put soil and the plant into your newly decorated pot. Find a sunny spot in your room for it!
10. Install Chic Art Deco Drawer Pulls
Stylish Drawer Hardware

Sometimes the smallest details make the biggest difference. Swapping out the plain, boring knobs on your dresser or nightstand is a quick and easy upgrade. Choosing hardware with a unique shape, like these golden fans, adds a dose of style and personality.
This simple change can make a basic piece of furniture look much more expensive and custom. It’s like putting on a fancy piece of jewelry. It elevates the whole look of the furniture and the room. This project takes only a few minutes but provides a lot of impact for very little effort.
DIY: Swap Your Drawer Knobs
This is one of the easiest ways to make your furniture look new!
Step 1: Get Your New Knobs First, find some new knobs or drawer pulls that you love. Hardware stores and online shops have tons of cool designs. Make sure you count how many you need!
Step 2: Get Your Tool You will only need one tool for this job: a screwdriver. Make sure it fits the screw on your current knobs. Most are either a Phillips head (like a plus sign) or a flat head (like a minus sign).
Step 3: Take Off the Old Knob Open the drawer. On the inside, you will see the end of a screw holding the knob in place. Use your screwdriver to turn the screw to the left (lefty-loosey) until it comes all the way out. The old knob will come right off.
Step 4: Put On the New Knob Your new knob probably came with its own screw. From the inside of the drawer, push the new screw through the hole. Then, from the outside, line up your new knob with the screw and start turning it to the right (righty-tighty).
Step 5: Tighten it Up Keep turning the knob until it’s nice and snug. You can use your screwdriver on the inside to hold the screw still while you tighten the knob from the outside. Don’t make it so tight that you hurt the wood, just tight enough so it doesn’t wiggle.
Step 6: You’re Done! Repeat for all your drawers. In just a few minutes, you have given your dresser a whole new style!
11. Layer Global-Inspired Textiles
Bohemian Woven Decor

Layering different fabrics can make a bedroom feel rich and well-traveled. A mix of patterns and textures from around the world adds a unique, bohemian vibe. Woven baskets on the wall, a patterned rug as a wall hanging, and multiple throw blankets create a cozy, collected feel. The key is to combine different materials like wool, cotton, and jute.
This approach tells a story of adventure and artistry. The warm, earthy tones create a comfortable and inviting atmosphere. It is a way to display beautiful textiles as art. This makes the room feel personal and full of character, turning your bed into a stylish nest.
DIY a Woven Wall Hanging
Let’s make a mini woven tapestry for your wall!
Step 1: Make Your Loom You will need a sturdy piece of cardboard. Cut it into a rectangle, maybe the size of a book. Then, cut small slits along the top and bottom edges, about half an inch apart. This is your loom!
Step 2: String Your Loom Take some plain string (called “warp”) and slide it into the first slit at the top. Bring it all the way down and slide it into the first slit at the bottom. Then wrap it around the back and up into the second slit at the top. Keep wrapping the string up and down until all the slits are filled. Tie the end on the back.
Step 3: Start Weaving Now for the fun part! Take some colorful yarn (this is called “weft”). Tie one end to the first warp string on the left. Now, weave the yarn over the first string, under the second, over the third, and so on, all the way across. This is called a “plain weave.”
Step 4: Weave Back When you get to the other side, just turn around and weave back. This time, you will go under the strings you went over, and over the strings you went under. Use your fingers to gently push the rows of yarn together.
Step 5: Change Colors and Textures Keep weaving rows of yarn. You can switch colors whenever you want! Just tie a new piece of yarn to the old one. You can also use fluffy yarn, skinny yarn, or even strips of fabric to make it look interesting.
Step 6: Finish It Up When you are done weaving, cut the warp strings from the back of your cardboard loom. Tie the top loops to a small stick or dowel to hang it. You can leave the bottom loops as they are, or tie them in knots to create a fringe. You made a beautiful piece of art!
12. Mount a Floating Nightstand
Minimalist Floating Bedside Table

A floating nightstand is a fantastic choice for small bedrooms. Because it mounts directly to the wall, it frees up floor space. This makes the entire room feel larger and less cluttered. The clean lines and simple design contribute to a modern, minimalist aesthetic. It provides just enough space for essentials like a lamp, a book, and a glass of water.
This type of nightstand creates an airy and open feeling. It is also easier to clean underneath than a traditional table. Swapping a bulky bedside table for a sleek floating one is a smart, space-saving move that adds a touch of modern style.
DIY a Simple Floating Shelf Nightstand
Let’s make a cool shelf that looks like it’s floating on the wall!
Step 1: Get Your Supplies You will need one nice piece of wood for your shelf, two “L-brackets” (they look like the letter L), a drill, screws, and a level (it’s a tool that helps you hang things straight). You can paint or stain your wood if you want.
Step 2: Prepare Your Shelf If you want to paint or stain your wooden shelf, do that first. Make sure it’s completely dry before you move to the next step.
Step 3: Find the Studs This is a very important step for a grown-up to help with. You need to hang your shelf on the strong wooden beams inside the wall, called studs. A grown-up can use a “stud finder” tool or tap on the wall to find them. Mark the spots with a pencil.
Step 4: Attach Brackets to the Wall Hold one L-bracket on the wall where you marked a stud. Use the level to make sure it’s straight up and down. Ask the grown-up to use the drill to screw the bracket into the wall. Do the same for the second bracket, making sure it’s level with the first one.
Step 5: Attach the Shelf Place your wooden board on top of the two brackets. Use your drill and some shorter screws to attach the shelf to the brackets from underneath.
Step 6: Check Your Work Use the level one more time to make sure your shelf is perfectly flat. That’s it! Your floating nightstand is ready for your lamp and books. Because you screwed it into the studs, it will be very strong.
13. Display Wabi-Sabi Style Pottery
Artisanal Ceramic Decor

Wabi-sabi is a Japanese idea that finds beauty in imperfection. Using handmade pottery in your bedroom is a great way to bring this feeling into your space. The slightly uneven shapes, unique glazes, and natural textures of these pieces add a sense of calm and character. They remind us that not everything has to be flawless to be beautiful.
You can display a single, interesting vase with a dry branch, or group a few pieces together on a shelf or bench. This style celebrates natural materials and simple forms. It helps create a serene and grounded atmosphere, making your bedroom a peaceful retreat.
DIY a Wabi-Sabi Air-Dry Clay Bowl
Let’s make a cool, perfectly imperfect bowl without needing a hot oven!
Step 1: Get Your Clay Go to a craft store and buy a package of “air-dry clay.” You’ll also need a small bowl of water and maybe a rolling pin (or a smooth can or bottle). It’s a good idea to work on a placemat or some wax paper.
Step 2: Shape Your Bowl Take a piece of clay about the size of an apple. Knead it in your hands for a minute to make it soft. You can roll it into a ball and then flatten it out with your hands or the rolling pin. Don’t worry about making it a perfect circle!
Step 3: Pinch and Form Once you have a flat-ish piece, start pinching the edges and pulling them up to form the sides of your bowl. This is called a “pinch pot.” Keep turning the clay in your hand as you pinch. The sides can be a little wobbly and uneven. That’s what makes it look special.
Step 4: Smooth and Decorate Dip your fingers in the water and gently smooth out any cracks or rough spots. You can leave it plain or press things into the clay to make textures, like a leaf or the tines of a fork.
Step 5: Let it Dry Place your finished bowl somewhere safe and let it dry. This is the hardest part: waiting! It will probably take two or three days for it to get completely hard. You will know it’s ready when it feels light and is all one color.
Step 6: Paint it (Optional) Once it’s totally dry, you can paint your bowl with acrylic craft paints. You can paint the inside a different color than the outside. Let the paint dry. This bowl is for decoration, so don’t put food or water in it. It’s great for holding keys or jewelry!
14. Add a Cozy Cable Knit Throw
Textured Cable Knit Blanket

A cable knit blanket is a classic way to add texture and warmth to a bedroom. The thick, braided pattern feels timeless and incredibly cozy. It’s like putting a favorite sweater on your bed. Draping it over your duvet or at the foot of the bed adds a layer of visual comfort.
This kind of throw works with almost any style, from modern to farmhouse. In a neutral color like gray or cream, it adds sophistication without being loud. It’s an easy swap that makes your bed look more inviting and feel more comfortable on a chilly night. It’s a simple touch that brings a lot of comfort.
DIY a Faux Cable Knit Fleece Blanket
Let’s make a blanket that looks like it has cozy cables, but with a super easy trick!
Step 1: Your Blanket-Making Supplies You will need two large pieces of fleece fabric in the same color. You will also need sharp fabric scissors and a ruler.
Step 2: Make the Fringe Lay your two pieces of fleece on top of each other on the floor, making sure all the edges are lined up. Now, all around the four edges of the blanket, cut a fringe. The cuts should be about 4 inches deep and 1 inch wide. Cut through both layers of fabric at the same time.
Step 3: Tie the Edges Now you need to tie the two layers together. Take the top and bottom fringe pieces and tie them together in a simple double knot. Do this all the way around the entire blanket. This will keep your two layers together and create a nice border.
Step 4: Create the “Cables” Lay your blanket out flat. Now, you will make small cuts in the top layer of fleece only. Be careful not to cut through the bottom layer! Make a small, a two-inch slit. Then, skip about four inches and make another two-inch slit. Continue this all the way down the blanket to make a column of slits. Make several columns of these slits across your blanket.
Step 5: Weave the “Cables” This is the magic part! Start at the top of one column. Reach through the top slit and grab the fabric bar below it. Pull that bar up and through the top slit. Now you have a new loop. Reach through that new loop, grab the bar below it, and pull it through. Keep doing this all the way down the column. It will create a braided look, just like a cable knit sweater!
Step 6: Finish the Ends When you get to the bottom of a column, just cut the last fabric bar in half and tie a small knot to secure it. Do this for all your “cable” columns. Now you have a super soft, textured blanket!
15. Bring in an Aromatherapy Diffuser
Essential Oil Diffuser

A bedroom should appeal to all your senses, not just your eyes. An aromatherapy diffuser can completely change the feeling of a room by adding a pleasant scent. Using essential oils like lavender or chamomile can create a calming atmosphere that helps you relax and sleep better.
Many diffusers also have a soft light and make a gentle mist, which adds to the peaceful mood. They often have a natural wood finish that fits in well with other decor. Swapping a regular candle for a diffuser is a safe and long-lasting way to keep your room smelling fresh and feeling like a spa.
DIY a Simple Reed Diffuser
Let’s make a room freshener that works all by itself!
Step 1: Gather Your Scent-Making Stuff You will need a small glass bottle or jar with a narrow opening (an old spice jar or small vase works well). You will also need some reed diffuser sticks (you can buy these at a craft store). For the liquid, you need a “carrier oil” like almond oil or safflower oil, and your favorite essential oils.
Step 2: Mix Your Scent Fill your glass bottle about halfway with the carrier oil. Now, add your essential oils. You will need about 20-30 drops. You can use just one scent, like lavender, or mix a few together. For example, you could mix orange and clove for a cozy smell.
Step 3: Stir it Up Put the lid on your bottle and give it a gentle shake to mix the oils together. Or you can use one of the reed sticks to stir it carefully.
Step 4: Add the Reeds Take about 5 to 7 of your reed sticks and place them inside the bottle so they are soaking in the oil mixture.
Step 5: Let Them Soak Let the sticks sit in the oil for about an hour. The reeds are like tiny straws that will start to soak up the scented oil.
Step 6: Flip the Reeds After an hour, take the sticks out, flip them over, and put the dry ends into the bottle. Now the oily ends are in the air, releasing the beautiful scent into your room!
Step 7: Keep it Fresh About once a week, you should flip the sticks again to refresh the scent. Your DIY diffuser will make your room smell amazing!
16. Add a Plush Velvet Bench
Elegant Velvet Seating

A bench at the foot of the bed is both a beautiful and useful piece of furniture. It provides a place to sit while putting on shoes or a spot to lay out your clothes for the next day. Choosing a bench in a rich fabric like velvet adds a touch of luxury and comfort to the room.
The deep green color and tufted details of this bench create an elegant focal point. The slim metal legs keep it from looking too heavy. This is a great way to add an extra layer of texture, color, and sophistication to your bedroom. It makes the space feel more complete and thoughtfully designed.
DIY an Upholstered Stool
Let’s turn a boring stool into a fancy, soft seat!
Step 1: Your Fancy Stool Supplies You will need a small, simple stool or bench. You’ll also need a piece of foam that is the same size as the top of the stool, a piece of fabric (like velvet), and a staple gun. This is a job where a grown-up’s help is needed.
Step 2: Create the Cushion Place the foam on top of the stool. You can use a bit of glue to hold it in place if you want.
Step 3: Cover with Fabric Lay your fabric on the floor with the pretty side facing down. Place the stool upside down on top of the fabric. The foam should be between the fabric and the stool top.
Step 4: Staple the First Side Pull the fabric on one side up and over the edge of the stool’s seat. Ask a grown-up to use the staple gun to put a few staples on the underside of the seat to hold the fabric in place.
Step 5: Staple the Opposite Side Now, go to the opposite side of the stool. Pull the fabric very tight, then fold it over and staple it underneath. You want the fabric to be smooth and snug over the foam.
Step 6: Do the Other Two Sides Now do the same thing for the other two sides. Pull the fabric tight and staple it underneath.
Step 7: Fold the Corners The corners can be tricky. You need to fold them neatly, like you are wrapping a birthday present. Pull the corner point in first, then fold the sides over it. It takes a little practice to get it smooth. Staple the folded corners securely underneath.
Step 8: Trim the Excess Use scissors to trim off any extra fabric from the underside of the stool. Flip it over, and you have a brand new, custom-upholstered stool!
17. Group Candles for a Cozy Glow
Clustered Candle Display

There is nothing quite like the soft, flickering light of a candle to make a room feel cozy and romantic. Instead of just one candle, try grouping several of them together. A cluster of candles in different heights and sizes creates a beautiful and dynamic display.
Placing them on a simple tray helps to contain them and makes the arrangement look intentional. The warm light is relaxing and helps you unwind at the end of the day. This simple addition can transform your bedroom into a peaceful sanctuary, especially on a dark evening.
DIY a Painted Candle Holder Set
Let’s take some plain candle holders and make them a matching set!
Step 1: Your Candle Holder Collection Go to a thrift store or a dollar store and find a few candle holders. Look for different shapes and sizes. They can be made of glass, metal, or wood.
Step 2: Clean and Prepare Wash your candle holders with soap and water to make sure they are clean. Let them dry completely. If they are shiny, it’s a good idea to lightly sand them so the paint will stick better.
Step 3: Get Ready to Paint Take your candle holders outside or to a well-ventilated area and place them on some newspaper. You will need spray paint. Using one single color for all the different candle holders is what will make them look like a cool, matching set. A color like white, black, or gold works well.
Step 4: Spray Painting Time Shake the spray paint can really well. Hold the can about a foot away from the candle holder and spray in light, even strokes. It’s better to do a few thin coats than one thick, drippy coat.
Step 5: Let Them Dry and Recoat Let the first coat of paint dry for about an hour. Then, spray a second coat on to make sure you have covered everything. Let your finished candle holders dry for at least 24 hours so the paint gets hard.
Step 6: Arrange Your New Set Once they are completely dry, you can arrange your new, custom-colored candle holders on a dresser or a tray. Add some candles, and ask a grown-up to light them for you to see the beautiful glow.
18. Hang Heavy, Floor-to-Ceiling Drapes
Elegant Blackout Curtains

The way you dress your windows has a big effect on the feel of your room. Hanging heavy drapes that go all the way from the ceiling to the floor makes a room look taller and more elegant. This trick of the eye adds a sense of drama and luxury.
Using thick, dark-colored curtains also helps to block out light, which is great for sleeping in. It can also help to muffle sound from outside. Swapping flimsy blinds for substantial drapes is an upgrade that makes your room feel more private, comfortable, and sophisticated.
DIY No-Sew Curtain Hemming
Let’s make sure your curtains are the right length without any sewing!
Step 1: Your Curtain Tools You will need your new curtains, an ironing board, an iron, a measuring tape, some pins, and a roll of “iron-on hemming tape.” You can find this at any craft or fabric store.
Step 2: Hang Your Curtains First, hang your new curtains up on the curtain rod. This is the only way to know exactly how long they need to be.
Step 3: Find the Right Length Decide where you want your curtains to end. Some people like them to just barely touch the floor, and some like them to “puddle” a little bit. Once you decide, fold the bottom of the curtain up to that length and use a few pins to hold it in place.
Step 4: Take Them Down and Measure Take the curtain down and lay it on the floor or a large table. Measure the folded part to make sure it’s the same all the way across.
Step 5: Time to Iron Lay the bottom edge of your curtain on the ironing board. Unpin the hem and fold it up neatly along the crease you made. Have a grown-up help you press the fold with a hot iron.
Step 6: Use the Magic Tape Now, open up the fold. Place the hemming tape inside the crease. Fold the hem back down over the tape.
Step 7: Seal the Hem Ask a grown-up to press the hot iron on top of the hem for about 10-15 seconds. The heat will melt the glue on the tape and seal your hem permanently. Keep moving the iron along the whole width of the curtain. Let it cool down, and you are done! No sewing needed.
19. Upgrade to Mid-Century Modern Furniture Legs
Tapered Mid-Century Legs

You don’t always need to buy new furniture to get a new look. A very clever and easy trick is to just change the legs on a piece you already have. Swapping clunky, square legs for slim, tapered ones can completely change the style of a dresser or sofa.
Mid-century modern legs, which are often angled and have metal tips, make furniture look lighter and more elegant. They lift the piece off the floor, which can make a small room feel more open. This is a simple, low-cost way to give your old furniture a fresh, stylish update.
DIY: Add New Legs to Furniture
Let’s give a boring cabinet or table a cool new look from the ground up!
Step 1: Your Furniture Leg Kit First, you need to buy a set of new furniture legs. You can find them online or at a home improvement store. They often come in a kit with “mounting plates” and screws. You will also need a drill.
Step 2: Remove the Old Legs Flip your piece of furniture upside down. Most old legs are just screwed on. You should be able to twist them off by hand or use a screwdriver or wrench.
Step 3: Attach the Mounting Plates The mounting plates are flat pieces of metal with a hole in the middle for the new leg to screw into. Place one plate at each corner on the bottom of your piece of furniture. Ask a grown-up to use a drill to screw the plates securely into place.
Step 4: Screw in the New Legs This is the easy part! Your new legs will have a screw sticking out of the top. Just line that screw up with the hole in the mounting plate and start twisting. Keep twisting until the leg is tight.
Step 5: Flip it Over Do this for all four legs. Then, carefully flip your furniture back over. It has a brand new, stylish look! This is a great way to make an old piece of furniture look modern and cool.
20. Introduce a Stylish Bedside Carafe
Minimalist Bedside Water Carafe

Having a glass of water by your bed is practical. Using a stylish carafe and cup set makes it feel like a little luxury. This simple addition elevates your nightstand from just a storage surface to a thoughtfully styled space. The clean glass and simple shape feel modern and uncluttered.
It’s a small detail that shows you care about your comfort and your surroundings. It’s more elegant than a plastic water bottle and more convenient than getting up for a drink in the middle of the night. This is an easy and inexpensive way to add a touch of hotel-like sophistication to your bedroom.
DIY a Personalized Etched Water Glass
Let’s put your initial on a glass to make it extra special!
Step 1: Your Glass Etching Supplies You will need a plain water glass, some “etching cream” from a craft store, a small paintbrush, and a letter sticker (like the kind you use for scrapbooking). Make sure to wear gloves and ask a grown-up for help with this project, as the cream is a strong chemical.
Step 2: Prepare Your Glass Wash and dry your glass completely. Then, very carefully place your letter sticker on the glass wherever you want your initial to be. Press down all the edges of the sticker very firmly so none of the cream can sneak underneath.
Step 3: Apply the Etching Cream A grown-up should do this part. Using the paintbrush, apply a thick, even layer of the etching cream over the sticker. Make sure you cover the whole area inside the letter stencil.
Step 4: Wait Patiently Let the cream sit on the glass. The directions on the bottle will tell you exactly how long to wait, but it’s usually about 5 to 10 minutes. Don’t touch it while it’s working its magic.
Step 5: Rinse it Off When the time is up, a grown-up should rinse all the cream off the glass under running water. Be careful not to splash.
Step 6: The Big Reveal Once all the cream is washed away, you can peel off the sticker. You will see that the glass underneath is now frosty! Your initial is permanently etched onto the glass. It’s a very fancy and personal touch for your bedside table.
21. Refresh Your Lampshades
Classic Pleated Lampshade

Lighting is a key part of a room’s mood, but we often forget about the lampshades. An old, dusty, or dated lampshade can make the whole room feel tired. Swapping it for a new one is a very quick and effective update. A classic pleated shade, for example, adds a soft, traditional touch of elegance.
Consider the shape, color, and fabric of the new shade. A different shape can change the look of the lamp base entirely. A lighter color will let more light through, brightening the room. This simple change can make your existing lamps feel brand new again.
DIY a Fabric-Covered Lampshade
Let’s give a plain lampshade a colorful new outfit!
Step 1: Your Lampshade Makeover Kit You will need a plain, smooth lampshade (a drum shape is easiest to work with). You will also need a piece of fabric that is big enough to wrap all the way around it, fabric spray adhesive, and sharp scissors.
Step 2: Prepare Your Fabric Lay your fabric on a table and iron it to get out all the wrinkles. A smooth piece of fabric will give you the best result.
Step 3: Cut the Fabric to Size Place your lampshade on the fabric. Gently roll the shade along the fabric and trace the top and bottom edges with a pencil as you go. When you get back to the start, you will have the shape of your lampshade traced on the fabric. Cut this shape out, leaving about one extra inch of fabric on all sides.
Step 4: Glue the Fabric On Take your lampshade and fabric outside or to a well-ventilated area. Spray an even coat of the fabric adhesive onto the lampshade. Carefully line up your fabric with the shade and start pressing it on, smoothing it out with your hands as you go to get rid of any air bubbles.
Step 5: Finish the Seam Where the two ends of the fabric meet, fold one edge under to create a clean seam. Use a little extra glue to secure it.
Step 6: Tuck the Edges You will have extra fabric at the top and bottom. Snip little cuts into this extra fabric every inch or so. Then, fold the flaps to the inside of the lampshade and use a bit of glue to hold them in place. Let it dry completely, and you have a beautiful, custom lampshade!
22. Incorporate a Heated Blanket
Cozy Heated Throw Blanket

For the ultimate comfort upgrade, consider a heated blanket. It’s a functional swap that adds a serious amount of coziness to your bed, especially on cold nights. Modern heated blankets are soft, lightweight, and come in many stylish colors and textures that can complement your existing decor.
Beyond just warmth, a heated blanket can be very relaxing. It helps to soothe sore muscles and creates a comforting sense of security. Swapping a regular throw for a heated one is a practical luxury. It turns your bed into an even more inviting and restorative retreat at the end of a long day.
DIY a Cozy Cover for a Heating Pad
Let’s make a soft, washable cover for a heating pad to make it feel like a fancy heated pillow!
Step 1: Gather Your Cozy Supplies You will need a standard electric heating pad. You’ll also need a piece of soft fabric, like fleece or flannel. It should be a little more than twice the size of your heating pad. You will also need scissors and either a sewing machine or a needle and thread.
Step 2: Cut Your Fabric Lay your fabric flat. Place the heating pad on top of it. Cut the fabric so you have a piece that is about two inches wider than the heating pad on both sides, and twice as long (plus about four inches).
Step 3: Fold and Sew the Sides Fold your fabric in half, with the pretty sides of the fabric facing each other. Sew along the two long sides of the fabric, leaving one of the short ends open. You are creating a fabric pouch.
Step 4: Hem the Opening At the open end of your pouch, fold the raw edge over about half an inch, and then fold it over again. Sew this down to create a nice, clean hem. This will keep the fabric from fraying.
Step 5: Turn It Right-Side-Out Turn your fabric pouch right-side-out. All your seams should now be on the inside. You have a soft, custom-sized pillowcase for your heating pad!
Step 6: Use Your Cozy Cover Slide your heating pad inside. Make sure the cord and the controller stay outside the cover. The fabric cover makes the heating pad feel much softer against your skin, and when it gets dirty, you can just slide it off and throw it in the wash.
23. Hang Pendant Lights as Bedside Lamps
Industrial Pendant Bedside Lights

Here is another great way to free up space on your nightstand. Hanging pendant lights from the ceiling on either side of the bed is a stylish and unexpected choice. It draws the eye upward, making the ceiling feel higher. It also provides excellent focused light for reading.
This look feels very modern and a bit industrial, especially with exposed bulbs and simple cords. You can choose from thousands of different pendant styles to match your decor. This swap adds architectural interest to the room and makes a bold design statement.
DIY a Plug-In Pendant Light
Let’s make a hanging light that you can plug into the wall!
Step 1: Your Light-Making Kit You will need a “plug-in lamp cord set” (it’s a long cord with a socket on one end and a plug on the other), a “lampshade fitter” or cage (this is the metal part that will hold your bulb), and a cool-looking Edison bulb. You will also need a ceiling hook.
Step 2: Assemble Your Light Most of these parts are designed to just screw together. First, unscrew the ring on the lightbulb socket. Slide the lampshade fitter or cage onto the socket. Then, screw the ring back on tightly to hold the cage in place.
Step 3: Screw in the Bulb Gently screw your Edison bulb into the socket.
Step 4: Hang it Up Decide where you want your light to hang. Ask a grown-up to screw a hook securely into the ceiling. Make sure it’s screwed into a ceiling joist (the strong wood beams in the ceiling) so it’s strong enough to hold the light.
Step 5: Adjust the Height Drape the cord over the hook. You can adjust how high or low the light hangs by simply pulling the cord one way or the other. You can also wrap the cord around the hook a few times.
Step 6: Plug it In Run the cord down the wall and plug it into an outlet. You can use small, clear clips to hold the cord neatly against the wall if you like. Now you have a very cool, custom hanging light!
24. Layer Sheer and Opaque Curtains
Layered Linen Curtains

For the most versatile window treatment, try layering your curtains. Hang two curtain rods, one in front of the other. On the back rod, closest to the window, hang a set of sheer curtains. On the front rod, hang a set of heavier, opaque drapes. This combination gives you complete control over the light and privacy in your room.
During the day, you can leave the sheer curtains closed to soften the sunlight and provide some privacy, while still letting in a beautiful, filtered glow. At night, you can close the heavier drapes to block out all the light and make the room feel cozy and secure. This layered look also adds depth and sophistication.
DIY a Double Curtain Rod
You don’t need a special rod to get this look. You can make your own!
Step 1: Get Your Rods and Brackets You will need two regular curtain rods. You will also need a set of “double curtain rod brackets.” These are special brackets that have two hooks on them, one in front of the other, to hold two separate rods.
Step 2: Install the Brackets Ask a grown-up to help you install the brackets on the wall above your window. They should be placed a few inches outside the window frame on each side, and a few inches above it. Use a level to make sure they are straight.
Step 3: Hang the Back Rod Take your first curtain rod and put your sheer curtains on it. Then, place this rod on the back hooks of your brackets (the ones closest to the wall).
Step 4: Hang the Front Rod Take your second curtain rod and put your heavier, opaque curtains on it. Then, place this rod on the front hooks of your brackets.
Step 5: Adjust Your Curtains Arrange your curtains so they hang nicely. You can pull the heavy curtains to the side during the day and close them at night. Your sheer curtains can stay closed most of the time to give your room a soft, dreamy look. You have created a beautiful and functional layered window treatment!
25. Install Picture Ledges for Art
Floating Shelf Gallery Wall

If you like to change your art and photos often, a gallery wall with nails can be a hassle. Picture ledges are a brilliant solution. These narrow, floating shelves allow you to display your favorite framed pieces without putting a lot of holes in the wall. You can easily swap, rearrange, and layer your art whenever you feel like a change.
This creates a look that is more casual and relaxed than a traditional gallery wall. You can mix different frame sizes and even add in small objects like little plants or souvenirs. It is a flexible and stylish way to showcase your personality.
DIY a Simple Picture Ledge
Let’s build a simple shelf that is great for holding picture frames.
Step 1: Get Your Wood Go to a home improvement store. You will need one long, flat piece of wood (about 4 inches wide). You will also need another, much thinner and narrower piece of wood for the front lip of the shelf. You will also need wood glue and some small nails or screws.
Step 2: Build the Ledge Lay your wider piece of wood flat. Run a line of wood glue along one of the long edges. Now, take your skinny piece of wood and stand it up on its edge in the glue. This will create a little “lip” that will keep your pictures from sliding off.
Step 3: Secure the Lip Ask a grown-up to help you use a hammer and some small nails, or a drill and some small screws, to secure the lip to the base of the shelf.
Step 4: Paint or Stain It You can paint your new picture ledge to match your wall color, which will make it look like it’s floating. Or you can stain it to match other wood in your room. Let it dry completely.
Step 5: Hang it on the Wall Ask a grown-up to help you hang the shelf. The best way is to screw it directly into the wall studs to make sure it’s strong. Use a level to make sure it’s perfectly straight. Now you can start arranging your favorite art on your new ledge!
26. Layer Rugs for a Bohemian Feel
Layered Southwestern-Style Rugs

Why stop at just one rug? Layering rugs is a great way to add extra texture, pattern, and color to your bedroom floor. It creates a cozy and collected look that is central to bohemian style. The key is to start with a larger, neutral rug on the bottom, like a simple jute or sisal rug.
Then, you can place a smaller, more colorful, and patterned rug on top. This allows you to bring in a bold design without it overwhelming the entire room. It also helps to define different areas, like the space around your bed. It’s a fun and creative way to play with the textiles in your room.
DIY a Painted “Layered” Rug
Let’s make a plain rug look like it has a cool, smaller rug on top of it, using just paint!
Step 1: Get Your Rug and Painting Tools You will need one large, plain, flat-weave rug. You will also need painter’s tape, a measuring tape, and fabric paint in a few different colors. You’ll also need paintbrushes.
Step 2: Plan Your “Top” Rug Decide how big you want your “top” rug to be. Use your measuring tape to mark out a smaller rectangle in the center of your large rug. Use the painter’s tape to tape off this rectangle.
Step 3: Create a Border Inside your taped-off rectangle, you can create a border. Use more tape to make a smaller rectangle inside the first one. The space between the two lines of tape will be your border.
Step 4: Paint the Border Using one of your paint colors, paint the border of your “top” rug. Let it dry.
Step 5: Paint the Center Now, use a different color to paint the center rectangle of your “top” rug. You can even paint a simple pattern in the center, like stripes or triangles. You can use more tape to help you make these patterns.
Step 6: The Big Reveal Once all the paint is completely dry, carefully peel off all the painter’s tape. You will have a large rug that looks like it has a smaller, patterned rug perfectly placed right on top of it. It’s a clever trick that adds a lot of style!
27. Go Bold with a Monochromatic Color Scheme
Moody Monochromatic Bedroom

Choosing one color and using it in different shades and tones can create a very sophisticated and calming room. A monochromatic color scheme is bold and intentional. In a deep, moody color like this dark blue, it can make a bedroom feel like a cozy, enveloping cocoon.
The key to making this look work is to use a lot of different textures. You can see the matte walls, the velvet headboard, the smooth cotton sheets, and the woven basket. These different textures keep the single color from feeling flat or boring. It’s a powerful design choice that makes a big impact.
DIY a Monochromatic Painted Frame
Let’s take a picture frame and make it part of your room’s color story.
Step 1: Your Frame and Paint Find an old picture frame with an interesting shape. You will also need some acrylic craft paint that is the exact same color as your bedroom walls. If you have leftover wall paint, that is even better! You will also need a paintbrush.
Step 2: Prepare Your Frame Take the glass and the backing out of the frame. If the frame is glossy, give it a light sanding so the paint will stick. Wipe off all the dust.
Step 3: Paint it! Using your paintbrush, give the frame a nice, even coat of your wall-colored paint. Make sure to get into all the little nooks and crannies.
Step 4: Let it Dry and Recoat Let the first coat dry completely. You will probably need to add a second coat to get a really solid, even color. Let that dry too.
Step 5: Put it Back Together Once the frame is totally dry, put your art or photo and the glass back in.
Step 6: Hang it Up Now, hang your picture on the wall. Because the frame is the same color as the wall, it will blend in and create a very cool, subtle, three-dimensional effect. The art inside will seem to float on the wall. It’s a simple trick that looks very high-end.
28. Install Smart, Color-Changing Light Bulbs
Smart Mood Lighting

Smart light bulbs are a technological upgrade that can have a huge impact on the mood of your bedroom. These bulbs can be controlled from your phone or with your voice. You can change their brightness and, in many cases, their color. This allows you to customize your lighting for any situation.
You can set a bright, cool white light for waking up in the morning, a warm, cozy glow for relaxing in the evening, or even a fun color like blue or purple when you are listening to music. Swapping your regular bulbs for smart bulbs is an easy way to bring your bedroom lighting into the 21st century.
DIY a “Smart” Lamp with a Timer
You can make any lamp a little smarter with a simple mechanical outlet timer.
Step 1: Get Your Timer Go to a hardware store and buy a mechanical outlet timer. They are very inexpensive and easy to use. It’s a small box that plugs into the wall, and it has a dial with numbers for all the hours in the day.
Step 2: Set the “On” Time Look at the dial on the timer. It has a bunch of little pins around the edge. Each pin usually represents 15 or 30 minutes. Decide what time you want your lamp to turn on. Find that time on the dial and push down all the pins around that time.
Step 3: Set the “Off” Time Now, decide what time you want your lamp to turn off. All the pins between the “on” time and the “off” time should be pushed down. All the other pins should be pulled up.
Step 4: Set the Current Time There is usually a little arrow on the dial. Turn the dial until that arrow is pointing to the current time.
Step 5: Plug Everything In First, plug the timer into your wall outlet. Then, plug your lamp into the timer. Make sure the switch on the lamp itself is turned to the “on” position.
Step 6: Enjoy! The lamp won’t be on now (unless you are in the “on” time you set). But when the right time comes, the timer will click, and your lamp will magically turn on all by itself! It’s a great way to have a light turn on to help you wake up in the morning, or to make it look like someone is home when you are away.
29. Add a Skirt to a Bedside Table
Charming Skirted Table

A skirted table is a classic design element that brings softness and charm to a bedroom. It’s a wonderful way to hide a simple or unattractive table and turn it into a beautiful feature. The draped fabric adds texture and pattern to the room. It feels very traditional and a little bit romantic.
This is also a very practical idea. The skirt hides the space under the table, which you can then use for hidden storage. You can choose a fabric that matches your curtains or your duvet cover to tie the whole room together. It is a lovely way to add a touch of custom, decorative flair.
DIY a No-Sew Skirt for a Table
Let’s dress up a small table with a beautiful fabric skirt!
Step 1: Your Table-Dressing Supplies You will need a small, round table. You will also need a piece of fabric that is large enough to drape all the way to the floor on all sides. You will also need either a hot glue gun or a roll of heavy-duty, double-sided “hook and loop” tape (like Velcro).
Step 2: Measure and Cut Your Fabric Place your fabric over the table. You want it to hang down evenly on all sides, just barely touching the floor. Trim the fabric into a large circle that is the right size.
Step 3: Attach the Skirt If you are using hook and loop tape, cut it into several small pieces. Stick the “hook” side (the rough side) onto the edge of your tabletop every few inches. Then, stick the “loop” side (the soft side) onto the underside of your fabric, matching the positions. Now you can just press the fabric onto the table.
If you are using a hot glue gun, ask a grown-up to help. Run a line of hot glue around the edge of the tabletop and carefully press the fabric onto it.
Step 4: Add a Topper (Optional) To hide the top edge and give it a finished look, you can cut a smaller circle of a different, coordinating fabric. Place this on top of your main skirt. You can also have a piece of glass cut to fit the top of your table, which will hold the fabric in place and give you a sturdy surface.
Step 5: Hide Your Storage Your beautiful new skirted table is complete. You can now hide a basket or some boxes underneath for some secret storage!
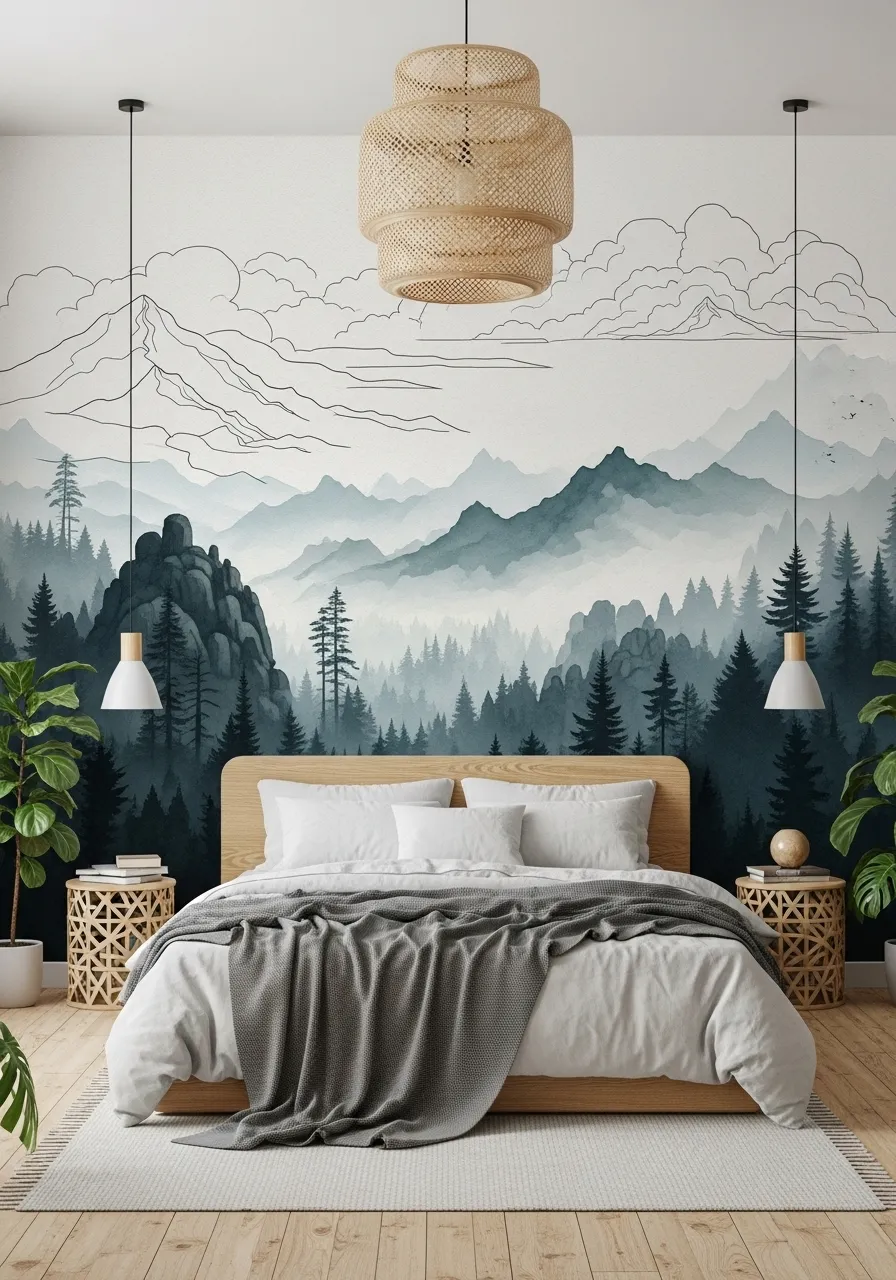
30. Install a Wall Mural for a Dramatic Backdrop
Scenic Mountain Wall Mural

For the ultimate feature wall, consider a large-scale mural. A mural can transport you to another place and completely change the atmosphere of your room. A peaceful landscape, like this misty mountain scene, can make your bedroom feel like a calm and expansive retreat. It acts as a massive piece of art that defines the entire space.
Modern murals are often sold as large panels of wallpaper, which makes them much easier to install than they used to be. This is a bold design choice that creates a huge amount of impact. It turns a plain wall into a breathtaking view.
DIY a “Mural” with Wall Decals
You don’t have to be a great painter to create a mural. You can use wall decals!
Step 1: Choose Your Decals Wall decals are basically large, high-quality stickers for your walls. You can buy them online in all sorts of designs. You can get trees, mountains, flowers, or geometric shapes. Choose a set of decals that will work together to create a scene.
Step 2: Plan Your Design Before you start sticking, plan where you want everything to go. You can even cut the shapes out of the backing paper and tape them to the wall lightly with painter’s tape to see how it will look.
Step 3: Clean Your Wall Wipe down your wall with a damp cloth to make sure it’s clean and free of dust. Let it dry completely. Decals stick best to a clean, smooth surface.
Step 4: Start Sticking! Carefully peel your first decal from its backing paper. Place it on the wall where you planned. Use a flat, straight tool (like a credit card) to smooth the decal from the center out to the edges. This will get rid of any air bubbles.
Step 5: Build Your Scene Keep adding your other decals. You can overlap them to create a sense of depth. For example, you can place a tree decal so it looks like it’s in front of a mountain decal. Take your time and have fun creating your scene.
Step 6: Step Back and Admire Unlike wallpaper, decals are usually easy to remove. So if you don’t like where you put something, you can often gently peel it off and move it. Once you are happy with your mural, step back and enjoy your amazing new feature wall!
31. Create a Woven Wall Tapestry Display
Bohemian Fiber Art Wall

Go beyond a single piece of macrame and create a full display of fiber art. Mixing different styles of woven wall hangings adds a huge amount of texture and personality. The variety in knots, colors, and materials creates a rich, layered look. This approach turns a blank wall into a soft, tactile focal point.
This style is deeply connected to a bohemian and handcrafted aesthetic. It makes a room feel cozy, personal, and artistic. Hanging the pieces from natural branches enhances the organic feel. It is a beautiful way to celebrate craftsmanship and bring warmth into your sleeping space.
DIY a T-shirt Yarn Wall Hanging
Let’s make a cool, textured wall hanging using old T-shirts!
Step 1: Your T-shirt Art Supplies You will need a few old T-shirts in colors you like, a nice-looking stick or dowel, and sharp scissors.
Step 2: Make Your T-shirt Yarn Lay one T-shirt flat and cut off the bottom hem and the top part right under the sleeves. Now you have a fabric tube. Start cutting this tube into one long, continuous strip, about one inch wide. Cut in a spiral, like you are peeling an apple. Do this with all your T-shirts. Gently pull on the strips, and they will curl up and become “T-shirt yarn.”
Step 3: Attach the Yarn to the Stick Cut your T-shirt yarn into long pieces. A good length is about twice as long as you want your final hanging to be. Attach each piece to your stick using a “Lark’s Head” knot (just like in the macrame project: fold the yarn in half, put the loop over the stick, and pull the ends through). Cover your stick with yarn.
Step 4: Add Some Braids Take three strands of yarn hanging from your stick and make a simple braid. You can make it long or short. Tie a small knot at the bottom to secure it.
Step 5: Add Some Knots Take two strands of yarn next to each other and tie them together in a simple knot. You can create rows of knots to make a pattern.
Step 6: Mix it Up! Leave some strands plain, make some braids, and add some knots. You can even weave a different colored piece of yarn through the hanging strands. The idea is to create a lot of interesting textures.
Step 7: Trim the Bottom Once you are happy with your design, use your scissors to trim the bottom fringe. You can cut it straight across or in an angle. Now you have a cool, recycled piece of art!
32. Style Your Bookshelves with Purpose
Curated “Shelfie” Display

Bookshelves are not just for storing books. They are a prime opportunity to display your personality and create a beautiful, styled moment in your room. A well-styled bookshelf, or “shelfie,” mixes books with other objects like vases, photos, and small sculptures. It feels much more dynamic and interesting than just rows of books.
The key is to create balance. Stack some books horizontally to create platforms for other objects. Leave some empty space to let your items breathe. Vary the height and texture of your objects. This turns a simple storage unit into a curated display that tells a story about you.
DIY: Style a Shelf Like a Pro
Let’s make your shelf look like it belongs in a magazine!
Step 1: Start with a Clean Slate Take everything off your shelf. This is the best way to start fresh.
Step 2: Add Your Books First Books are the anchor of your shelf. Don’t just line them all up standing vertically. Try stacking some of them horizontally (lying flat). This creates different heights and gives you little stages for other items. Group books by color for a cool effect.
Step 3: The Rule of Three Things often look best in groups of three. Try putting a small vase, a framed picture, and a little rock or souvenir together. It’s a simple trick that designers use all the time.
Step 4: Vary Height and Shape Put tall things next to short things. Put round things next to square things. For example, you could place a tall, skinny vase next to a short, fat stack of books. This makes your shelf much more interesting to look at.
Step 5: Add Something Natural Bring in a small plant, a piece of driftwood, or a pretty shell. Adding something from nature makes your shelf feel alive and fresh. A small, trailing plant like an ivy is a great choice.
Step 6: Step Back and Edit Once you have everything on the shelf, step back and look at it. Does it feel too crowded? Take one thing away. Does it feel too empty? Add a small item. Keep adjusting until you love it!
33. Incorporate Antique Wooden Furniture
Classic Vintage Dresser

New furniture can sometimes lack character. Bringing in a piece of antique or vintage wooden furniture adds a sense of history and warmth to a room. The rich color of the wood, the classic shapes, and the original hardware tell a story that modern furniture often cannot.
You don’t need a full set. A single piece, like a beautiful old dresser or nightstand, can serve as a stunning focal point. It can be mixed with more modern pieces to create a unique and personal style. It’s a way to add soul and timeless elegance to your bedroom.
DIY: Give New Furniture an “Antique” Look
Let’s make a new piece of wood furniture look like a treasured antique!
Step 1: Your “Antiquing” Kit You will need a piece of wooden furniture, some sandpaper (medium and fine grit), dark-colored wood stain or “antiquing glaze,” and a few clean rags.
Step 2: Sand Off the Shine Most new furniture has a shiny top coat. Use your medium-grit sandpaper to lightly sand the entire piece. You don’t need to remove all the finish, just rough it up a bit so the stain will stick. Pay extra attention to the edges and corners where furniture would naturally get worn over time.
Step 3: Distress it (Optional) This is a fun part! To make it look like it’s had a long life, you can “distress” the wood. Gently tap it with a hammer in a few spots. You can even lightly tap a bag of screws against it to create small dents and dings. Don’t go crazy, just a few marks here and there.
Step 4: Apply the Dark Stain Wipe all the dust off your furniture. Now, dip a clean rag into your dark stain or glaze. Wipe it all over a section of your furniture.
Step 5: Wipe it Off Don’t let the stain dry! Immediately take a new, clean rag and wipe most of it off. The dark stain will stay in the little dents, dings, and wood grain, making the piece look old and highlighting all the details.
Step 6: Let it Dry Continue this process until you have covered the whole piece of furniture. Let it dry completely according to the directions on the can. You have just given your furniture years of “history” in one afternoon!
34. Create a Hotel-Style Bed with a Bed Runner
Crisp Hotel Bed Runner

There is a reason why beds in nice hotels always look so inviting. They are often styled with simple, crisp white linens and a few thoughtful layers. A bed runner is a narrow strip of fabric that lays across the foot of the bed. It adds a pop of color and a touch of sophistication without the bulk of a full throw blanket.
This is a very easy way to get that polished, hotel-chic look. You can choose a runner in a bold color to contrast with neutral bedding, or in a rich texture like velvet or silk for a bit of luxury. It’s a simple detail that makes your bed look professionally styled.
DIY a Simple No-Sew Bed Runner
Let’s make a stylish runner for the end of your bed.
Step 1: Your Runner-Making Supplies You will need a piece of fabric. The length should be enough to hang over the sides of your bed a little. The width is up to you, but about 20 inches is a good start. You will also need iron-on hemming tape and an iron.
Step 2: Measure and Cut Your Fabric Lay your fabric on the floor. Measure and cut a long rectangle to the size you want.
Step 3: Iron Your Fabric Iron your fabric rectangle to get all the wrinkles out. This will make it much easier to work with.
Step 4: Hem the Long Sides Lay your fabric with the pretty side facing down. On one of the long sides, fold the edge over about one inch and press it flat with a hot iron (ask a grown-up for help). Now, open that fold, place the hemming tape inside, and iron it shut. This will create a nice, clean edge. Do the same thing on the other long side.
Step 5: Hem the Short Sides Now, do the exact same thing for the two short ends of your runner. Fold the edge over, press it, put the tape inside, and iron it shut.
Step 6: The Final Press Give your whole finished runner one last press with the iron.
Step 7: Style Your Bed Lay your new, custom-made bed runner across the foot of your bed. It’s a super simple project that makes your whole bed look more finished and stylish, just like in a fancy hotel!
35. Add a Statement Accent Chair
Textural Woven Accent Chair

If you have a bit of extra space, adding an accent chair to a corner of your bedroom can create a cozy reading nook or a convenient place to drop your bag. A statement chair is one with a unique shape or material that acts like a piece of sculpture. A woven peacock chair or a modern leather lounge chair instantly adds a high-design touch.
The chair doesn’t have to match your other furniture perfectly. In fact, a contrasting style often looks more interesting and collected. Drape a soft sheepskin or a throw blanket over it to make it even more inviting. This is a functional piece that also adds a huge amount of style.
DIY a Painted Chair Makeover
Let’s take a boring old chair and make it a colorful accent piece!
Step 1: Find Your Chair and Supplies Find a simple wooden chair at a thrift store or a garage sale. Look for one with a cool shape. You will also need some sandpaper, a can of spray paint in a bold, fun color, and a can of clear spray sealer.
Step 2: Prepare the Chair First, clean the chair well with a damp cloth. If the chair has a shiny finish, use your sandpaper to lightly scuff up the entire surface. This will help the new paint stick. Wipe off all the sanding dust.
Step 3: Time to Paint Take your chair outside or to a well-ventilated area and place it on some newspaper. Shake your can of spray paint very well. Hold the can about a foot away from the chair and spray in light, even strokes. It’s best to do several thin coats. Start with the chair upside down to get all the legs and undersides first.
Step 4: Let it Dry and Flip Let the first coat dry for about an hour. Then flip the chair over and paint the top side. Apply a second coat to the whole chair to make sure you have a solid, beautiful color.
Step 5: Seal it for Protection Once the paint is completely dry (wait at least 24 hours), it’s a good idea to protect it. Spray the whole chair with one or two light coats of the clear spray sealer. This will keep your paint from chipping.
Step 6: Show it Off Let the sealer dry completely. Now you have a bright, fun, and totally unique accent chair to put in the corner of your room!
36. Design a Symmetrical Photo Gallery Wall
Uniform Grid Gallery Wall

For a look that is more classic and orderly than an eclectic gallery wall, try a symmetrical grid layout. This involves using frames that are all the same size and color, and hanging them in a precise, evenly spaced grid. This creates a calm, clean, and sophisticated look.
This style is particularly effective for a collection of black and white photos. The uniformity of the frames and the photos creates a powerful, unified statement. It works beautifully above a headboard or a dresser. It’s a way to display personal memories in a very polished and high-end way.
DIY a Perfect Grid Gallery Wall
Let’s hang your pictures in a super straight and organized grid.
Step 1: Your Grid-Making Supplies You will need all your pictures in frames that are the exact same size and color. You will also need a measuring tape, a pencil, a level, and nails or picture hangers.
Step 2: Do the Math This is the most important part! You need to plan your grid on paper first. Measure the width of your wall space. Measure the width of one of your frames. Decide how many frames you want in each row. Then, figure out the spacing. For example, if your wall is 100 inches, and you have three 20-inch frames, that’s 60 inches of frames. You have 40 inches left for spacing. You will have four spaces (one on each end, and two between the frames), so you would space them 10 inches apart.
Step 3: Mark the Top Row Once you have your measurements, use your measuring tape and level to draw a very light pencil line on the wall where the tops of your first row of frames will go.
Step 4: Mark the Nail Spots Now, along that line, mark the center point for each frame in your top row. Measure down from that center point to where the nail needs to go and mark it.
Step 5: Hang the First Row Ask a grown-up to hammer in the nails on your marked spots. Hang your first row of pictures. Use your level to make sure each one is perfectly straight.
Step 6: Mark and Hang the Next Rows Now, measure down from your first row to where your next row should start. Repeat the process of marking and hanging. When you are done, all your pictures will be perfectly aligned. Erase any pencil marks, and you will have a very impressive and professional-looking gallery wall.
37. Hang a Dreamy Bed Canopy
Sheer Fabric Bed Canopy

A bed canopy can instantly make a bedroom feel more romantic and cozy. It creates a soft, enclosed space that feels like a private sanctuary. You don’t need a traditional four-poster bed to get this look. You can create a beautiful canopy with ceiling-mounted curtain rods and sheer fabric panels.
Adding a string of fairy lights to the canopy enhances the magical, dreamy feeling. The soft glow creates a beautiful ambiance in the evening. This is a project that adds a huge amount of drama and charm to a room, turning a simple bed into a stunning focal point.
DIY a Simple Hoop Bed Canopy
Let’s make a beautiful, dreamy canopy that hangs from the ceiling.
Step 1: Your Canopy-Making Kit You will need a large embroidery hoop (you can find these at a craft store), two long panels of sheer curtain fabric, some clear fishing line, and a ceiling hook.
Step 2: Prepare Your Hoop Take your embroidery hoop and separate the two rings. You will only be using the inner ring for this project.
Step 3: Attach the Fabric Take one of your sheer curtain panels. Most sheer curtains have a pocket at the top for the curtain rod. You are just going to thread the embroidery hoop through that pocket, gathering the fabric onto the hoop as you go. Do the same with your second curtain panel. You should have a circle of wood with two long curtains hanging down.
Step 4: Create the Hanger Cut three long, equal-length pieces of your clear fishing line. Tie them to the hoop at three evenly spaced points (like a peace sign). Then, bring the other ends of the three strings together and tie them in a strong knot. This will be your hanger.
Step 5: Hang Your Canopy Ask a grown-up to screw a hook securely into the ceiling directly above the center of your bed.
Step 6: Finish the Look Hang your new canopy from the ceiling hook. Arrange the two curtain panels so they drape down beautifully on either side of your bed’s headboard. You can tuck them behind your nightstands to keep them in place. For extra magic, you can weave a string of battery-powered fairy lights around the hoop.
38. Drape a Luxurious Cashmere Throw
Elegant Fringe Throw Blanket

Sometimes, a single touch of high-quality material can elevate an entire room. A simple cashmere or fine wool throw is a timeless accessory. It adds a layer of quiet luxury and sophistication. The softness of the fabric is incredibly inviting, and the simple, classic design never goes out of style.
Drape it casually over the foot of the bed or across a chair. A neutral color like beige or gray works with almost any decor and always looks elegant. This is an investment in comfort and style. It’s a simple swap for a fleece blanket that makes your room feel much more grown-up and refined.
DIY a No-Sew Fringed Fleece Throw
Let’s make a cozy fleece blanket with a fancy-looking fringe.
Step 1: Your Fleece and Tools You will need a large piece of fleece fabric in a color you love. You will also need sharp fabric scissors and a ruler.
Step 2: Trim Your Fabric Lay your fleece out on a large surface. Trim the edges so you have a nice, clean rectangle. Make sure to cut off the “selvage” edges (the edges of the fabric that sometimes have writing on them).
Step 3: Cut the Fringe You are only going to make a fringe on the two shorter ends of your blanket. Using your ruler and scissors, start cutting strips into the fabric. The strips should be about 5 inches deep and about half an inch wide.
Step 4: Knot the Fringe Now you are going to make a special kind of knot. Take your first strip of fringe. Make a small slit with your scissors near the top of the strip (right where the fringe cut ends). Then, take the end of that same fringe strip and push it through the little slit you just made. Pull it tight to create a neat-looking knot.
Step 5: Repeat, Repeat, Repeat! Do this for every single strip of fringe on both ends of your blanket. It might take a little while, but it’s very easy to do while you are watching a movie.
Step 6: Snuggle Up When you are done, your blanket will have a beautiful, knotted fringe that looks much more complicated than it really was. It’s a super soft and stylish throw that is great for snuggling up with.
39. Introduce Playful Memphis Design Elements
Quirky Postmodern Decor

If your style is more playful and bold, consider adding some elements of Memphis design. This style from the 1980s is all about bright colors, geometric shapes, and a sense of fun. A lamp made of stacked, colorful blocks or a nightstand with a terrazzo pattern and squiggly handles can instantly inject energy into a room.
You don’t need to go all-out. A few carefully chosen pieces can act as a fun, artistic surprise in a more neutral room. This is a great way to show off a creative and non-conformist personality. It’s a swap that proves that bedrooms don’t always have to be calm and quiet.
DIY a Memphis-Style Painted Box
Let’s decorate a plain wooden box with fun shapes and colors!
Step 1: Your Memphis Art Supplies You will need a plain wooden box, some sandpaper, and acrylic craft paints in a few bright colors (like yellow, pink, and teal) plus black and white. You will also need some paintbrushes.
Step 2: Prepare Your Box If your box is rough, give it a light sanding and wipe off the dust. Paint the entire box, inside and out, with a coat of white paint. This will make your other colors look really bright. Let it dry.
Step 3: Paint Some Big Shapes Using one of your bright colors, paint a big, simple shape on the box, like a pink circle or a yellow triangle. Don’t worry about being neat.
Step 4: Add More Shapes and Colors Now, use your other colors to add more shapes. You can paint some blue squares or some teal half-circles. You can even let the shapes overlap a little bit.
Step 5: Add the Squiggles and Dots This is the key to the Memphis look! Once your colorful shapes are dry, take your black paint and a thin brush. Paint some black squiggly lines over your other shapes. You can also paint some little black dots or a black and white checkerboard pattern on a corner.
Step 6: Let it Dry Let your box dry completely. You can spray it with a clear sealer to protect it if you like. You have just created a fun and funky piece of art that is great for holding jewelry or other small treasures.
40. Install a Space-Saving Floating Desk
Wall-Mounted Fold-Down Desk

In many modern homes, a bedroom also needs to serve as a workspace. A bulky desk can take up a lot of room and make a space feel cluttered. A wall-mounted, fold-down desk is a brilliant solution for small spaces. When you need to work, you can fold it down to reveal a practical desk surface and some small storage cubbies.
When you are finished, you can simply fold it back up against the wall. It becomes a neat, unobtrusive cabinet, and you get all your floor space back. This is a very functional swap that allows your bedroom to be a multi-purpose space without sacrificing style or feeling crowded.
DIY a Wall-Mounted Homework Station
Let’s create a special spot on the wall for homework or drawing.
Step 1: Your Homework Station Supplies You will need a few simple wall shelves. You will also need some wall-mounted organizers, like a pencil holder cup and a paper file that you can screw into the wall. You will need a drill, screws, and a level.
Step 2: Plan Your Layout Decide where you want your homework station to be. Use a pencil and a level to mark where your main shelf (your “desk”) will go. Then, mark where you want to put a smaller shelf above it, and where your organizers will go.
Step 3: Find the Studs It’s very important to hang shelves on the strong wooden studs inside the wall so they can hold weight. Ask a grown-up to help you use a stud finder to locate and mark the studs in your chosen spot.
Step 4: Install the Main Shelf Ask the grown-up to help you install your main desk shelf. Make sure it’s screwed securely into the wall studs and that it’s perfectly level. This will be your main work surface.
Step 5: Install the Other Elements Now, install your smaller shelf above the desk. This is a great place for books. Then, install your pencil cup and your paper holder on the wall within easy reach.
Step 6: Get Organized Put your pencils and pens in the cup, and your notebooks and paper in the file holder. You can add a small lamp on your desk shelf. You have now created a compact, organized, and very functional place to work that doesn’t take up any floor space!
41. Create a Symmetrical Bedside Setup
Mirrored Bedside Tables

Symmetry is a classic design principle that creates a sense of calm and order. An easy way to bring this into your bedroom is by creating a symmetrical layout on either side of the bed. Using identical nightstands, lamps, and even pillows creates a balanced and visually pleasing look. It feels intentional and very put-together.
This approach works especially well in traditional or formal bedrooms. The mirrored nightstands in this room add a touch of glamour and help to reflect light. Even the art above the beds is arranged symmetrically. This creates a powerful feeling of harmony and restfulness.
DIY: Achieve a Symmetrical Look
Let’s make the two sides of your bed look like perfect twins!
Step 1: Start with the Nightstands The most important step is to have two nightstands that are the same. If yours don’t match, you can paint them the same color to make them look like a pair.
Step 2: Get Matching Lamps Next, you need two identical lamps. Place one in the center of each nightstand.
Step 3: The “Rule of Three” on Each Side Now, you’ll decorate the nightstands. Remember the “rule of three,” but do the same thing on both sides. For example, on each nightstand, you could have your lamp, a small stack of books, and a little plant.
Step 4: Mirror Your Pillows When you make your bed, arrange your pillows symmetrically. For example, you could have two big square pillows at the back, two regular sleeping pillows, and one small decorative pillow in the very front. Make sure they are arranged as a mirror image of each other.
Step 5: Art Above the Bed If you have art above your bed, try to center it perfectly. Or, if you have multiple pieces like in the picture, arrange them in a balanced, symmetrical way.
Step 6: Check Your Work Stand at the foot of your bed and look. Do both sides look balanced, like a reflection in a mirror? If they do, you have created a beautiful and calming symmetrical design.
42. Install Sound-Dampening Acoustic Panels
Minimalist Acoustic Wall Panels

A bedroom should be a quiet, peaceful retreat. If you live in a noisy apartment or on a busy street, sound can be a major source of stress. Acoustic panels are a functional upgrade that can make a huge difference. These soft, fabric-covered panels are designed to absorb sound, reducing echo and muffling outside noise.
Modern acoustic panels are no longer just for recording studios. They come in stylish shapes and colors that can look like minimalist wall art. Placing them on the wall behind your bed or on a wall that faces a noise source can help to create a much quieter and more serene environment for sleeping.
DIY Fabric-Wrapped Sound Panels
Let’s make some cool-looking panels that will help make your room quieter.
Step 1: Your Sound-Proofing Kit You will need some special “acoustic foam” panels, which you can buy online. You will also need some fabric that you like, a can of spray adhesive, and a staple gun. This is a project for a grown-up to help with.
Step 2: Cut Your Fabric Lay your fabric on the floor, pretty-side down. Place one of your foam panels on top of it. Cut the fabric so that you have about three extra inches on all sides of the foam.
Step 3: Glue the Fabric to the Front Lightly spray the front face of the foam panel with your spray adhesive. Carefully lay your fabric on top, smoothing it out with your hands to get rid of any wrinkles or bubbles.
Step 4: Wrap the Edges Flip the panel over. Now, you will wrap the edges like a birthday present. Pull one side of the extra fabric tight, fold it over the back edge of the foam, and use the staple gun to secure it. Do this on the opposite side next, pulling the fabric tight. Then do the other two sides.
Step 5: Neaten the Corners The corners should be folded neatly, just like you would wrap a present. Fold them in and use the staple gun to secure the folds on the back.
Step 6: Hang Your Panels You can hang your new, fabric-covered panels on the wall using removable picture-hanging strips. Arrange them in a cool pattern to look like art. They will look great and help to make your room a quieter, more peaceful place.
43. Grow Calming Herbs on Your Nightstand
Bedside Lavender and Chamomile

Bring the soothing power of a garden right to your bedside. Growing small pots of calming herbs like lavender and chamomile can make your bedroom smell wonderful and feel like a natural sanctuary. These plants are known for their relaxing properties. The gentle, natural scent can help you unwind and prepare for a good night’s sleep.
Keeping these herbs on your nightstand is a simple, beautiful, and functional choice. They add a touch of living greenery and connect you with nature. It’s a sensory experience that goes beyond just visual decor. You can even snip a few sprigs to put under your pillow.
DIY a Mini Indoor Herb Garden
Let’s plant some yummy-smelling herbs to keep in your room!
Step 1: Your Herb Garden Supplies You will need one or two small terracotta pots, some potting soil, and some small herb plants or seeds. Lavender and chamomile are great for bedrooms, but you could also try mint or rosemary. You can buy little starter plants at a garden store.
Step 2: Get Ready to Plant If your pot has a hole in the bottom, place a small rock over it to keep the soil from falling out.
Step 3: Add the Soil Fill your pot about two-thirds full with the potting soil.
Step 4: Plant Your Herb If you have a starter plant, gently take it out of its plastic container. Loosen the roots a little bit with your fingers. Place the plant in your pot. Add more soil around the plant until the pot is almost full. Gently pat the soil down. If you are using seeds, just sprinkle a few on top of the soil and cover them with a tiny bit more soil.
Step 5: Give it a Drink Give your new plant a little bit of water.
Step 6: Find a Sunny Spot Place your new herb pot on your nightstand or a sunny windowsill. Most herbs need a few hours of sunlight each day. Water it whenever the soil feels dry to the touch. Now you have a beautiful, fragrant plant that will help make your room a calm and happy place!
Refreshing your bedroom does not need to be a huge, expensive project. As we’ve seen, even the smallest changes can have a massive impact on how your space looks and feels. A new throw blanket, a different lampshade, or a simple houseplant can completely alter the mood.
Your bedroom is your personal escape from the world. It deserves to be a place that feels comfortable, restorative, and uniquely you. The goal is to create a room that you truly love walking into at the end of each day.
Don’t feel like you have to do everything at once. Pick one or two ideas from this list that excite you and start there. You will be amazed at how quickly you can transform a stale space into the cozy, stylish sanctuary you deserve.
Key Takeaways
- Start with Small Swaps: You don’t need a full makeover. Simple changes like new drawer pulls, a stylish water carafe, or a set of fresh pillows can make an instant difference.
- Texture is Everything: Adding a variety of textures—like a chunky knit blanket, a velvet bench, or woven wall art—is the fastest way to make a room feel cozy and visually interesting.
- Personalize Your Walls: A blank wall is a missed opportunity. Use a gallery wall, picture ledges, or even a large-scale mural to display your personality and create a stunning focal point.
- Embrace DIY: Many of these swaps can be done yourself, which saves money and adds a personal, handmade touch to your decor that you can’t buy in a store.
- Function Can Be Beautiful: Smart, space-saving solutions like floating nightstands, wall-mounted desks, and layered curtains are practical upgrades that also add a huge amount of style.